

Page 1

EPSON AMERICA INC.
Product Support Bulletin
Subject: AP-3250 Commonly Asked Questions and Answers
EPSON
Date: 4/3/92
Page(s): 1 of 6
This bulletin answers some commonly asked questions about the AP-3250 printer.
The questions and answers are listed below.
QUESTIONS AND ANSWERS ON THE AP-3250
1.
Q. What is the AP-3250 printer?
A.
The AP-3250 is Epson’s first narrow carriage light duty printer specifically
designed to meet the unique needs of the entry-level home computer
user.
Listed below are some of the key features of the AP-3250 printer:
- Epson ESC/P 2 command set
- Built-in paper cassette, holds up to 50 single sheets of letter size
paper
- Roman and Sans Serif fonts, scalable from 8 to 32 points
- High resolution 360 x 360 DPI bit-image graphics
- Convenient, easy-to-use two button control panel
- Print Speed:
- Quiet operation, only 50 dB(A)
- Built-in 11KB input buffer
- Small size and small footprint
- Epson’s two year limited warranty with unlimited 800 number free
technical support
200 CPS Draft at 12 CPI
72 CPS Letter Quality at 12 CPI
PSB No: P-0084A
Originator: SLS/JV
2. Q.
A.
Is the AP-3250 printer a replacement or addition to the Epson printer line?
The AP-3250 print is a replacement product. It replaces the AP-3000 /
LQ-200 printer.
Page 2

Q. What is the Epson ESC/P 2 command set?
3.
A.
As the leading impact printer vendor, the Epson Standard Codes for
Printers (ESC/P) has become a de facto standard for most dot matrix
printers. Epson Standard Codes are featured by most other vendors as
an immediate entry into a wide range of third party software. As the
market continues to develop new requirements, Epson has moved to
improve its standard by offering a version called ESC/P 2.
PSB No: P-0084A
Page: 2 of 6
4.
Q. What are the benefits of ESC/P 2?
A.
The features of ESC/P 2 are divided into two categories: Scalable Fonts,
and Enhanced Graphics.
SCALABLE FONTS: ESC/P 2 provided access to Scalable Roman and
Sans Serif fonts. The Scalable Fonts are available in even increments
from 8 to 32 points. In addition to these sizes, 10.5 and 21 point sizes are
also available. Epson printers with ESC/P 2 perform the calculations
necessary to scale the fonts. The Scalable Fonts are most easily selected
within application software programs that provide ESC/P 2 printer drivers.
ENHANCED GRAPHICS: ESC/P 2 also provides Enhanced Graphics
capabilities in certain software applications supporting the raster graphics
mode of ESC/P 2. Enhanced Graphics is defined as a finer, more
accurate placement of printed dots leading to greater clarity of text and
sharper more detailed graphics in graphical printing environments such as
Microsoft Windows or Lotus 1-2-3. Enhanced Graphics also allows for
true 360 horizontal DPI printing with a single pass of the print head,
creating better print quality and faster print speeds than other dot-matrix
printers.
5.
Q.
When printing multi-page documents, what would cause the AP-3250 to
print the first page correctly but print too low on the following pages?
A.
This difference in print position is easy to adjust in most software
application programs. Most application programs have a default page
length of 66 lines per page when using 11" continuous paper. Since the
AP-3250 uses single sheets of paper, it automatically provides a small top
and bottom margin. Since these margins are non-printable area, the AP3250’s maximum number of lines per page when using 11” singe sheet
paper is 61 lines. Most software application programs include an option to
Page 3

PSB No: P-0084A
Page: 3 of 6
adjust the maximum number of lines per page. Decreasing the program’s
maximum number of lines per page by 5 (e.g. 61 lines) should correct for
this print position difference.
6. Q.
A.
7.
Q.
A.
8.
Q.
A.
Why is a ON-LINE/OFF-LINE or PAUSE button not present on the
AP-3250’s front panel?
The AP-3250 printer was designed to be as easy to use as possible.
Because of this, the AP-3250 was designed any unnecessary buttons.
The AP-3250 automatically goes into a ready condition after being
powered on. (See the question below for additional information.)
Why does the AP-3250 produce two (2) long and two (2) short beeps
when first power-on?
The AP-3250 produces these beeps at power-on to indicate that it has
completed its power-on initialization process and is ready to print.
What are the product codes for AP-3250 options and supplies?
Listed below are the product codes for the AP-3250 optional push tractor
and ribbon cartridge.
S015032
C800262
9.
Q. What is the advantage of purchasing an optional Push Tractor?
A.
The optional Push Tractor allows the AP-3250 to use continuous narrow
carriage paper while still maintaining the ability to use the AP-3250’s built-
in single sheet paper cassette. When using the optional push tractor, the
AP-3250 can accept a two part carbonless multi-part form with a total
thickness up to 0.18mm.
10.
Q. What interface does the AP-3250 come standard with?
A.
The AP-3250 comes standard with a built-in Centronics compatible parallel
interface.
Fabric Ribbon Cartridge
Push Tractor
Page 4

PSB No: P-0084A
Page: 4 of 6
11.
Q. How do I use the AP-3250 to operate with serial communications?
A. The AP-3250 only operates with parallel communications.
12.
Q. If a printer driver selection is not shown for the AP-3250 in my application
software programs, which printer driver selection should I choose?
A.
The recommended printer driver selections for the AP-3250 are listed
below in order from best to worst.
AP-3250
BEST
LQ-570/1070
LQ-870/1170
LQ-510
LQ-860
LQ-850
LQ-200
LQ-500
LQ-2550
LQ-2500
LQ-800
LQ-1500
Generic Epson WORST
To take full advantage of the AP-3250’s features, including ESC/P 2,
choose one of the first three printers listed above.
If none of these printer
selections are available from within your application software, contact your
software manufacturer to determine whether they offer a printer driver
update or if they plan to make one available in the future.
13.
Q. What are the AP-3250 printer’s rated text mode print speeds?
A.
The AP-3250 printer’s print speeds are listed below
Characters/inch Draft CPS LQ CPS Printable Columns
10
12
15
17.1
20
167
200
250
103
120
60 80
72
90
96
120
103 137
120 160
Note: CPS = Characters Per Second
Page 5

14. Q. Does the AP-3250 use DIP switches?
A.
No, the AP-3250 does not use DIP switches. The various features
settings are selected through use of the two buttons on the printer’s front
panel.
15.
Q. Can the AP-3250 print on labels?
A.
Yes, the AP-3250 can print on labels. The optional pull tractor is used to
load continuous labels.
16.
Q. Can the AP-3250 print on envelopes?
A.
Yes, the AP-3250 can print on envelopes. The envelopes are loaded at
the rear of the printer by using the printer’s manual insertion slot.
The printer must be placed in the upright position first.)
PSB No: P-0084A
Page: 5 of 6
(Note:
17.
Q. Can the AP-3250 print on legal size paper?
A.
Yes, the AP-3250 can print on legal paper. Legal size paper is loaded at
the rear of the printer by using the printer’s manual insertion slot.
The printer must be placed in the upright position first.)
18.
Q. The AP-3250’s User’s Guide lists information on 120, 220 and 240 volt
versions of this printer.
this printer?
A.
The AP-3250 is available only in the 120 volt configuration in the U.S.A..
19.
Q. Can the AP-3250 print in landscape orientation?
A.
Yes, but the AP-3250 requires the use of a software application program
because landscape characters are not included in its built-in characters
set. Two very popular software application programs for printing in the
landscape mode are Sideways and Always.
How can I purchase a 220 or 240 volt version of
(Note:
Page 6

PSB No: P-0084A
Page: 6 of 6
20.
Q. Why is the AP-3250’s parallel cable connector located on the side of the
printer instead of the rear like most other printers?
A.
Since the AP-3250 may be operated in two different positions it was
necessary to relocate the parallel cable connector to the side of the
printer.
21.
Q. Can different fonts be selected on the AP-3250’s front panel?
A.
Yes, different fonts may be selected from the AP-3250’s front panel by
using the font button. However, all font selections made from the front
panel can be overridden by an software application program. The
recommended method to select fonts is through the program that you are
using to print. If the program does not provide font selection abilities, then
the printer’s font panel is very useful.
22.
Q. When printing high density (360 x 360 DPI) bit-image graphics why does
ink smearing sometimes occur on the outside edges of the printout with
certain print patterns?
A.
The AP-3250 builds the graphic image by making multiple passes when
printing high density graphics. Dependant upon the printed pattern and
the ink absorption factor of the paper being used, ink smearing may occur
on the edges of the printed pattern. This occurrence is much less
noticeable when printing at resolutions lower than 360 x 360 DPI. Should
this phenomenon be encountered, select a lower graphic resolution in your
software program.
Page 7

EPSON AMERICA INC.
Product Support Bulletin
EPSON
Subject:
Date: 12/4/91
Page(s): 1 of 14
This bulletin provides detailed explanations and illustrations for some of the more
commonly used printer commands used in ESC/P2 Listed below are the
commands discussed in this bulletin.
Command
ESC X m n1 n2
ESC ( C m1 m2 n1 n1
ESC(vm1 m2 n1 n2
ESC(Vm1 m2 n1 n2
ESCtn
ESC ( t n1 n2 d1 d2 d3
ESC( ^ n1 n2 d1...d
Understanding and Using
Command Name
Select Pitch and Point Size
Set Page Length in Defined Units
Set Relative Vertical Position
Set Absolute Vertical Position
Select Character Table
Assign Character Table
Print Data as Characters
2
ESCP/2
Commands and Syntax
PSB No: P-0082
Originator: JW
PSB Page
2
5
6
8
9
10
14
Page 8

PSB No: P-0082
Page: 2 of 14
ESC X m n1 n2
C X m n1 n2 is the command for selecting pitch and point size where m, n1 and
n2 are variables. The variable "m" is used to select the pitch which is the character
spacing. The variable "n1" selects the point size and the variable “n2”, at this time,
will always be 0 (zero). The variables "m" and "n1" are explained below.
The values used for ’m’ are 0,1,18,21,24,30,36,42,48,60, and 72. If "0" is
used as the value for ”m”, there will be no change in pitch. If "1" is used as the
value for "m", the character pitch will be proportional spacing. To determine the
character pitch for all other values of "m", divide 360 by "m".
then 360 divided by 60 equals 6 and the character pitch is 6 characters per inch. If
m=30, the character pitch is 12 characters per inch.
For the Roman and Sans Serif fonts, the values used for "n1" are 0,16,20,21,24,
28,32,36,40,42,44,48,52,56,60 and 84. For all other fonts, the values used for
"n1" are 0,21, and 42. The actual point size that will print is n1 divided by 2. For
example, if n1=20, the point size is 10. If n1=48, the point size is 24.
When selecting a point size larger than 24 (the value for n1 is greater than 48)
select proportional spacing (m=1) for the character pitch.
(Select Pitch and Point Size)
For example, if m=60
NOTE:
In the Basic programming language, the command would look like this.
LPRlNT CHR$(27);"X";CHR$(1);CHR$(48);CHR$(0);”This is 24 point proportional
spaced”
Chr$(27) is ESC, chr$(1) selects proportional spacing, chr$(48) selects 24 point
character size. At this time, n2 is always zero (0).
Page 9

PSB No: P-0082
Page: 3 of 14
10 INPUT “Point Size”;A$
20
B=VAL(A$)*2
21
RESTORE 70
22 FOR X=1 TO 16
23 READY
24
IF B=Y THEN GOTO 30
25 NEXT X
26 CLS
27 PRINT A$ ” is not a valid point size choice.”
20 GOTO 10
30 C=VAL(A$)
40 LPRINT CHR$(27);“X”;CHR$(1);CHR$(B);CHR$(0);”These are “;A$;” point
characters”
50
LPRINT CHR$(27);“(v”;CHR$(2);CHR$(C);CHR$(C);CHR$(0)
60
GOTO 10
70 DATA 0,16,20,21,24,28,32,36,40,42,44,48,52,56,60,64
Line 10 Line 20 tine 21 -
Line 30 - computes the value for “n1” for advancing paper using the ESC ( v
Line 40 -
Line 50 -
Line 60
NOTE: To halt the program, hold down the “Ctrl” key and press the “C” key.
allows you to specify the point size desired.
computes the value for “n1” in the ESC X command.
check to ensure that a valid point size was input
valid, the program jumps to line 30.
program prints a message on the screen and starts over again.
command.
sends the “Set Pitch and Point Size” command to the printer. (Note: The
pitch is set for proportional spacing for all point sizes to ensure proper
character spacing regardless of the point size.)
sends the “Set Relative Vertical Position” command to the printer. This
command advances the paper in preparation for printing the next line.
causes the program to start again at the beginning.
If the point size is not valid, the
If the point size is
Page 10

These are 8 point characters
These are 10 point characters
These are 10.5 point characters
These are 12 point characters
These are 14 point characters
These are 16 point characters
PSB No: P-0082
Page: 4 of 14
These
These
are 18 point characters
are 20 point characters
These are 21 point characters
These are 22 point characters
These are 24 point characters
These are 26 point characters
These are 28 point characters
These are 30 point characters
These are 32 point characters
Page 11

PSB No: P-0082
Page: 5 of 14
ESC ( C m1 m2 n1 n2 (Set Page Length in Defined Units
ESC ( C m1 m2 n1 n2 is the command for setting the page length in units where ml,
m2, n1 and n2 are variables. The “unit’ is usually 1/360 of an inch unless defined
otherwise by the “ESC ( U" command. Currently, the values for m1 and m2 MUST be
m1=2 and m2=0.
To determine the values for n1 and n2 perform the following steps.
1.
Determine the desired page length in inches.
2
Multiply the page length by 360.
Divide the result by 256 using long division.
3.
4.
The remainder in the quotient from step 3 is the value for n1.
The whole number in the quotient from step 3 is the value for n2.
5.
EXAMPLE
1.
The page length is 8.5
2
8.5 x 360 = 3060
3.
3060 divided by 256 =
4.
n1=244
5.
n2=11
inches.
11 with
a
remainder of 244.
II
In the Basic programming language, the command would look like this.
This command, as listed in the line above, will set the page length to 8.5 inches.
NOTE: The current line becomes the top of form. This command cancels any
previously set top and bottom margin settings. If you wish to set the top and bottom
margins via software command, the commands must be issued AFTER the “Set Page
Length in Defined Units” command. The proper page length setting can be confirmed
by issuing a “Form Feed” command, chr$(12), or by pressing the “FF button on the
control panel while the printer is “Off Line”.
Page 12

PSB No: P-0082
Page: 6 of 14
ESC ( v m1 m2 n1 n2 (Set Relative Vertical Position
1
ESC (v m1 m2 n1 n2 is the command for advancing the print position vertically in
units where m1, m2, n1 and n2 are variables. The "unit" is usually 1/360 of an inch
unless defined otherwise by the “ESC ( U" command. Currently, the values for ml
and m2 MUST be m1=2 and m2=0.
To determine the values for n1 and n2 perform the following steps.
1.
Determine the desired vertical motion distance in inches.
2
EXAMPLE
2 1x360=360
3.
4.
5.
Multiply the distance by 360.
3.
Divide the result by 256 using long division.
4.
The remainder in the quotient from step 3 is the value for n1.
5.
The whole number in the quotient from step 3 is the value for n2
1.
The desired distance is 1 inch.
360 divided by 256=1 with a remainder of 104.
n1=104
n2=1
In the Basic programming language, the command would look like this.
This command, as listed in the line above, will feed the paper up 1 inch from the
current line. The current print column (horizontal position) IS NOT changed.
‘Reverse” paper feed less than 1/2 inch can be performed with this command. To
accomplish "reverse" paper feeding requires the following steps.
1.
Determine the desired vertical motion dice in inches.
2
3.
4.
5.
6.
Multiply the distance by 360.
Divide the result by 256 using long division.
Subtract the remainder in the quotient computed in step 3 from 256.
The result from step 4 is the value for n1.
The value for n2 will always be 255.
Page 13

PSB No: P-0082
Page: 7 of 14
EXAMPLE
1.
The desired distance is 1/4 inch.
2.
4.
5.
6.
In the Basic programming language, the command would look like this.
LPRlNT CHR$(27);“(v”;CHR$(2);CHR$(0);CHR$(166);CHR$(255)
This command, as listed in the line above, will feed the reverse feed the paper 1/4 inch
from the current line. The current print column (horizontal position) IS NOT changed.
1/4 x 360 = 90
3.
90 divided by 256
256-90=166
n1=166
n2=255
=0with
remainderof90.
a
Page 14
PSB No: P-0082
Page: 8 of 14
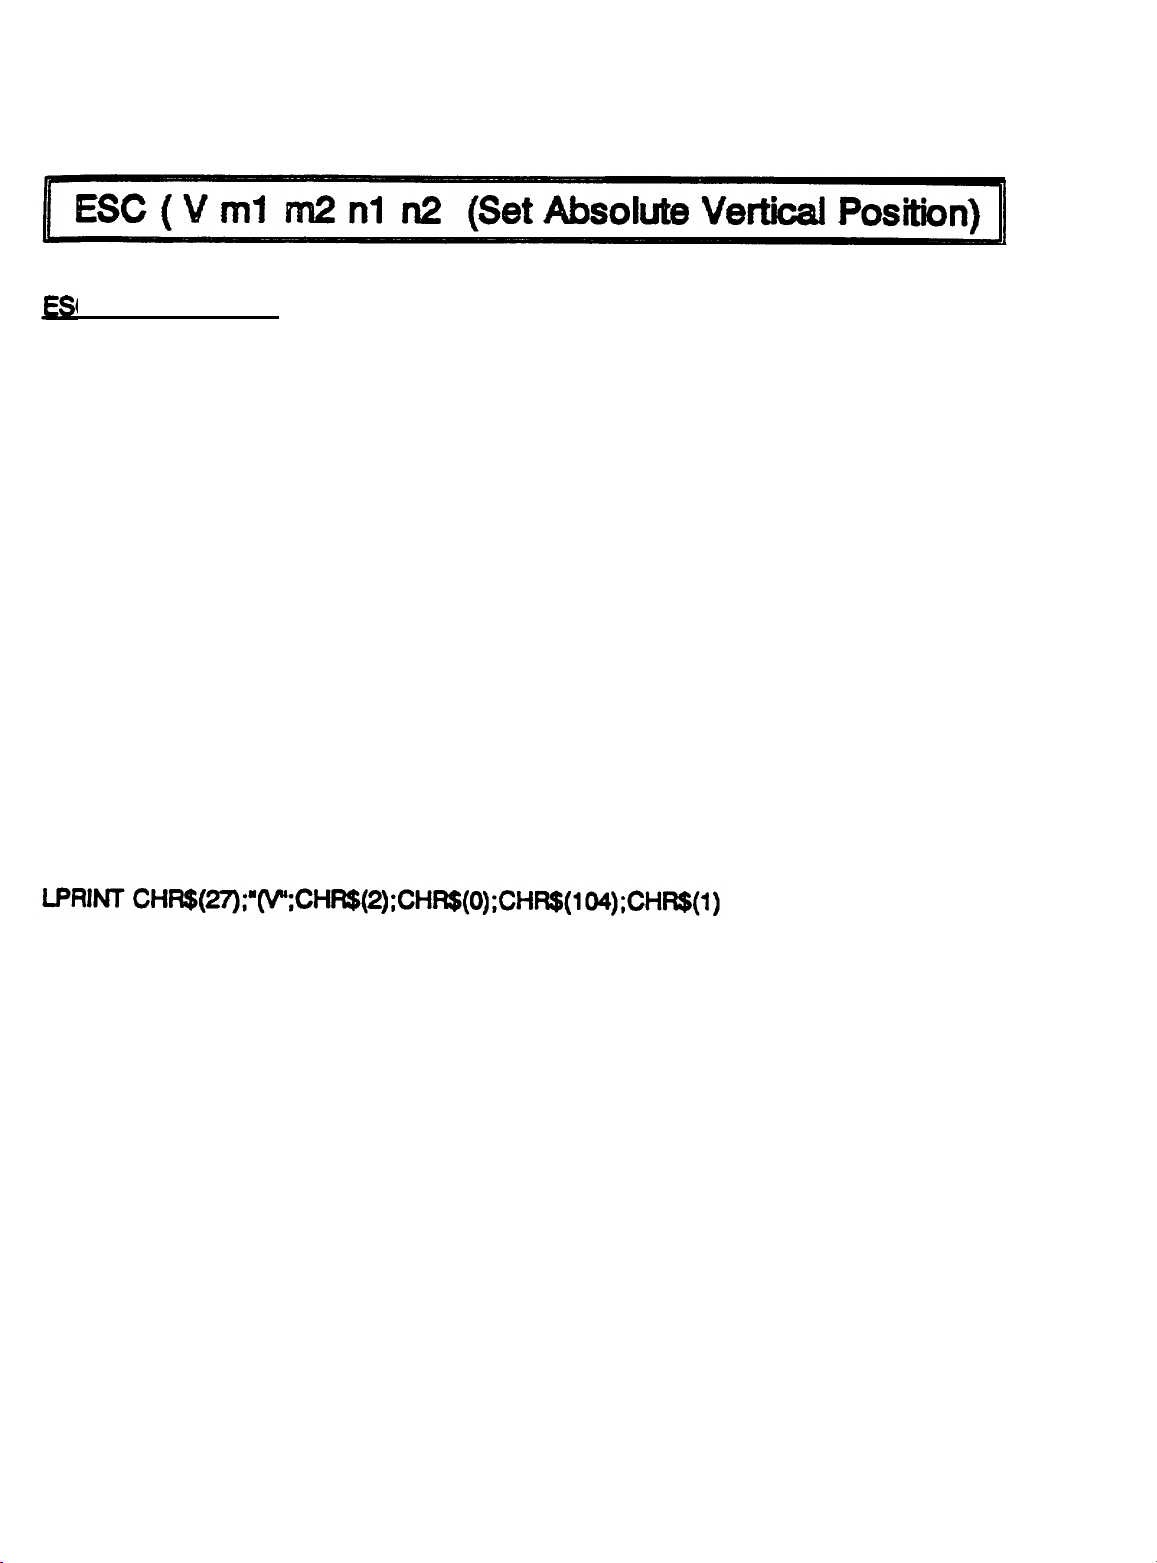
C
(V m1 m2 n1 n2 is the command for changing the print position vertically (with
respect to the Top of Form position) in units where m1, m2, n1 and n2 are variables.
The "unit” is usually 1/360 of an inch unless defined otherwise by the ”ESC(U"
command.
To determine the values for n1 and n2 perform the following steps.
2 Multiply the distance by 360.
3.
4.
5.
EXAMPLE
2 1x360=360
3.
4.
5.
Currently, the values for m1 and m2 MUST be m1=2 and m2=0.
1.
Determine the desired vertical distance from the Top of Form in inches.
Divide the result by 256 using long division.
The remainder in the quotient from step 3 is the value for n1.
The whole number in the quotient from step 3 is the value for n2
1.
The desired dice from the Top of Form is 1 inch.
1
360 divided by 256=
n1=104
n2=1
with a remainder of 104.
In the Basic programming language, the command would look like this.
This command, as listed in the line above, will position the paper 1 inch from the
current Top of Form setting.
of the paper, the paper will be positioned so that the printer is ready to print 1 inch
down from the top edge of the paper.
For example, if the Top of Form setting is the top edge
Page 15

PSB No: P-0082
Page: 9 of
ESC t n is the command for selecting a character table to be used for printing where
n is a variable. The following table lists the values for n and the character table
associated with the value.
14
n
II
3 I PC437 (US)
II
NOTE: 1. Character tables other than those listed above can be assigned by using
the ESC ( t command (Assign Character Table).
2
The value used for n can be either the ASCII value OR the ASCII character
(i.e. chr$(1) or “1”).
In the Basic programming language, the command would look like this.
LPRlNT CHR$(27);"t";CHR$(0);
CHR$(27) is ESC and CHR$(0) selects table #0 (italic).
I
Table
Table 1
II
II
Page 16

PSB No: P-0082
Page:
10
of
14
ESC ( t n1 n2 d1 d2 d3 (Assign Character Table)
ESC (t n1 n2 d1 d2 d3 is the command for assigning character tables where n1, n2,
d1,d2, and d3 are variables. Currently, variables, n1, n2 and d3 MUST be n1=3,
n2=0, and d3=0. Variable d1 is a number corresponding to one of the four tables
selectable with the ESC t n command. This is the table that will be replaced. Valid
values for d1 are 0,1,2, and 3 (see Table 1 below). Variable d2 is a number
corresponding to a registered table.
indicated by Variable d1. Valid Values for d2 are 0, 1,3,7,8, and 9 (see Table 2
below).
This is the table that will replace the table
Table 1
Table 2
After using the ESC ( t command, the ESC t n command MUST be sent to select the
table before printing from the new table.
0 is sent (assign Registered Table 3 (PC850) to Selectable Table 1 (PC437). In order
to print the Q character (ASCII 245), the command ESC t 1 must be sent. In the Basic
programming language, the sequence would be as follows:
LPRINT CHR$(27);“(T);CHR$(3);CHR$(0);CHR$(1);CHR$(3);CHR$(0);
LPRINT CHR$(27);"t";CHR$(1);
LPRINT CHR$(245)
Some ESC/P2 documentation may illustrate as many as 22 different Registered
Tables. The Registered Tables are a part of the character set, therefore, they are
contained in the Character Generator ROM. The CG ROM differs based upon the
destination country. For this reason, only the above Registered Tables are available
on LQ-570, LQ-1070, LQ-870 and LQ-1170 printers sold for the U.S. market. Foreign
Character Generator ROMs ARE NOT available in the United States. The following
For example, the command ESC ( t 3 0 1 3
Page 17

PSB No: P-0082
Page:
11 of 14
page contains a print sample of the Registered Tables available in printers sold in the
U.S. In order to print the first 31 characters in Tables 1 through 9, the ESC ( ^
command must be sent.
Listed below is a Basic language program and an explanation of the program that will
print the output illustrated on page 13 of this bulletin.
10
FOR Z=1 TO 6
20
READ Y,Y$
30 LPRINT “Table”;Y;” “;Y$
40 LPRINT CHR$(27);“(t”;CHR$(3);CHR$(0);CHR$(0);CHR$(Y);CHR$(0);
50
LPRINT CHR$(27);“t”;CHR$(0)
60
IF Y=0 THEN GOTO 100
70 LPRINT CHR$(27);“(^“;CHR$(31);CHR$(0);
80 FOR X=1 TO 255:LPRlNT CHR$(X);:NEXT X
90
GOTO 120
100 FOR X=33 TO 126:LPRINT CHR$(X);:NEXT X
110 FOR X=161 TO 254:LPRlNT CHR$(X);:NEXT X
120 LPRINT CHR$(10):LPRINT CHR$(10)
130 NEXT Z
140 DATA 0, Italic, 1, PC437 (US),3,PC850 (International),7,PC860 (Portugal)
150
DATA 8, PC863 (Canada-French),9,PC865 (Norway)
Program Description
10
Begin loop to print the 6 Registered Tables
20
Read Registered Table number and Table Name
30
Print Registered Table number and Table Name
40
Send the Assign Character Table command to the printer assigning the
Registered Character Table read in line 20 to Selectable Character Table 0.
Send the Select Character Table command to the printer selecting Selectable
50
Table number 0 as the current Character Table for printing.
If the Registered Character Table number is 0, do not execute commands in lines
60
70 through 90. This is because the Italic Character Table duplicates control
codes and non-displayable characters in ASCII values 127 through 160. Program
lines 100 and 110 prevent the attempted printing of this range of ASCII values.
Note: tines 70 through 90 will execute ONLY if the Registered Character Table to be
printed is NOT table number 0. Refer to the conditional command in line 60.
70
If the Registered Character Table number is not 0, send the Print Data as
Characters command to the printer. Specifically, this command, as listed, tells
the printer to print the next 31 bytes as data, not control codes.
Page 18

PSB No: P-0082
Page:
12 of 14
60 If the Registered Character Table number is not 0, print ASCII values 1 through
255 inclusive. Remember, line 70 allows the first 31 ASCII values to print as
characters, not control codes.
90 If the Registered Character Table number is not 0, do not execute commands in
lines 100 and 110.
100 If this Registered Character Table number is 0, sand ASCII values 33 through 126
to the printer.
110 If this Registered Character Table number is 0, send ASCII values 161 through
254 to the printer.
120 Send 2 line feed commands to the printer to provide separation between tables.
130 If program lines 20 through 120 have not executed 6 times, return to line 20 and
start again.
140 Data that is read by line 20. This line and line 150 contain the Registered Table
number and name that will be used by this program.
Page 19

PSB No: P-0082
Page: 13 of 14
Table 0
‘#$X&
>pqrstuvwxyz(
nbcdefghijklmnopqrstuvwxyz{,‘}-
Italic
()*+,-
./0123456789:;c=>?~ABCDEFGHIJKLMNOPQRSTU~YZ~\~n-fabcdefghijklm
:}‘!“#$X&‘()*+,-./0123456789:;
e=> ?BABCDEFGHI
JKLMNOPQRSTUVRXYZ[
\ J
^,
Table 8
D~,+~*~o~~~pRU.4:!!~[g,~tl~t~oA
XSTUWXYZ[\]--’
PC863 (Canada-French)
abcdefghijklmno
!“#$%C’()*+,-./Or23456789
:;<=*?@ABCDEFGHIJKLMNOP
~rstuvwxyz{I)~~~b~Alt~EBbii~~E~E~~X~iiO~6U~fbOf~‘66”.3-f~~~~~a:.,~~~~~~~~~~)~JJJ~
kt-fttL+nLLrrt+l
Table 9
b~~~**no~~bORU,4:"~~-~tl~t~~A
RSTUWYCYZ[\I--’
PC865 (Norway)
abcdefghijklmno
w
raprxCalrr~BQG~B~nnfLIFJ9='..Jn2r
!“#SX&‘()*+,-./0123456789
:;<=>?QABCDEFGHIJKLMNOP
qrstuvwxyz( I}CU~~~AA~oe~iiiXAB~b;~ij~a~~a~0f0Ptfbi6ri~RPo;~~f?;~n-:-~~.~)~i111~)lJJJ~
fH-ttLpTw+LLr+jJ
rly raPrxCa~+~BQ6~8EnifL~rJ~~.*.~a2~
Page 20

PSB No: P-0082
Page:
14 of 14
C ( ^ n1 n2 d1,.. dk is the command for printing control codes as data where n1
and n2 are variables and d1...dk represent the data that is to be printed as
characters. The variables n1 and n2 tell the printer "the next xx
ASCII
codes are to be
interpreted as characters instead of control codes”. This command is used primarily
to print displayable characters such as ASCII values 0 through 31 in Registered Tables
1 through 9 which are normally used as
control codes (LF, FF,
ESC, etc.)
TO determine the values for n1 and n2 perform the following steps.
1.
Determine how many ASCII codes will be sent sequentially immediately
following n1 and n2
2
Using long division, divide the quantity of ASCII codes that will be sent
sequentially immediately following n1 and n2 by 255.
3.
The remainder in the quotient is the value for n1.
4.
The whole number in the quotient is the value for n2
EXAMPLE
1. The symbols for the different suits of a card deck (hearts, diamonds, clubs,
and spades -
V’, +, 4,
and 4) are to be printed. These are each separate
ASCII codes (ASCII codes 2, 3, 4, and 5 when using the PC437 Character
table).
2. 4 divided by 255=
0 with a remainder of 4.
3. n1=4
4. n2=0
In the Basic programming language, the command would look like this.
This command, as listed in the line above, will cause the printer to print the symbols
for the different suits of a card deck (hearts, diamonds, clubs, and spades
and
4).
Another example of using the ESC ( ^ command is illustrated in the
V’,
+, 4,
explanation of the ESC ( t (Assign Character Table) command.
Page 21
EPSON AMERICA INC.
Product Support Bulletin
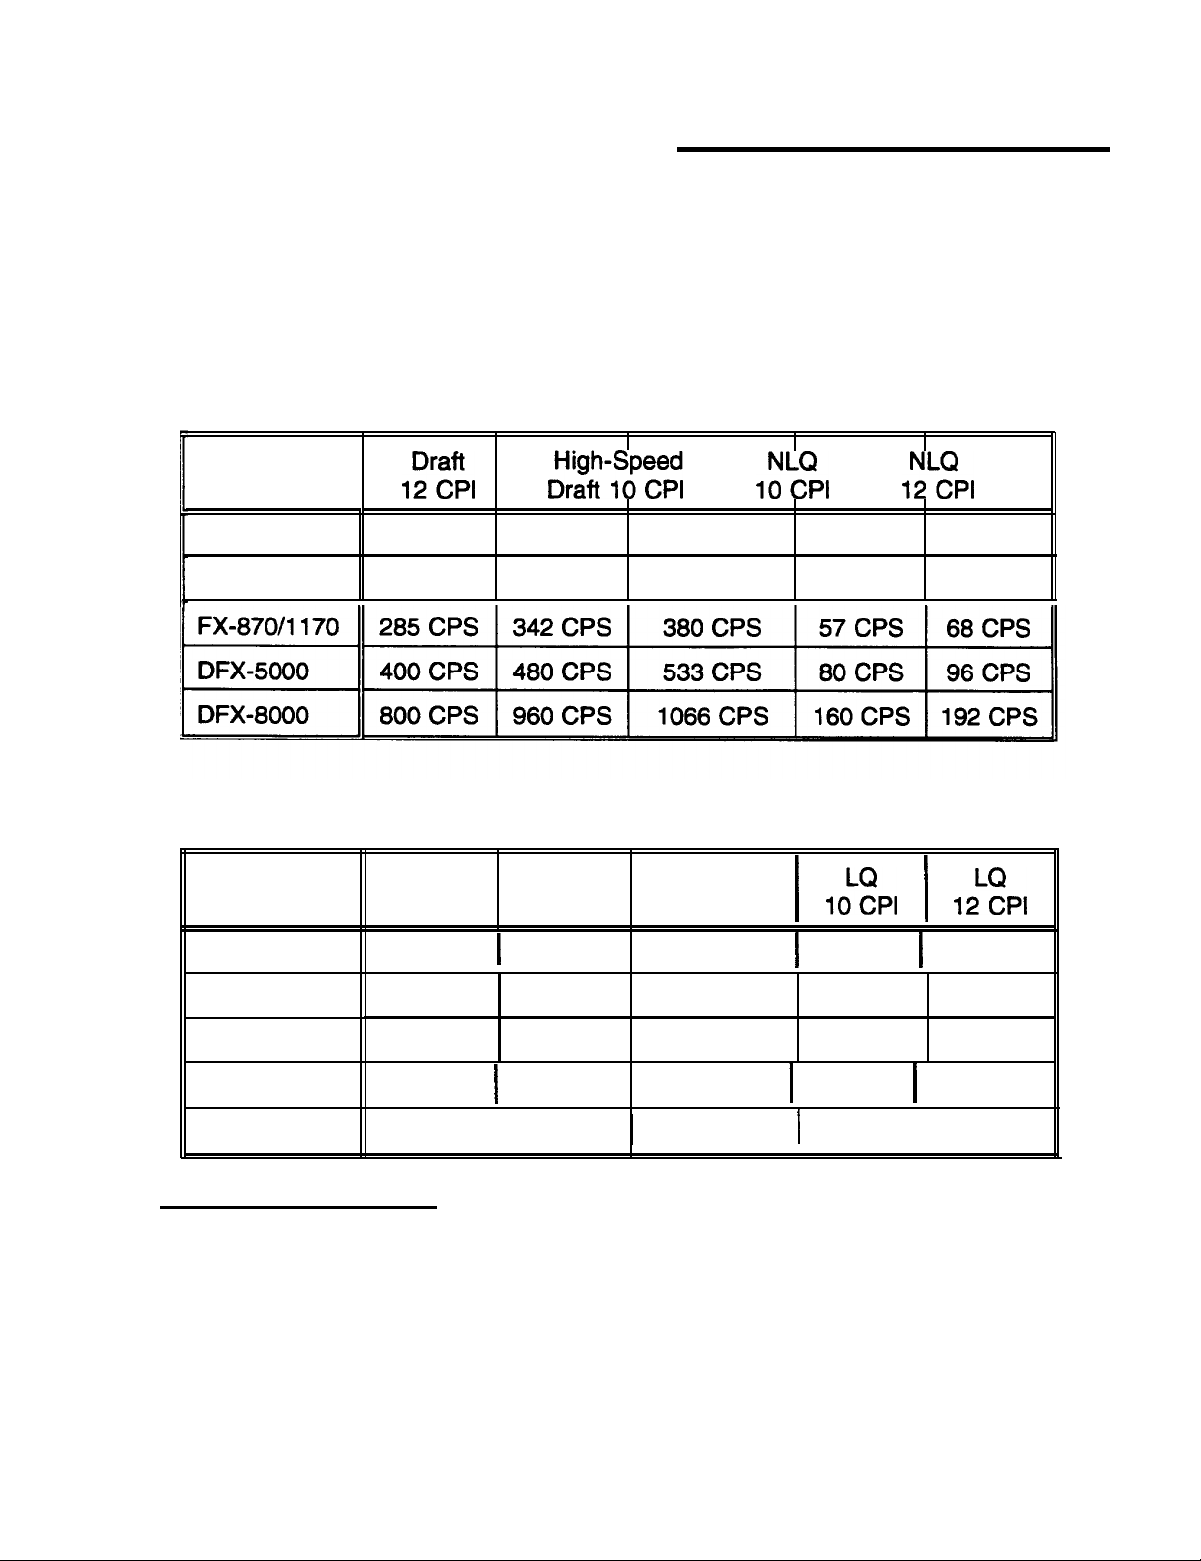
Subject: Quick Reference for Current Dot-Matrix Printer Print Speeds
EPSON
Date: 10/9/92
Page(s): 1 of 1
Model
AP-2250
LX-810
Model
PSB No: P-0030C
Originator: SLS
9-PIN PRINTERS
l%Y
200
200
CPS
CPS
D”:,“n”-“,““c”p4
240 CPS n/a
240 CPS n/a
24-PIN PRINTERS
Draft
10 CPI
Draft
12 CPI
High-Speed
Draft 10 CPI
legal
40
40
1 ICZPI / IEPI
llLFPl
CPS
CPS
,
CPS
48
CPS
48
AP-3250
LQ-570/1070
LQ-860
LQ-870/1170
LQ-2550
GLOSSARY OF TERMS
CPI:
CPS: Characters Per Second
Draft:
Elite:
Pica:
LQ:
NLQ:
Characters Per Inch
Draft uses a minimum number of dots per character for high-speed printing.
12 Characters Per Inch (12 CPI)
10 Characters Per Inch (10 CPI)
Letter Quality reduces the print speed and increases the number of dots per
character to increase the print quality. (24-pin printers only)
Near Letter Quality reduces the print speed and increase the number of dots
per character to increase the print quality. NLQ printing requires two passes
per character. (9-pin printers only)
167 CPS 1 200 CPS
210 CPS 252 CPS
246 CPS 295 CPS
275 CPS
333 CPS I 400 CPS
1
330 CPS
1
n/a
225
CPS
300
CPS
300 CPS 1 92 CPS I 110 CPS
~
n/a
60 CPS
70
CPS
82
CPS
1
111 CPS I 133 CPS
1
72 CPS
84
98
CPS
CPS
Page 22

EPSON AMERICA, INC.
Product Support Bulletin
Subject: Quick Reference for 9/24 Pin Printer Paper Specifications
EPSON
Date: 10/9/92
Page(s): 1 of 1
This PSB provides a quick reference for the paper specifications on Epson’s current
line of Q-pin and 24-pin dot-matrix printers when using continuous paper. The
‘Maximum No. of Copies” is the maximum allowable number of copies when using
continuous multi-part carbonless paper. The “Total” number is the maximum
allowable number of copies including the original. The ‘Maximum Total Thickness”
is the maximum allowable total thickness including the original plus any copies.
PSB No: P-0022D
Originator: SLS
9-PIN PRINTERS
Model
AP-2250 *
LX-810
FX-870/1170
DFX-5000
(Front Tractor)
(Rear Tractor)
Orig. + Maximum No.
of Copies
1
1
1
1
1
2
2
3
5
3
Total Maximum Total
Thickness
3
3
4
6
4
0.0098” (0.25mm)
I
0.0098” (0.25mm)
I
0.0126” (0.32mm)
I
0.018"
0.012”
(0.46mm)
(0.30mm)
DFX-8000
(Front Tractor)
(Rear Tractor)
Model
AP-3250 *
LQ-570/1070
LQ-860
LQ-870/1170
LQ-2550
* Note:
The AP-2250 and AP-3250 require an optional push tractor to use
continuous paper.
1
1
5
3
24-PIN PRINTERS
Orig. + Maximum No.
of Copies
I
I
I
I
I
1
1
1
1
1
1
3
3
3
5
I
I
I
I
I
6
4
Total
2
4
4
4
6
0.018"
0.012”
Maximum Total
0.0071” (0.18mm)
0.0126” (0.32mm)
0.0126” (0.32mm)
0.0126” (0.32mm)
0.018"
(0.46mm)
(0.30mm)
Thickness
(0.46mm)
 Loading...