

Page 1

Teaching and Learning Center
Scanning Basics for Epson Perfection 1640SU
GETTING STARTED ............................................................................................... 2
USING THE FLATBED SCANNER....................... ERROR! BOOKMARK NOT DEFINED.
USING THE SLIDE SCANNER ................................................................................. 8
SCANNING TIPS................................................................................................... 12
NOTE: The Teaching and Learning Center recommends the use of PhotoShop for scanning
pictures/graphics/slides (covered in this document), OmniPage Pro for scanning text and
Adobe Acrobat to scan something into pdf (covered in another document).
Updated 1/26/2005
Page 2
Using the Flatbed Scanner
Getting Started
Scanning is basically the same process no matter what type of scanner you are using. Adobe
Photoshop is just one of the programs that allows for scanning, and that is the program we
are using the in step-by-step process below. Many scanners also come with their own
scanning software, and this can be used as well. For the examples listed below, we will
describe one of the scanners that is in the TLC computer lab, the Epson Perfection 1640SU.
Place your image facedown on the scanner. Double click on the 'Adobe PhotoShop' on your
desktop, or select it in your Start menu.
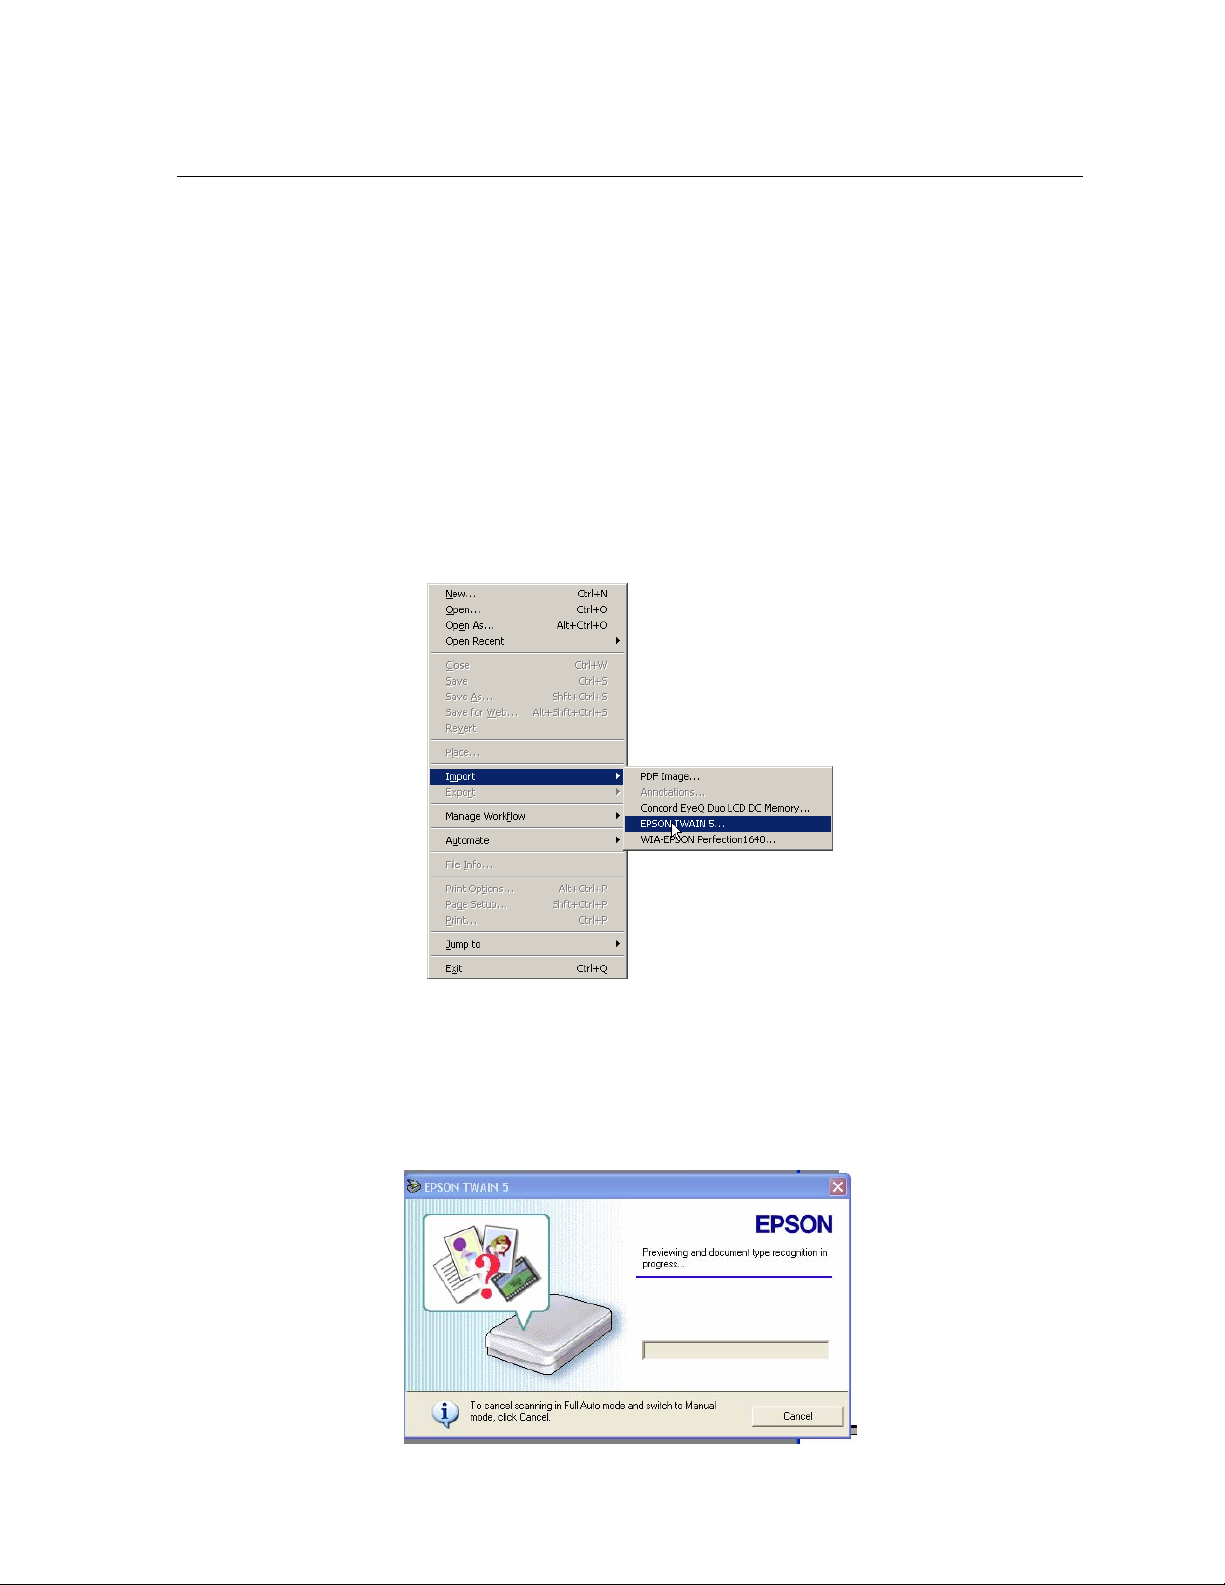
In Photoshop click File, point the cursor to Import, then click on Select EPSON TWAIN
5…
The scanner pre-scans your image. If you want to scan in full auto mode allow the pre-scan
to continue. If you want to scan in manual mode click on cancel.
Page 3
Using the Flatbed Scanner
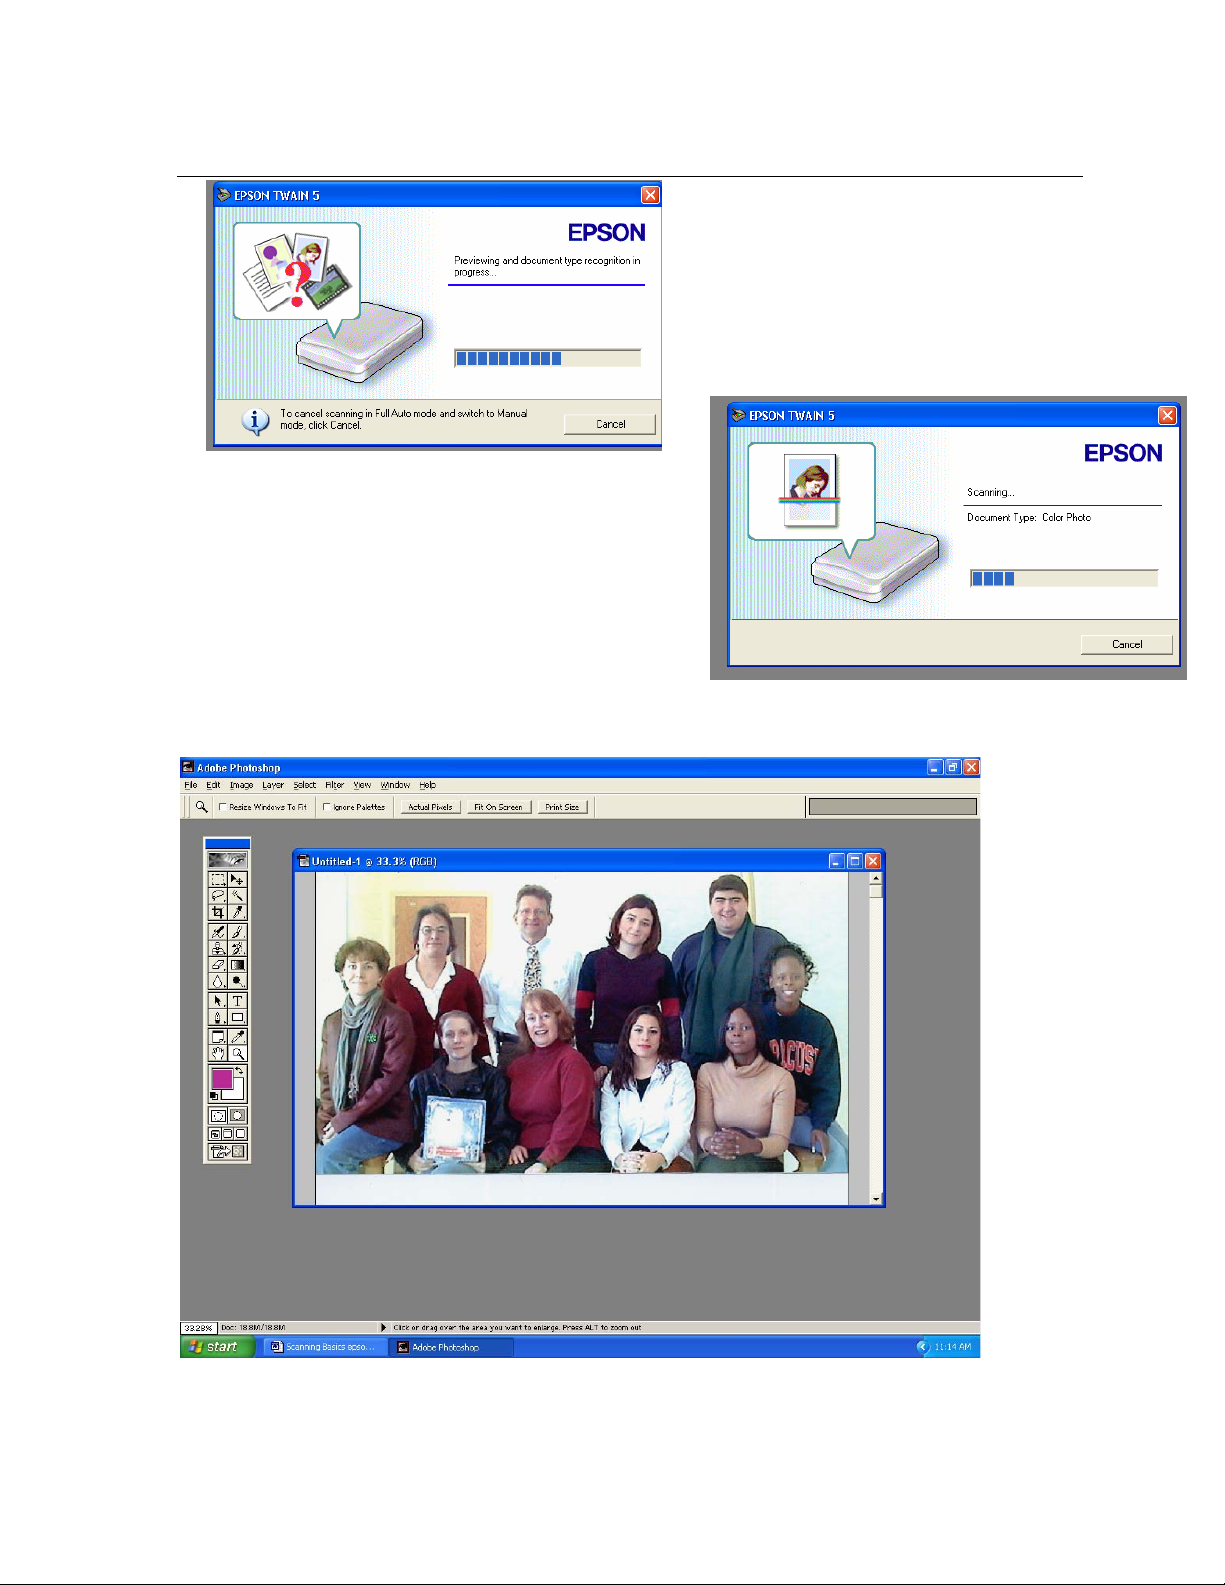
When the scanner is done scanning you will have a
window open of your image in Photoshop similar to
the one below.
In auto mode the scanner will chose the
document type and continue to scan your
image.
Page 4
Using the Flatbed Scanner
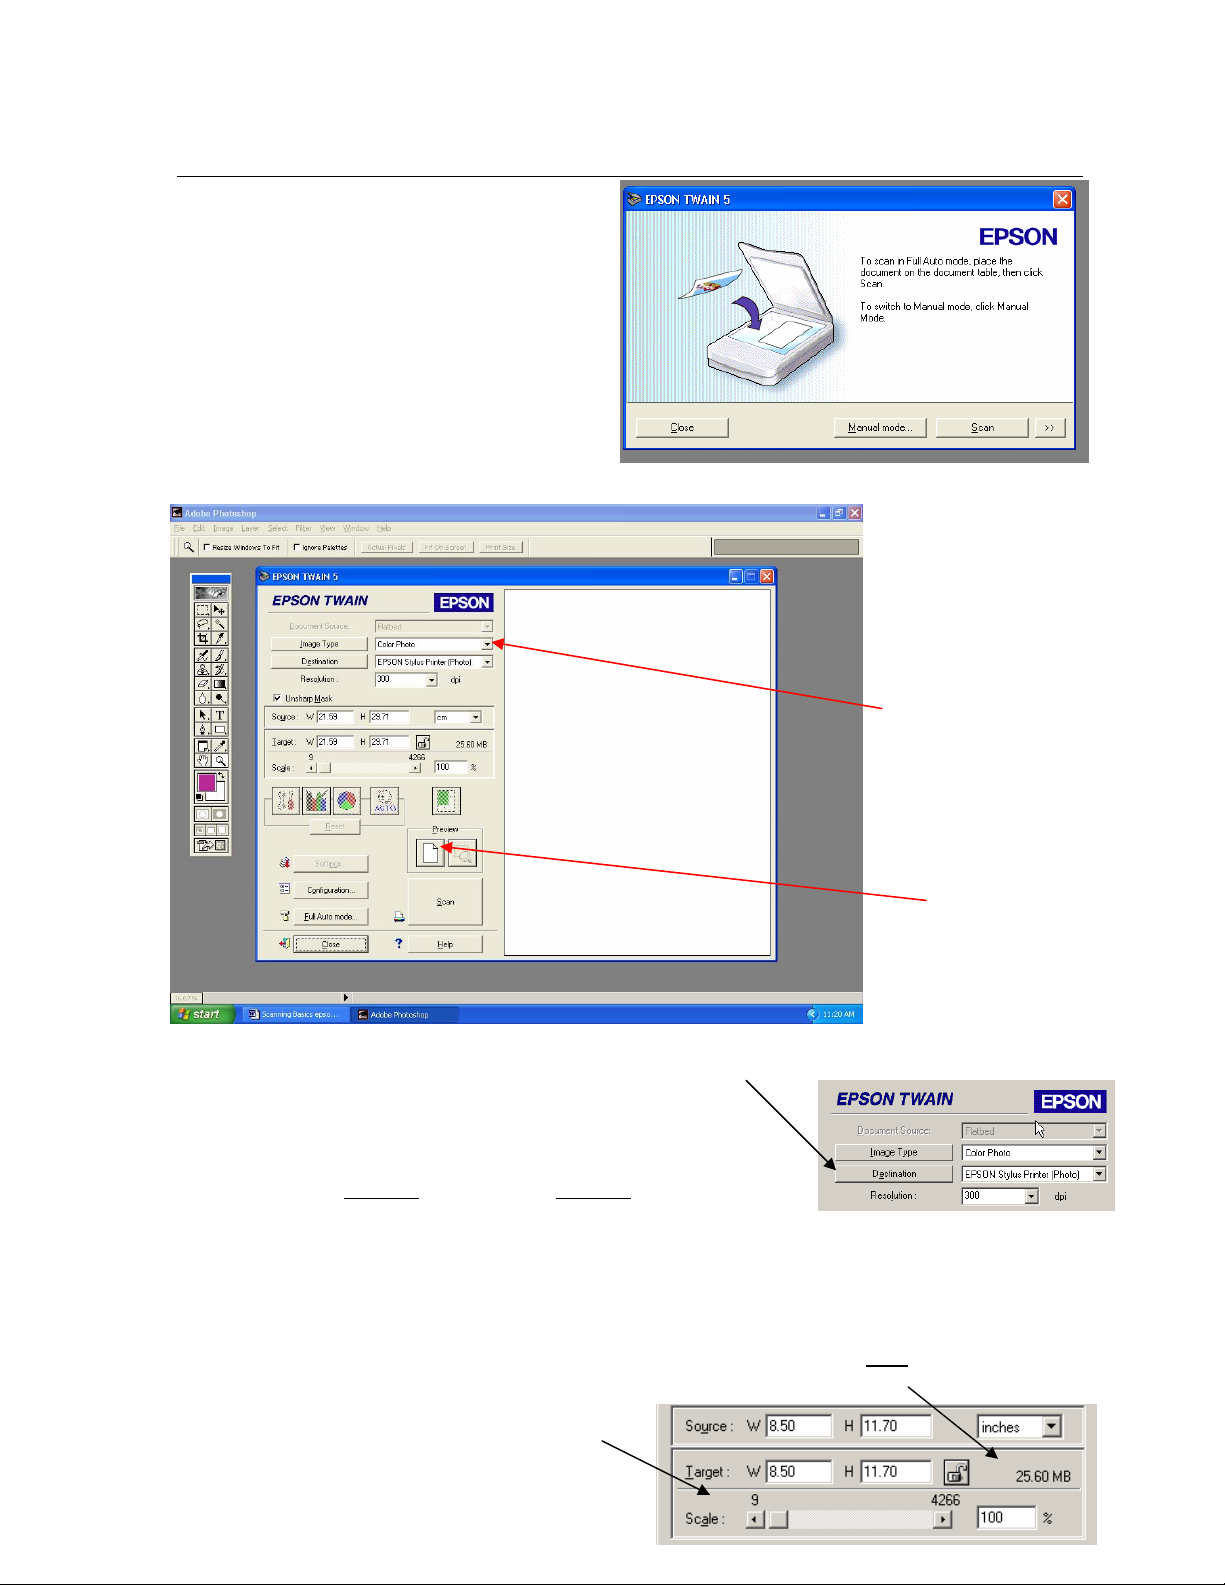
If you would like to continue in manual
mode after clicking the initial cancel up
above, a window will pop up asking to
either click on Manual mode or Scan for
continuing in Full Auto Mode. Click on
manual mode.
You will get a new
window that looks
similar to this.
From here you can
change the image
type by using the
pull down menu.
When the image
type is correct click
on the preview
button.
DESINATION: (this selects the resolution of the image.)
This does not tell you the actual resolution, it asks you what
type of printer you are going to use and sets the dots per inch
(dpi) for the best resolution for that printer. You can get around
this by using the 300-dpi
Internet and the World Wide Web, use the "Web page" setting,
which is 96 dpi or select 'Screen/Web'. You can also manually set the resolution by clicking
the ‘down button’ to the left of the Resolution number.
SIZE displays the actual file size but this will change according to how much you crop the
image and what type of file format you save your file as. For example,"jpeg
in compression and can significantly reduce the file size.
SCALING is used if you want to make the
image size bigger or smaller than one to one.
setting or the 600-dpi setting. For the
" format has built
Page 5

Using the Flatbed Scanner
Normally it scans
at a 1:1 ratio and
displays the size at
the bottom of the
scaling window.
The actual image
appears on the
right hand side of
the window. To
have the program
locate the image
automatically click
on
There is a dashed
line outline around
the image.
Grab the edges of the
box by clicking on
them and move them
in or out so they fit
around your picture.
If the box disappears,
click your mouse and
drag to create a new
box.
If you make changes
to how you have
your picture placed
on the scanner, click
the Preview button.
A new scan will begin.
Page 6

Using the Flatbed Scanner
When you are ready to make the final scan, click on the Scan button. After the scan is
finished click on the Close button on the window and you will be back in Adobe
PhotoShop.
Your picture is not saved until you click File / Save as.
You can save the picture to disk, or to your NT account.
(Please consult a TLC employee if you have any questions
regarding your file size and applications.) Since there are
several ways in which to save your file, one of the advisors can
suggest the proper format for your specific application. Select
where you would like to save your file under 'Save in:' name
your file under 'File name;' and click save.
Page 7

Using the Flatbed Scanner
When you have finished scanning and saving your picture, click on the File / Exit
Don't forget! to take your picture out of the scanner, and to sign out on your way out of
the center.
Page 8

Using the Slide Scanner
Using the Slide Scanner
(From http://www.epson.com/cgibin/Store/support/supDetail.jsp?BV_UseBVCookie=yes&infoType=Doc&oid=14567&prodo
id=32723)
Page 9

Using the Slide Scanner
Align the slide so that the top edge of the slide corresponds with the top edge of the
scanner. You may align up to 4 slides at each corner.
Page 10

Using the Slide Scanner
Top of Slide
It is also recommended that the emulsion surface of the slide be face down (which means the
shiny surface of the slide should be facing up).
1. Click on File / Import / TWAIN 32 in the PhotoShop, allow the scanner to prescann, making the image appear. If the screen appears like Figure 1, make sure to set
the Document Source to the correct slide type (positive film, negative film, etc.), and
the right side of the screen should look like Figure 2.
Figure 1 Figure 2
Page 11

Using the Slide Scanner
2. The picture may now be scanned, click Scan button. NOTE: scanning may take a
minute. If the scanner cut off part of the image, please ask a TLC employee for
assistance.
3. When it is finished scanning, close the scan window by clicking on the Close button.
You should see the original screen with your new picture on it.
4. From the menu bar, click File \ Save As.
Name your file in the File name box.
You have the option of saving the file as a few different types; they are as follows:
• JPEG or JPG: This format compresses the image, with some data loss
depending on the degree of the compression. This is the best format for
scanned photographs used on web sites or for sending photographic
images in email.
• GIF: This format is used mainly for computer-generated graphics such as
buttons and bars and clip art style images. It works well for text and
graphics with straight lines, but is limited to 256 colors and poorly suited
for photographic purposes.
You can save the picture to disk, or to your NT account. (Please consult a TTC advisor if
you have any questions regarding your file size and applications.) Since there are several
ways in which to save your file, one of the advisors can suggest the proper format for your
specific application. Select where you would like to save your file under 'Save in:,' name
your file under 'File name;' and click Save.
After you have saved your file be sure remove your slide from the scanner. If you would like
to scan another slide, repeat steps 4 – 11.
Finishing up
1. When you have finished scanning slides, click on File / Exit.
2. Don't forget to take your slides out of the scanner, and to sign out on your way out of the
center.
Page 12

Scanning Tips
Scanning Tips
What setting should I use?
For most accurate reproduction, scan your images using the same data type as that of the
final intended output device. This may also help you control file size. Here are some
examples:
OCR Text and Line Art use the Black and white setting (or use the centers OCR
software!)
Laser printer use Grayscale setting.
Monitor 256/True color use millions of color setting.
Post production use True color (CMYK) setting.
Experiment with different settings
Scan images using different settings. Compare the results on your screen to select the one
that suits your needs.
How much resolution is enough
When scanning, the relationship between your scanner and the output device to use is
important in determining the resolution. The following suggestions may be helpful in
deciding:
Scan for the intended output device. For monitors (the internet), use 72 dpi (Windows large
fonts)-96 dpi (Windows small fonts), laser printers 300-600 dpi, and photo-quality 12002400 dpi.
Scan at higher resolution (2x the original) when doing extensive image processing to work
with as much information as possible.
Scan at higher resolution when enlarging the image to scan.
Scan at 1.5 to 2x the intended halftone screen's lines per inch when sending the file to a
postproduction house to create halftones.
Highest resolution is not always the best selection
High-resolution images require enormous amounts of disk space. There are no advantages to
scanning an image at a higher resolution than what it is to be displayed at. The standard color
typesetting resolution is 180 dpi and a standard photograph ranges from 400 to 600 dpi.
Similarly, exceeding the resolution capabilities of your output device or monitor will not
result in a gain in image quality. A standard VGA monitor's display resolution in Windows is
72 dpi (Windows large fonts) or 96 dpi (Windows small fonts).
Page 13

Scanning Tips
Scan photos instead of printed pictures
Images from magazines or books are composed of tiny dots. The typical resolution for color
typesetting is 180 or 300 dpi, so scanning at higher resolutions offers no advantages. As a
matter of fact, higher resolutions may even be worse because the scanner often sees white
dots in between the printed color dots. To preserve accurate toning details, if possible, scan
photographs instead of printed materials.
Scan good quality images and text
You always lose some information when you scan. By carefully choosing your images and
settings, you can minimize this problem. For example, don't try to scan extremely light or
dark images or those with very low contrast.
Limit the image size when possible
Small images require much less hard disk space and processing time than large ones. Be
aware of how much disk space you have on your system when you acquire your pictures. If
your available disk space is limited, you may only be able to copy a few photographs to your
camera or computer.
 Loading...