

Page 1
TM
A Product Of High Res Solutions
Hesperia, CA. 92345
Toll Free 800-640-2768 • fax 760-947-1380
HighResSolutions.com • HighResSolutions@msn.com
Hy-Rez QuikRIP is protected by international copyright law. No part of this software or
manual may be duplicated, modified or redistributed in any manner whatsoever without
the written consent of the copyright holder. Consent is never considered nor granted. All
configuration files, methods and sequences employed to create, extract, separate,
modify , and manipulate the output of film positives using this software are the intellectual
property of the copyright holder.
Hy-Rez QuikRIP was created by the developer of QuikSeps Color Separation Software exclusively
for High Res Solutions.
QuikStart Manual
Page 2

A Product of High Res Solutions
11355 Mariposa Road • Hesperia, CA 92345
Toll Free 800-640-2768 •Fax 760-947-1380
HighResSolutions.com • HighResSolutions@msn.com
Limited W arranty on Hy-Rez™ QuikRIP products.
High Res Solutions warrants that the disc is free from defects in material and workmanship under normal use
and service for which this hardware is designed for a period of 90 days from date of receipt of purchase.
Failure of the hardware resulting from accident, abuse, or misapplication is not covered under this Limited
W arranty . Other than the above limited warranty , High Res Solutions makes no other warranty whatsoever,
either legal or conventional, expressed or implied, with respect to the licensed software and hardware. Y ou are
advised to read the User Manual and test the software thoroughly before relying on it. Y ou assume the risk of
using the licensed software. Because of the diversity of conditions and hardware under which this software may
be used, no warranty of merchantability or fitness for a particular purpose is given. Some regions do not allow
the exclusion of implied warranties so the above exclusion may not apply .
This product is protected under International Copyright Laws. No part of this software or manual may be
reproduced mechanically or electronically or in any form without prior written permission of the Copyright
holder . The use and copying of this product is subject to the license agreement that must registered and ac-
cepted by High Res Solutions in order to complete installation of this product. High Res Solutions assumes no
responsibilities or liability for any errors or inaccuracies on this document. Federal Copyright laws permit you to
make a backup of this product for archival purposes only . Any duplication of this product, including but limited
to, copies for sale, loan, rental, or gift is strictly forbidden and subject to both criminal and civil penalties.
All Trademarks and tradenames are acknowledged. Postscript, Adobe Photoshop, and Adobe Illustrator are
trademarks of Adobe Inc. Macintosh is a trademark of Apple Corp.
High Res Solutions 2003©
2
Page 3

What Exactly Is Hy-Rez QuikRIP?
Quite simply, Hy-Rez QuikRIP is a set of highly calibrated configuration settings and postscript printer description files that run within
CADlink PhotoScript.
These allow an ordinary Epson 3000 or 1520 ink jet printer to generate accurate imagesetter-style film positives for use within the
screen printing industry.
Without an application (RIP) such as this along with the screenprint
specific calibration our product provides, it would be impossible to
generate any form of usable halftones with your ink jet printer!
Getting Started
Note: If not already completed, the drivers included with your
Epson 3000 or 1520 printer must be installed. These are needed
to perform general maintenance on the printer such as head
cleanings. However, DO NOT install the Epson Stylus RIP Postscript
Driver!
The installation of this driver will cause conflicts with PhotoScript
and Hy-Rez QuikRIP. If this driver has been installed, remove all
software associated with the printer and reinstall only the printer
driver, omitting the Epson Stylus RIP Postscript Driver.
It is VITAL to first install PhotoScript prior to running the Hy-Rez
QuikRIP installer!
If PhotoScript is not installed first, the RIP will not function properly.
Carefully follow the installation instructions in the PhotoScript
manual and make sure NOT to have the dongle inserted during installation.
When prompted to select your printer during installation, only install
the driver for your printer, the Epson 3000 or 1520. Do not simply
check the Epson box. Doing so will install drivers and print modes
for an excessive number of printers.
3
Page 4
The first section of this quikstart manual primarily refers to Windows.
Mac users please see section 2.
Installing Hy-Rez QuikRIP - Windows
When the PhotoScript installation is complete, after your computer
has been restarted, and the port has been selected for your printer,
its time to install Hy-Rez-QuikRIP.
(Youll be prompted to select a port at restart, choose LPT1 on a PC)
Insert the Hy-Rez QuikRIP CD and run the installer. The installer
will copy the correct version to either Windows 95 - 98 - 2000 - ME XP - XP Pro or NT.
We recommend that you restart your computer again after installing
Hy-Rez QuickRip.
Using Hy-Rez QuikRIP - Windows
First insert the security dongle into an available USB port. Without
it PhotoScript will not function. Do not lose this small piece of
equipment! The cost of replacement is the price of the software
package.
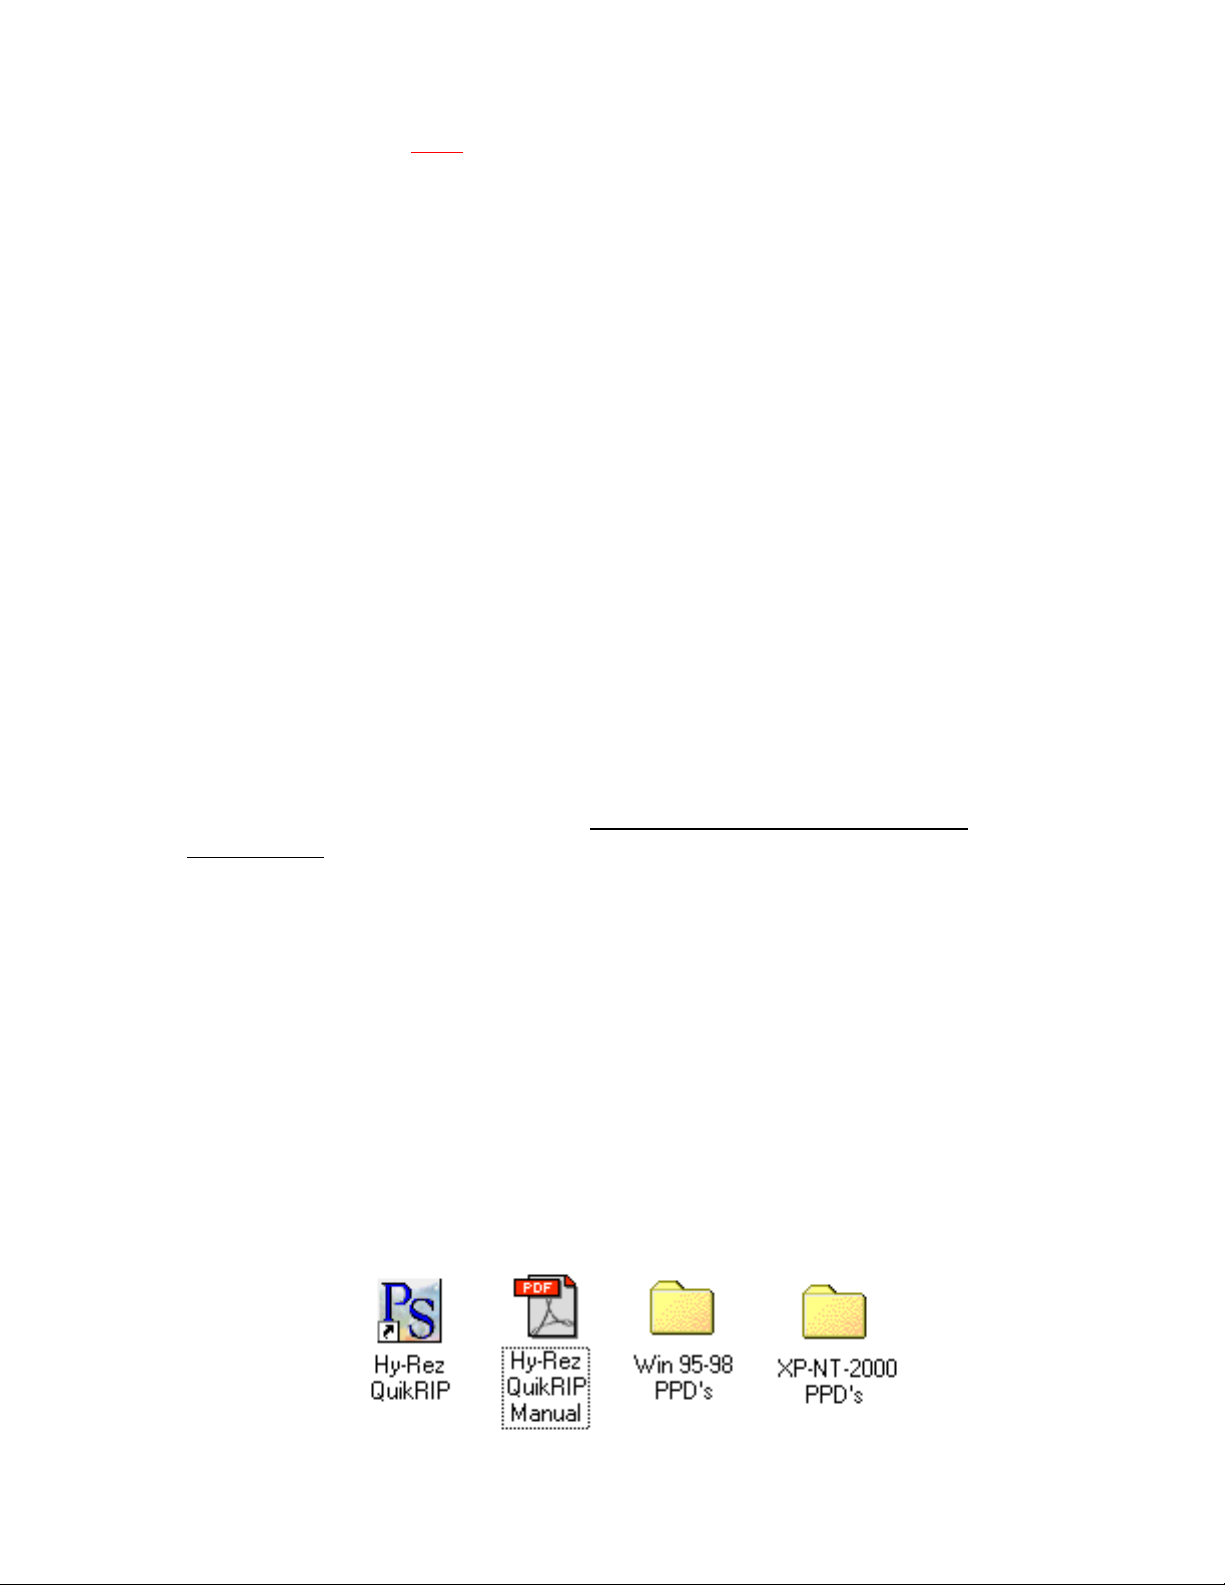
The installer has placed many files within PhotoScript itself in addition to the items below now located on the desktop. The Hy-Rez
QuikRIP application icon, 2 folders containing modified PPDs for the
Epson 3000 and 1520, in addition to a copy of this manual. The
screenprint specific calibration files have been installed within PhotoScript.
The Hy-Rez QuikRIP application will also be accessible through the
Start Menu of your PC.
4
Page 5
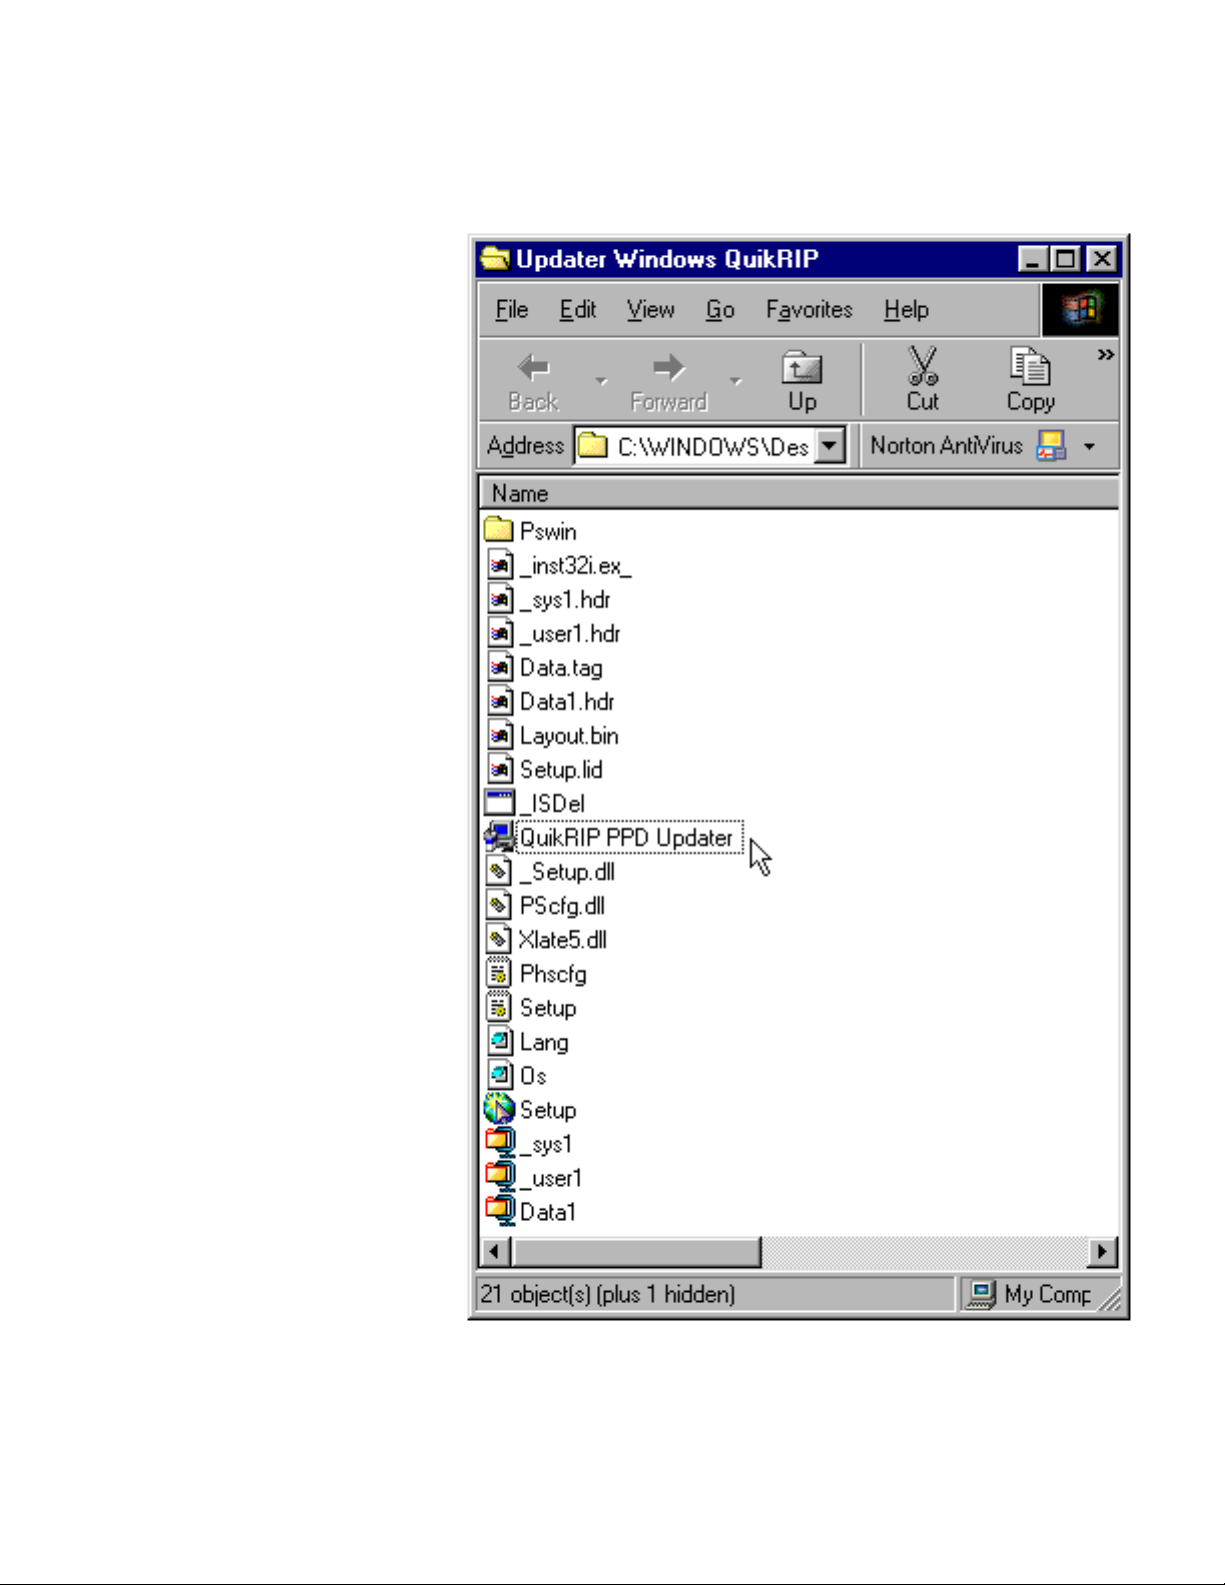
Running The Updater - Windows
The final step to installing is to update the
system PPDs to match
the custom PPDs the
installer has placed on
the Desktop.
Open the folder on the
CD named Updater
Windows QuikRIP and
double click the
QuikRIP PPD Updater.
Your system PPDs have
now been updated.
This step is VERY important and MUST be
followed.
You may disregard the
other files in the folder
however if the updater
is copied to your computer, the entire folder
must be copied! The
other files are needed
by the updater to adjust
your system!
Note: PPDs are called
SPDs on Windows 95-
98. If using 95-98,
select the SPD file when
the loading of a printer
description file is required. This is discussed later in this
manual.
5
Page 6

Here are the 5 custom print modes youll be using.
The names of these modes are:
Hy-Rez QuikRip 1
Hy-Rez QuikRip 2
Hy-Rez QuikRip 3
Hy-Rez QuikRip Dark
Hy-Rez QuikProof
The QuickRip 1 setting is most likely the one of choice if you have
difficulty in controlling dot gain on press. This setting modifies the
density of the entire usable tonal range so a 10% - 20% - 30% etc.,
dot images to the substrate correctly in less than ideal conditions.
The QuickRip 2 and QuickRip 3 we refer to as our Normal Modes.
The primary difference is the manner in which the 5% to 20% tonal
range are modified. You may find the #3 setting more appealing
when outputting art from Illustration software such as FreeHand,
Illustrator and Corel. This is especially true if the art contains
postscript gradients.
The QuickRip Dark setting initially scales back the size of the halftone dots themselves allowing for a second pass of ink within the
ink jet. This setting is useful when imaging to poor quality film.
Those who only use high-quality film such as Hy-Rez Polyester Ink
Jet Imaging Film available from High Res Solutions will not have to
use this setting.
The QuikProof mode is for outputting an accurate color proof of your
image.
All settings above are employed to generate film positives and
control the entire usable tonal range of 5% - 80%, not only the
5% - 20% range. Attempting to use PhotoScript without Hy-Rez
QuikRIP will provide unsatisfactory results on press.
6
Page 7
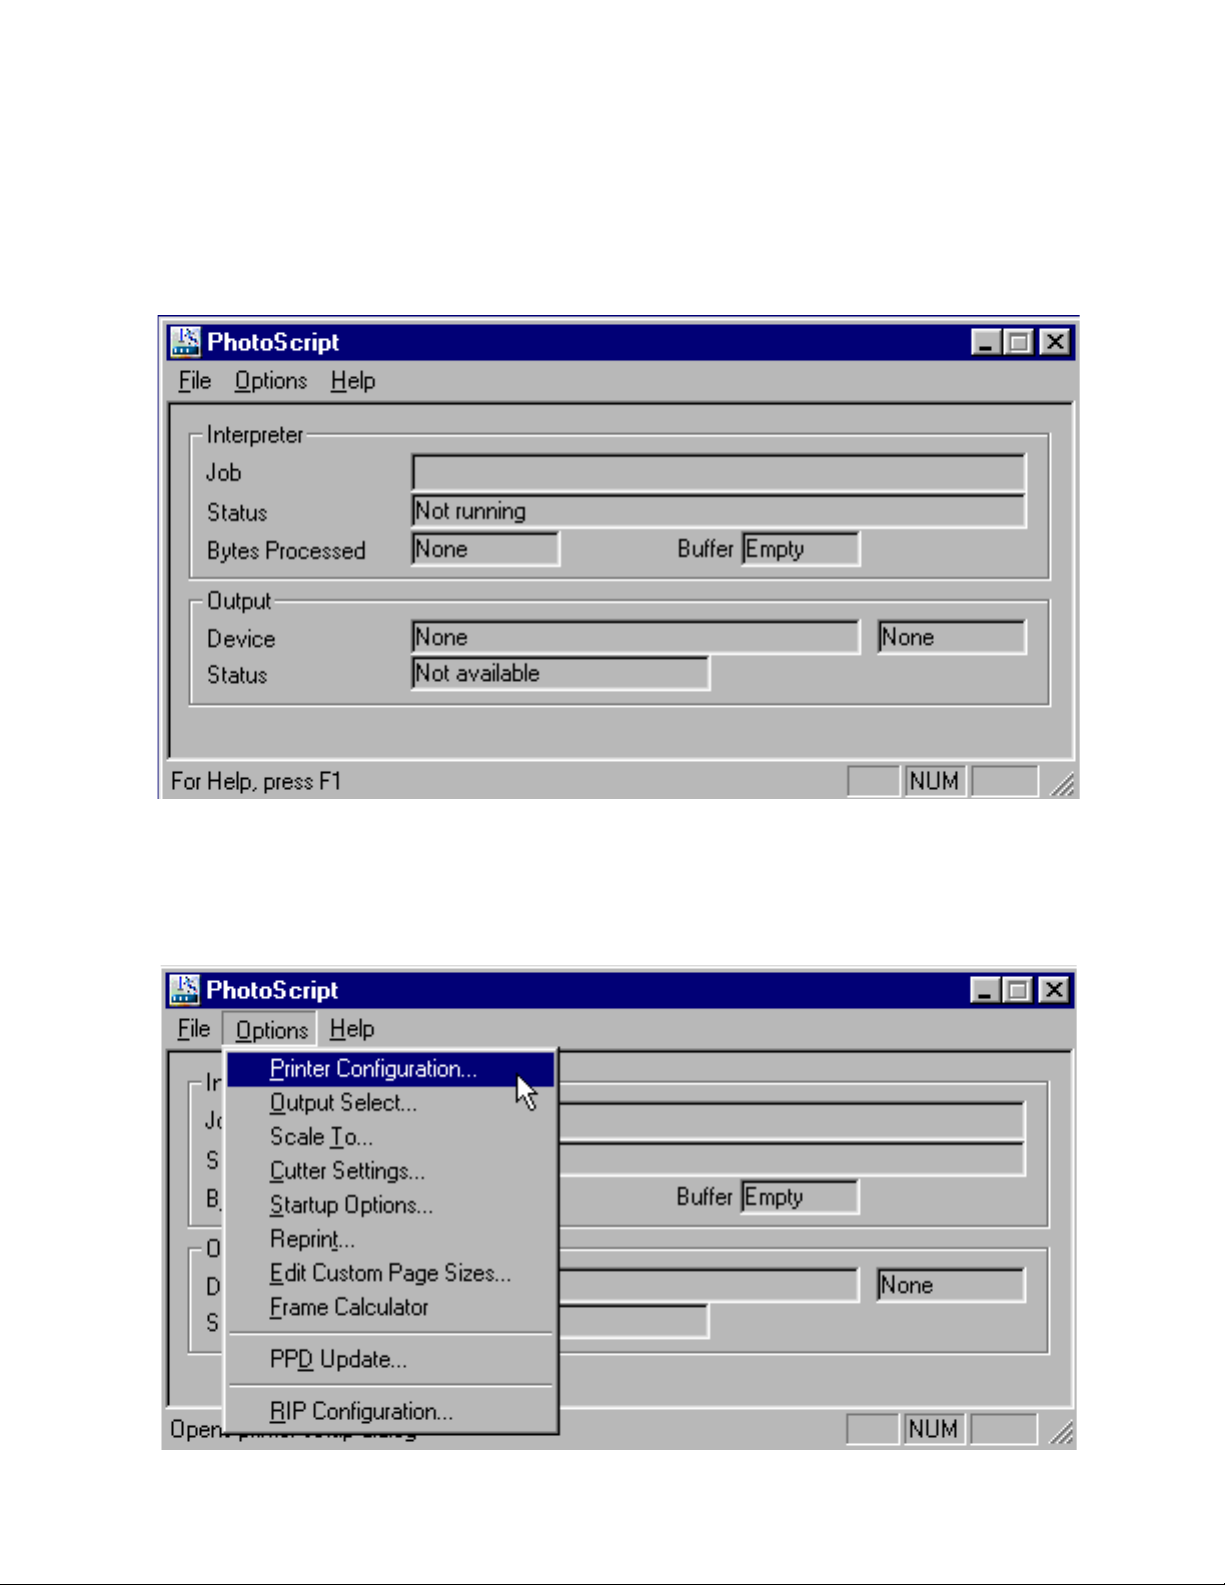
Running Hy-Rez QuikRIP - Windows
Double-click the Hy-Rez QuikRIP icon on your desktop to launch the
RIP. The below window will appear. Time to launch may vary
greatly depending on your computer.
Now select the Options menu and choose Printer Configuration
7
Page 8
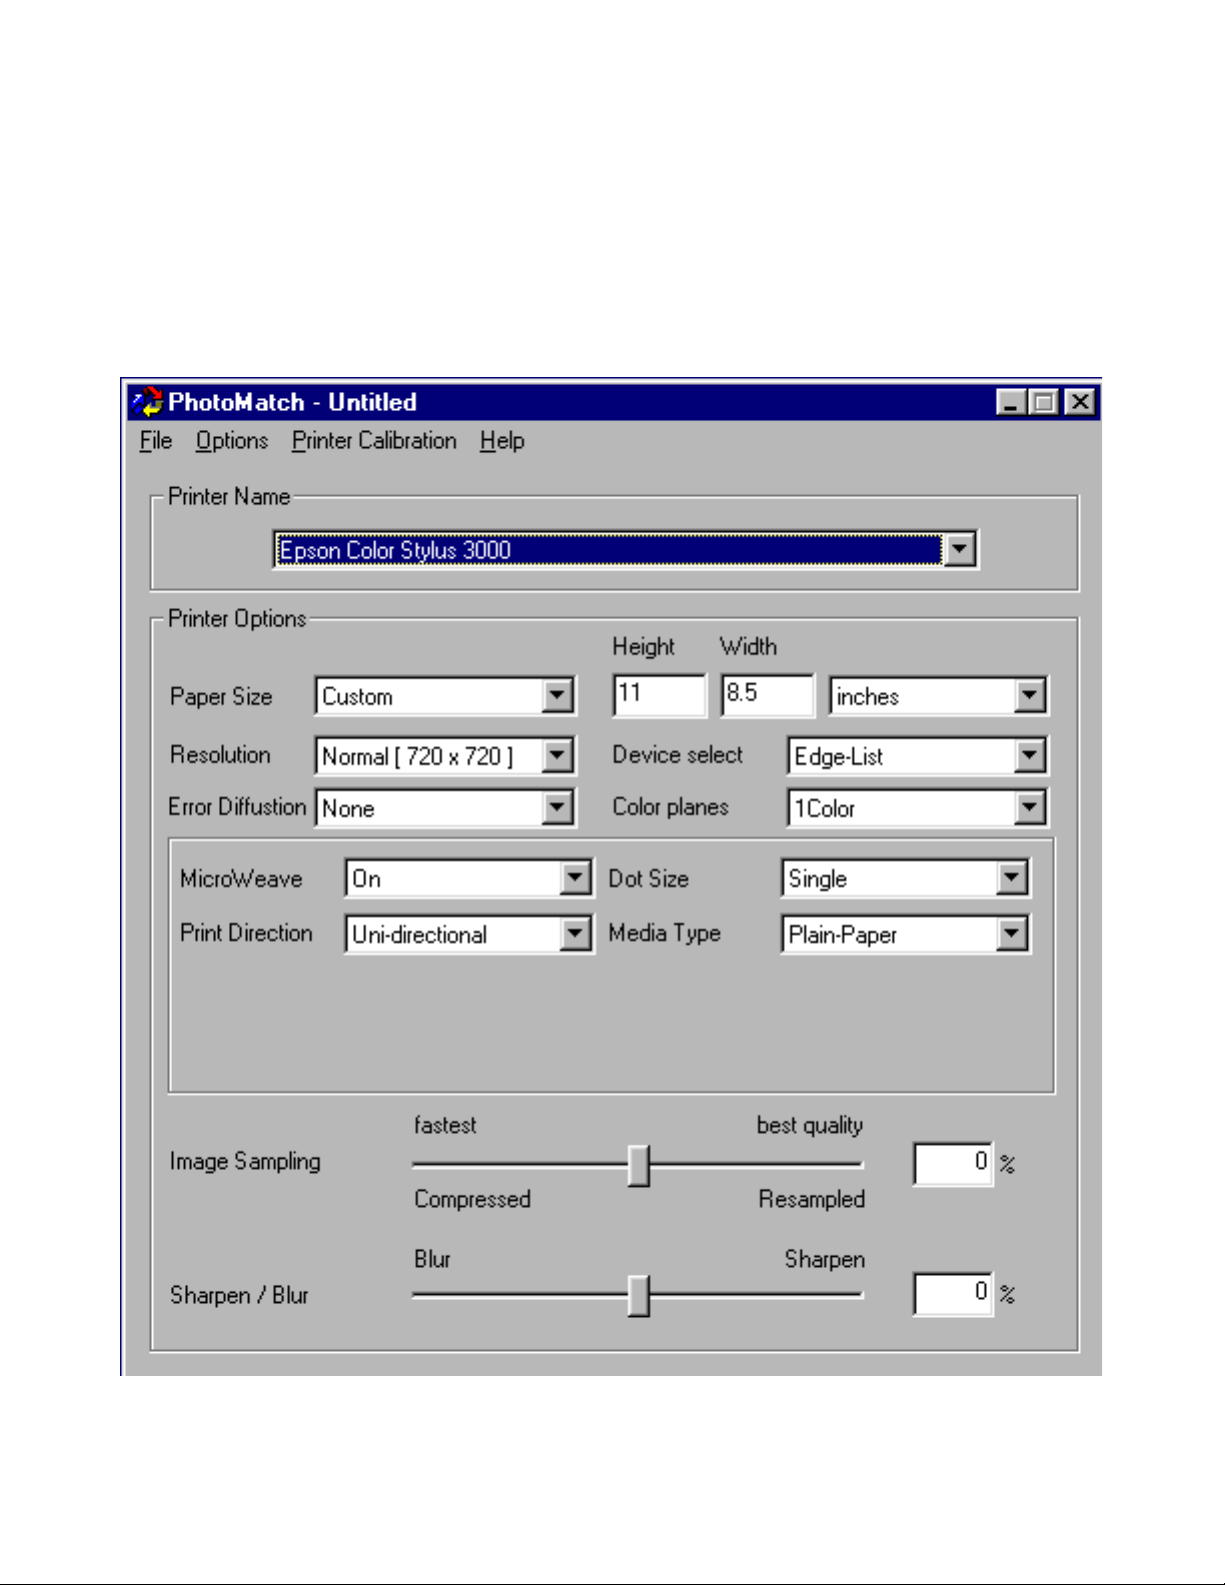
This launches the PhotoMatch Screen.
If only one ink jet model is installed, the printer name will default to it.
8
Page 9
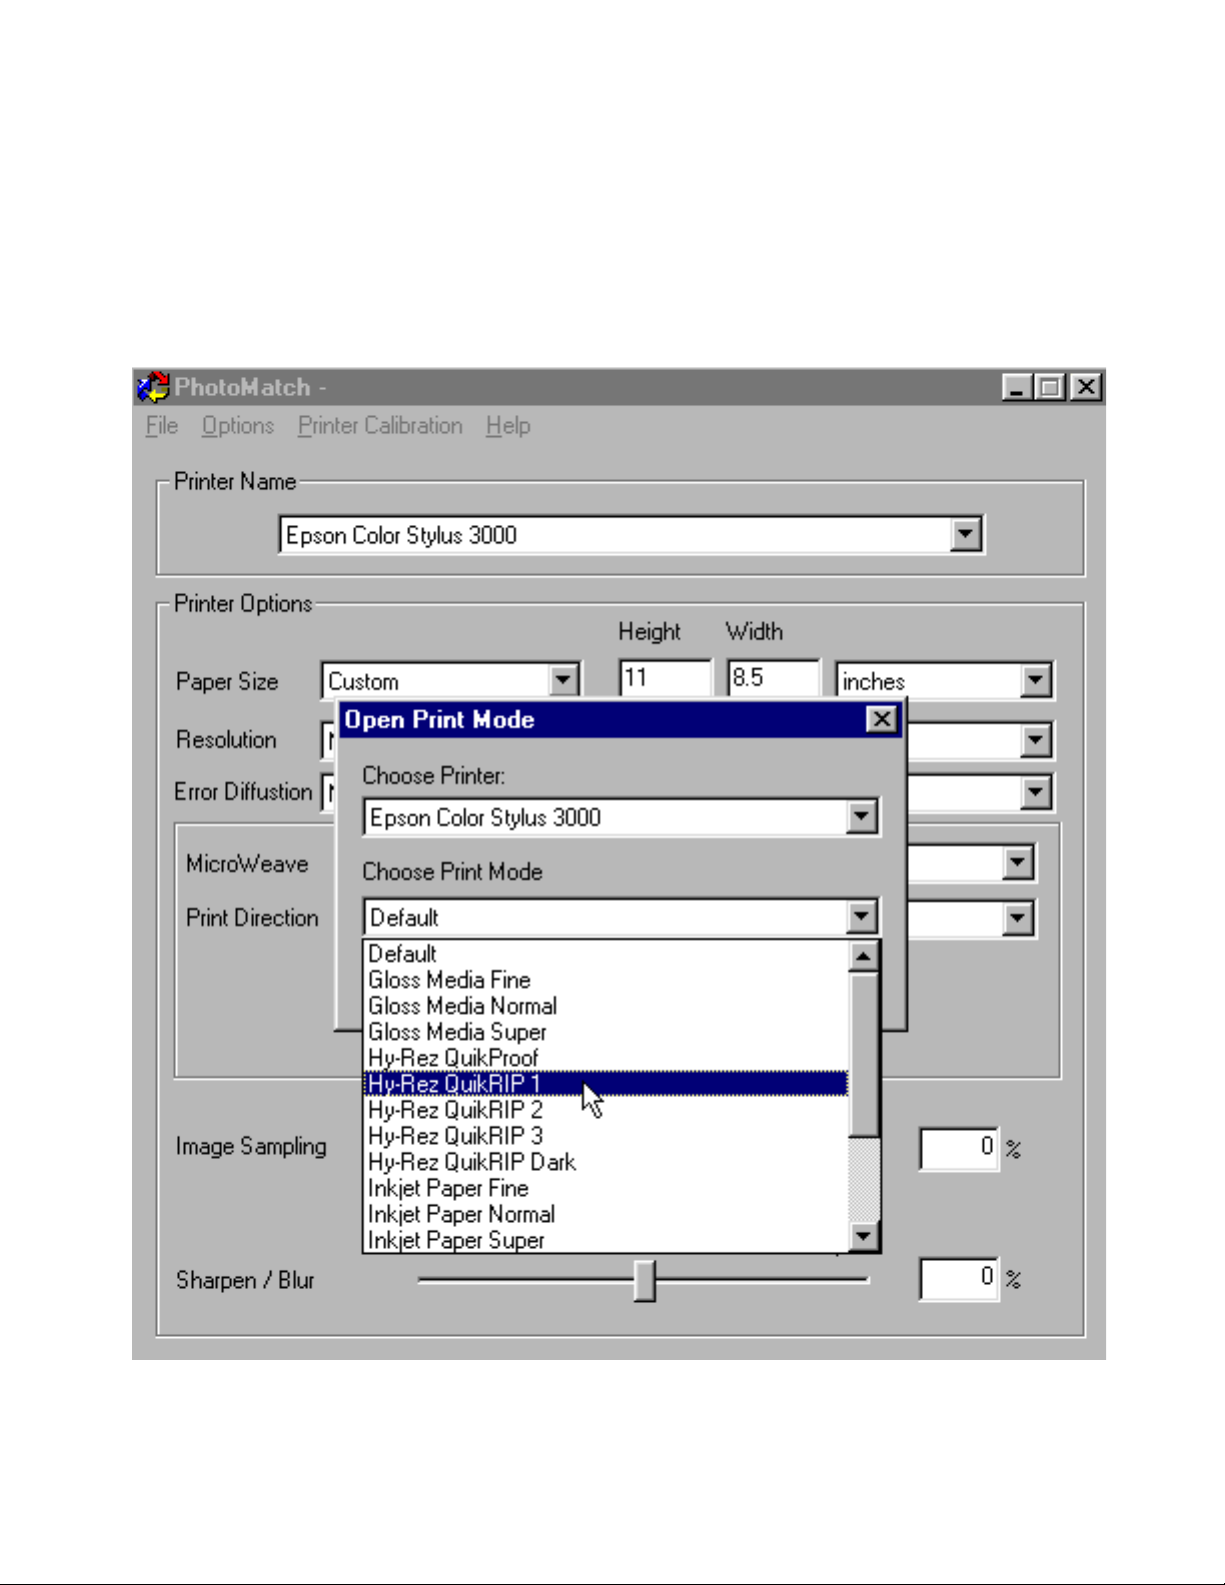
Under the File menu select Open PrintMode. A dialog box will
appear containing the 5 custom Hy-Rez QuikRIP modes in addition to the default modes included with PhotoScript.
Select the PrintMode you have decided to use and click OK.
9
Page 10
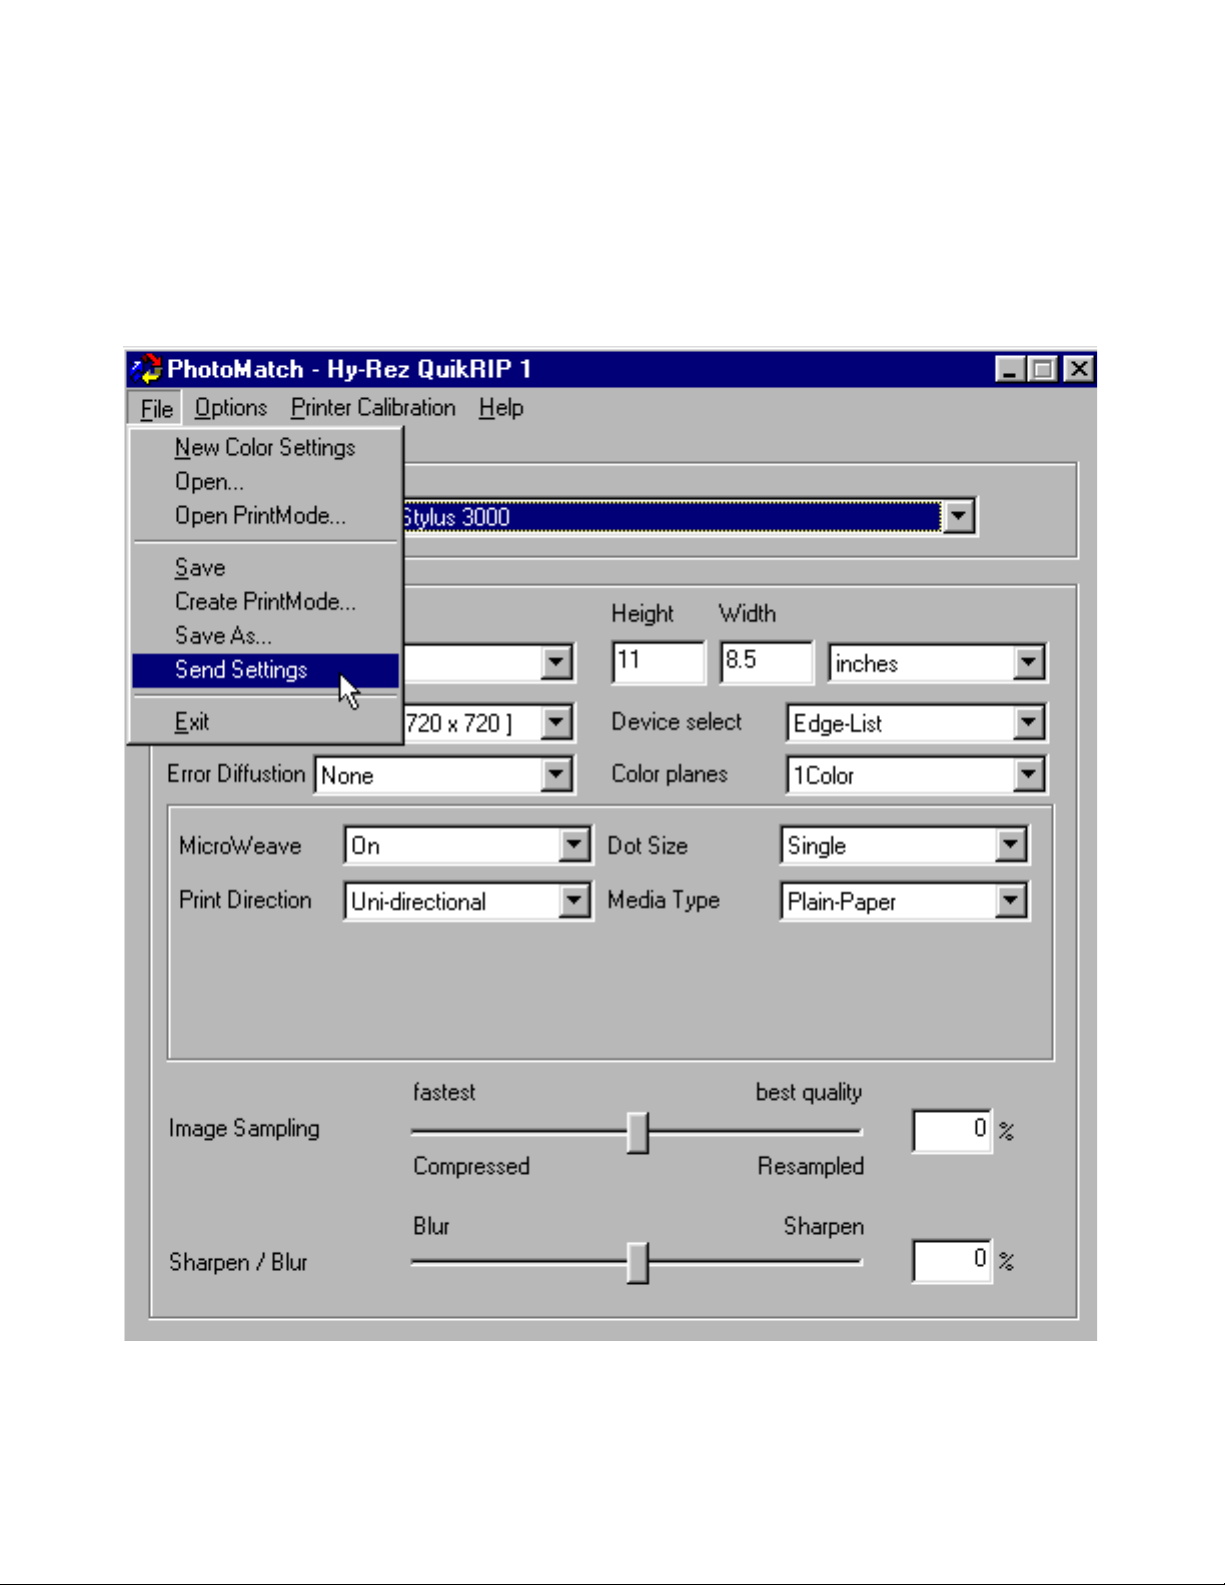
The next step is to load these settings into the RIP.
From the File menu select Send Settings
10
Page 11
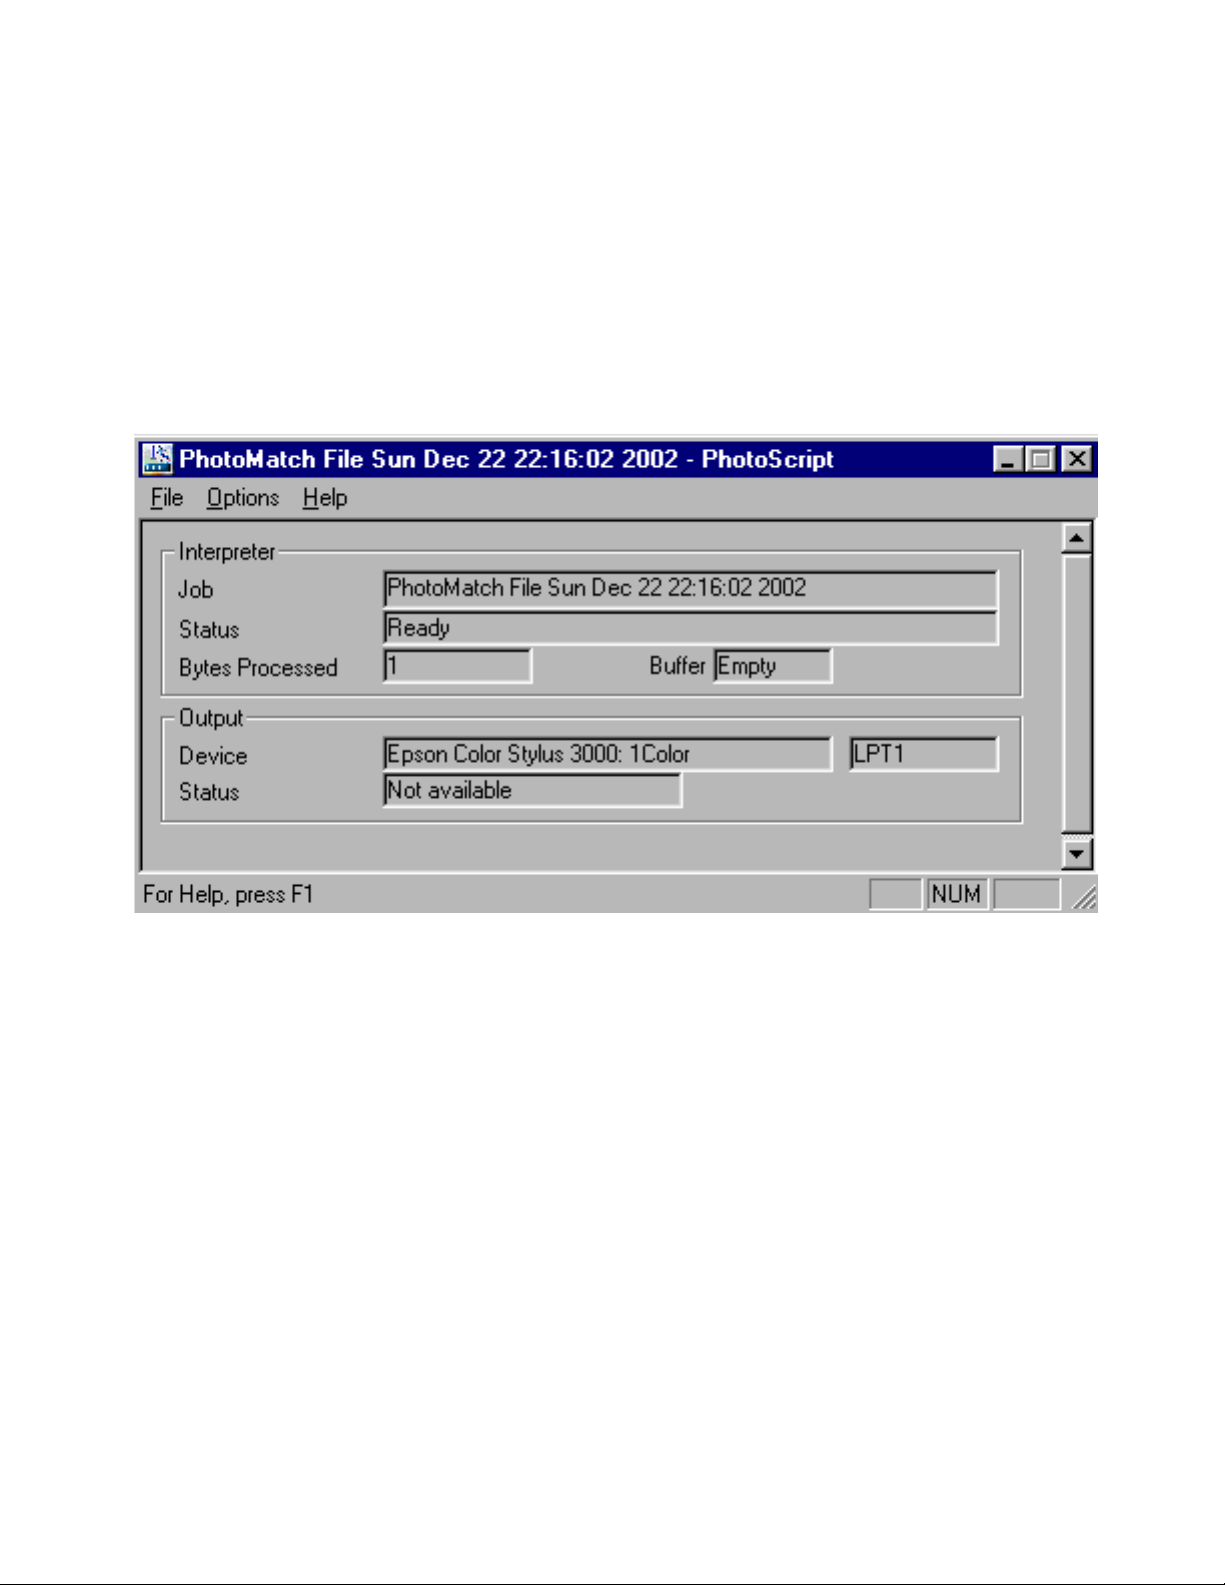
Once Send Settings has been initiated, you will
notice activity in the original PhotoScript screen.
These printer configurations have now been loaded
into the RIP and are awaiting instructions from the
graphics application used to output the art...
Photoshop, Illustrator, Corel, etc.
Close the large PhotoMatch screen (pictured on the
previous page) by selecting Exit from the File menu.
Note that clicking the close box will not close this
screen.
The smaller PhotoMatch screen above MUST REMAIN
OPEN AT ALL TIMES for the RIP to function.
If a change in PrintModes is required during the day,
its not necessary to quit PhotoScript, just select
Printer Configuration again and repeat the process.
The configuration of the RIP is now complete and
youre now ready to print from your graphics application.
11
Page 12

Printing With Hy-Rez QuikRIP - Windows
You have made it through the hardest part and printing from
within an application is no different than what youve done in the
past.
The RIP functions basically like a postscript laser printer attached
to your system so no special knowledge is required to print using
your ink jet along with the RIP.
There are only a few important factors to remember. The first is
selecting the printer from within the application. If an Epson 3000
is installed for example, youll notice 2 printer drivers describing
this printer in the print dialog box. The printer driver to select is
Epson Color Stylus 3000. This is the PhotoScript driver. The
other is the generic Epson driver installed when the printer was
first placed into service. Do Not use this driver!
The next step is to load the correct PPD file if needed. Not all
graphic applications require a PPD to be loaded, Photoshop does
not require one but most Vector based programs such as Illustrator and FreeHand do. Without loading the correct PPD, you wont
have access to vital aspects such as selecting which colors to
print, setting line screen angles, halftone frequency, etc.
Weve included customized PPDs for both the Epson 3000 and
1520 within a folder placed on the desktop during installation.
The PPDs installed within your system have also been modified
during the installation process to work with the RIP. These may
also be selected.
You have purchased a high end postscript RIP. You should already
be aware of the correct procedure of printing from graphic applications (if you are not, please refer back to your graphics application
manual). We will discuss printing from a Vector based program
that requires a PPD to be loaded on the following pages. Printing
directly from Photoshop is discussed at the end of the manual.
12
Page 13

WARNING
Windows Users Only
“The Most Important Part Of The Manual”
Do not relocate the PhotoScript Folder to another location on your
hard drive. It must remain where the installer has originally placed
it.
If you decide to read the PhotoScript manual, you must still use
our technique to print using the RIP and not CADlinks.
DO NOT follow the Photoscript manual instructions on printing
from an application!
Do not attempt to select a Print Mode through the Device Options
Tab of the Print Properties dialog box.
Attempting to select a Hy-Rez QuikRIP PrintMode from within an
applications print dialog box may not work!
Hy-Rez QuickRIP settings MUST be loaded and sent to the RIP in
the manner outlined previously.
The application used to output the films will automatically utilize
these settings as the current settings.
It is important that the instructions in this manual are followed
exactly as stated to avoid any problem with performance and
accuracy.
13
Page 14

Printing With Hy-Rez QuikRIP - Windows
Selecting The Printer and PPD File
The graphic below does not show the original Epson 3000 printer
driver from the manufacturer, it does however illustrate the
correct file to choose.
This screen shot is from Illustrator 8.0. The printer name could
be displayed slightly differently in other applications. Just make
certain it begins with Epson Stylus Color 3000 or Epson Stylus
Color 1520.
14
Page 15

The graphic below displays the correct PPD file being chosen.
15
Page 16

After the PPD has been selected and loaded, you may now apply
advanced printing instructions to the graphic. Once satisfied
with the settings just click print!
Weve used Adobe Illustrator in these examples. The settings within
other applications may appear different but work in a similar fashion.
Consult your application manual for further information.
Remember, outputting directly from Adobe Photoshop does not require
the use of a PPD file.
Refer to the back of the manual for tips on outputting films directly
from Photoshop.
16
Page 17

Expect the films to require considerable time to process. If
youre accustomed to a postscript laser printer, the time required
to print a set of separations will seem very long. Separations
could take 10 minutes per color depending on complexity, film
size, coverage, etc.
The good news is that while the image is printing, you may use
the host computer (the one thats actually sending the job to the
printer) for other things! The RIP handles everything, runs in the
background and frees up the system.
Another plus is the excellent registration and clarity of the films
when compared to laser output. The films are actually clear
and not frosted. Due to the complete lack of heat in the
process, registration is precise. However, we recommend the
use of cut film sheets only, feeding from a roll could prove
problematic, especially with registration.
Remember this is an ink jet and wet ink is being applied to the
film. Please allow ample time for the films to dry prior to use.
Although not a requirement, it may be helpful to spray the films
(once completely dry) with a clear fixative spray (very light
coating) to improve durability in the handling, storage and
exposure process. Its also a good idea to slip-sheet the imaged
film with paper for storage.
17
Page 18

Troubleshooting Hy-Rez QuikRIP
Windows & Macintosh
For the most part, weve had very little difficulty with PhotoScript along
with Hy-Rez QuikRIP but there are a few matters that might show up.
Problem: The RIP doesnt recognize the USB dongle.
Two reasons could cause this problem. First the dongle was inserted
into the computer prior to installation or, second PhotoScript is installed
on Windows XP, XP Pro, 2000 or possibly NT. To fix problem #1,
reinstall PhotoScript without the dongle inserted. Problem #2, remove
the dongle from the computer and run the dongle.exe installer located
in the PhotoScript folder. Restart the computer and reinsert the dongle.
Problem: The RIP doesnt recognize the Parallel Dongle.
Follow the instructions above however DO NOT remove or install the
Parallel Dongle while the computer is turned on. Doing so could damage
your system!
Problem: (Mac Only) The RIP is asking me for a serial number.
A label should be applied to the dongle that contains a number such as
dtpp110030um. Enter this number and reinsert the dongle.
Problem: Computer machine code is imaging to the film and not the
artwork.
This could happen if youve attempted to restart a stopped or paused
print job. This can get very expensive if not caught in time since your
printer will continue to output sheet after sheet of text at high speed to
your film.
First, pause the printer. Second, locate CLEO, the small cat icon on the
lower right corner of the screen (in the System Tray along side the
system clock), right click it and choose Close. Now select EXIT within
the PhotoScript File Menu.
You may also have to open the Printers Menu (Start Menu / Settings /
Printers), select your PhotoScript printer by double clicking its icon and
select Purge Print Documents from the Printer Menu. This will make
certain all data has been flushed from the system.
On a Mac, Pause the printer, stop the RIP, close the RIP.
We recommend that you restart the computer.
18
Page 19

Problem: (Mac) I cant select my laser printer or alternate printing device! Im only allowed to print using the Epson PhotoScript
printer.
First turn your laser printer on. Then use the Chooser and once
again select the correct printer driver and alternative printer. This is
most likely PSPrinter or LaserWriter 8 if using a postscript laser. To
re-select the Epson PhotoScript printer, open the Chooser and select
the PhotoScript Printer Driver.
Problem: The RIP cant locate or open PhotoMatch Creator.
Try launching PhotoMatch Creator manually after launching PhotoScript by double-clicking it. PhotoMatch is located within the PhotoScript folder. If this doesnt work, close then restart the RIP and try
again. If the problem persists after physically restarting the system, reinstall PhotoScript followed by Hy-Rez QuikRIP.
Note: PhotoMatch Creator is not included with the Mac version.
Problem: Im printing a 1 color document from my Illustration
program (FreeHand, Illustrator, etc.) and even after setting the
line screen and angle (example: 55 lpi - 26 degrees) in the print
options, the RIP doesnt use the settings from the application. It
seems to be printing at a high line screen and incorrect angle!
(example: 80 lpi - 45 degrees
Most likely youre attempting to output the image as a composite.
Although the image is only 1 color, it must be treated as a separation. Simply uncheck the composite box and choose separations.
Now select the black and apply the screen settings to that color.
which is unusable)
___________________________________________________________________________
In conclusion, most problems can be resolved by reinstalling the
programs. It requires only a few minutes and its virtually guaranteed to eliminate the trouble of trying to pinpoint the exact malfunction.
Postscript RIPs use very precise language and the slightest
misconfiguration of an error could render the RIP useless. So when
in doubt, reinstall!
Please register with cadlink.com for advanced technical support of
PhotoScript. They can help if a major hardware or software conflict
arises or for issues beyond the scope of our aftermarket screen print
specific Hy-Rez QuikRIP.
The next section deals with installation and printing from a
Macintosh.
19
Page 20

Macintosh Installation and Use
What Exactly Is Hy-Rez QuikRIP?
Quite simply, Hy-Rez QuikRIP is a set of highly calibrated
configuration settings and postscript printer description files that
run in CADlink PhotoScript.
These allow an ordinary Epson 3000 or 1520 ink jet printer to
generate accurate imagesetter-style film positives for use within the
screen printing industry.
Without an application (RIP) such as this along with the screenprint
specific calibration our product provides, it would be impossible to
generate any form of usable halftones with your ink jet printer!
Getting Started
Note: If not already completed, the drivers included with your
Epson 3000 or 1520 printer must be installed. These are needed to
perform general maintenance on the printer such as head cleanings.
However, DO NOT install the Epson Stylus RIP Postscript Driver!
The installation of this driver will cause conflicts with PhotoScript
and Hy-Rez QuikRIP. If this driver has been installed, remove all
software associated with the printer and reinstall only the printer
driver omitting the Epson Stylus RIP Postscript Driver.
It is VITAL to first install Prior to running the Hy-Rez QuikRIP
installer!
If PhotoScript is not installed first, the RIP will not function properly.
Carefully follow the installation instructions in the PhotoScript
manual and make sure NOT to have the dongle inserted during
installation.
When prompted to select your printer during installation only install
the driver for your printer, the Epson 3000 or 1520. Do Not simply
check the Epson box, doing so will install drivers and print modes for
an excessive number of printers. Only install the driver for your
printer, the Epson 3000 or 1520.
At the end of the PhotoScript installation, a prompt will be issued to
install Quark specific files. If Quark is not installed on your system,
just click cancel.
20
Page 21

Installing Hy-Rez QuikRIP - Macintosh
After the PhotoScript installation is complete and your computer has
been restarted, its time to install Hy-Rez-QuikRIP.
Insert the Hy-Rez QuikRIP CD and run the Mac installer.
Although not required to restart again following the installation of
Hy-Rez QuikRIP, we recommend that you do so.
Using Hy-Rez QuikRIP - Macintosh
The installer has placed three files on the desktop (pictured
below) in addition to many other files within PhotoScript itself.
Simply launch the Hy-Rez QuikRIP application. Youll now be
asked for a serial number, enter the number located on the label of
the USB Dongle and click ok.
The security dongle may now be inserted into an available USB port.
Without it, PhotoScript will not function. Do not lose this small
piece of equipment! The cost of replacement is the price of the
software package itself.
At this point if PhotoScript does not recognize the dongle, quit the
program and relaunch the application. Its not necessary to restart
the computer.
The folder titled Epson PPDs contain modified postscript page description files which are required by Illustration programs such as
FreeHand and Illustrator in addition to most Page Layout applications such as PageMaker.
The Hy-Rez QuikRIP application will also be accessible through the
primary directory of your internal hard drive.
21
Page 22

Running The PPD Updater - Macintosh
Open the folder on the CD named QuikRIP Updater and double click the
QuikRIP PPD Updater.
Your system PPDs have now been updated and now match the custom PPD
the installer has placed on the Desktop.
22
Page 23

Here are the 5 custom print modes youll be using.
The names of these modes are:
Hy-Rez QuikRip 1
Hy-Rez QuikRip 2
Hy-Rez QuikRip 3
Hy-Rez QuikRip Dark
Hy-Rez QuikProof
The QuickRIP 1 setting is most likely the one of choice if you have
difficulty in controlling dot gain on press. This setting modifies the
density of the entire usable tonal range so a 10% - 20% - 30% etc.,
dot images to the substrate correctly in less than ideal conditions.
The QuickRIP 2 and QuickRIP3 we refer to as our Normal Modes.
The primary difference is the manner in which the 5% to 20% tonal
range are modified. You may find the #3 setting more appealing
when outputting art from Illustration software such as FreeHand,
Illustrator and Corel. This is especially true if the art contains postscript gradients.
The Dark setting initially scales back the size of the halftone dots
themselves allowing for a second pass of ink within the ink jet.
This setting is useful when imaging to poor quality film. Those who
only use high-quality film such as Hy-Rez Polyester Ink jet Imaging
Film available from High Res Solutions will not have to use this
setting.
The QuikProof mode is for outputting an accurate color proof of your
image.
All settings above are employed to generate film positives and
control the entire usable tonal range of 5% - 80%, not only the
5% - 20% range. Attempting to use PhotoScript without Hy-Rez
QuikRIP will provide unsatisfactory results on press.
23
Page 24

Setup Hy-Rez QuikRIP - Macintosh
Once the RIP is launched, locate the Options Menu and choose Output Selection.
Within the Output Selection Window choose the installed printer the
RIP will utilize, such as the Epson 3000 and select the Port the
device is attached to. In the case of Mac users, select the USB
Port. If you have not done so already, a Serial to USB adapter must
be purchased to connect the Epson 3000 to a Macintosh.
Once the correct printer and port has been selected, click OK.
24
Page 25

Setup Desktop Printer - Macintosh
The creation of a Desktop Printer is required on a Macintosh for
correct use of the RIP. A Desktop Printer basically defines a given
printer installed and assures the proper output settings are available within applications used to image to the device.
To setup a Desktop Printer for the RIP, locate the PS Desktop Printer
Utility located within the PhotoScript 7 folder and launch the application.
25
Page 26

After the window at the
left appears, make certain
to select PhotoScript 8.7
and then choose
PhotoScript Lite (Direct)
to create the Desktop
Printer with.
Click the Change button next to the Generic Printer Icon above
to locate the correct PPD File.
26
Page 27

Select the correct PPD
within the window at
left. If for any reason
the proper Epson PPD
does not appear in
the list, navigate to
the desktop, open the
Epson PPDs folder
and choose the PPD
for the installed
printer.
Now save the desktop printer. In the example below weve
named the desktop printer Epson 3000.
27
Page 28

The new Desktop Printer Icon is now
visible on the desktop.
Printing From An Application - Macintosh
The following example of printing from a Mac application employs the
use of an Illustration Program. Weve used Illustrator 9.0. Illustration
programs require the use of a PPD file to be loaded which is covered in
the following example. Well discuss printing from Photoshop in addition
to suggested line screens and angles at the end of the manual.
First open the Chooser from the Apple Menu and select the PhotoScript
8.7 Printer Driver.
Upon selecting Print from within your application, the print dialog box
will appear. Make sure the correct printer is selected then scroll down
to Printer Extensions 1. (following page)
28
Page 29

Now select the desired Hy-Rez
QuikRIP Mode within the Print
Mode Menu.
29
Page 30

The graphic below outlines the procedure to load the PPD file. First select the
current application, in this example Adobe Illustrator 9.0 then click Separation
Setup. When the Separations Window appears, click Open PPD and find the
correct PPD file. In our example the PPD to select is Epson Color Stylus 3000.
If the PPD is unavailable, navigate to the Desktop and choose the PPD from
the Epson PPDs Folder the installer has placed on your computer.
30
Page 31

After the PPD has been loaded, you will have access to advanced printing
functions such as selecting desired colors, line screen frequency, screen
angles, etc.
Weve used Adobe Illustrator in these examples. The settings within
other applications may appear different but work in a similar fashion.
Consult your application manual for further information.
Remember, outputting directly from Adobe Photoshop does not require
the use of a PPD file.
Refer to the back of the manual for tips on outputting films directly
from Photoshop.
31
Page 32

Expect the films to require considerable time to process. If
youre accustomed to a postscript laser printer, the time required
to print a set of separations will seem very long. Separations
could take 10 minutes per color depending on complexity, film
size, coverage, etc.
The good news is that while the image is printing, you may use
the host computer (the one thats actually sending the job to the
printer) for other things! The RIP handles everything, runs in the
background and frees up the system.
Another plus is the excellent registration and clarity of the films
when compared to laser output. The films are actually clear
and not frosted. Due to the complete lack of heat in the process, registration is precise. However, we recommend the use of
cut film sheets only, feeding from a roll could prove problematic,
especially with registration.
Remember this is an ink jet and wet ink is being applied to the
film. Please allow ample time for the films to dry prior to use.
Although not a requirement, it may be helpful to spray the films
(once completely dry) with a clear fixative spray (very light coating) to improve durability in the handling, storage and exposure
process. Its also a good idea to slip-sheet the imaged film with
paper for storage.
32
Page 33

Recommended Line Screens & Angles
Recommended Line Screens and Angles
Simulated Process, Complex Vector Art:
White Underbase *
50 LPI - 56 Degrees
Highlight White
50 LPI - 56 Degrees
All Top Colors / Spot Colors / Including Black
55 LPI - 26 Degrees
* If you decide to use mesh below 180 for the White Underbase
such as 156, output this film at 45 LPI - 56 Degrees.
Using 156 mesh for the underbase on dark substrates is an excellent
choice for the owners of 6 color machines where printing a highlight white
could prove impossible.
We recommend QuikSeps for the generation of Simulated Process Color Separations. Con-
tact High Res Solutions for further information.
Recommended Line Screens and Angles
CMYK True Process Color:
White Underbase *
50 LPI - 56 Degrees
Highlight White
50 LPI - 56 Degrees
All Top Colors
Cyan / 55 - 60 LPI / 56 Degrees
Magenta / 55-60 LPI / 71 Degrees
Yellow / 55 - 60 LPI / 86 Degrees
Black / 55-60 LPI / 26 Degrees
Spot Printers / 55-60 LPI / 26 Degrees
* If you decide to use mesh below 180 for the White Underbase
such as 156, output this film at 45 LPI - 56 Degrees.
We do not recommend CMYK on dark substrates.
Great Process Color can be difficult to achieve so we recommend using Version 2.0 or
higher of QuikSeps which includes QuikPro-AccuColor to generate easy to print CMYK True
Process Color Separations. Contact High Res Solutions for further information.
33
Page 34

Recommended Line Screens and Angles
Basic Art - Low Mesh Counts:
The following are recommended for imaging basic art that contains
tints to lower mesh counts.
Lower LPI may be used. In fact, certain art may benefit
from using a lower LPI.
Below are the highest LPI recommended settings.
125 Mesh / 35 LPI / 26 Degrees
156 Mesh / 45 LPI / 26 Degrees
200 Mesh / 50 LPI / 26 Degrees
Outputting The Films
Directly From Adobe Photoshop
Including Exporting As DCS 2.0 Files
Once the color separations or basic art has been completed and youve
decided on which channels are to be imaged as film positives, its time to
make a choice on the method used to output the films.
Basically there are two methods. The easiest is to simply output the films
from within Photoshop. The slightly more involved technique is to export
the file in DCS 2.0 Format and import this file into a page layout or illustration program such as PageMaker, Quark, Illustrator, etc. The page layout programs are the best choice for the output of DCS files.
Both work well and both have their advantages and disadvantages. Rest
assured that whichever method you decide upon, the end result will be
identical. There is no performance enhancement to be gained by using
one instead of the other. Its simply a matter of personal preference.
Printing directly from Photoshop in addition to exporting and printing DCS
files to other applications work in a similar fashion on either Mac or Windows machines.
The primary difference on the Mac is the selection of the Hy-Rez QuikRIP
Print Mode from within the application itself as compared to pre-loading the Print Mode within PhotoScript itself using Windows.
The following pages outline Photoshop printing and the export of DCS 2.0
files.
34
Page 35

Output Directly From Photoshop
To print the individual color channels from within Photoshop, first select each
spot channel required for output within the channels palette by turning on the
eye next to the channel name.
Next choose Page Setup from the File Menu and select the printer to be used
with the RIP. Click the Screens Button and uncheck the Use Printers Default
Screens box to allow the entry of new screen frequencies, angles and dot
shape for each spot channel to be printed. Also make sure to verify the Page
Size and check Registration Marks if needed.
Select each color channel within the Ink Scroll Box and enter a Frequency and
Angle for Each channel to be imaged to film.
Make sure to select a dot shape either round or ellipse. Much has been written
about the miracle powers of using an elliptical dot. Much of what is written is
slightly exaggerated. It can help, and should be experimented with but with
everyday style graphics where youre not attempting to accurately reproduce a
fine work of art, you wont see much improvement.
35
Page 36

Photoshop has now been configured to output the file.
Select Print from the File Menu.
On the bottom of the print dialog box, make certain the Print
Space Profile is set to Separations. If this step is omitted,
the halftones may not image correctly.
36
Page 37

Export And Output As DCS File
To output the films from an external source such as an Illustration or Page
Layout program, your file must be exported from Photoshop as a DCS 2.0 File.
In order to do this, its advisable to work on a duplicate file. When working on
the duplicate delete any of the RGB channels by selecting and dragging to the
trash. Once any of the RGB channels are deleted, this switches the mode of
your file to Multichannel and will convert the remaining 2 RGB channels to
process colors. Delete these 2 unneeded channels.
Under the File Menu select Save A Copy. Within this dialog box scroll to
select Photoshop DCS 2.0. Name this file something unique (other than your
original) and click Save.
When the DCS
2.0 Window pops
up, accept the
default settings
with all other
options and click
Save.
This file is now
ready to be imported / placed
into an external
application for
output.
37
Page 38

Printing a DCS 2.0 file from a Page Layout or Illustration program is exactly
the same as printing any multi-color document.
Once imported or placed into the external program, just select each channel
for output and apply a screen frequency and angle to each along with the
other usual settings such as page size, orientation, printer selection, etc.
Using A Macintosh To Output From Photoshop
The subtle differences of the Mac platform.
From the File Menu choose Print Options. Now check the Show More Options box to expand the screen allowing a larger selection criteria.
38
Page 39

Selecting the
Screen Button
brings up the
Halftone Screens
Box. Choose
each color and
apply a halftone
Frequency, Angle
and shape.
Select the Page
Setup Button
and choose page
size and orientation.
39
Page 40

Select the Print Button from within Print Options and choose the current
application, in this case Adobe Photoshop 6.0.1. Make certain the Print
Space Profile box is set to Separations. The halftones may not image
correctly if this step is omitted.
Drop down the Printer Extensions 1 Menu and select the desired
Hy-Rez QuikRIP Print Mode.
Your file is now ready to be printed.
40
 Loading...