

Page 1
1000/1500
Reference Guide
Page 2
FCC COMPLIANCE STATEMENT
FOR AMERICAN USERS
0
Reorient or relocate the receiving antenna
0
Increase the separation between the equipment and receiver
a
Connect the equipment into an
receiver is connected
0
Consult the dealer or an experienced radio/TV technician for help.
outlet on a
circuit
different
from that to
which
the
WARNING
The connection of a non-shielded equipment interface cable to this equipment will
invalidate the FCC Certification of this device and may cause interference levels which
exceed the limits established by the FCC for this equipment. It is the responsibility of
the user to obtain and use a shielded equipment interface cable with this device. If this
equipment has more than one interface connector, do not leave cables connected to
unused interfaces.
Changes or modifications not expressly approved
the user’s authority to operate the equipment.
by
Epson America,
Inc., could
void
FOR CANADIAN USERS
This digital apparatus does not exceed the Class B limits for radio noise emissions from
digital apparatus as set out in the radio interference regulations of the Canadian
Department of Communications.
Le present appareil
limites applicables
sur
le brouillage
Canada.
num&ique n’emet
aux appareils
radio6lectrique
pas de bruits radio6lectriques depassant les
numeriques
&licte par le
de Classe B prescrites dans le
Ministere
des Communications du
reglement
Page 3

EPSON@@mbam
1000/1500
Reference Guide
Page 4

All rights reserved. No part of this publication may be reproduced, stored in a retrieval
system, or transmitted in any form or by any means, mechanical, photocopying recording
or otherwise, without the prior written permission of Seiko Epson Corporation. No patent
liability is assumed with respect to the use of the information contained herein. Neither is
any liability assumed for damages resulting from the use of the information contained
herein.
Neither Seiko Epson Corporation nor its affiliates shall be liable to the purchaser of this
product or third parties for damages, losses, costs, or expenses incurred by purchaser or
third parties as a result of: accident, misuse, or abuse of this product or unauthorized
modifications, repairs, or alterations to this product.
Seiko Epson Corporation and its affiliates shall not be liable against any damages or
problems arising from the use of any options or any consumable products other than those
designated as Original Epson Products or Epson Approved Products by Seiko Epson
Corporation.
ActionLaser is a trademark of Epson America, Inc.
Epson and Epson ESC/P are registered trademarks
of Seiko Epson
Corporation
General Notice: Other product names
may be trademarks of their respective
used herein are for identification purposes
companies.
Copyright 0 1992 by Epson America, Inc., Torrance, California.
only and
Page 5

Contents
Getting Started
Where to Get Help
Safety Information
Laser Safety
CDRH Regulations
Internal Laser Radiation.
Ozone Emission
Laser Printer Precautions
Chapter 1
The Control Panel
Display (LCD)
Indicator lights
Buttons
Other control panel features
Using the Printer with Software
Selecting fonts
Entering printer commands
Printing foreign or other characters
Enhancing Print Quality
Adjusting print density
Resolution Improvement Technology
Sharing Your Printer
Using Printer Emulations
Switching printer emulations
Controlling Your Printer
.............................
.........................
..........................
...........................
......................
...................
........................
......................
..........................
.........................
.........................
.........................
......................
....................
........................
......................
.................
..................
.................
.............
............
.................
1
2
2
3
4
4
5
1-2
1-2
1-3
1-3
1-5
1-5
1-11
1-12
1-15
1-17
1-18
1-18
1-22
1-23
1-24
iii
Page 6

Chapter 2
Paper Handling
Choosing Paper
Selecting a paper size
Loading Paper
Loading single sheets
Loading envelopes, labels, transparencies, and
heavy paper
Chapter 3
General Problems
Print Quality Problems
Memory Problems
Option Problems.
Messages
Data Dump Mode
Replacing the Imaging Cartridge
Chapter
SelecType Overview
Using SelecType
Options
................................
4 SelecType
The control panel
The display
Buttons
SelecType tutorial
.................................
AUTO CONT.
CH TIMEOUT
COPIES
DENSITY
EMULATION
FEATURE PRINT
FONT
FONT SAMPLE
FULL PRINT
............................
......................
.............................
......................
..........................
Troubleshooting
...........................
........................
...........................
...........................
...........................
..................
.........................
...........................
........................
............................
..............................
........................
..........................
..........................
..............................
.............................
..........................
........................
...............................
.........................
...........................
2-2
2-2
2-3
2-3
2-5
3-2
3-8
3-13
3-15
3-18
3-27
3-29
4-2
4-3
4-3
4-3
4-4
4-5
4-7
4-8
4-8
4-8
4-9
4-9
4-11
4-11
4-11
4-12
iv
Page 7

INPUT
INTERFACE
LANG
MACRO
MEMORY LEFT
OFFSET
ORIENT.
PAGE COUNTER
PAGE SIZE
RITech
RX-BUFFER SIZE
STANDBY
..............................
..........................
...............................
.............................
........................
.............................
............................
.......................
...........................
..............................
.......................
...........................
STATUSSHEET ........................
SUB CONFIG.
SYSTEM CONFIG.
TONER
USER
.............................
..............................
.........................
.......................
VERSION.. ..........................
Chapter 5 Options
4-13
4-14
4-18
4-18
4-20
4-21
4-21
4-22
4-22
4-23
4-23
4-25
4-25
4-25
4-26
4-26
4-27
4-30
What’s Available
Identity Cards
..........................
............................
Epson PostScript card
Epson CL identity card
Caring for cards
Inserting a card.
Removing a card
Recovering from an error
Font Cartridges
...........................
Inserting a font cartridge
Selecting fonts
Removing a font cartridge
Recovering from an error
.....................
....................
........................
........................
........................
...................
...................
.........................
..................
...................
5-2
5-5
5-5
5-6
5-7
5-8
5-9
5-10
5-10
5-14
5-15
5-15
5-15
V
Page 8

The Faceup Output Tray
Installing the faceup output tray
The Lower Paper Cassette Unit
Installing the lower paper cassette unit.
Using the lower paper cassette
Optional Interface Boards
Installing an interface board
The Memory Chip Sets
When to increase your printer’s memory
Selecting a memory chip set combination
Installing memory chip sets
Checking the printer’s memory
......................
...................
......................
..................
........................
..................
...............
...........
................
..........
..........
................
5-16
5-16
5-18
5-18
5-20
5-22
5-22
5-34
5-35
5-35
5-36
5-46
Appendix A
Printer Specifications
Printing
Paper and paper delivery
Consumable products
Mechanical
Electrical
Controller hardware
Environmental
Interface Specifications
Parallel interface
Serial interface
Initialization
Option Specifications
Face-up output tray
Lower paper cassette unit
Technical Specifications
..............................
...........................
.............................
..............................
.........................
...................
.....................
......................
.........................
........................
........................
.........................
.........................
.......................
...................
A-2
A-2
A-3
A-5
A-6
A-6
A-6
A-7
A-9
A-9
A-12
A-15
A-16
A-16
A-16
vi
Page 9

Appendix
HP Emulation Mode
B
Introduction
ActionLaser to HP LaserJet print feature comparison
Operating the printer as an HP LaserJet IIISi
SelecType Options
ORIENT.
FONT
SUB CONFIG.
Available Fonts and Symbol Sets
Resident bitmap fonts
Resident scalable fonts
Font samples
Symbol sets
Default Settings
HP Emulation Command Summary
Printer commands arranged by topic
GL/2 mode
Epson GL/2 Mode
Introduction
SelecType options
Epson GL/2 mode commands summary
Appendix
.............................
..........................
............................
..............................
.........................
.................
.....................
....................
..........................
...........................
...........................
...............
............
...........................
..........................
..........................
.......................
..........
LQ and FX Emulation Modes
C
...
........
B-2
B-2
B-4
B-6
B-6
B-6
B-8
B-10
B-11
B-12
B-13
B-16
B-30
B-32
B-34
B-42
B-45
B-45
B-47
B-52
Introduction
Operating as an LQ or FX printer
SelecType Options
ORIENT.
FONT
SUB CONFIG.
Available Fonts and Character Tables
Resident fonts
Character tables
Default Settings.
LQ and FX Emulation Command Summary
Printer commands arranged by topic
.............................
..............
..........................
............................
..............................
.........................
..............
.........................
........................
...........................
............
...........
C-2
C-2
C-3
C-3
C-3
C-4
C-10
C-10
C-11
C-13
C-14
C-17
vii
Page 10
Getting Started
The ActionLaser 1000 and 1500 printers combine high
performance and reliability with a wide range of features.
To get started with your ActionLaser printer, please:
P
Read the safety information, laser printer precautions, and
important safety instructions in this introduction.
Q
Use your Setup and Maintenance guide to set up and test
your new printer.
0
Refer to this Reference Guide for detailed information about
your printer.
If you require additional assistance, see “Where to Get Help”
below.
Where to Get Help
Epson America provides local customer support and service
through a nationwide network of authorized Epson dealers and
Service Centers.
If you need to call for technical assistance, please have your
printer’s serial number and a status sheet printout handy. See
Chapter 4 for information on printing a status sheet.
Epson also provides the following support services through
Epson Connection at (800) 922-8911:
CI
Assistance in locating your nearest Authorized Epson
Reseller or Service Center
Q
Technical assistance with the installation, configuration,
and operation of Epson products
Getting Started 1
Page 11

Q
Epson technical information library fax service
0
Product literature with technical specifications on our
current and new products
Ll
Sales of supplies, parts, documentation, and accessories for
your Epson product
Q
Customer Relations
Q
User group locations.
Safety Information
Laser Safety
This printer is certified as a Class 1 laser product under the U.S.
Department of Health and Human Services (DHHS) Radiation
Performance Standard according to the Radiation Control for
Health and Safety Act of 1968. This means that the printer does
not produce hazardous laser radiation.
Since radiation emitted inside the printer is completely
confined within protective housings and external covers, the
laser beam cannot escape from the machine during any phase
of user operation.
2
Getting Started
Page 12

CDRH Regulations
The Center for Devices and Radiological Health (CDRH) of the
U.S. Food and Drug Administration implemented regulations
for laser products on August 2,1976. Compliance is mandatory
for products marketed in the United States. The label shown
below indicates compliance with the CDRH regulations and
must be attached to laser products marketed in the United
States.
This laser product conforms to the
applicable requirement of 21 CFR
Chapter I, subchapter J.
SEIKO EPSON CORP.
Hirooka Off ice
80 Hirooka, Shiojiri-shi, Nagano-ken,
JAPAN
MANUFACTURED:
WARNING:
Use of controls, adjustments, or performance of procedures
other than those specified in this guide may result in
hazardous radiation exposure.
Your printer is a Class 1 laser product as defined in IEC 825
specifications. The label shown below is attached in countries
where required.
LASER KLASSE1 NACH IEC 825
CLASS LASER PRODUCT TO IEC 825
KLASSE1 LASER PRODUKT I.H.T. IEC 825
LUOKAN1 LASERLAITE
I
I
Getting Started 3
Page 13

Internal Laser Regulation
Max. Radiation Power 5(mW)
Wave Length 760-810(nm)
This is a Class IIlb Laser Diode Assay that has an invisible laser
beam. The print head unit is NOT A FIELD SERVICE ITEM.
Therefore, the print head unit should not be opened under any
circumstance.
Ozone Emission
During printer operation, a small amount of ozone is released.
This amount is not large enough to affect human beings
adversely.
However, it is best to make sure the room where you are using
the printer has adequate circulation, especially when you are
printing a high volume of materials or using the printer
continuously over a long period of time.
4 Getting Started
Page 14
Laser Printer Precautions
These printers use laser technology. The following list of
precautions applies whenever you open the printer cover. Even
if you are familiar with other types of printers, be sure to follow
these precautions carefully to ensure safe, efficient operation.
Do not touch the fuser, which is marked by a
HOT SURFACE
can be very hot.
High voltages are present inside the printer when the
power is turned on.
Protect the light-sensitive imaging cartridge from exposure
to light. Avoid exposing the imaging cartridge to room light
for any longer than necessary. Overexposing it may cause
abnormally dark or light areas on the printed page and may
reduce the service life of the unit.
If you must expose the imaging cartridge either by taking it
out of the printer or by leaving the printer cover open,
cover the unit with a soft cloth or sheet of paper.
Avoid pressing on the top of the imaging cartridge.
Pressing directly on the cartridge may cause toner to spill
into the printer. If the non-printed side of your paper is
dirty indicating a spill, see Chapter 3, “Troubleshooting.”
Never force the printer’s components into place. Although
the printer is designed to be sturdy, rough handling can
damage it.
label. If the printer has been in use, the fuser
CAUTION:
Getting Started 5
Page 15

Important Safety Instructions
1.
Read all of these instructions.
2.
Follow all warnings and instructions marked on the printer.
3.
Unplug this printer from the wall outlet before cleaning.
Use a damp cloth for cleaning and do not use liquid or
aerosol cleaners.
4.5.Do not use this printer near water.
Do not place the printer on an unstable cart, stand, or table
because it may fall, causing serious damage.
6.
Slots and openings in the cabinet and the back or bottom are
provided for ventilation. Do not block or cover them. Do
not put the printer on a bed, sofa, rug, or other similar
surface or in a built-in installation unless proper ventilation
is provided.
7.
Use the type of power source indicated on the marking
label. If you are not sure of the type of power available,
consult your dealer or local power company.
8.
This product is equipped with a 3-wire grounding-type
plug, a plug having a third (grounding) pin. This plug will
only fit into a grounding-type outlet. This is a safety
feature. If you are unable to insert the plug into the outlet,
contact your electrician to replace your obsolete outlet. Do
not defeat the purpose of the grounding-type plug.
9.
Do not put your printer where the cord will be walked on.
10. If you use an extension cord, make sure that the total of the
ampere ratings on the products plugged into the extension
cord does not exceed the extension cord ampere rating.
Also, make sure that the total of all products plugged into
the wall outlet does not exceed 15 amperes.
6 Getting Started
Page 16

11. Never push objects of any kind through cabinet slots as they
may touch dangerous voltage points or short out parts that
could result in a risk of fire or electric shock. Never spill
liquid of any kind on the printer.
12.
Except as specifically explained in the Reference Guide, do
not attempt to service this product yourself. Opening or
removing those covers that are marked “Do Not Remove”
may expose you to dangerous voltage points or other risks.
Refer all servicing in those compartments to service
personnel.
13.
Unplug this printer from the wall outlet and refer servicing
to qualified service personnel under the following
conditions:
A.
When the power cord or plug is damaged or frayed.
B.
If liquid has been spilled into it.
C.
If it has been exposed to rain or water.
D.
If it does not operate normally when the operating
instructions are followed. Adjust only those controls
that are covered by the operating instructions since
improper adjustment of other controls may result in
damage and will often require extensive work by a
qualified technician to restore the product to normal
operation.
E.
If it has been dropped or the cabinet has been damaged.
F.
If it exhibits a distinct change in performance, indicating
a need for service.
Getting Started 7
Page 17

Chapter 1
Controlling Your Printer
The Control Panel .
Display (LCD)
Indicator lights
Buttons . . . .
Other control panel features
Using the Printer with Software
Selecting fonts
Entering printer commands
Printing foreign or other characters
Enhancing Print Quality
Adjusting print density
Resolution Improvement Technology
Sharing Your Printer
Using Printer Emulations
Switching printer emulations
.........................
.........................
.........................
.........................
.........................
......................
....................
.......................
......................
.................
..................
..................
.............
............
.................
1-2
1-2
1-3
1-3
1-5
1-5
1-11
1-12
1-15
1-17
1-18
1-18
1-22
1-23
1-24
Controlling Your Printer
1-1
Page 18
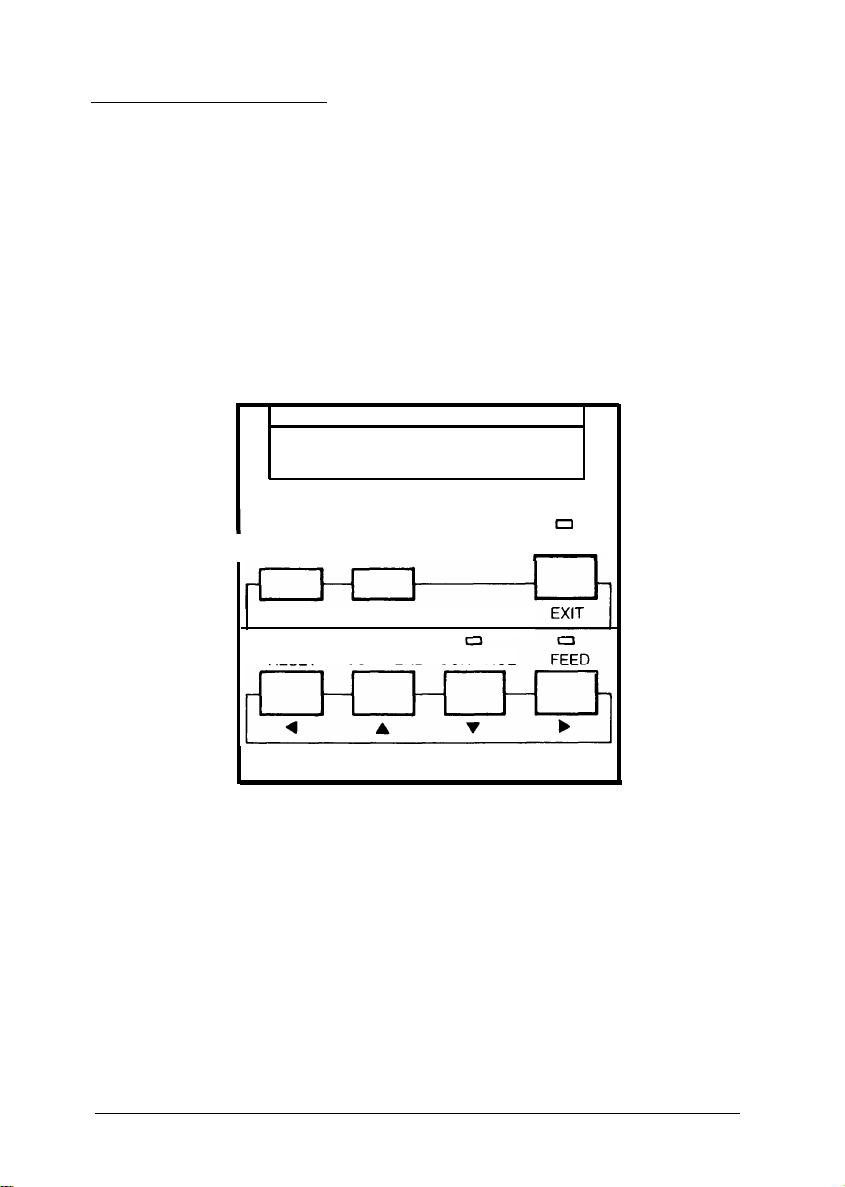
The Control Panel
The printer control panel gives you easy control over most
common printer operations. The panel consists of a liquid
crystal display (LCD), indicator lights, and buttons.
Display (LCD)
The display shows the printer’s status, such as
PRINTING,
available options.
0
I
INITIALIZE
SelecType
LEVEL 1
RESET
LEVEL 2
COPY END CONTINUE
ON LINE
and
1-2
Controlling Your Printer
Page 19

Indicator lights
ON LINE
CONTINUE
FEED
On when the printer is on line, indicating
that the printer can receive and print data.
Flashes when an error is detected or a
maintenance procedure is needed. The
error message appears on the display at
the same time.
On when data is received and stored in the
printer’s buffer without being printed out.
Rapid flashing indicates the printer is
receiving data from the computer.
Buttons
The top three buttons on the control panel function as follows:
SelecType
LEVEL 1
LEVEL 2
Enters SelecType Level 1. See “SelecType,”
Chapter 4.
Enters SelecType Level 2. See “SelecType,”
Chapter 4.
ON LINE/EXIT
Switches the printer between on line and
off line status. This switch is disabled
when the printer is in SelecType mode.
Exits SelecType mode.
Controlling Your Printer
1-3
Page 20

You use the four buttons in the bottom row of the control panel
to select printer settings and functions.
INITIALIZE/RESET
COPY END
RESET-When
until
RESET
printer finishes printing the current page
and then stops. The remaining data is
discarded, and some SelecType Level 1
settings return to their previously saved
values. See Chapter 4, “SelecType.”
When you hold down this button while
you turn on the printer, FACTORY RESET
appears on the display and all the
SelecType settings return to the factory
settings.
INITIALIZE-When
button until INITIALIZE appears (after
RESET), received print data clears and
SelecType Level 1 and 2 settings return to
the power-on settings.
COPY
when multiple-copy printing is selected
and the printer is off line.
you hold down this button
appears on the display, the
you hold down this
END-Cancels the remaining copies
1-4
CONTINUE
FEED
CONTINUE-If the CONTINUE light is
flashing, read the corresponding error or
status message on the display and correct
the problem as described in Chapter 3.
Then press this button to resume printing.
When the printer is off line and the
light is lit, press this button to print out
data in the printer’s memory.
Controlling Your Printer
FEED
Page 21

Tip:
Other common uses for these buttons are as follows:
LI
ON LINE
0
RESET
CI
FEED
Press to set the printer on line after you supply
paper. (The printer is off line when the paper is
out.)
Press to stop printing or to clear remaining data.
Press to print out data in the printer’s memory.
(This button ejects the page even though the
printer has not received a form feed command.)
Other control panel features
Data dump
A
CH (:P:S:O)
v
IES (PS&XX)
Hold down the
turn on the printer to enter data dump
(hex dump) mode. This feature helps you
find the cause of communication problems
between the computer and printer. For
more information, see the section on data
dump in Chapter 3, “Troubleshooting.”
See “Sharing Your Printer” later in this
chapter.
See “Intelligent Emulation Switch” later in
this chapter.
LEVEL
2 button while you
Using the Printer with Software
A portion of the application software called the printer driver
translates the margins, fonts, and all the other selections you
have entered into control codes that the printer understands.
You load the software’s printer driver when you select a printer
from the software menu.
Controlling Your Printer
1-5
Page 22

Choosing the correct printer driver from the software menu
helps to ensure that the application sends the correct codes to
the printer. The ActionLaser 1000 emulates an HP LaserJet IIIP
and the ActionLaser 1500 emulates an HP LaserJet III,@ so you
can access the most printer features from your software by
choosing that printer driver or the selection closest to it.
Because the printer driver automatically places control codes in
the data for your document when it sends the file to the printer,
software settings usually override the settings you made at the
control panel. So, the best way to enter most of your printer
selections is through the software. Some software packages also
let you embed your own printer control codes into the
document.
Note:
®
Your software’s manual and technical support representative are
your
best sources for information on installing
Printer drivers are included with
your
software package. Many
your
software.
manufacturers provide technical support phone assistance for helping
you install
This section provides quick instructions for using your printer
with some software you may already have installed in your
computer. The descriptions cover a number of the leading
software packages. If you need further details or if you are
using a package not described here, see the manual supplied
with your software.
your
printer drivers.
If you have documents or software that require a printer
emulation other than HP LaserJet,@ see “Using Printer
Emulations” later in this chapter.
Note:
The descriptions below assume that you have already installed
software.
1-6
Controlling Your Printer
your
Page 23

Lotus® 1-2-9 Release 3.1
1.
At the C:\123R3> prompt (or from your Lotus directory),
type install and press Enter.
2.
Highlight “Change Selected Equipment” and press Enter.
3.
Highlight “Modify Current DCF” and press Enter.
4.
Highlight “Change Selected Printer” and press Enter.
5.
Choose HP and press Enter.
6.
Scroll down, and select HP LaserJet IIP.*
7.
Select the name of the cartridge you have installed, or choose
“No Cartridge.”
8.
The program may ask you to insert Disk 4 of your original
diskettes so that it can copy files. Follow the instructions on
the screen.
9.
Return to the main menu.
10. Select “End Installation Program.”
11. When the screen asks if you want to save changes, select Yes.
12. Use the DCF name displayed, or type in another one.
13. When the screen says “INSTALLATION SUCCESSFUL,”
press Enter.
14. The next screen says “GENERATING FONTS.” Choose the
range of fonts you want to generate, and press Enter.
15. After the fonts are generated successfully, press any key.
* HP LaserJet III for the ActionLaser 1500.
Controlling Your Printer
1-7
Page 24

Microsoft® Word 5.5
1.
Run Setup again to install the driver for your printer.
2.
Select “Install printer drivers” when Word gives you that
option.
3.
Scroll down to select HP LaserJet II* and press Enter.
4.
Select the cartridge you have installed, if applicable.
5.
Select the port you are using (most commonly LPT1: if you
are using the parallel port or COM1: if you are using the
serial port).
6.
Follow the instructions in the Setup program to copy the
driver files.
Windows™ 3.0 or 3.1
1.
Click the mouse on the Control Panel icon.
2.
Click on the Printers icon.
3.
Select the Add Printer button on the right-hand side of the
window.
4.
Scroll down to HP LaserJet II.*
Highlight HP LaserJet II* with the mouse.
5.
6.
Select Install.
7.
Windows displays the message “Insert Windows Setup
Disk 5 or a disk with the updated HPPCL.DRV
(HPPCL5A.DRV for ActionLaser 1500) in A:\.” Insert the
disk and select OK.
* HP LaserJet III for the ActionLaser 1500.
1-8
Controlling Your Printer
Page 25

8.
In the Installed Printers window, “HP LaserJet II” on None,
Inactive” should be highlighted. Select Configure.
9.
Select the port you are using (most commonly LPT1: if you
are using the parallel port or COM1 : if you are using the
serial port).
10. Select Setup.
11. Match the memory on the screen to the memory in your
printer.
12. Select the graphics resolution you want to use.
13. Match the paper tray and cartridges to what you have
installed in the printer.
14. When everything is the way you want it, select OK.
15. In the Status box, select Active.
16. Select OK.
17. Close the Control Panel window.
WordPerfect® 5.1
1. Press Shift+F7.
2. Press S.
3. Press 2.
4.
Press the down arrow key to scroll to HP LaserJet II.*
5. Press 1.
6. Press Enter.
* HP LaserJet III for the ActionLaser 1500.
Controlling Your Printer
1-9
Page 26

7. Press 1.
8 Press Enter.
WordStar® 6.0
1.
At the C:\WS6> prompt (or from your WordStar directory),
type prchange and press Enter.
2.
Type a name to identify the printer definition file you are
creating. For example, type HPLJIIP* and press Enter.
3.
A menu lets you choose the type of printer you are installing.
Select HP LaserJets.
4.
The program shows a list of its available HP LaserJet printer
drivers. Select HP LaserJet II.*
5.
The next menu lets you set up the printer; you can add fonts,
create a batch file for downloading to the printer, select
sheet feeder, and choose your printer port. Follow the
instructions on the screen to define your printer.
Be sure the selection for the port you are using is correct
(most commonly
COM1: if you are using the serial port).
LPT1:
if you are using the parallel port or
6.
When the printer is defined correctly, select “Return to
Installed Printer Menu.”
7.
WordStar asks whether this is to be your default printer. For
ease of use, make the printer your default.
* HP LaserJet III for the ActionLaser 1500.
1-10
Controlling Your Printer
Page 27

Selecting fonts
Lotus 1-2-3 Release 3.1
1.
From the Wysiwyg menu, press F.
2.
Press F again.
3.
The program lists 8 fonts. To select one of those fonts, type a
number from 1 to 8.
4.
If you want to use a font other than the 8 listed, press R.
5.
After you have pressed R, Lotus asks which of the fonts in
the list you want to replace. Press a number from 1 to 8.
6.
Highlight the name of the new typestyle you want and press
Enter.
7.
Enter a point size and press Enter.
Microsoff Word 5.5
1.
Highlight the characters you want to select for this font.
2 Press Alt+t.
3. Press c.
4.
Use the arrow keys to select the font you want to use and
press Enter.
Controlling Your Printer
1-11
Page 28

WordPerfect 5.1
1. Press Ctrl+F8.
2. Press 4.
3.
Highlight the font you want to use.
4. Press 1.
WordStar 6.0
1.
Select “Choose font” from the Style menu.
2.
WordStar displays a list of available fonts. (Bitmap fonts are
followed by a point size; scalable fonts are followed by an
ellipsis.)
3.
Highlight the font you want and press Enter.
4.
If you have selected a scalable font, WordStar prompts you to
enter a point size.
Entering printer commands
(Appendix B provides a complete list of the control codes for
this printer. This section describes how to enter those codes in
your software.)
Lotus 1-2-3 Release 3.1
Lotus allows you to enter printer control codes as a setup string
in an area of the Print menu. To enter a setup string, follow the
steps below.
1.
In the non-Wysiwyg menu, select Print.
2.
Select Printer from the next menu.
1-12
Controlling Your Printer
Page 29

3. Select Options.
4. Select Setup.
5.
The Lotus prompt says “Enter setup string:.” Begin the string
with a backslash, and type the decimal values
corresponding to the command.
For example, to specify landscape orientation, you type the
following:
\027\038\108\049\079
Microsoff Word 5.5
The Word software package lets you modify Word’s printer
driver file, a file with the extension .PRD, to create your own
driver file. By modifying the printer driver file, you can
perform certain global functions: for example, remapping the
character table so that whenever you enter & on the keyboard,
the printer prints ®.
Word’s Printer Information for Microsoft Word manual describes
this procedure in detail. Briefly, to modify the .PRD file, you
run a Word program called MAKEPRD. (The file
MAKEPRD.EXE must be in your directory.) The MAKEPRD
program converts the .PRD file into an ASCII text file, and you
can type the new printer control commands as text in this file.
When the text version of your .PRD file is modified the way
you want it, you run MAKEPRD again to convert the file back
into a printer driver file.
Within the Microsoft Word program itself, you also can key in
command strings as text and send them to the printer as long as
the command string is not interrupted with Word formatting
codes. For example, you could type the following line into a
text-only file and send it to the printer with Microsoft Word:
ESC*c10A ESC*c1200B ESC*c0P
Controlling Your Printer
1-13
Page 30
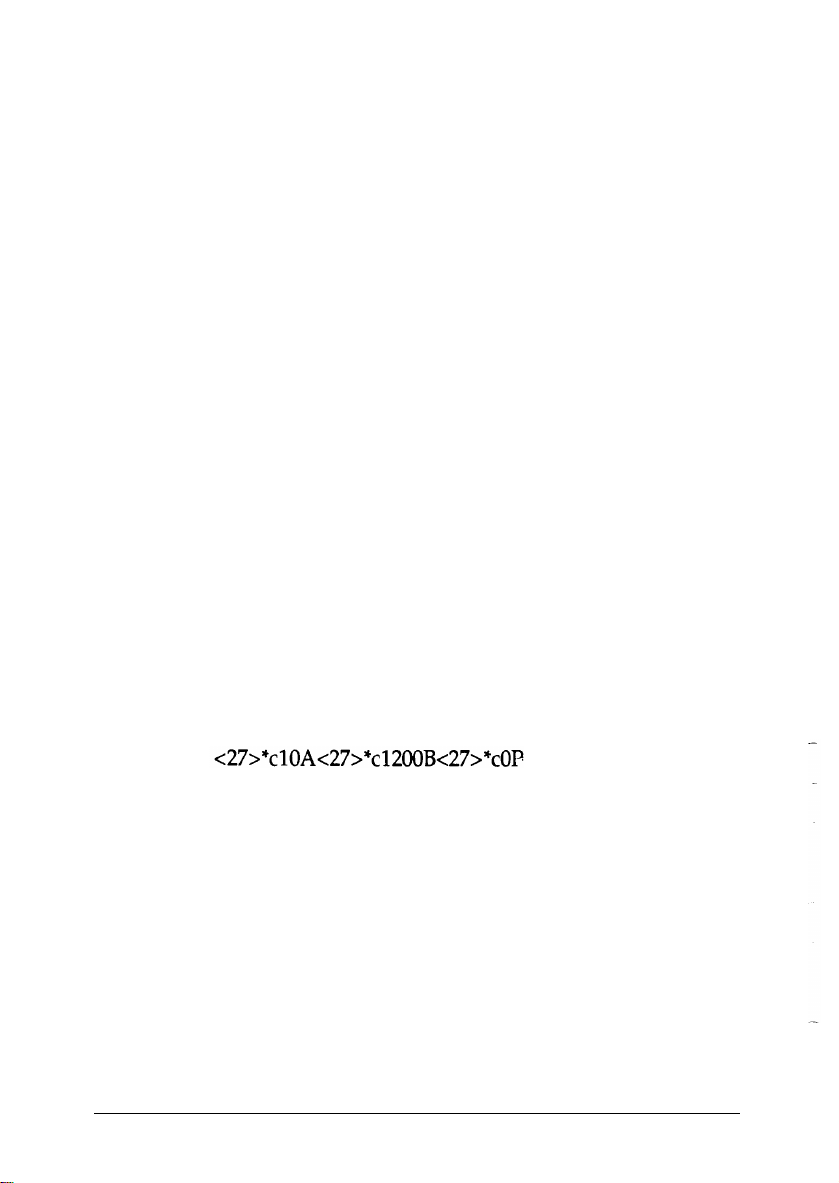
(Type the ESC codes by turning NUM LOCK on, holding down
the Alt key, and entering the number 27 on the keypad. The
spaces in the command line above are to separate the codes
visually. In your typing, do not leave spaces before the escape
codes.)
The printed page should contain a vertical rule 10 dots wide
and 1200 dots long.
WordPerfect 5.1
1. Press Shift+F8.
2. Press 4.
3. Press 6.
4. Press 2.
5. Press 1.
6.
Type the command. (Use less-than and greater-than signs to
enclose the decimal numbers in the command.)
For example, to draw a vertical rule 10 dots wide and 1200
dots long, type:
1-14
7.
Press Enter four times.
8.
You can press Alt+F3 to verify that your printer command is
embedded in the text.
Controlling Your Printer
Page 31

WordStar 6.0
1. Type ^P!.
2. WordStar prompts you
to the printer. Type the
3.
The program prompts you for the characters you want to
display on the screen. Type a descriptive name for your
command.
for the characters
command.
you want
Printing foreign of other characters
The printer is capable of printing many characters other than
those shown on your keyboard. Most software packages have a
method to let you enter a number corresponding to the
character you want to print so that you can print that character.
You can find the number you need to enter by looking at the
symbol set tables in this manual. (See Available Fonts and
Symbol Sets in Appendix B.) Many software packages expect
you to type a decimal number corresponding to the character.
There is a hexadecimal to decimal conversion listing in “Printer
command arranged by topic” in Appendix B of this manual.
Note that the same numeric code prints different characters
depending on the symbol set the printer is currently using. For
example, the yen sign corresponds to decimal 188 (hexadecimal
BC) in the Roman-8 symbol set. In the IBM-US character set, the
yen sign is decimal 157 (hexadecimal 9D).
to
send
Controlling Your Printer
1-15
Page 32

Lotus 1-2-3 Release 3.1
Hold down the Alt key and type the decimal number on the
numeric keypad that corresponds to the character in the symbol
set.
For example, if your printer is using the Roman-8 symbol set
and you want to enter the yen sign into your spreadsheet, hold
down the Alt key and press 188.
Microsoft Word 5.5
1.
Turn Num Lock on.
2.
Hold down the Alt key and type the decimal number on the
numeric keypad that corresponds to the character in the
symbol set.
For example, if your printer is using the Roman-8 symbol set
and you want to enter the yen sign, hold down the Alt key
and press 188.
WordPerfect 5.1
Hold down the Alt key and type the decimal number on the
numeric keypad that corresponds to the character in the symbol
set.
For example, if your printer is using the Roman-8 symbol set
and you want to enter the yen sign, hold down the Alt key and
press 188.
1-16
Controlling Your Printer
Page 33

WordStar 6.0
If you want to print a character from the IBM extended
character set, follow the steps below:
1.
Press ^P and then press 0.
2.
WordStar displays a matrix containing all the characters in
the set that are not available on your keyboard.
3.
Type the number corresponding to the character you want,
and press Enter.
4.
Press Esc to exit the menu.
To print other characters:
Hold down the Alt key and type the decimal number on the
numeric keypad that corresponds to the character in the symbol
set.
For example, if your printer is using the Roman-8 symbol set
and you want to enter the yen sign, hold down the Alt key and
press 188.
Enhancing Print Quality
If your printing is slightly too light or too dark or if it is not
quite as crisp as it should be, first make sure you are using
smooth, high-quality paper. (See Chapter 2, “Paper Handling,”
for more details on paper.)
If your paper is not the problem, try adjusting the print density
using SelecType Level 2. Additionally, if you have an
ActionLaser 1500 printer, try changing the Resolution
Improvement Technology setting described later in this section.
Controlling Your Printer
1-17
Page 34

For serious print quality problems, such as black or white
streaks, see the print quality section in Chapter 3,
“Troubleshooting.”
Adjusting print density
If your test prints are too light or too dark, adjust print density
as follows:
1.
Press the
2.
Press V until the following appears:
3.
Press b once and then ‘I to select a density setting from 1 to
5 asterisks. The more asterisks there are the darker the print.
4.
Press ) to set the new density setting.
5.
Press the
6.
Reprint the first page of your document to see if the density
is satisfactory. If the density needs further adjustment,
repeat steps 1 through 5.
LEVEL 2
0
DENSITY
EXIT
button.
L”“”
D b
button to exit SelecType.
Note:
Increasing the print density increases toner consumption. If you
select darker print, you my need to replace the imaging cartridge
more often.
Resolution Improvement Technology
If you have an ActionLaser 1500 printer, read this section on
enhancing print quality. Resolution Improvement Technology
(RITech) is Epson’s new printer technology that produces
smoother and crisper lines, text, and graphics.
1-18
Controlling Your Printer
Page 35

The illustration below shows an enlarged sample of a curve
printed with conventional laser technology and the same curve
printed with RITech.
RITech off
RITech on
The RITech setting
The factory setting for RITech gives the best quality text and
graphics for nearly all purposes. It does not require you to set
or adjust anything. Occasionally, however, adjusting the
RITech setting with SelecType may further improve the print
quality.
For example, you may want to change the setting after you
replace an imaging cartridge or if you notice that your printing
is not as smooth and crisp as it should be.
To guide you in choosing the optimum RITech setting, the
SelecType RITech option prints a check pattern.
Controlling Your Printer
1-19
Page 36

Checking the RITech setting
1.
Enter SelecType Level 2 by pressing the
2.
Press v until RITech and the current RITech setting appear
on the display.
3.
Press b three times. The printer prints the check pattern.
4.
Look at your check pattern to see if your current setting is
correct. The check pattern is a rectangle with a pattern
inside it, as shown below. When the RITech setting is best,
you cannot see the pattern inside the rectangle.
LEVEL 2
button.
RITech
Incorrect
Note:
RITech may not improve graphics that include gray shading or a
screen pattern.
turn RITech off.
After you print a RITech pattern, SelecType Level returns to the
default settings and the printer clears its memory including any
downloaded font data.
If
you are printing such graphics, you may want to
RITech
Correct
1-20
Controlling Your Printer
Page 37

Changing the RITech setting
You can select LIGHT, MEDIUM (the factory setting), HEAVY,
or OFF.
RITech is in effect when you select LIGHT, MEDIUM, or
HEAVY. Changing the setting to OFF turns off the RITech
feature.
If your check pattern is too heavy, change the setting to LIGHT;
if it is too light, change the setting to HEAVY; if you are printing
gray shading or screen patterns, change the setting to OFF.
To change your RITech setting, follow these steps:
1.
Enter SelecType Level 2 by pressing the
2.
Press V until RITech appears on the display.
3.
Press ) once and then press V until your desired setting
(LIGHT, MEDIUM, HEAVY, or OFF) appears on the
display.
4.
Press ) twice to set the new setting and print a new check
pattern using the new RITech setting.
LEVEL 2
button.
5.
Look at the new check pattern to see if it is improved. If you
wish to save the new setting, press the
SelecType.
If the pattern still needs to be improved, you probably need to
change the print density setting. For a darker (HEAVY) RITech
setting, make the print density lighter and vice versa. See
“Adjusting print density” earlier in this chapter for instructions.
Note:
EXIT
button to exit
Do not change the pint density unless it is necessary. Doing so
affects all text and graphics, so check the new setting by printing
several pages.
Controlling Your Printer
1-21
Page 38

Sharing Your Printer
You can connect your printer to more than one computer at the
same time. Simply connect interface cables from the computers
to the interfaces on your printer.
Your printer comes with a built-in parallel interface
(Centronics
The ActionLaser 1500 also has a built-in serial (RS-232C)
interface. If you want to install an optional interface, see
Chapter 5, “Options,” for instructions.
Note:
®
compatible) and a slot for an optional interface.
If you use the ActionLaser 1500’s built-in serial interface, you will
need to configure it to match your computer. See the INTERFACE
option in Chapter 4, “SelecType” for information on settings.
AUTOSENSE setting
By default, your printer uses AUTOSENSE, a SelecType setting
that automatically detects which interface channel (parallel,
serial, or optional) is receiving data from the computer and
allocates all of the printer’s available memory to that channel.
In the unlikely event that you have problems with files from
different computers interfering with each other, you may wish
to try the INDIVIDUAL setting which allocates a separate area
of memory for each channel. For information on how to use the
INDIVIDUAL setting, see the USER option in Chapter 4,
“SelecType.”
By pressing
three interface channels, you can manually switch between
channels P, S, or O as applicable to your printer.
1-22
Controlling Your Printer
A
when you are sharing the printer with two or
Page 39

Using Printer Emulations
A printer emulation is a set of operating commands that
determines how data sent from your computer is interpreted
and acted upon by the printer. Your printer has several resident
emulations:
c1
HP IIP LaserJet (ActionLaser 1000)
CI
HP III LaserJet (ActionLaser 1500)
c3
Epson LQ
P
Epson FX
a
Epson GL/2 (ActionLaser 1500).
The HP LaserJet IIP emulation is the default setting for the
ActionLaser 1000. HP LaserJet III emulation is the default
setting for the ActionLaser 1500. See Appendixes B and C for
detailed information on all of your printer’s emulations.
In most cases you will not need to change the default setting.
However, there are four reasons why you may need to use a
printer emulation other than the default setting:
Q
If you need to print documents already formatted for a dot
matrix printer.
Q
If you need to use application programs that do not
support an HP LaserJet printer.
D
If you are using the optional PostScript identity card.
P
If you are using Epson GL/2 mode with the ActionLaser
1500.
Controlling Your Printer
1-23
Page 40

Switching printer emulations
There are three ways to switch printer emulations: SelecType,
the Intelligent Emulation Switch (IES), and emulation control
languages.
SelecType
To choose different printer emulations for one or more of the
printer’s interfaces (parallel, serial for the ActionLaser 1500
only, or optional) using SelecType, follow the instructions
below:
1.
Press the
until you see the EMULATION option. Press b once.
2.
Press v until you see the interface channel (P, S, or O) you
want to assign.
3.
Press ) once. Then press v until you see the emulation you
want (for example, LQ or FX).
4.
Press b to set the emulation.
5.
Repeat steps 2 through 4 if you want to switch emulations in
any other channel. Then press the
SelecType.
LEVEL 2
button to enter SelecType Level 2. Press
EXIT
button to exit
V
Intelligent Emulation Switch
The Intelligent Emulation Switch is available when you install
the optional PostScript@ identity card. See Chapter 5, “Options“
for more information on identity cards.
1-24
Controlling
Your
Printer
Page 41

When you install the optional PostScript card and set the
Intelligent Emulation Switch (IES) setting with the SelecType
Level 2 EMULATION option, you can access several emulation
pairs:
Emulation Pairs
c1
PostScript & LaserJet IIP
0
PostScript & Laser Jet III
Ll
PostScript & LQ
D
PostScript & FX
LI
PostScript & GL/2
The IES setting enables the printer to switch automatically
between the two emulations in each pair indicated by the IES
setting.
To select IES, first install the optional PostScript identity card,
then follow the SelecType procedure shown above.
By pressing V when you are using one of the IES emulation
pairs, you can manually switch between PostScript and the
other emulation selected. Hold down ‘I until an asterisk
appears on the desired emulation pair.
SelecType option
PS&LJ=2P
PS&3/P/Si (ActionLaser 1500)
PS&LQ
PS&FX
PS&GL/2 (ActionLaser 1500)
(ActionLaser 1000)
Emulation control languages
Note:
Emulation control languages are intended for experienced users and
programmers.
Controlling Your Printer
1-25
Page 42

Three emulation control command languages are available to
change the printer emulation:
CI
Epson Job Language (EJL)
P
Printer Job Language (PJL)
0
Emulation Switch (ES).
Epson Job Language (EJL)
The Epson Job Language is an original Epson language. It can
perform the following operations for your printer:
0
Switching the printer emulation
Q
Transferring the printer’s system information to the
computer
Q
Entering the Printer Job Language (PJL) mode.
EJL can switch the printer emulation with a monodirectional
interface, but a bi-directional interface is required for the
computer to receive system information from the printer.
For more details on EJL commands, see the end of this section.
Printer Job Language (PJL)
The Printer Job Language mode uses PJL commands to change
printer emulations. Because the PJL mode emulates the HP
LaserJet series IIP (ActionLaser 1000) or III (ActionLaser 1500)
printer PJL feature, you can use software written for that
printer when it is shared in a network environment.
You can also enter the EJL mode from the PJL mode. For
information on the PJL commands, see Appendix B.
1-26
Controlling Your Printer
Page 43

Emulation Switch (ES)
This feature lets you use printer commands to switch directly
between the PostScript and LaserJet emulations.
To switch from LaserJet to PS emulation, send the following:
<ESC><DEL>
To switch from PS to LaserJet emulation, use your software to
send the following:
executive<CR>[<LF>]
serverdict<SP>begin<SP>0<SP>exitserver<CR>[<LF>]
executive<CR>[<LF>]
statusdict<SP>begin<CR>[<LF>]
5<SP>setsoftwareiomode<CR>[<LF>]
^D
Code in brackets [ ] are not absolutely necessary. <SP>
represents a space.
Epson Job Language command summary
The EJL mode enables your printer to switch to any emulation
available. To operate in EJL mode, follow the steps below:
1.
Exit the current (or default) printer emulation and enter EJL
mode with the universal exit command.
2.
If you wish, send other EJL commands, such as the comment
command, to the printer.
3.
Send an EJL command to enter a new printer emulation
from the EJL mode.
Controlling Your Printer
1-27
Page 44

Perform these steps by sending specific commands from your
computer to your printer. For step 1, always send the universal
exit command:
<ESC><SOH>
Next you must immediately send an EJL command. For
example, you can enter the LQ emulation by sending the
following commands.
“@EJL ENTER LANGUAGE = LQ”<LF>
The printer emulation indicated on the display changes to the
new one.
Overview of the EJL commands
EJL commands must be sent immediately after the printer
receives the universal exit command; otherwise the printer
returns to its default printer emulation.
Every EJL command starts with the string: @EJL, which must
be in uppercase letters, although other commands can be in
both uppercase and lowercase.
You must send the LF code at the end of an EJL command; only
an LF code terminates the EJL command. If the EJL command is
not followed by an LF code, the printer does not recognize it as
an EJL command; it is then printed as a character string in the
current printer emulation.
If the printer emulation you attempt to switch to is not
available, the printer switches to the default printer emulation.
If you are in Epson GL mode, you cannot exit with the
universal exit command. You must switch emulations with
SelecType.
1-28
Con trolling Your Printer
Page 45

Command summary for using EJL
<ESC><SOH> Universal exit language/Start of EJL
Format:
ASCII code: ESC SOH
Decimal: 27 1
Hexadecimal: 1B 01
Description:
Exit current printer emulation and enter EJL mode
Note:
From Epson GL mode, you cannot enter the EJL mode with this
command. You must change the printer emulation with SelecType.
@EJL ENTER LANGUAGE = <Language><LF> Enter printer
emulation
Format:
ASCII code:
@EJL<WS>ENTER<WS>LANGUAGE[<WS>]=[<WS>]
<Language>[<CR>]<LF>
Decimal: 64 69 74 76 32 69 78 84 69 82 32 76 65 78 71
85 65 71 69 [32] 61 [32] <ASCII strings> [13] 10
Hexadecimal: 40 45 4A 4C 20 45 4E 54 45 52 20 4C 41
4E 47 55 41 47 45 [20] 3D [20] <ASCII strings> [0D] 0A
Language:
PS, LJ-2P, 3/P/Si, LQ, FX, Epson GL, Epson GL2, PJL
Description:
Enter printer emulation from EJL
<WS> represents spaces (decimal 32) or a Horizontal Tab (HT)
(decimal 9). Commands marked with brackets can be omitted.
Controlling Your Printer
1-29
Page 46

@EJL COMMENT <comment strings> <LF> Comment
Format:
ASCII code: @EJL<WS>COMMENT<WS>
<comment strings>[<CR>]<LF>
Decimal: 64 69 74 76 32
[13] 10
Hexadecimal: 40 45
4A
4C
677977
77 69 78 84 32
4F 4D 4D 45 4E 54 20
20 43
<comment>
<comment> [0D] 0A
@EJL INQUIRE NAME <LF> Inquire printer name
Format:
ASCII code: @EJL<WS>INQUIRE<WS>NAME[<CR>]<LF>
Decimal: 64 69 74 76 32 73 78 81 85 73 82 69 32 78 65
77 69 [13] 10
Hexadecimal: 40
45 4A 4C 20494E51 55 49 5245 20
4E 41 4D 45 [0D] 0A
Description:
Inquires printer name. If you are using a bidirectional
interface between the computer and the printer, your
printer outputs the following answer strings:
@EJL ANSWER NAME = <Printer name> <CR> <LF>
<WS> represents spaces (decimal 32) or a Horizontal Tab (HT)
(decimal 9). Commands marked with brackets can be omitted.
1-30
Controlling Your Printer
Page 47

Chapter 2
Paper Handling
Choosing Paper
Selecting a paper size
Loading Paper
Loading single sheets
Loading envelopes, labels, transparencies, and
heavy paper
...........................
.....................
............................
.....................
.........................
2-2
2-2
2-3
2-3
2-5
e
Paper Handling 2-1
Page 48

Choosing Paper
For best results, use paper made especially for laser printers.
Paper made for plain-paper copiers is also a good choice. Paper
should be of good quality and relatively smooth. Since the
printer is sensitive to moisture, keep it dry.
You can use the printer’s paper bin to feed most types of 60 to
90 g/m2 (16 to 24 lb) letter-size paper. If you feed paper or other
media one sheet at a time, you can use up to 157 g/m2 (42 lb)
paper.
You may use colored paper but not paper to which a colored
coating has been added.
Note:
The quality of any particular brand or type of paper my be changed
by the manufacturer at any time, so Epson cannot guarantee any
particular one. Also, some inks or dyes may smear or come off when
subjected to the high temperature of the fuser. Always test samples of
paper stock before purchasing large quantities or printing large jobs.
Selecting a paper size
If you use a paper size other than letter and your software does
not allow you to select a new size, see the PAGE SIZE option in
Chapter 4, “SelecType.”
2-2 Paper Handling
Page 49

Loading Paper
To load a letter-size stack of paper into the printer, fan the
paper, open the paper cover, adjust the paper guides, and insert
the paper into the paper bin.
After you close the paper cover, make sure the paper stopper
on top of the paper cover is inserted in the slot closest to the
center of the printer. Make sure that the paper path selector on
the top left corner of the printer is set to the face-down position.
For an illustrated explanation of this procedure, see your Setup
and Maintenance guide.
Loading single sheets
If you want to print on paper other than letter size, you need to
load the paper one sheet at a time through the paper bin feed
slot. The printer accommodates hand-fed paper ranging in size
from 86 x 140 mm (3.4 x 5.5 inches) to 216 x 356 mm (8.5 x 14
inches), envelopes, transparencies, labels, and heavy paper
(over 90 g/m2 or 24 lb).
Paper Handling 2-3
Page 50

To
feed paper one sheet at a time, follow these steps:
1.
Select the paper size using your application software. If this
is not possible, use SelecType to choose the size of the paper.
2.
Make sure the printer is on line.
3.
Open the paper cover and remove the stack of paper from
the paper bin.
4.
Adjust the paper guides to match the size of paper you are
using. Insert a sheet of paper into the bin until it meets
resistance and then close the paper cover.
Note:
For printing on envelopes, labels, transparencies, and heavy
paper, set the paper path selector on the top left corner
of the
printer to the face-up position. If you feed single sheets regularly,
you may want to install the optional face-up output tray. See
Chapter 5, “Options.”
5.
If you leave the paper feed selector in the face-down
position, install the paper stopper to match your paper size
by inserting its hooked prong into the appropriate slot on
the top of the paper cover and sliding it to the right.
2-4 Paper Handling
Page 51

6.
Make sure the
to the printer from your computer.
When you are finished feeding single sheets, open the paper
cover, readjust the paper guides, and replace the stack of
letter-size paper in the paper bin. If necessary, reset the paper
path selector on the top left corner of the printer to the
face-down position.
ON LINE
light is on; then you can send data
Loading envelopes, /labels, transparencies, and heavy paper
Use only labels and overhead projector transparencies designed
to be used with laser printers or plain-paper copiers. Since
envelopes, labels, transparencies, and heavy paper must be fed
through the printer one sheet at a time, read this section and
then see “Loading single sheets” discussed earlier in this
section.
Note:
If
you feed envelopes, labels, transparencies, and heavy paper, you
should set the paper feed selector to the face-up position.
single sheets regularly you may want to install the optional face-up
paper tray. See Chapter 5, “Options.”
If you feed
Paper Handling
2-5
Page 52

ENVELOPES--Print quality may appear irregular on envelopes
because some parts of the envelope are thicker than others. Test
a sample making sure to feed the envelope flap-side down.
Adjust the print density using SelecType Level 2 if printing is
too light.
LABELS---Before printing on labels, test to see whether or not
the label sheet leaks adhesive by pressing a sheet of paper on
top of the sheet of labels. If the paper sticks at all, don’t use the
labels.
2-6 Paper Handling
Page 53

Chapter 3
Troubleshooting
General Problems . . . . . . . . . . . . . . . . . . . . . . . . . . 3-2
Print Quality Problems . . . . . . . . . . . . . . . . . . . . . . . 3-8
Memory Problems . . . . . . . . . . . . . . . . . . . . . . . . . . 3-13
Option Problems . . . . . . . . . . . . . . . . . . . . . . . . . . . 3-15
Messages
Data Dump Mode
Replacing the Imaging Cartridge . . . . . . . . . . . . . . . . . 3-29
...............................
..........................
3-18
3-27
E
Troubleshooting 3-1
Page 54

General Problems
CAUTION:
e
Printer stops and FEED JAM message appears
1.
2.
Whenever you ship or transport the printer, first remove the
toner cartridge and place it in a plastic bag. Then seal the bag
to prevent the fine toner particles from pouring into the
printer or onto your clothing.
Open the paper cover. Carefully remove all the paper in the
paper bin along with any sheets that have fed part way into
the printer.
If the paper tears when you remove it, make sure you
remove any pieces remaining in the printer. To do this,
gently open the printer cover.
WARNING:
If you open the printer cover you expose the fuser, which is
Q
marked by a
not to touch the fuser.
CAUTION HOT SURFACE
label. Be careful
3-2
Remove the imaging cartridge. Then remove any paper from
the paper feed path, reinsert the imaging cartridge, and
close the printer cover.
3.
Tap the edges of the paper stack on a flat surface and
carefully reload it into the paper bin. (Do not reload curled
or wrinkled sheets.) Close the paper cover.
4.
The jammed page is automatically reprinted. If you did not
open the printer cover to clear the feed jam, press
CONTINUE.
Troubleshooting
Page 55

Printer stops and PAPER JAM message appears
1.
Gently open the printer cover and remove the imaging
cartridge.
WARNING:
Q
Opening the printer exposes the fuser, which is marked by
a
CAUTION HOT SURFACE
touch the fuser.
2.
Gently pull out the paper. If it tears, make sure you remove
any pieces remaining in the printer.
label. Be careful not to
Note:
Because the toner on the paper inside the printer may not have
been fixed on the page, toner may come off on your hands when
you remove the paper. If you spill toner on your clothing, rinse it
off with cold water. Using hot water may leave a permanent
stain. When you resume printing, the first few pages may be
slightly smeared with excess toner.
Troubleshooting 3-3
Page 56

3.
Reinstall the imaging cartridge. Then close the printer cover.
4.
After a paper jam, the jammed page is automatically
reprinted.
Preventing paper feed and paper jam problems
If you have frequent paper feed or paper jam problems, use this
checklist of corrective measures:
Use a higher-quality paper, one that is not too thin or rough.
Some types of paper require single sheet feeding. See Chapter 2.
Fan the stack of paper and then tap it on an edge to align it before
you load it.
Be sure that you do not load too much paper in the bin.
Be sure to adjust the paper guides so that the paper can slide in
and out freely.
Never let more than 100 sheets accumulate in the standard
face-down output tray on top of the printer.
Try turning over the stack of paper in the bin. Most packages of
paper indicate the best side with an arrow on the end of the
package. Make sure the best side is loaded face down.
Display panel stays blank when you turn printer on
Turn off the printer and check the power cable connections
between the printer and the electrical outlet; then turn the
printer back on.
If the electrical outlet is controlled by an outside source such as
a wall switch, make sure the switch is turned on or plug
another electrical device into the outlet to check whether the
outlet is operating properly.
3-4 Troubleshooting
Page 57

The
ON LINE
Your computer may not be properly connected to the printer.
Perform the procedure, “Testing the computer-to-printer
connection” in the Setup and Maintenance guide.
The interface cable may not be plugged in securely. Check both
end s of the cable between the printer and the computer. If you
are using a parallel interface, secure the connector using the
wire retaining clips.
Make sure that your interface cable meets the specifications for
the printer and computer.
Make sure that you have selected the appropriate interface
(parallel, serial for the ActionLaser 1500 only, or optional) with
SelecType. If you are using the serial interface, also set the baud
rate, protocol, data bit, and related settings. See your computer
manual for the correct settings and interface requirements. If
you are using the parallel interface, make sure the BUSY
DELAY option in SelecType Level 2 is set to 0.
Make sure that your software is properly set up for your
printer.
light is on but nothing prints
The imaging cartridge may be empty. Replace it as described at
the end of this chapter.
Printer doesn’t print and the
Press
ON LINE
comes on).
once to set the printer on line (the
ON LINE
light is off
ON LINE
Troubleshooting 3-5
light
Page 58

Font selected with software commands won’t print
Be sure you have installed the correct font cartridge and make
sure that the orientation (portrait or landscape) matches the
selected font.
Some or all of the output is garbled or printed as asterisks
Make sure that both ends of the interface cable are plugged in
securely.
If you are using a serial interface, make sure that both the
computer and printer are set to use the same number of data
bits per word and that they both use the same parity, baud rate,
and number of stop bits.
If the printer still does not print correctly, contact your dealer.
Position of the printout not correct
Make sure that you are using the correct page length and
margin settings in your application program. Do not use
SelecType to make these settings because software settings
override SelecType.
Graphics don’t print correctly
Make sure that your software program is set for the printer
emulation you are using. For example, if you are using the
LJ-2P emulation, be sure that your graphics software is set for a
LaserJet II printer.
3-6 Troubleshooting
Page 59

If you are using a serial interface, make sure that you set an
8-bit data word and not a 7-bit word in your interface settings
in SelecType.
Graphics require large amounts of memory; see “Memory
Problems,” in this chapter for more help.
SelecType does not function as expected
Application software programs override SelecType settings.
Therefore, use software settings instead of SelecType settings
whenever possible.
Your setting may have been changed by your software
program. Perform a factory reset by pressing the
while you turn on your printer. Then try printing using the
section “Testing the computer-to-printer connection” in your
RESET
Setup and Maintenance guide.
You may have entered the wrong SelecType level. See the
Quick Reference card whenever you use SelecType.
You may be trying to select a setting that is not available in the
currently selected printer emulation. To check the available
options, see Appendixes B and C.
button
You may be trying to set up different SelecType configurations
for different printer emulations. See Appendixes B and C for
more information.
Never save settings to the same macro number in different
interface channels.
Troubleshooting 3-7
Page 60

Print Quality Problems
Dark or dirty background
Change the DENSITY option in SelecType Level 2 for light
print.
Clean the paper path inside the printer using a clean, soft, dry
cloth.
Clean internal printer components by printing three pages with
only one character per page.
There may be a problem with the imaging cartridge. Remove
the cartridge, shake it from side to side, and then reinstall it. If
this does not solve the problem, replace the imaging cartridge
as described at the end of this chapter.
3-8 Troubleshooting
Page 61

Vertical black or white bands or lines
Clean the printer lens. Remove the imaging cartridge and place
it on a clean, flat surface. Locate and clean the clear lens on the
inside middle of the printer.
Wipe the lens from end to end with a clean, soft, dry, lint-free
cloth. Then re-insert the imaging cartridge in the printer and
close the printer cover. If the problem remains, install a new
imaging cartridge as described at the end of this chapter and
print several pages to check the print quality.
Horizontal black or white bands or black page
Install a new imaging cartridge as
described at
chapter.
the end of this
Troubleshooting
3-9
Page 62

Uneven darkness
Take out the imaging cartridge, shake it from side to side, and
then reinstall it.
Your paper may be moist or damp. Printing is sensitive to
moisture absorbed by the paper. Do not store your paper in a
humid or damp environment.
If this does not solve the problem, install a new imaging
cartridge as described at the end of this chapter. Then print
several pages to check the print quality.
Toner smudges
Remove the imaging cartridge, shake it from side to side to
distribute the toner, and wipe the bottom of it with a clean, dry
cloth.
Clean the paper path inside the printer using a clean, soft, dry
cloth.
Clean internal printer components by printing three pages with
only one character per page.
If the problem remains, replace the imaging cartridge as
described at the end of this chapter.
Missing areas on printed image
Your paper may be moist or damp. Printing is sensitive to
moisture absorbed by the paper. The higher the moisture
content in the paper, the lighter the printed output. Do not
store your paper in a humid or damp environment.
3-10 Troubleshooting
Page 63

You may not be using the correct type of paper for your printer.
If the surface of your paper is too rough, printed characters
appear distorted or broken. Smooth, high-quality copier paper
is recommended for best results. See Chapter 2, “Paper
Handling,” for information on choosing paper.
Completely blank pages
If, after checking the SelecType Level 2 TONER option, the
TONER message indicates that the amount of toner is low
(E*
F), replace the imaging cartridge as described at the end of
this chapter.
Check to be sure the imaging cartridge is installed as described
in the Setup and Maintenance guide.
The problem may be with your software program or interface
cable. Run a feature print or print out a status sheet. If blank
pages continue to print, the problem may be with the printer.
Turn off the printer and contact your dealer.
Printed image is light or faint
Use the DENSITY option in SelecType Level 2 for darker print.
If, after checking the SelecType Level 2 TONER option, the
TONER message indicates that the amount of toner is low
(E”
F), replace the imaging cartridge as described at the end of
this chapter.
Your paper may be moist or damp. Printing is sensitive to
moisture absorbed by the paper. The higher the moisture
content in the paper, the lighter the printed output. Do not
store your paper in a humid or damp environment.
Troubleshooting 3-11
Page 64

Take out the imaging cartridge, shake it from side to side to
distribute the toner, and then reinstall it. If the problem
persists, replace the imaging cartridge as described at the end
of this chapter.
Image is too dark
Use the DENSITY option in SelecType Level 2 for lighter print.
If the problem persists, replace the imaging cartridge as
described at the end of this chapter.
Non-printed side of the page is dirty
Toner may have spilled in the paper feed path. Remove the
imaging cartridge and then clean the paper path of the printer
using a clean, soft, dry, lint-free cloth.
WARNING:
Q
Opening the printer exposes the fuser, which is marked by a
CAUTION HOT SURFACE
fuser.
label. Be careful not to touch the
3-12 Troubleshooting
Page 65

Memory Problems
All of the following messages indicate that you need to simplify
the page you are trying to print, change your memory
allocation, or add more memory to your printer.
ADD MEMORY FOR CH X
INSUFF MEMORY
PAGE BUFFER FULL
SET FULL PRINT
The first solution you can try for each of these is simplifying
your page by reducing the number or size of fonts or the
number or size of graphics or both. The second solution to try is
to reduce the RX-buffer size if it is higher than the default
value. If these are not satisfactory solutions, try the other
solutions described below under the appropriate error message.
ADD MEMORY FOR CH X (P, S or O)
This appears only when you are using the USER INDIVIDUAL
option. It indicates which interface channel needs more
memory. Try each of the following until you have solved the
problem:
1.
In the SelecType INDIVIDUAL option, increase the memory
allocated to the channel indicated.
2.
Change the SelecType USER option from INDIVIDUAL to
AUTOSENSE.
3.
Add memory to the printer. See Chapter 5, “Options,” for
details.
Troubleshooting 3-13
Page 66

INSUFF MEMORY
1.
Press
CONTINUE
2.
If the message remains, press
to clear the error.
RESET
or initialize the printer
as described in Chapter 4.
You can also clear this error by turning the printer off and back
on again, However, it may be necessary to simplify the page
you are trying to print or to add more memory to the printer.
See Chapter 5 for details.
PAGE BUFFER FULL
1.
Press
CONTINUE
2.
If the message remains, it may be necessary to simplify the
to clear the error.
page you are trying to print or to add more memory to the
printer. To add memory, see Chapter 5.
SET FULL PRINT
1.
Press
CONTINUE
2.
Change the SelecType Level 1 FULL PRINT setting as
described in Chapter 4.
3-14 Troubleshooting
to clear the error.
Page 67

Option Problems
A font cannot be selected or the message CARD ERROR appears
Remove and carefully reinsert the cartridge.
Make sure the cartridge is listed in the table of available font
cartridges in Chapter 5, “Options.”
Paper does not feed from the optional lower paper cassette
Be sure you have made the proper choice with your application
software.
The INPUT menu in SelecType Level 1 may be set to STD. To
use the optional lower paper cassette, the INPUT menu in
SelecType Level 1 must be set to OPT or AUTO. Change the
setting as described in Chapter 4, “SelecType.”
There may be no paper in the lower paper cassette. Load it with
paper.
Be sure that the lower paper cassette is properly installed and
that you have not tried to load it with too many sheets of paper.
The cassette can hold a maximum of 250 sheets of 75 g/m
(20 lb) paper.
The lower paper cassette may not be installed properly. See
Chapter 5 for instructions on installing the lower paper cassette.
Troubleshooting 3-15
2
Page 68

FEED JAM with optional lower paper cassette
1.
Remove the lower paper cassette as shown below.
2.
Remove any folded or curled paper from the front opening.
Then remove all paper from the paper cassette discarding
curled or wrinkled sheets.
3.
Tap the edge of the paper stack. Then reinsert it into the
cassette making sure the paper is evenly aligned and rests
below the maximum paper mark.
4.
Make sure you are using the correct paper size. See the
section on using the optional lower paper cassette in
Chapter 5, “Options,” for more information.
Note:
Make sure you are using paper that meets the specifications for
this printer. See Chapter 2 for the correct paper to use.
5.
Press
CONTINUE.
reprinted.
3-16 Troubleshooting
The jammed page is automatically
Page 69

Using the optional face-up output tray, the printer does not feed
onto the face-up tray
Make sure that the paper path selector on the top left corner of
the printer is set to the face-up position. Never allow more than
20 sheets to accumulate in the face-up output tray.
Even with additional memory installed, complex pages don’t print
and INSUFF MEMORY message still appears
FULL PRINT, RX-BUFFER, or memory share ratio (the
allotment of memory per interface channel) setting of the USER
INDIVIDUAL menu in SelecType may need to be changed. See
“Memory Problems” in this chapter for more information.
You may not have installed enough memory. If you have an
ActionLaser 1000, you can add up to 6.0MB of memory for a
total of 6.5MB. If you have an ActionLaser 1500, you can add
up to 4.0MB of memory for a total of 5.0MB. If you have
installed all possible memory and the error message continues
to appear, you may have to simplify the document you are
trying to print.
Troubleshooting 3-17
Page 70

Messages
Status, error, and caution messages tell you what the printer is
doing, including what may be wrong and, in some cases, how
to correct the problem.
This section contains an alphabetical list of these messages and
how to correct any problems.
If the red
correct the problem and then press the
clear the error. If the AUTO CONT option in SelecType is ON,
some errors clear automatically even though the problem
remains. In most instances, you should leave AUTO CONT
OFF.
Status messages are indicated by [S] and error messages by [E].
(In some cases the message on the display also shows the
printer emulation.)
ADD MEMORY FOR CH X [E]
There is not enough memory for Channel X. See “Memory
Problems” earlier in this chapter.
CARD MEMORY OVERFLOW [E]
This indicates that the memory of a font card in slot A exceeds
4MB. Remove the card and press
CONTINUE
light flashes when an error is detected,
CONTINUE
CONTINUE.
button to
3-18 Troubleshooting
Page 71

COPY END X/X [S]
Appears when you press the
multiple-copy printing when the printer is off line. The first X is
the number of the current page and the second X the number of
copies selected in SelecType.
COVER OPEN [E]
The printer cover is open. Close it to continue printing. This
message also shows the amount of toner left in the imaging
cartridge. For example: A full toner amount is E*****F.
DATA [S]
The printer has received data but is not yet printing, or the
printer has received data and is off line. To resume printing,
press
ON LINE
EJL [S]
if the printer is off line, or press
COPY END
button to cancel
FEED.
The printer is in EJL mode. See “Emulation control languages”
in Chapter 1.
FACTORY RESET [S]
The printer is being initialized to the factory settings.
Troubleshooting 3-19
Page 72

FEED JAM [E]
Paper is not feeding into the printer from the specified paper
bin or cassette or has jammed on its way into the printer. See
the FEED JAM section in this chapter for information.
ILLEGAL CARD #X [E]
The card or cartridge in slot X cannot be read. To correct this
error, press
CONTINUE.
If the error message remains, make
sure the printer is off line and reinsert the card or cartridge as
described in Chapter 5, “Options.”
INITIALIZE [S]
The printer is being reset to the default settings.
INSUFF MEMORY [E]
The printer has insufficient memory available for the task you
have given it. To correct the error, press
message remains, press
RESET
or perform INITIALIZE as
CONTINUE.
If the
described in Chapter 4. See “Memory Problems” earlier in this
chapter.
INVALID ASSIGN [E]
If you assign PostScript to more than one channel, this message
appears when you attempt to exit SelecType. Press 4 to return
to EMULATION and change the channel assignments.
3-20 Troubleshooting
Page 73

NEW CARTRIDGE? [S]
The printer asks if you replaced the imaging cartridge. Press
RESET
to change the TONER setting to
the cartridge. Otherwise, press
CONTINUE
NEW
if you just replaced
to clear the message.
PAGE BUFFER FULL [E]
Text or graphics data has filled the printer’s buffer and the
printer has ejected an incomplete page. Press
CONTINUE
clear the error. See “Memory Problems” earlier in this chapter.
PAPER FEEDING [S]
The printer is feeding paper.
PAPER JAM [E]
See the PAPER JAM section earlier in this chapter.
to
PAPER OUT [E]
There is no paper in the standard paper bin and the optional
lower paper cassette (if installed). Load more paper into the
selected paper bin or cassette and press
ON LINE.
See
Chapter 2, “Paper Handling.”
Troubleshooting 3-21
Page 74

PAPER OUT (paper source) (paper size) [E]
There is no paper in the paper source from which the printer
expects to feed paper. The right column of the display prompts
you to load the correct paper size into the paper bin or cassette.
Press
ON LINE.
PAPER SIZE ERROR [E]
The paper size you selected with SelecType (or the default size
if you have not selected a size) does not match the paper loaded
in the selected paper source. Press
CONTINUE
to clear the error.
Insert the correct paper or change the paper size setting with
your application software or with PAGE SIZE in SelecType as
described in Chapter
4.
PJL [S]
The printer is in PJL mode. See “Emulation control languages”
in Chapter 1.
PRINTING [S]
The printer has received data and is printing.
PRINT PAUSED X/X [S]
The printer stops printing during a multi-copy print operation.
The first X is the printed number of the current page and the
second X the number of copies selected in SelecType.
3-22 Troubleshooting
Page 75

PS& xxx [S]
The printer is using the intelligent emulation switch and is not
in a timeout status. The asterisk (*) indicates the currently-used
emulation. It can use either one of the emulations shown on the
display. XXX is the emulation paired with PostScript.
RAM CHECK X.X MB [S]
The printer is checking RAM (X.X = capacity).
RAM Error [E]
This indicates an error was found during RAM CHECK. Turn
off the printer. If you installed the optional memory chip sets,
remove the controller board and check installation as described
in Chapter 5. If the error message appears again, contact your
dealer.
READY [S]
The printer is ready to receive data or print.
READY:X DUMP [S]
The printer is in the data dump mode. See “Data Dump Mode”
later in this chapter.
Troubleshooting 3-23
Page 76

REINSERT CARD [E]
You may have removed a card or cartridge while the
FEED
was still lit or while the printer was on line. Make sure the
printer is off line, reinsert the card or cartridge into the correct
slot, and press
CONTINUE.
REMOVE CARD [E]
You may have inserted a card or cartridge while the printer
was on line or while the
FEED
light was on. To correct this
error, take the printer off line, then remove the card or cartridge
and press
CONTINUE.
Before you re-insert the card or
cartridge, make sure that all data in the buffer has been printed
and that the printer is
FEED
to print out the remaining data.
off line.
If the
FEED
light is on, press
RESELECT TRAY [E]
The optional lower paper cassette is not installed and the
SelecType INPUT option is set to OPT or AUTO. Install the
optional lower paper cassette; then press
press
CONTINUE
and paper is automatically selected from the
CONTINUE
or simply
standard paper bin. Then change the INPUT option to STD.
light
RESET [S]
The printer has been reset to its previous setting using the
macro number specified with LOAD MACRO in SelecType.
3-24 Troubleshooting
Page 77

ROM Check [S]
The printer is checking ROM.
SAVE MEMORY OVERFLOW [E]
The printer does not have enough memory to save any
additional macros. To correct this error, delete unused macros
using the DELETE MACRO submenu; then repeat SAVE
MACRO.
SERVICE REQ. CXXXX [E]
SERVICE REQ. E00XX [E]
A controller or print engine error has been detected. Write
down the error number that appears in the right column of the
display and turn off the printer. Turn the printer back on after a
few seconds to see if the error message still appears. If it does,
turn off the printer, unplug the power cord from the electrical
outlet, and contact a qualified service person.
SET FULL PRINT [E]
This message may appear when you are trying to print
graphics or a mix of text and graphics. Press
CONTINUE,
see “Memory Problems” earlier in this chapter.
Troubleshooting 3-25
then
Page 78

STANDBY XXX [S]
When the STANDBY menu is set to ENABLE, the printer enters
the standby mode if it is not used for about thirty minutes.
Press any panel button or send data to warm up the printer.
STARTUP ERROR [E]
To clear this error, press 4 to select LT paper. WAIT appears as
the printer returns to its default settings.
TRAY SET (paper source) (paper size) [E]
The paper size setting does not match the paper loaded in the
specified paper source. The right column of the display
indicates the expected paper size and the currently selected
paper source. You can either change the paper size setting or
load the correct paper size. After you correct the paper
mismatch, press
CONTINUE.
WAIT [S]
The printer is being reset after a STARTUP ERROR.
WARMING UP [S]
The printer is warming up. The amount of toner left in the
imaging cartridge is also displayed. For example: A full toner
amount is E*****F.
3-26 Troubleshooting
Page 79

Data Dump Mode
The data dump mode is a special feature that makes it easy for
experienced users to find the cause of communication problems
between the printer and computer. The data dump mode
produces an exact printout of the codes reaching the printer.
1.
Make sure that the printer is loaded with paper and turned
off.
2.
Hold down the
printer. Make sure you hold the button down until the
READY :X DUMP message appears. (X is the channel in
use.)
3.
Run any program that causes the printer to print (either an
application program or a program written in any
programming language). Your printer prints out all of the
codes sent to it in hexadecimal format as shown in the
sample below.
LEVEL 2
button while you turn on the
0001
0002
0003
0004
0005
0006
0007
0008
0009
000A
000B
000C
000D
000E
000F
********
1B 74011B5200 1B 321C261C6B 00
1B
40
1B 43461B 4A861B242C
78 00
001B21
5A
65 1B
1B 24 2C0054
74
1B 24B100 70
79
63 6F
640174
79
73 2E
6E 1B
63 75 72
62 65 73
00 1B 78
35 1B 4A 32 1B242C0054 72 6F 75 62 6C
00
245A0073686F6F 74696E
72 1B
65
75 1B24FC
6F
75 6E7465 721B244D01
686569
32 1B242C0073 6F 6C 75
1B 4A
1B 4A 32 1B242C
4D0065 72726F 72 1B
24
73 2C 1B 24 9E0079 6F 75 1B24B4
74 1B24D10073 6F 75 72 63 65 1B 24
HEX DUMP LIST
0143686170
68 69731B
24 77 006469
72 6F626C 656D73
006D61791B
72 1B
24 48 00
73 63 75
24 86016C
00 49 661B243C00
00
74
24
61
24
********
1C
2E 1B
65 72 1B
671B4A
636861
73 73 65 73
1B24E6
130165 6E
6E641B
69 6B
65 6C
74696F 6E
6F006F 63
Troubleshooting 3-27
.@.t..R..2.&.k..
1C
6B
x..CF.J..$,....k
1
.x.Chapter.$
24
Z.5,J2.$,.Troubl
5E
e.$Z.shooting.J^
70
.$,.This.$H.chap
ter.$w.discusses
.$..probLems.$..
00
you.$..may.$..en
24
counter.$M.and.$
d.their.$..likel
y.J2.$,.solution
61
s..J2.$,.If.$<.a
n.$M.error.$o.oc
00
curs,.$..you.$..
best.$..source.$
PAGE
1
Page 80

4.
To turn off the data dump mode and stop printing, press
ON LINE
while a page is being printed, the green
to set the printer off line. (If you press
ON LINE
ON LINE
light
flashes until the page is ejected and the printer goes off
line.) To exit the data dump mode, turn off the printer or
hold down the RESET button until INITIALIZE appears on
the display.
Look at the sample data dump printout shown in Step 3. By
reading the characters printed in the text field on the right side
of the data dump printout or the printout of hexadecimal
codes, you can check what codes are being sent to the printer.
In the text field, printable characters appear as their true ASCII
characters. Non-printable codes, such as control codes, are
represented by dots.
For example, look at the first two hexadecimal codes on line
0006 of the printout sample
(74
65). Code 74 represents the
letter t; code 65 represents the letter e. Check the seventh line of
the text field on the right side of the printout and you will find
the letter t followed by the letter e.
3-28 Troubleshooting
Page 81

Replacing the Imaging Cartridge
The imaging cartridge prints up to 6,000 pages depending upon
the complexity of your print jobs.
If your printed images become faint, enter the SelecType
Level 2 TONER option to find out approximately how much
toner remains in the imaging cartridge. Simply count the
asterisks between the E (empty) and the F (full). Each asterisk
represents up to 20% of the total toner capacity. When you see
only one asterisk on the SelecType TONER message indicating
that there is less than 20% toner left, you should replace the
imaging cartridge.
WARNING:
Q
Do not touch the fuser, which is marked with a
HOT SURFACE
1.
Turn on the printer.
label.
CAUTION
Note:
If you replace the cartridge when the power is off, you must
change the TONER setting to
turn on the printer. See steps 7 and 8 later in this section.
NEW
using SelecType when you
Troubleshooting 3-29
Page 82

2.
Gently open the printer cover and remove the imaging
cartridge by pulling it toward you.
3.
Dispose of the imaging cartridge with nonburnable items.
CAUTION:
Do not turn the imaging cartridge upside down.
Do not expose the imaging cartridge to light any longer
than necessary.
4. While holding the new imaging cartridge horizontally, gently
shake it side to side a few times to distribute the toner evenly.
3-30 Troubleshooting
Page 83

5.
Firmly grip the tab on the left side of the imaging cartridge.
Pull the clear seal all the way out with firm, even pressure.
6.
Hold the cartridge and gently shake it front to back.
7.
Insert the cartridge by placing the pins on each side of the
cartridge into the grooves inside the printer. Slide it gently
into the opening until it stops. Leave the cover open.
Troubleshooting 3-31
Page 84

8.
Next you reset the TONER setting. Three messages flash in
rotation on the display:
NEW CARTRIDGE?
YES, PRESS RESET
NO, PRESS CONTINUE.
9.
Press
RESET
10. Gently press down on the printer cover until it clicks shut.
to change the TONER setting to
NEW (full).
Please note: If you replace the cartridge when greater than 20%
toner is left, the three rotating messages do not appear. Instead
COVER OPEN E”*
SelecType Level 2 TONER option to change the setting to
If you do not change the TONER setting to
the cartridge, the TONER message will not be correct. Also
NEW CARTRIDGE?
Note:
F
(two or more asterisks) appears. Use the
N E W.
NEW
after replacing
appears even if the toner level is full.
Each time you replace the cartridge, print a feature print to be sure
the print quality is satisfactory and that you installed the cartridge
properly. See “Test printing” in the Setup and Maintenance guide.
3-32 Troubleshooting
Page 85

Chapter 4
SelecType
SelecType Overview
Using SelecType
The control panel
The display
Buttons
.............................
SelecType tutorial
Options
................................
AUTO CONT.
CH TIMEOUT
COPIES
DENSITY
.............................
............................
EMULATION
FEATURE PRINT
FONT
..............................
FONT SAMPLE
FULL PRINT
INPUT
..............................
INTERFACE
LANG
...............................
........................
...........................
.......................
...........................
.......................
.........................
.........................
.........................
.......................
........................
..........................
..........................
MACRO .............................
MEMORY LEFT
OFFSET
ORIENT.
.............................
............................
PAGE COUNTER
PAGE SIZE
RITech
..............................
RX-BUFFER SIZE
STANDBY
STATUSSHEET..
SUB CONFIG.
SYSTEM CONFIG.
TONER
USER
.............................
..............................
VERSION..
........................
.......................
...........................
.......................
...........................
......................
.........................
.......................
..........................
4-2
4-3
4-3
4-3
4-4
4-5
4-7
4-8
4-8
4-8
4-9
4-9
4-11
4-11
4-11
4-12
4-13
4-14
4-18
4-18
4-20
4-21
4-21
4-22
4-22
4-23
4-23
4-25
4-25
4-25
4-26
4-26
4-27
4-30
SelecType 4-1
Page 86

SelecType Overview
The SelecType function on the printer control panel lets you
control most of the printer’s functions, such as printing test
pages, selecting paper size, and changing the printer’s
configuration.
At the back of this guide, you’ll find a Quick Reference card that
includes a map of all the SelecType menus and options.
To view the current SelecType settings, print the status sheet as
described later in this chapter.
You can test many of these options by setting them, and
then performing a DOS Print Screen. See “Testing the
computer-to-printer connection” in your Setup and Maintenance
guide.
Your application program settings usually override the
SelecType settings. Therefore, use application program settings
whenever possible.
4-2
SelecType
Page 87

Using SelecType
This section explains how to use SelecType.
The control panel
The control panel contains the display, two SelecType buttons,
one
ON LINE/EXIT
function/arrow buttons.
button, three indicator lights, and four
LEVEL 1
INITIALIZE
RESET
LEVEL 2 EXIT
0
COPY END CONTINUE FEED
0
The display
When you enter SelecType, menus and options appear on the
display. The display shows SelecType menu titles on the left
side and options for each menu on the right side.
SelecType 4-3
Page 88

The display also uses the icons shown below:
This icon to the left of an option indicates that
you can press either A or V to view other
options in the menu.
This icon to the left of an option indicates it is
the current selection. You can use A or v to
view other options.
b
This icon indicates that you can press F to enter
a submenu, select an option, set an option, or
execute an action.
Buttons
LEVEL 1
LEVEL2
EXIT
Use the arrow buttons to move through menus and to select,
display, set, or execute SelecType options.
A ‘I
Enter SelecType Level 1.
Enter SelecType Level 2.
Exit SelecType Level 1 or Level 2.
Enter a submenu, set an option, or select or
execute an action.
Return to the main menu.
Display options in the same menu. You can view
the options one at a time by pressing the
buttons once or you can scroll through them
quickly by holding down one of these buttons.
4-4 SelecType
Page 89

SelecType tutorial
1.
Note that the first thing you will see on the display before
entering SelecType is:
READY
For the ActionLaser 1500, you will see READY:P 3/P/Si.
Make a note of the interface channel, for example,
P=parallel. You may need this information later.
2.
Press the
3.
The main menu option appears. The b icon indicates that
you can enter the submenu by pressing . In many cases,
the display also shows the current setting, as shown below.
+
INPUT
4.
Enter the options submenu by pressing ) .
INPUT + AUTO LT b SET
+
indicates the option is selected.
5.
Display the other submenu options by pressing A or v .
INPUT
: P LJ-2P
LEVEL1
4
button to enter SelecType Level 1.
AUTO LT
STD
b
SET
b
#
indicates the option is not selected. The message on the
right, b
by pressing b .
SET,
indicates you can select the option displayed
SelecType 4-5
Page 90

In the INPUT submenu, you can display any of the options
listed below.
AUTO
STD
OPT
OPT
appears only when you have installed the optional
lower paper cassette unit.
Note:
Although the main menu options are the same for all printer
emulations, some Level 1 submenu options are different in each
emulation. See the Appendix that describes the printer emulation
you are using for a description of the submenu options for that
emulation.
6.
When you reach the option you want to select, press F to
set the option. SET disappears from the display and
the ) icon moves to the right of the display indicating that
the new option has been selected.
At the same time, 4 moves to the left of the main menu
option, indicating that you are back in the main menu.
Note:
If you want to return to the main menu at any time without
changing
7.
Exit SelecType. To exit SelecType from any main menu or
submenu, press the
READY message.
4-6 SelecType
+
INPUT STD
b
a setting, press 4 to exit the submenu.
EXIT
button. The display shows the
Page 91

Note:
Once you set an option, the setting remains in effect until you change
it again or turn off the printer. If you want a setting to remain in
effect even when you turn the printer off and on, you can use the
SYSTEM CONFIG. option to save Level 1 settings. See ‘MACRO”
later in this chapter. Level 2 settings are saved automatically when
you exit Level 2.
Options
This section lists all the menus and options available. Most
menus and options are the same in the different printer
emulations. However, some have a different function for each
emulation. These menus are listed in the appendix that
describes the printer emulation. See the Quick Reference card at
the back of this Reference Guide for a map of all SelecType
menus and options.
When you enter SelecType Level 1, you see one of these options:
INPUT
PAGE SIZE
COPIES
ORIENT.
FONT
When you enter SelecType Level
FEATURE PRINT LANG.
EMULATION DENSITY
INTERFACE TONER
RX-BUFFER SIZE VERSION
USER
CH TIMEOUT
AUTO CONT. STANDBY
STATUS SHEET
FONT SAMPLE
SUB CONFIG.
SYSTEM CONFIG.
PAGE COUNTER
RITech
2,
you see one of these options:
SelecType 4-7
Page 92

AUTO CONT.
This Level 2 option permits the printer to automatically
continue printing after a certain period of time when one of the
following errors occurs: SET FULL PRINT, PAGE BUFFER
FULL, PAPER SIZE ERROR, TRAY SET XXX, INSUFF
MEMORY, and SPL IGNORED. When this option is OFF, you
must press the
cases, leave this option set to OFF.
Menu/submenu Available options
4
AUTO CONT.
CONTINUE
button to resume printing. In most
OFF b ON or OFF
CH TIMEOUT
This Level 2 option sets the time for a channel timeout. If the
printer is on line and receives no new data for the number of
seconds specified, and if there is data in another channel, the
printer automatically switches to the channel with data. The
factory setting is 60.
Menu/submenu
:
CH TIMEOUT 60
Available options
b
10 to 600 (in increments of 10)
COPIES
This Level 1 option selects the number of copies to be printed
up to 999. The factory setting is 1. If you select a number greater
than one, the display keeps count of the number of copies
completed and the current setting. For example, if you set the
COPIES option to 10 and five copies have been printed, the
display shows 5/l0.
Menu/submenu
0
COPIES
4-8 SelecType
1
Available options
b
1 to 999
Page 93

DENSITY
Use this Level 2 option to adjust the print density if your print
is too light or too dark. Use 1 or 2 asterisks to lighten a dark
image. Use 4 or 5 asterisks to darken a light image. The default
setting is 3 asterisks.
Menu/submenu Available options
4
DENSITY L*** D b L*****D
L****D
L***D
L**D
L*D
Note:
Increasing the print density increases toner consumption. If you
select darker print, you may need to replace the imaging cartridge
more often.
EMULATION
This Level 2 option selects the printer emulation for each
interface you are using. The ActionLaser l000 default is LJ-2P
and the ActionLaser 1500 default is 3/P/Si. For more
information on each printer emulation, see Appendixes B
and C. After EMULATION appears, press b once to see the
following display:
Menu/submenu
4CH
P
LJ-2P
Available options
b
CH P (Parallel) LJ-2P or 3/P/Si
CH S (Serial) 3/P/Si
(ActionLaser 1500 only)
CH O (Optional) LJ-2P or 3/P/Si
SelecType 4-9
Page 94

First select the interface (P, S, or 0) by pressing v . Then
press ) to display the next emulation. The following appears:
Menu/submenu
b
CH P
The ActionLaser 1000 resident emulations are LJ-2P, LQ, and
FX. The ActionLaser 1500 resident emulations are 3/P/Si, LQ,
FX, and GL/2. The other emulations, Epson GL and I’S, appear
on the display if the corresponding identity card is installed. In
addition, if you have an ActionLaser 1000, the optional
PCL5/RITech board must be installed for 3/P/Si and Epson
GL/2 to appear.
LJ-2P
SET
Available options
LJ-2P
(ActionLaser 1000 only)
LQ
FX
3/P/Si
(ActionLaser 1500 only)
Epson GL
PS
Epson GL/2
(ActionLaser 1500 only)
PS&3/P/Si (IES setting)
PS&LJ-2P (IES setting)
PS&LQ (IES setting)
PS&FX (IES setting)
PS&GL/2 (IFS setting)
Note:
When you are using a program you developed that sends PostScript
files, be sure that data is followed by a Ctrl-D (^D). Otherwise, the
printer does not switch the emulation properly with the Intelligent
Emulation Switchfeature. You cannot perform a DOS Print Screen
in the PostScript mode.
4-10 SelecType
Page 95

FEATURE PRINT
You can use this Level 2 option to print out the printer’s
features to check whether your printer is working correctly.
Menu/submenu Available options
$
FEATURE PRINT
Press ) to print out the feature page.
After you print the feature print, SelecType Level settings
return to their defaults and the printer clears its memory,
including any downloaded font data.
b
b
PRINT
FONT
This Level 1 option selects one of the fonts available in the
current printer emulation. See Appendixes B and C in this
Reference Guide for information on the printer emulation you
are using.
FONT SAMPLE
This Level 1 option prints a sample of the fonts available for
your selected printer emulation. The portrait fonts and
landscape fonts are printed on different pages. Press F twice to
print the font sample.
Menu/submenu
0
FONT SAMPLE
Available options
b
b PRINT
SelecType 4-11
Page 96

FULL PRINT
This Level 1 option is a submenu of SYSTEM CONFIG. The
default setting of 0 is sufficient for most uses of the printer. If
the printer displays the message S
this setting. The setting (any number from 0 through 62) times
20 is the number of kilobytes (KB) reserved in RAM for page
composition. For example, a setting of 5 reserves 100KB.
ET F U L L P RI NT,
increase
Menu/submenu
4
FULL PRINT 0 b 0 to 62
Available options
The following table shows the maximum setting necessary for
each size of paper. The setting may be lower than the
maximum, but it will never need to be higher.
GLT
45
C5
38
Since the amount of RAM you reserve with this option is not
available for any other purpose, it is best to leave the setting at
0 until you see a SET FULL PRlNT message. Then, increase the
setting in small increments until the error does not occur.
4-12
SelecType
Page 97

If FULL PRINT is set to the maximum value, the printer does
not display the SET FULL PRINT error. If an INSUFF MEMORY
or PAGE BUFFER FULL message appears, you must install
optional memory. See Chapter 5 for information on installing
memory chip sets.
INPUT
This Level 1 option selects whether paper feeds into the printer
from the standard paper bin or the optional lower paper
cassette.
Menu/submenu
:
INPUT
If you choose STD, the printer loads paper from the standard
paper bin.
If you choose OPT, the printer loads paper from the optional
lower paper cassette. OPT appears as an option on the display
only if you install the optional lower paper cassette unit.
If you choose AUTO, the printer loads paper from the paper
cassette containing the size of paper specified by the PAGE
SIZE option. If both cassettes contain the specified paper size,
the printer loads paper from the standard paper bin until it is
empty, then switches to the lower paper cassette. You may
print up to 400 sheets continuously.
If the paper in either the bin or the cassette does not match the
paper size set with the PAGE SIZE option, the printer returns a
paper size error. Correct the setting or load the correct size
paper.
AUTO LT b AUTO
Available options
ST D
(Standard)
OPT
(Optional)
SelecType 4-13
Page 98

INTERFACE
This Level 2 option allows you to change settings for the
built-in interfaces, parallel and serial. This option is not
available for channel 0.
Menu/submenu
4
INTERFACE
Available options
b P (Parallel)
S (Serial) (ActionLaser 1500 only)
The PARALLEL option has these three submenus:
Menu/submenu
4
CH P CONFIG.
Available options
b
SLCTIN
AUTOFEED
BUSY DELAY
Normally, you do not need to change these settings. Change
them only when you have special requirements.
SLCT-IN-When you set SLCT-IN to OFF, the printer is
continuously selected and ignores device control codes DC1
and DC3. In almost all cases, leave SLCT-IN set to OFF. When
SLCT-IN is ON, the SLCT-IN signal goes HIGH at power-on
and the control codes DC1 and DC3 are valid.
Menu/submenu
4
SLCT-IN
OFF b ON or OFF
Available options
AUTOFEED-When you set AUTOFEED to OFF, the printer
ignores the AUTOFEED signal on pin 14 and does not send an
automatic line feed (LF) command with each carriage return
(CR). When you set AUTOFEED to ON, the printer adds a line
feed to each carriage return it receives. If your text lines
overprint each other, set AUTOFEED to ON.
Menu/submenu
:
AUTOFEED
4-14 SelecType
Available options
OFF b ON or OFF
Page 99

BUSY DELAY-Use BUSY DELAY to set the delay period from
the ACKNLG to the BUSY signal. Available settings are 0, -5,
and +5 microseconds plus MIN. The MIN option sets the
ACKNLG signal to high.
Menu/submenu
#
BUSY DELAY
0 b -5, 0, +5, or MIN
Available options
The SERIAL option has these nine submenus:
Menu/submenu
4
CH S CONFIG.
Available options
b
WORD LENGTH
BAUDRATE
PARITY
STOP BIT
DTR
XON/XOFF
ENQ/ACK
DSR
CTS
These settings must match the settings your computer is using.
Check your computer’s manual.
WORD LENGTH-You can select 8-bit word length or 7-bit
word length. See your computer manual and software
documentation for the proper setting. The factory setting is
&bit.
Menu/submenu Available options
4
WORD LENGTH 8 b 7 or 8
SelecType 4-15
Page 100

BAUDRATE-Use this option to set the data transfer rate
(baud) for the serial interface. The baud rate is measured in bits
per second (bps). See your computer manual and software
documentation for the proper setting. The factory setting is
9600.
Menu/submenu
4
BAUDRATE
9600 b
Available options
300
600
1200
2400
4800
9600
19200
38400
PARITY-When this option is set to NONE, parity checking is
disabled. The parity bit, if used, provides a basic form of error
detection. See your computer manual and software
documentation for the proper setting.
Menu/submenu
4
PARITY
NONE b NONE
Available options
EVEN
ODD
STOP BIT-Use this option to set the number of stop bits on
each character of information sent to the printer. Stop bits
signal the end of a character.
Menu/submenu
0
STOP BIT
4-16 SelecType
Available options
2
b
1 or 2
 Loading...