

EnGenius EP800, FreeStyl 2 Quick Installation Manual
1
EP800 Quick Installation Guide English
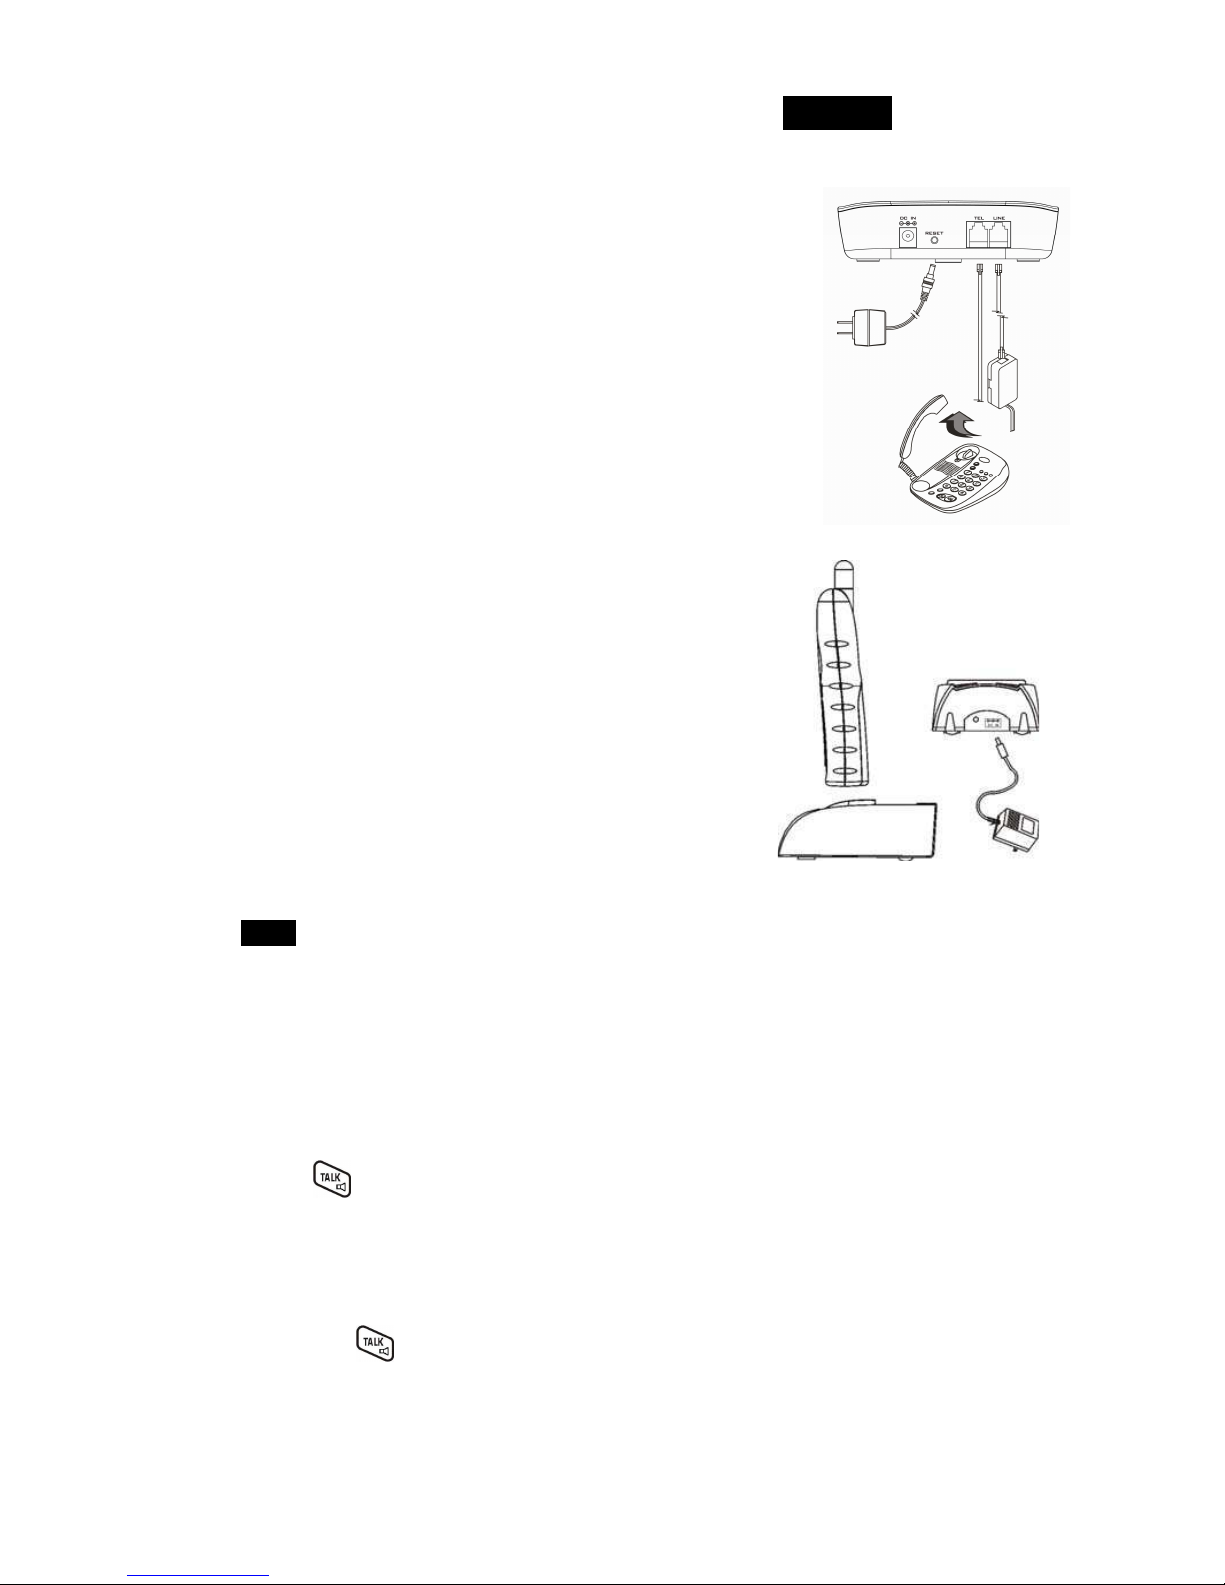
Base Station Installation
1. Install base station antenna.
2. Plug the transformer end of the base station AC/DC adaptor into a
standard AC electrical power outlet, plug the other end into the “DC In”
jack on the back of the base station.
3. Plug phone cord into the “LINE” Jack.
4. A standard telephone or answering machine can be plugged into the
adjacent receptacle on the bottom of the base station marked TEL.
Handset and Charger Installation (Charger only for EP800H)
1. Plug the transformer end of the Charger AC/DC adaptor into a
standard AC electric power outlet, plug the other end into the “DC In”
jack on the back of the Charger.
2. Install battery pack onto the handset.
3. Install handset antenna.
4. Place handset onto the charger front slot.
5. Fully charge the battery for three hours before use.
6. The phone system is now ready to perform basic functions such as
making and receiving phone calls and
intercom calls. No base station
or handset programming is needed for basic operations.
Handset Registration
1. Press MENU-7 to enter the registration mode
2. Press and hold the base’s PAGE button for 3 seconds until the In Use LED (white color) lighting up and
flashing, also the base station will emit prompt sound to remind you the base station is in the registration
mode.
3. Press handset key “1”, this completes the registration process. The base station will assign a handset
ID between 12 and 19 automatically. The assigned ID will be displayed on the handset LCD, indicating
successful registration.
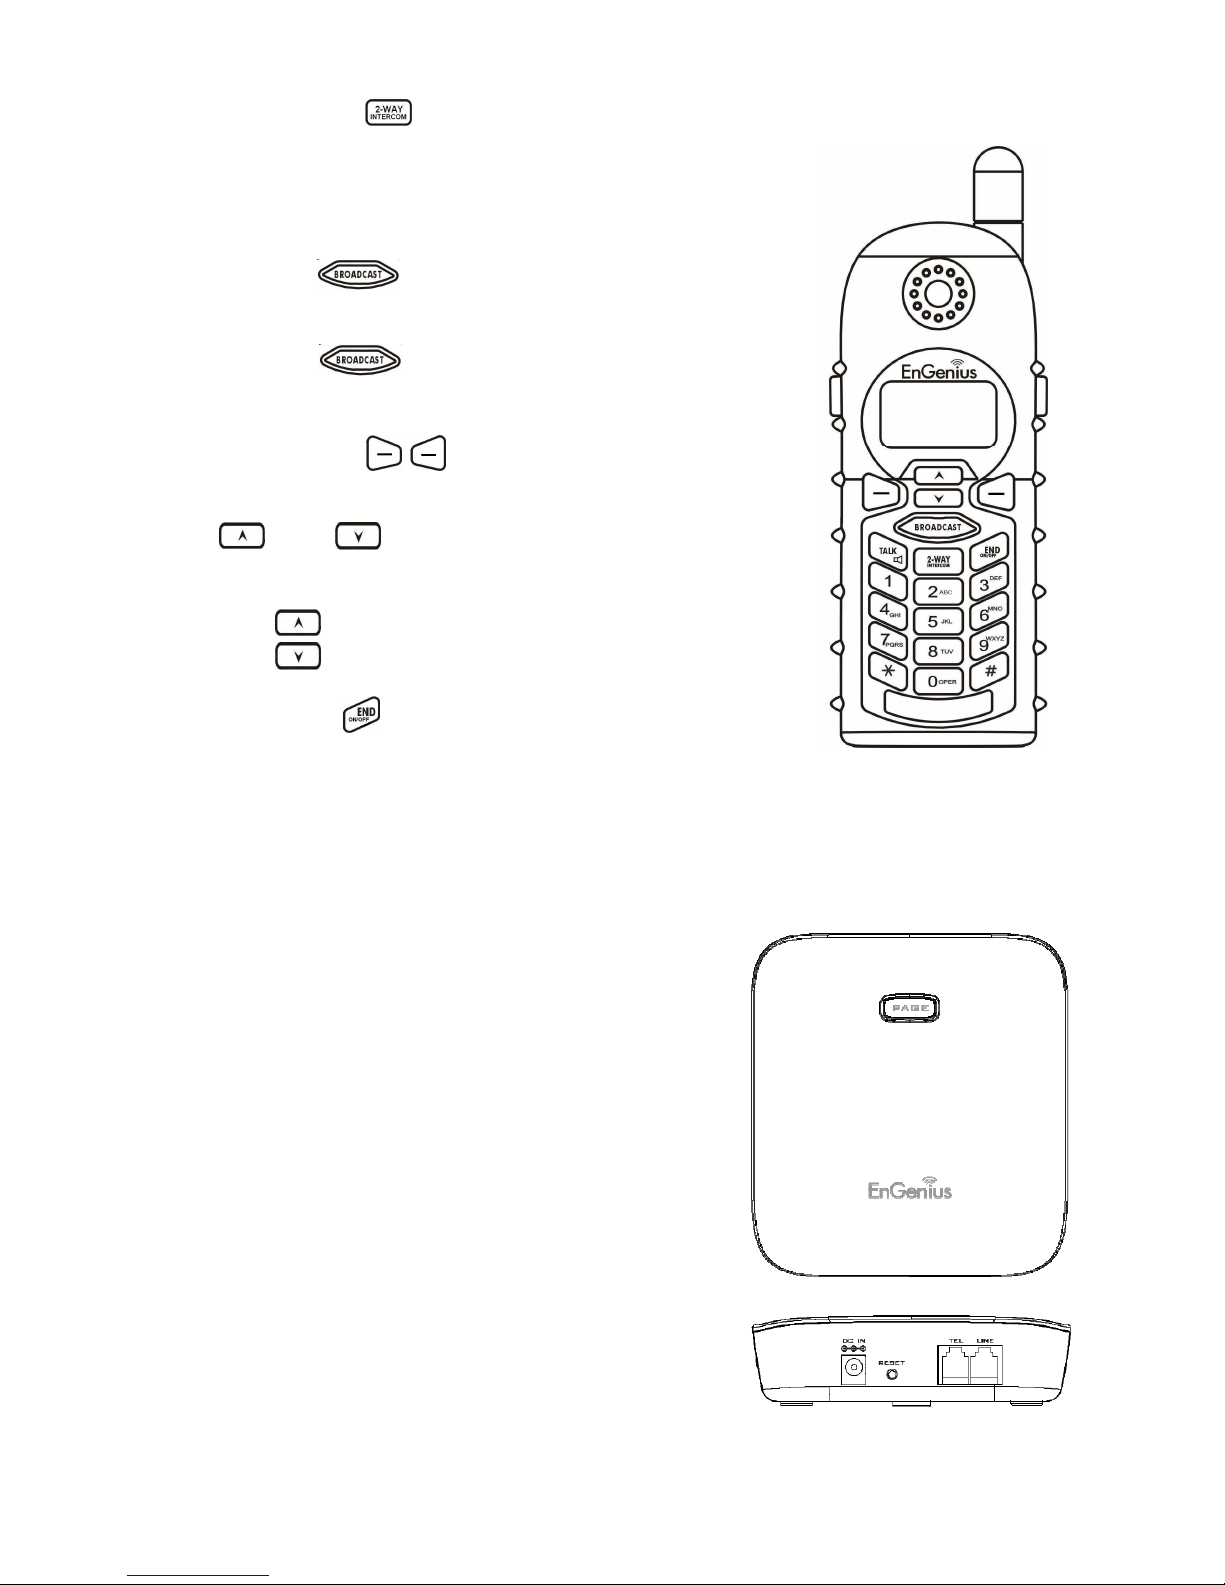
Handset features
1.
TALK/FLASH ( )
a. Places or answers a telephone or intercom call
b. Sends a Flash signal to phone line to retrieve a dial tone after the call
ends, or to perform the call waiting feature provided by local phone
companies during a call.
2.
SPEAKERPHONE ( )
Press and hold the key for over 2 second to enable/disable the
speakerphone during incoming, outgoing or intercom call.
2
3.
2-WAY INTERCOM ( )
a. Places an intercom call to another handset, a group handset (group
paging) or all registered handsets.
b. Intercom calls are digital, full duplex, and are conducted without the
assistance from the base station.
4.
BROADCAST ( )
a. Half duplex broadcasting to handsets for immediate announcement
b. Half duplex broadcasting to base stations
Re:Press the
key on the left top corner of handset to activate
the broadcast function.
5.
Left/Right Soft Keys (
)
a. Make menu selection.
6.
Up( ) /Down( ) Scrolling Keys
a. Scroll through records and menu selections.
b. Adjust receiver voice volume when in the Talk mode.
c.
Press to review call log when in the Standby mode.
d.
Press to enter phonebook when in the Standby mode.
7.
END; On/Off Key ( )
a. Ends a call.
b. Leaves current menu operation, up one level.
c. Press for 3 seconds to off the power
Base Features
1. Reset Button (RESET)
a. Restores base station to factory settings
b. Reset button is intended to prevent accidental system
reset.
c. All handsets (including administrator) and additional
base(s) need to be re-registered after a base station reset.
2. Page Button (PAGE)
To search a misplaced handset; press “PAGE” button, all
registered handsets beep for 30 seconds.
Press “PAGE” again or any key on handset to stop.
3. Registration Button (PAGE)
Enters registration mode along with handset, assigns handset
ID (11-19).
4. Line Jack
Standard RJ-11C/CA-11A connector to plug in the telephone
line
5. Telephone Jack
Another RJ-11C to plug in the optional answering machine
6. DC In: to plug in the power adaptor
 Loading...