

Page 1
“EMERSON AND THE G-CLEF LOGO ARE REGISTERED
TRADEMARKS OF EMERSON RADIO CORP.,
PARSIPPANY, NEW JERSEY, U.S.A.”
FEATURES
●
MTS/SAP Tuner
●
181 Channel Selection- All VHF/UHF channels plus up to 125 cable channels.
●
PLL Frequency Synthesized Tuning- Provides free and easy channel selection and lets
you tune directly to any channel using the channel number buttons on the remote control.
●
Sleep Timer
●
Closed Caption Decoder
●
Auto Shut Off Function- If there is no signal input from the antenna terminal and no user
operation for 15 minutes, the TV will turn itself off automatically.
●
V-CHIP- Enables parents to prevent their children from watching inappropriate material on TV.
●
Full-Function Remote Control
●
On-Screen Function Display
●
S-VIDEO Input- Allows you to get better picture detail and clarity.
●
Component Input
Note to CATV system installer:
This reminder is provided to call the CATV system installer's attention to Article 820-40 of the NEC that
provides guidelines for proper grounding and, in particular, specifies that the cable ground shall be connected to the grounding system of the building as close to the point of cable entry as practical.
FCC WARNING- This equipment may
generate or use radio frequency energy.
Changes or modifications to this equipment may cause harmful interference
unless the modifications are expressly
approved in the instruction manual.
The user could lose the authority to
operate this equipment if an unauthorized change or modification is made.
IF YOU NEED ADDITIONAL ASSISTANCE WITH SET-UP OR OPERATING AFTER
READING OWNER’S MANUAL, PLEASE CALL TOLL FREE
1-800-256-2487 OR
VISIT OUR WEB SITE AT
http://www.EmersonAudioVideo.com.
Owner’s Manual
Printed in U.S.A.
L3202UC * * * *
EWL2005
20 INCH LCD TELEVISION
(Photo Stand Type)
WARNING:
TO REDUCE THE RISK OF FIRE OR ELECTRIC SHOCK, DO NOT EXPOSE THIS APPLIANCE TO RAIN OR MOISTURE.
IMPORTANT SAFEGUARDS
CAUTION: TO REDUCE THE RISK OF ELECTRIC
SHOCK, DO NOT REMOVE COVER (OR BACK) NO
USER SERVICEABLE PARTS INSIDE. REFER SERVICING TO QUALIFIED SERVICE PERSONNEL.
CAUTION
RISK OF ELECTRIC SHOCK
DO NOT OPEN
THIS SYMBOL INDICATES THAT DANGEROUS VOLTAGE CONSTITUTING A
RISK OF ELECTRIC SHOCK IS PRESENT WITHIN THIS UNIT.
THIS SYMBOL INDICATES THAT
THERE ARE IMPORTANT OPERATING
AND MAINTENANCE INSTRUCTIONS
IN THE LITERATURE ACCOMPANYING
THE APPLIANCE.
The important note is located on the rear of the cabinet.
1. READ INSTRUCTIONS-All the safety and operating
instructions should be read before the appliance is
operated.
2. RETAIN INSTRUCTIONS-The safety and operating
instructions should be retained for future reference.
3. HEED WARNINGS-All warnings on the appliance and
in the operating instructions should be adhered to.
4. FOLLOW INSTRUCTIONS-All operating and use
instructions should be followed.
5. CLEANING-Unplug TV from the wall outlet before
cleaning. Do not use liquid cleaners or aerosol cleaners. Use a damp cloth for cleaning.
EXCEPTION: A product that is meant for uninterrupted service and, that for some specific reason, such as
the possibility of the loss of an authorization code for a
CATV converter, is not intended to be unplugged by
the user for cleaning or any other purpose, may
exclude the reference to unplugging the appliance in
the cleaning description otherwise required in item 5.
6. ATTACHMENTS-Do not use attachments not recommended by the TV manufacturer as they may cause
hazards.
7. WATER AND MOISTURE-Do not use this TV near
water, for example, near a bath tub, wash bowl, kitchen
sink, or laundry tub, in a wet basement, or near a
swimming pool, and the like.
8. ACCESSORIES-Do not place this TV
on an unstable cart, stand, tripod,
bracket, or table. The TV may fall,
causing serious injury to someone,
and serious damage to the appliance.
Use only with a cart, stand, tripod,
bracket, or table recommended by the
manufacturer, or sold with the TV.
Any mounting of the appliance should follow the manufacturer’s instructions and should use a mounting
accessory recommended by the manufacturer. An appliance and cart combination should be moved with care.
Quick stops, excessive force, and uneven surfaces may
cause the appliance and cart combination to overturn.
9. VENTILATION-Slots and openings in the cabinet and
the back or bottom are provided for ventilation and to
ensure reliable operation of the TV and to protect it
from overheating, these openings must not be blocked
or covered. The openings should never be blocked by
placing the TV on a bed, sofa, rug, or other similar surface. This TV should never be placed near or over a
radiator or heat register. This TV should not be placed
in a built-in installation such as a bookcase or rack
unless proper ventilation is provided or the manufacturer’s instructions have been adhered to.
10. POWER SOURCES-This TV should be operated only
from the type of power source indicated on the marking label. If you are not sure of the type of power supply to your home, consult your appliance dealer or
local power company. For TVs intended to operate
from battery power, or other sources, refer to the operating instructions.
11. GROUNDING OR POLARIZATION-This TV is
equipped with a polarized alternating-current line
plug(a plug having one blade wider than the other).
This plug will fit into the power outlet only one way.
This is a safety feature. If you are unable to insert the
plug fully into the outlet, try reversing the plug. If the
plug should still fail to fit, contact your electrician to
replace your obsolete outlet. Do not defeat the safety
purpose of the polarized plug.
12. POWER-CORD PROTECTION-Power-supply cords
should be routed so that they are not likely to be
walked on or pinched by items placed upon or against
them, paying particular attention to cords at plugs, convenience receptacles, and the point where they exit
from the appliance.
13. OUTDOOR ANTENNA GROUNDING-If an outside
antenna or cable system is connected to the TV, be sure
the antenna or cable system is grounded so as to provide some protection against voltage surges and builtup static charges. Article 810 of the National Electrical
Code, ANSI/NFPA No. 70, provides information with
respect to proper grounding of the mast and supporting
structure, grounding of the lead-in wire to an antenna
discharge unit, size of grounding conductors, location
of antenna-discharge unit, connection to grounding
electrodes, and requirements for the grounding electrode. (Fig. A)
14. LIGHTNING-For added protection for this TV receiver during a lightning storm, or when it is left unattended and unused for long periods of time, unplug it from
the wall outlet and disconnect the antenna or cable system. This will prevent damage to the TV due to lightning and power-line surges.
15. POWER LINES-An outside antenna system should not
be located in the vicinity of overhead power lines or
other electric light of power circuits, or where it can
fall into such power lines or circuits. When installing
an outside antenna system, extreme care should be
taken to keep from touching such power lines or circuits as contact with them might be fatal.
16. OVERLOADING-Do not overload wall outlets and
extension cords as this can result in a risk of fire or
electric shock.
17. OBJECT AND LIQUID ENTRY-Never push objects
of any kind into this TV through openings as they may
touch dangerous voltage points or short out parts that
could result in a fire or electric shock. Never spill liquid of any kind on the TV.
18. SERVICING-Do not attempt to service this TV yourself as opening or removing covers may expose you to
dangerous voltage or other hazards. Refer all servicing
to qualified service personnel.
19. DAMAGE REQUIRING SERVICE-Unplug this TV
from the wall outlet and refer servicing to qualified
service personnel under the following conditions:
a. When the power supply cord or plug is damaged or
frayed.
b. If liquid has been spilled, or objects have fallen into
the TV.
c. If the TV has been exposed to rain or water.
d. If the TV does not operate normally by following the
operating instructions. Adjust only those controls that
are covered by the operating instructions, as improper
adjustment of other controls may result in damage and
will often require extensive work by a qualified technician to restore the TV to its normal operation.
e. If the TV has been dropped or damaged in any way.
f. When the TV exhibits a distinct change in perfor-
mance, this indicates a need for service.
20. REPLACEMENT PARTS-When replacement parts are
required, be sure the service technician uses replacement parts specified by the manufacturer that have the
same characteristics as the original part. Unauthorized
substitutions may result in fire, electric shock, injury to
persons or other hazards.
21. SAFETY CHECK-Upon completion of any service or
repairs to this TV, ask the service technician to perform
routine safety checks to determine that the TV is in
proper operating condition.
22. HEAT-This TV product should be situated away from
heat sources such as radiators, heat registers, stoves, or
other products (including amplifiers) that produce heat.
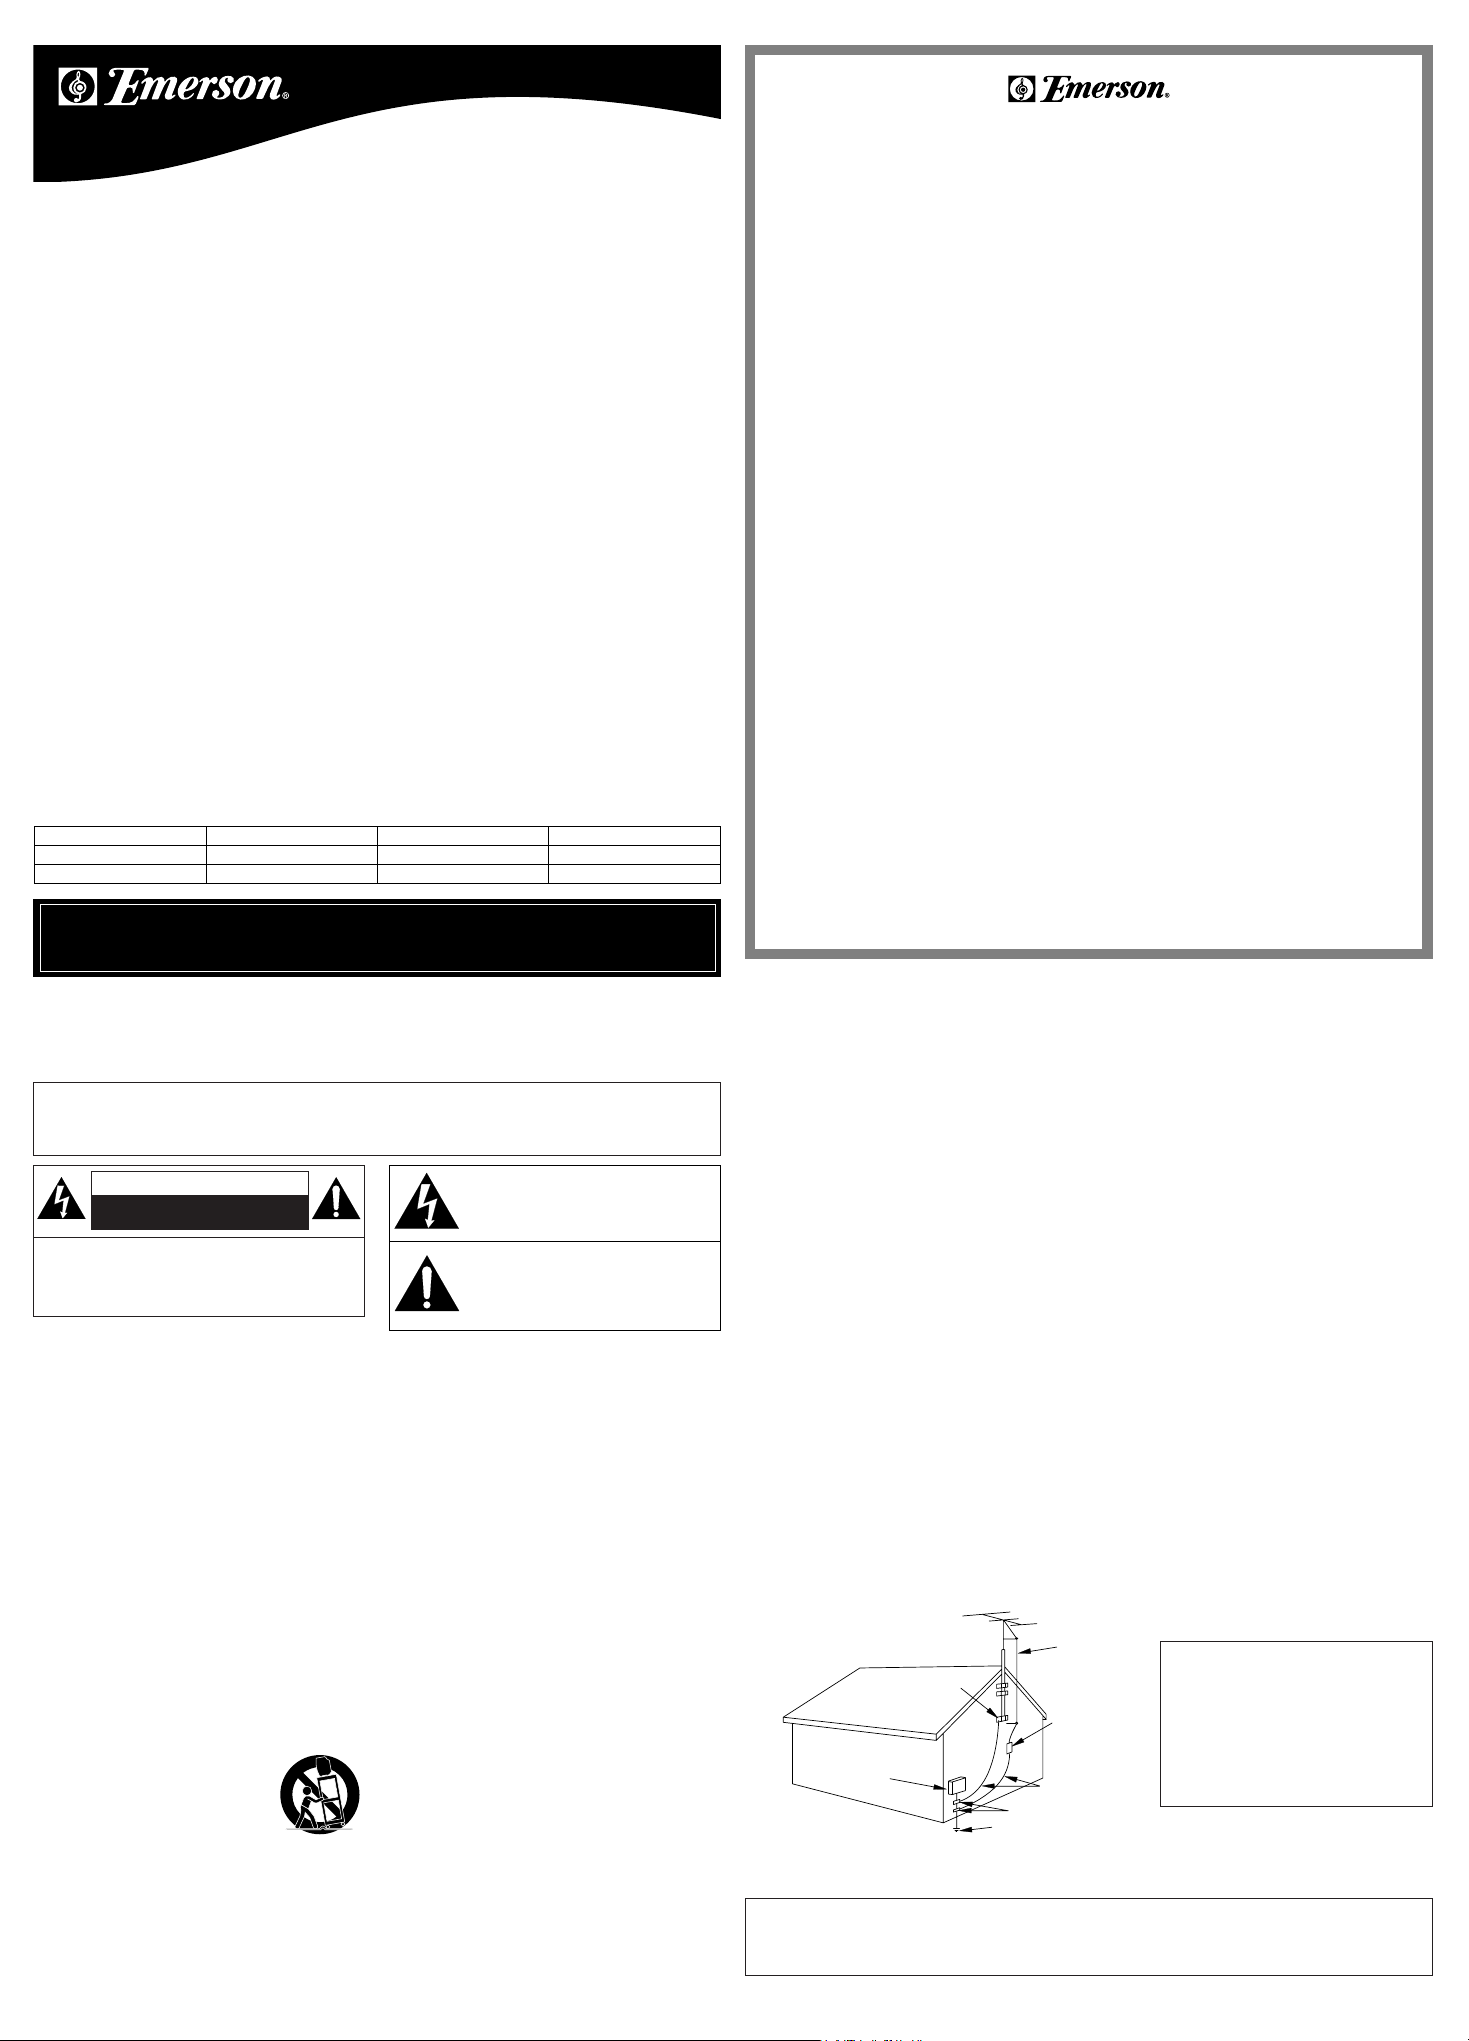
FIGURE A
EXAMPLE OF ANTENNA GROUNDING AS PER
NATIONAL ELECTRICAL CODE
ELECTRIC
SERVICE
EQUIPMENT
GROUND
CLAMP
NEC - NATIONAL ELECTRICAL CODE POWER SERVICE GROUNDING
ELECTRODE SYSTEM
(NEC ART 250, PART H)
S2898A
GROUND CLAMPS
GROUNDING CONDUCTORS
(NEC SECTION 810-21)
ANTENNA
DISCHARGE UNIT
(NEC SECTION 810-20)
ANTENNA
LEAD IN
WIRE
PRECAUTIONS
●
Place your TV in a room with adequate ventilation.
●
Keep your TV set away from sources of direct heat, such as heat registers or direct sunlight.
●
Do not place your TV on soft surfaces, such as rugs or blankets.
●
Leave enough room for air to circulate around the bottom, top and back of the set.
The serial number of this product may be found on the back of the TV. No others have the same
serial number as yours. You should record the number and other vital information here and retain
this book as a permanent record of your purchase to aid identification in case of theft.
LIMITED WARRANTY
FUNAI CORP. will repair this product, free of charge in CANADA in the event of defect in materials or workmanship as follows:
DURATION :
PAR TS : FUNAI CORP. will provide parts to replace defective parts without charge for one (1) year from the date
of original retail purchase. Certain parts and LCD image burn-in are not covered under this warranty.
LABOR : FUNAI CORP. will provide the labor without charge for a period of ninety (90) days from the date of
original retail purchase.
LIMITS AND EXCLUSIONS :
THIS WARRANTY IS EXTENDED ONLY TO THE ORIGINAL RETAIL PURCHASER. APURCHASE RECEIPT
OR OTHER PROOF OF ORIGINAL RETAIL PURCHASE WILL BE REQUIRED TOGETHER WITH THE
PRODUCT TO OBTAIN SERVICE UNDER THIS WARRANTY.
This warranty shall not be extended to any other person or transferee.
This warranty is void and of no effect if any serial numbers on the product are altered, replaced, defaced, missing or
if service was attempted by AUTHORIZED SERVICE CENTER. This limited warranty does not apply to any product
not purchased and used in CANADA.
This warranty only covers failures due to defects in material or workmanship which occurs during normal use. It does
not cover damage which occurs in shipment, or failures which are caused by repairs, alterations or product not supplied by FUNAI CORP., or damage which results from accident, misuse, abuse, mishandling, misapplication, alteration, faulty installation, improper maintenance, commercial use such as hotel, rental or office use of this product or
damage which results from fire, flood, lightning or other acts of God.
THIS WARRANTY DOES NOT COVER PACKING MATERIALS, ANY ACCESSORIES (EXCEPT REMOTE
CONTROL), ANY COSMETIC PARTS, COMPLETE ASSEMBLY PARTS, DEMO OR FLOOR MODELS.
FUNAI CORP. AND ITS REPRESENTATIVES OR AGENTS SHALL IN NO EVENT BE LIABLE FOR ANY
GENERAL, INDIRECT OR CONSEQUENTIAL DAMAGES ARISING OUT OF OR OCCASIONED BY THE
USE OF OR THE INABILITY TO USE THIS PRODUCT. THIS WARRANTY IS MADE IN LIEU OF ALL
OTHER WARRANTIES, EXPRESS OR IMPLIED,AND OF ALL OTHER LIABILITIES ON THE PART OF
FUNAI, ALL OTHER WARRANTIES INCLUDING THE WARRANTY OF MERCHANTABILITY AND FITNESS
FOR A PARTICULAR PURPOSE, ARE HEREBY DISCLAIMED BY FUNAI AND ITS REPRESENTATIVES IN
CANADA.
ALL WARRANTY INSPECTIONS AND REPAIRS MUST BE PERFORMED BY AN AUTHORIZED SERVICE
CENTER. THIS WARRANTY IS ONLYVALID WHEN THE UNIT IS CARRIED-IN TO AN AUTHORIZED SERVICE CENTER.
THE PRODUCT MUST BE ACCOMPANIED BY A COPY OF THE ORIGINAL RETAIL PURCHASE RECEIPT.
IF NO PROOF OF PURCHASE IS ATTACHED, THE WARRANTY WILL NOT BE HONORED AND REPAIRS
COSTS WILL BE CHARGED.
ATTENTION :
FUNAI CORP. RESERVES THE RIGHT TO MODIFY ANY DESIGN OF THIS PRODUCT
WITHOUT PRIOR NOTICE.
To locate your nearest AUTHORIZED SERVICE CENTER or general service inquiries,
please contact us at :
FUNAI CORPORATION
Customer Service
Tel :1-800-256-2487
http://www.EmersonAudioVideo.com
19900 Van Ness Avenue, Torrace, CA 90501
Date of Purchase
Dealer Purchase from
Dealer Address
Dealer Phone No.
Model No.
Serial No.
PORTABLE CART WARNING
S3126A
Page 2
INSTALLING THE BATTERIES
Install two AAA batteries (supplied)
matching the polarity indicated inside
battery compartment of the remote control.
[BATTERY PRECAUTIONS]
• Be sure to follow the correct polarity as indicated in the battery compartment.
Reversed batteries may cause damage to the device.
• Do not mix different types of batteries together (e.g. Alkaline and Carbon-Zinc) or old batteries
with fresh ones.
• If the device is not to be used for a long period of time, remove the batteries to prevent
damage or injury from possible battery leakage.
• Do not try to recharge batteries not intended to be recharged; they can overheat and rupture.
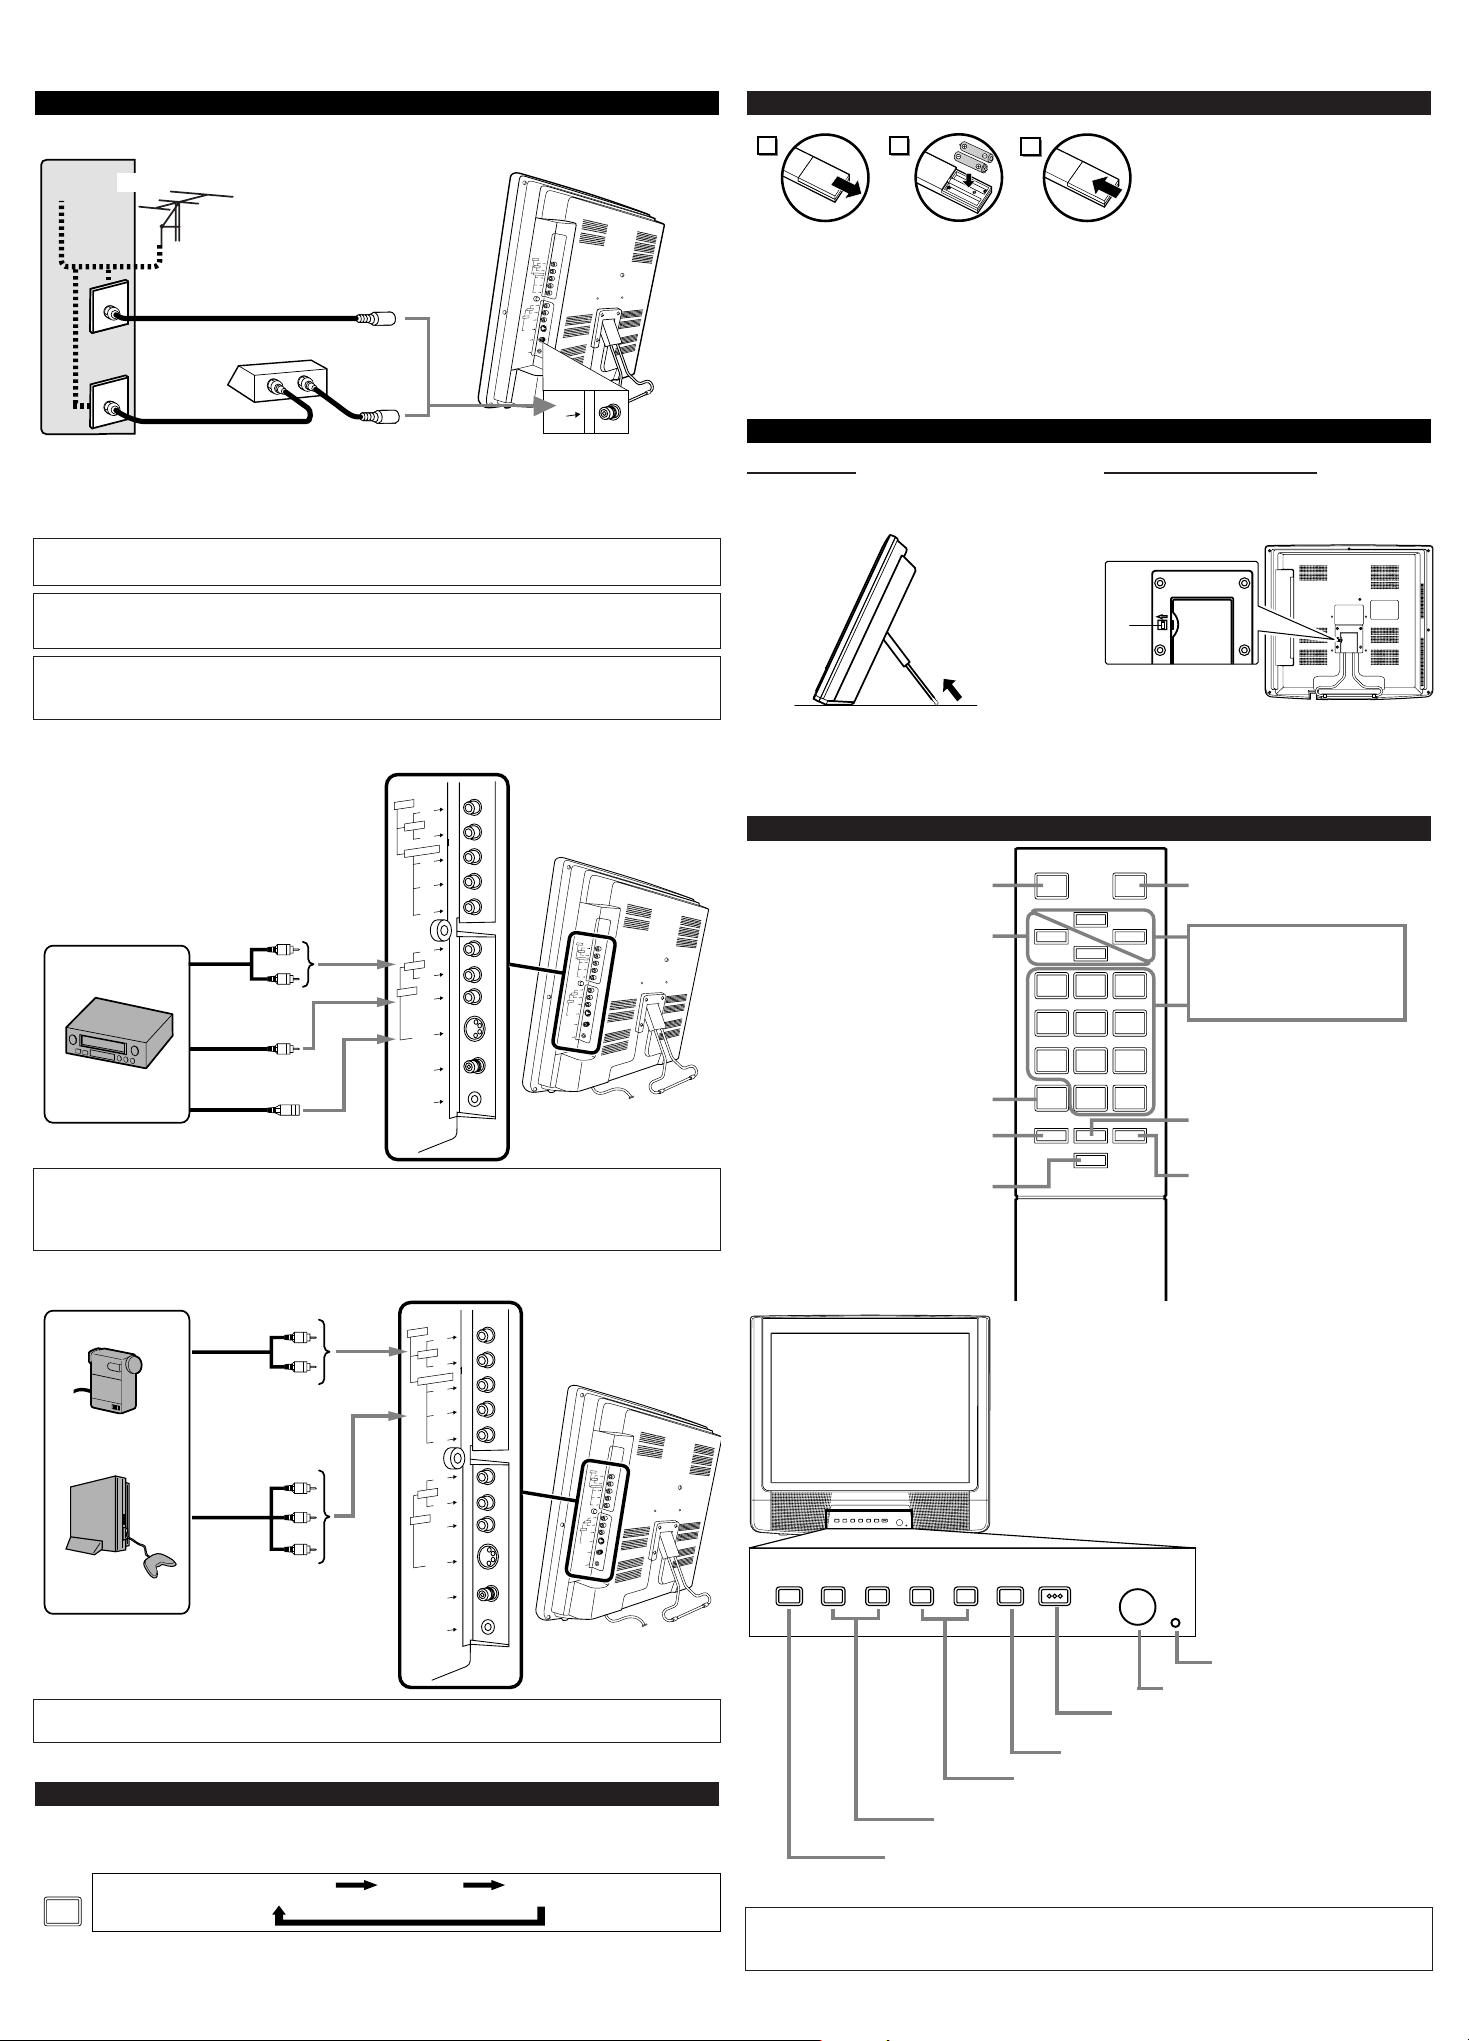
PREPARATION FOR USE
2
1
3
CONNECTIONS
L
Y
Pb
Pr
R
L
A
V
I
N
2
A
U
D
IO
R
A
V
-
IN
1
S
-VI
DEO
V
ID
E
O
HE
A
D
PH
ON
E
A
NT
A
U
D
IO
C
O
M
P
O
N
E
N
T
AV
-IN2
R
L
Y
Pb
Pr
AUDIO
COMPONENT
R
L
VIDEO
S-VIDEO
ANT
AUDIO
AV
-IN1
HEAD PHONE
OPERATIONS
VIDEO2 input
L
Y
Pb
Pr
R
L
A
V
I
N
2
A
U
D
IO
R
A
V
-
IN
1
S-VIDEO
V
ID
E
O
H
E
AD
P
H
O
N
E
AN
T
A
U
D
IO
C
O
M
P
O
N
E
N
T
AV
-IN2
R
L
Y
Pb
Pr
AUDIO
COMPONENT
R
L
VIDEO
S-VIDEO
ANT
AUDIO
AV
-IN1
HEAD PHONE
Note:
●
If some digits appear in the corner of the screen when the unit is turned on at the first time,
press
[POWER] without unplugging the power cord.
Audio Cable
Video Cassette
Recorder
Note:
●
The AUDIO L jack is for mono input. The sound is heard from both speakers. Use this jack for
connecting monaural audio equipment.
●
The S-VIDEO jack is given priority over the VIDEO jack.
Component
Video Cable
Audio Cable
Video Game
Video Camera
Rear of this TV
Rear of this TV
Note:
●
The TV can only accept a 480i (interlaced) video signal.
REMOTE CONTROL AND FRONT PANEL FUNCTION
123
456
789
0
+100
MENU
o
n
pm
MUTE SLEEP
DISPLAY
CH RET
INPUT
SELECT
POWER
CH
VOL
POWER button
To turn TV on/off
Channel number buttons
CH
KK /LL
buttons
MENU button
To view on-screen menu
SLEEP button
DISPLAY button
To display CH No./Audio Status
CH RET button
To return to previous channel
INPUT SELECT button
To select TV or external input
MUTE button
To m ute sound
VOL XX/YYbuttons
To adjust volume
To select channels
XYX
Y
MENU VOLUME CHANNEL
SELECT
POWER
X
Y
X
Y
MENU VOLUME CHANNEL
SELECT
POWER
CAUTION: TO PREVENT ELECTRIC SHOCK, MATCH WIDE BLADE OF PLUG TO
WIDE SLOT, FULLY INSERT.
[EXTERNAL CONNECTION]
ex.
ex.
L
Y
Pb
Pr
R
L
A
V
I
N
2
A
U
D
I
O
R
A
V
-
IN
1
S
-V
ID
EO
V
I
D
E
O
H
E
A
D
P
H
ON
E
A
NT
A
U
D
I
O
C
O
M
P
O
N
E
N
T
ANT
IN
OUT
(OUT)
(OUT)
(IN)
(IN)
(OUT)
(OUT)
(IN)
(IN)
Note:
•
For your safety and to avoid damages to the unit, unplug the antenna cable from the
ANT jack before moving the unit.
(OUT)
Video Cable
S-Video Cable
(IN)
SELECTING AUDIO/VIDEO INPUT
When you use the AUDIO/VIDEO input jacks, select “VIDEO1” or “VIDEO2” mode by
pressing [INPUT SELECT] on the remote control. The input mode changes by pressing the
button as following:
TV channel VIDEO1 VIDEO2
VIDEO1 input
You can bracket this product as wall mounting TV using the arm adapted for 100mm (commercially available).
OR
Photo Stand
Adjust the length of the stand in
5 levels to change the angle of TV.
To close the photo stand
Close the stand while pushig the tab to the
direction that the arrow indicates.
PHOTO STAND
POWER button
To turn TV on/off
VOLUME XX/YYbuttons
To adjust volume
SELECT button
CHANNEL XX/YYbuttons
To select channels
MENU button
To view on-screen menu
Infrared Sensor Window
Power Indicator
CLOSE
CLOSE
Tab
Plug the incoming cable into the ANT jack on the rear of the TV.
*
NOTE (DO NOT DISCONNECT FROM BOX)
Some cable TV systems use scrambled signals
and require a special converter to receive these
channels. Consult your local cable company.
Rear of this TV
OR
Incoming cable from home antenna /
cable company (No cable box)
Incoming cable from cable
company or satellite antenna
Cable box or
Satellite box*
Cable
TV signal
Antenna
OR
INPUT
SELECT
Page 3
[TEXT MODE (TEXT1, TEXT2)]
●
TEXT1 and TEXT2
display half-screen text
by scrolling (such as a
channel guide, schedule
or announcement).
OPERATIONS (Continued)
OPTIONAL SETTINGS
PICTURE ADJUSTMENT
1
1
BRIGHTNESS
Adjust until the darkest parts of the picture are
as bright as you prefer.
[-] : decrease brightness
[+] : increase brightness
CONTRAST
Adjust to increase or decrease contrast.
[-] : decrease contrast
[+] : increase contrast
COLOR
Adjust to be brilliant or pale color.
[-] : be pale color [+] : be brilliant color
TINT
Adjust to obtain natural skin tones.
[-] : add red [+] : add green
SHARPNESS
Adjust to detail in the picture.
[-] : make soft [+] : make clear
Notes:
●
The display will disappear automatically
after 10 seconds unless you press any buttons.
●
Magnetism from nearby appliances and
speakers might affect the color of the TV
picture. If this happens, press [POWER] to
turn off the TV and turn it on again after
about 30 minutes.
CHANNEL SETTING
1
1
1
1
The tuner scans and memorizes all
available channels in your area.
2
2
Select the desired language
3
3
To exit the menu
Notes:
●
The TV distinguishes between standard TV
channels and cable (CATV) channels.
●
The TV may recognize CATV channels as
TV channels if reception condition is poor.
If this happens, check the antenna
connections and try steps 2 to 3 again when
reception conditions are better.
●
If there is no TV
signal input, “NO TV
SIGNAL” will appear
on the display after the
completion of channel
scanning.
LANGUAGE SELECTION
3
3
When the scanning is completed, the
lowest memorized channel appears on
the TV screen.
1
1
2
2
Select the channel you wish
4
4
Notes:
●
If closed captioning is not broadcast, you
cannot receive it and nothing is displayed.
●
When your TV receives a special effects
playback signal (i.e., Search, Slow and Still)
from a VCR’s video output channel (CH3 or
CH4), the TV may not display the correct
caption or text.
●
Captions and texts may not match the TV
voice exactly.
●
Interference may cause the closed caption
system not to function properly.
●
The caption or text characters will not be
displayed while the menu display or
functions display is shown.
●
If a black box appears on the screen, this
means that the TV is set to TEXT mode. To
clear screen, select [CAPTION1],
[CAPTION2] or [OFF].
Add: light blue
Delete: light red
2
2
3
3
Select “PICTURE”
Select “LANGUAGE”
[ENGLISH] [ESPAÑOL]
[FRANÇAIS]
Select “CHANNEL SET UP”
Select “CHANNEL SET UP”
Select “ADD/DELETE CH”
Select “AUTO PRESET CH”
15
ADD/DELETE
Add or delete the channel
You may view specially labeled (cc) TV
programs, movies, news and prerecorded
tapes, etc. with either a dialogue caption or
text display added to the program.
1
1
Select “CAPTION”
[CAPTION MODE (CAPTION1, CAPTION2)]
●
CAPTION1
displays standard closed captions (what a
character is saying).
●
CAPTION2
displays foreign language closed captions
(foreign language words showing what a
character is saying).
●
There are three ways of displaying
according to programs:
Paint-on mode: Displays input characters
on the screen immediately.
Pop-on mode : Once characters are stored
in memory, they are
displayed all at once.
Roll-up mode : Displays the characters
continuously by scrolling
(max. 4 lines).
*Second Audio Program (SAP) :
Your program can also be received in a
second language or sometimes a radio
station.
MULTI-CHANNEL TELEVISION SOUND (MTS)SYSTEM
Regular
-None-
STEREO
SAP
Stereo
broadcast
Menu
Selection
Type of
broadcast
MAIN
MONO
SAP*
-None- -None-
MONO
STEREO
SAP
MAIN
MAIN
Note:
●
If you select [SAP] when second audio is
not available, the TV will receive normal
audio.
1
1
2
2
MENU
Select the desired sound
mode
[MAIN] [MONO] [SAP]
3
3
MENU
- TV SET UP -
PICTURE
CHANNEL SET UP
V-CHIP SET UP
LANGUAGE [ENGLISH]
CAPTION [OFF]
TV SOUND [MAIN]
BACK LIGHT [BRIGHT]
SLEEP [0] MINUTE
Select “TV SOUND”
To exit the menu
Notes:
●
When you disconnect the unit from the AC
outlet or when you have a power failure, the
sleep time will be lost.
●
To cancel the sleep timer,
press [SLEEP] repeatedly until “SLEEP 0
MINUTE” is displayed.
●
The Sleep Timer
Setting display will disappear automatically
after 10 seconds of the operation.
●
You can also set the Sleep Timer by pressing [SLEEP] repeatedly.
SLEEP TIMER SETTING
1
1
- TV SET UP -
PICTURE
CHANNEL SET UP
V-CHIP SET UP
LANGUAGE [ENGLISH]
CAPTION [OFF]
TV SOUND [MAIN]
BACK LIGHT [BRIGHT]
SLEEP [0] MINUTE
SLEEP 10 MINUTE
• The time increases by 10
minutes up to 90.
2
2
Select the desired caption mode
To exit the menu
3
3
[OFF]
[CAPTION1] [CAPTION2]
[TEXT2] [TEXT1]
CLOSED CAPTION
BACK LIGHT SETTING
1
1
Select “BACK LIGHT”
o
p
CH
2
2
Select the desired brightness mode
3
3
m
n
VOL
[BRIGHT]
[NORMAL]
[DARK]
MENU
To exit the menu
To exit the menu
5
5
2
2
Select an item to adjust
3
3
o
p
CH
[BRIGHTNESS] [CONTRAST]
[SHARPNESS] [TINT]
[COLOR]
Adjust the setting
...
+
...
–
Select “SLEEP”
[AUTO PRESET CHANNELS]
As the initial setting, this TV has memorized
all channels, including the ones not available
in your area. This feature automatically puts
only available channels into the memory.
[ADDING/DELETING CHANNELS]
You can add or delete channels manually.
MENU
CH
o
p
VOL
- TV SET UP -
PICTURE
CHANNEL SET UP
V-CHIP SET UP
LANGUAGE [ENGLISH]
CAPTION [OFF]
TV SOUND [MAIN]
BACK LIGHT [BRIGHT]
SLEEP [0] MINUTE
m
CH
o
p
VOL
- CHANNEL SET UP -
ADD/DELETE CH (TV)
AUTO PRESET CH
m
NO TV SIGNAL
MENU
CH
o
p
VOL
m
n
CH
o
p
VOL
m
n
MENU
VOL
m
- TV SET UP -
PICTURE
CHANNEL SET UP
V-CHIP SET UP
LANGUAGE [ENGLISH]
CAPTION [OFF]
TV SOUND [MAIN]
BACK LIGHT [BRIGHT]
SLEEP [0] MINUTE
MENU
CH
o
p
VOL
m
VOL
m
CH
o
p
VOL
m
n
MENU
VOL
m
n
- TV SET UP -
PICTURE
CHANNEL SET UP
V-CHIP SET UP
LANGUAGE [ENGLISH]
CAPTION [OFF]
TV SOUND [MAIN]
BACK LIGHT [BRIGHT]
SLEEP [0] MINUTE
- CHANNEL SET UP -
ADD/DELETE CH (TV)
AUTO PRESET CH
MENU
- TV SET UP -
PICTURE
CHANNEL SET UP
V-CHIP SET UP
LANGUAGE [ENGLISH]
CAPTION [OFF]
TV SOUND [MAIN]
BACK LIGHT [BRIGHT]
SLEEP [0] MINUTE
MENU
CH
o
p
- TV SET UP -
PICTURE
CHANNEL SET UP
V-CHIP SET UP
LANGUAGE [ENGLISH]
CAPTION [OFF]
TV SOUND [MAIN]
BACK LIGHT [BRIGHT]
SLEEP [0] MINUTE
VOL
m
n
MENU
MENU
CH
o
- TV SET UP -
PICTURE
CHANNEL SET UP
V-CHIP SET UP
LANGUAGE [ENGLISH]
CAPTION [OFF]
TV SOUND [MAIN]
BACK LIGHT [BRIGHT]
SLEEP [0] MINUTE
p
BRIGHTNESS
-+
VOL
m
n
MENU
Page 4

GENERAL SPECIFICATIONS
Television system: NTSC-M
TV Standard
Closed Caption
System: §15.119/FCC
Channel coverage
VHF: 2 ~ 13
UHF: 14 ~ 69
CATV: 2 ~ 13, A ~ W,
W+1 ~ W+84,
A-5 ~ A-1, 5A
Tuning System: 181 channel
frequency synthesized
tuning system
Channel access: Direct access keyboard,
programmable
scan and up/down
Terminals
Antenna input: VHF/UHF/CATV
75 ohm unbalanced
(F-type)
S-Video input: Mini DIN 4-pin jack
Video input: RCA connector x 1
Audio input: RCA connector x 4
Component video input:
One pin jack (Y), 1Vpp(75 ohm)
Two pin jacks (PR)/(PB), 700mVpp(75 ohm)
Headphone: 1/8" stereo (3.5mm)
Stereo Sound System
2 speakers
2 ways AV input
ELECTRICAL SPECIFICATIONS
Sound output: 1W, 8 ohm x 2
OTHER SPECIFICATIONS
Remote control: Digital encoded
infrared light system
Operating
temperature: 5°C to 40°C
(41°F~104°F)
Power requirements: AC120V, 60Hz
Power consumption
(Maximum): 57W
LCD: 20"
Dimensions(H x W x D):
Photo Stand open 17-11/16" x 19-1/2" x 8-3/16"
(450mm x 495mm x 208mm)
Photo Stand close 18-1/4" x 19-1/2" x 4-1/4"
(463mm x 495mm x 108mm)
Weight:
With Photo Stand: 11.5 lbs. (5.2kg)
Without Photo Stand:11.0 lbs. (5.0kg)
•Designs and specifications are subject to
change without notice and without our
legal obligation.
•If there is a discrepancy between languages,
the default language will be English.
SPECIFICATIONS
OPTIONAL SETTINGS (Continued)
MAINTENANCETROUBLESHOOTING GUIDE
Sometimes a performance problem can be easily solved by checking seemingly apparent but often overlooked possibilities. Before arranging for service, check these items. It could save your time and money.
QUICK SERVICE CHECK LIST
PROBLEM
POSSIBLE REMEDY
Try a new channel, if OK, then possible station trouble.
Is TV plugged in?
Power at outlet?
Is TV’s power on?
Is antenna or cable connected to terminal on the back of the set?
If outside antenna is being used, check for broken wire or loose connection.
Check for local interference.
Turn off the TV and then turn it on after about a minute.
Adjust COLOR control.
Adjust CONTRAST & BRIGHT control.
Check batteries in remote control.
Move the TV away from the nearby appliances which generate a magnetic field.
Turn off using [POWER], then turn it on again 30 minutes later or so.
Temperature around is too low.
Life of the Back Light is approximately 50,000 hours. Ask the Service Center to replace.
It is quality of the LCD Panel.
Remote Control Doesn’t Work
Bars On Screen
Picture Distorted
Picture Rolls Vertically
No Color
Poor Reception on Some Channels
Weak Picture
Lines or Streaks in Picture
Ghosts in picture
Picture Blurred
Sound OK, Picture Poor
Picture OK, Sound Poor
No Picture or Sound
Different color marks on screen
Black or Luminous point on Screen
Closed Caption Problem Possible Remedy
Misspelled captions are shown.
Text is not shown in its entirety
or there is a delay of what is being said.
Captions are scrambled with white boxes
on the TV screen.
No captions are displayed in a program
which must contain closed caption.
No captions are displayed when playing a
prerecorded videotape with closed caption.
The TV screen shows a black box.
Spelling errors may pass through uncorrected by the closed captioning production company in a live broadcast.
Captions that are delayed a few seconds behind the actual dialogue
are common for live broadcasts. Most captioning production companies can display a dialogue to a maximum of 220 words per minute.
If a dialogue exceeds that rate, selective editing is used to insure that
the captions remain up-to-date with the current TV screen dialogue.
Interference caused by building, power lines, thunderstorms, etc.
may cause scrambled or incomplete captions to appear.
Broadcasters may use a time compression process to the actual program so that additional advertising time can be given. In this case,
captions will be lost since the decoder cannot read the compressed
information.
The videotape may be either an illegal copy or the tape duplicating
company may accidentally have left out the captioning signals during the copying process.
You are in TEXT mode. Select [CAPTION1], [CAPTION2] or
[OFF].
CABINET CLEANING
●
Wipe the front panel and other exterior
surfaces of the TV with a soft cloth
immersed in lukewarm water and wrung dry.
●
Never use a solvent or alcohol. Do not spray
insecticide liquid near the TV. Such
chemicals may cause damage and
discoloration to the exposed surfaces.
PICTURE SCREEN CLEANING
If the liquid crystal display panel should
require cleaning, wipe it with a cotton or soft
cloth. Before cleaning the picture screen,
disconnect the power cord.
SUPPLIED ACCESSORIES
●
Owner’s Manual
●
Remote control unit
(NE900UD)
●
Batteries
(“AAA” x 2)
1
1
To exit the menu
Notes (for TV RATING and MPAA RATING):
●
You cannot access the setup menu when the
“PROTECTED PROGRAM by ...” message
appears. Move to an unblocked channel
before you hit [MENU].
●
When you select a rating and set it to
[BLOCK], the higher ratings will be blocked
automatically. The lower ratings will be
available for viewing.
●
When you set the lowest rating to [VIEW],
all other ratings will automatically be available for viewing.
V-CHIP SET UP
To exit the menu
[TV RATING SET UP]
4
4
Select a rating
<Selection> <Rating Category Explanations>
• TV-Y : Appropriate for all children
• TV-Y7 : Appropriate for children seven
and older
• TV-G : General Audience
• TV-PG : Parental Guidance suggested
• TV-14 : Unsuitable for children under
14
• TV-MA : Mature audience only
5-1
5-1
* Rating with no sub categories
Set to [BLOCK] or [VIEW]
* Rating with sub categories
Select a rating
Set to [BLOCK] or [VIEW]
This enables parents to prevent their children
from watching inappropriate material on TV.
● The limitation is not available for news,
sports programs, unedited movies on premium cable channels and Emergency
Broadcast System signals.
● When you try to access to a program which
is blocked, “PROTECTED PROGRAM by
...” message appears on the TV screen.
● Programming may be rated by the Motion
Picture Association of America (MPAA) or
according to the Television Parental
Guidelines. In order to block any inappropriate programming, set your limits in both
MPAA RATING and TV RATING.
Select “V-CHIP SET UP”
<Selection> <Rating Category Explanations>
• TV-Y7
FV : Fantasy Violence
• TV-PG / TV-14 / TV-MA
D : Suggestive Dialog
(TV-PG, TV-14 only)
L: Coarse Language
S : Sexual Situation
V: Violence
6
6
6
6
2 times
Select a feature to set up
3
3
5-2
5-2
B TV-Y [VIEW]
TV-Y7 ( ) [VIEW]
TV-G [VIEW]
TV-PG( ) [VIEW]
TV-14 ( ) [VIEW]
TV-MA( )[VIEW
]
TV-Y [VIEW]
TV-Y7 ( ) [VIEW]
B TV-G [BLOCK]
TV-PG(DLSV) [BLOCK]
TV-14 (DLSV) [BLOCK]
TV-MA( LSV) [BLOCK
]
TV-Y [VIEW]
TV-Y7 ( ) [VIEW]
TV-G [VIEW]
B TV-PG ( ) [VIEW]
TV-14 ( ) [VIEW]
TV-MA( )[VIEW]
Sub categories
The LCD panel is manufactured to provide many years of useful life. Occasionally a few non active
pixels may appear as a tiny spec of color. This is not to be considered a defect in the LCD screen.
TV-PG [BLOCK]
B D [BLOCK]
L [BLOCK]
S [BLOCK]
V [BLOCK]
TV-PG [BLOCK]
B D[VIEW]
L [BLOCK]
S [BLOCK]
V [BLOCK]
2
2
If you have not set up your personal access
code, enter 0000 (default access code).
ACCESS CODE
_ _ _ _
Enter 4-digit code
4
4
[CHANGING THE ACCESS CODE]
5
5
Notes:
●
Make sure you enter exactly the same new
code in the “CONFIRM CODE” space as
one in the “NEW CODE” space. If they are
differrent, the “NEW CODE” space is
cleared for redoing.
●
Your personal access code will be erased
and will return to the default (0000) when a
power failure occurs or when you turn off
the power using a wall switch. If you have
forgotten the code, unplug the power cord
for 10 seconds to restore the access code to
0000.
Enter 4-digit code
MENU
To exit the menu
A
B
A
B
C
C
4
4
[MPAA RATING SET UP]
Select a rating
repeatedly
5
5
Set to [BLOCK] or [VIEW]
<Selection> <Rating Category Explanations>
• G : General Audience
• PG : Parental Guidance suggested
• PG-13 : Unsuitable for children under
13
• R : Restricted; under 17 requires
accompanying parent or adult
guardian
• NC-17 : No one under 17 admitted
• X : Mature audience only
B G[VIEW]
PG [VIEW]
PG-13 [VIEW]
R[VIEW]
NC-17 [VIEW]
X[VIEW]
G[VIEW]
PG [VIEW]
PG-13 [VIEW]
B R [BLOCK]
NC-17 [BLOCK]
X [BLOCK]
MENU
CH
o
p
VOL
- TV SET UP -
PICTURE
CHANNEL SET UP
V-CHIP SET UP
LANGUAGE [ENGLISH]
CAPTION [OFF]
TV SOUND [MAIN]
BACK LIGHT [BRIGHT]
SLEEP [0] MINUTE
m
123
456
789
0
CH
o
p
- V-CHIP SET UP -
TV RATING
MPAA RATING
CHANGE CODE
VOL
m
CH
o
p
VOL
m
VOL
m
CH
o
p
VOL
m
MENU
MENU
CH
o
p
VOL
m
123
456
789
0
NEW CODE
[[[[
CONFIRM CODE
_ _ _ _
Page 5

Guide d'utilisation
Modèle de mise à la terre d’une antenne suivant les
instructions du Code national sur l’électricité.
BOÎTE D’ENTRÉE DE
SERVICE
COLLIER DE MISE
À LA TERRE
CNE-CODE NATIONAL SUR L’ÉLECTRICITÉ SYSTÈME DE MISE À LA TERRE DE L’ENTRÉE DE
SERVICE (CNE, ART. 250, PARTIE H)
S2898A
COLLIERS DE MISE À LA TERRE
CONDUCTEURS DE MISE À LA TERRE
(CNE, SECTION 810-21)
DÉCHARGE D’ANTENNE
(CNE, SECTION 810-20)
DESCENTE D’ANTENNE
Schéma A
EMERSON ET LE LOGO G-CLEF SONT DES MARQUES
DE FABRIQUE DÉPOSÉES DE EMERSON
RADIO CORP., PARSIPPANY, NEW JERSEY,
U.S.A .
EWL2005
TÉLÉVISEUR À CRISTAUX LIQUIDES DE
20 POUCES (Type Support Photo)
CARACTÉRISTIQUES
●
Syntonisateur MTS/SAP
●
Sélection de 181 canaux-
●
Syntonisation à boucle de verrouillage de phase "PLL"- Offre la sélection simple et
Tous les canaux VHF/UHF plus 125 canaux de la câblodistribution.
en toute liberté des canaux et vous permet d’accorder directement un canal à l’aide des touches
numériques de canaux sur la télécommande.
●
Minuterie-sommeil
●
Décodeur de sous-titres
●
Fonction de mise hors circuit automatique- Dans le cas où le téléviseur ne reçoit aucun
signal en provenance de la borne d’antenne et qu’il n’y a aucune image sur l’écran pendant 15
minutes, l’appareil s’éteindra automatiquement.
●
CIRCUIT V- Permet aux parents d’éviter que leurs enfants ne regardent des émissions
télévisées qui ne leur sont pas destinées.
●
Télécommande comprenant l’ensemble des fonctions de l’appareil
●
Affichage des fonctions à l'écran
●
Entrée S-VIDÉO- Vous permet d’obtenir une image plus détaillée et nette.
●
Entrée composants
PRÉCAUTIONS À SUIVRE
●
Installez le téléviseur dans une pièce suffisamment aérée.
●
Faites en sorte que le téléviseur soit éloigné de toute source directe de chaleur, tels que des
appareils de chauffage ou d’une lumière solaire directe.
●
Ne déposez pas le téléviseur sur une surface molle, telle que celle d’un tapis ou d’une couverture.
●
Laissez un espace suffisant sur le dessus, le dessous et l’arrière de l’appareil de manière à
faciliter une circulation d’air adéquate.
Le numéro de série de ce téléviseur est indiqué à l’endos de l’appareil. Aucun autre téléviseur ne
possède le même numéro. Inscrivez-le ici, avec les autres informations pertinentes indiquées ci-dessous
et conservez ce guide à titre de référence permanente sur la date d’achat et le modèle en cas de vol.
Date d'achat
Nom du marchand
Adresse du marchand
SI APRES LA LECTURE DE CE MANUEL, VOUS AVEZ BESOIN D’UNE AIDE SUPPLÉMENTAIRE POUR
L’INSTALLATION OU LE FONCTIONNEMENT DE CET APPAREIL, VEUILLEZ COMPOSER LE NUMÉRO
D’APPEL GRATUIT
1-800-242-7158 OU CONSULTEZ NOTRE SITE INTERNET http://www.Symphonic.us.
Numéro de téléphone
Numéro de modèle
Numéro de série
GARANTIE LUMITÉE
FUNAI CORP. réparera ce produit à titre gratuit au CANADA en cas de défaut de matériaux ou de façon comme suit :
DURÉE :
PIÉCES : FUNAI CORP. fournira les pièces pour remplacer les pièces défectueuses à titre gratuit
MAIN-D’ŒUVRE : FUNAI CORP. fournira la main-d’œuvre à titre gratuit pendant une période de quatre-
pendant un (1) an à partir de la date d’achat au détail d’origine. Certaines pièces et le
déverminage du LCD ne sont pas couverts par cette garantie.
vingt-dix (90) jours à partir de la date d’achat au détail d’origine.
LIMITES ET EXCLUSIONS :
CETTE GARANTIE CONCERNE UNIQUEMENT L’ACHETEUR AU DÉTAIL D’ORIGINE. UN REÇU
D’ACHAT OU UNE AUTRE PREUVE DE L’ACHAT AU DÉTAIL D’ORIGINE SERA REQUIS AVEC LE
PRODUIT POUR OBTENIR UN SERVICE SOUS CETTE GARANTIE.
Cette garantie ne sera étendue à aucune autre personne ou cessionnaire.
Cette garantie est nulle et sans effet si un des numéros de série du produit est altéré, remplacé, dégradé, manquant
ou si le service a été tenté dans un CENTRE DE SERVICE AUTORISÉE. La garantie limitée ne s’applique à aucun
produit acheté et utilisé au CANADA.
Cette garantie couvre uniquement les défaillances dues aux défauts en matériaux ou façon survenant pendant l’emploi
normal. Elle ne couvre pas les dommages survenant pendant l’expédition, ou les défaillances causées par des
réparations, modifications ou produits non fournis par FUNAI CORP., ou les dommages résultant d’un accident, d’un
usage incorrect, d’un usage abusif, d’un traitement erroné, d’une application erronée, d’une modification, d’une
installation incorrecte, d’une maintenance incorrecte, d’un usage commercial par exemple dans un hôtel, en location ou
dans un bureau de ce produit, ou de dommages dus à un incendie, une inondation, la foudre ou autres cas de force
majeure.
CETTE GARANTIE NE COUVRE PAS LES MATÉRIAUX D’EMBALLAGE, LES ACCESSOIRES (SAUF LA
TÉLÉCOMMANDE), LES PARTIES ESTHÉTIQUES, LES PIÈCES D’ASSEMBLAGE COMPLET, LES
MODÈLES DE DÉMONSTRATION OU DE SURFACE.
FUNAI CORP. ET SES REPRÉSENTANTS OU AGENTS NE SERONT EN AUCUN CAS RESPONSABLES DE TOUT
DOMMAGE GÉNÉRAL, INDIRECT OU CONSEQUENTIEL SURVENANT OU OCCASIONNÉ PAR L’EMPLOI OU
L’INCAPACITÉ D’UTILISER CE PRODUIT. CETTE GARANTIE EST FAITE AU LIEU DE TOUTE AUTRE
GARANTIE, EXPRESSE OU IMPLICITE, ET TOUTES LES AUTRES RESPONSABILITÉS DE LA PART DE FUNAI,
TOUTES LES AUTRES GARANTIES INCLUANT LA GARANTIE DE COMMERCIALIBILITÉ, ET L’ADAPTATION
À UN BUT PARTICULIER, SONT ICI DENIÉES PAR FUNAI ET SES REPRÉSENTANTS AU CANADA.
TOUTES LES INSPECTIONS DE GARANTIE ET RÉPARATIONS DOIVENT ÊTRE EFFECTUÉES PAR UN
CENTRE DE SERVICE AUTORISÉE. CETTE GARANTIE EST VALIDE QUAND L’APPAREIL ESTAPPORTÉ
À UN CENTRE DE SERVICE AUTORISÉE.
CE PRODUIT DOIT ÊTRE ACCOMPAGNÉ D’UNE COPIE DU REÇU D’ACHATAU DÉTAIL D’ORIGINE. SI
AUCUNE PREUVE DE L’ACHAT N’EST JOINTE, LA GARANTIE NE SERA PAS HONORÉE ET LE COÛT
DES RÉPARATIONS SERA À PAYER.
ATTENTION :
FUNAI CORP. SE RÉSERVE LE DROIT DE MODIFIER TOUTE CONCEPTION DE CE
PRODUIT SANS PRÉAVIS.
Veuillez nous contacter pour trouver le CENTRE DE SERVICE AUTORISÉ le plus proche
de chez vous ou pour toutes demandes générales de service à :
FUNAI CORPORATION
Service à la Clientèle
Tel :1-800-256-2487
http://www.EmersonAudioVideo.com
19900 Van Ness Avenue, Torrace, CA 90501
L3202UC
MESURES DE SÉCURITÉ IMPORTANTES
AVERTISSEMENT :
POUR PRÉVENIR TOUT RISQUE D’INCENDIE OU DE CHOC ÉLECTRIQUE, NE PAS
EXPOSER CET APPAREIL À LA PLUIE OU À L’HUMIDITÉ.
LE SYMBOLE DE L’ÉCLAIR DANS UN
ATTENTION
RISQUE DE CHOC
ÉLECTRIQUE. NE PAS OUVRIR
MISE EN GARDE : AFIN DE RÉDUIRE LES RISQUES DE
CHOCS ÉLECTRIQUES, N’ENLEVEZ PAS LE COUVERCLE
(OU L’ARRIÈRE). NE CONTIENTAUCUNE PIÈCE
POUVANT ÊTRE RÉPARÉE PAR L’UTILISATEUR. CONFIEZ
TOUTE RÉPARATION À UN TECHNICIEN QUALIFIÉ.
Avertissements importants apposés à l’arrière de l’appareil.
1. LISEZ CE GUIDE – Avant la mise en marche de cet
appareil, veuillez lire l’ensemble des instructions
concernant la sécurité et le fonctionnement.
2. CONSERVEZ CE GUIDE – Pour pouvoir le consulter
ultérieurement, les instructions concernant la sécurité
et le fonctionnement de l’appareil devront être
conservées.
3. RESPECTER LES MISES EN GARDE – On devra
prendre en considération et les suivre toutes les
observations au sujet de l’appareil et de son
fonctionnement.
4. OBSERVEZ LES DIRECTIVES – Vous êtes prié de
suivre toutes les directives concernant le
fonctionnement et l’entretien de l’appareil.
5. NETTOYAGE – Tout d’abord, débranchez l’appareil
de la prise murale. N’utilisez pas de produits à nettoyer
liquides ou en aérosols. Utilisez un chiffon doux et
légèrement humecté d’eau.
EXCEPTION : Un produit prévu pour un service
prolongé et, qui pour une raison spécifique, comme la
possibilité de la perte d’un code d’autorisation pour un
convertisseur de câblovision, n’est pas prévu pour être
débranché par l’utilisateur pour le nettoyage ou une
autre raison, peut exclure la référence au
débranchement de l’appareil dans la description du
nettoyage, sinon requise de l’article 5.
6. ACCESSOIRES – N’utilisez que les accessoires
recommandés par le fabricant. Tout autre accessoire
risquerait de provoquer un fonctionnement défectueux
ou même dangereux.
7. EAU ET HUMIDITÉ – N’utilisez pas cet appareil à
proximité de l’eau (près d’une baignoire, d’un lavabo,
d’un évier, d’une piscine, cuve de lessive, dans un
sous-sol humide. etc.).
8. SUPPORT – N’installez pas cet
appareil sur un meuble, un comptoir,
un trépied, un support ou une table
instable. L’appareil risquerait de
tomber et de blesser gravement
quelqu’un et, en outre, il serait
sérieusement endommagé.
SYMBOLE D'AVERTISSEMENT POUR
APPAREIL ET MEUBLE A ROULETTES
S3126A
LES COMPOSANTES
9. VENTILATION – Les orifices et ouvertures servent à
10. SOURCE D’ALIMENTATION – Cet appareil ne devra
11. MISE À LA TERRE OU POLARISATION – Cet
12. PROTECTION DES FILS ÉLECTRIQUES – Les fils
13.
TRIANGLE ÉQUILATÉRAL INDIQUE LA
PRÉSENCE D’UNE TENSION SUFFISAMMENT
ÉLEVÉE POUR ENGENDRER UN RISQUE DE
CHOC ÉLECTRIQUE.
LE POINT D’EXCLAMATION DANS UN TRIANGLE
ÉQUILATÉRAL INDIQUE QUE LE MANUEL
D’INSTRUCTIONS INCLUS AVEC L’APPAREIL
CONTIENT D’IMPORTANTES RECOMMANDATIONS
QUANT AU FONCTIONNEMENT ET À L’ENTRETIEN
DE CE DERNIER.
procurer une ventilation et un fonctionnement adéquat de
l’appareil de manière à ce qu’il ne soit pas surchauffé.
Ces orifices et ouvertures ne doivent pas être obstrués ou
recouverts. N’installez jamais l’appareil sur un lit, un
canapé, un tapis ou toute autre surface similaire, ni à
proximité d’un radiateur ou d’un thermostat. Cet appareil
ne doit pas être placé à l’intérieur d’un meuble, telle une
étagère ou une bibliothèque, à moins qu’il n’y ait une
aération suffisante.
être branché que sur le type de source d’alimentation
indiqué sur l’étiquette prévue à cet effet. Si vous n’êtes
pas certain du type de source d’alimentation dont vous
disposez, contactez votre revendeur ou votre compagnie
d’électricité. Pour les appareils fonctionnant avec des
piles, consultez les directives de fonctionnement.
appareil possède une fiche polarisée pour prise C.A.
(fiche dont une broche est plus large que l’autre).
Cet appareil possède une fiche polarisée pour prise de
C.A. (une des lames est plus large que l’autre). Cette
fiche ne s’insère dans la prise de courant que dans un
sens par mesure de sécurité. Si l’insertion de la fiche
dans un sens donné est difficile, inversez sa position.
Si c’est encore difficile, demandez à un électricien
qualifié de remplacer la prise. Cette fiche étant
sécuritaire, n’essayez pas de la modifier.
d’alimentation devront être disposés de manière à ce
qu’ils ne soient pas écrasés ou tordus par les objets les
entourant. Faites particulièrement attention aux fiches,
aux raccordements et aux endroits où les fils sortent de
l’appareil.
MISE À LA TERRE D’UNE ANTENNE EXTÉRIEURE –
Si une antenne extérieure ou un système de câblodistribution est raccordé à l’appareil, veillez à ce que
ces derniers soient reliés à la terre afin de protéger
l’appareil contre des surcharges de tension ou une
accumulation d’électricité statique. (Schéma A)
14. FOUDRE –
lors d’orages ou d’une inutilisation prolongée, débranchez
l’appareil de la prise murale ainsi que l’antenne (ou le
système de câblodistribution). Cette mesure permettra
d’éviter que l’appareil ne soit endommagé lors d’un orage
ou d’une surcharge de tension.
15. FILS ÉLECTRIQUES – Si vous choisissez d’installer
une antenne extérieure, prenez garde à ce qu’elle ne se
trouve pas à proximité de câbles électriques sur
lesquels elle risquerait de tomber.
L’installation d’une telle antenne doit être effectuée
très prudemment afin que l’antenne ou les fils (ou
circuits) électriques n’entrent pas en contact et
n’entraînent une électrocution pouvant être mortelle.
16. SURCHARGE ÉLECTRIQUE – Ne surchargez pas les
prises murales ou les fils de prolongement. Cela
pourrait entraîner un risque d’incendie ou de
commotion électrique.
17. OBJETS ET LIQUIDES – N’essayez jamais d’insérer
un objet à l’intérieur de l’appareil par l’intermédiaire
des orifices, car vous pourriez toucher des pièces sous
tension ou provoquer un court-circuit entraînant un
début d’incendie ou une commotion électrique. Faites
en sorte de ne renverser aucun liquide sur l’appareil.
18. RÉPARATIONS – N’essayez pas de réparer vousmême l’appareil. Si vous ouvrez l’appareil ou retirez le
boîtier, vous vous exposerez à une tension élevée ainsi
qu’à d’autres dangers. Pour n’importe quelle réparation
ou vérification, faites appel à un technicien qualifié.
19. DOMMAGE NÉCESSITANT UNE RÉPARATION –
Débranchez l’appareil de la prise murale et confiez
l’entretien/dépannage à un personnel qualifié dans les
cas suivants :
NOTE POUR L’INSTALLATEUR DU SYSTÈME DE CÂBLODISTRIBUTION :
Ce rappel est pour attirer l’attention de l’installateur du système de TV par câble sur l’Article 820-40 du
Code National Electrique qui fournit les directives pour une mise à la terre correcte, plus particulièrement
la précision que le câble de mise à la terre doit être connecté au système de mise à la terre du bâtiment,
aussi près que possible du point d’entrée du câble.
Par mesure de protection supplémentaire,
a. Lorsque le fil d’alimentation ou sa fiche est
endommagé.
b. Lorsqu’un liquide ou un objet a pénétré dans
l’appareil.
c. Lorsque l’appareil a été exposé à la pluie ou à de l’eau.
d. Si l’appareil ne fonctionne pas normalement bien que
l’on ait suivi les instructions. Ne réglez que les
ajustements décrits dans ce manuel d’instructions. Un
réglage erroné des autres commandes risque
d’endommager l’appareil et de nécessiter un long
travail de la part d’un technicien qualifié pour remettre
l’appareil en état de fonctìonnement.
e. Lorsqu’on a laissé tomber l’appareil et que le boîtier
est endommagé.
f.
Lorsque le fonctìonnement de l’appareil diffère de la
période initiale, il sera nécessaire alors de le faire réparer.
20. PIÈCES DE RECHANGE – Lorsque des pièces de
rechange sont nécessaires, assurez-vous que le
technicien utilise les pièces recommandées par le
fabricant ou qu’elles présentent les mêmes
caractéristiques que les pièces d’origine. L’utilisation
de pièces différentes risque de provoquer un incendie,
une commotion électrique ou d’autres dommages.
21. INSPECTION POUR LA SÉCURITÉ –
l’achèvement de la réparation ou de l’entretien,
demandez au technicien de procéder à une inspection
afin de s’assurer que l’appareil est en état de
fonctionner.
22. CHALEUR – L’installation de ce téléviseur doit être
éloignée de sources de chaleur telles que celles d’un
appareil de chauffage, d’une bouche d’air chaud, d’un
four ou de tout autre appareil (y compris des
amplificateurs) dégageant de la chaleur.
À
ATTENTION FCC - Cet appareil peut
générer ou utiliser la puissance des
fréquences radio. Tout changement ou
modification de cet appareil peut
entraîner des interférences
importantes si ces modifications ne
sont pas expressement autorisées dans
le manuel d’instructions. L’utilisateur
peut perdre l’autorisation d’utiliser
cet appareil s’il y apporte des
changements ou modifications non
autorisés.
Page 6

L
Y
Pb
Pr
R
L
A
V
I
N
2
A
U
D
I
O
R
A
V
-IN
1
S-VID
EO
V
I
D
E
O
H
EA
D
PH
O
N
E
AN
T
A
U
D
IO
C
O
M
P
O
N
E
N
T
AV
-IN2
R
L
Y
Pb
Pr
AUDIO
COMPONENT
R
L
VIDEO
S-VIDEO
ANT
AUDIO
AV
-IN1
HEAD PHONE
PRÉPARATIFS
2
1
3
INPUT
SELECT
123
456
789
0
+100
MENU
o
n
pm
MUTE SLEEP
DISPLAY
CH RET
INPUT
SELECT
POWER
CH
VOL
XYX
Y
MENU VOLUME CHANNEL
SELECT
POWER
X
Y
X
Y
MENU VOLUME CHANNEL
SELECT
POWER
L
Y
Pb
Pr
R
L
A
V
-I
N
2
A
U
D
I
O
R
A
V
-
IN
1
S
-VI
DE
O
V
ID
E
O
HE
AD
P
H
O
NE
A
N
T
A
U
D
IO
C
O
M
P
O
N
E
N
T
ANT
IN
OUT
L
Y
Pb
Pr
R
L
A
V
I
N
2
A
U
D
IO
R
A
V
-IN
1
S-VIDEO
V
ID
E
O
H
EA
D P
H
O
NE
AN
T
A
U
D
IO
C
O
M
P
O
N
E
N
T
AV
-IN2
R
L
Y
Pb
Pr
AUDIO
COMPONENT
R
L
VIDEO
S-VIDEO
ANT
AUDIO
AV
-IN1
HEAD PHONE
CLOSE
CLOSE
Onglet
RACCORDEMENTS
Branchez le câble d’entrée dans la prise ANT à l’arrière de l’appareil.
Signal de
Télécâble
Antenne
OU
Câble d’entrée de la société antenne /
télécâble (Pas de boîte de télécâble)
Boîte de raccordement
câble* ou satellite
OU
Câble d’entrée de la société
de télécâble ou de l’antenne
satellite
*REMARQUE (NE DÉCONNECTEZ PAS DE LA BOÎTE)
Certains câblodistributeurs émettent des signaux brouillés
et nécessitent l’utilisation d’un convertisseur spécifique
pour la réception des canaux du câble. Consultez votre
câblodistributeur à ce sujet.
Vous pouvez installer ce produit comme téléviseur en montage mural en utilisant le bras adapté
pour 100 mm (disponible dans le commerce).
ATTENTION : POUR ÉVITER LES CHOC ÉLECTRIQUES, INTRODUIRE LA LAME LA
PLUS LARGE DE LA FICHE DANS LA BORNE CORRESPONDANTE DE LA PRISE ET
POUSSER JUSQU’AU FOND.
Remarque :
Pour votre sécurité et pour éviter d’endommager l’appareil, débranchez le câble
•
d’antenne de la prise ANT avant de déplacer l’appareil.
[RACCORDEMENT EXTÉRIEURE]
Entrée AUX1
Arrière du téléviseur
INSTALLATION DES PILES
Installez deux piles AAA (fournies), en
respectant les polarités indiquées dans
le logement piles de la télécommande.
[PRÉCAUTIONS CONCERNANT LES PILES]
• Observez les polarités indiquées dans le logement piles.
Des piles inversées peuvent endommager le dispositif.
• Ne mélangez pas différents types de piles (par ex. Alcalines et Carbone-Zinc) ou des piles
ancienne et neuve.
• Si le dispositif doit rester inutilisé pendant longtemps, retirez les piles pour éviter tout
dommage ou blessure possible suite à la fuite des piles.
• N’essayez pas de recharger des piles non prévues pour la recharge; la surchauffe et la rupture
sont possibles.
SUPPORT PHOTO
Support photo
Ajustez le longeur du support en 5 niveaux
pour changer l’angle du téléviseur.
Fermeture du support photo
Fermez le support en poussant l’onglet dans le
sens de la flèche.
FONCTIONNEMENT
Arrière du téléviseur
(SORTIE) (ENTRÉE)
ex.
(ENTRÉE)
Câble Audio
(ENTRÉE)
(SORTIE)
Magnétoscope
Câble Vidéo
(SORTIE)
Câble S-Vidéo
Remarques :
●
La prise d’entrée AUDIO L est pour une entrée monophonique. Le son est entendu à partir
des deux haut-parleurs. Utilisez cette prise pour un équipement monophonique devant être
connecté.
●
La prise S-VIDEO a priorité sur la prise VIDEO du panneau arrière.
Entrée AUX2
(SORTIE)
Câble Audio
Vidéocaméra
(ENTRÉE)
Arrière du téléviseur
(ENTRÉE)
FONCTION DE COMMANDE À DISTANCE ET PANNEAU AVANT
Pour allumer/éteindre le téléviseur
Touche POWER
Touches VOL XX/
Pour régler le volume
Touche MENU
Pour visionner le menu à l’écran
Touche MUTE
Pour assourdir le son
Touche DISPLAY
Pour visionner le menu à l’écran
YY
Touche INPUT SELECT
Pour sélectionner le téléviseur ou
une entrée extérieure
Touches CH ▲ /▼
Touches numériques
Pour sélectionner les canaux
Touche SLEEP
Touche CH RET
Pour revenir au canal précédent
(SORTIE)
Jeu vidéo
Remarque :
●
Le téléviseur accepte seulement un signal vidéo 480i (entrelacé).
SÉLECTION DE L’ENTRÉE AUDIO/VIDÉO
À l’emploi des prises d’entrée AUDIO/VIDEO, sélectionnez le mode “AUX1” ou “AUX2” en
appuyant sur
appuyant sur les touches comme suit :
[INPUT SELECT] sur la télécommande. Le mode d’entrée change en
Câble composants
vidéo
Canal de télévision AUX1 AUX2
Témoin power
Fenêtre du capteur à infrarouges
Touche POWER
Pour allumer/éteindre le téléviseur
Touche SELECT
Touches CHANNEL ▲ /▼
Pour sélectionner les canaux
Touches VOLUME XX/
YY
Pour régler le volume
Touche MENU
Pour visionner le menu à l’écran
Remarque :
●
Si plusieurs chiffres apparaissent dans le coin de l’écran à la première mise sous tension de
l’appareil, appuyez sur [POWER] sans débrancher le cordon d’alimentation.
Page 7

FONCTIONNEMENT (Suite)
- RÉG. TV -
IMAGE
RÉGLAGE DES CANAUX
RÉGLAGE CIRCUIT V
LANGAGE [FRANÇAIS]
S-TITRES [HF]
SON TV [MAIN]
RÉTROÉCLAIRAGE
[LUMINEUX]
SOMMEIL [0] MINUTE
- TV SET UP -
PICTURE
CHANNEL SET UP
V-CHIP SET UP
LANGUAGE [ENGLISH]
CAPTION [OFF]
TV SOUND [MAIN]
BACK LIGHT [BRIGHT]
SLEEP [0] MINUTE
MENU
o
p
CH
-
LUMINOSITÉ
+
15
AJOUT/SUPPRESS.
Type de
diffusion
Normale
-Aucn-
Diffusion stéréo
STÉRÉO
SAP
Sélection de
menu
MAIN
MONO
SAP*
-Aucn-
-Aucn-
MONO
STÉRÉO
SAP
MAIN
MAIN
- RÉG. TV -
IMAGE
RÉGLAGE DES CANAUX
RÉGLAGE CIRCUIT V
LANGAGE [FRANÇAIS]
S-TITRES [HF]
SON TV [MAIN]
RÉTROÉCLAIRAGE
[LUMINEUX]
SOMMEIL [0] MINUTE
o
p
CH
m
VOL
MENU
o
p
CH
m
VOL
m
VOL
o
p
CH
m
n
VOL
- RÉG. TV -
IMAGE
RÉGLAGE DES CANAUX
RÉGLAGE CIRCUIT V
LANGAGE [FRANÇAIS]
S-TITRES [HF]
SON TV [MAIN]
RÉTROÉCLAIRAGE
[LUMINEUX]
SOMMEIL [0] MINUTE
m
n
VOL
MENU
MENU
o
p
CH
m
n
VOL
MENU
MENU
m
VOL
o
p
CH
SOMMEIL 10 MINUTE
MENU
o
p
CH
MENU
o
p
CH
MENU
o
p
CH
MENU
o
p
CH
m
n
VOL
MENU
MENU
RÉGLAGE DES CANAUX
[PRÉRÉGLAGE AUTOMATIQUE DES CANAUX]
Comme réglage initial, ce téléviseur a mémorisé tous
les canaux, y compris ceux qui ne sont pas disponibles
dans votre région. Cette fonction mémorise
automatiquement seulement les canaux disponibles.
1
1
Sélectionnez “RÉGLAGE DES CANAUX”
- RÉG. TV -
IMAGE
RÉGLAGE DES CANAUX
RÉGLAGE CIRCUIT V
LANGAGE [FRANÇAIS]
S-TITRES [HF]
SON TV [MAIN]
VOL
RÉTROÉCLAIRAGE
SOMMEIL [0] MINUTE
[LUMINEUX]
m
2
2
Sélectionnez “CH. AUTO PRÉRÉG.”
- RÉGLAGE DES CANAUX -
AJOUT/SUPP. CH. (CATV)
CH. AUTO PRÉRÉG.
[AJOUT/SUPPRESSION DE CANAUX]
Vous pouvez ajouter ou supprimer
manuellement des canaux.
1
1
Sélectionnez “RÉGLAGE DES CANAUX”
2
2
Sélectionnez “AJOUT/SUPP. CH.”
3
3
Sélectionnez le canal souhaité
- RÉG. TV -
IMAGE
RÉGLAGE DES CANAUX
RÉGLAGE CIRCUIT V
LANGAGE [FRANÇAIS]
S-TITRES [HF]
SON TV [MAIN]
RÉTROÉCLAIRAGE
SOMMEIL [0] MINUTE
- RÉGLAGE DES CANAUX -
AJOUT/SUPP. CH. (CATV)
CH. AUTO PRÉRÉG.
[LUMINEUX]
AJUSTEMENT DES ASPECTS DE L’IMAGE
1
Sélectionnez “IMAGE”
1
2
2
Sélectionnez l’article à régler
[LUMINOSITÉ] [CONTRASTE]
[NETTETÉ] [TEINTE] [COULEUR]
3
3
Ajustez le réglage
VOL
...
m
n
...
+
–
Remarques :
●
L’affichage disparaîtra automatiquement au bout de 10 secondes à moins que vous appuyiez sur une touche.
●
Le magnétisme des appareils et des enceintes à proximité peut affecter la couleur de l’image du téléviseur.
Dans ce cas, appuyez sur [POWER] pour éteindre le téléviseur et rallumez-le au bout d’environ 30 minutes.
LUMINOSITÉ
Ajustez la luminosité jusqu’à ce que les parties
les plus claires de l’image soient aussi
brillantes que vous le désirez.
[-] : diminue la luminosité
[+] : augmente la luminosité
CONTRASTE
Augmentez ou diminuez les contrastes.
[-] : diminue le contraste
[+] : augmente le contraste
COULEUR
Réglez aux couleurs vives ou pâles.
[-] : couleurs plus pâles
[+] : couleurs plus vives
TEINTE
Ajustez la teinte pour obtenir la couleur de la
peau naturelle.
[-] : ajout de rouge [+] : ajout de vert
NETTETÉ
Réglez pour détailler l’image.
[-] : adoucit [+] : rend plus net
Le syntoniseur balaie et mémorise tous les
canaux disponibles dans votre région.
3
3
Le balayage terminé, le canal le plus
4
4
bas en mémoire apparaît à l’écran
Remarques :
●
Le téléviseur fait la distinction entre canaux
de télévision standard et canaux de
câblovision (CATV).
●
Le téléviseur peut reconnaître des canaux de
télévision en tant que canaux CATV si les
conditions de réception sont mauvaises. Dans ce
cas, contrôlez les raccordements de l’antenne et
essayez à nouveau les étapes
2 et 3 quand les
5
5
conditions de réception sont meilleures.
●
S’il n’y a pas d’entrée
de signal de télévision,
“PAS DE SIGNAL
PAS DE SIGNAL TV
TV” apparaîtra à
l’écran après le
balayage des canaux.
RÉGLAGE DE LA MINUTERIE-SOMMEIL
1
1
Sélectionnez “SOMMEIL”
VOL
m
• La durée augmente par
n
- RÉG. TV -
IMAGE
RÉGLAGE DES CANAUX
RÉGLAGE CIRCUIT V
LANGAGE [FRANÇAIS]
S-TITRES [HF]
SON TV [MAIN]
RÉTROÉCLAIRAGE
SOMMEIL [0] MINUTE
[LUMINEUX]
10 minutes jusqu’à 90.
Remarques :
●
●
●
●
SON DE TÉLÉVISION MULTIVOIE (MTS
1
Sélectionnez “SON TV”
1
*Second Programme Audio (SAP) :
2
2
[MAIN] [MONO] [SAP]
3
3
Pour quitter le menu
Sélectionnez le mode son
souhaité
Remarque :
●
Ajoutez ou supprimez le canal
Ajout: bleu clair
Suppression: rouge clair
Pour quitter le menu
Quand vous déconnectez l’appareil de la
prise CA ou en cas de panne de courant, la
durée de la minuterie-sommeil sera perdue.
Pour annuler la
minuterie-sommeil,
appuyez plusieurs fois
sur [SLEEP] jusqu’à
l’affichage de
“SOMMEIL 0
MINUTE”.
L’affichage du réglage de la minuteriesommeil disparaîtra automatiquement après
10 secondes de fonctionnement.
Vous pouvez aussi régler la minuteriesommeil en appuyant plusieurs fois sur
[SLEEP].
)
Votre programme peut aussi être reçu dans
une seconde langue ou parfois d’une station
de radiodiffusion.
Si vous sélectionnez [SAP] quand une
seconde langue n’est pas disponible, le
téléviseur recevra le son normal.
RÉGLAGE DE RÉTRO-ECLA
1
1
Sélectionnez “RÉTROÉCLAIRAGE”
2
2
Sélectionnez le mode de luminosité désiré
[LUMINEUX] [NORMAL] [FONCE]
3
3
Pour quitter le menu
AFFICHAGE DE SOUS-TITRES
Vous pouvez visionner des émissions
télévisées, films, informations, vidéocassettes
pré-enregistrés, etc. qui sont spécialement
étiquetés de “cc” et ajoutés des sous-titres du
dialogue ou de texte.
1
Sélectionnez “S-TITRES”
1
- RÉG. TV -
IMAGE
RÉGLAGE DES CANAUX
RÉGLAGE CIRCUIT V
LANGAGE [FRANÇAIS]
S-TITRES [HF]
SON TV [MAIN]
RÉTROÉCLAIRAGE
SOMMEIL [0] MINUTE
[
MODE DE SOUS-TITRES (S-TIT1, S-TIT2)
●
S-TIT1
[LUMINEUX]
affiche des sous-titres standard (ce qui dit un
personnage).
●
S-TIT2
affiche des sous-titres en langue étrangère (mots de
langue étrangère indiquant ce que dit le personnage).
●
Il y a trois modes d’affichage selon les
programmes:
Mode d’affichage instantané :
Les caractères entrés sont immédiatement
affichés.
Mode d’affichage séquentiel :
Une fois mémorisés, les caractères sont tous
affichés à la fois.
Mode d’affichage continuel :
Les caractères sont affichés en continu par
défilent (4 lignes max).
[MODE TEXTE (TEXT1, TEXT2)]
●
TEXT1 et TEXT2
affichent un demi-écran
de texte par défilement
(comme guide de
canaux, programme ou
annonce).
2
2
Sélectionnez le mode de sous-titres souhaité
[HF] [S-TIT1] [S-TIT2]
[TEXT2] [TEXT1]
3
3
Pour quitter le menu
]
Remarques :
●
Si aucun sous-titrage n’est diffusé, vous ne
pouvez pas le recevoir et rien n’est affiché.
●
Lorsque votre téléviseur reçoit une
commande de lecture spécifique (telle la
recherche visuelle, le ralenti, l’arrêt sur
image) provenant d’un magnétoscope auquel
il est raccordé par le canal commun de
transmission 3 ou 4 (CH 3 / CH 4), il se peut
que l’affichage des sous-titres (ou du texte)
soit altéré ou n’apparaisse plus à l’écran.
●
Il est normal que les sous-titres et les textes ne
soient pas précisément synchronisés avec la
transmission sonore et visuelle de l’émission.
●
De l’interférence magnétique causée par un
appareil à proximité peut entraîner un
mauvais fonctionnement de l’affichage des
sous-titres.
●
Ce téléviseur ne peut afficher les sous-titres
et les textes lorsque la fonction d’affichage
à l’écran du menu des fonctions et
commandes est utilisée.
●
Si une boîte noire apparaît à l’écran, cela
signifie que le téléviseur est réglé au mode
TEXTE. Pour effacer l’écran, sélectionnez
[S-TIT1], [S-TIT2] ou [HF].
RÉGLAGES OPTIONNELS
SÉLECTION DE LA LANGUE D’AFFICHAGE
1
1
Sélectionnez [LANGUAGE]
2
Sélectionnez la langue souhaitée
2
[ENGLISH] [ESPAÑOL]
VOL
n
m
3
3
Pour quitter le menu
MENU
[FRANÇAIS)]
Page 8

RÉGLAGES OPTIONNELS (Suite)
LISTE DE VÉRIFICATIONS À
EFFECTUER AVANT DE
CONTACTER UN RÉPARATEUR
PROBLÈME
MESURE CORRECTIVE
Essayez un autre canal, s’il est bien capté, il se peut que l’autre station éprouve des ennuis.
Le téléviseur est-il branché ?
La prise est-elle montée ?
Le téléviseur est-il sous tension?
L’antenne ou le câble est-il raccordé à la prise à l’arrière de l’appareil?
Si une antenne extérieure est utilisée, vérifiez s’il n’y a pas de fil rompu ou de raccordement desserré.
Vérifiez s’il n’y pas d’interférence près de chez vous.
Éteignez le téléviseur et rallumez-le après environ une minute.
Ajustez le COULEUR.
Ajustez le CONTRASTE et la LUMINOSITÉ.
Vérifiez l’état des piles.
Éloignez le téléviseur de l’appareil à proximité qui produit un champ magnétique.
Éteignez avec [POWER], puis rallumez 30 minutes plus tard environ.
La température environnante est basse.
L’autonomie du rétro-éclairage est d’environ 50.000 heures.
Demandez le remplacement au Centre de service.
C’est la qualité du panneau LCD.
La télécommande ne fonctionne pas
Il y a des barres dans l’image
L’image est déformée
L’image défile verticalement
Il n’y a pas de couleur
Mauvaise réception de certains canaux
L’image est mauvaise
Il y a des lignes parasites dans l’image
L’image se dédouble
L’image est floue
Le son est bon mais l’image est mauvaise
L’image est bonne mais le son est mauvais
Pas de son ni d’image
Différentes couleur sur l’écran
Point noir ou lumineux sur l'écran
CODE D’ ACCES
_ _ _ _
- RÉG. TV -
IMAGE
RÉGLAGE DES CANAUX
RÉGLAGE CIRCUIT V
LANGAGE [FRANÇAIS]
S-TITRES [HF]
SON TV [MAIN]
RÉTROÉCLAIRAGE
[LUMINEUX]
SOMMEIL [0] MINUTE
- RÉGLAGE CIRCUIT V -
COTE TV
CHANGER CODE
COTE MPAA
MENU
o
p
CH
m
VOL
o
p
CH
m
VOL
o
p
CH
m
VOL
m
VOL
o
p
CH
m
VOL
MENU
o
p
CH
m
VOL
MENU
MENU
RÉGLAGE CIRCUIT V
Ceci permet aux parents d’éviter que leurs enfants
regardent des matériaux inappropriés à la télévision.
●
La limitation n’est pas disponible pour les
informations, programmes sportifs, films
non-édités sur canaux du câble optionnels et
signaux du Système de Diffusion d’Urgence.
●
Quand vous essayez d’accéder à un
programme barré, le message “ÉMISSION
PROTÉGÉE par …” apparaît à l’écran.
●
La programmation peut être classée par
l’Association des Films des États-Unis (MPAA)
ou selon les Règles Directrices Parentales sur la
Télévision. Pour barrer toute programmation
inappropriée, réglez vos limitations à la fois en
COTE MPAA et COTE TV.
1
Sélectionnez “RÉGL. CIRCUIT V”
1
[RÉGLAGE COTE TV]
A
4
4
Sélectionnez une cote
<Sélection>
• TV-Y :
<Explications sur la catégorie de classement>
Approprié pour tous les enfants
• TV-Y7 : Appoprié pour les enfants de 7
ans et plus
• TV-G : Pour tout le monde
• TV-PG : Gouverne parentale conseillée
• TV-14 : Ne convient pas pour les
enfants au-dessous de 14 ans
• TV-MA : Seulement pour les adultes
5-1
* Cote sans sous-catégories
5-1
Réglez à [BARRÉ] ou [VISION]
B TV-Y [VISION]
TV-Y7 ( ) [VISION]
TV-G [VISION]
TV-PG( ) [VISION]
TV-14 ( ) [VISION]
TV-MA( ) [VISION
TV-Y [VISION]
TV-Y7 ( ) [VISION]
B TV-G [BARRÉ]
TV-PG(DLSV) [BARRÉ]
TV-14 (DLSV) [BARRÉ]
TV-MA( LSV) [BARRÉ]
6
6
Réglez à [BARRÉ] ou [VISION]
TV-PG [BARRÉ]
B D [VISION]
L [BARRÉ]
S [BARRÉ]
V [BARRÉ]
Pour quitter le menu
Remarques (pour la COTE TV et la COTE MPAA) :
●
Vous ne pouvez pas accéder au menu de
configuration quand le message “ÉMISSION
]
<Sélection>
• TV-Y7
<Explications sur la catégorie de classement>
FV : Violence de Fantaisie
• TV-PG / TV-14 / TV-MA
D : Dialogue suggestif
(TV-PG, TV-14 seulement)
L: Langage vulgaire
S : Situation sexuelle
V: Violence
6
6
Pour quitter le menu
[RÉGLAGE COTE MPAA]
B
4
4
Sélectionnez une cote
B G[VISION]
PG [VISION]
PG-13 [VISION]
R[VISION]
NC-17 [VISION]
X[VISION]
PROTÉGÉE par…” apparaît. Passez à un
canal non barré avant d’appuyer sur
●
Quand vous sélectionnez une cote et la réglez
[MENU].
à [BARRÉ], les cotes supérieures seront
automatiquement barrées. Les cotes
inférieures pourront être visionnées.
●
Quand vous réglez la cote la plus basse à
[VISION], toutes les autres cotes sont
automatiquement visionnables.
[
CHANGEMENT DE CODE D’ACCÈS
C
4
4
Entrez le code de 4 chiffres
123
456
789
0
5
5
Pour quitter le menu
NOUVEAU CODE
[[[[
CONFIRMER CODE
_ _ _ _
]
5-2
* Cote avec sous-catégories
2
2
Entrez le code de 4 chiffres
123
456
789
0
Si vous n’avez pas encore réglé votre code d’accès
personnel, entrez 0000 (code d’accès par défaut).
3
3
Sélectionnez une fonction à configurer
5-2
TV-Y [VISION]
TV-Y7 ( ) [VISION]
2 fois
Sélectionnez une cote
A
B
C
TV-G [VISION]
B TV-PG ( ) [VISION]
TV-14 ( ) [VISION]
TV-MA( ) [VISION]
Sous-catégories
TV-PG [BARRÉ]
B D [BARRÉ]
L [BARRÉ]
S [BARRÉ]
V [BARRÉ]
5
5
Réglez à [BARRÉ] ou [VISION]
plusieurs fois
<Sélection>
<Explications sur la catégorie de classement>
• G : Pour tout le monde
• PG : Gouverne parentale conseillée
• PG-13 : Ne convient pas pour les
enfants au-dessous de 13 ans
• R : Limité; au-dessous de 17 ans,
nécessite la présence des
parents ou d’un adulte
• NC-17 : Interdit aux enfants au-dessous
de 17 ans
• X : Seulement pour les adultes
ENTRETIEN DE L’APPAREILPROBLÈMES DE FONCTIONNEMENT
Parfois, lorsque l’appareil ne fonctionne pas correctement, la cause du problème peut être facilement identifiée en vérifiant
simplement un détail qui a été négligé à prime abord. Avant de contacter le centre de service autorisé le plus près de chez
vous, nous vous suggérons d’effectuer les vérifications suivantes. Cela pourrait vous faire économiser temps et argent.
NETTOYAGE DU BOÍTIER DU TÉLÉVISEUR
●
Essuyez le devant du téléviseur et ses autres surfaces
externes à l’aide d’un chiffon doux que vous aurez
préalablement trempé dans de l’eau tiède et tordu.
●
N’utilisez jamais de solvant ni d’alcool pour
nettoyer l’appareil. Ne vaporisez pas
d’insecticide à proximité du téléviseur. Ces
produits chimiques pourraient endommager
l’appareil et décolorer les surfaces atteintes.
G [VISION]
PG [VISION]
PG-13 [VISION]
B R [BARRÉ]
NC-17 [BARRÉ]
X [BARRÉ]
Remarques :
●
Vérifiez que vous entrez exactement le
même nouveau code dans l’espace
“CONFIRMER CODE” seulement dans
l’espace “NOUVEAU CODE”. S’ils sont
différents, l’espace “NOUVEAU CODE”
est supprimé pour réentrée.
●
Votre code d’accès personnel sera effacé et
reviendra au code par défaut (0000) en cas
de panne de courant ou si vous mettez hors
tension à l’aide d’un interrupteur mural. Si
vous avez oublié le code, débranchez le
cordon d’alimentation 10 secondes pour
remettre le code d’accès à 0000.
NETTOYAGE DE L’ÉCRAN
Essuyez l’écran en vitre du téléviseur à l’aide
d’un chiffon doux. Débranchez toujours le
cordon d’alimentation de l’appareil avant de le
nettoyer.
Problèmes de sous-titres Solution possible
Des sous-titres avec erreurs d’orthographe
apparaissent.
Le texte n’est pas entièrement affiché ou il
y a du retard par rapport à ce qui est dit.
Les sous-titres sont brouillés et il y a des
carrés blancs à l’écran.
Pas de sous-titres affichés dans l’émission
qui doit en contenir.
Pas de sous-titres affichés à la lecture d’une
vidéocassette préenregistrée avec soustitres.
Une boîte noire apparaît à l’écran du téléviseur.
Le panneau LCD est fabriqué pour assurer de nombreuses années de vie utile. Parfois, quelques pixels non-actifs peuvent
apparaître comme un point fixé de bleus, vert ou rouge. Cela ne doit pas être considéré comme un défaut de l’écran LCD.
Des erreurs d’orthographe peuvent passer non corrigées par la
société de sous-titrage dans le cas d’une émission en direct.
Les sous-titres décalés de quelques secondes sur le dialogue réel sont
communs dans les émissions en direct. La plupart des sociétés de
sous-titrage peuvent afficher un dialogue de 220 mots par minute. Si
un dialogue dépasse cette cote, le montage sélectif est utilisé pour
assurer que les sous-titres restent à jour avec le dialogue à l’écran.
Des interférences causées par des bâtiments, lignes électriques, orages etc.
peuvent provoquer l’apparition de sous-titres brouillés ou incomplets.
Les diffuseurs peuvent utiliser un système de compression du temps
pour le programme réel afin d’obtenir plus de temps pour la
publicité. Dans ce cas, les sous-titres seront perdus parce que le
décodeur ne peut pas lire les informations compressées.
La vidéocassette est peut-être une copie illégale ou l’entreprise de
duplication a par accident omis d’inclure les signaux de sous-titres
pendant le processus de duplication.
Vous êtes en mode TEXTE. Sélectionnez [S-TIT1], [S-TIT2] ou [HF].
ACCESSOIRES FOURNIS
●
Guide d'utilisation
●
Télécommande
(NE900UD)
FICHE TECHNIQUE
RENSEIGNEMENTS GÉNÉRAUX
Système télévision: NTSC-M
Décodeur de sous-titres: §15.119/FCC
Distribution des canaux:
bande VHF: 2 à 13
bande UHF: 14 à 69
câblodistribution: 2 à 13, A ~ W,
Système de syntonisation: 181 canaux avec
Accès aux canaux:
Bornes
Entrée d’antenne: VHF/UHF/CATV
Entrée S-Vidéo:
Entrée vidéo:
Entrée audio:
Entrée de composant video
Prise à une broche (Y)/1Vpp (75 ohms)
Prise à deux broches (P
(75 ohms)
Casque d’écoute:
Système de son stéréophonique
2 haut-parleurs
Entrée AV 2 voies
standard télévision
W+ 1 ~ W + 84,
A-5 ~ A-1, 5A
syntonisation de
fréquences à
synthétiseur
Clavier à accès direct,
avec balayage
ascendant/descendant
programmable
75 ohms non
équilibrés (Type F)
Mini-jack DIN à 4 ergots
Connecteur RCA x 1
Connecteur RCA x 2
b/Pr)/700m Vpp
Stéréophonique de 1/8 po.
(3,5 mm)
SPÉCIFICATIONS-ÉLECTRICITÉ
Puissance de sortie du son:
AUTRES SPÉCIFICATIONS
Télécommande: Rayon infrarouges
Température de
fonctionnement: 5˚ à 40˚C
Source d’alimentation: Courant alternatif
Consommation
(maximale): 57 watts
Tube écran: 20 pouces
Dimensions (H x L x P):
Support photo ouvert
17-11/16 po. x 19-1/2 po. x 8-3/16 po.
(450mm x 495mm x 208mm)
Support photo fermé
18-1/4 po. x 19-1/2 po. x 4-1/4 po.
(463mm x 495mm x 108mm)
Poids:
Avec Support photo: 11,5 lbs. (5,2kg)
Sans Support photo: 11,0 lbs. (5,0kg)
•
La conception et les caractéristiques spécifiques
de cet appareil sont sujettes à modification sans
préavis ni obligations légales.
•
S’il y a une différence entre les langues,
l’anglais prévaudra comme langue par défaut.
●
Deux (2) piles AA
(“AAA” x 2)
1W, 8 ohm x 2
avec code numérique
(41˚ à 104˚F)
120 volts, 60 hertz
 Loading...