

Page 1
Quick Start Guide
A Multimedia Center on your
Notebook Computer
Packing List
Notebook computer\Support CD with drivers\Quick Start
Guide\Adaptor\Power cable\Phone cable\Battery\Remote Controller
Getting Started
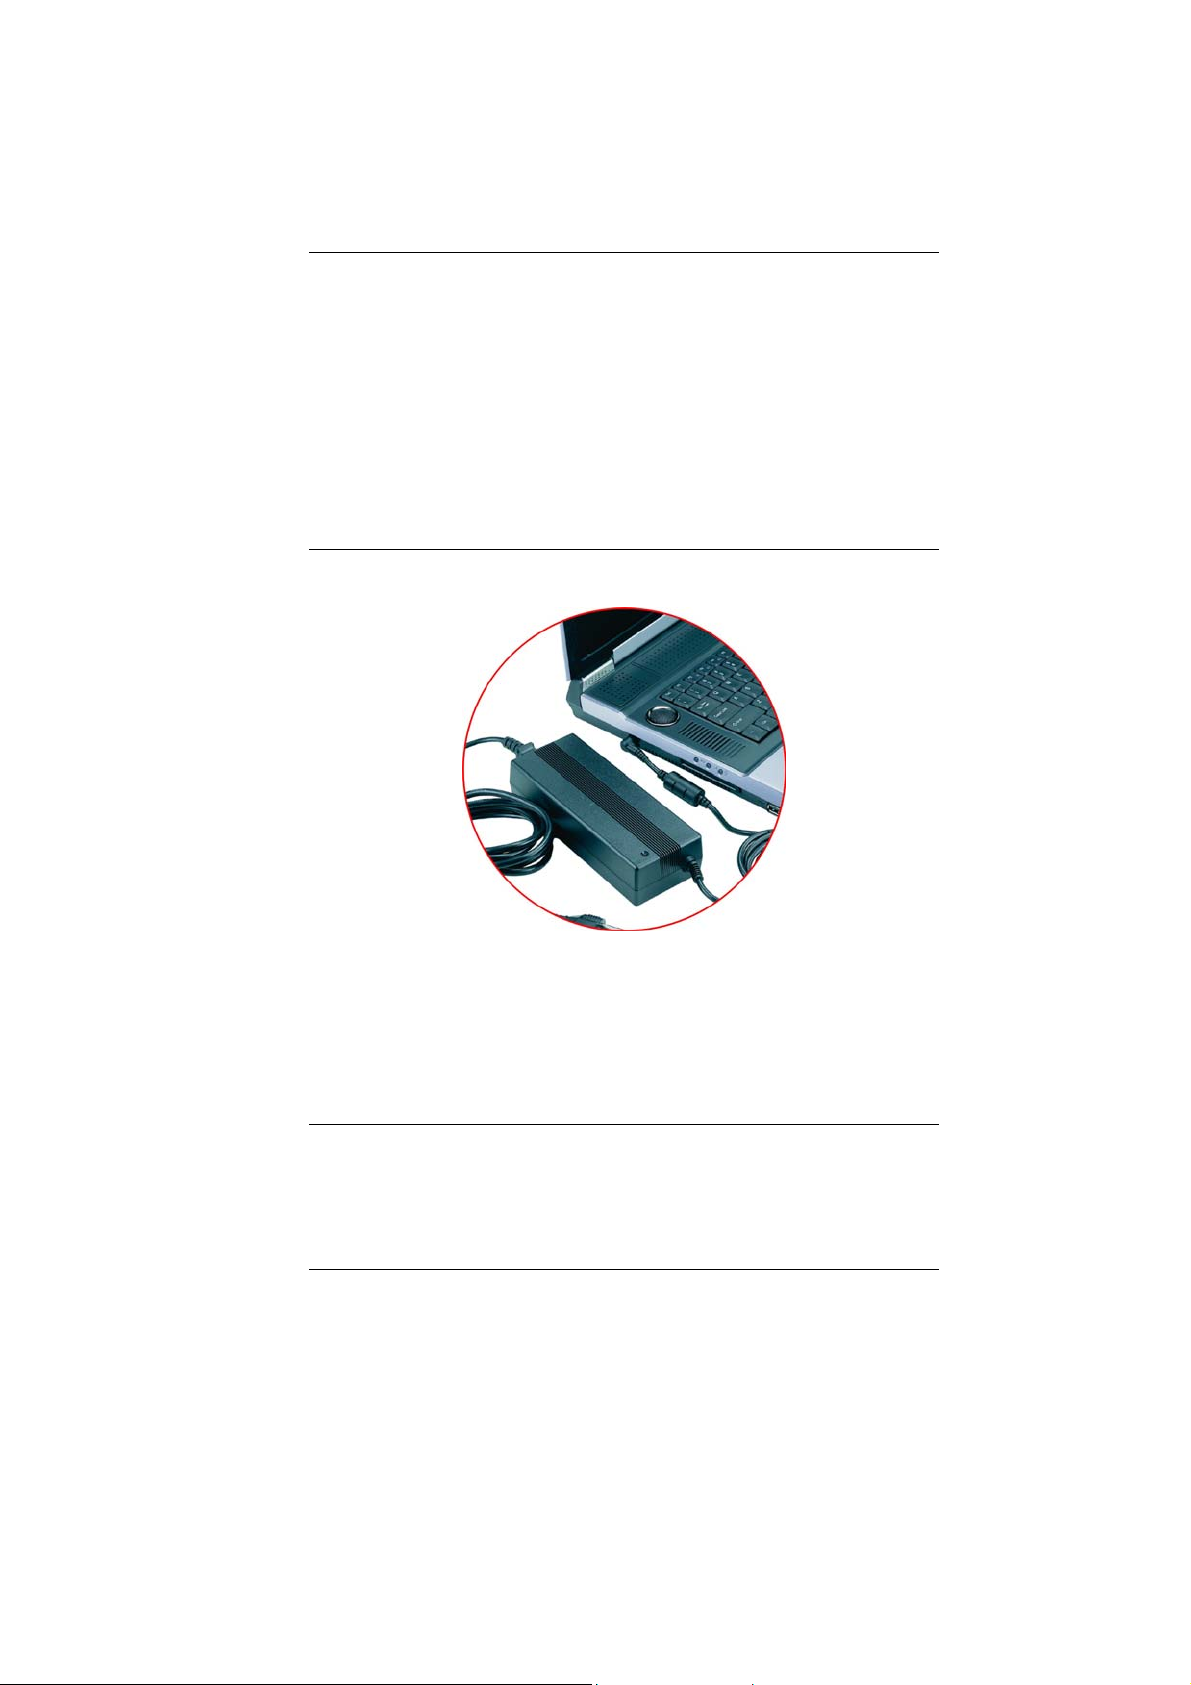
Charging the Battery
To charge the battery, plug the AC adapter into both the unit and a
•
standard wall outlet.
• Connect the AC adapter to the AC connector on the left side of the
notebook.
• Charge the battery before turning the unit on. The LED will turn off
when the battery is fully charged.
Activating the Computer
Open the Display
Locate the display latch on the front of the unit. Slide the latch until the
display panel releases and raise the LCD screen. Adjust the display to a
comfortable viewing angle.
1
Page 2
Turning On your notebook
Press and hold the power button for 1-2 seconds will turn on the system
or press this button when the computer is in Suspend mode will resume
normal operation.
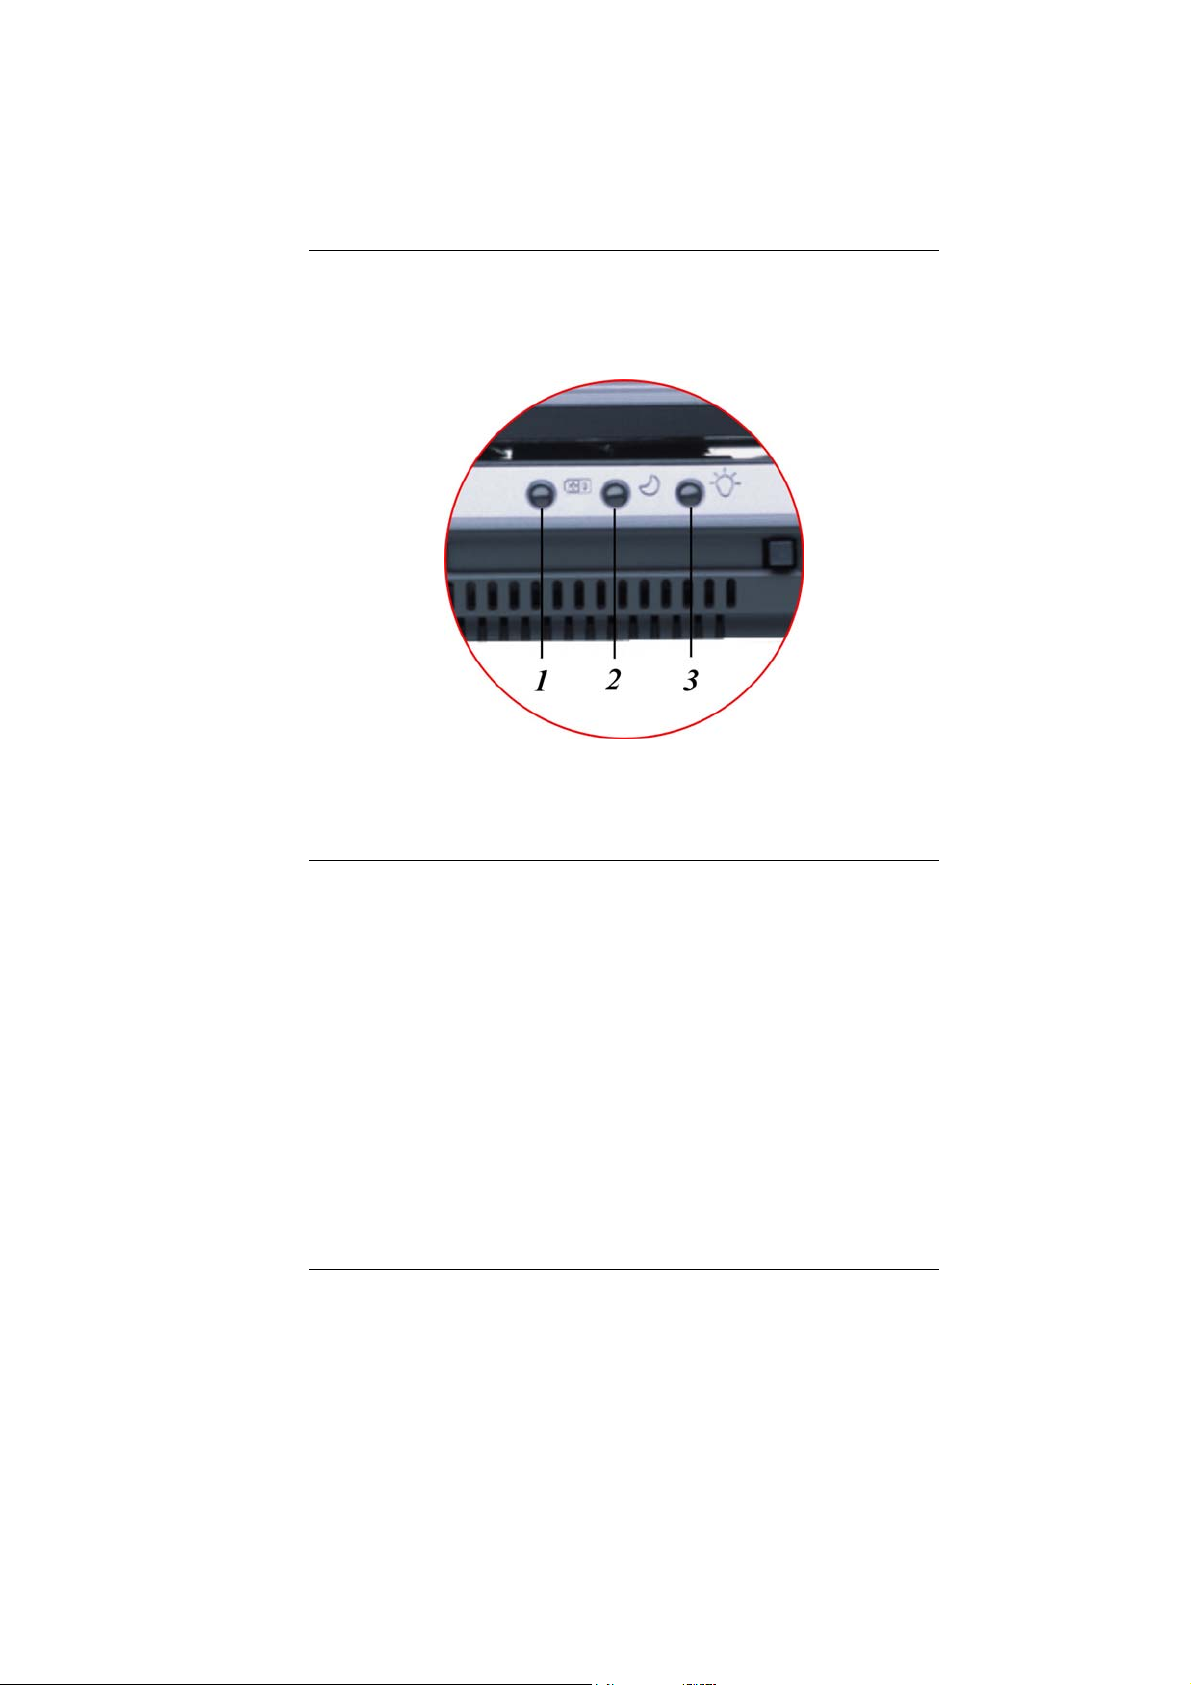
1.
Battery Charge – Green color indicates in charging status.
2.
Suspend -.Green light indicates in suspend mode.
3.
Power On - This indicator will lit when the notebook is powered on.
Raid Setting (If Your System Supports RAID)
Short for Redundant Array of Independent (or Inexpensive) Disks, a
category of disk drives that employ one or more drives in combination for
to respond gracefully to an unexpected hardware or software failure and
performance.
There are number of different RAID levels.
• Level 0: Provides data striping (spreading out blocks of each file
across multiple disks) but no redundancy. This improves
performance but does not deliver fault tolerance.
• Level 1: Provides a technique in which data is written to two
duplicate disks simultaneously.
2
Page 3
• Press <Ctrl-F> key combination to further enter the available option
in installing the RAID setting.
• Select from 1 to 5 for various option.
3
Page 4

• Press the “ESC” key to exit after the application has been properly
installed.
Installing the System OS (If your System Supports RAID)
The support CD that comes along with your package contain the RAID
driver for you to install in order to run this application.
• Insert the Support CD into your notebook optical drive. Copy the
Driver\RAID\*.* to the diskette.
• You will have to boot the system with a disk before you copy the
driver to the diskette.
• Connect the floppy disk drive along with the diskette inserted inside
to your notebook computer.
• Insert your OS CD into the optical drive.
• Power on your computer and boot directly from the OS CD.
• Follow the instruction on the display and press the “F6” button.
4
Page 5

• Press the “S” key to the additional device.
• Again press the “Enter” key to select the Win XP OS and proceed
with the installation of the Win XP on your system.
Installing the Operating System
Before installing the OS, you need to set the CD-ROM as the boot device.
Follow the instructions to set CD-ROM as the boot unit. Turn on the
computer, when any display appears, press the [DEL] key immediately
until the system enters the BIOS Setup screen, you may now make the
necessary changes.
Setting the boot device
After entering the BIOS Setup screen, use the [Î] keys on the keyboard
to select the Boot Menu, then use the [Ð] key to move the cursor to the
“Boot Device Priority” field, to change the order of the kind of boot
device in your system.
5
Page 6

Once you have made all of your selections from the various menus in the
Setup program, you should save your changes and exit Setup. Select
Exit from the menu bar.
Using Hotkeys
If you have installed the InterVideo applications in the Support CD and
Windows operating system from Microsoft, you can use these hot keys to
run the Music/DVD/TV (InterVideo application), Outlook/Explorer
(Microsoft’ application) function.
1.
Music Button - (Launch the WinRIP application) Use this key to play
music.
2.
DVD Button - (Launch the WinDVD application) Use this key to watch
a DVD movie.
3.
TV Button - (Launch the WinDVR application) Use this key to watch TV.
4.
Outlook Express Button - Use this key to open Microsoft's Outlook to
send/receive your mail.
5.
Internet Explorer Button - Use this key to open the Internet Explorer.
Driver Installation
To make installation of the drivers easier, we offer an auto installation
method for the Microsoft Windows system. To install the driver for the
system, the attached CD disk contains the driver installation, users manual.
Follow the step-by-step procedures to execute the "AutoRun" application
by selecting the topic of "Driver Installation". The drivers will be installed
in the system automatically. During the installation, it is very normal that
the system may restart.
6
Page 7

Audio DJ Function
Your notebook provides you with an Audio DJ application that basically
function the same as when you are using the Windows based Media
Player in playing a music CD.
The functions are:
1. 2.
Infrared Remote Control Stop Button
3. 4.
Previous Track Button Play/Pause Button
5. 6.
Next Track Button Volume Down Button
7. 8.
Volume Up Button Audio DJ Power Button
Installing an External Devices
To expand your computing capabilities, you can add a variety of external
devices to your computer. You may, for example, want to add a mouse,
modem, or a printer.
Working with the Remote Control
The Remote Control comes with three multimedia softwares: WinDVR,
WinDVD, and WinRip. These softwares use only one remote control; the
function of each buttons will vary on different software.
7
Page 8

PC Power Button
The “PC Power” button allows you turn on/off your PC even in a distance.
DVR Mode Button
Press the DVR button if you want to use the WinDVR software. “WinDVR”
gives you high-quality digital recording of your favorite TV shows on your
PC.
DVD Mode Button
Press the DVD button if you want to use the WinDVD software.
“WinDVD” uses the power of your PC to bring DVDs to life.
NOTE: Please take note that when you are playing the DVD applicaton,
you will only be able to use the Remote Control DVD button if your system
support the InterVideo WinCinema application. If your system support the
WinXP MCE application, you will have to use the “Microsoft Remote
Control” that comes with your package.
To choose between these two applications, please proceed to BIOS Setup
and select the “Advanced” menu. From the “Shortcut Key Working With”
selection item, select the “InterVideo” if your system only support
the ”InterVideo” application or the “WinXP MCE” application if your system
support the Microsoft’s WinXP MCE application.
Music Mode Button
Press the Music button and you will have two selectable buttons on the
screen, “WinRip”.
8
Page 9

Audio DJ Mode Button
You can press the “Audio DJ” button to control the audio DJ even when
the system is “Power Off”.
Windows XP Media Center Edition (MCE)
The Windows MCE is a complete software for home PC operating system
for you to enjoy entertainment choices together in one place easily
accessible from anywhere in the room.
9
Page 10

This will benefits the consumers to enjoy Media Center experience in their
own living room.
For more information on the function of the MCE, please refer to the
Windows XP MCE user’s guide that goes along with your software
package.
Cable Connection
Your notebook supports three video standard namely: NTSC, PAL and
SECAM. Ask your local dealer on the type of standard being used in
your respective country of origin.
• Remove the cover on the cable TV connector at the rear of the
computer with the aid of a screw driver.
• Connect one end of the cable wire to the RF connector of the
computer while the other end is connected to the wall socket or
directly to the antenna.
10
 Loading...