

Page 1

robotics
WARNING :
Use under the direct supervision of an adult when
handling parts with sharp points or edges.
Keep away from children under three years of age.
Use only batteries! Never use any other source of
electricity. Do not mix old and new batteries.
Do not use rechargeable batteries.
book
Tree of Knowledge (H.K.)
No part of this publication
may be reproduced
or transmitted,
in any form or by any means,
without permission
from the publisher
Page 2

Robot
The word Robot is used to describe any automatically
operated machine that replaces the human being.
It does not look like a human being nor does it necessarily
do the same things as human beings.
The origin of the word Robot is from a Czech word, Robota,
meaning " forced Labor " The word was used in a play written in 1920
showing how the industrial revolution created mechanical workers called robots,
which could do all types of physical work.
There is a very old Charlie Chaplin lm called "Modern Times",
in which the machine operator behaves like a machine.
One of the rst robot devices was a water clock made by the The Greeks in 250 BC.
From as early as 3rd century BC, during the Han dynasty in China,
a mechanical orchestra was made for the Emperor,
later ying birds, an otter that caught sh and many mechanical dolls were made.
The present day Robots started as mechanical toys and were later
adapted for use in industry and led to the development
of automatic industrial machinery.
One of the most important parts of a Robot are its "arms "or manipulators ,
these usually consist of an arm and body with 3 joints connected
by large links and a wrist consisting of 2 or 3 joints.
Many every day machines are made up of elementary robot mechanisms.
It was only from 1960 that microelectronics were introduced into robots.
The electronic robots in this kit are simple to assemble and operate.
They will show you how larger and more complicated robots function and behave.
1
Page 3
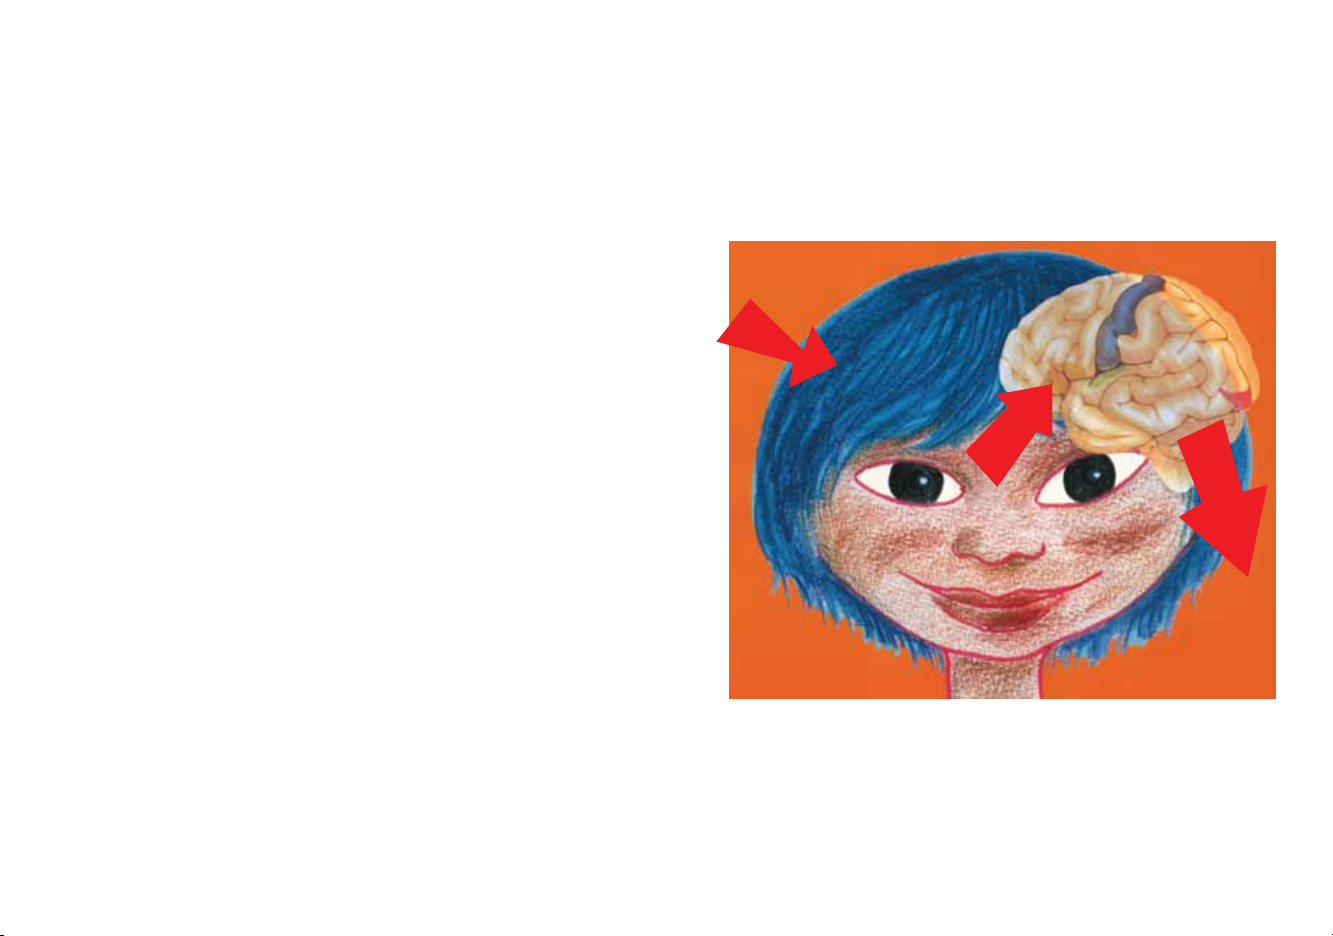
How do these Robots " think " ? Everyone has 5 basic senses; you see with your eyes, taste with your tongue, hear with your ears,
smell with your nose, and feel with the skin on your ngers.
The information that you get from any of these 5 " sensors " is transmitted
to your brain, the brain processes the information and the muscles in your body react.
Let's say you go out in the bright sun, what happens?
You immediately start to squint or shut your eyes completely.
A robot is programmed to operate in the same way, it receives
information and reacts accordingly.
The simple robot will receive information from the sensor and
Input
will react immediately.
As an example; we will use the robot that moves forward until it meets
an object in its way. It receives the information and stops.
We call this an open loop system: it works on the basis of receiving
information and reacting.
Process
A more complicated robot could do the following; it receives information
that there is an object in its way; it stops and now it can be programmed
to reverse, turn to the left, and try to go forward again.
If the object in the way is small, it can now go forward, but if the object
is large it will have to reverse and turn further to the left until such time
that it will not meet the object when it goes forward.
This robot works on what is called a closed loop system.
It receives information, compares it with what it has been programmed
to do, acts, and waits to receive further information before acting again.
To use the same example of the sun in your eyes.
You go out in the bright sun, and you immediately squint,
your brain now analyses the information and decides how you react,
for example by raising your hand over your eyes to act as a shade or you put on sunglasses.
Output
2
Page 4

There are three robots in this kit and the three circuit boards have the name of each individual robot
printed on them. Now a simple explanation as to how each robot operates.
REMOTE CONTROL ROBOT:
onto the front of the robot. Using any remote control from a TV or Stereo will start
the robot moving. It will work in a range of 2 meters. Surprise your friends by placing
the Robot next to the TV: when they use the Remote for the TV, the Robot will
start moving towards them.
Adjust the trimmer to make it more sensitive to the IR beam.
WAKE ME ROBOT:
As soon as the sensor detects light, natural
light or articial light, it moves forward
and makes a noise. You can use this
in your room as a Wake Up Alarm.
Place the robot next to the window
at night, and in the morning when it
becomes light, the robot will buzz and
move forward. Try putting out the lights
in the room and shining a torch on the
robot: it will move, it may follow you as
you walk. You can make your robot more
sensitive to light by adjusting the trimmer.
DETECTOR ROBOT:
As soon as it detects something in front of it, this robot will go backwards to avoid
the obstacle. This is something like a guide dog used by the blind.
Try and use this as watchdog for your room or desk. As soon as someone
approaches and passes in front of the robot, it will move backwards and buzz.
You can adjust the trimmer to increase its sensitivity to obstacles.
This Robot is sensitive to light.
This Robot has a sensor that detects obstacles in its way.
This robot operates by ashing an Infra Red beam
All the robots operate on two 1.5 AA batteries.
Before you start assembling your robot,
make sure that you have recognized
all the parts as they appear in the parts list.
3
Page 5
How to assemble your Robots.
The rst step is to prepare the chassis which will be used for all three robots. All three modules
and bodies t the same chassis. Changing the modules will give you dierent robots. Changing
the bodies gives them a dierent character. For the assembly you will need to use a very
small screwdriver. We suggest that you have this ready before you start.
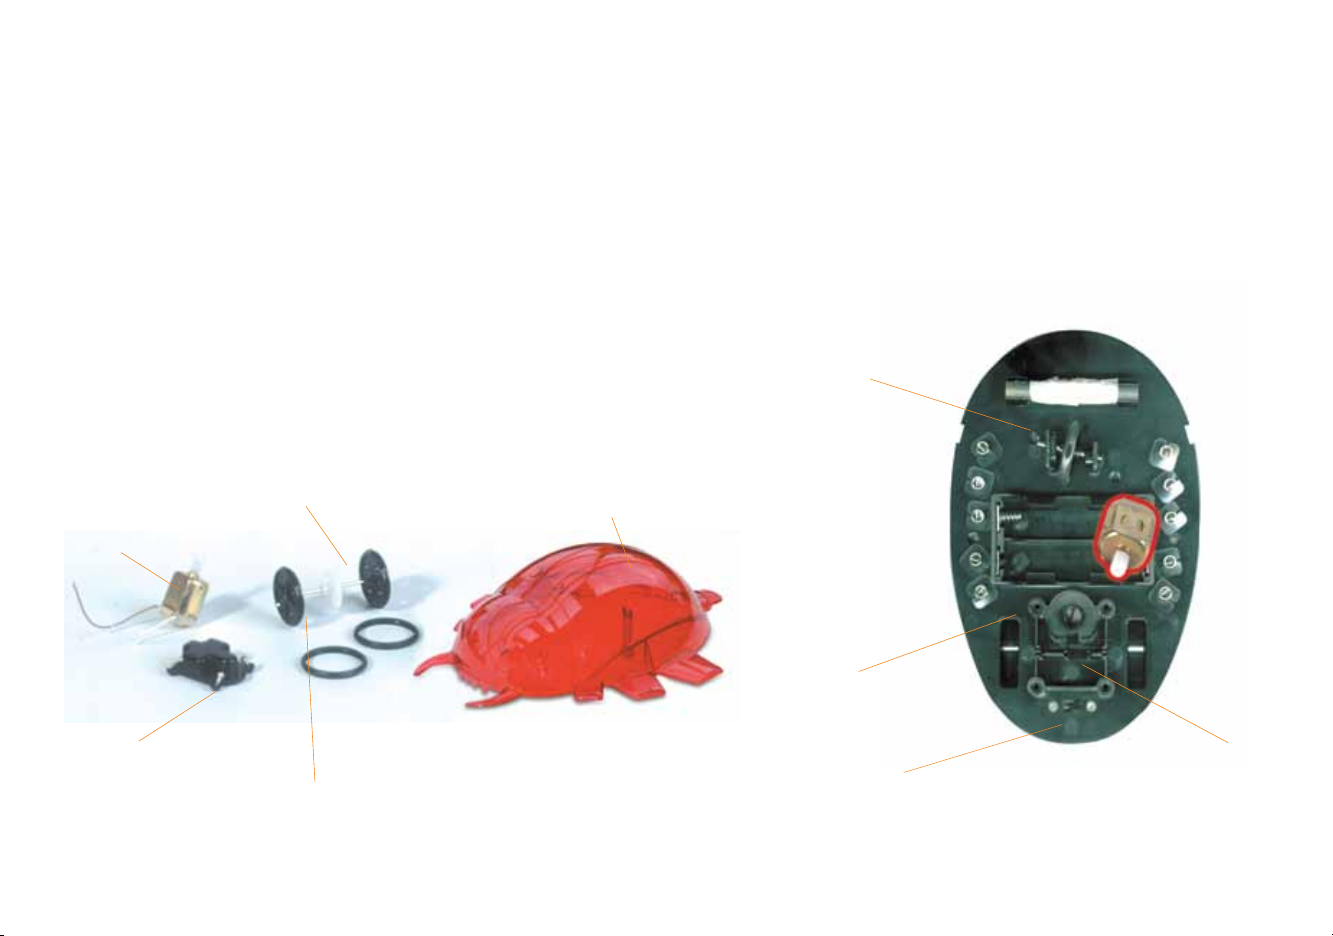
Step 1
Take the rear wheels (4).
Insert the rear wheels into the gear box at the back of the chassis,
you will see that the wheels only t in in one direction.
Gear
Motor (10)
Gearbox Cover (8)
Rear Wheels (4)
Body
Trimmer
Gear
Motor
Switch (11)
4
Housing
Page 6

Step 2
Take the motor (10) and insert it into the large hole (motor housing) from the top side of
the chassis, so that the "worm wheel" of the motor connects (meshes) with the cog wheel
that drives the back wheels.
Place the gearbox cover (8) on the gearbox
and secure it with 4 screws.
After you have secured the gear box cover, secure the motor.
Between the motor and the switch there is a post,
take the screw with the shape as shown in the picture, tighten it to the post, this will hold the
motor in place.
Step 3
Take the Module (printed circuit) and very carefully place it at the front
of the chassis, inserting the plastic rod into one of the two holes,
either on the right or the left, depending on the module.
The plastic rod is the trimmer, used for adjusting the sensivity.
In the middle of the module there is a small hole for the small screw
in your kit and two small holes at the back of the module that t onto
two small pins on the chassis. Using your screwdriver tighten the screw
in place on the pillar on the chassis. Using a small screwdriver tighten
the screw in place on the pillar
of the chassis. When secured,
take the wires and place each
wire next to one of the springs.
Pin
Trimmer
Pillar
Module
Support
Electronic Module
Trimmer
Pin
5
Page 7

Step 4
Connect all the wires of the same color to the same spring (there should be
2 or 3 wires of the same color).It does not matter which spring you use; take
whichever spring is easiest to reach with the same colored wires.
The springs are only used to connect the colored wires together, the
numbers next to them are meaningless.
The wires are connected by bending the spring sideways with your nger;
this creates a gap in the side of the spring. Push the wires into the gap,
making sure that only the bare parts of the wires are inserted into the
spring. Now let go and the wires are trapped in the spring.
Step 5
If the black and red wires from the battery holder are not on the bottom side of chassis push them through the hole next to the battery holder.
Step 6
Make sure that all the wires are in the right place and that none of the wires have come out of the springs.
Take one of the bodies of your choice and place it on the chassis.
Hold the body with one hand and turn the Robot over: with your other hand insert the the 2 screws into the holes situated between the springs
on both sides, and tighten them with a small screwdriver.
Step 7
Insert two AA batteries, switch on and try out the Robot. You will probably want to change the sensitivity: you can do this by adjusting the
trimmer. This can be done from the bottom of the Robot.
You will see a small rod by the front wheel.
Gently rotate it in one direction and then the other until your Robot responds, the way you want.
When not in use remove the batteries. NOTE: DO NOT USE RECHARGABLE BATTERIES
It is best to use new batteries when starting to use the Robot for the rst time.
6
Page 8

...researchers at robotics labs around the world are studying
the way people and robots interact. If people are to teach
machines, they ask, what would be the best way? And if
machines are to serve people, washing dishes and sending
faxes, what kind of robotic behavior will people be
comfortable with? How should the robot appear?
...training, the robot moves beyond simple imitation. Once
the robot has learned a task, it is able to perform it even
under dierent circumstances.
“In a task that involves making phoocopies, the
robot can get to the copy machine even if there’s a
stack of boxes in the way, or if the door to the copy
room is closed.”
Cinthya Breazeal and her colleagues at the Articial
Intelligence La at the Massachusetts Institute of Technology
have spent countless hours talking to Kismet, a robot that is
programmed to recongnize basic emotions in a human voice
and can respond through mechanically driven movements
of its eyes and mouth.
For years, the researchers have treated Kismet as if it were a
baby, at times shaking a stued toy in front of it or speaking
lovingly to it. Last year, Breazeal and a colleague reported
that Kismet could tell from the tone of and instructor’s voice
whether it was being praised, scolded or comforted. By
rening Kismet’s responses, the researchers hope to enable it
to develop new behaviors through social interaction.
7
Page 9

“When people interact with a young child, they have a lot of prosody in their voice,
exaggerate their facial expressions, slow down their gestures, all to make it easy for
the child to understand them, “ Breazeal said. “If we are willing to do this for infants
and even pets, there’s no reason why we would not do the same for robots that have
emotional appeal.”
As researchers plug away, trying to breathe human characteristics into circuits and
metal, they parade the best of the humanoid robots before museum visitors and
television cameras. Asimo, a robot made by Honda Motor Co. that resembles
anastronaut and can walk up and down stairs, does a little work as well. At the
automaker’s Tokyo headquarters, Asimo sometimes guides visitors to a conference
room.
“People really enjoy this,” a company representative said. “The only problem is that
when Asimo leaves the room, the guests want to follow it to see what it’s going to do
next.”
(With compliments to the New York Times)
Trouble Shooting
If your Robot does not move, check if you have inserted the batteries correctly.
Make sure the batteries are new.
Make sure your switch is on.
Check if you need to adjust the trimmer.
Check if all the connections are correct and that the wires have not moved.
Check if the motor is pushed all the way down and that the gears are "meshed"
Check if there is nothing disturbing the wheels from moving.
8
 Loading...