

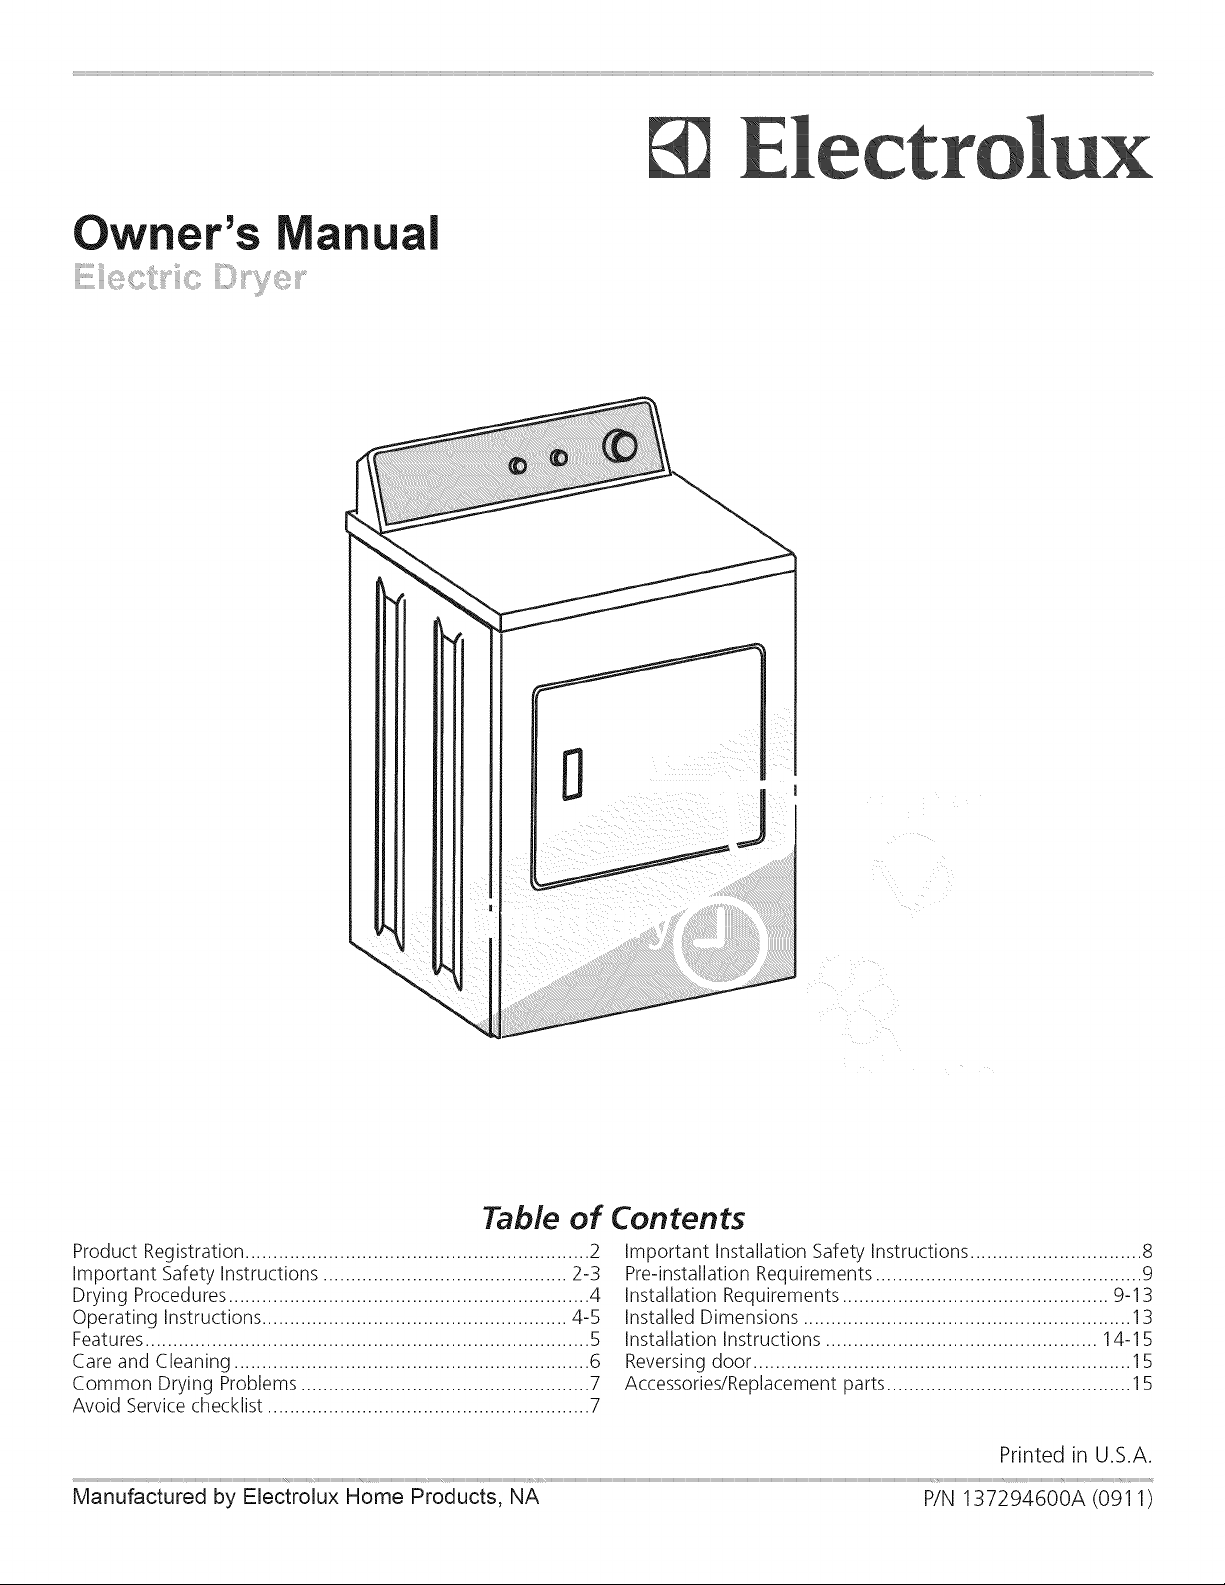
Electrolux EKDR14XAKW0 Owner’s Manual
D
Table of Contents
Product Registration .............................................................. 2
Important Safety Instructions ............................................ 2-3
Drying Procedures................................................................. 4
Operating Instructions ....................................................... 4-5
Features................................................................................ 5
Care and Cleaning ................................................................ 6
Common Drying Problems.................................................... 7
Avoid Servicechecklist .......................................................... 7
Important Installation Safety Instructions ............................... 8
Pre-installation Requirements ................................................ 9
Installation Requirements ................................................ 9-13
Installed Dimensions ........................................................... 13
Installation Instructions ................................................. 14-15
Reversing door .................................................................... 15
Accessories/Replacement parts ............................................ 15
Printed in U.S.A.
Manufactured by Electrolux Home Products, NA P/N 137294600A (0911)
Product Record
Read and Save These Instructions
Record Your Model and Serial Numbers
The model and serial numbers of your dryer are found on the
dryer serial plate located of the left side of the door opening.
Record and retain these numbers.
Model Number
Serial Number
Purchase Date
Important Safety Instructions
Recognize safety symbols, words and
labels
Safety items throughout this manual are labeled
with a WARNING or CAUTION based on the risk
type as described below:
This symbol alerts you to situ-
ations that may cause serious
body harm, death or property
damage.
This symbol alerts you to situ-
ations that may cause bodily
injury or property damage.
Save these instructions for
future reference.
manual must be followed to minimize the risk of fire or explosion or to
prevent property damage, personal injury or death.
Do not store or use gasoline or other flammable vapors and
liquids in the vicinity of this or any other appliance.
WHAT TO DO IFYOU SMELL GAS:
• Do not try to light any appliance.
• Do not touch any electrical switch; do not use any phone in
your building.
Clear the room, building or area of all occupants.
immediately call your gas supplier from a neighbor's phone.
Follow the gas suppiier's instructions.
if you cannot reach your gas supplier, caii the fire depart-
ment.
Read all instructions before using this appliance. This book
contains valuable information about:
• Operation
Care
Service
Keep it in a safe place.
This Use and Care Guide provides general operating instruc-
tions for your dryer. It also contains information about fea-
tures for several other models. Your dryer may not have every
feature included.
Use the dryer only as instructed in this Use & Care Guide and
the Operating Instructions included with your dryer.
For your safety the following information in this
The California Safe Drinking Water
and Toxic Enforcement Act requires the Governor of
California to publish a list of substances known to the
state to cause cancer, birth defects or other reproduc-
tive harm, and requires businesses to warn customer
of potential exposure to such substances. Included in
this list are soot and carbon monoxide, both of which
may be produced by the use of this product.
The instructions appearing in this Use and
Care Guide are not meant to cover every possible
condition and situation that may occur. Common
sense and caution must be practiced when installing,
operating and maintaining any appliance.
Installation and service must be performed by a qualified
installer, service agency or the gas supplier.
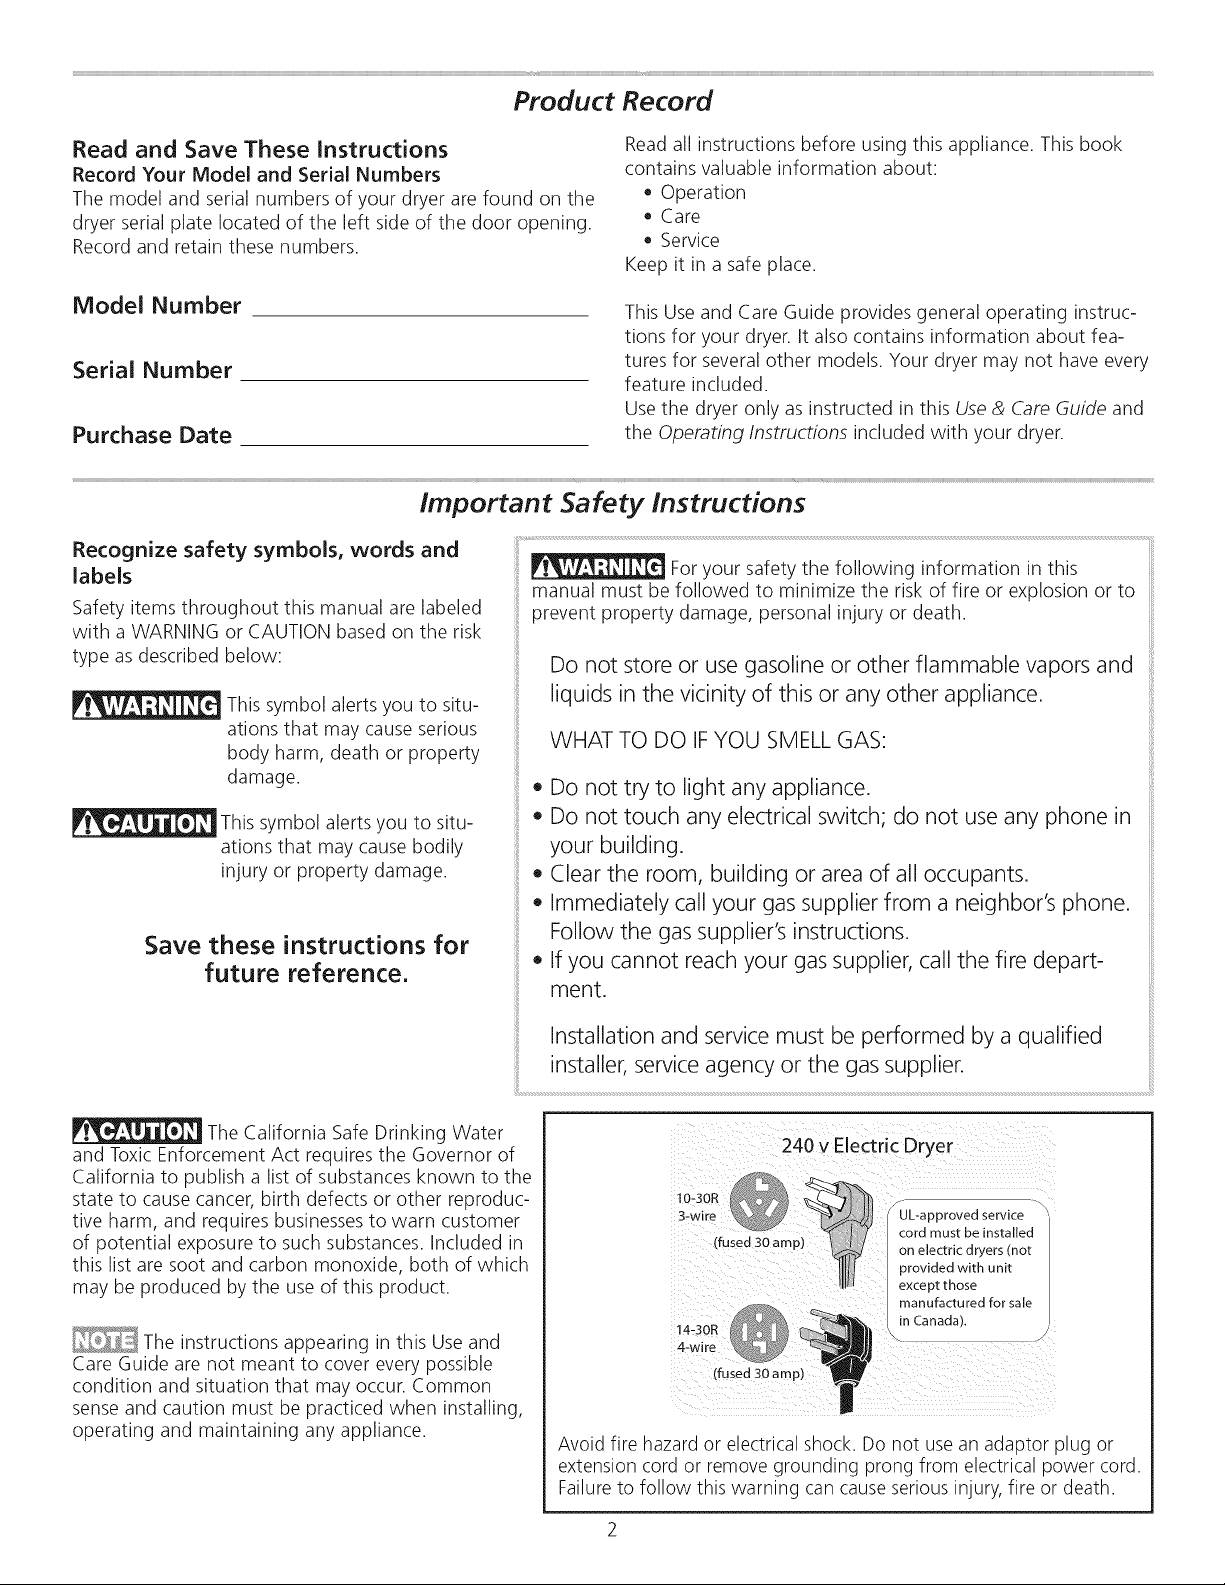
240 v Electric Dryer
I0-30R
3-wire UL-approved service
(fused 30 amp) on electric dryers ino_
14-30R
4-wire
(fused 30 ampj
cord must be installed
prov{ded with unit
except those
manufactured for sale
in Canada}
Avoid fire hazard or electrical shock. Do not use an adaptor plug or
extension cord or remove grounding prong from electrical power cord.
Failureto follow this warning can cause serious injury, fire or death.
Important Safety Instructions, continued
To reduce the risk of fire, electrical shock, or injury to persons when using this dryer, comply with the basic
warnings listed below. Failure to comply with these warnings could result in serious personal injuries.
You can be killed or seriously injured if you don't follow these Important Safety Instructions:
PREVENT F/RE
• Do not dry items that have been previously cleaned in, soaked
in, or spotted with gasoline, cleaning solvents, kerosene,
waxes, etc. Do not store these items on or near the dryer.
Thesesubstancesgive off vapors that could ignite or explode.
• Do not place items exposed to cooking oils in your dryer.
Items contaminated with cooking oils may contribute to a
chemical reaction that could cause a load to catch fire.
• Do not dry articles containing rubber, plastic or similar
materials such as bras, galoshes, bath mats, rugs, bibs,
baby pants, plastic bags and pillows that may melt or burn.
Some rubber materials, when heated, can under certain
circumstances produce fire by spontaneous combustion.
• Clean the lint screen before or after each load. The interior
of the dryer, lint screen housing and exhaust duct should be
cleaned approximately every 18 months by qualified service
personnel. An excessiveamount of lint build-up in these
areas could result in inefficient drying and possible fire. See
Care and Cleaning.
• Do not operate the dryer if the lint screen is blocked, dam-
aged or missing. Fire hazard, overheating and damage to
fabrics can occur.
- FIRE HAZARD - A clothes dryer produces
combustible lint. The dryer must be connected to an outdoors
exhaust. Regularly inspect the outdoor exhaust opening and
remove any accumulation of lint around the opening and in
the surrounding area.
• Do not obstruct the flow of ventilating air. Do not stack or place
laundry or throw rugs against the front or back of the dryer.
• Do not spray any type of aerosol into, on or near dryer at
any time.
• Do not usefabric softeners or products to eliminate static
unless recommended by the manufacturer of the fabric
softener or product.
• Do not continue to use the dryer is you hear squeaking,
grinding, rubbing or other unusual noises. This could be a
sign of mechanical breakdown and lead to fire or serious
injury. Contact a qualified technician immediately.
• Failure to comply with these warnings could result in fire,
explosion, serious bodily injury and/or damage to the rub-
ber or plastic parts of the dryer.
PROTECT CHILDREN
• Do not allow children to play on or in the dryer. Close
supervision of children is necessary when the dryer is used
near children. As children grow, teach them the proper,
safe use of all appliances.
• Destroy the carton, plastic bag and other packing materi-
als after the dryer is unpacked. Children might usethem
for play. Cartons covered with rugs, bedspreads or plastic
sheets can become airtight chambers.
• Keep laundry products out of children's reach. To prevent
personal injury, observe all warnings on product labels.
• Before the dryer is removed from service or discarded, re-
move the dryer door to prevent accidental entrapment.
• Failure to comply with these warnings could result in seri-
ous personal injuries.
PREVENT INJURY
• Toprevent shock hazard and assure stability during opera-
tion, the dryer must be installed and electrically grounded
by a qualified service person in accordance with local
codes. Installation instructions are packed in the dryer for
the installer's reference. Referto INSTALLATION INSTRUC-
TIONS for detailed grounding procedures. If the dryer is
moved to a new location, have it checked and reinstalled
by a qualified service person.
• Toprevent personal injury or damage to the dryer, the
electrical power cord of a gas dryer must be plugged into a
properly grounded and polarized 3-prong outlet. The third
grounding prong must never be removed. Never ground
the dryer to a gas pipe. Do not use an extension cord or an
adaptor plug.
• ALWAYSdisconnect the dryer from the electrical supply
before attempting any service or cleaning. Failure to do so
can result in electrical shock or injury.
• Do not use any type spray cleanser when cleaning dryer
interior. Hazardous fumes or electrical shock could occur.
• Toprevent injury, do not reach into the dryer if the drum is
moving. Wait until the dryer has stopped completely before
reaching into the drum.
PREVENT INJURY AND DAMAGE TO THE DRYER
• Ai] repairs and servicing must be performed by an au-
thorized servicer unless specifically recommended in this
Owner's Guide. Use only authorized factory parts.
• Do not tamper with controls.
• Do not install or store the dryer where it will be exposed to
the weather.
• A thermal limiter switch automatically turns off the motor
in the unlikely event of an overheated situation (electric
dryers only). A service technician must replace the thermal
limiter switch after correcting the fault.
o
Failure to comply with these warnings could result in seri-
ous personal injuries.
Drying Procedures
To reduce the risk of fire,
electric shock or injury to persons, read the
IMPORTANTSAFETYINSTRUCTIONSin this Use
and Care Guide before operating your dryer.
(Mesh bag not included.)
Clean the lint filter after
every load.
1. Prepare load for drying.
• Dry items of similar fabric, weight and construction in the same load.
Separate dark items from light-colored items. Separate items that shed
lint from those that attract lint.
Check for stains which may not have been removed in washing. Repeat
stain removal process and wash again before drying. Dryer heat may
permanently set some stains.
Placedelicate or small items in a mesh bag.
Be sure buckles, buttons and trim are heatproof and won't damage the
drum finish. Close zippers; fasten hooks and Velcro®-Iike fasteners. Tie
strings and sashes to prevent snagging and tangling.
2. Check that the lint filter is dean and in place.
3. Load the dryer and dose the door.
Load items loosely. The average wet load will fill the drum 1/3 to 1/2
full. Items need room to tumble freely for even drying and lesswrin-
kling.
If desired, place a dryer fabric softener sheet on top of the load at the
beginning of the cycle.
Tosave energy and time and avoid uneven drying and wrinkling, do not
overload the dryer.
When drying large items, dry only two or three items at a time. Fillout
the load with small and medium sized items.
For delicate or very small loads, add two or three similar items to im-
prove tumbling action.
4 Select the appropriate cycle and settings for each load.
See Operating Instructions for your specific model.
5. Start the cycle.
• Toadd or remove items when the dryer is running, open the door. The
dryer will stop when the door is opened. Allow the drum to come to a
complete stop before reaching inside.
Close the door and press Start to resume the cycle.
6. When the cycle ends, remove items immediately and hang or fold.
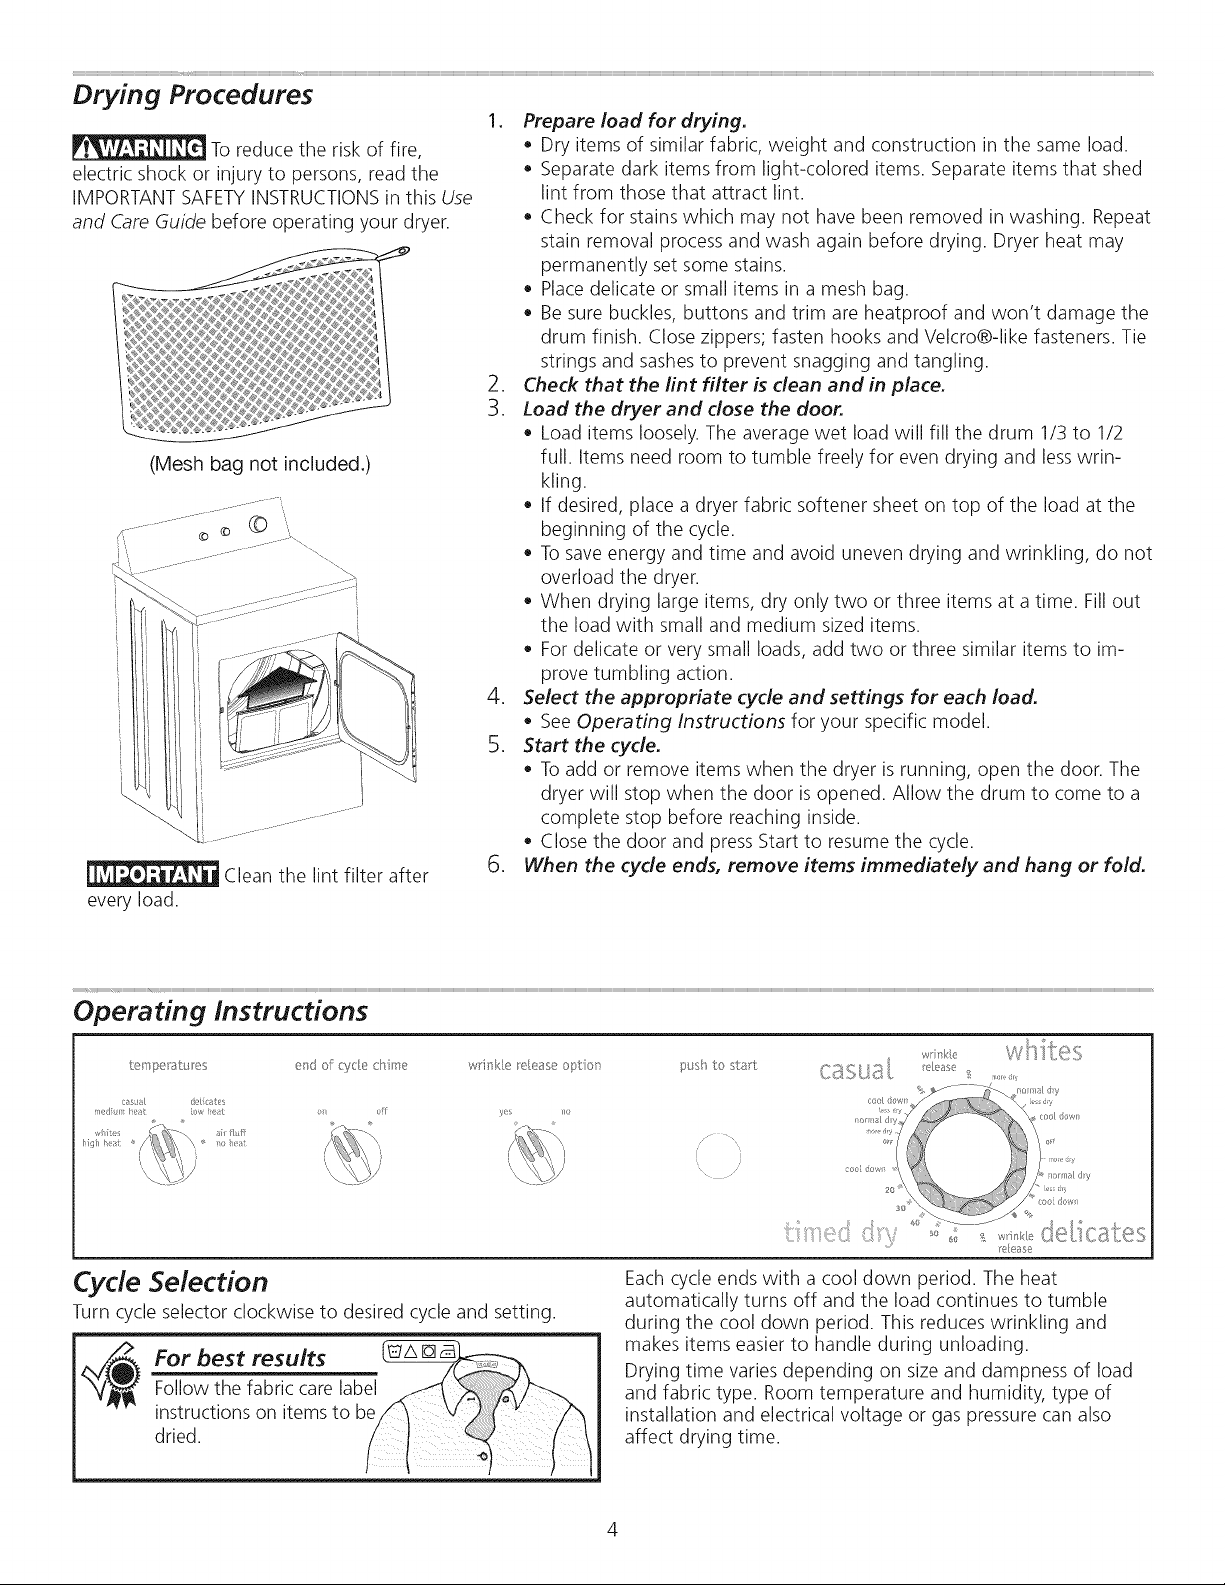
Operating Instructions
_,mpe_ ; es e_d :_f cycte c me wd_ke e[e,_ise opol _ :_sl_ _ _l::a_l:: r_4_,_s_
_i/flul/¸
\
Cycle Selection
Turn cycle selector clockwise to desired cycle and setting.
_ or best resultsFollow the fabric care label
instructions on items to be
dried.
wlnke
/
Each cycle ends with a cool down period. The heat
automatically turns off and the load continues to tumble
during the cool down period. This reduces wrinkling and
makes items easier to handle during unloading.
Drying time varies depending on size and dampness of load
and fabric type. Room temperature and humidity, type of
installation and electrical voltage or gas pressure can also
affect drying time.
Cycle Selection, continued Temperature Selection
AUTO DRY CASUAL
This cycle is best for permanent press items. Drying time is
determined automatically at the temperature selection of
your choice.
• Casual medium heat issuggested for permanent press
items.
Initially set cycle selector on normal dry.
For items requiring more drying time, set cycle selector
on more dry.
For items requiring lessdrying time, set cycle selector on
less dry.
A signal will sound toward the end of the cool down
period when the end of cycle chime isturned on.
If the wrinkle release option is turned to yes, the cycle
selector will advance to the wrinkle release setting.
Unheated tumbling continues during wrinkle release
for 16 minutes to help reduce wrinkling if the dried load
cannot be removed promptly. A signal will sound briefly
every five minutes as a reminder to remove the load
when the end of cycle chime isturned on.
AUTO DRY WHITES
This cycle is best for cotton items. Drying time isdetermined
automatically at the temperature selection of your choice.
Whites high heat issuggested for cotton items.
Initially set cycle selector on normal dry.
For items requiring more drying time, set cycle selector
on more dry.
For items requiring lessdrying time, set cycle selector on
less dry.
AUTO DRY DELICATES
This cyc{eis best for knit and de{icate items. Drying time is
determined automatically at the temperature selection of
your choice.
Delicates low heat issuggested for knit and delicate items.
Initially set cycle selector on normal dry.
For items requiring more drying time, set cycle selector
on more dry.
For items requiring lessdrying time, set cycle selector on
less dry.
If the wrinkle release option is turned to yes, the cycle
selector will advance to the wrinkle release setting.
Unheated tumbling continues during wrinkle release
for 16 minutes to help reduce wrinkling if the dried load
cannot be removed promptly. A signal will sound briefly
every five minutes as a reminder to remove the load
when the end of cycle chime isturned on.
TIMED DRY
This cycle provides approximately 60 minutes of drying time
at the temperature selection of your choice.
Always follow directions on fabric care labels.
- FIRE HAZARD - To avoid fire hazard, do not
use heat to dry items containing feathers or down, foam rub-
ber, plastics, or similarly textured, rubber-like materials. Use
the Timed Dry cycle and the Air Fluff/No Heat setting.
The whites-high heat, casual-medium heat, and
deficates-low heat temperature settings may be used
_with any cycle setting. The air fluff-no heat setting can be
::used only in the Timed Dry cycle. Air fluff-no heat setting
tumbles the load without heat. Use air fluff to freshen
clothing, pillows or blankets, or to dust draperies.
Energy Saving Tips
Keep the lint screen clean and exhaust the dryer correctly.
Sort laundry properly and select proper temperature and
cycle settings. Choose an automatic dry cycle whenever
possible for accurate drying time.
Dry only full loads. Single items and small loads usually take
longer to dry.
Avoid overloading, adding wet items to a partially dry load,
and overdrying.
Dry one load after another to take advantage of a warm dryer.
Opening the door needlessly causes warm air to escape,
which prolongs drying time.
If possible, use the dryer on low humidity days.
Install the dryer in an area where the room temperature is
at least 45% (7°C).
Features
END OF CYCLESIGNAL
A signal will sound at the end of the cycle and periodically
during wrinkle release (some models) if selected.
DRUM LIGHT (some models)
The drum light will come on whenever the door is opened to
illuminate the drum during loading and unloading. Closing
the door turns off the light.
REVERSIBLEDOOR
Your dryer is equipped with a reversible door. The door can
be hinged on the right or left side.
For step-by-step instructions on DOOR REVERSAL,re-
fer to the Installation Instructions supplied with this dryer.
 Loading...