

Page 1

EDS6051
...................................... ........................................................
USER MANUALTUMBLE DRYER
Page 2
2 www.electrolux.com
Contents
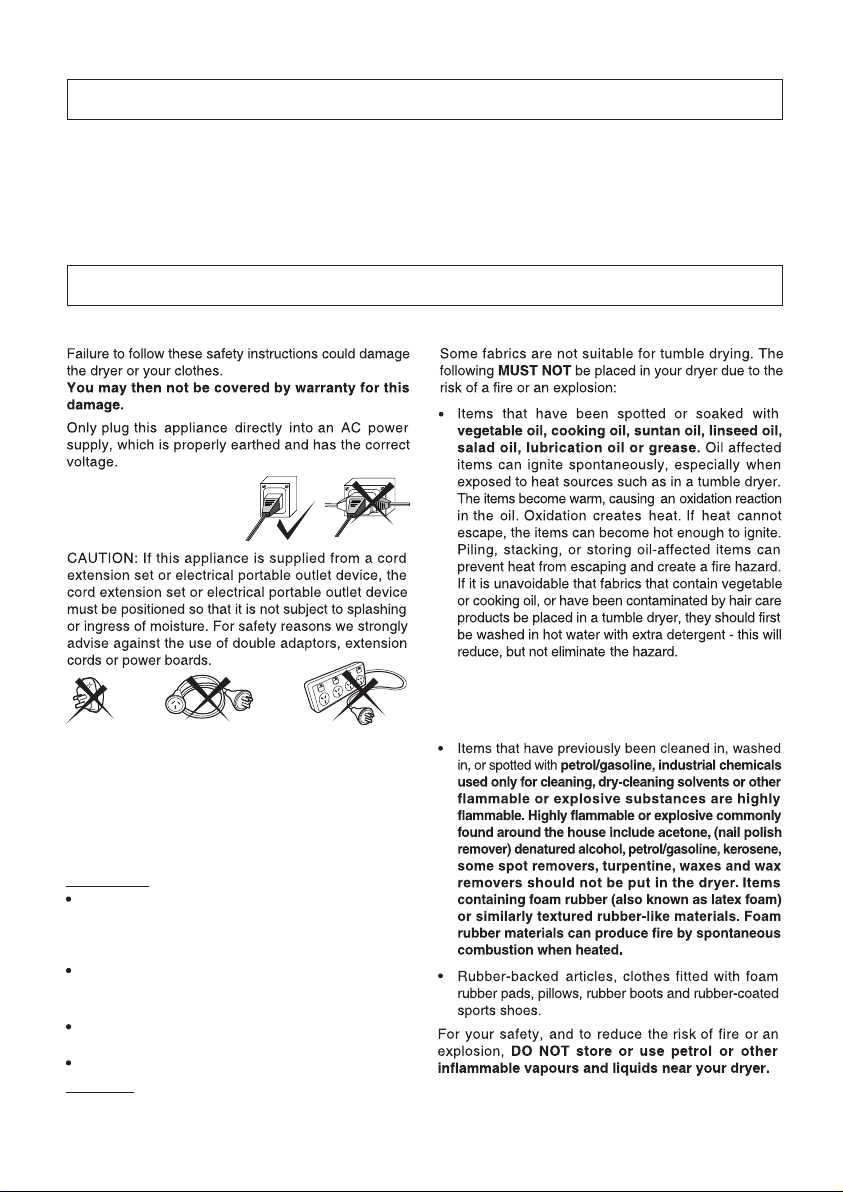
Important Safety Instructions
-
Dryer Safety
-
Fire Hazards
-
Cleaning the Lint Filter
-
Drying Guide
Installation Instructions
....................................................
...................................................
...................................
...................................................
Page 2
Page 2
Page 3
Page 3
Page 4...................................
Important Safety Instructions
Use
-
The Control Panel
-
Operating Sequence
Care And Cleaning Page 9
Hints Page 10
.................................................................
Troubleshooting & Accessories Page 11
Warranty Page 15
..........................................................
.......................................
....................................
.........................................
...................
Page 6
Page 7
DRYER SAFETY
See the serial number sticker
located on the bottom of the
door opening for voltage
information.
This appliance is not intended for use by persons
(including children) with reduced physical, sensory or
mental capabilities, or lack of experience and
knowledge, unless they have been given supervision
or instruction concerning use of the appliance by a
person responsible for their safety.
Children should be supervised to ensure that they do
not play with the appliance.
IMPORTANT:
If the electrical cord of this appliance is
damaged, it must be replaced by the Manufacturer, Authorised Service Agent or similarly
qualified person in order to avoid a hazard.
These dryers are for drying clothes, towels and
linen at home. Do not use them for any other
purpose.
Lint must not be allowed to accumulate around
the tumble dryer.
Do not dry unwashed items in the tumble dryer.
WARNING: Never stop a tumble dryer before the
end of the drying cycle unless all items are
quickly removed and spread out so that the heat
is dissipated.
FIRE HAZARDS
The final part of a tumble dryer cycle occurs without
heat (cooling cycle) to ensure that the items are left
at the temperature that ensures that the items will
not be damaged.
Page 3
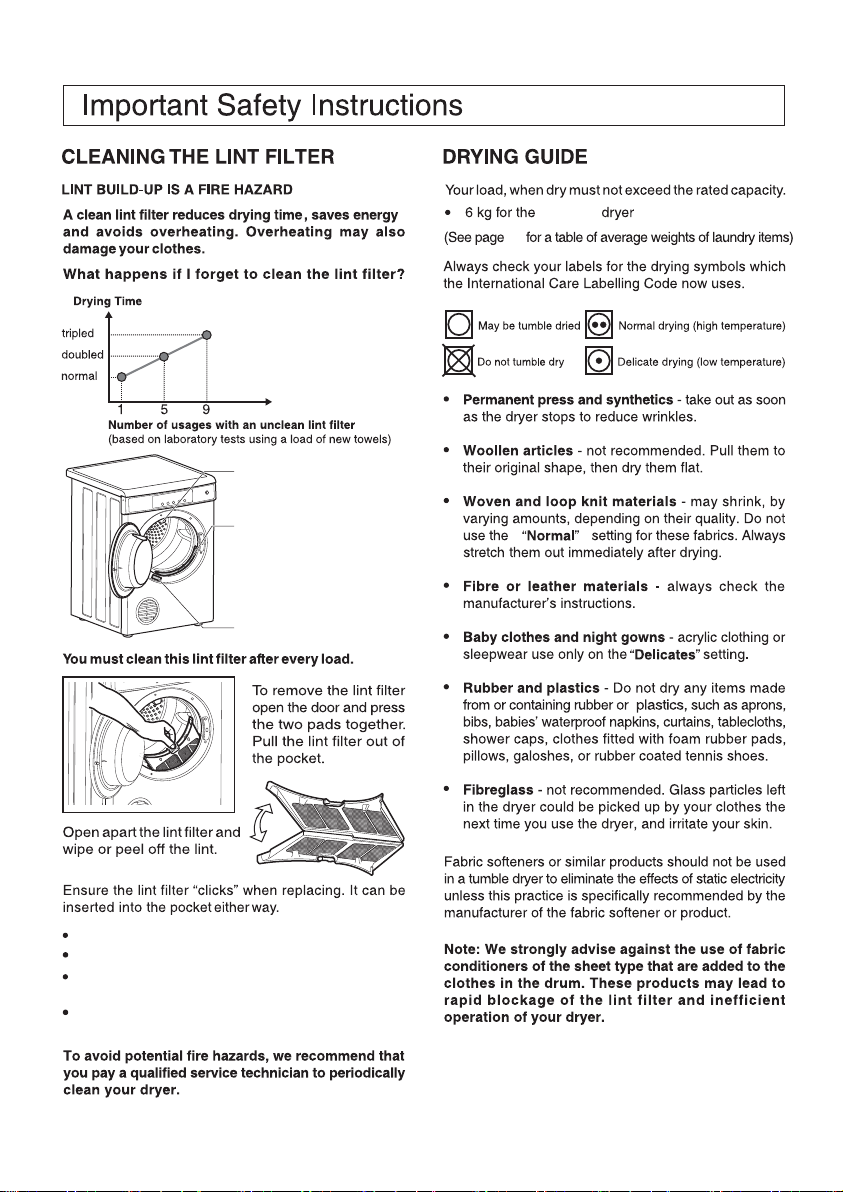
Nozzle
Lint Filter
The lint filter is located at
the front of your dryer at
the bottom of the door
opening.
Rating Plate
10
EDS6051
www.electrolux.com
3
Never operate your dryer without the lint filter.
Do not allow lint to build around your dryer.
A torn or damaged lint filter must be replaced
immediately.
Overloading can increase lint build-up because the
airflow is reduced.
Page 4
4
www.electrolux.com
on top of a front load washing machine using a
stacking kit available as an optional extra (not
available for all washing machine models).
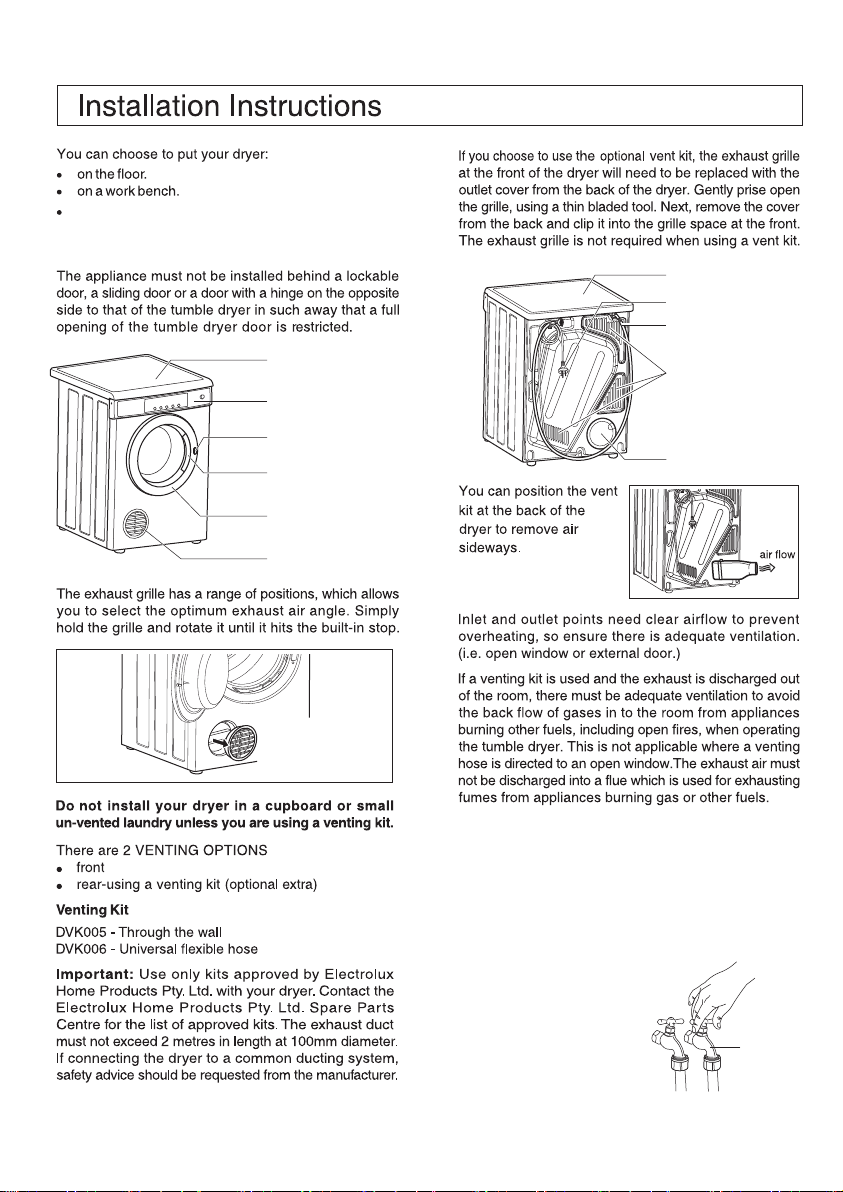
Worktop
Mains Cable
Water Inlet Hose
(Optional Extra)
Worktop
Control Panel
Door Safety Switch
Button
Door Handle
Door
Exhaust Grille
Removable
Exhaust
Grille
Air Inlet Duct
Outlet Cover
Water Connection
Cold water tap must be installed within 110 cm of your
dryer’s water inlet and the tap must be 3/4 inch BSP
thread for laundry hose connection. Water pressure
must be between 200kpa to 800kpa.
Use the hose supplied with the dryer. DO NOT USE
OLD HOSES.
To connect the water inlet to dryer:
1.
Turn off cold water supply
to washer.
Cold
water tap
Page 5

Remove cold inlet hose from cold water supply.
2.
Check rubber seal,
replace if worn.
3.
Turn on cold supply for a short time to run some
water into a bucket or container to clear any
contaminants in the line.
4.
Connect the Y-Connector to the cold water tap.
Check rubber
seal
www.electrolux.com
5.
Connect the cold inlet hose for the washer and the
dryer to the Y-Connector and tighten them.
Cold water tap
To Washing
Machine
Turn on the water tap and check for leaks at all
6.
connection.
5
Page 6

6
www.electrolux.com
6 58 104 3 7 19
The dryer
is
or
This button allows you to select 2 options.
continue
unload
2
When a new program is selected while the dryer is
already running, the drying process will continue
using the settings from the new program.
Iron Aid:
This option will help in reducing wrinkles on your
clean and dry clothes by using a combination of
moisture and warm air function. Maximum load
should not exceed 1 kg when this option is
selected. This option cannot be combined with any
other programs.
This option should only be used to reduce
wrinkles for clothes which are clean and dry.
When this option is selected, all other
programs will be suppressed.
from
Page 7

To activate this option press and hold the “Option”
and “Delay” buttons simultaneously until a long
beep is heard.
To deactivate press and hold the same buttons
until a short beep is heard.
www.electrolux.com
Press door
safety switch
button.
To obtain the best drying results with small loads
it is recommended to use Extra Dry program.
7
For drying delicates and
synthetics at lower heat for
maximum care of the fabrics.
The Delicate setting will cause
the heater to cycle on for
shorter time than the Normal
setting.
Page 8

8
www.electrolux.com
WARNING: Never stop a tumble dryer before
the end of the drying cycle unless all items
are quickly removed and spread out so that
the heat is dissipated.
at
both
Page 9

Care And Cleaning
Warning!
You must DISCONNECT the appliance from
the electricity supply, before you can carry out
any cleaning or maintenance work.
External Cleaning
Clean the appliance only with soap and warm water.
Fully dry all the surfaces.
Caution!
Do not use alcohol, solvents or chemical
products.
Cleaning The Water Inlet Filter
If your water is very hard or contains traces of lime
deposit, the water inlet filter may become clogged.
It is therefore a good idea to clean it from time to time.
To clean the water inlet filters:
1.
Close the water tap.
2.
Remove the water inlet
hose from the water tap.
Clean the filter in the inlet
3.
hose with a stiff brush.
Remove the inlet hose behind the appliance.
4.
www.electrolux.com
5.
Clean the filter in the valve with a stiff brush or a
towel.
Re-install the inlet hose. Make sure that the
6.
couplings are tight to prevent leakages.
Open the water tap.
7.
9
Page 10

10
www.electrolux.com
Due to variations in dryer load fabric texture and
thickness it is possible that not all items will be
dried evenly. It you experience uneven dryness on
Normal Dry program please use either Extra Dry or
Timer Program but be mindful of the type of fabric
being dried to avoid overdrying certain types of
fabric. Always follow drying instructions attached to
the items intended to be dried in a clothes dryer.
Page 11

TROUBLESHOOTING
Instructions
Isolated wet spots on fabrics
after “Iron Aid” cycle completed.
No water goes out from
Nozzle, when “Iron Aid ”
cycle is selected.
Clothes are slightly damp
after using “Iron Aid” cycle.
www.electrolux.com
Important Safety
the
temperature
You have used wet clothes with “Iron Aid” option.
The “Iron Aid” program reduces wrinkle on dry laundry only. It is not a
drying program.
Water pressure too low - please check that the water pressure is between
200 kPa and 800 kPa.
The water tap is closed, please open the water tap.
The inlet hose is squashed or kinked, please check inlet hose connection.
The filter in the inlet hose is blocked, please clean the inlet hose filter.
Refer to relevant paragraph in “ Care And Cleaning” section.
The Nozzle is clogged, please contact the Service Centre.
Contact the Service Centre if you are still having problems.
This is Normal. Iron Aid uses moisture to reduce the wrinkle on fabrics. It
is recommended to hang clothes after using this cycle.
If your laundry feels wet rather than slightly damp, then the household
water pressure is too high. You may need to reduce pressure by installing
a pressure reducing valve at Mains water connection to the household.
This must be done by qualified plumber.
Note: High water pressure is harmful to all appliances in your household
that are connected to the water supply ie: washing machine,
dishwasher... etc.
11
Page 12

12 www.electrolux.com
IMPORTANT
ACCESSORIES
below:
10.
Page 13

Note
www.electrolux.com 1
3
Page 14

14
www.electrolux.com
Page 15

www.electrolux.com
15
Page 16

www.electrolux.com/shop
808116304-001-032014
 Loading...