

Electrolux E36IC75FSS4, E36IC75FSS3, E36IC75FSS1 Owner’s Manual
J_
Use _ Care Guide
-Induction Cooktop
Finding information
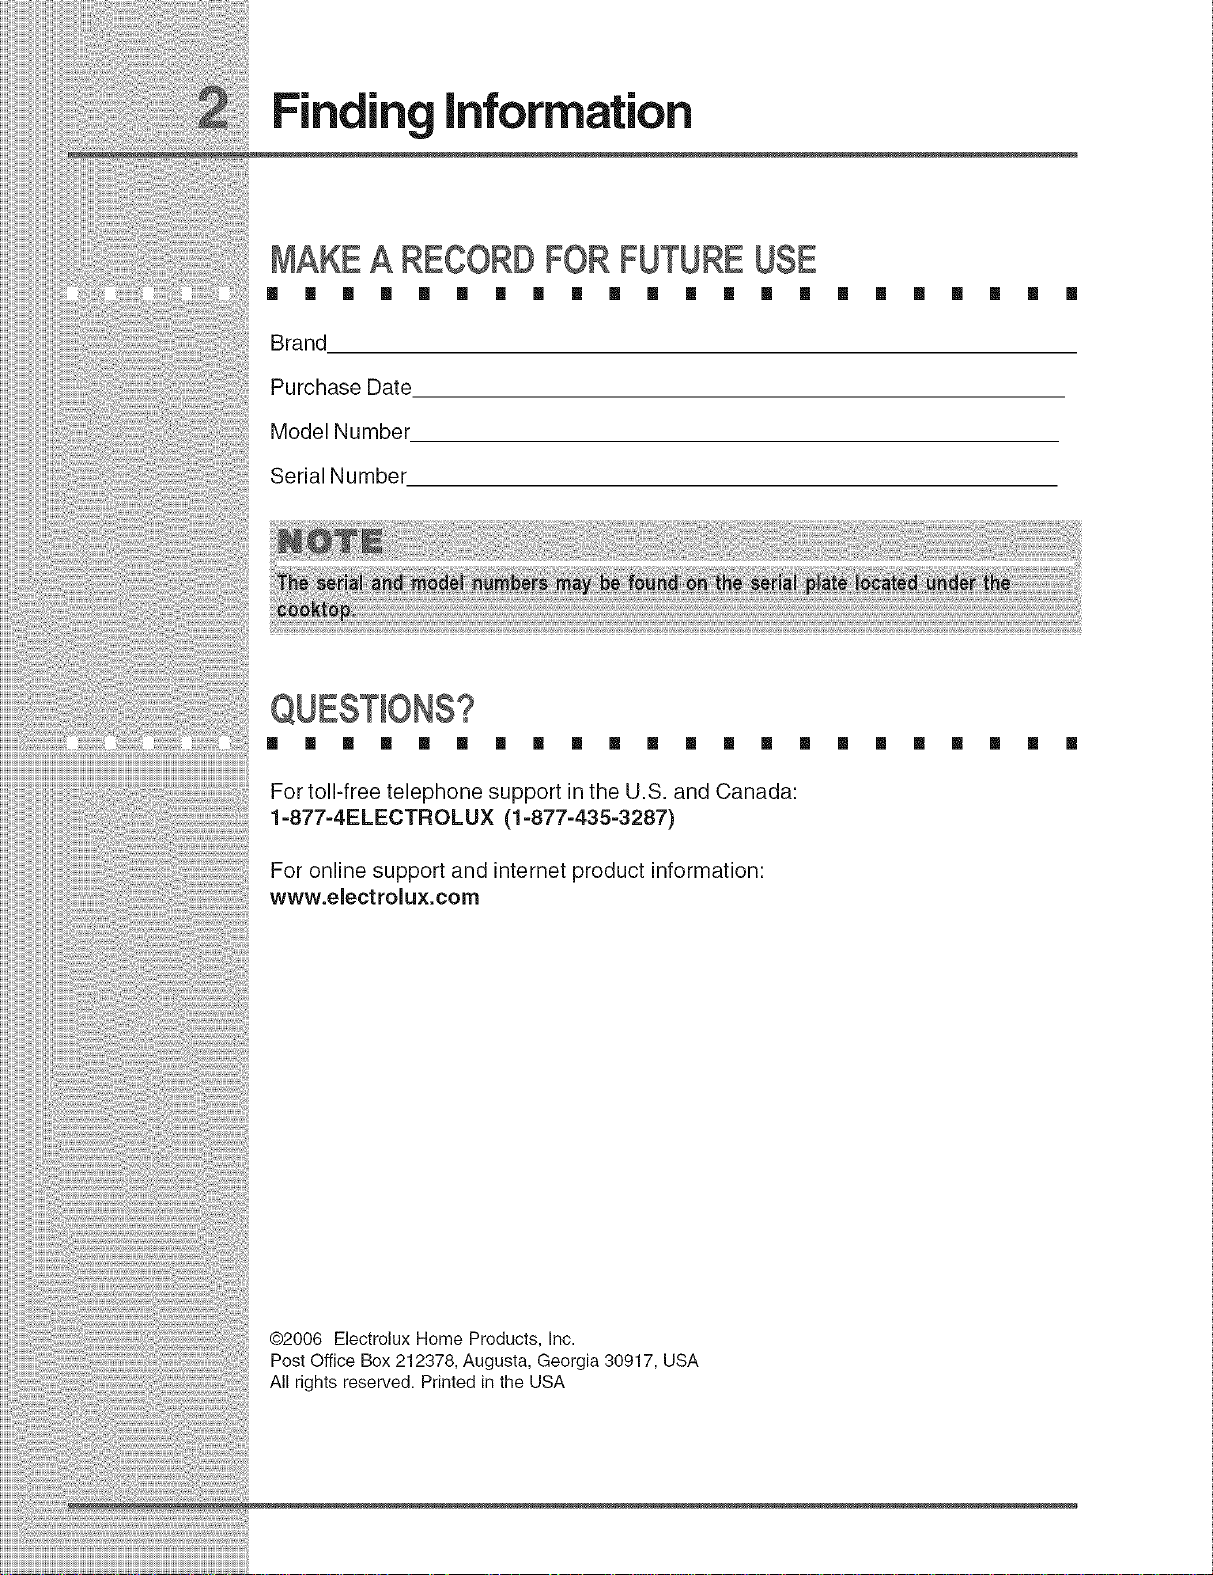
MAKEA RECORDFORFUTUREUSE
[] [] [] [] [] [] [] [] [] [] [] [] [] [] [] [] [] [] [] [] [] []
Brand
Purchase Date
Model Number
Serial Number
[] [] [] [] [] [] [] [] [] [] [] [] [] [] [] [] [] [] [] [] [] []
For toll-free telephone support in the U.S. and Canada:
l=877-4ELECTROLUX (1-877-435-3287)
For online support and internet product information:
www.electrolu×.com
©2006 Electrolux Home Products, inc.
Post Office Box 212378, Augusta, Georgia 30917, USA
All rights reserved. Printed in the USA
Finding information
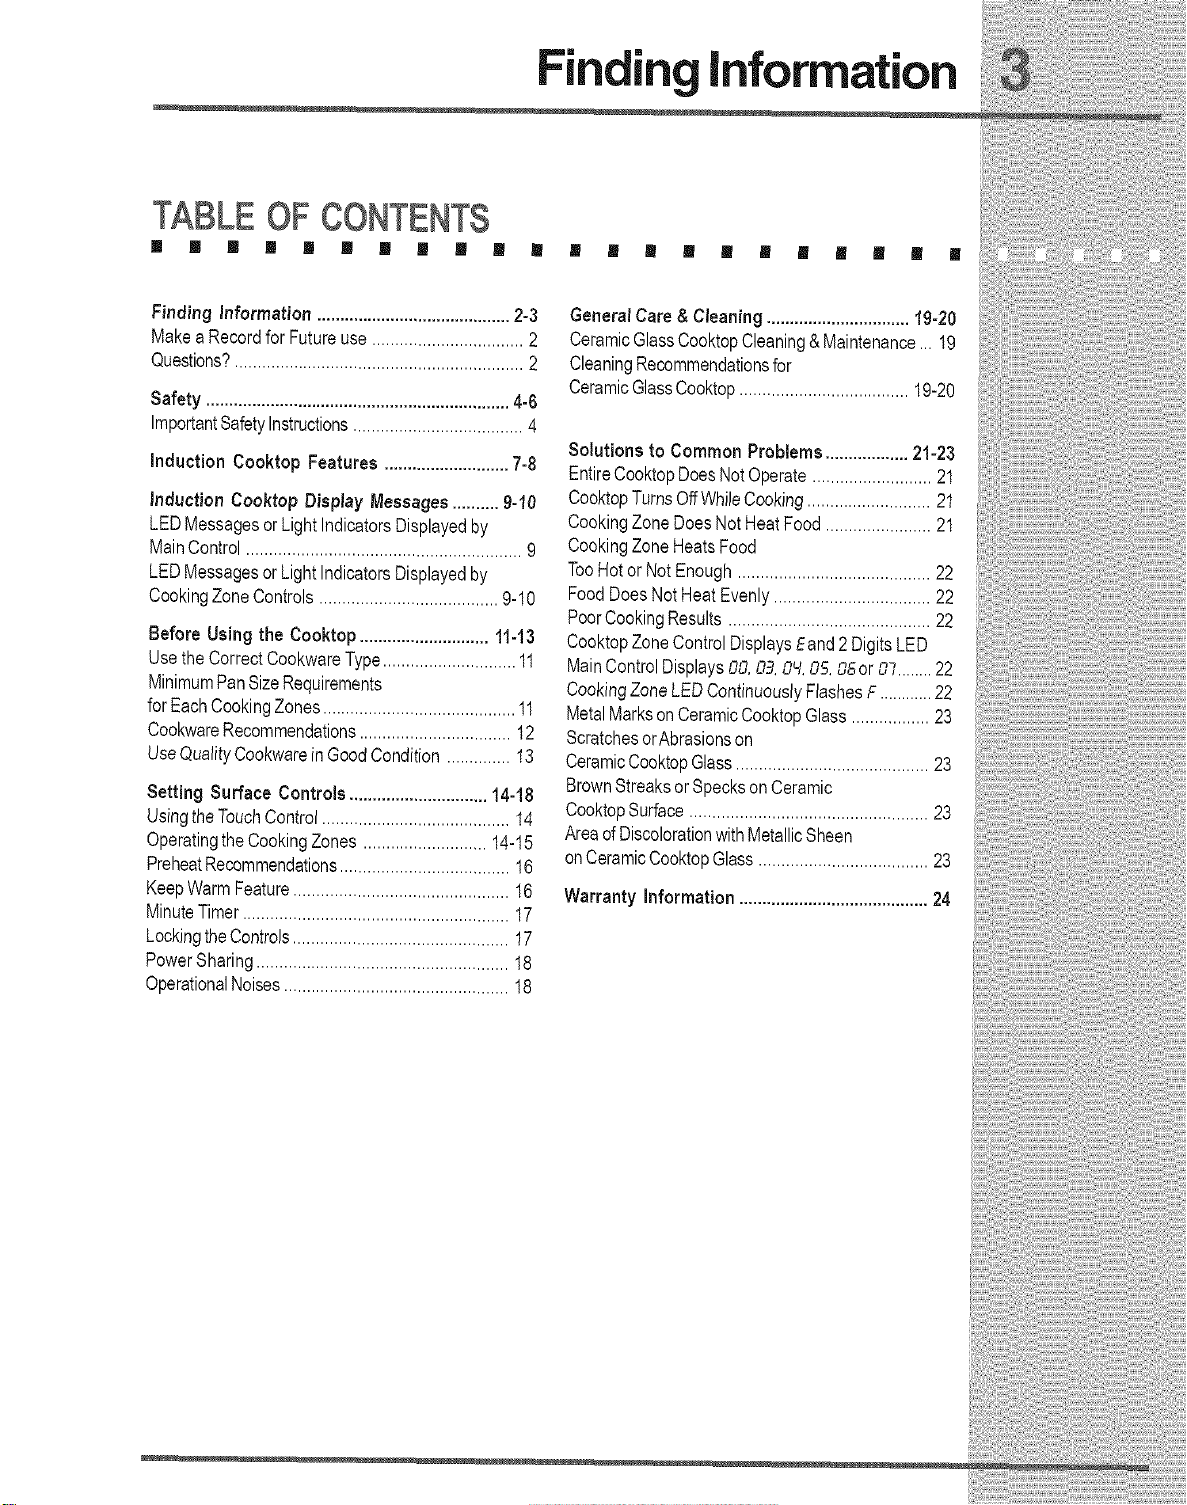
TABLEOF CONTENTS
FindingInformation ..........................................2-3 GeneralCare& Cleaning...............................19-20
MakeaRecordforFutureuse.................................2 CeramicGlassCooktopCleaning&Maintenance... 19
Questions?...............................................................2 CleaningRecommendationsfor
Safety ..................................................................4-6 ....
ImportantSafetyInstructions.....................................4 :::::
nduct on Cooktop Features 7-8 Ent ok e ""
Induction Cooktop Display Messages..........9-10 CooktopTurnsOffWhileCooking...........................21
LEDMessagesor LightIndicatorsDisplayedby CookingZoneDoesNotHeatFood.......................21
' 9 CookngZoneHeatsFood
MainControl............................................................
LEDMessagesor LightIndicatorsDisplayedby TooHotorNotEnough..........................................22
Cookin ZoneControls g 10 FoodDoesNotHeatEveny 22
g ....................................... - ..................................
Before Using the Cooktop............................11-13 CooktopZoneControlDisplaysEand2DigitsLED
UsetheCorrectCookwareType.............................11 MainControlDisplaysCO,O9,O_',0£ 05or 07........22 ':
MinimumPanSizeRequirements CookingZoneLEDContinuouslyFlashesF ............22 ::
forEachCookingZones..........................................11 MetalMarksonCeramicCooktopGlass.................23
CookwareRecommendations.................................12 ScratchesorAbrasionson
UseQualityCookwarein GoodCondition..............13
Setting Surface Controls ..............................14-18
UsingtheTouchControl.........................................14
OperatingtheCookingZones...........................14-15
PreheatRecommendations.....................................16
KeepWarmFeature...............................................16
MinuteTimer..........................................................17
LockingtheControls...............................................17
PowerSharing.......................................................18
OperationalNoises.................................................18
........................... ireCo topDo sNotOperate..........................21 ::
CeramicGlassCooktop.................................. 19-20 ::
Solut onsto Common Probems 21-23
PoorCookingResults............................................22
CeramicCooktopGlass..........................................23
BrownStreaksorSpecksonCeramic
CooktopSurface....................................................23
AreaofDiscolorationwithMetallicSheen
onCeramicCooktopGlass.....................................23
Warranty information.........................................24

Safety
I [] [] I I I [] [] I I I [] [] [] I [] [] I I [] [] []
Read all instructions before using this appliance. Save these instructions for future reference.
This manual contains important safety symbols and instructions. Please pay attention to these
symbols and follow all instructions given.
This symbol will help alert you to situations that maycause serious bodily harm, death or property
damage.
Thissymbolwill help alert you to situationsthat may cause bodily injuryor property damage,
Toreducethe riskof fire, electricalshock, or injurywhenusing yourelectriccooktop,follow basic
precautionincluding the following:
This unit has been tested and found to comply wnththe hmlts for a class B digital device
pursuant to Part 18 of the FCC rules These hmlts are designed to provide reasonable
protection against harmful interference in a resndentlal installation This unntgenerates, uses
and can radiate radio frequency energy and, if not installed and used in accordance with the
instructions, may cause harmful interference to radio communications However there is no
guarantee that _nterference will not occur in a particular installation If this unit does cause
harmful interference to radio ortelevns_onreception, wMch can be determined by turning the
unit off and on, the user _sencouraged to try to correct the interference by one or more of the
follownng measures
Reorient or relocate the recelvnng antennae
Increase the d_stance between the unit and recewer
, Connect the unntInto an outlet or a c_rcuntdnfferent from that to which the recewer is
connected
Personsw_thapacemakerorsimilarmedicaldeviceshouldexercisecautionusingorstandingnearaninduction
unitwhileitis_noperation,astheelectromagneticfieldmayaffecttheworkingofthepacemakerorsimilarmedical
device ItwouldbeadwsabletoconsultyourDoctororthepacemakerorsimilarmedicaldevicemanufacturer
aboutyourparticulars_tuat_on
, Remove all tape and packaging wrap before using the appliance. Destroy the carton
and plastic bags after unpacking the appliance. Never allow cMdren to play w_th
packaging material
• Proper Installation. Be sure your appliance is properly installed and grounded by a
qualified technician in accordance with the National Electrical Code ANSI/NFPA
No. 70 -latest edition in the United States, or CSA Standard C22.1, Canadian Electrical
Safety
Code, Part 1, in Canada, and local code requirements. Install only per installation
instructions provided in the hterature package for this apphance
Ask your dealer to recommend a qualified technician and an authonzed repair service Know
how to disconnect the electncal power to the apphance at the circuit breaker or fuse box in
case of an emergency
• User Servicing. Do not repair or replace any part of the appliance unless specifically
recommended in the manuals. All other servicing should be done only by a quahfied
technician to reduce the nsk of personal injury and damage to the apphance
• Never modify or alter the construction of an appliance such as removal of panels, wire
covers or any other permanent part of the product.
• Storage on Appliance. Flammable materials should not be stored near or on the
cooking surface. This includes paper, plastic and cloth _tems, such as cookbooks,
plastlcware and towels, as well as flammable hqulds Do not store explosives, such as aerosol
cans, onor near the apphance Flammable matenals may explode and result in fire or property
damage
Donotstoreitemsof interestto childreninthe cabinetsabovetheappliance,Childrenclimbingonthe
cooktopto reach itemscouldbe seriouslyinjured.
• Do not leave children alone. Children should not be left alone or unattended in the
area where an appliance is in use. They should never be allowed to s_tor stand on any
part of the apphance
DONOTTOUCHCOOKINGZONESORAREASNEARTHESESURFACES.CookingZonesmaybehotfrom
residualheateventhoughtheyaredarkincolorAreasneartheCookingZonesmaybecomehotenoughtocause
burnsDuringandafteruse,donottouch,orletclothingorotherflammablematerialstouchtheseareasuntilthey
havehadsufficienttimetocool
_', lS,,_, _o,,_m, d_,_ _ i_'_,¢_,,t_
Neveruseyour appliancefor warmingor heating a room,
- Wear Proper Apparel. Loose-fitting or hanging garments should never be worn while
using the appliance. Do not let clothing or other flammable materials contact hot surfaces
= Do Not Use Water or Flour on Grease Fires. Smother the fire with a pan lid, or use
baking soda, a dry chemical or foam-type extinguisher.
,, When heating fat or grease, watch it closely. Fat or grease may catch fire if allowed to
become too hot
• Use Only Dry Pot holders. Moist or damp pot holders on hot surfaces may result in
burns from steam. Do not let the pot holders touch hot surface units Do not use atowel or
other bulky cloth instead of a pot holder
= Do Not Heat Unopened Food Contai nets. Build up of pressure may cause the contai net
to burst and result in injury.
Safety
iMPORTANT SAFETY iNSTRUCTiONS FOR USING YOUR COOKTOP
= Know which touch key pads controls each surface of the Cooking Zones.
Clean the appliance regularly to keep all parts free of grease that could catch fire.
Exhaust fan ventilation hoods and grease filters should be kept clean. Do not allowgrease to
accumulate on hood or filter. Greasy deposits in the fan could catch fire. When flaming food
under the hood, turn fan on. Refer to hood manufacturer's instructions for cleaning.
* Use Proper Pan Size. This appliance isequipped with one or more Cooking Zones of different
sizes. Select utensils having flat bottoms large enough to cover the Cooking Zones. The pan
detection sensors will not allow the affected Cooking Zones to operate without a pan present.
= Utensil Handles Should Be Turned Inward and Should Not Extend Over Adjacent
Cooking Zones. To reduce the risk of burns, ignitionof flammable materials, and spillage due
to unintentional contact with the utensil.
= Never Leave Prepared Food on the Cooking Zones. Boilovers cause smoking and greasy
spillovers that may ignite, or a pan that has boiled dry may melt or become damaged.
• Protective Liners. Do not use aluminum foil to line any part of the cooktop. Only use
aluminum foil as recommended after cooking process, ifused as a cover to be placed over the
food. Any other use of aluminum foil may result inthe riskof electric shock, fire orshort circuit.
Glazed Cooking Utensils. Only certain types of glass, glass/ceramic, ceramic,
earthenware, or other glazed utensils are suitable for range top service without breaking due
to the sudden change in temperature. Check the manufacturer's recommendations for
cooktop use.
• Ventilating hood. The ventilating hood above your cooking surface should be cleaned
frequently, so the grease from cooking vapors does not accumulate on the hood or filter.
FOR CERAMiC=GLASS COOKTOP ONLY
= Do Not Clean or Operate a Broken Cooktop. if cooktop should break, cleaning solutions
and spillovers may penetrate the broken cooktop and create a risk of electric shock. Contact
a qualified technician immediately.
• Clean Cooktop with Caution. If a wet sponge or cloth is used to wipe spills on a hot cooking
area, be careful to avoid a steam burn. Some cleaners can produce harmful fumes if applied
to a hot surface.
= Do Not Place Hot Cookware on Cold Cooktop Glass. This could cause glass to break.
= Do not slide pan across the cooktop surface. They may scratch the cooktop surface.
= Do Not Let Pans Boil Dry. This may cause permanent damage in the form of breakage,
fusion, or marking that can affect the ceramic-glass cooktop. (This type of damage is not
covered by your warranty).
ction Cooktop Features
INDUCT ONCOOKTOPFEATURES
I [] BI [] [] [] [] [] [] [] [] [] [] [] [] I m m ! ! m []
READ THESE iNSTRUCTiONS CAREFULLY BEFORE USING THE COOKTOP
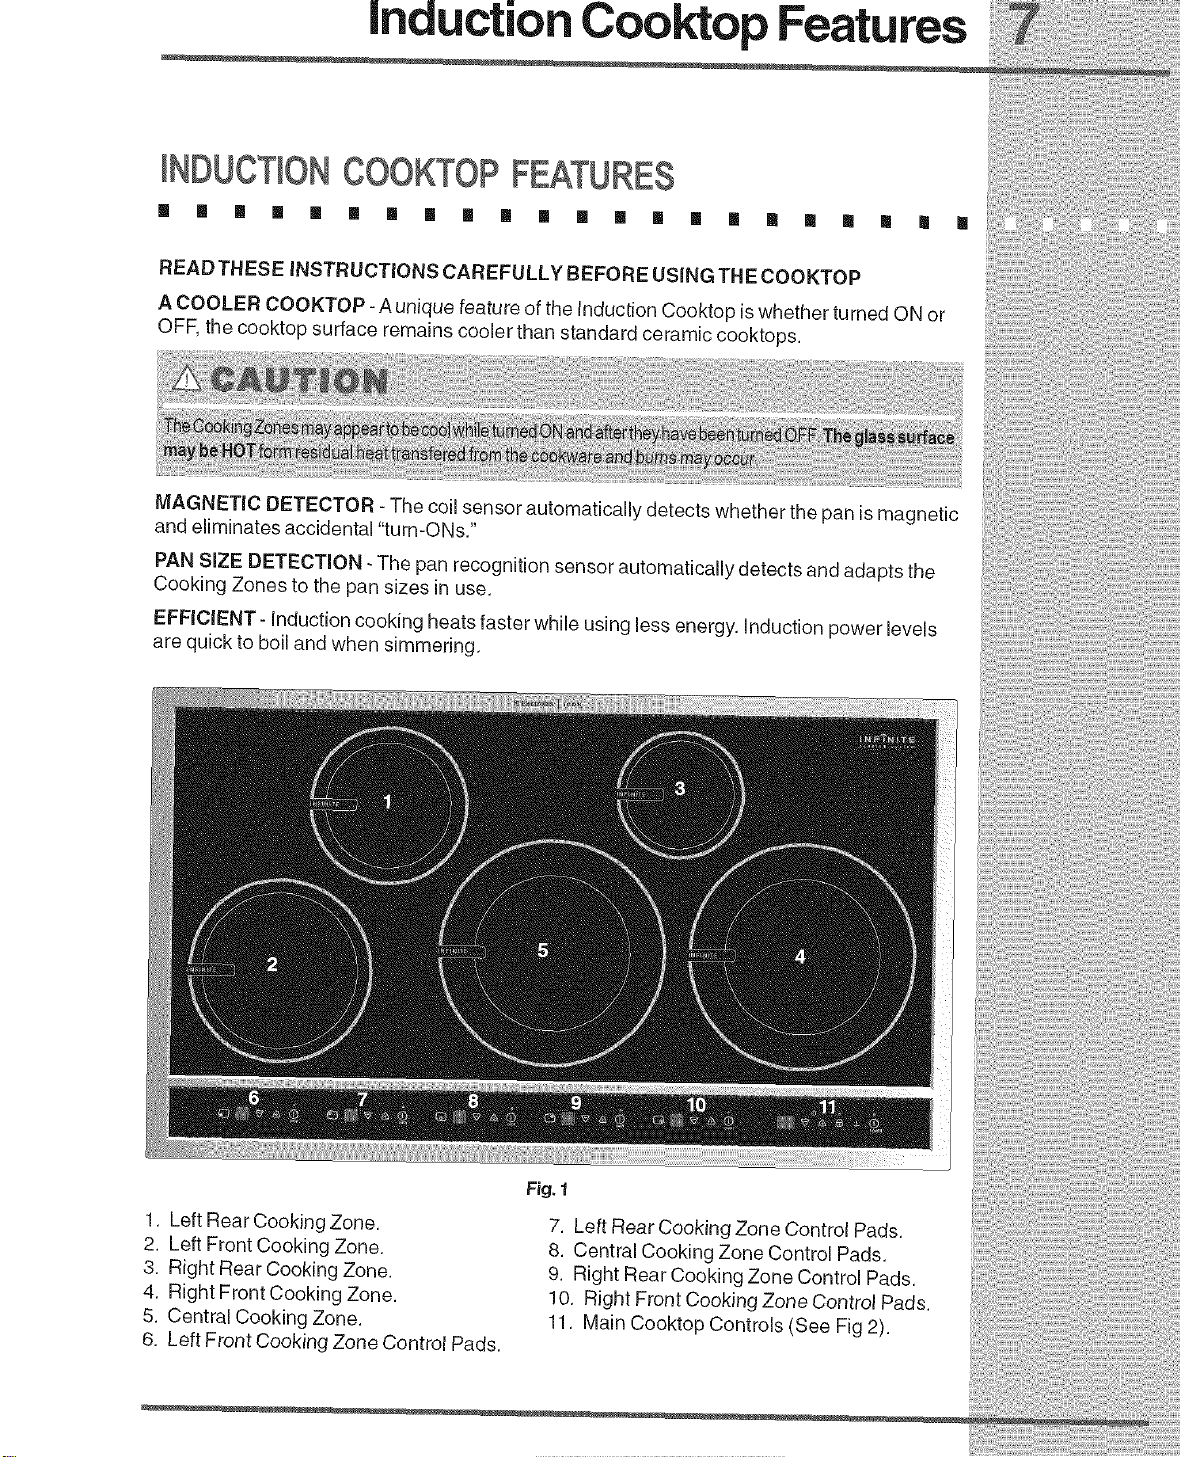
A COOLER COOKTOP-A unique feature of the Induction Cooktop iswhether turned ON or
OFF, the cooktop surface remains cooler than standard ceramic cooktops.
MAGNETIC DETECTOR - The coil sensor automatically detects whether the pan is magnetic
and eliminates accidental "tum-ONs."
PAN SiZE DETECTION - The pan recognition sensor automatically detects and adapts the
Cooking Zones to the pan sizes in use.
EFFICIENT- induction cooking heats faster while using less energy, induction power levels
are quick to boil and when simmering,
1. Left Rear Cooking Zone.
2. Left Front Cooking Zone.
3. Right Rear Cooking Zone.
4. Right Front Cooking Zone.
5. Central Cooking Zone.
6. Left Front Cooking Zone Control Pads.
Fig, 1
7. Left Rear Cooking Zone Control Pads.
8. Central Cooking Zone Control Pads.
9. Right Rear Cooking Zone Control Pads.
10. Right Front Cooking Zone Control Pads.
11. Main Cooktop Controls (See Fig 2).
induction Cooktop Features
)NDUCT)ONCOOKTOPFEATURES(CONT'D}
III [] [] [] [] [] [] [] [] [] [] [] [] [] [] [] [] [] [] [] [] []
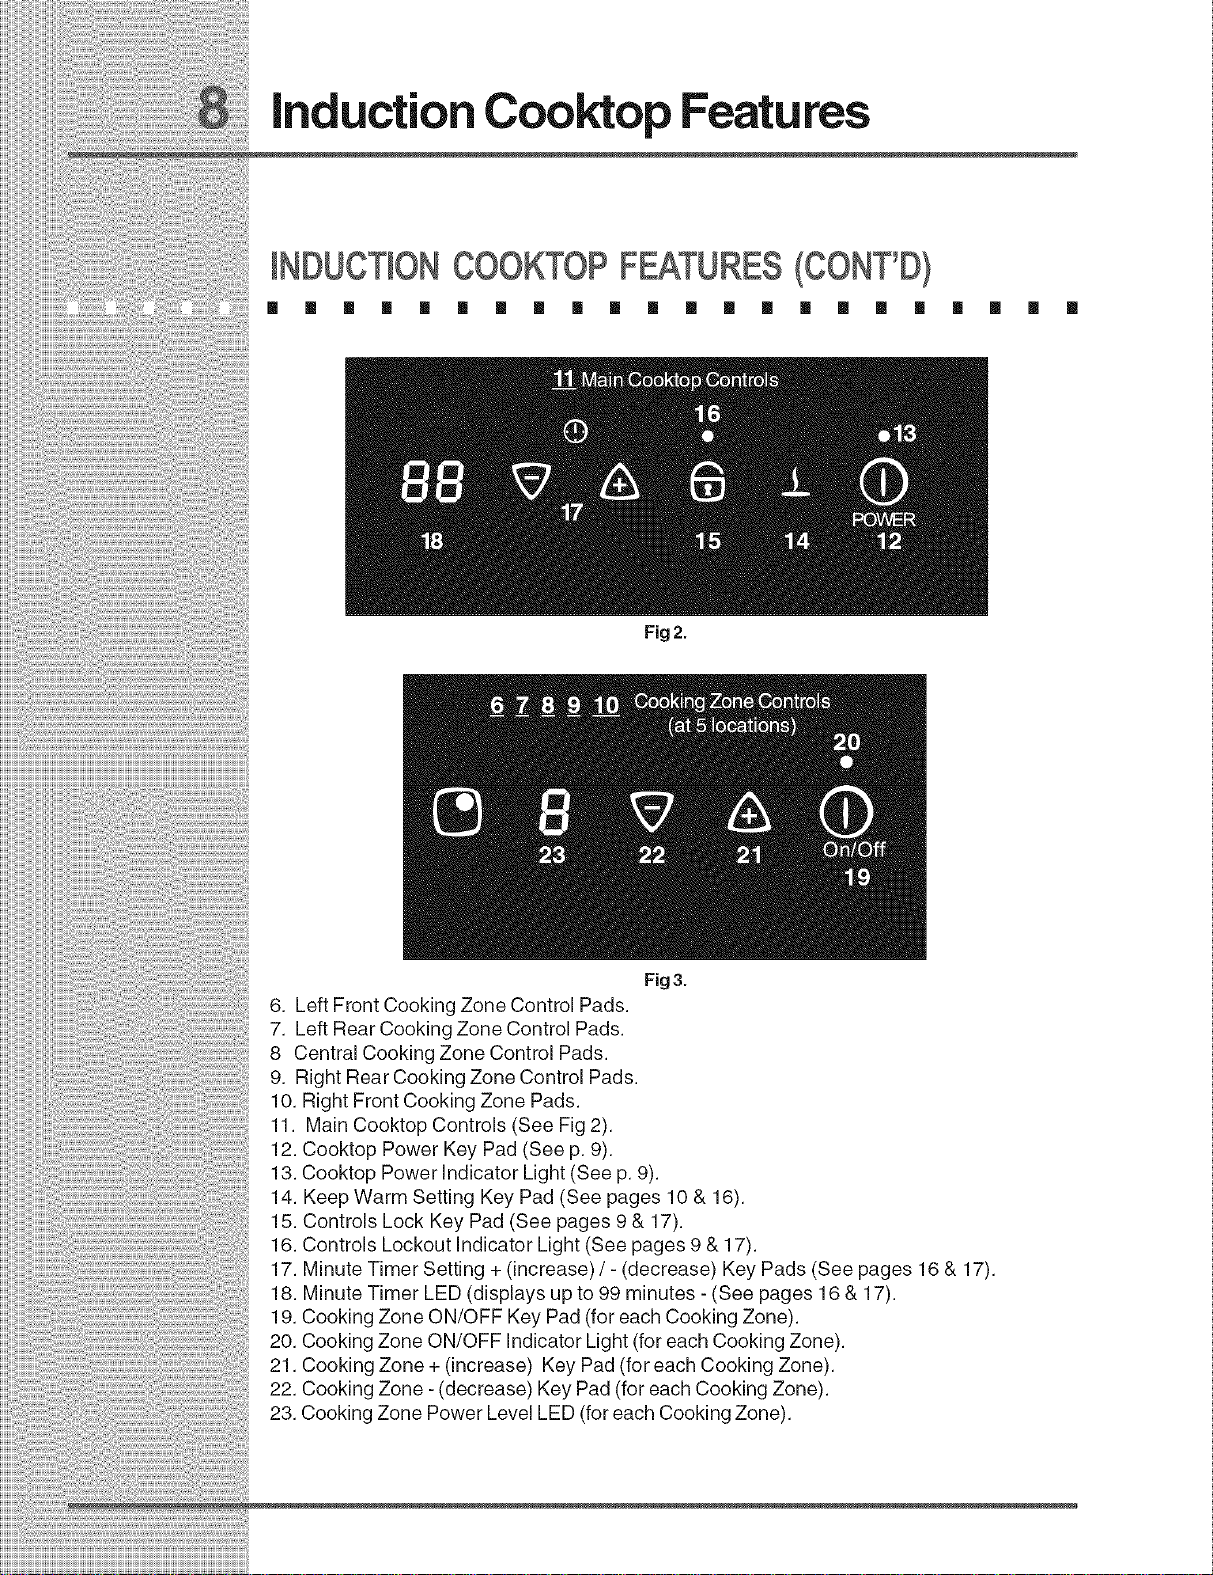
Fig 2.
Fig 3.
6. Left Front Cooking Zone Control Pads.
7. Left Rear Cooking Zone Control Pads.
8 Central Cooking Zone Control Pads.
9. Right Rear Cooking Zone Control Pads.
10. Right Front Cooking Zone Pads.
11. Main Cooktop Controls (See Fig 2).
12. Cooktop Power Key Pad (See p. 9).
13. Cooktop Power indicator Light (See p. 9).
14. Keep Warm Setting Key Pad (See pages 10 & 16).
15. Controls Lock Key Pad (See pages 9 & 17).
16. Controls Lockout indicator Light (See pages 9 & 17).
17. Minute Timer Setting + (increase) / - (decrease) Key Pads (See pages 16 & 17).
18. Minute Timer LED (displays up to 99 minutes - (See pages 16 & 17).
19. Cooking Zone ON/OFF Key Pad (for each Cooking Zone).
20. Cooking Zone ON/OFF indicator Light (for each Cooking Zone).
21. Cooking Zone + (increase) Key Pad (for each Cooking Zone).
22. Cooking Zone- (decrease) Key Pad (for each Cooking Zone).
23. Cooking Zone Power Level LED (for each Cooking Zone).
 Loading...