

Dual DXRM59BT User Manual

DXRM59BT
INSTALLATION/OWNER'S MANUAL
AM/FM Receiver with Bluetooth
DXRM59BT INSTALLATION
Preparation
Please read entire manual before installation.
Before You Start
• Disconnect negative battery terminal. Consult a qualified technician for instructions.
• Avoid installing the unit where it would be subject to high temperatures, such as from
direct sunlight, or where it would be subject to dust, dirt or excessive vibration.
Getting Started
• Remove trim ring from unit.
• Remove 2 transit screws located on top of the unit.
• Connect wiring harness and antenna. Consult a qualified technician if you are unsure.
• Certain vehicles may require an installation kit and/or wiring
harness adapter (sold separately).
• Test for correct operation.
• Snap trim ring into place.
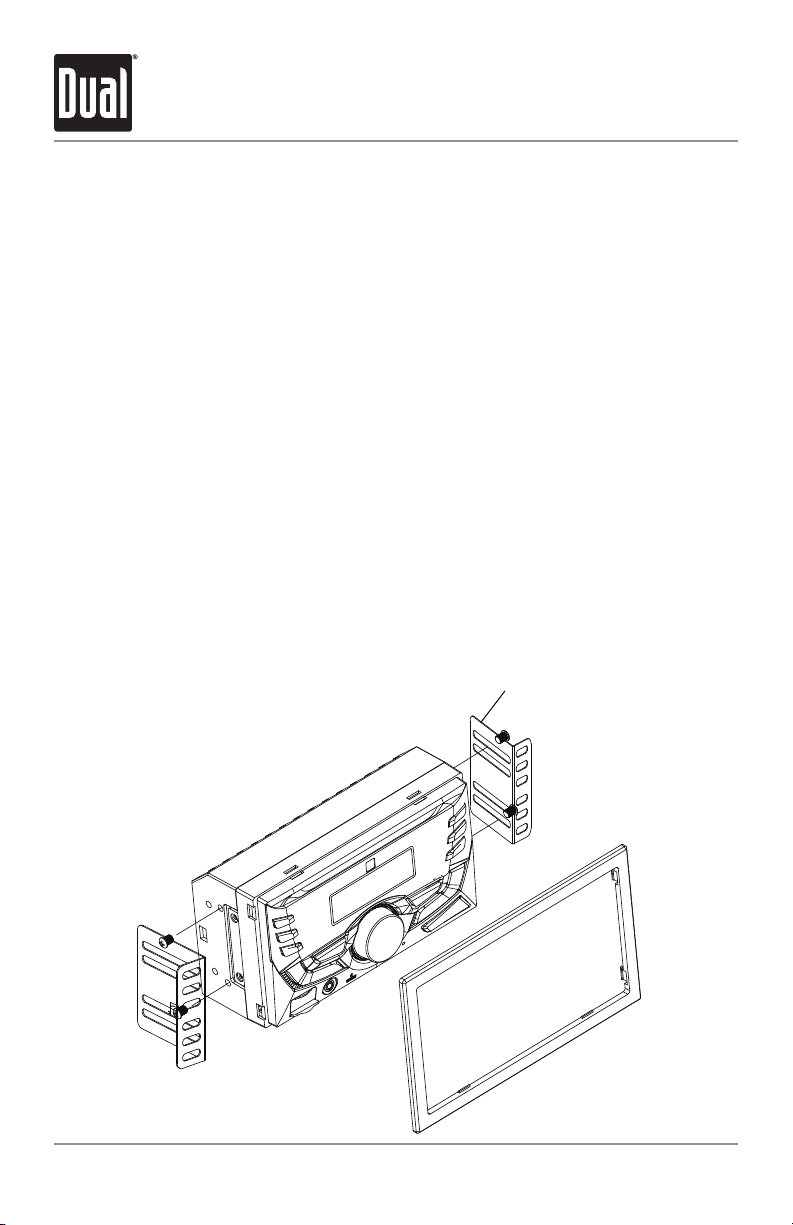
Mounting the Head Unit:
ISO mounting
Using the existing
brackets or the brackets
supplied with the
installation kit, mount
the brackets to the sides
of the head unit with the
screws supplied with the
head unit.
Metal Bracket(Not supplied)
2
DXRM59BT INSTALLATION
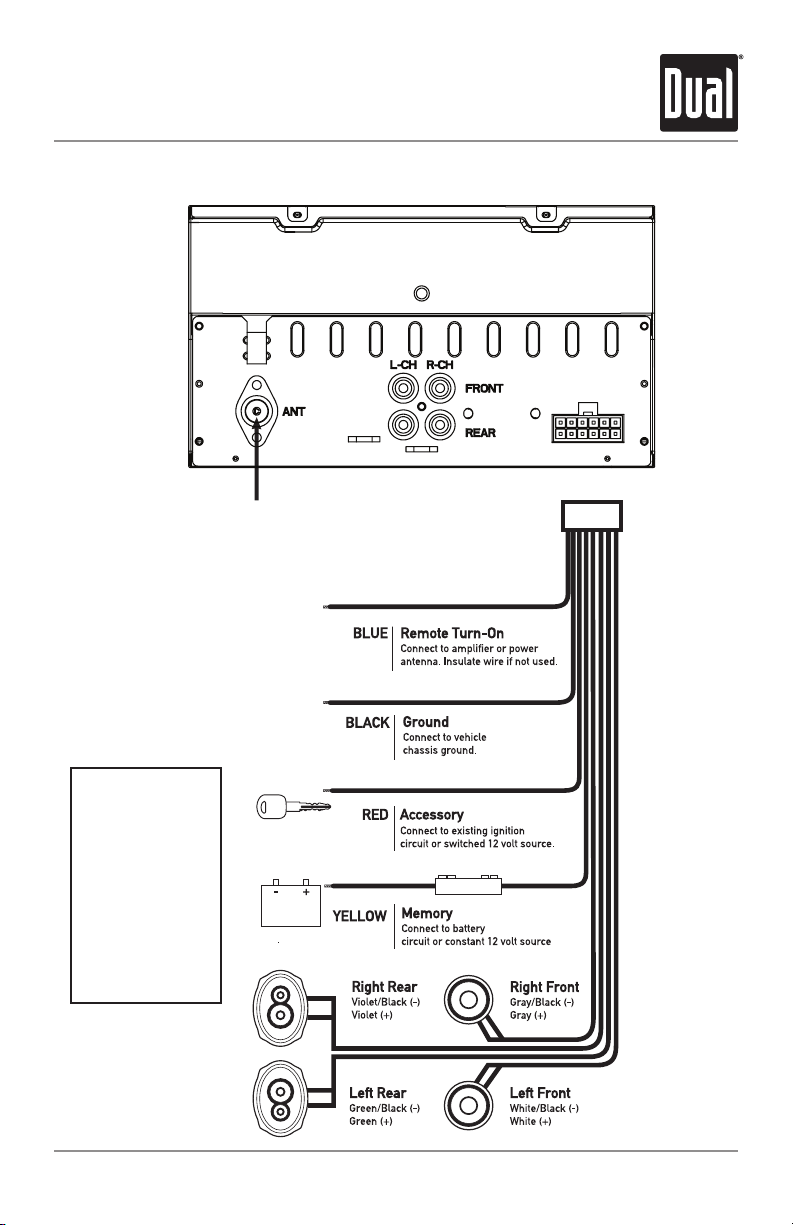
Wiring Diagram
Antenna
Connector
FUSE
When replacing the
fuse, make sure new
fuse is the correct type
and amperage. Using
an incorrect fuse could
damage the radio.
The unit uses
one 10 amp ATM fuse
located beside the wiring
connector.
10 AMP
AGC Fuse
3
DXRM59BT OPERATION
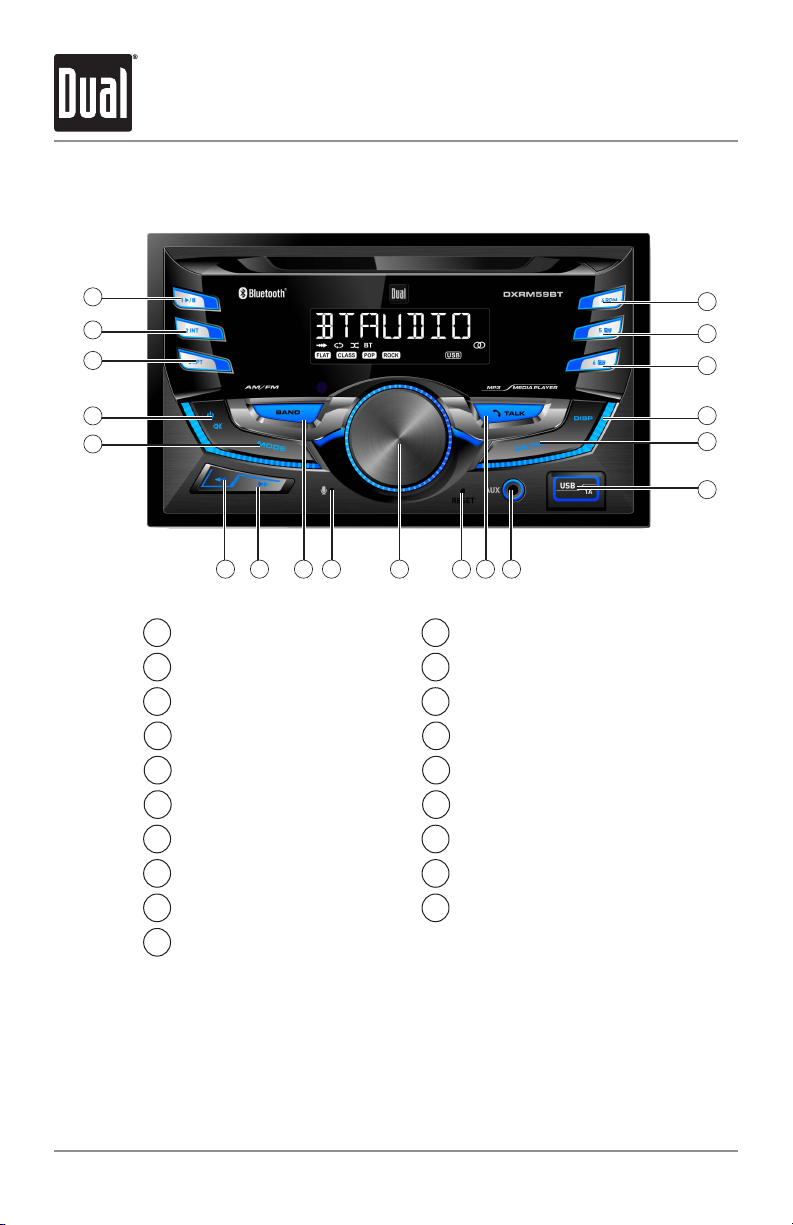
Control Locations
1
2
3
4
5
6 7 8 9 10 11 12 13
Preset 1 / Repeat
1 11
Preset 2 / Random
2 12
Preset 3 / Intro
3 13
Power / Mute
4 14
5 15
Mode
Tune / Track Down
6 16
Tune / Track Up
7 17
Band
8 18
Reset
Bluetooth Talk
Auxiliary Input
USB Port
AS/PS
Display
Preset 6 / Folder Up
Preset 5 / Folder Down
19
18
17
16
15
14
Microphone
9
Volume Knob
10
Preset 4 / Play / Pause
19
4
DXRM59BT OPERATION
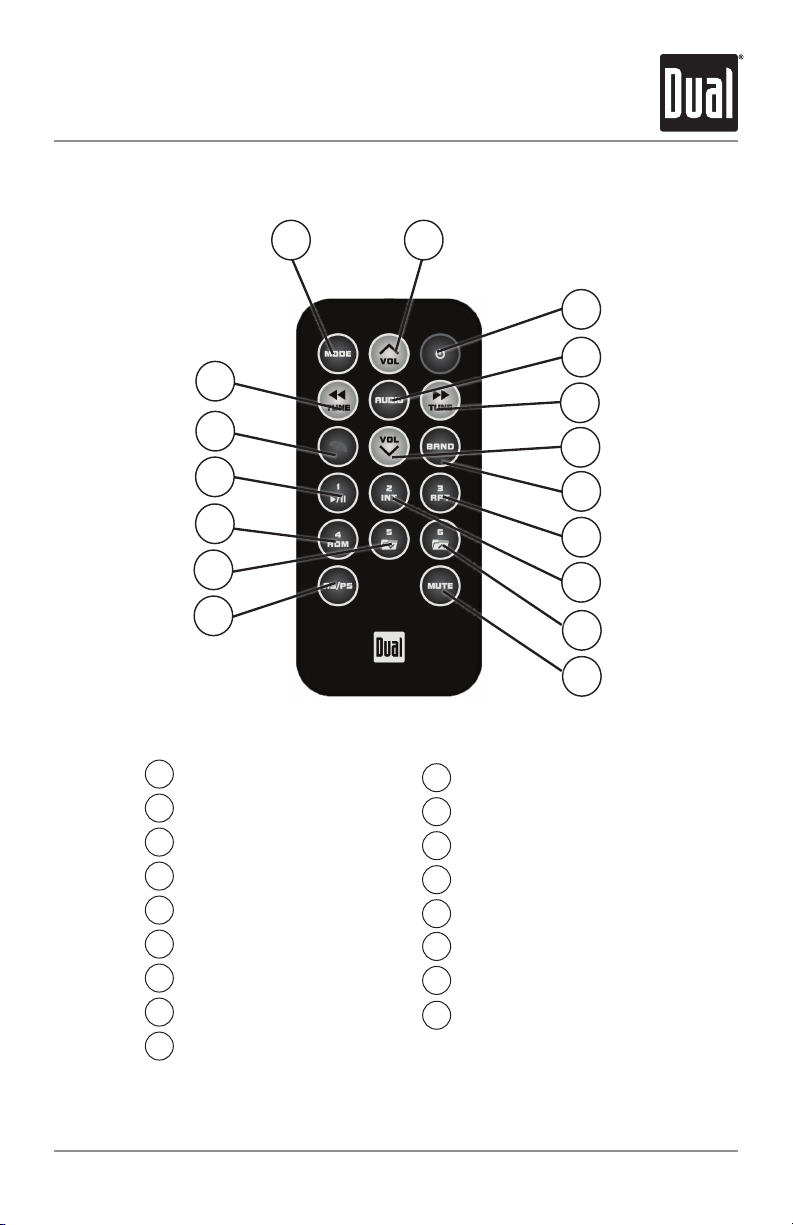
Remote Control
17
16
15
14
13
12
Mode
1
Volume Up
2
Power
3
Select
4
Tune / Track Up
5
Volume Down
6
Band / Go Back
7
Preset 3 / Intro
8
9
Preset 2 / Random
1
2
3
4
5
6
7
8
9
10
11
Preset 6 / Folder Up
10
Mute
11
Audio / Menu
12
Preset 5 / Folder Down
13
Preset 4 / Play / Pause
14
15
Preset 1 / Repeat
16
Bluetooth Talk
17
Tune / Track Down
5
 Loading...