

Page 1
The manufacturer reserves the right to alter without notice any weights, measurements
or other technical data shown in this manual. All figures, measurements and capacities
shown in this manual are approximate and do not constitute specifications.
Manufacturer:
Drive Medical Ltd,
Ainley’s Industrial Estate, Elland HX5 9JP.
Web: www.drivemedical.co.uk
Issued 5/16
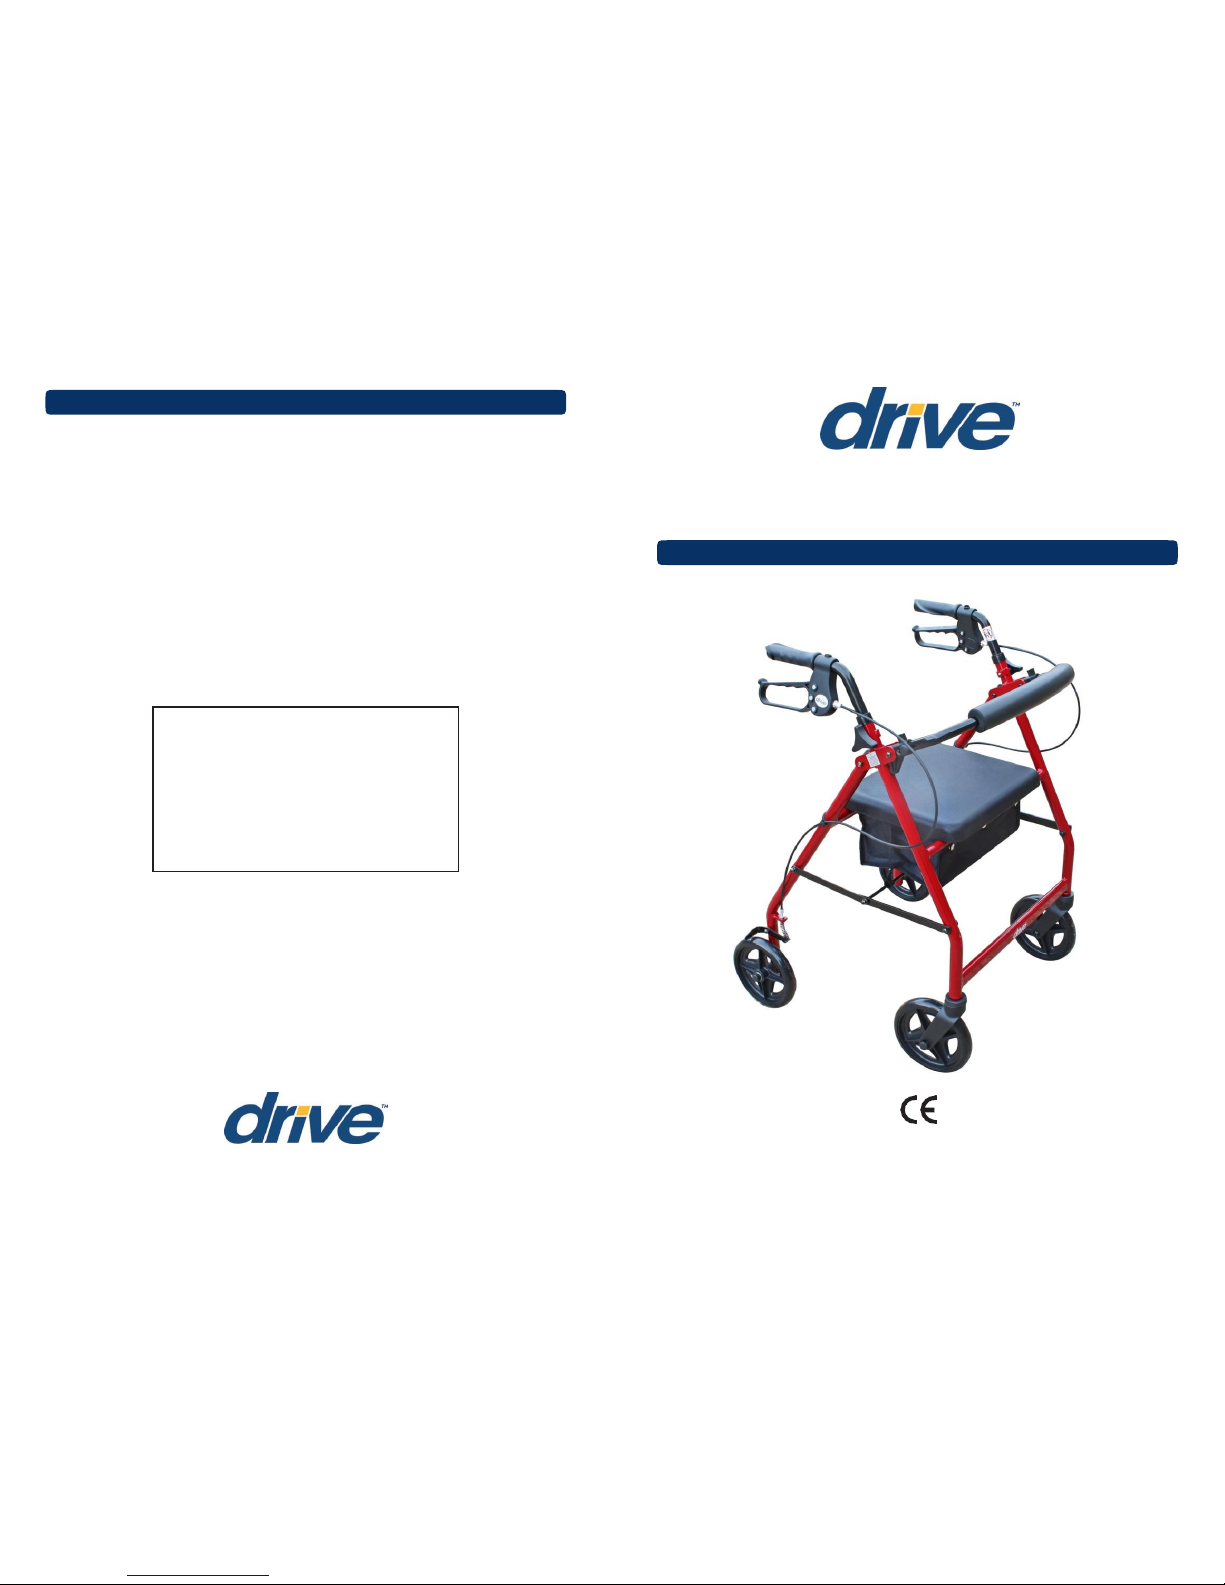
Rollator (R6 and R8)
Please read these instructions carefully before assembling or using this product.
Ensure you are familiar with all of the safety and operating instructions.
Dealer
Stamp
Assembly & Operating Instructions
Page 2
1 2
Specification 1
Important Safety Information 2
Care and Maintenance 2
Parts Description 3
Assembling the Rollator 4 - 6
Adjusting Handlebar Height
7
Brake Operation
8
Folding and Transporting
9
Warranty 10
Please read all of these instructions fully before assembly or using.
•
Unpack and check that you have all of the parts and attachments shown.
•
To avoid risk of suffocation to children or animals, dispose of the plastic bags
correctly.
•
Remove all packing materials and dispose of correctly.
•
For your health and comfort, make sure that you adopt a comfortable posture and that
you can operate the brakes with ease.
The Drive Medical lightweight 4-wheeled Rollator is designed to aid the user to walk and,
as an option, carry items such as shopping.
The R6 is ideal for indoor use, whilst the R8 is suitable for indoor and outdoor use.
They are intended to be lightweight and portable whilst offering stability and security
to the user.
All Drive Medical walkers are manufactured to the highest quality standards and are
CE marked.
They provide a robust and visually appealing product whilst being a cost-effective
solution to some mobility problems.
•
Ensure that the handles are at equal heights and securely locked in position.
•
Ensure the Rollator is always fully folded out before using.
•
Ensure that all the wheels are stable and are on the ground before using.
•
Ensure that the brakes provide adequate support and test before using.
Contact your dealer if the brakes are not operating correctly.
•
Ensure that the user sits in the centre of the seat.
•
Do not use the four-wheel Rollators on gradients 7° / 1 in 8 or above.
•
Ensure that the brakes are locked on when sitting on the seat.
The Rollator comes with the following features:
•
Aluminium frame and handlebars
•
Arthritic-friendly loop brakes
•
Padded Seat with Underseat Bag
•
Owners Handbook
•
Non-marking solid tyres
•
Ensure that the latest health and safety practice is used for carrying and lifting items,
such as wheeled walkers.
In addition to the above, a number of Rollator accessories including bags, trays and
baskets are available from your dealer.
Weights and Dimensions
R6RD-59 / R6BL-59
R8RD-59 / R8BL-59
Dimensions:
(L x W x H) cm’s / inches
62 x 62 x 78 - 93cm
25” x 25” x 31” - 36½”
63 x 63 x 82 - 97cm
25” x 25” x 33” - 38”
Dimensions folded:
(L x W x H) cm’s / inches
20 x 62 x 81cm
8” x 25” x 32”
20 x 63 x 82cm
8” x 25” x 32¼”
Seat Height: cm’s / inches
53cm / 21”
56cm / 22”
Weight: kg’s / lb’s
6.3kg / 13lb 12oz
6.9kg / 15lb 6oz
Maximum User Weight
135kg / 21 stone
135kg / 21 stone
Drive Medical is an ISO 9001 certified company.
For more details about our products please see your local dealer.
•
Ensure the Rollator is used only as an aid for mobility.
•
Ensure the Rollator is kept clean. Wipe down the Rollator with a damp cloth on a
regular basis. Do not use any abrasive detergents. Solvents can damage the coating
and surface of plastic parts.
•
Check the moving parts (e.g. – wheels and height adjustment) regularly.
•
All the fasteners (screws, nuts and bolts) are checked regularly to ensure they are
securely tightened.
•
Check that the front castor wheel/s swivel freely. Do not use the Rollator if they do not.
•
Only use an approved Drive Medical Ltd dealer for any maintenance and repairs
on your Rollator.
Important Safety Information
Contents
Introduction
Care and Maintenance
Specifications
Page 3
3 4
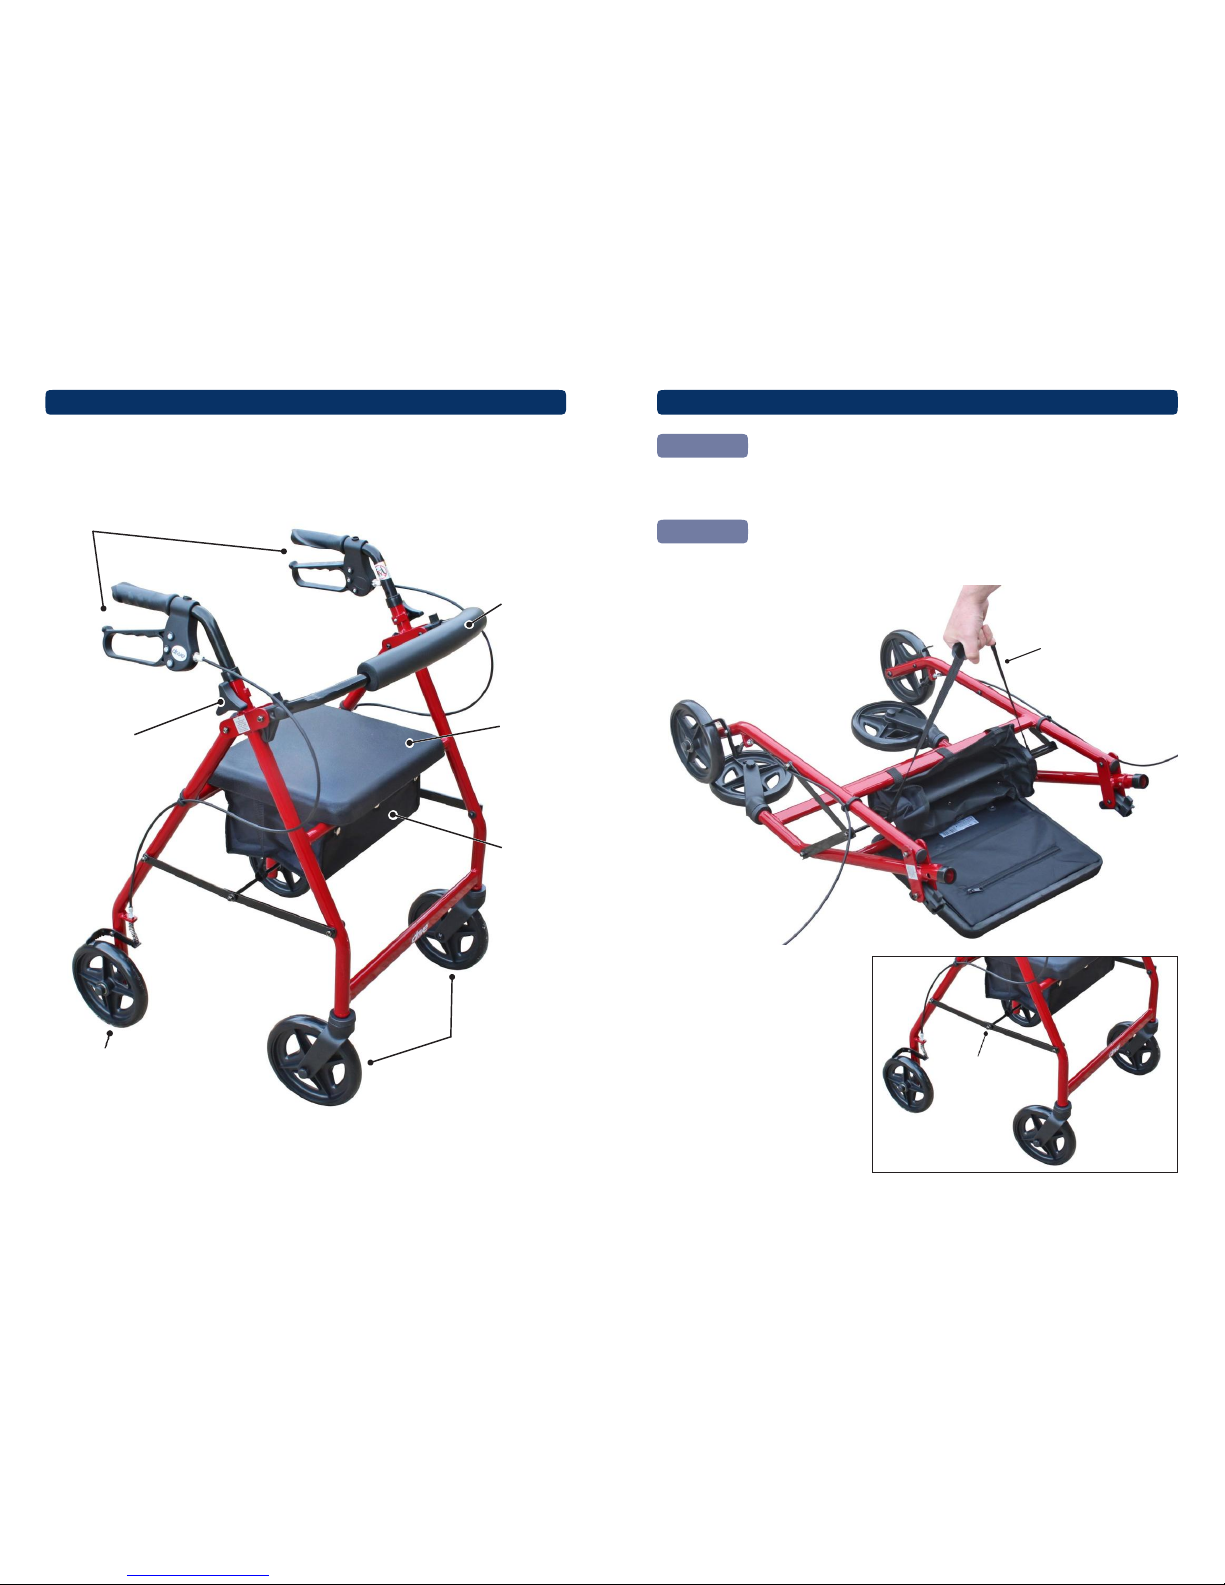
The diagram below shows a four wheel Rollator.
Remove packaging
Handles /
Brake Levers
Remove the Rollator and all components from the packaging. Lay out the Rollator.
Unfolding the Rollator
Backrest
To unfold the Rollator, lift using the lifting strap which is located under the seat.
Tightening
Handles
Seat
(with Zip
pocket on
underside)
Underseat
Bag
Important:
Always ensure the side braces
are fully down before using.
Rear Wheels
(with Brakes)
Front Castor
Wheels
Assembling the Rollator
Parts Description
Lower the Rollator down onto it’s wheels
and push down on the
central bar to fully open.
Lifting strap
Side brace
Step 2
Step 1
Page 4
5 6
Step 3
Step 4
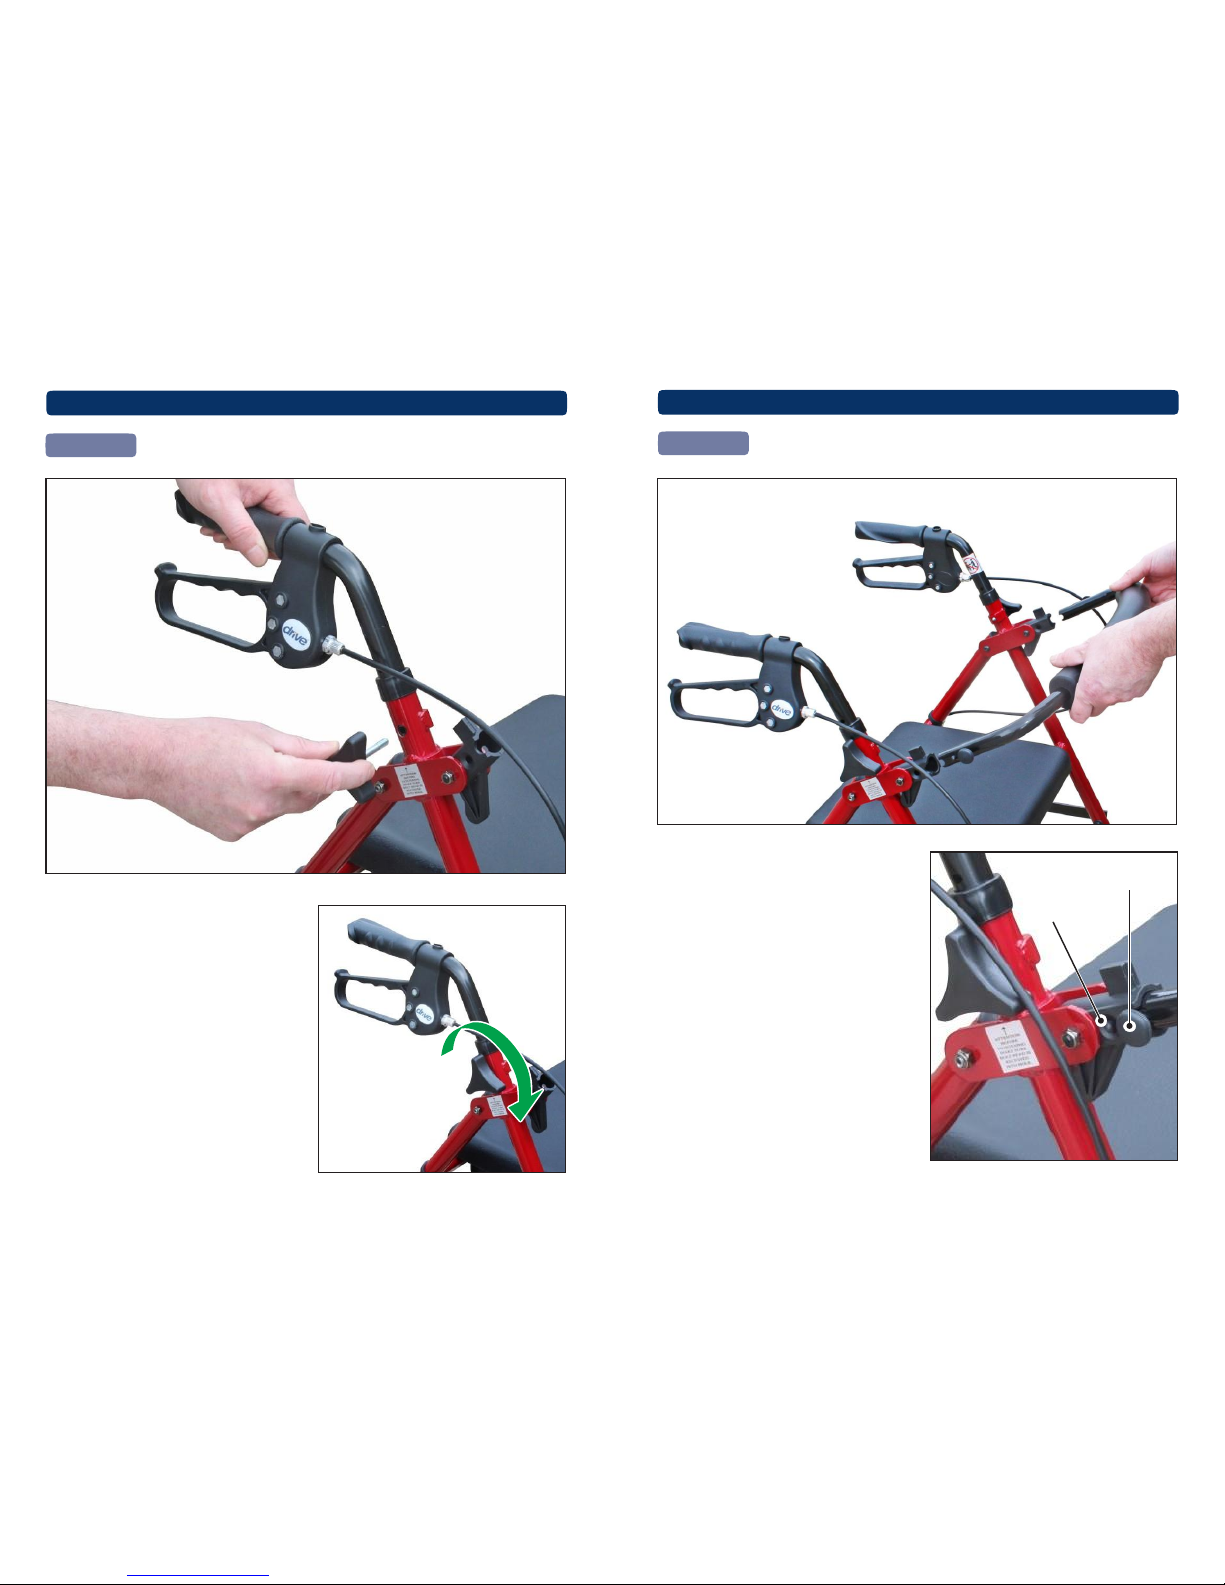
Fitting Handlebars
Insert the handlebar into the tubing
ensuring the brake cable is to the
outside of the Rollator frame.
Select the required height and secure
with the tightening handle supplied.
Turn clockwise to tighten and anticlockwise to unscrew.
Repeat for the other handlebar.
Fitting Backrest
Remove all packaging from the
backrest.
Position the backrest ends into both
brackets, push in both backrest
‘buttons’ and fully insert into the
brackets.
Ensure the ‘pins’ are fully located in
the holes (see picture on the right).
To remove the backrest, pull both
‘btttons’ out and remove the backrest
from the brackets
Assembly
Assembly
Backrest
Handlebar
Brake
Cable
Tightening
handle
Button
Pin
Tighten
Page 5
7 8
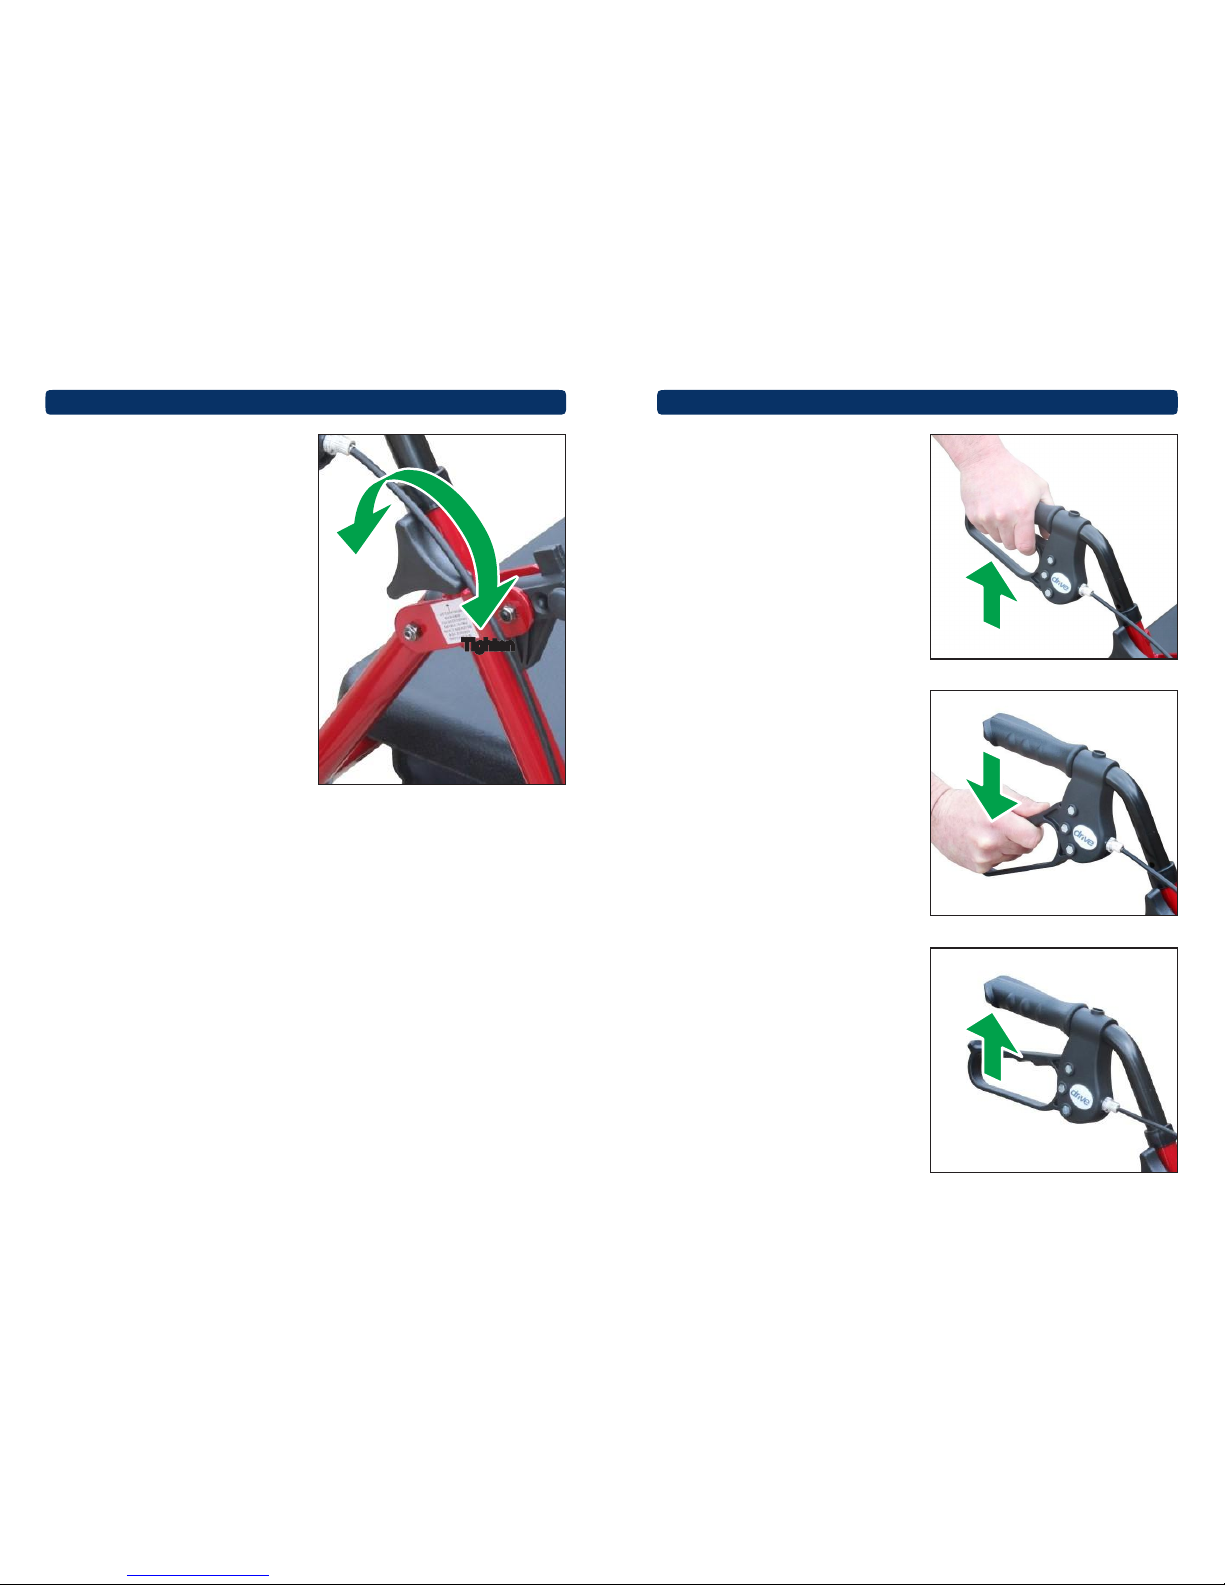
To adjust the height of the
handlebars, unscrew the tightening
handles on either side of the Rollator
turning anti-clockwise and remove.
Adjust the height of the handlebars to
suit the user, re-insert the tightening
handles and tighten by turning
clockwise to secure (as shown in the
picture).
Ensure that the tightening handles
and brake cables are on the outside
of the Rollator.
To operate the brakes:
Squeeze the brake levers up and hold
in position to engage the brakes
(as shown by the green arrow).
Release the levers to release the
brakes.
To lock the brakes:
Push down on the brake lever until it
locks and stays in down position
(as shown by the green arrow).
Important:
Ensure that the brakes are locked on
when sitting on the seat.
To unlock the brakes:
Pull up on the brake lever until the
lock removes (as shown by the
green arrow).
Note: The brakes on Rollators are factory
set and should not require adjustment. For
technical assistance on the Rollator brakes,
contact your Drive Medical Ltd dealer.
Brake Operation
Adjusting Handlebar Height
Unscrew
Tighten
Brakes
engaged
Brakes
locked
Brakes
unlocked
Page 6
9 10
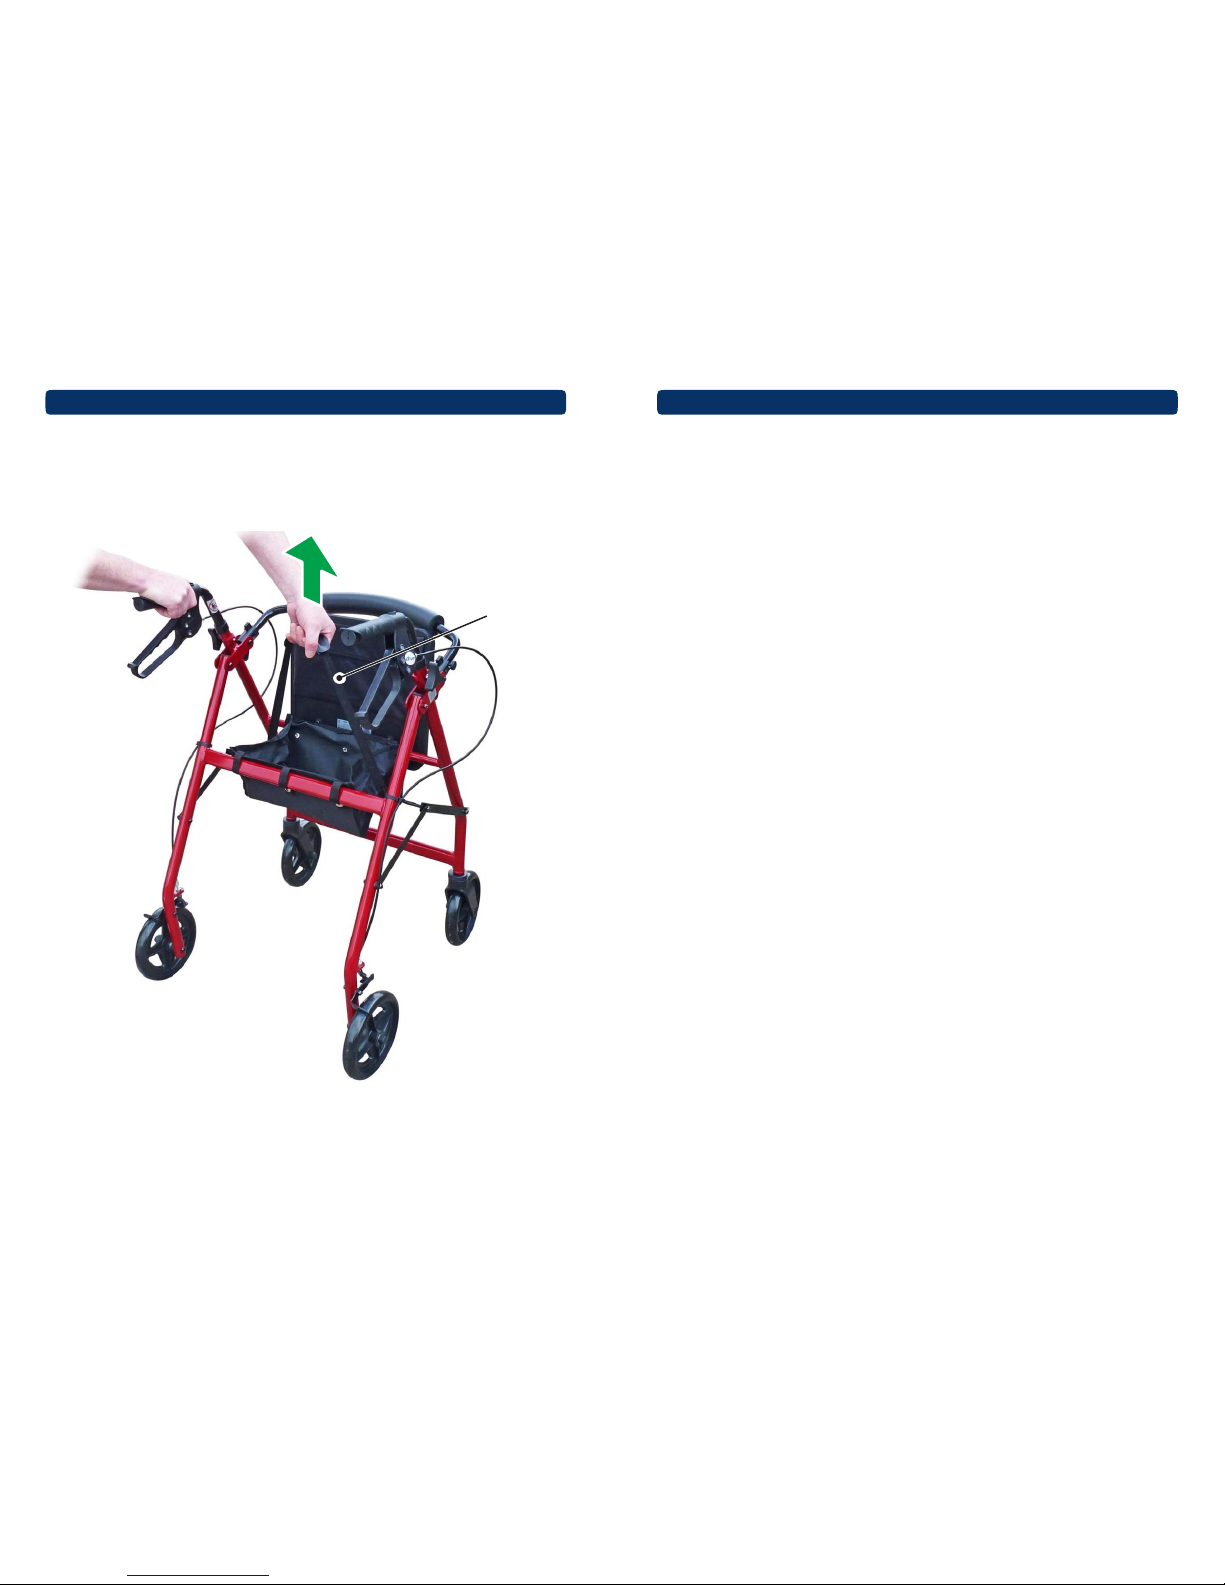
To fold the Rollator for transporting:
Whilst holding the Rollator handle, lift up the seat and lift the Rollator using the
lifting strap. As you lift off the ground, the Rollator will fold.
Note: It is recommended that the brakes are locked when folding and storing.
Lifting strap
To unfold the Rollator:
Lift the Rollator using the lifting strap which is located under the seat.
Lower the Rollator down onto it’s wheels and push down on the central bar to
fully open (see page 4 for full instructions).
To improve the safety and lifespan of your walker, it is recommended that you have it
serviced on a regular basis. Recommended Service Schedules for walkers are available
to service agents.
There is a comprehensive twelve-month warranty from the date on which your new
walker is delivered. The warranty covers the walker for repairs or replacement during this
period. For more detail, please see the warranty conditions below:
1.
Any work or replacement part installation must be carried out by an authorised Drive
Medical Ltd dealer / service agent.
2.
To apply the warranty should your walker require attention please contact the outlet
from which you purchased the walker.
3.
Should any part of the walker require repair or full or part replacement, as a result of
a manufacturing or material defect within the warranty period, parts will be supplied
free of charge. Note: The guarantee is not transferable.
4.
Any repaired or replaced parts will be covered by the balance of the warranty period
on the walker.
5.
Parts replaced after the original warranty has expired will be covered by a threemonth warranty.
6.
Consumable items supplied will not generally be covered during the normal warranty
period unless such items require repair or replacement clearly as a direct result of a
manufacturing or material defect. Such items include (among others): upholstery and
tyres.
7.
The above warranty conditions apply to brand new walkers. Ex-demonstration
walkers supplied directly by Drive Medical Ltd carry a six-month warranty period.
If you are unsure whether your walker is covered contact your dealer.
8.
Under normal circumstances, no responsibility will be accepted where the walker
has required assistance as a direct result of:
a.
the walker part not having been maintained in accordance with the manufacturers
recommendations
b.
failure to use the manufacturer’s specified parts
c.
the walker or part having been damaged due to neglect, accident or
improper use
d.
the walker or part having been altered from the manufacturer’s specification
or repairs having been attempted before the dealer is notified
In the event of your walker requiring attention, please contact your service agent / dealer
and give all relevant details so they can act quickly.
This warranty is issued free of charge by Drive Medical to the original retail purchaser of
the device. This does not affect your statutory rights.
Warranty
Folding and Transporting
 Loading...