

Drive Inspired Kanga User Manual

2017 Medical Depot, Inc. All rights reserved.
Drive DeVilbiss Healthcare
99 Seaview Boulevard
Port Washington N.Y. 11050 USA
Made in USA
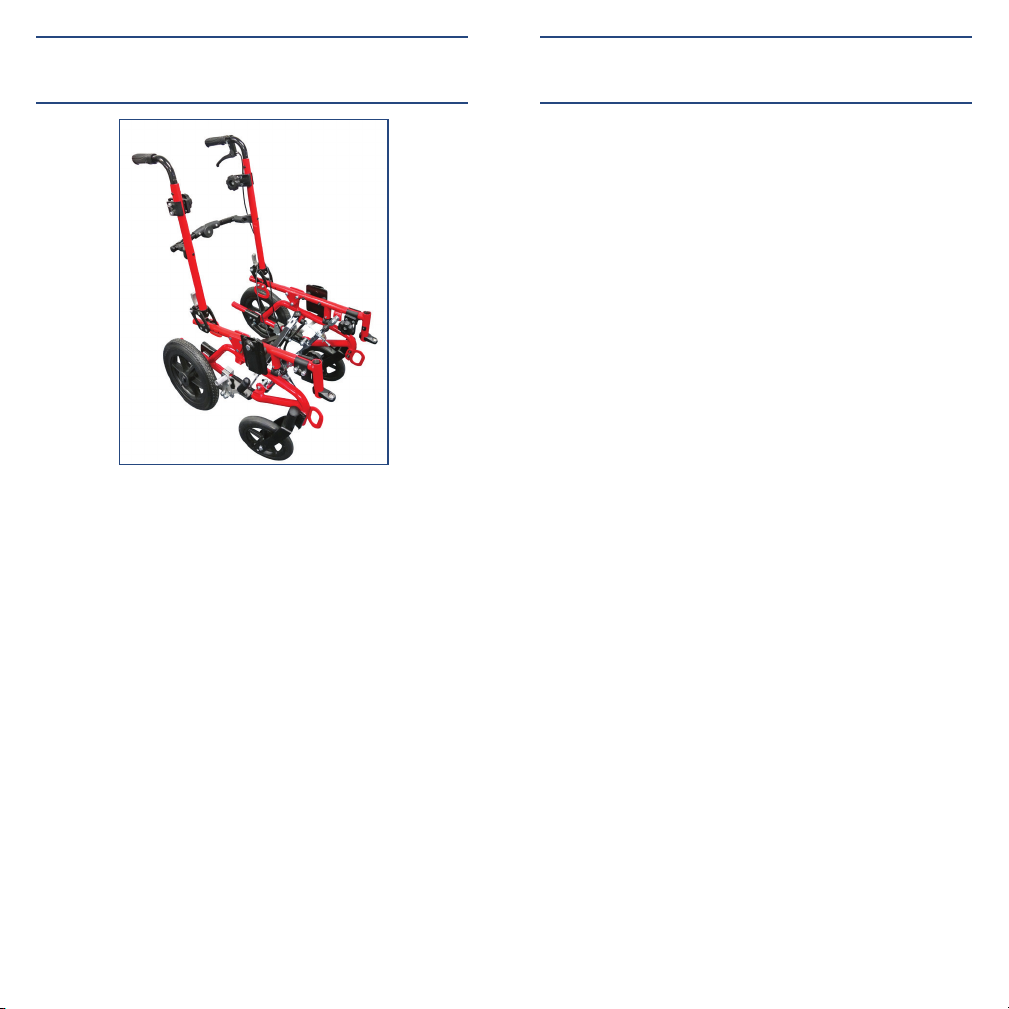
Kanga Wheelchair
Seating Package
Headrest
Truck Support
Thigh Supports
Abductor
Poly Tray
www.inspiredbydrive.com
REV2.10.4.17
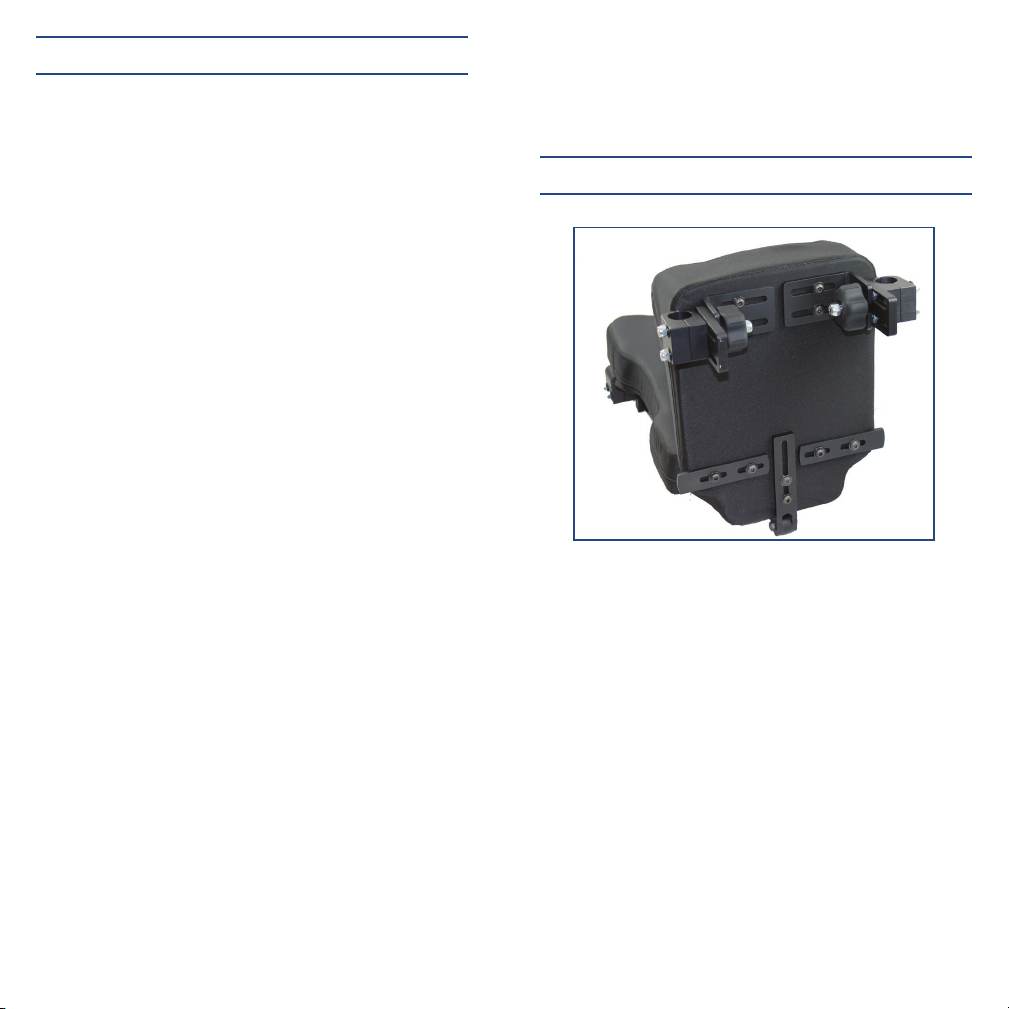
kanga seating package
Item Number
1300-921110
Kanga Seating Package 10” w/mounting hardware
1300-921112
Kanga Seating Package 12” w/mounting hardware
1300-921114
Kanga Seating Package 14” w/mounting hardware
Tools Needed: 5/32 allen wrench, 7/16 wrench or socket,
tape measure, pencil(1) Contoured seat.
Contents in package (qty)
(1) Contoured back
(1) #1300-7093
Left-side back hardware (hardware packet included)
(1) #1300-7095
Right-side back hardware (hardware packet included)
(1) #1300-7097
Seat knob clamp hardware
(1) #1300-7099
Seat-to-back hinge bolt packet
Warning! Do not install this equipment without first
reading and understanding the instructions and parts
included with this package. Innovative concepts will not
be responsible for damage or injury as a result of misuse
or improper installation. We recommend an experienced
professional be consulted in the selection and application
process of this product.
Warning! Until all mounting clamps, brackets and parts
are properly tightened and securely attached, make sure
client is safely supported while positioning adjustments
are made to prevent the client from falling out of the
wheelchair.
NOTE - Seat/back assembly; “holes through upholstery”
have already been made for ease of assembly. Do not initially over tighten mounting hardware as final adjustments
will be necessary prior to fitting client into seating.
step one - seat/back assembly
1.1 For shipping purposes only; the seat-to-back hinge is
attached to the back with only one bolt, loosen bolt and
adjust so that second bolt/washer can be installed to
securely fasten in place.
1.2 Align the seat and seat-to-back hinge to attach the
remaining two bolts/washers to bottom of seat.
1.3 Align the seat and seat-to-back hinge to attach the
remaining two bolts/washers to bottom of seat.
1.4 Align the seat and seat-to-back hinge to attach the
remaining two bolts/washers to bottom of seat.
step two - Installing hardware to
wheelchair frame
2.1 Open the package labeled “seat knob clamp hardware” loosen the large plastic hand knobs and attach the
seat knob clamps onto the seat mount brackets.
2.2 Locate the desired position for the seat/back within
the wheelchair frame. Using a pencil or a non-permanent
marking tool, mark the desired position for the seat/
back knob clamps on the wheelchair seat rails and back
canes. Remove the seat knob clamps from the seat mount
brackets.
2.3 Attach the seat knob clamps on the marked position
on the wheelchair seat rails.
2.4 Remove the right/left back knob clamps by loosening
the large plastic hand knobs.
2.5 Attach the right/left back knob clamp on the marked
positions on the wheelchair back canes.
2.6 Use tape measure and verify that both seat knob
clamps measure the same distance from a specific reference point on the wheelchair seat rails.
2.7 Repeat step 2.6 for the back knob clamps mounted to
the wheelchair back canes.
step three - attaching seat/back
to wheelchair frame
Attach the seat by aligning the seat mount brackets onto
the seat knob clamps attached to the wheelchair seat
rails.
Align the back knob brackets onto the back knob clamps
on the back canes.
Tighten all four of the large plastic hand knobs to secure
the seat/back in place.
Final adjustments for installing/removing seat/back, make
all necessary fine-tuning adjustments so that seat/back
assembly installs/removes properly. Do a final check and
tighten all hardware and plastic hand knobs prior to positioning client into wheelchair.
 Loading...