

Page 1
Networking Basics (continued)
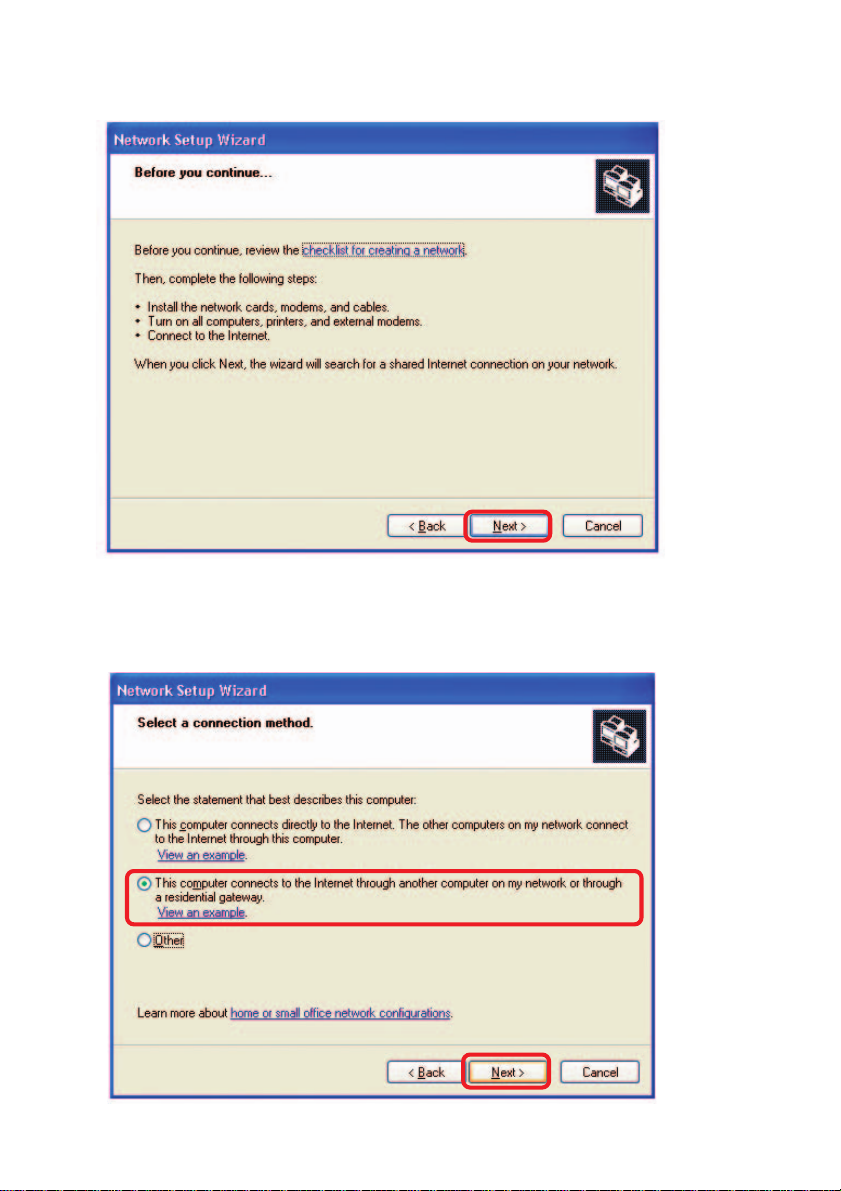
Please follow all the instructions in this window:
Click Next.
In the following window, select the best description of your computer . If your
computer connects to the internet through a gateway/router, select the second option
as shown.
Click Next.
26
Page 2
Networking Basics (continued)
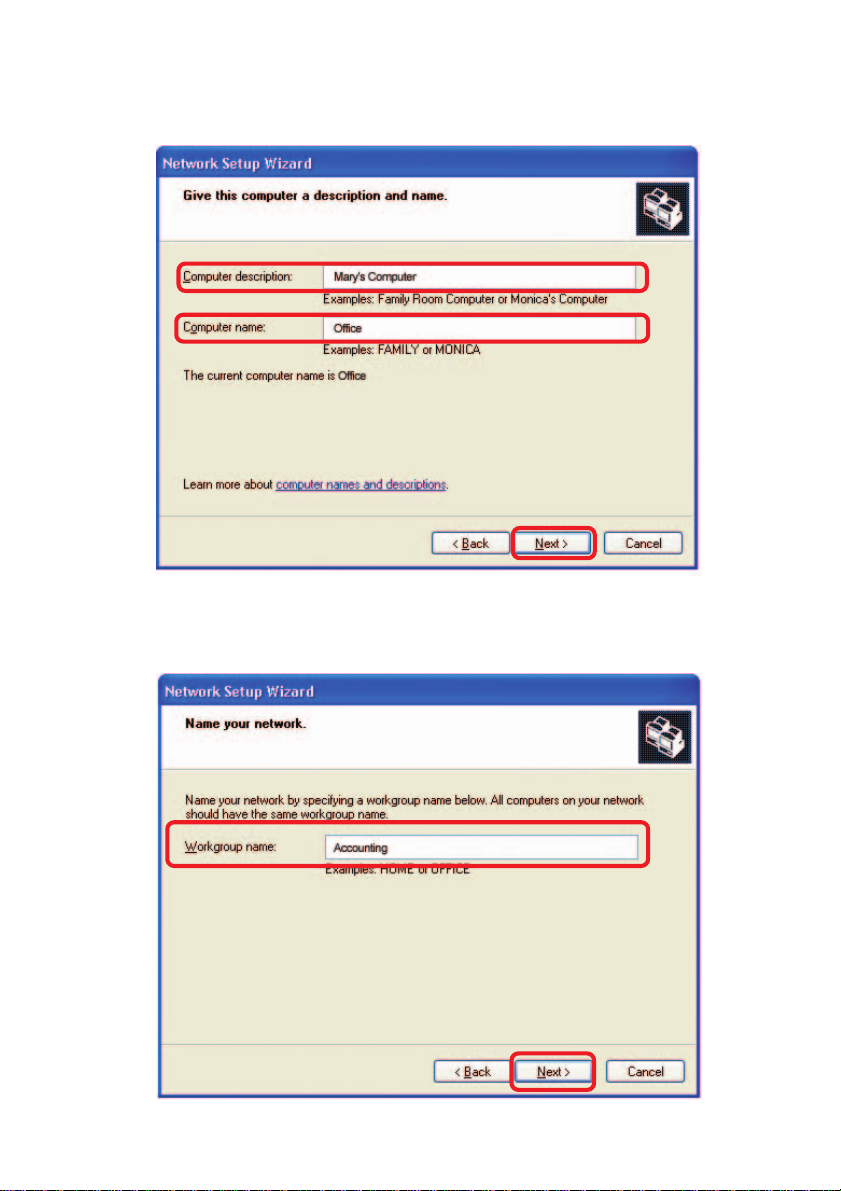
Enter a Computer description and a Computer name (optional.)
Click Next.
Enter a Workgroup name. All computers on your network should have the same
Workgroup name.
Click Next.
27
Page 3
Networking Basics (continued)
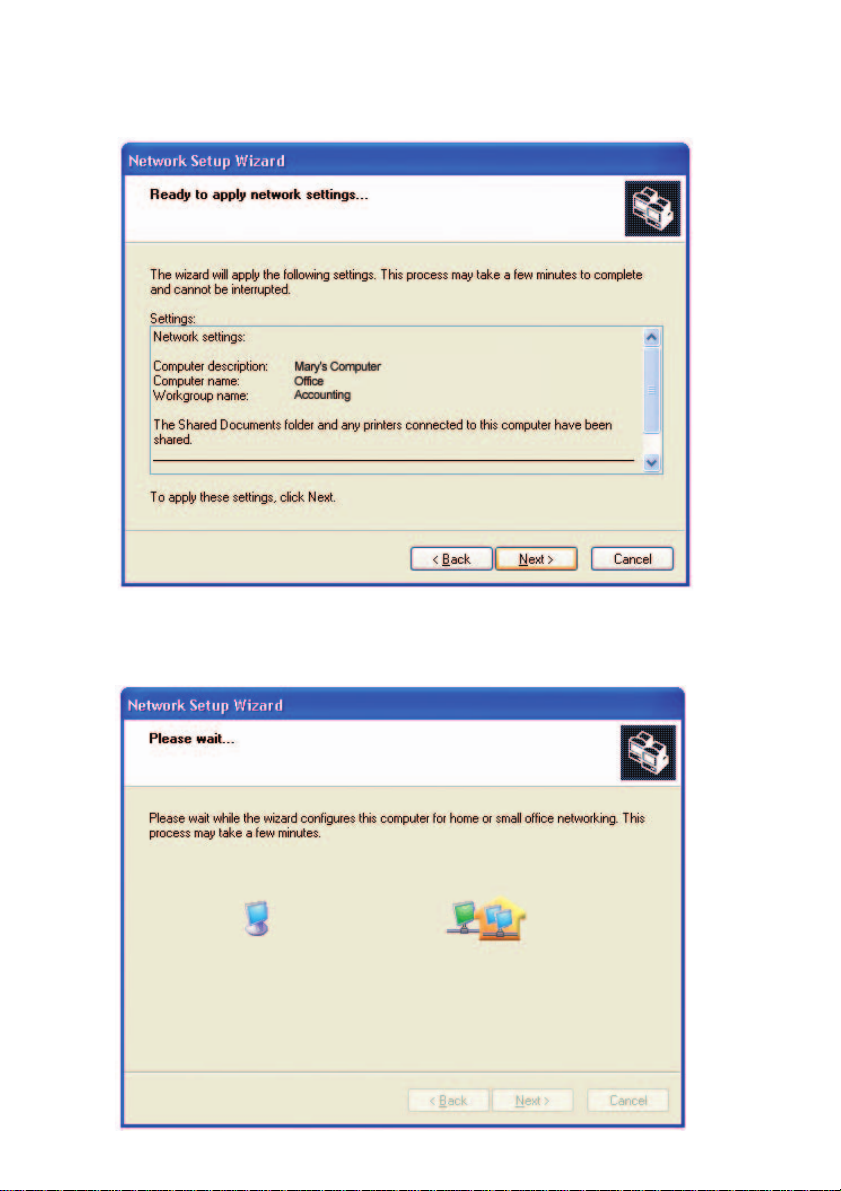
Please wait while the Network Setup Wizard applies the changes.
When the changes are complete, click Next.
Please wait while the Network Setup Wizard configures the computer.
This may take a few minutes.
28
Page 4
Networking Basics (continued)
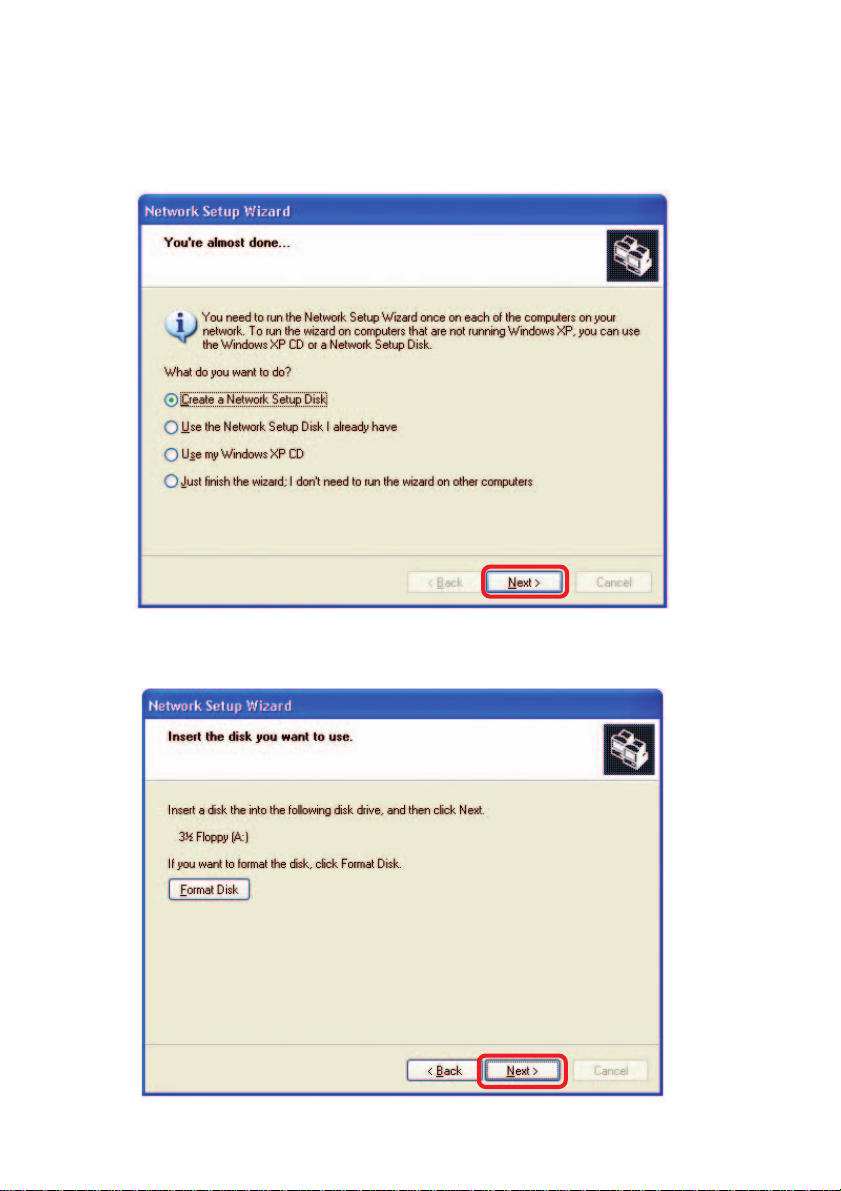
In the window below, select the option that fit s your needs. In this example, Create a
Network Setup Disk has been selected. You will run this disk on each of the
computers on your network. Click Next.
Insert a disk into the Floppy Disk Drive, in this case drive A.
Format the disk if you wish, and click Next.
29
Page 5
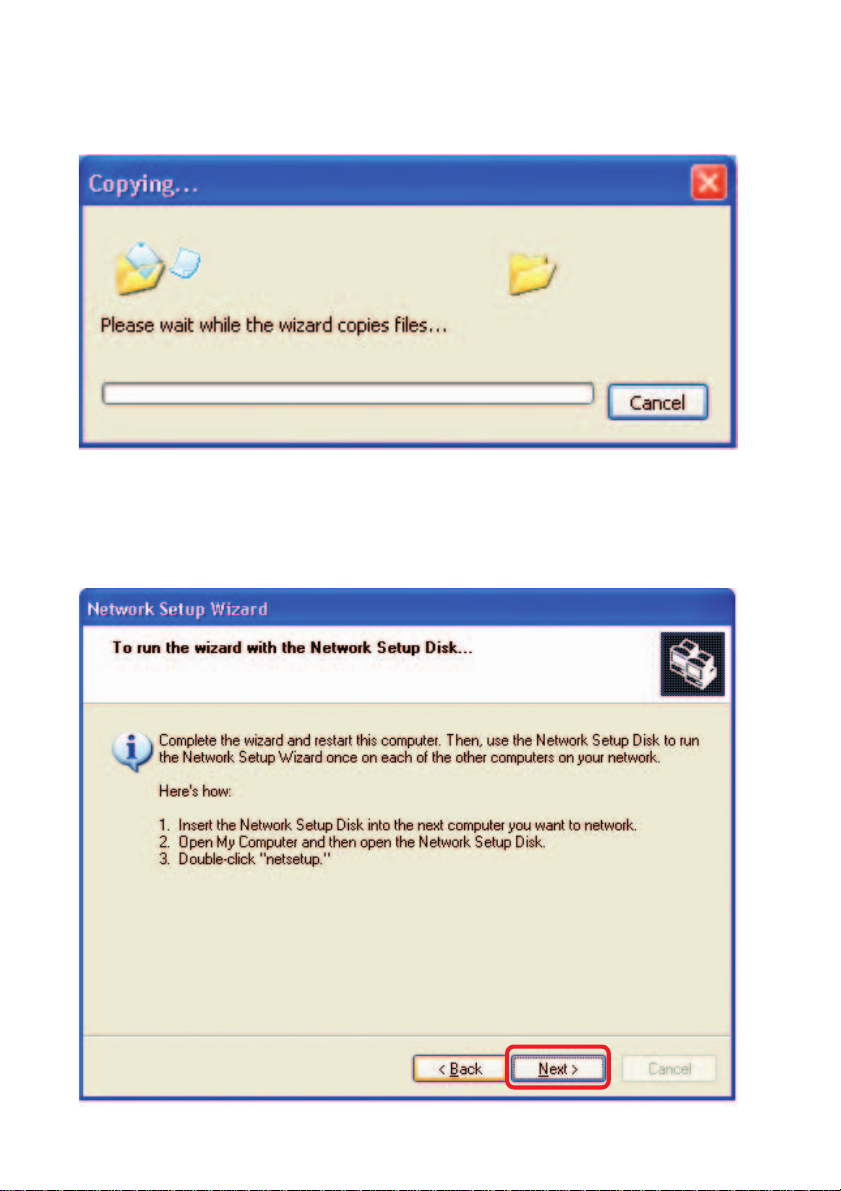
Networking Basics (continued)
Please read the information under Here’s how in the screen below . After you complete
the Network Setup Wizard you will use the Network Setup Disk to run the Network
Setup Wizard once on each of the computers on your network. T o continue click Next.
30
Page 6
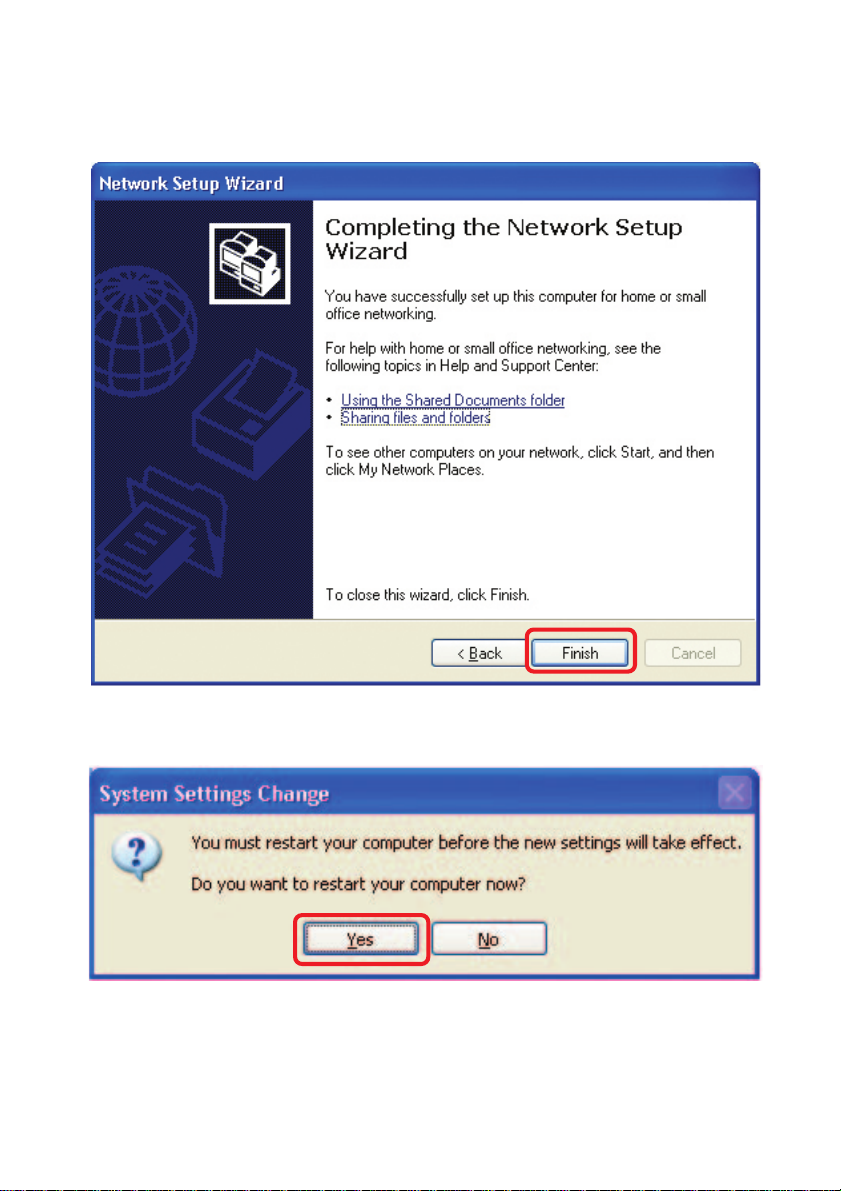
Networking Basics (continued)
Please read the information on this screen, then click Finish to complete the
Network Setup Wizard.
The new settings will take effect when you restart the computer . Click Yes to restart
the computer.
Y ou have completed configuring this computer. Next, you will need to run the Network
Setup Disk on all the other computers on your network. After running the Network
Setup Disk on all your computers, your new wireless network will be ready to use.
31
Page 7
Networking Basics (continued)
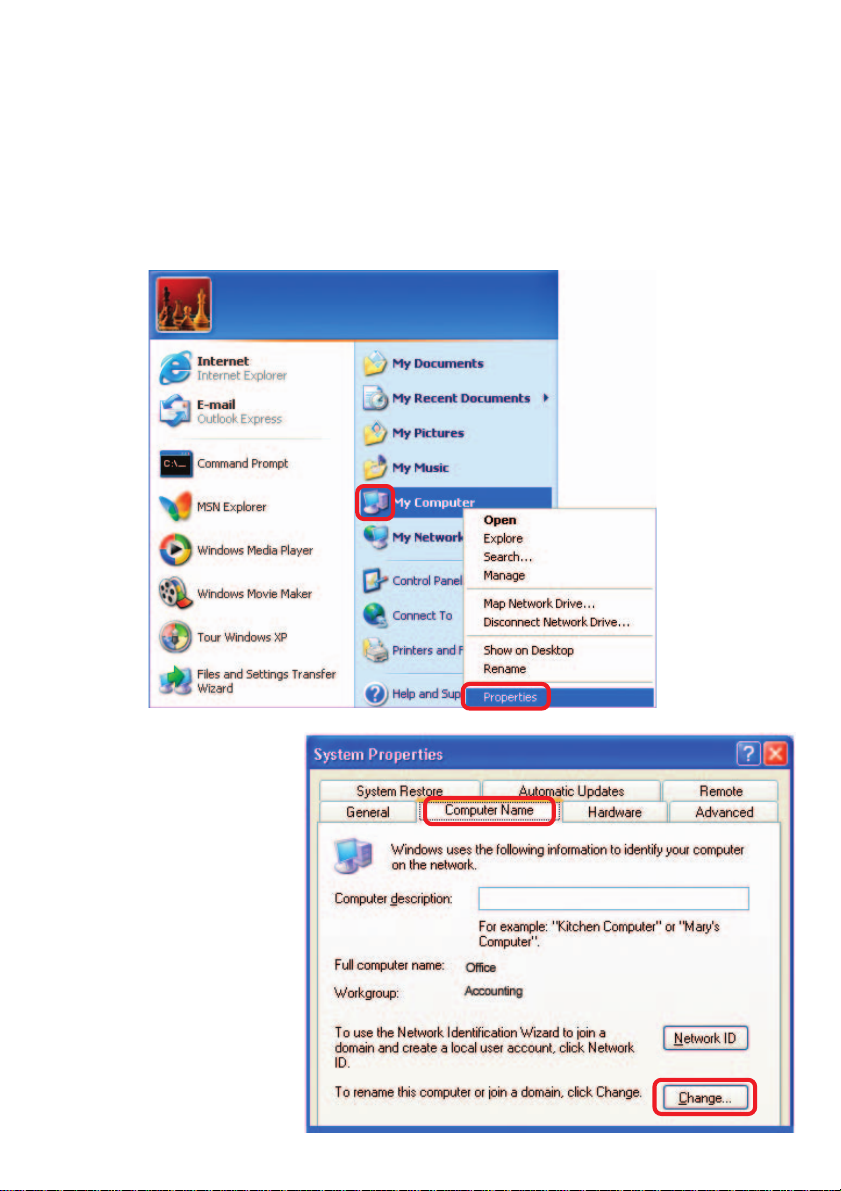
Naming your Computer
T o name your computer in Windows XP, please follow these directions:
Click Start (in the lower left corner of the screen).
Right-click on My Computer.
Select Properties.
Select the Computer
Name Tab in the System
Properties window.
Y ou may enter a Computer Description if you
wish; this field is optional.
T o rename the computer
and join a domain, click
Change.
32
Page 8

Networking Basics (continued)
Naming your Computer
In this window, enter the
Computer name.
Select Workgroup and enter
the name of the Workgroup.
All computers on your network
must have the same
Workgroup name.
Click OK.
Checking the IP Address in Windows XP
The wireless adapter-equipped computers in your network must be in the same IP address range (see Getting Started in this manual for a definition of IP address range). To
check on the IP address of the adapter , please do the following:
Right-click on the
Local Area
Connection icon
in the task bar .
Click on Status.
33
Page 9

Networking Basics (continued)
Checking the IP Address in Windows XP
This window will appear.
Click the
Support tab.
Click Close.
Assigning a Static IP Address in Windows XP/2000
Note: DHCP-capable routers will automatically assign IP addresses to the computers on the network, using DHCP (Dynamic Host Configuration Protocol) technology. If you are using a DHCP-capable router you will not need to assign static IP
addresses.
If you are not using a DHCP capable router, or you need to assign a static IP address,
please follow these instructions:
Go to Start.
Double-click on
Control Panel.
34
Page 10

Networking Basics (continued)
Assigning a Static IP Address in Windows XP/2000
Double-click on
Network
Connections.
Right-click on Local Area
Connections.
Double-click on
Properties.
35
Page 11

Networking Basics
(continued)
Assigning a Static IP
Address in
Windows XP/2000
Click on Internet Protocol
(TCP/IP)
Click Properties
In the window below, select Use
the following IP address. Input
your IP address and subnet
mask. (The IP addresses on
your network must be within the
same range. For example, if one
computer has an IP address of 192.168.0.2, the other computers should have
IP addresses that are sequential, like 192.168.0.3 and 192.168.0.4. The subnet
mask must be the same for all the computers on the network).
IP Address:
e.g., 192.168.0.2
Subnet Mask:
255.255.255.0
Default Gateway:
Enter the LAN IP address of
the wireless router. (D-Link
wireless routers have a LAN IP
address of 192.168.0.1)
Select Use the following
DNS server addresses.
Enter the LAN IP address of
the wireless router. (D-Link
wireless routers have a LAN
IP address of 192.168.0.1)
Click OK
You have completed the assignment of a st atic IP address. (Y ou do not need to assign
a static IP address if you have a DHCP-capable router).
36
Page 12

Networking Basics (continued)
Checking the Wireless Connection
by
Pinging in Windows XP and 2000
Go to Start > Run >
type cmd. A window
similar to this one
will appear. T ype
ping
xxx.xxx.xxx.xxx,
where xxx is the IP
Address of the
Wireless Router or
Access Point. A
good wireless
connection will show
four replies from the
Wireless Router or
Access Point, as
shown.
Checking the Wireless Connection
by
Pinging in Windows Me and 98
Go to Start > Run
> type command.
A window similar to
this will appear.
Type ping
xxx.xxx.xxx.xxx
where xxx is the IP
Address of the
Wireless Router or
Access Point. A
good wireless
connection will
show four replies
from the wireless
router or access
point, as shown.
37
Page 13

Troubleshooting
This Chapter provides solutions to problems that can occur during the installation and
operation of the DWL-7200AP Wireless Access Point. We cover various aspects of the
network setup, including the network adapters. Please read the following if you are having
problems.
Note: It is recommended that you use an Ethernet connection to
configure the DWL-7200AP.
1.
The computer used to configure the DWL-7200AP cannot
access the Configuration menu.
Check that the Ethernet LED on the DWL-7200AP is ON. If the LED
is not ON, check that the cable for the Ethernet connection is
securely inserted.
Check that the Ethernet adapter is working properly . Please see item
3 in this section: Check that the drivers for the network adapters
are installed properly.
Check that the IP address is in the same range and subnet as the
DWL-7200AP. Please see Checking the IP Address in Windows
XP in the Networking Basics section of this manual.
Note: The IP address of the DWL-7200AP is 192.168.0.50. All the computers on
the network must have a unique IP address in the same range, e.g., 192.168.0.x.
Any computers that have identical IP addresses will not be visible on the
network. They must all have the same subnet mask, e.g., 255.255.255.0
Do a Ping test to make sure that the DWL-7200AP is responding.
Go to Start>Run>Type Command>Type ping 192.168.0.50. A
successful ping will show four replies.
Note: If you have changed
the default IP address,
make sure to ping the correct IP address assigned
to the DWL-7200AP.
38
Page 14

Troubleshooting (continued)
The wireless client cannot access the Internet in the
2.
Infrastructure mode.
Make sure the wireless client is associated and joined with the correct access
point. To check this connection: Right-click on the Local Area Connection icon in
the taskbar> select View Available Wireless Networks. The Connect to
Wireless Network screen will appear. Please make sure you have selected the
correct available network, as shown in the illustrations below.
default
Check that the IP address assigned to the wireless adapter is within the
same IP address range as the access point and gateway. (Since the
DWL-7200AP has an IP address of 192.168.0.50, wireless adapters
must have an IP address in the same range, e.g., 192.168.0.x. Each
device must have a unique IP address; no two devices may have the
same IP address. The subnet mask must be the same for all the
computers on the network.) To check the IP address assigned to the
wireless adapter, double-click on the local area connection icon in
the taskbar > select the support tab and the IP address will be
displayed. (Please refer to Checking the IP Address in the Networking
Basics section of this manual.)
If it is necessary to assign a static IP address to the wireless adapter ,
please refer to the appropriate section in Networking Basics. If you are
entering a DNS server address you must also enter the default
gateway address. (Remember that if you have a DHCP-capable router ,
you will not need to assign a static IP address. See Networking
Basics: Assigning a Static IP Address.)
39
Page 15

Troubleshooting (continued)
3. Check that the drivers for the network adapters are
installed properly.
You may be using different network adapters than those illustrated here, but this
procedure will remain the same, regardless of the type of network adapters you are
using.
Go to Start
Right-click on
My Computer
Click
Properties
Select the Hardware
tab
Click Device Manager
40
Page 16

Troubleshooting (continued)
Double-click
on Network
adapters
Right-click on D-Link
DWL-AG660 Wireless
Cardbus Adapter
Select Properties
to check that the
drivers are installed properly
Look under Device status
to check that the device is
working properly
Click OK
D-Link DWL-AG660
D-Link DWL-AG660
41
Page 17

Troubleshooting (continued)
4. What variables may cause my wireless products to lose recep-
tion?
D-Link products let you access your network from virtually anywhere you want. However ,
the positioning of the products within your environment will affect the wireless range.
Please refer to Installation Considerations in the Wireless Basics section of this manual
for further information about the most advantageous placement of your D-Link wireless
products
5. Why does my wireless connection keep dropping?
.
Antenna orientation- Try different antenna orientations for the DWL-7200AP.
Try to keep the antenna at least 6 inches away from the wall or other objects.
If you are using 2.4GHz cordless phones, X-10 equipment or other home secu-
rity systems, ceiling fans, and lights, your wireless connection will degrade dramatically or drop altogether. T ry changing the channel on your access point and
wireless adapter to a different channel to avoid interference.
Keep your product away (at least 3-6 feet) from electrical devices that generate
RF noise, like microwaves, monitors, electric motors, etc.
6. Why can’t I get a wireless connection?
To establish a wireless connection, while enabling Encryption on the DWL-7200AP, you
must also enable encryption on the wireless client.
For 802.1 1a, the Encryption settings are: 64-, 128- or 152-bit. Make sure that the
encryption bit level is the same on the access point and the wireless client.
For 802.11b, the Encryption settings are: 64-, 128-, or 256-bit. Make sure that
the encryption bit level is the same on the access point and the wireless client.
Make sure that the SSID on the access point and the wireless client are exactly the
same. If they are not, wireless connection will not be established. Please note that there
are two separate SSIDs for 802.1 1a and 802.1 1b. The default SSID for both 802.1 1a and
802.1 1b is default.
42
Page 18

Troubleshooting (continued)
7. Resetting the DWL-7200AP to Factory Default Settings
After you have tried other methods for troubleshooting your network, you may
choose to Reset the DWL-7200AP to the factory default settings.
To hard-reset the D-Link DWL-7200AP to factory default settings, please do the
following:
Locate the Reset button on the back of the DWL-7200AP
Use a paper clip to press the Reset button
Hold for about 10 seconds and then release
After the DWL-7200AP reboots (this may take a few
minutes) it will be reset to the factory default settings
43
Page 19

Technical Specifications
Standards
IEEE 802.11g
IEEE 802.1 1b
IEEE 802.1 1a
IEEE 802.3
IEEE 802.3u
Device Management
Web-based - Internet Explorer v6 or later; Netscape
Navigator v6 or later; or other Java-enabled browsers
DHCP Client
Network Architecture
Supports Infrastructure Mode
LEDs
Power
WAN
LAN (10/100)
WLAN - 802.1 1a, 802.1 1g
Wireless Operating Range*
Indoors – up to 328 feet (100 meters)
Outdoors – up to 1,312 feet (400 meters)
Temperature
Operating: 32ºF to 149ºF (0ºC to 55ºC)
Storing: 4ºF to 167ºF (-20ºC to 75ºC)
Humidity:
95%maximum, non-condensing
* Environmental Conditions may adversely affect wireless signal range
44
Page 20

Technical Specifications (continued)
Safety and Emissions:
FCC
CE
CSA
Physical Dimensions:
L = 7.6 inches (193mm)
W = 5.5 inches (140mm)
H = 1.2 inches (31mm)
Wireless Data Rates with Automatic Fallback:
108Mbps 54Mbps 48Mbps 36Mbps
24Mbps 18Mbps 12Mbps 11Mbps
9Mbps 6Mbps 5.5Mbps 2Mbps
1Mbps
Security:
64-, 128-, 152-bit WEP (Wired Equivalent Privacy)
WPA - Wi-Fi Protected Access (64,128-bit WEP with TKIP,
MIC, IV Expansion, Shared Key Authentication)
Supports Advanced Encryption Standard (AES)
External Antenna Type:
Dual Non-Detachable Dipole Antenna
Wireless Frequency Range:
2.4 – 2.462GHz
5.15 – 5.35GHz, 5.725-5.85GHz
Modulation Technology:
Orthogonal Frequency Division Multiplexing (OFDM)
PBCC
Complementary Code Keying (CCK)
45
Page 21

Technical Specifications (continued)
Media Access Control:
CSMA/CA with ACK
Wireless Transmit Power:
15dBm(32mW)±2dB
Power Adapter:
Ext. Power Supply DC 5V, 2.0A
100-120V ~ 50-60Hz
Weight:
0.62 lbs (280g)
Receiver Sensitivity:
108Mbps OFDM, 10% PER, -73dBm
54Mbps OFDM, 10% PER,-73dBm
48Mbps OFDM, 10% PER,-76dBm
36Mbps OFDM, 10% PER,-82dBm
24Mbps OFDM, 10% PER,-85dBm
18Mbps OFDM, 10% PER,-88dBm
12Mbps OFDM, 10% PER,-89dBm
11Mbps CCK, 8% PER,-91dBm
9Mbps OFDM, 10% PER,-90dBm
6Mbps OFDM, 10% PER,-91dBm
5.5Mbps CCK, 8% PER,-92dBm
2Mbps QPSK, 8% PER,-93dBm
1Mbps BPSK, 8% PER,-94dBm
46
Page 22

Federal Communication Commission (FCC)
Interference Statement:
This device complies with Part 15 of the FCC Rules. Operation is subject to the following two
conditions:
(1) This device may not cause harmful interference, and
(2) this devicemust accept any interference received, including int erference that may cause
undesired operation.
This equipment has been tested and found to comply with the limits for a Class B digital device,
pursuant to Part 15 of the FCC Rules. These limits are designed to provide reasonable
protection against harmful interference in a residential installation. This equipment generates,
uses and can radiate radio frequency energy and, if not installed and used in accordance with
the instructions, may cause harmful interference to radiocommunications. However, there is
no guarantee that interference will not occur in a particularinstallation. If this equipment does
cause harmful interference to radio or television reception, which can be determined by
turning the equipment off and on, the user is encouraged to try to correct the interference by
one of the following measures:
- Reorient or relocate the receiving antenna.
- Increase the separation between the equipment and receiver.
- Connect the equipment into an outlet on a circuit different from that to which the receiver is
connected.
- Consult the dealer or an experienced radio/TV technician for help.
Important Radiation Exposure Statement:
This equipment complies with FCC radiation exposure limits set forth for an uncontrolled
environment. This equipment should be installed and operated with minimum distance 20cm
between the radiator & your body. This transmitter must not be co-located or operating in
conjunction with any other antenna or transmitter. The antenna(s) used for this transmitter
must not be co-located or operating in conjunction with any other antenna or transmitter.
Caution:
To assure continued compliance, any changes or modifications not expressly approved by the
party responsible for compliance could void the user’s authority to operate this equipment.
IEEE802.11b or g operation of this product is limited to channel 1- 11 by specified firmware
controlled in USA.
 Loading...