

Page 1
r
This product works with the following
operating system software: Windows
98, Windows NT, Windows 2000,
Windows Me and Windows XP.
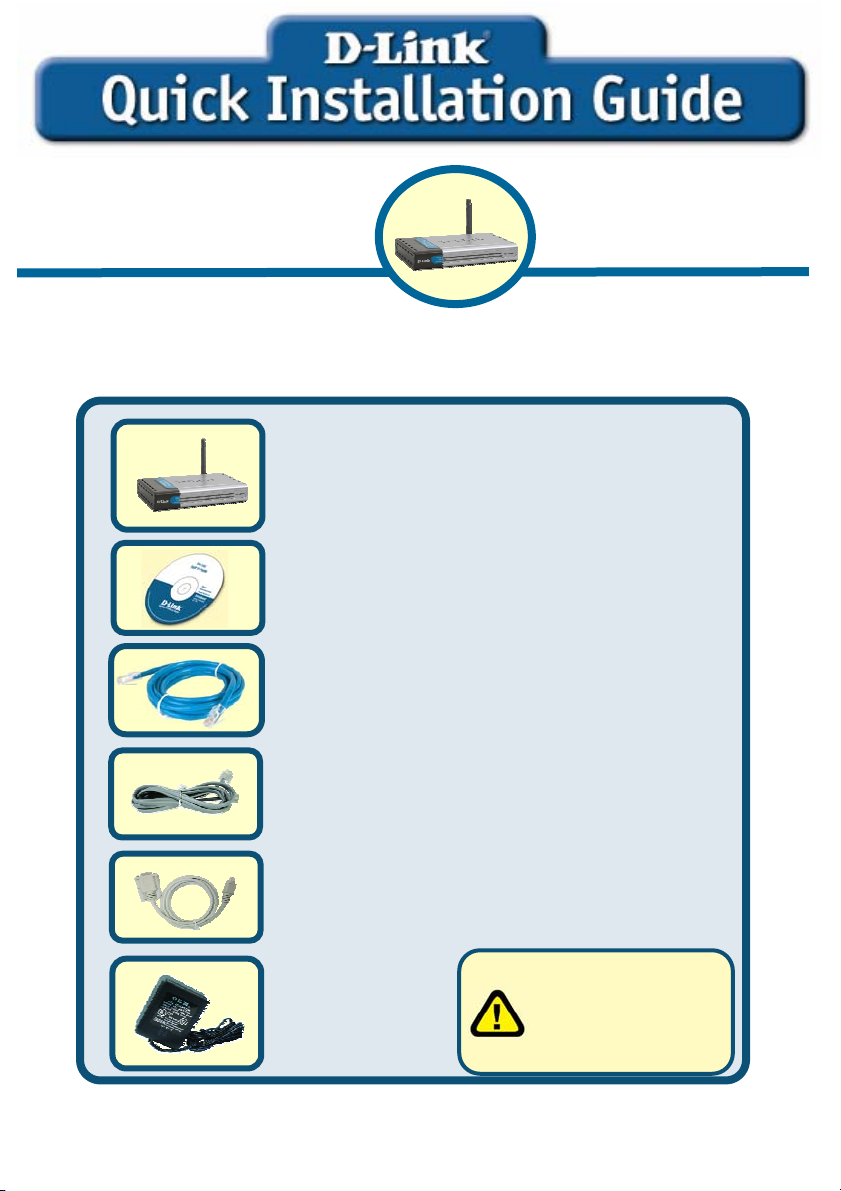
Check Your Package Contents
These are the items included with your purchase:
If any of the below items are missing, please contact your reseller.
DSL-G804V
Wireless ADSL Router
DSL-G804V Wireless ADSL Route
CD-ROM (Quick Install Guide and Manual)
One Ethernet (CAT5 UTP Straight-through)
Cable
One ADSL Cable
(standard telephone cable)
One Console (PS/2-RS232) Cable
Using a power adapter
12V, 1A
©2005 D-Link System, Inc. All rights reserved. Trademarks or registered trademarks are the property of their respective
holders. Software and specifications subject to change without notice.
with different voltage
rating will damage and
void the warranty for this
product.
Page 2
Connecting the Router to your
Computer
A、First, connect the power adapter to the power input at the back panel of the
DSL-G804V and then plug the other end of the power adapter to a wall outlet
or power strip.On the front of the device, the power LED will turrn ON to
indicate proper operation.
B、Insert one end of the Ethernet cable into an Ethernet(LAN) port on the back
panel of the DSL-G804V and the other end of the cable to an Ethernet Adapter
or available Ethernet port on your computer.
C、Insert the telephone cable included with the Router into the ADSL port, then
connect the cable to your telephone line.
D、Check the LED display on the front of the Router to confirm that the
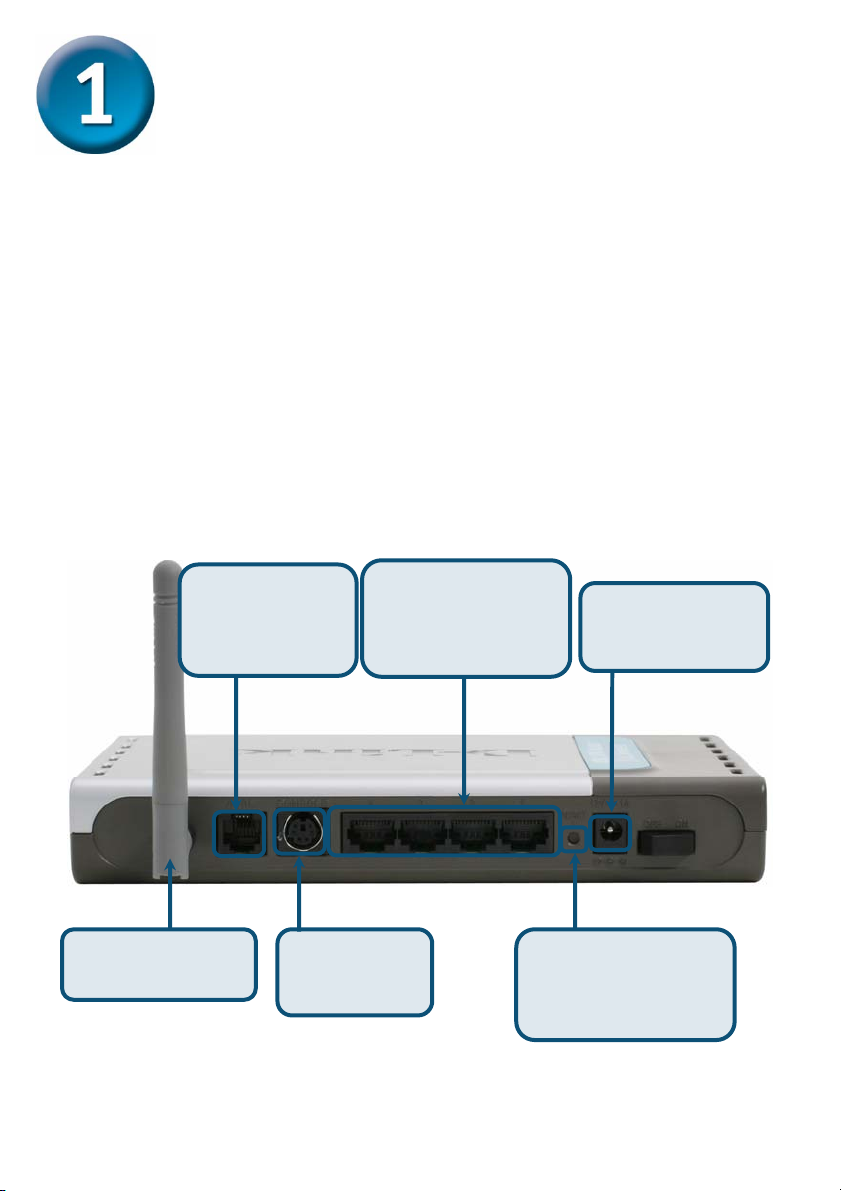
Rear Panel Connections
ADSL Modem
Port
Connect to your
ADSL provider
LAN Ports
Connects to the
LAN and other
computers
DC Power Input
Connect to DC
Adapter
Antenna
Omni Directional
Console Port
Connect to
PS2/RS-232
Factory Reset
Push in 5 seconds to
return to factory
default settings
2
Page 3
Connecting the Router to your
Computer (continued)
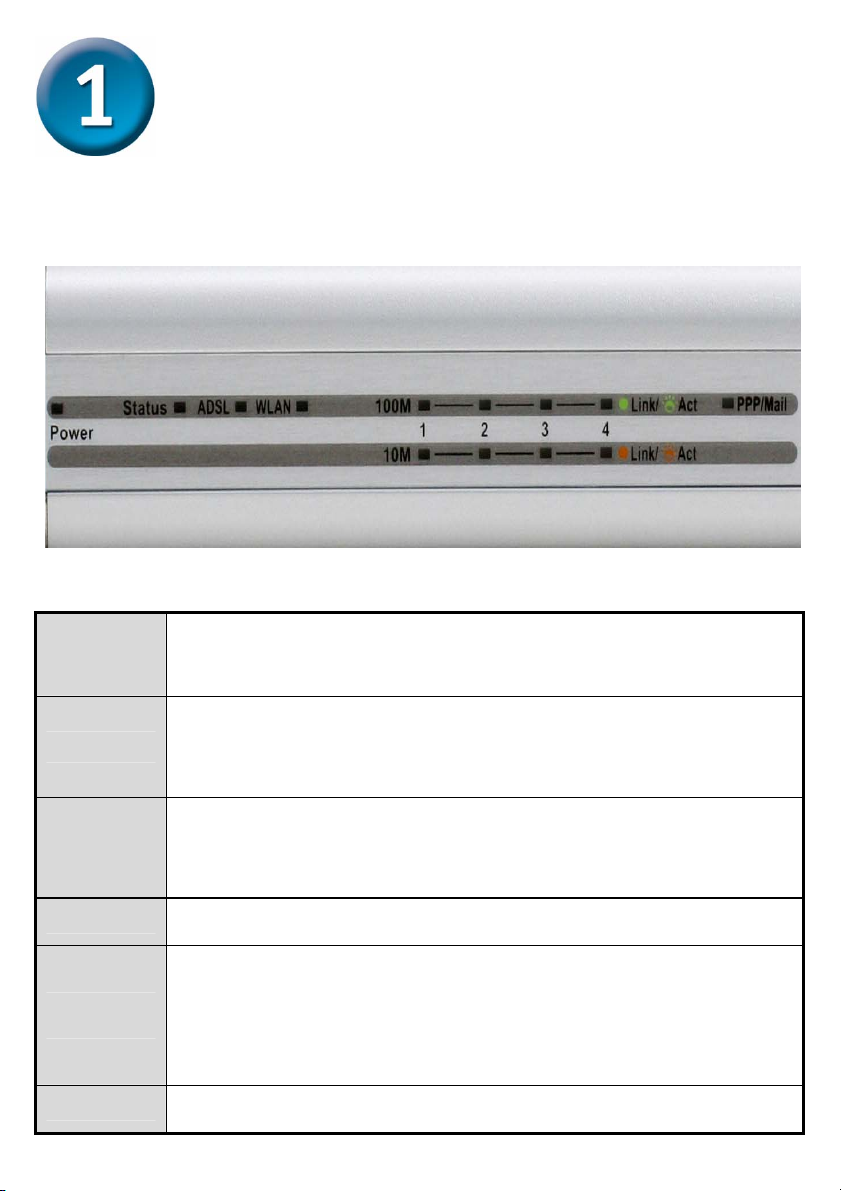
Front Panel LEDs
Power
Status
ADSL:
Link/Act
WLAN
LAN 1 - 4:
Link/Act
PPP/MAIL
Steady green light indicates the unit is powered on. When the device
is powered off this remains dark.
Lights steady green during power on self-test (POST). Once the
connection status has been settled, the light will blink green. If the
indicator lights steady green after the POST, the system has failed
and the device should be rebooted.
Steady green light indicates a valid ADSL connection. This will light
after the ADSL negotiation process has been settled. A blinking
green light indicates activity on the WAN (ADSL) interface.
Lit green when the wireless connection is established. A blinking
green when sending/receiving data.
Green: The router has a successful 100Mb Ethernet connection. A
solid green light indicates a valid link on startup. These lights blink
when there is activity currently passing through the Ethernet port.
Orange: The router has a successful 10Mb Ethernet connection. A
solid green light indicates a valid link on startup. These lights blink
when there is activity currently passing through the Ethernet port.
Lit steady when there is a PPPoA / PPPoE connection. Lit and
flashed periodically when there is email in the Inbox
3
Page 4
Configuring the Router
You have two methods to configure your router. The one is you can use the
Configuration Utility which is contained in the CD-ROM and follow the instructions
step by step to easy configure your router.
The other one is to use your Web browser to access the web pages used to setup the
Router, your computer must be configured to “Obtain an IP address automatically”,
that is, you must change the IP network settings of your computer so that it is a DHCP
Client. If you are using Windows XP and do not know how to change your network
settings, skip ahead to Appendix A
read the User Manual for instructions on changing IP settings for computers running
Windows operating systems.
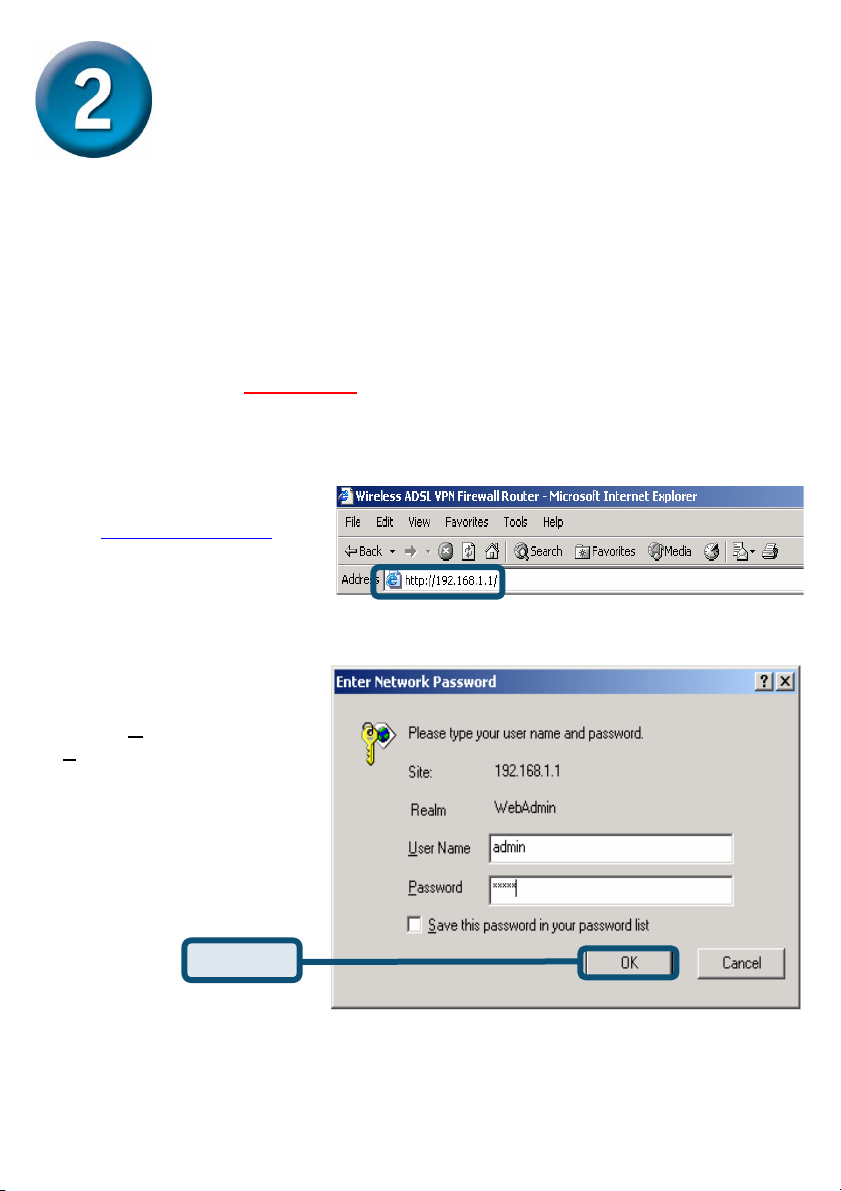
Open the web browser and
http://192.168.1.1 in
type
the browser’s address box.
This number is the default IP
address for this router.
Press Enter.
A user name and password
window will appear. The
default U
Password are “admin” and
“admin”. Press OK to logon
to the router.
ser Name and
and read the instructions provided. You may also
Click OK
4
Page 5
Configuring the Router (continued)
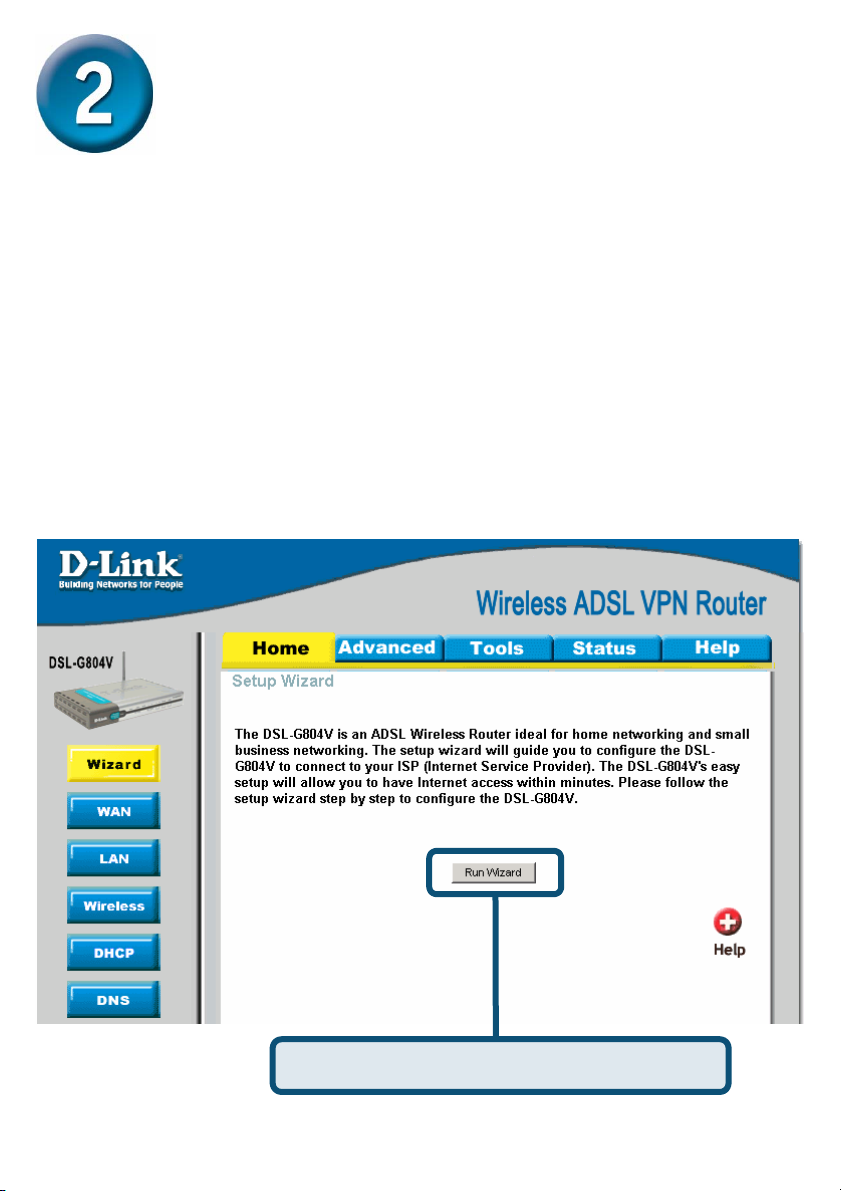
Once you have logged in, the Home directory tab is prominent with the Setup Wizard
menu displayed. Most users will be able to use the Setup Wizard to establish the
ADSL connection to your ISP. To begin using the Setup Wizard, click on the Run
Wizard button in the middle of the web page. A pop-up menu will appear. This pop-up
menu is the Setup Wizard. The Setup Wizard procedure consists of four general
steps:
1. Set your new password
2. Set Internet connection
3. Set Wireless connection
4. Save configuration
When you setup the Internet connection, you will need to enter information provided by
your ISP. The type of information you need depends on the type of connection you are
setting up.
Click on the Run Wizard button.
5
Page 6
Configuring the Router (continued)
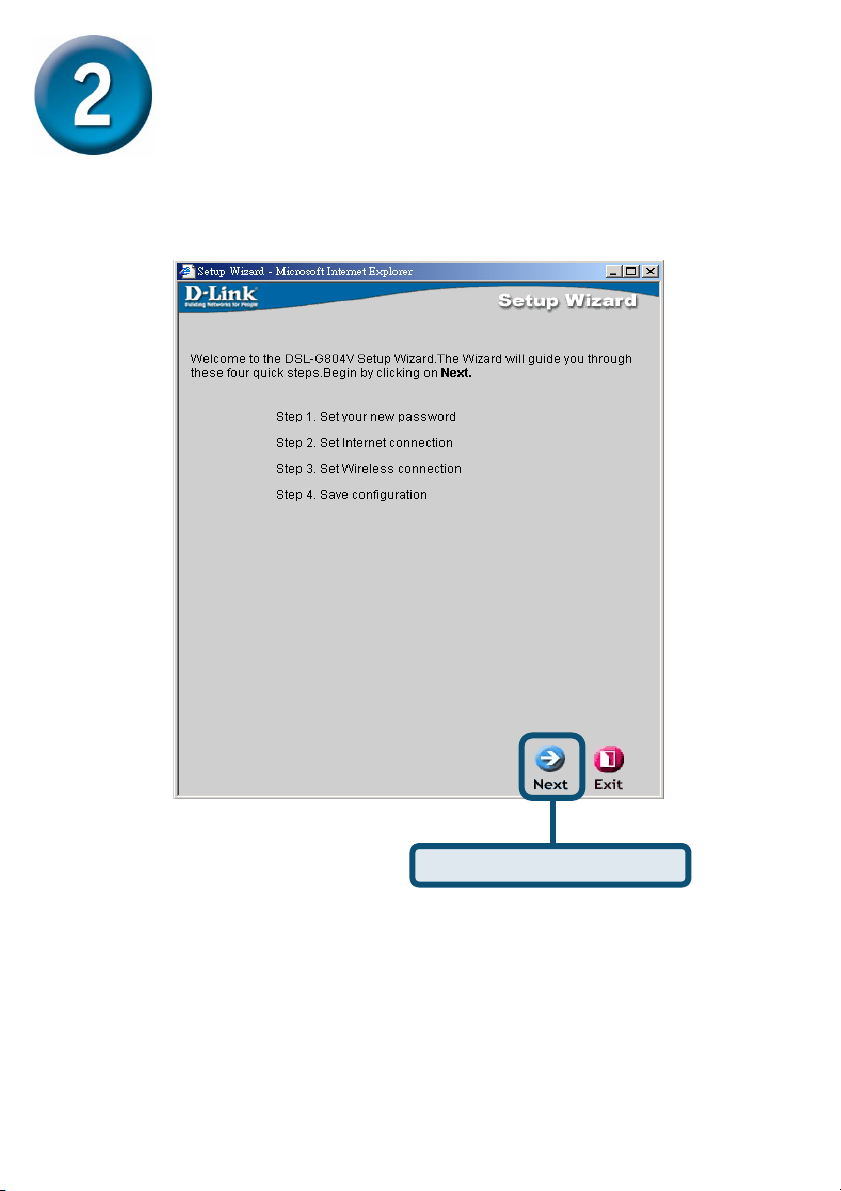
The first window of the Setup Wizard menu lists a summary of the steps required to
complete the setup. Click the Next button to begin setup and go on to step 1.
Click the Next button.
6
Page 7
Configuring the Router (continued)
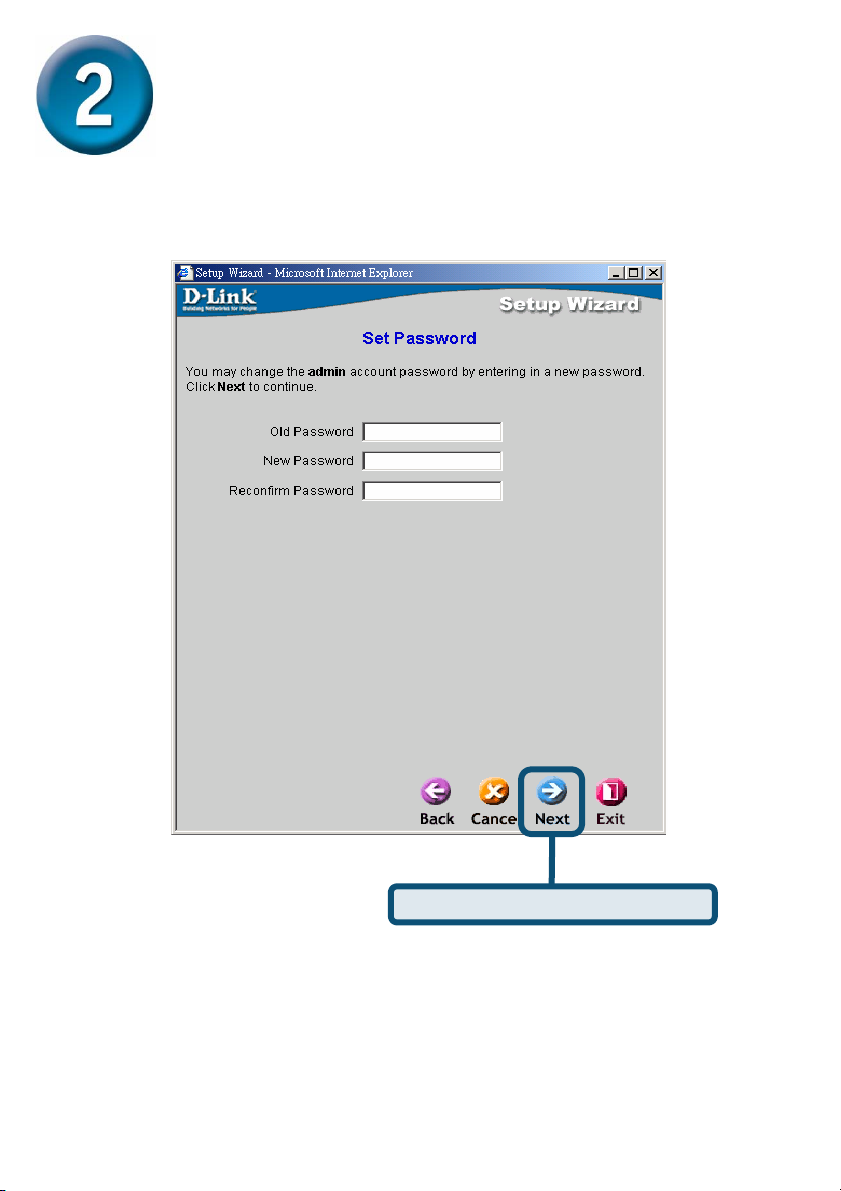
The factory default password is admin, you may like change the the password by
entering in a new password.
Click the Next button.
7
Page 8

y
Configuring the Router (continued)
You will see the Detecting Internet Connection Type Screen.
Next, you need to select and set the Internet Connection Type for the WAN
interfaces. Your ISP has given this information to you. If you do not know what type of
connection to use, exit the Set Wizard and contact your ISP for the information. The
Setup Wizard menu that appears when you click the next button depends on what
connection type you select.
Select the Connection Type used
for
our ADSL service.
Click the Next button.
8
Page 9

Configuring the Router (continued)
PPPoE/PPPoA Connections
Type in the Username and Password used to identify and verify your account to the
ISP. The VPI number and VCI number should not be changed unless you have been
instructed by ISP to change them. Select the Connection Type used for
encapsulation specific to your service. Click Next when you are ready to continue to
the Setup Completed menu. If you are not sure what Connection Type, VPI and VCI
to use, please check with your ISP.
Use the pull-
down menu to
choose the
correct
Connection
Type. The user
may choose
between PPPoE
or PPPoA, as
instructed by
your ISP.
Type the
Username and
Password for
your ISP
account.
Type the IP addresses for the
Address and/or Secondary
DNS Address, as instructed
Click the Next button.
WAN IP Address, Subnet
Address, Primary DNS
Type the VPI and
VCI, if these
values are not
correct, check
with your ISP for
information.
Mask, ISP Gateway
by your ISP.
9
Page 10

Configuring the Router (continued)
MPoA/IPoA
For this connection type, the user may choose MPoA or IPoA. The VPI number and
VCI number should not be changed unless you have been instructed by ISP to change
them. Select the Connection Type used for encapsulation specific to your service.
Click Next when you are ready to continue to the Setup Completed menu.If you are
not sure what Connection Type, VPI and VCI to use, please check with your ISP.
Use the pull-
down menu to
choose the
correct
Connection
Type. The user
may choose
between MPoA
or IPoA, as
instructed by
your ISP.
Type the IP addresses for the
WAN IP Address, Subnet
Address, Primary DNS
Address and/or Secondary
DNS Address, as instructed
Type the VPI and
VCI, if these
values are not
correct, check
with your ISP for
information.
Mask, ISP Gateway
by your ISP.
Click the Next button.
10
Page 11

Configuring the Router (continued)
Pure Bridge
Bridge is used to set the Bridge mode for the Router. The VPI number and VCI
number should not be changed unless you have been instructed by ISP to change
them. Select the Encapsulation used for encapsulation specific to your service. Click
Next when you are ready to continue to the Setup Completed menu.If you are not sure
what Connection Type, VPI and VCI to use, please check with your ISP.
Select the
Encapsulation Type
as LLC Bridged or
VcMux Bridged as
instructed by your ISP.
Type the VPI and
VCI, if these
values are not
correct, check
with your ISP for
information.
Click the Next button.
Next, you will see the Set Wireless connection Screen.
11
Page 12

g
)
Configuring the Router (continued)
Set Wireless connection
For this connection type, the user can enter the SSID name and Channel number to
be used for the Wireless Access Point.
Type the Network ID
(SSID), it is used for
identifying the WLAN.
It is case sensitive and
must not excess 32
Select the radio
channel number. The
permissible channels
depend on the
Regulatory Domain.
(The factory default
settin
is channel 6
characters.
Click the Next button.
12
Page 13

Configuring the Router (continued)
Setup Complete
All the settings for the ADSL connection are now completed. Click the Save Config
button to save the new settings and restart the Router. It will take about two minutes to
restart the Router.
Click the Save Config button.
Click the Exit button when the message appears informing you that the “Save Config
to FLASH Successful”. You can now launch your web browser to access the Internet.
13
Page 14

Appendix A
Configuring IP Settings in Windows XP
Use the following steps to configure a computer running Windows XP to be a DHCP
client.
1. From the Start menu on your desktop, go to Connect To, then click on Show
all Connections.
2. In the Network Connections window, right-click on LAN (Local Area
Connection), then click Properties.
Right-click on
the Local Area
Connection icon
and Select the
Properties
option from the
pull-down menu.
14
Page 15

3. In the General tab of the Local Area Connection Properties menu, highlight
Internet Protocol (TCP/IP) under “This connection uses the following items:”
by clicking on it once. Click on the Properties button.
Click Properties
4. Select “Obtain an IP address automatically” by clicking once in the circle.
Click the OK button.
Select Obtain an IP address
automatically in the Internet
Protocol (TCP/IP) Properties
window
15
Page 16

16
Page 17

Technical Support
You can find software updates and user documentation on the
D-Link website.
Tech Support for customers within Australia:
D-Link Technical Support over the Telephone:
1300-766-868
Monday to Friday 8:00am to 8:00pm EST
Saturday 9:00am to 1:00pm EST
D-Link Technical Support over the Internet:
http://www.dlink.com.au
email:support@dlink.com.au
Tech Support for customers within New Zealand:
D-Link Technical Support over the Telephone:
0800-900-900
Monday to Friday 8:30am to 8:30pm
Saturday 9:00am to 5:00pm
D-Link Technical Support over the Internet:
http://www.dlink.co.nz
email:support@dlink.co.nz
17
Page 18

Technical Support
You can find software updates and user documentation on the
D-Link website.
Tech Support for customers within South Eastern
Asia and Korea:
D-Link South Eastern Asia and Korea Technical Support
over the Telephone:
+65-6895-5355
Monday to Friday 9:00am to 12:30pm, 2:00pm-6:00pm
Singapore Time
D-Link Technical Support over the Internet:
email:support@dlink.com.sg
18
Page 19

Technical Support
You can find software updates and user documentation on the
D-Link website.
Tech Support for customers within India
D-Link Technical Support over the Telephone:
+91-22-26526741
+91-22-26526696 –ext 161 to 167
Monday to Friday 9:30AM to 7:00PM
D-Link Technical Support over the Internet:
http://ww.dlink.co.in
http://www.dlink.co.in/dlink/drivers/support.asp
ftp://support.dlink.co.in
email: techsupport@dlink.co.in
19
Page 20

Technical Support
You can find software updates and user documentation on the
D-Link website.
D-Link provides free technical support for customers for the
duration of the warranty period on this product.
Customers can contact D-Link technical support through our
web site or by phone.
Tech Support for customers within the Russia
D-Link Technical Support over the Telephone:
(095) 744-00-99
Monday to Friday 10:00am to 6:30pm
D-Link Technical Support over the Internet
http://www.dlink.ru
email: support@dlink.ru
20
Page 21

Technical Support
You can find software updates and user documentation on the D-Link website.
Tech Support for customers within the U.A.E & North Africa:
D-Link Technical Support over the Telephone:
Sunday to Wednesday 9:00am to 6:00pm GMT+4
D-Link Technical Support over the Internet:
Tech Support for customers within Israel:
D-Link Technical Support over the Telephone:
D-Link Technical Support over the Internet:
Tech Support for customers within Turkey:
D-Link Technical Support over the Telephone:
D-Link Technical Support over the Internet:
(971) 4-391-6480 (U.A.E)
Thursday 9:00am to 1:00pm GMT+4
D-Link Middle East & North Africa
http://support.dlink-me.com
email:support@dlink-me.com
(972) 9-9715701
Sunday to Thursday 9:00am to 5:00pm
http://www.dlink.co.il/support/
e-mail: support@dlink.co.il
(+90) 212-289 56 59
Monday to Friday 9:00am to 6:00pm
http://www.dlink.com.tr
e-mail: turkiye@dlink-me.com
Tech Support for customers within Egypt:
D-Link Technical Support over the Telephone:
(202) 414-4295
Sunday to Thursday 9:00am to 5:00pm
D-Link Technical Support over the Internet:
http://support.dlink-me.com
e-mail: amostafa@dlink-me.com
21
Page 22

Technical Support
You can find software updates and user documentation on the
D-Link website.
Tech Support for customers within South Africa
and Sub Sahara Region:
D-Link South Africa and Sub Sahara Technical Support
over the Telephone:
Monday to Friday 8:30am to 9:00pm South Africa Time
08600 DLINK ( For South Africa only )
D-Link Technical Support over the Internet:
+27-12-665-2165
http://www.d-link.co.za
email:support@d-link.co.za
22
Page 23

Technical Support
You can find updates and user documentation on the D-Link website
Tech Support for Latin America customers:
D-Link Technical Support over the followings Telephones:
Argentina: 0800-666 1442 Monday to Friday 09:00am to 22:00pm
Chile: 800-214 422 Monday to Friday 08:00am to 21:00pm
Colombia: 01800-700 1588 Monday to Friday 07:00am to 20:00pm
Ecuador: 1800-777 711 Monday to Friday 07:00am to 20:00pm
El Salvador: 800-6137 Monday to Friday 06:00am to 19:00pm
Guatemala:1800-300 0017 Monday to Friday 06:00am to 19:00pm
Panama: 0800-560 0193 Monday to Friday 07:00am to 20:00pm
Peru: 0800-52049 Monday to Friday 07:00am to 20:00pm
Venezuela: 0800-100 3470 Monday to Friday 08:00am to 21:00pm
D-Link Technical Support over the Internet:
www.dlinkla.com
www.dlinklatinamerica.com
email:support@dlink.cl
Tech Support for customers within Brazil:
D-Link Technical Support over the Telephone:
0800-7014104
Monday to Friday 8:30am to 18:30pm
D-Link Technical Support over the Internet:
www.dlinkbrasil.com.br
email:suporte@dlinkbrasil.com.br
23
 Loading...