

D-Link DSL-6740B Quick Installation Manual

Before You Begin
Make sure you have all the necessary information and equipment on hand before beginning the
installation.
Check Your Package Contents
If any of the items above are missing, please contact your reseller.
DSL-6740B Wireless ADSL Router
Ethernet Cable (Cat 5 UTP)
Telephone cable
Power Adapter
Using a powersupply
with a different voltage rating
will damage and void the
warranty for this product.
This product can be set up using any
current web browser, i.e., Internet
Explorer 6x or Netscape Navigator 7x.
DSL-6740B
Wireless 11N VDSL Router
2
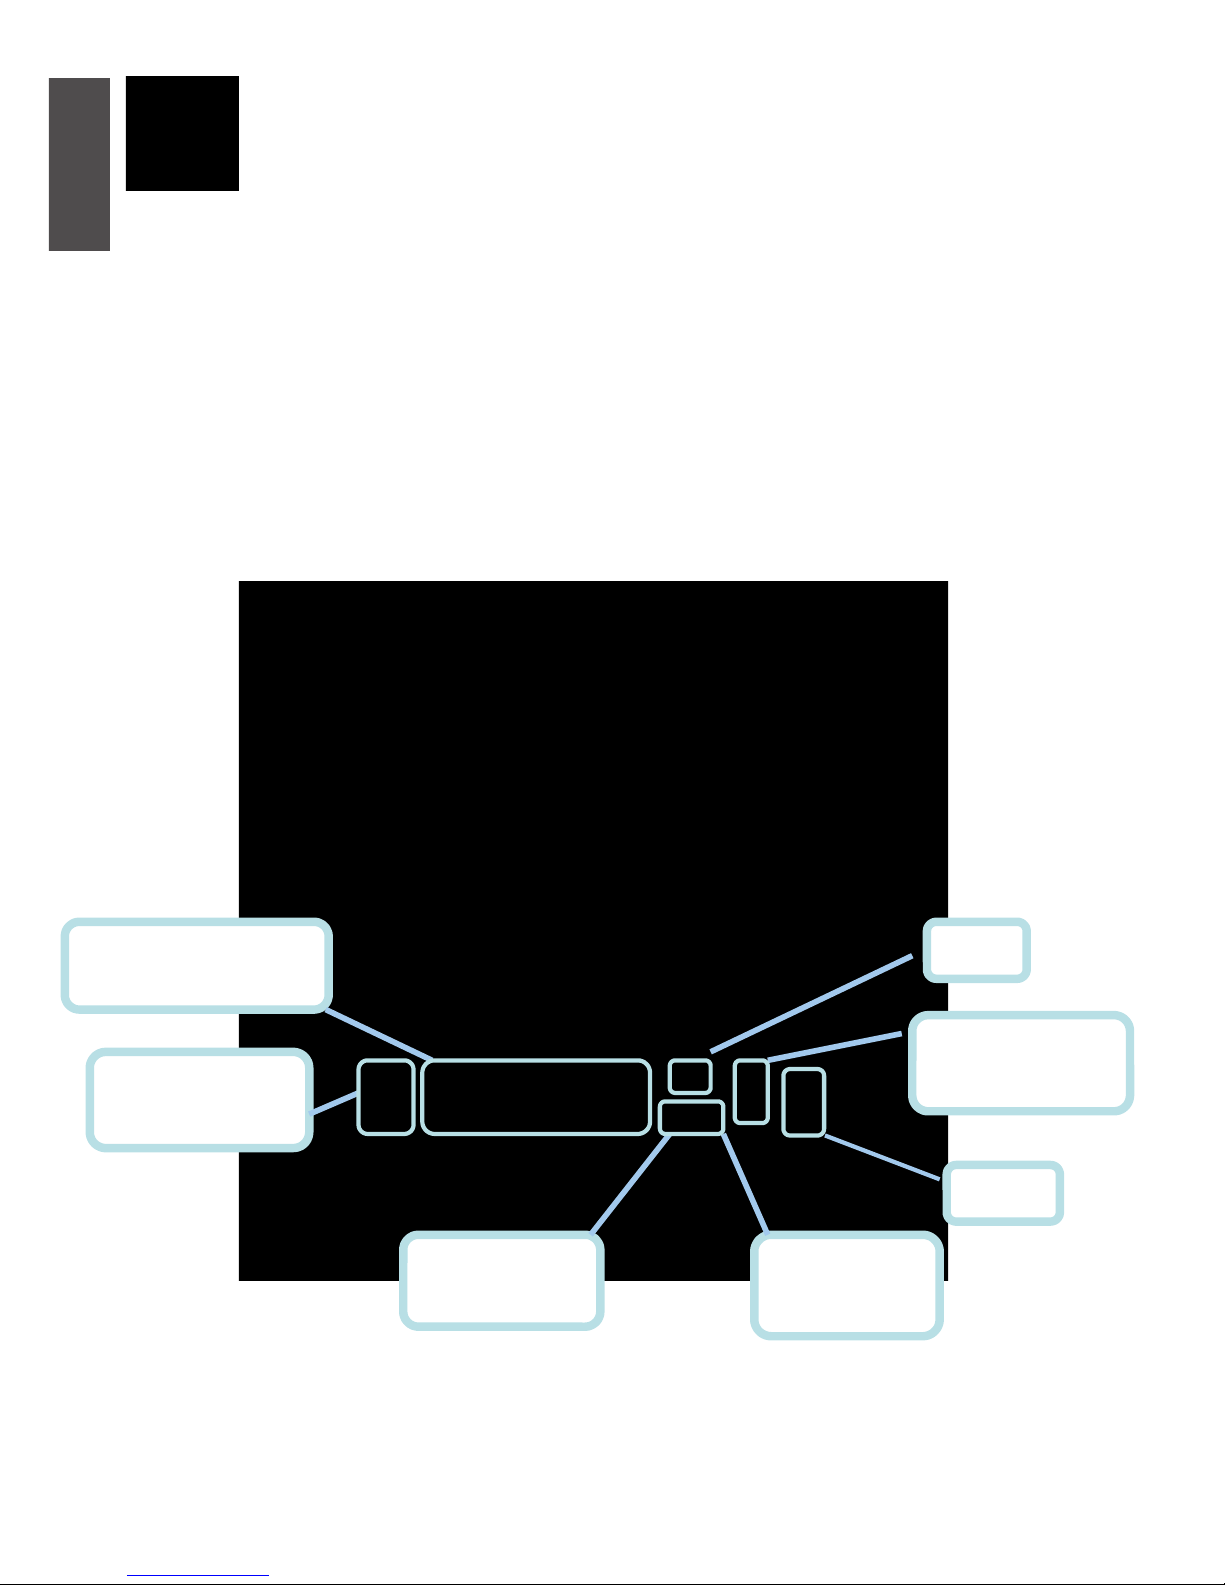
Connecting the Router to Your Computer
A. First, connect the power adapter to the receptor at the back panel of the
DSL-6740B and then plug the other end of the power adapter to a wall outlet or
power strip. The Power LED will turn on to indicate proper operation.
B. Insert one end of the cable into any Ethernet port on the back panel of the
DSL-6740B and the other end of the cable to an Ethernet Adapter or available Ethernet
port on your computer.
C. Insert one end of the telephone cable into the ADSL port on the back panel. Connect
the other end of the cable to the telephone wall outlet or low pass filter device that is
connected to the telephone wall outlet.
Ethernet Ports
Connect to Ethernet cable
Switch
PowerInput
Connect to power
WLAN button
Connect to STA
WPS button
Connect to WPS
DSL Port
Connect to ADSL
Reset
ENGLISH
3
Configuring the Router
To use your Web browser to access the web pages used to set up the Router, your computer
must be configured to “Obtain an IP address automatically,” that is, you must change the IP
network settings of your computer so that it is a DHCP Client. If you are using Windows XP
and do not know how to change your network settings, skip ahead to Appendix A and read the
instructions provided. You may also read the User Manual for instructions on changing IP
settings for computers running Windows operating systems.
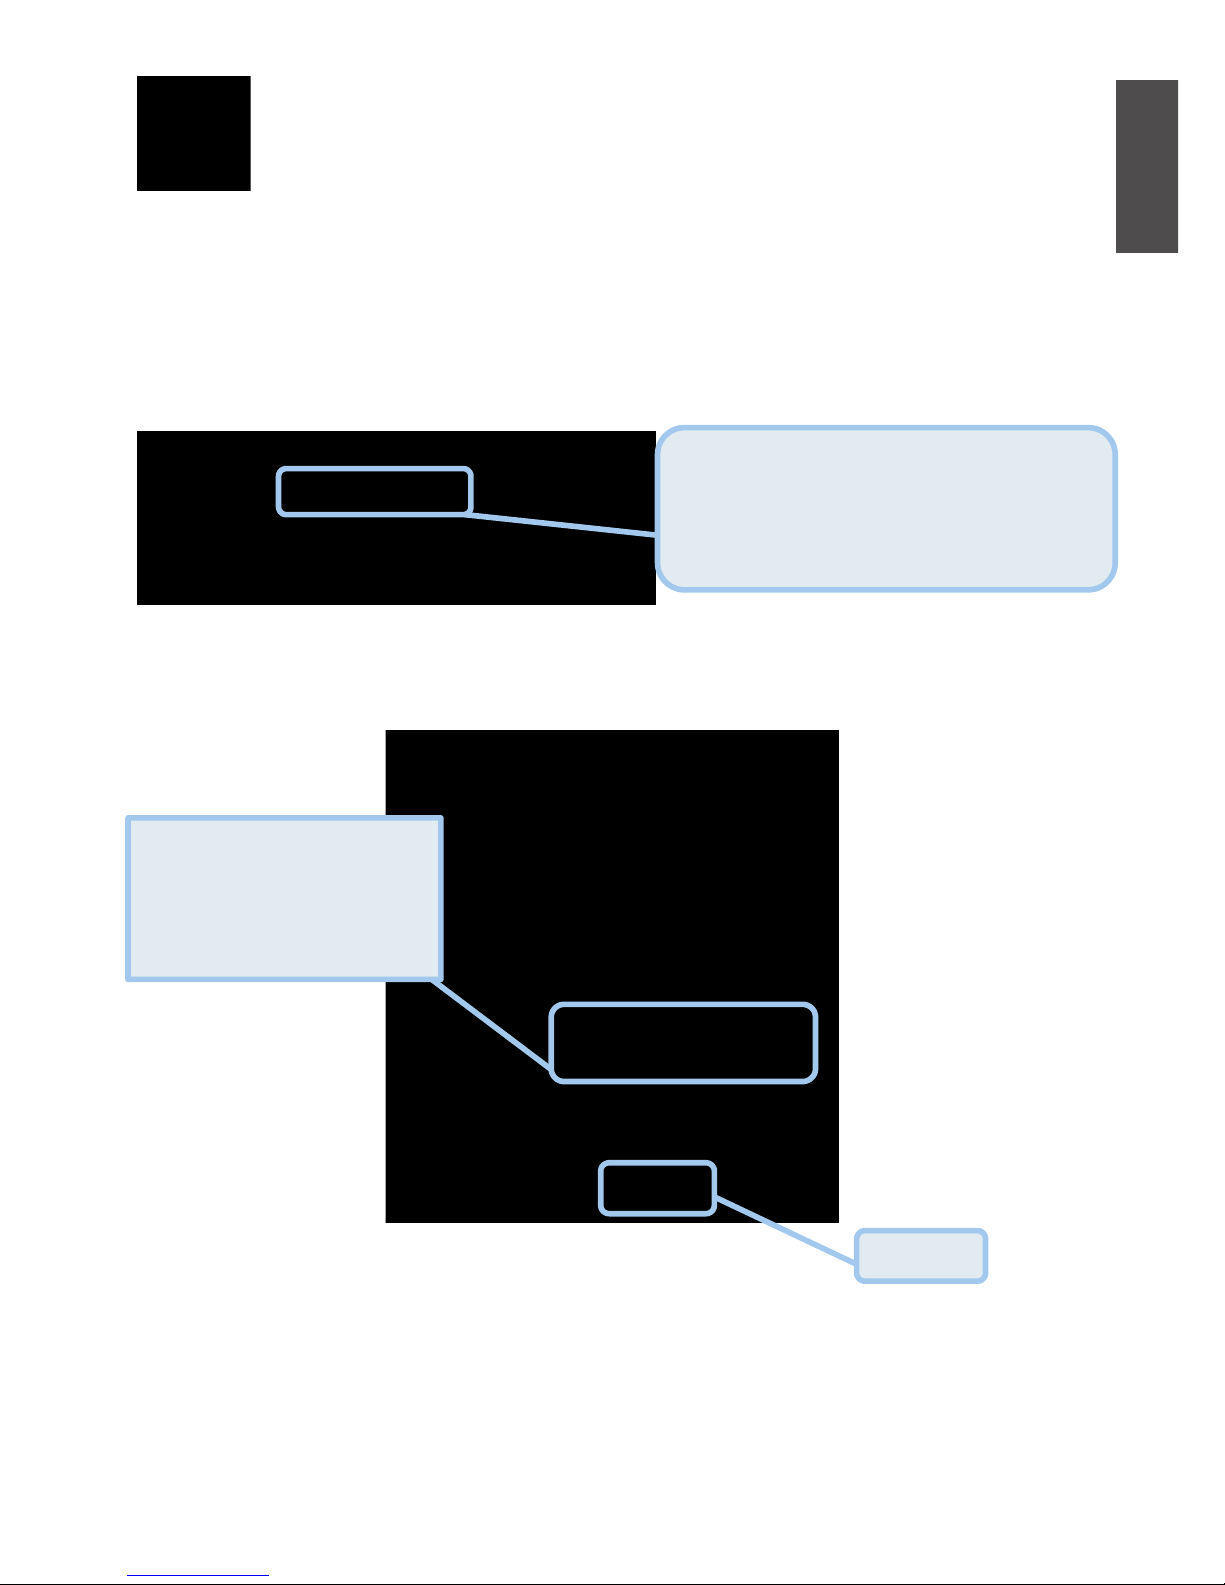
The logon pop-up screen will appear.
Open your Web browser and type
“http://192.168.0.1” into the URL address
box. Then press the Enter or Return
key.
The login dialog appears.
Type“
$GPLQLVWUDWRU
” for the
User Name and
“soporteETB2006” in the
Password field.
Click OK.
ENGLISH

4
Configuring the Router (continued)
After loginin to the DSL router, if no PVC is configured previously and no default settings
exists, the Quick Setup webpage appears, which contains some basic configuration that is
needed by VPI/VCI.
z ATM Interface Configuration
Choose Advanced Setup > Layer2 Interface, and the following page appears, so you can
add or remove the ATMVPI/VCI and related configurations.
ENGLISH

5
z ATM PVC Configuration
ENGLISH

6
z WAN Service
Choose Advanced Setup >WAN Service, and the following page appears, so you can
add/remove/Edit the WAN interface.
Click Add
tocreate WAN service interface configuration; Click Edit to modify WAN service.
According to the page context, choose the right item and click Next, Back step by step to
configure WAN service.
ENGLISH

7
When creating a WAN service, you can see the following page:
Here, you can select ATM interface which you configured before.
ENGLISH

8
For “EoA” type of ATM interface, you can create PPPoE/IPoE/Bridge WAN service (as below):
ENGLISH

9
At last, click Apply/Save to save the modification.
ENGLISH
10
Configuring the Router (continued)
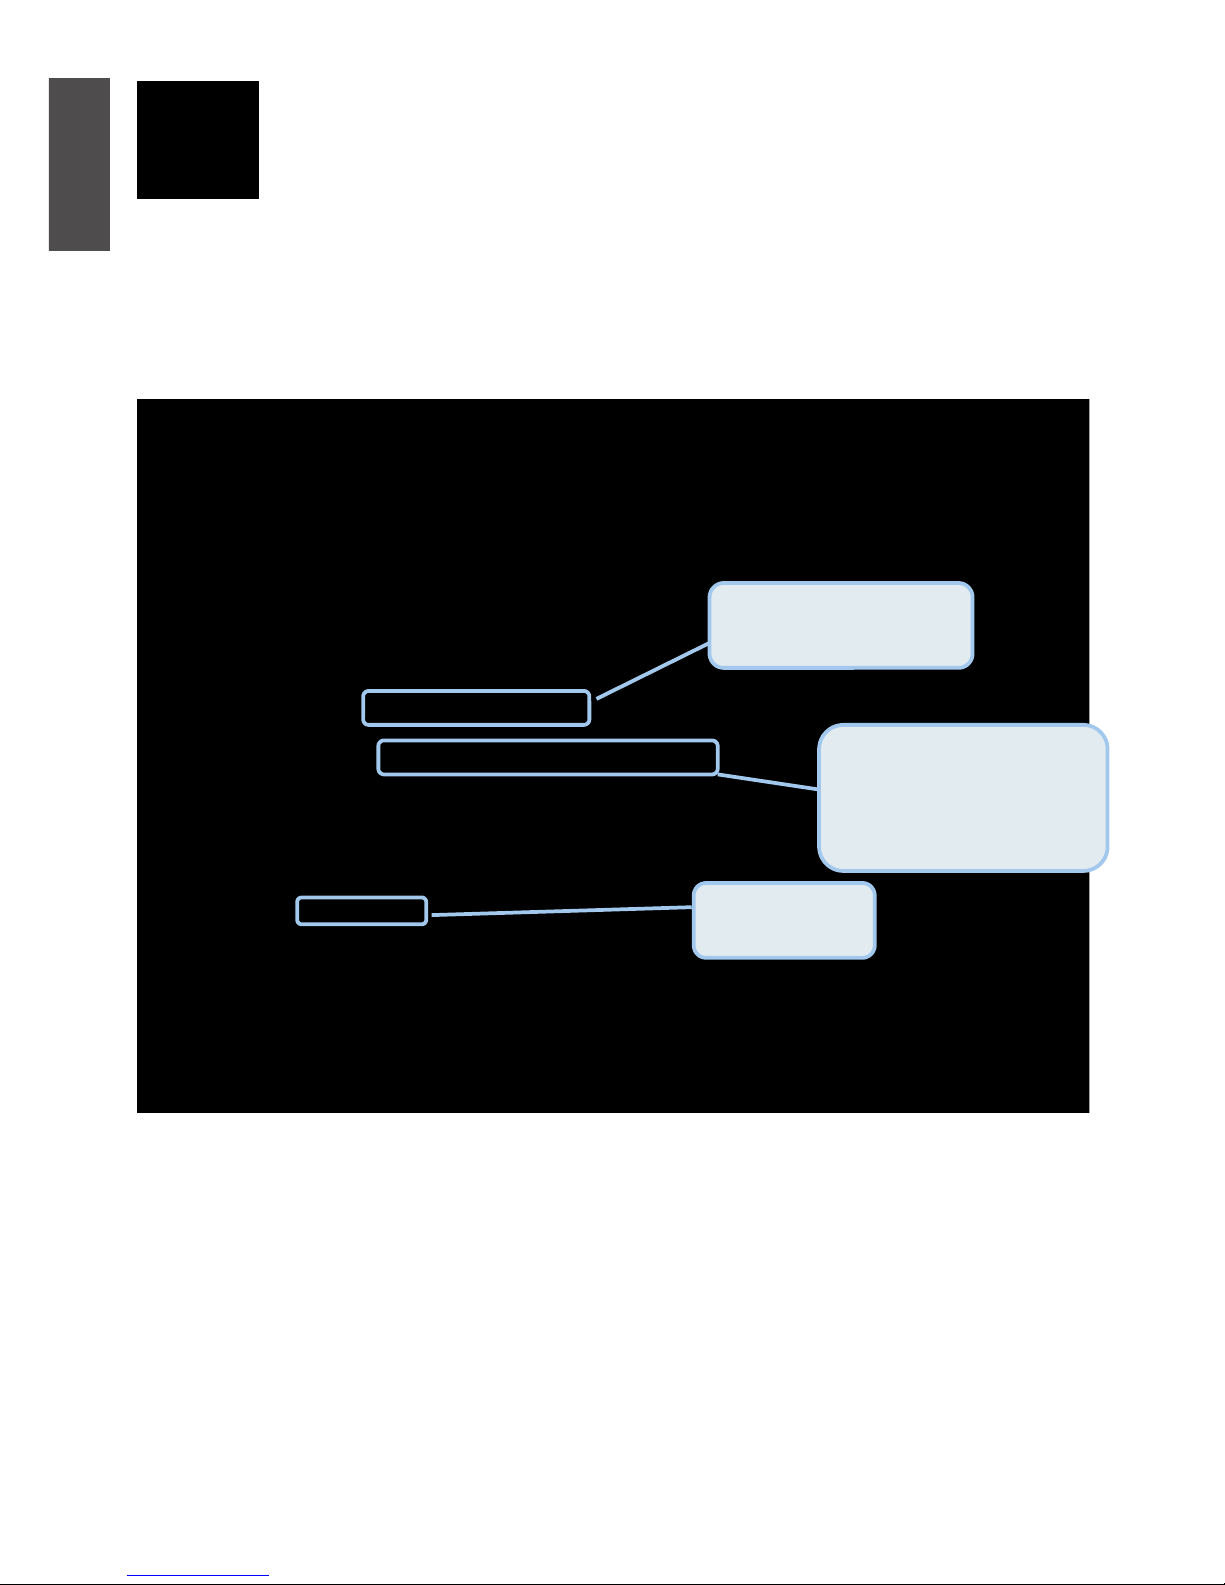
Wireless LAN Configuration
You can enable or disable the wireless LAN interface, hide the network from active scans,
set the wireless network name (also known as SSID) and restrict the channel set based on
country requirements.
Enter the SSID for the
Wireless LAN
The channel will adjust
according to nations to adapt
to each nation's
frequency provision.
Following is a description of the different options:
z Enable Wireless: If you want to make wireless be available, you have to check this
box first. Otherwise, the Hide Access Point SSID, Country, Enable Wireless Guest
Network, and Guest SSID box will not be displayed.
z Hide Access Point: Check this box if you want to hide any access point for your
router, so a station cannot obtain the SSID through passive scanning.
Click Apply / Save to save the basic wireless options and make the modification effect.
Click
Save/A
pply
ENGLISH
 Loading...