

Page 1

Model DU-C300
USB Digital Video
Camera
User’s Guide
Rev. 01 (August, 1999)
Printed in Taiwan
RECYCLABLE
Page 2

Table of Contents
Table of Contents
INTRODUCTION............................................................................1
HARDWARE INSTALLATION....................................................2
INSTALLING THE CAMERA...............................................................2
DRIVER INSTALLATION ............................................................ 3
INSTALLING THE CAMERA DRIVERS................................................3
CONFIGURING ICS FOR THE DSB-C300.................................6
SOURCE SETTINGS ........................................................................10
ADVANCED CAMERA SETTINGS.....................................................11
VIDEO FORMAT SETTINGS ............................................................13
SETTING UP ICS FOR THE INTERNET.............................................14
SPECIFICATIONS........................................................................17
Page 3
1
1
Introduction
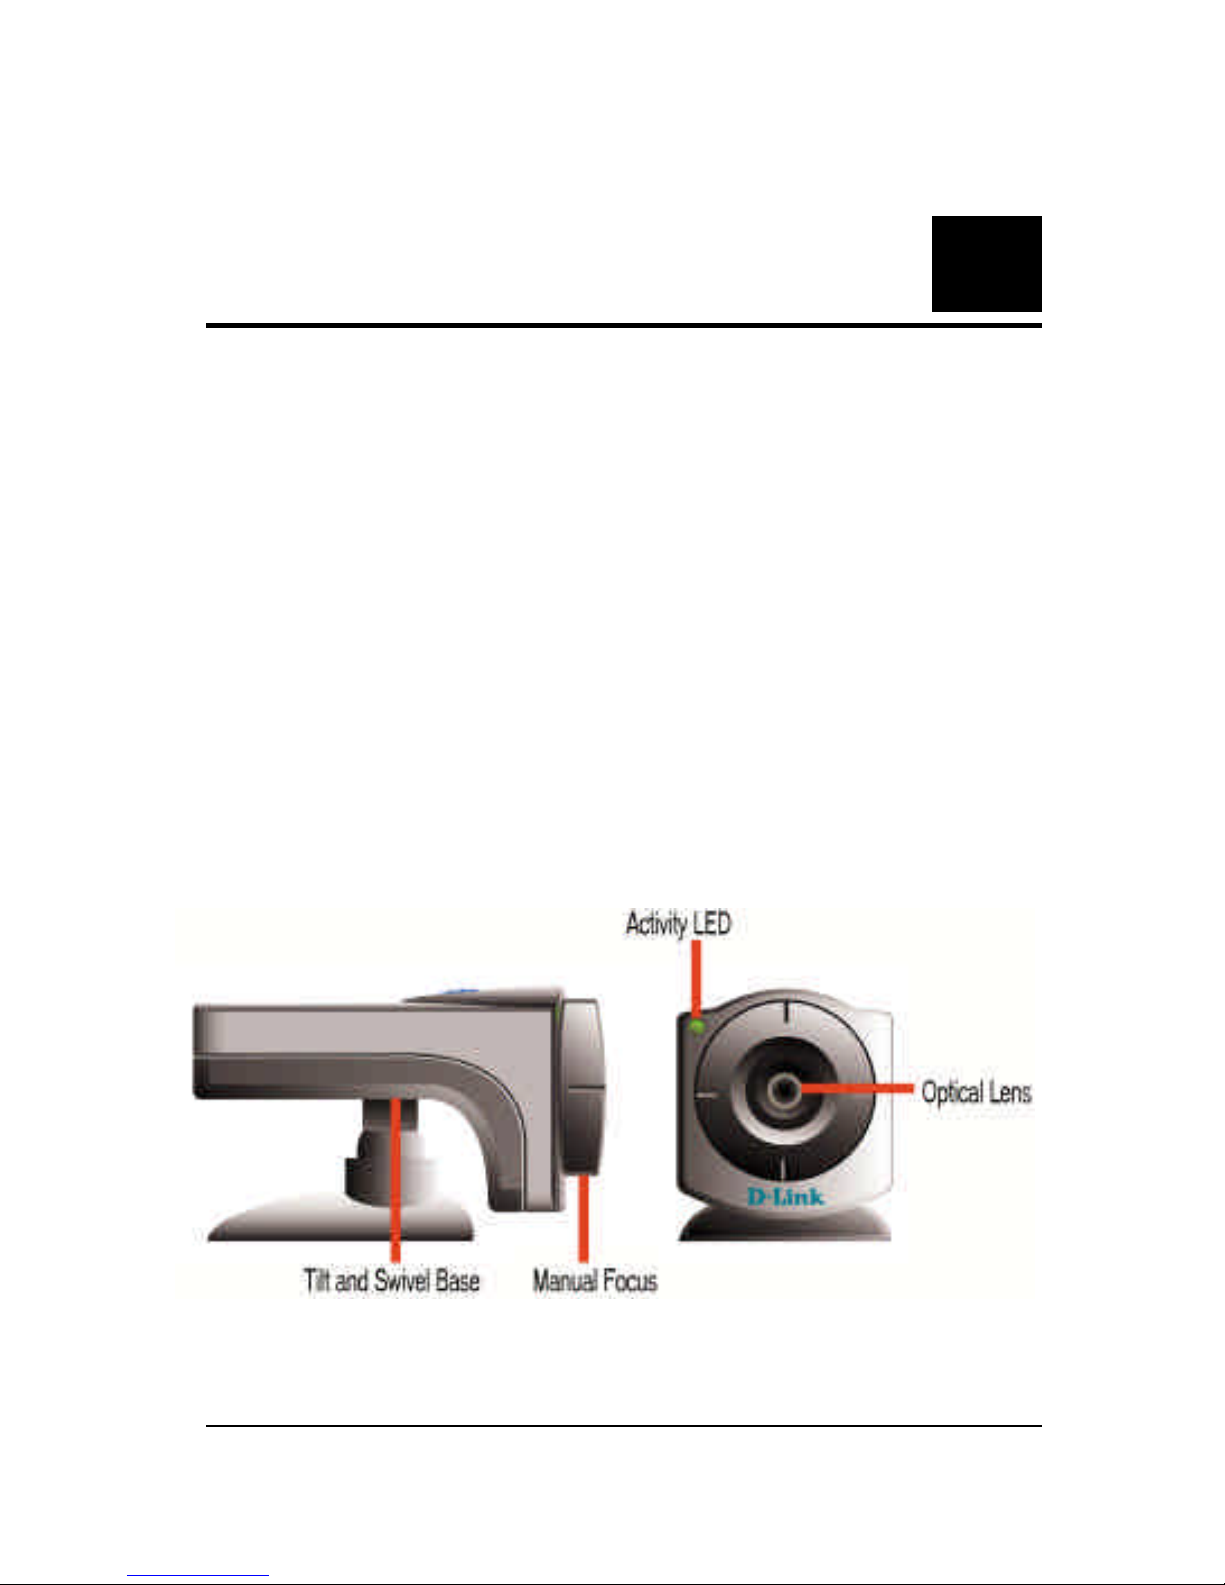
Thank you for purchasing the D-Link DU-C300 USB Digital
Video Camera. Using state of the art technology, it can be
used with any Windows 98 PC for video-conferencing, to
create multimedia presentations, or video emails. Included in
your package is Smith Micro’s Internet Video Link, a
complete Video software package that will allow you to get
the most out of your new camera.
This guide will walk you through the steps necessary to install
your DU-C300 and configure Internet Video Link .
Page 4
2
2
Hardware Installation
Installation of a D-Link DU-C300 requires installation of
the camera hardware itself, and then installation of the
software drivers.
Installing the Camera
Please verify that you have Windows 98 or Windows NT running and
working before attempting to install your DU-C300.
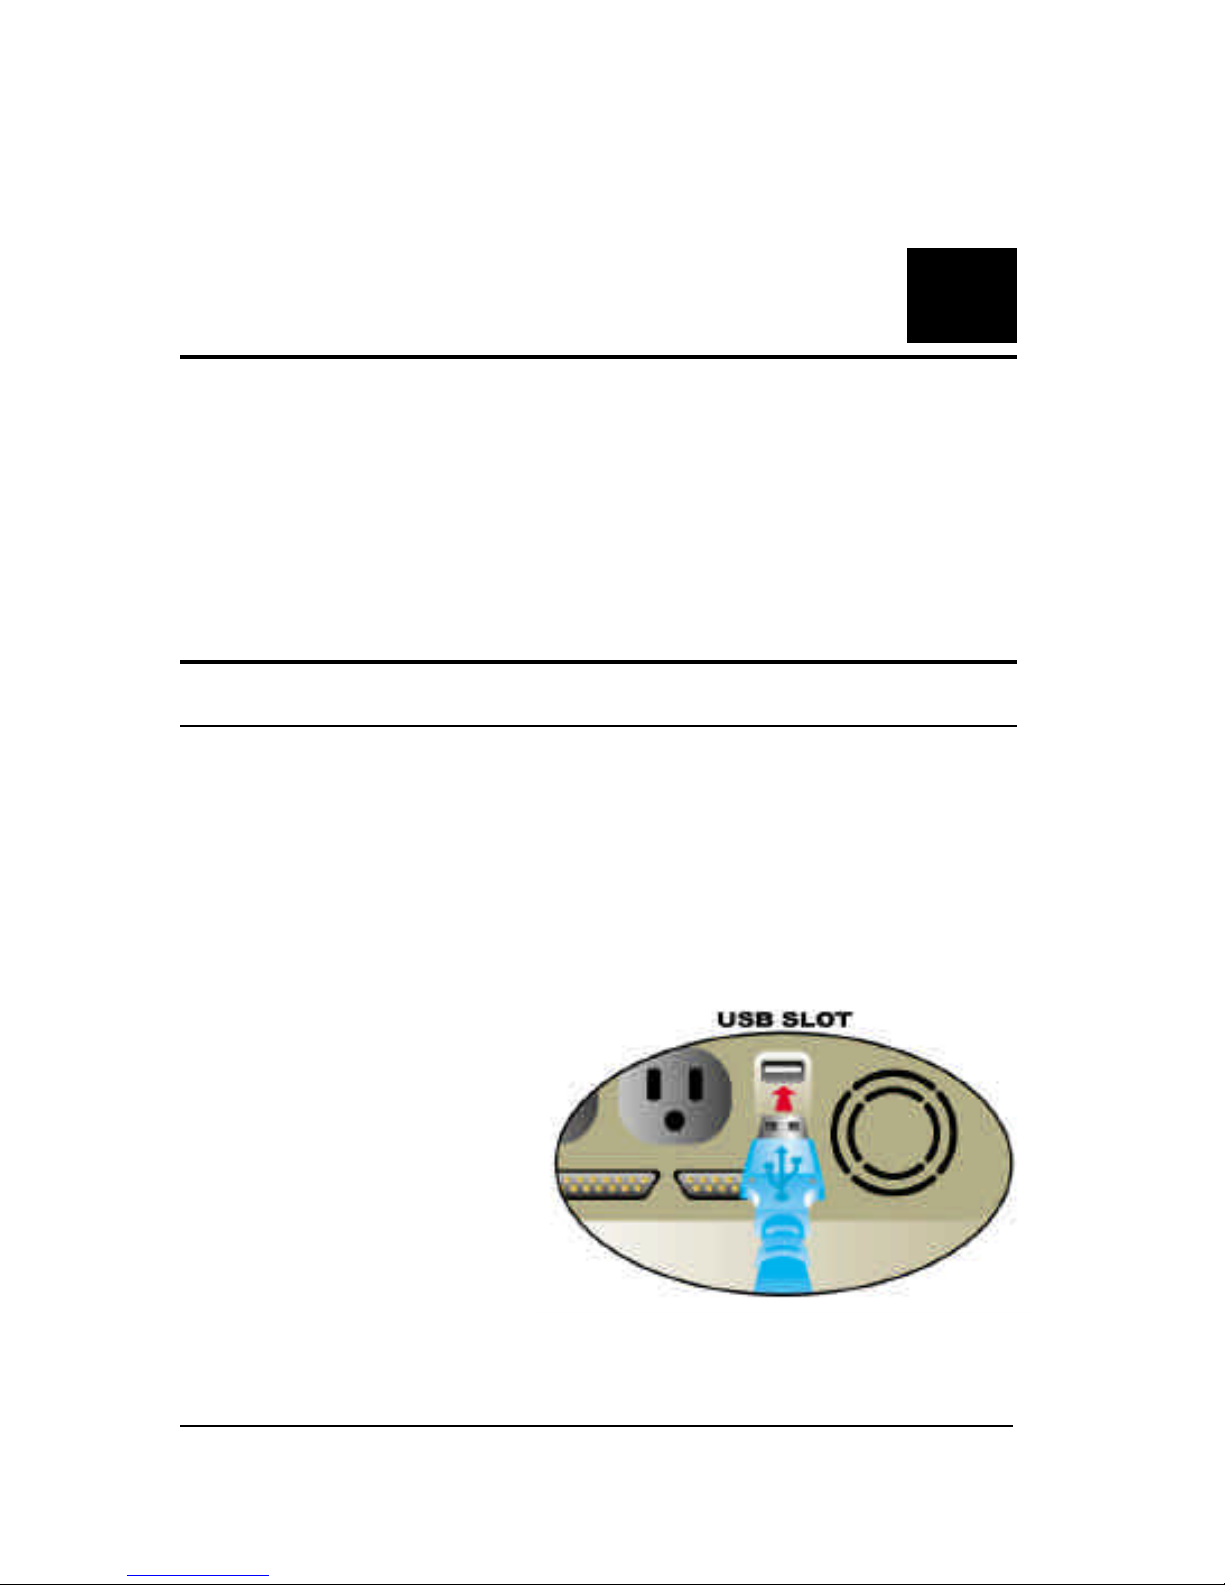
Install the camera by plugging its USB type ‘A’ connector into an
available USB port on your PC or on any USB hub attached to your
PC.
No power adapter is
required, the DU-C300 is
powered directly by the
USB Bus.
Once the camera has
been plugged in the
Add New Hardware
Wizard will start
automatically. This
concludes the hardware installation section of the manual.
Page 5
3
3
Driver Installation
Installing the Camera Drivers
Note: Please have your original Windows CD available, it may be
required to complete the installation.
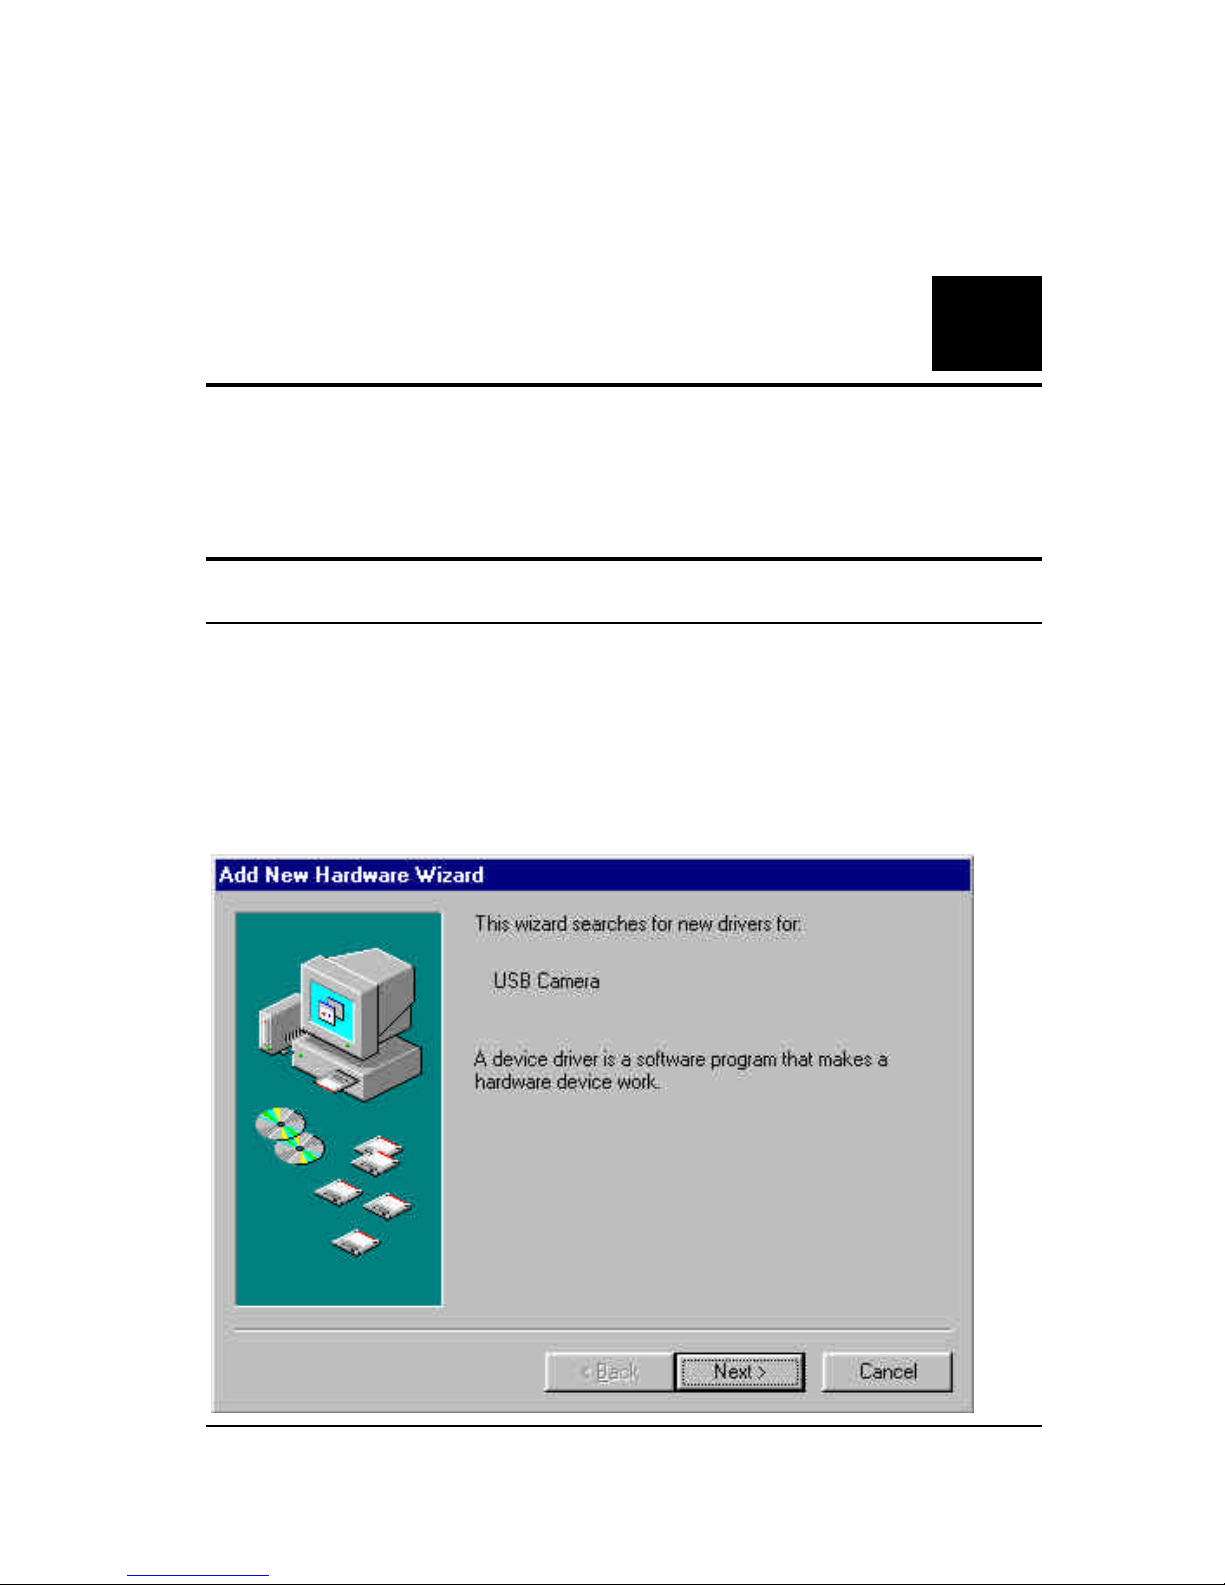
Once the DU-C300 has been installed the New Hardware
Wizard will launch:
Page 6
4
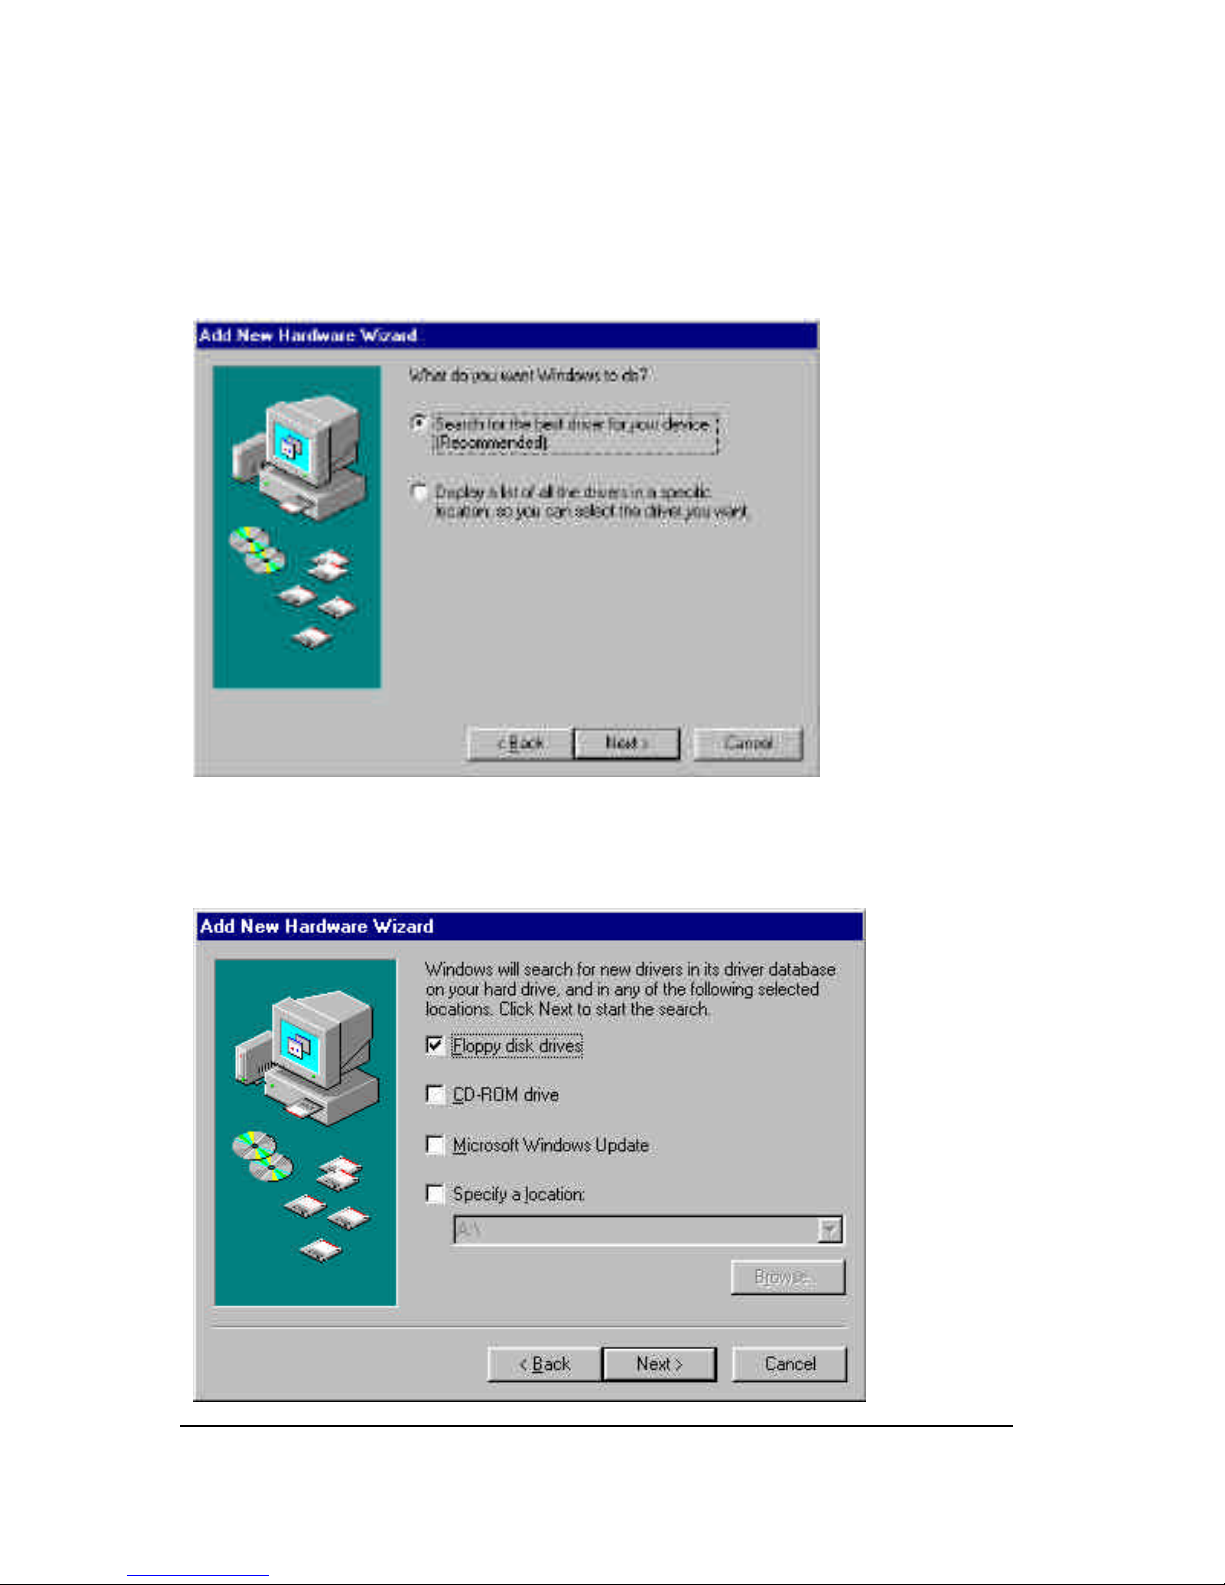
Once again press “Next>” so that your computer will search
for the best driver:
Make sure that the driver diskette that came with your
camera is in your floppy drive and that you have checked
“Floppy disk drives” and then press “Next>”:
Page 7
5
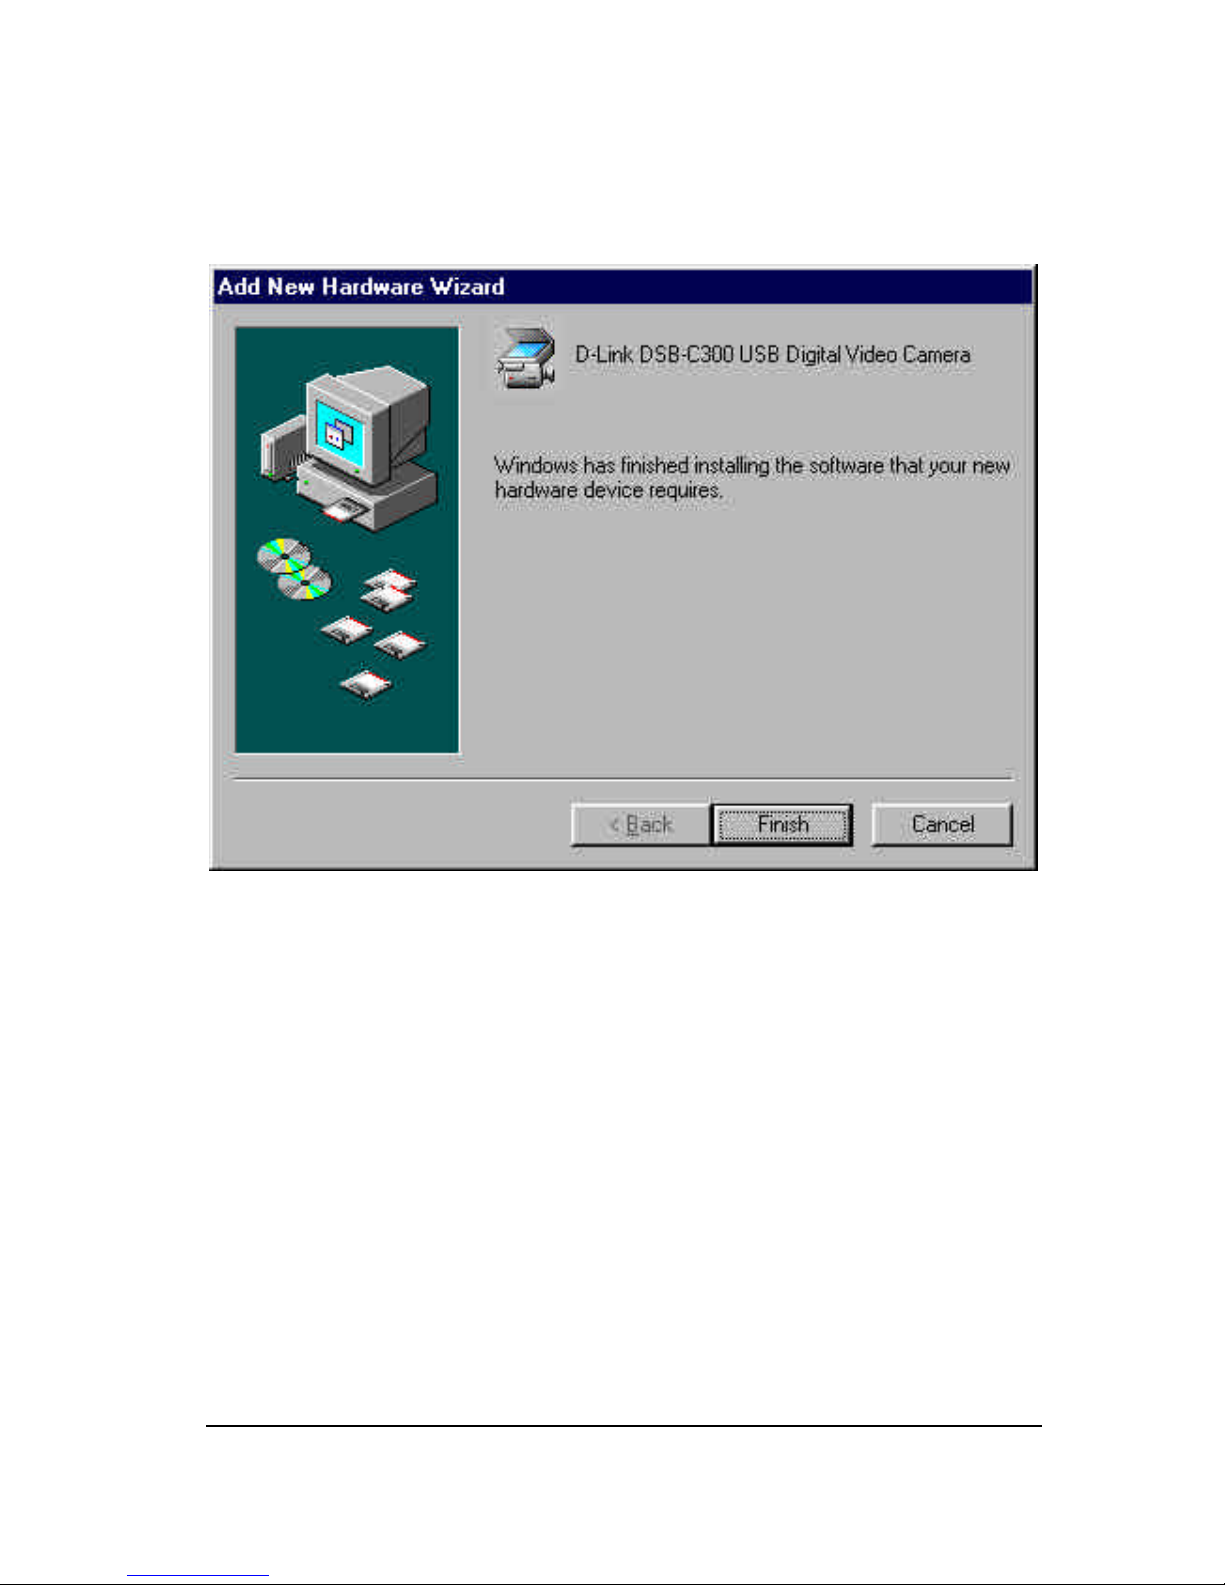
Once the driver has been installed click “Finish”:
Page 8
6
4
Configuring IVL for the
DU-C300
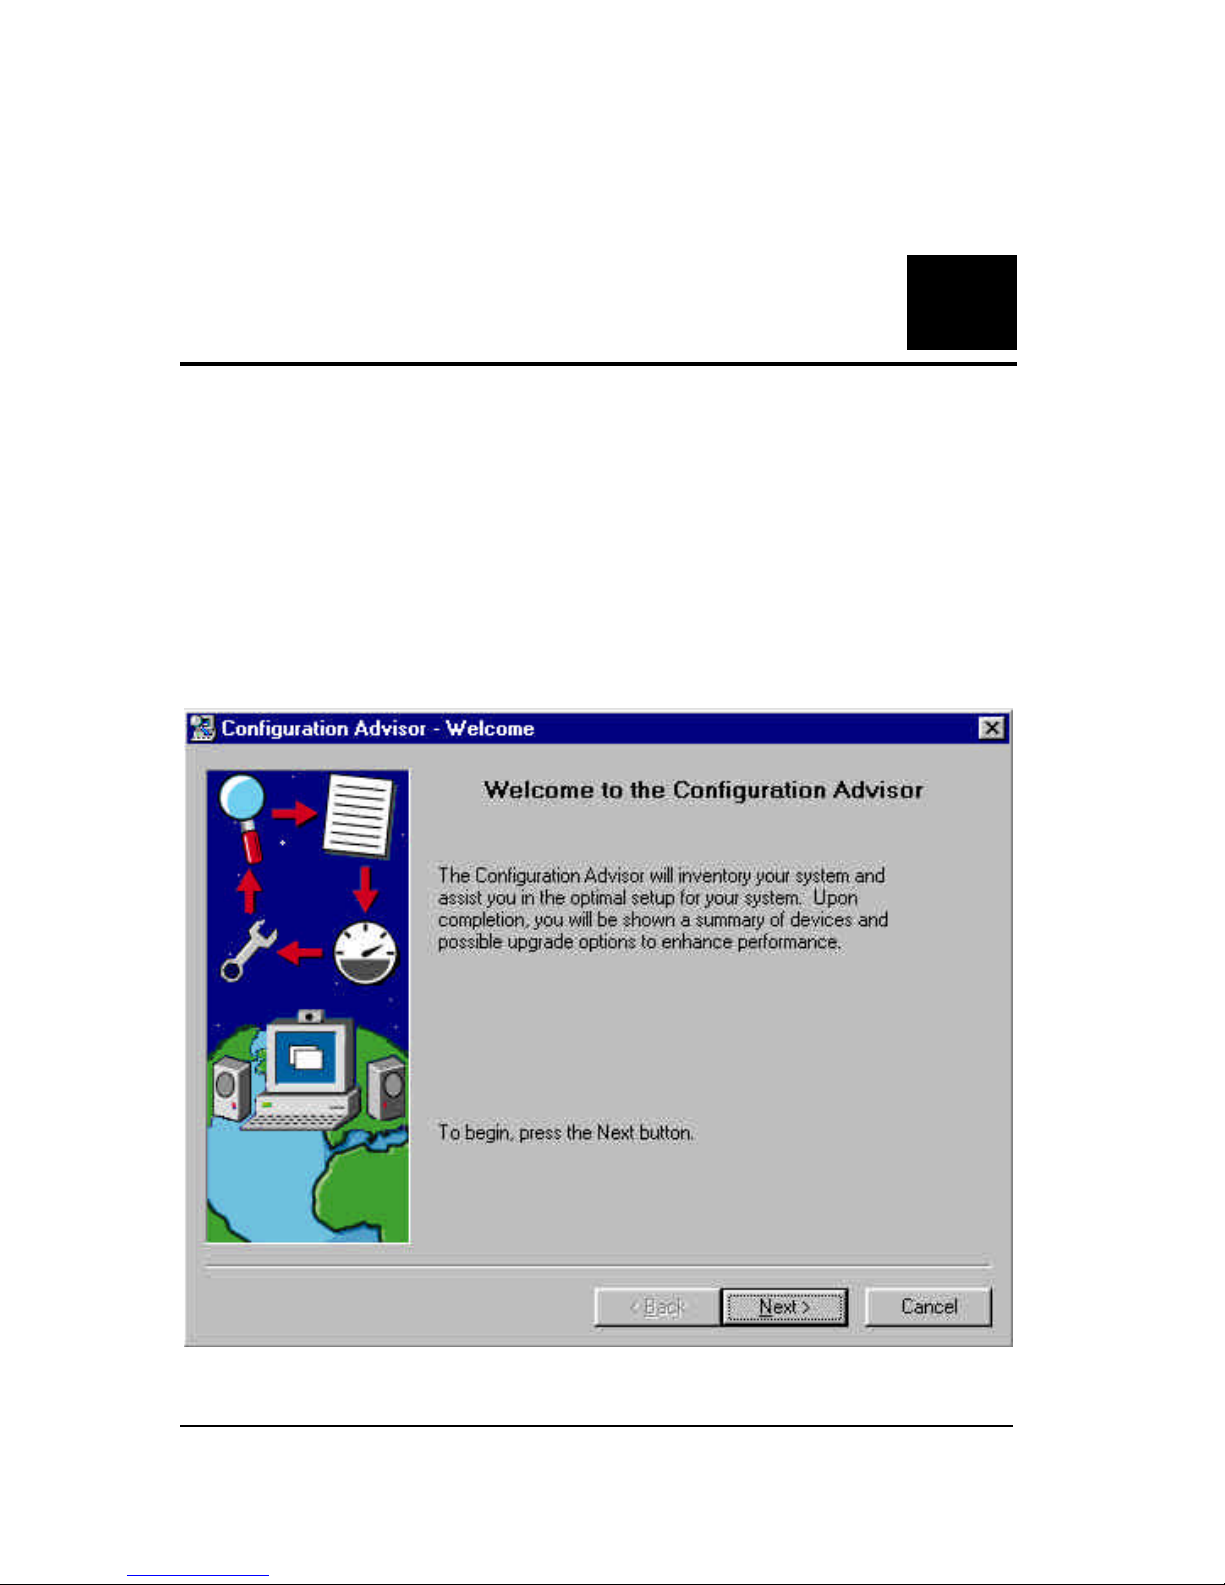
After you install Internet Video Link and start it for the
first time, the IVL Configuration Advisor will launch
automatically, click “Next>”:
Page 9
7
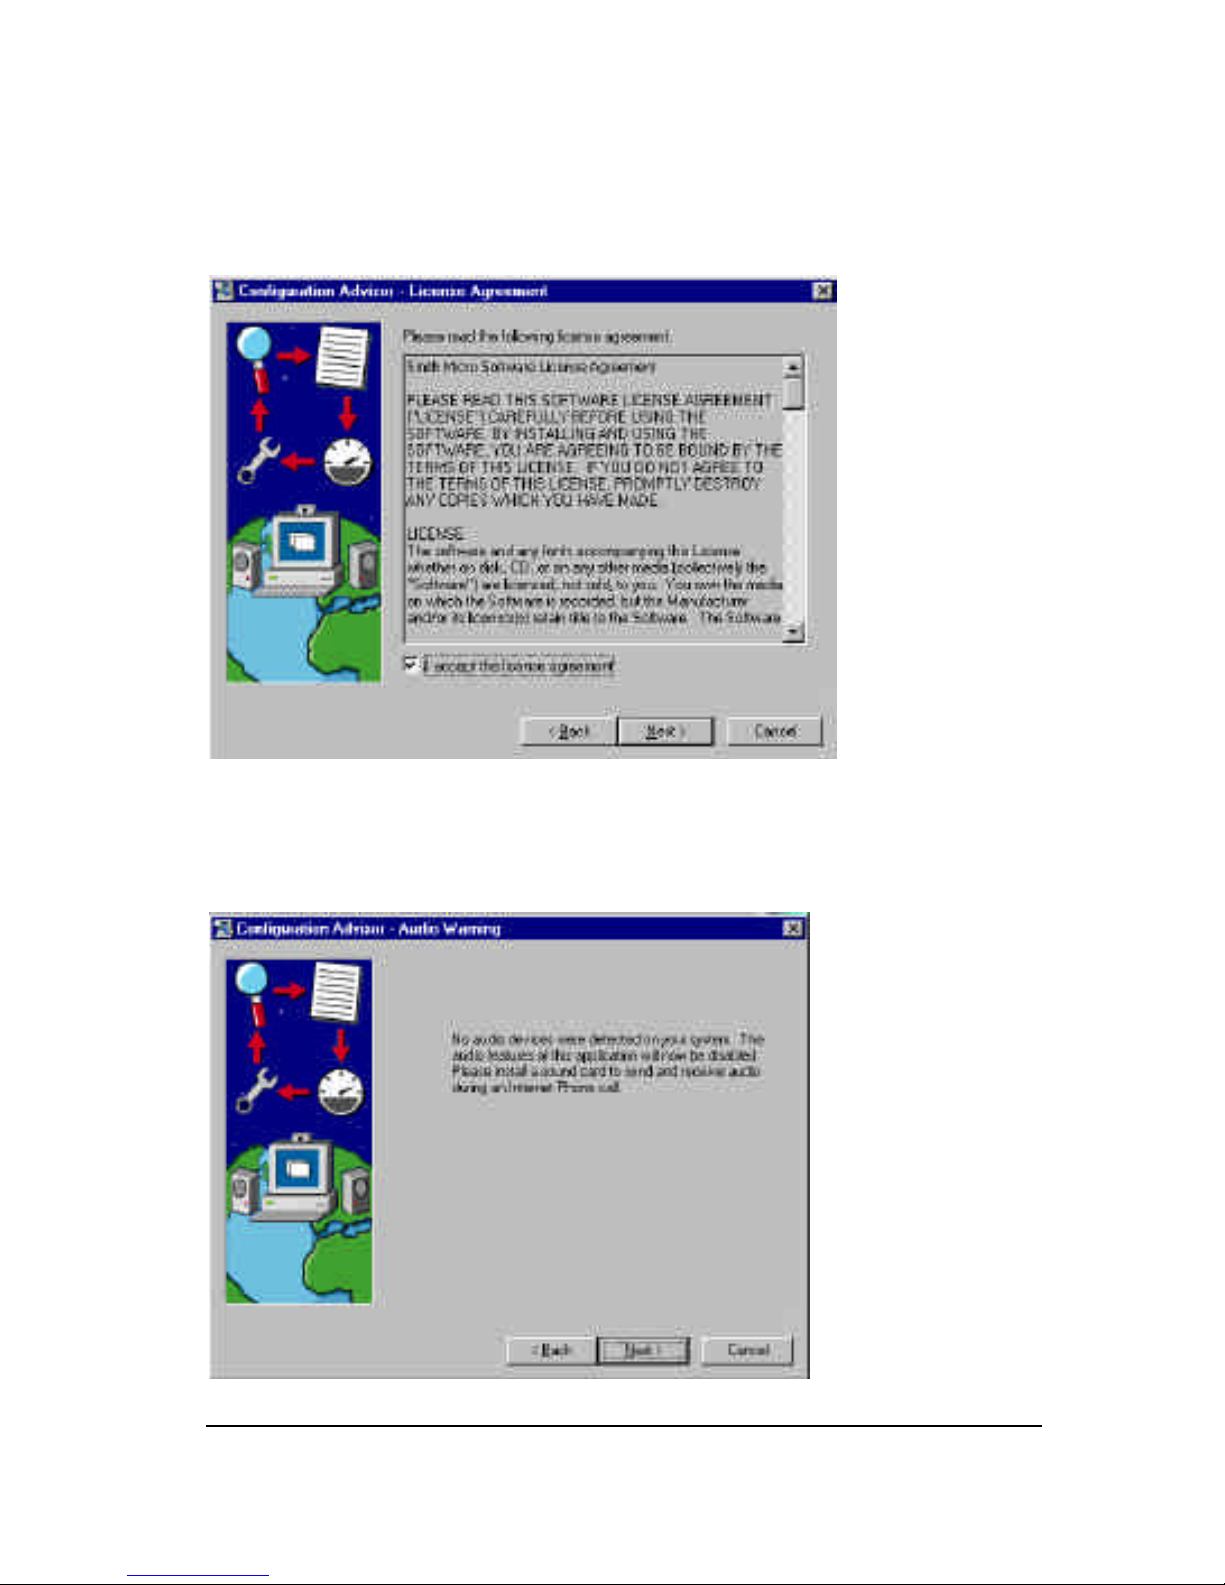
Read the License Agreement and click “Next>” to accept:
Next you will set up your sound, if you do not have a sound
card or microphone installed the following will appear,
choose “Next>”.
Page 10
8
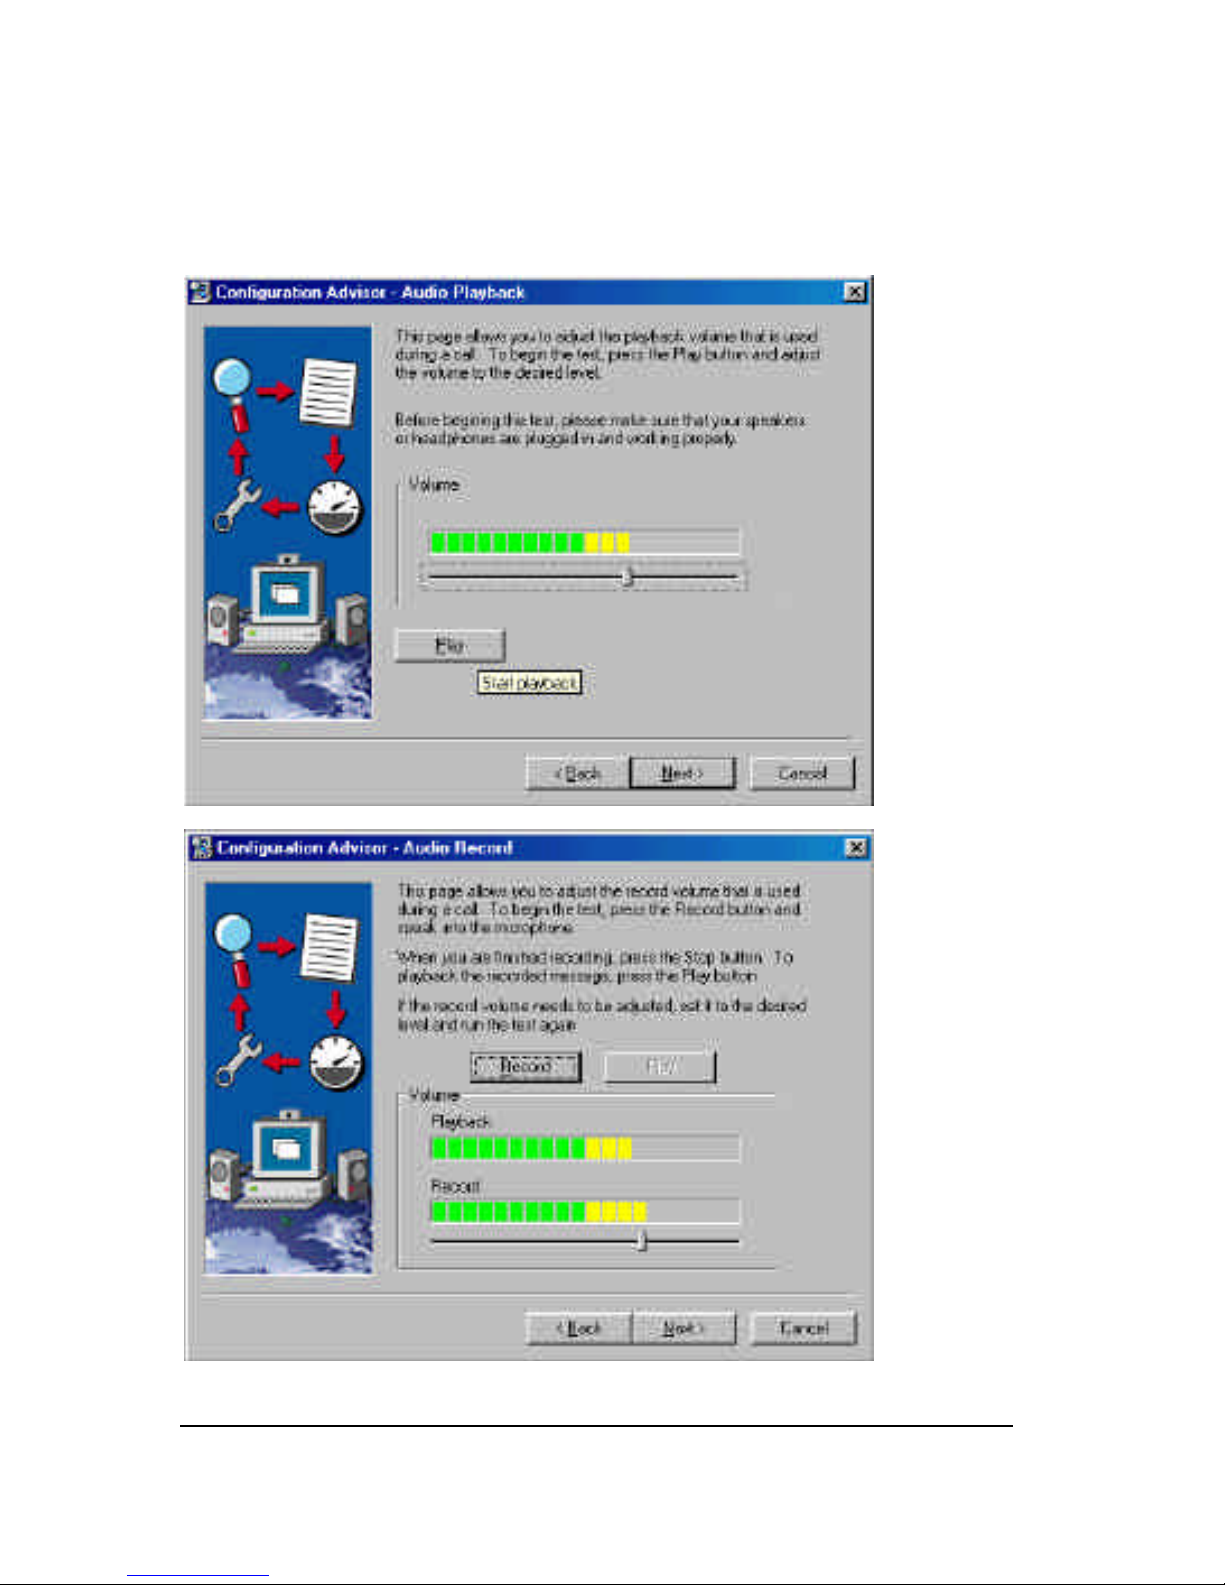
If you do have a sound card, follow these prompts:
Page 11
9
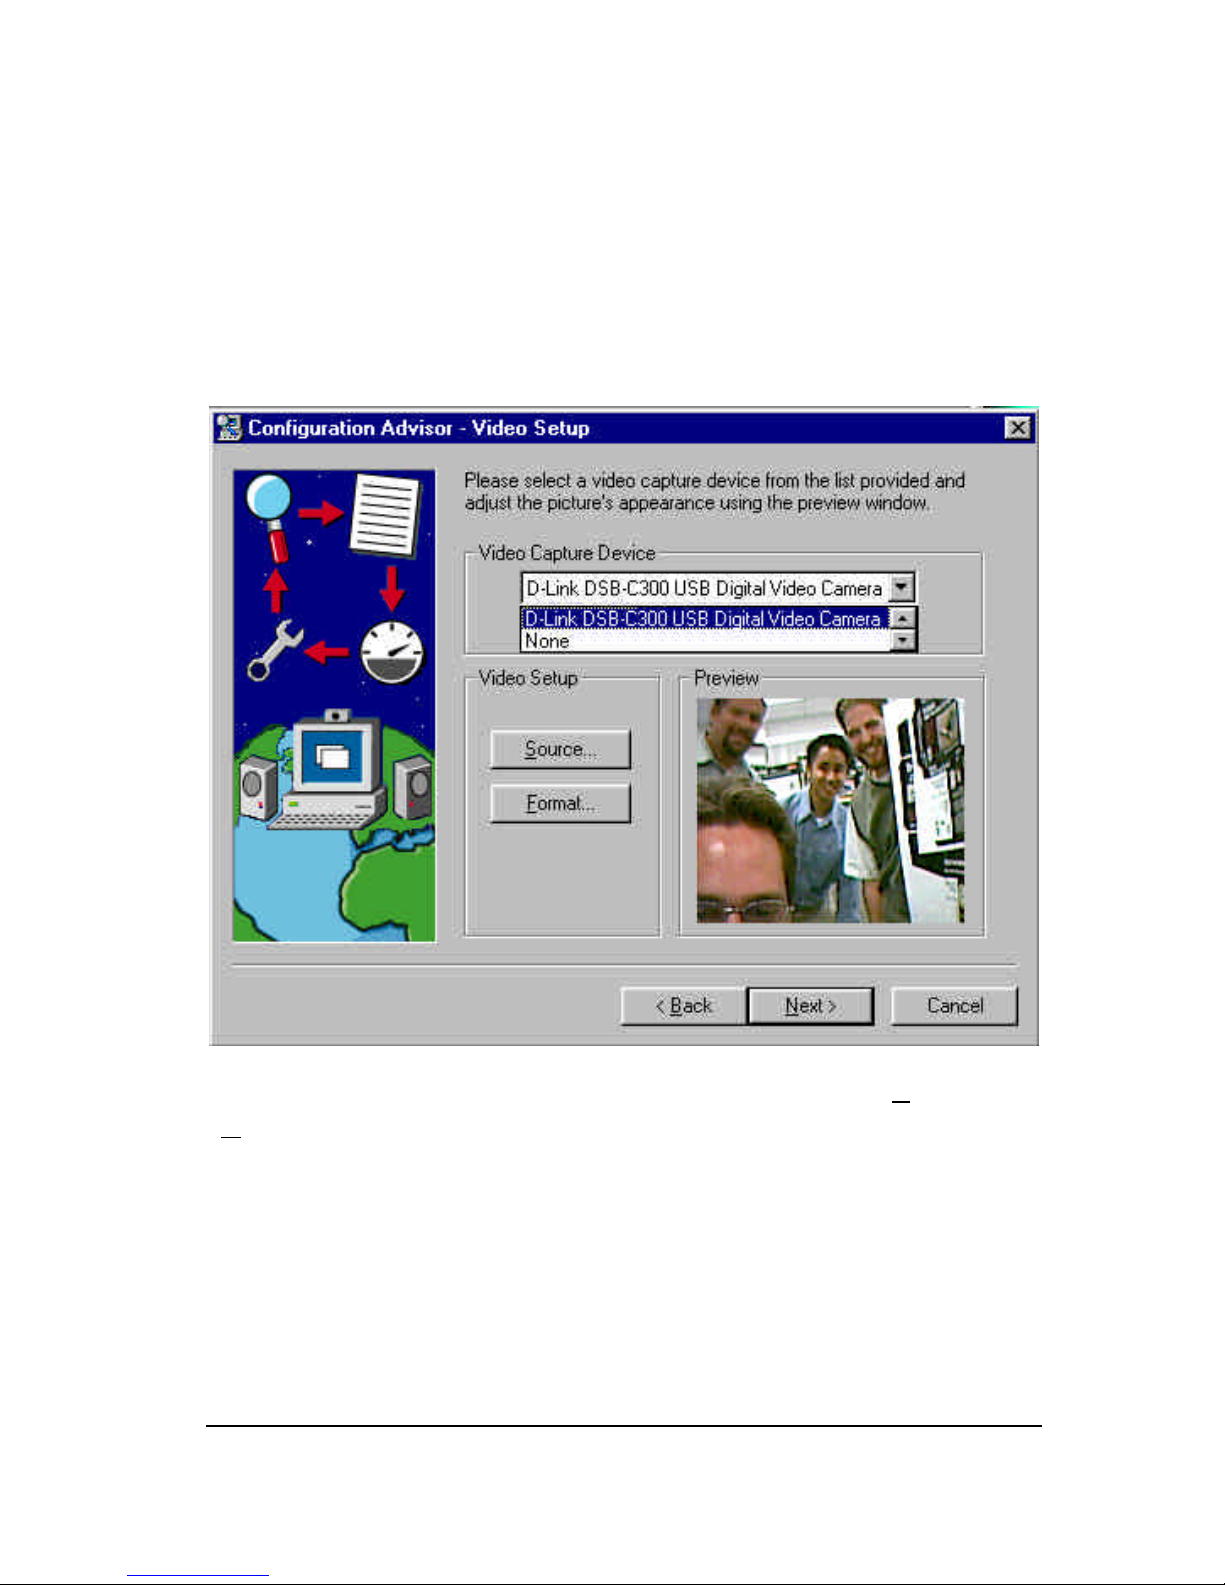
Next you must choose the “D-Link DU-C300 USB Digital
Video Camera from a list of input devices and then click
“Next>”
From the Video Setup Screen you may choose “Source” or
“Format” to adjust the DU-C300’s driver settings.
Page 12
10
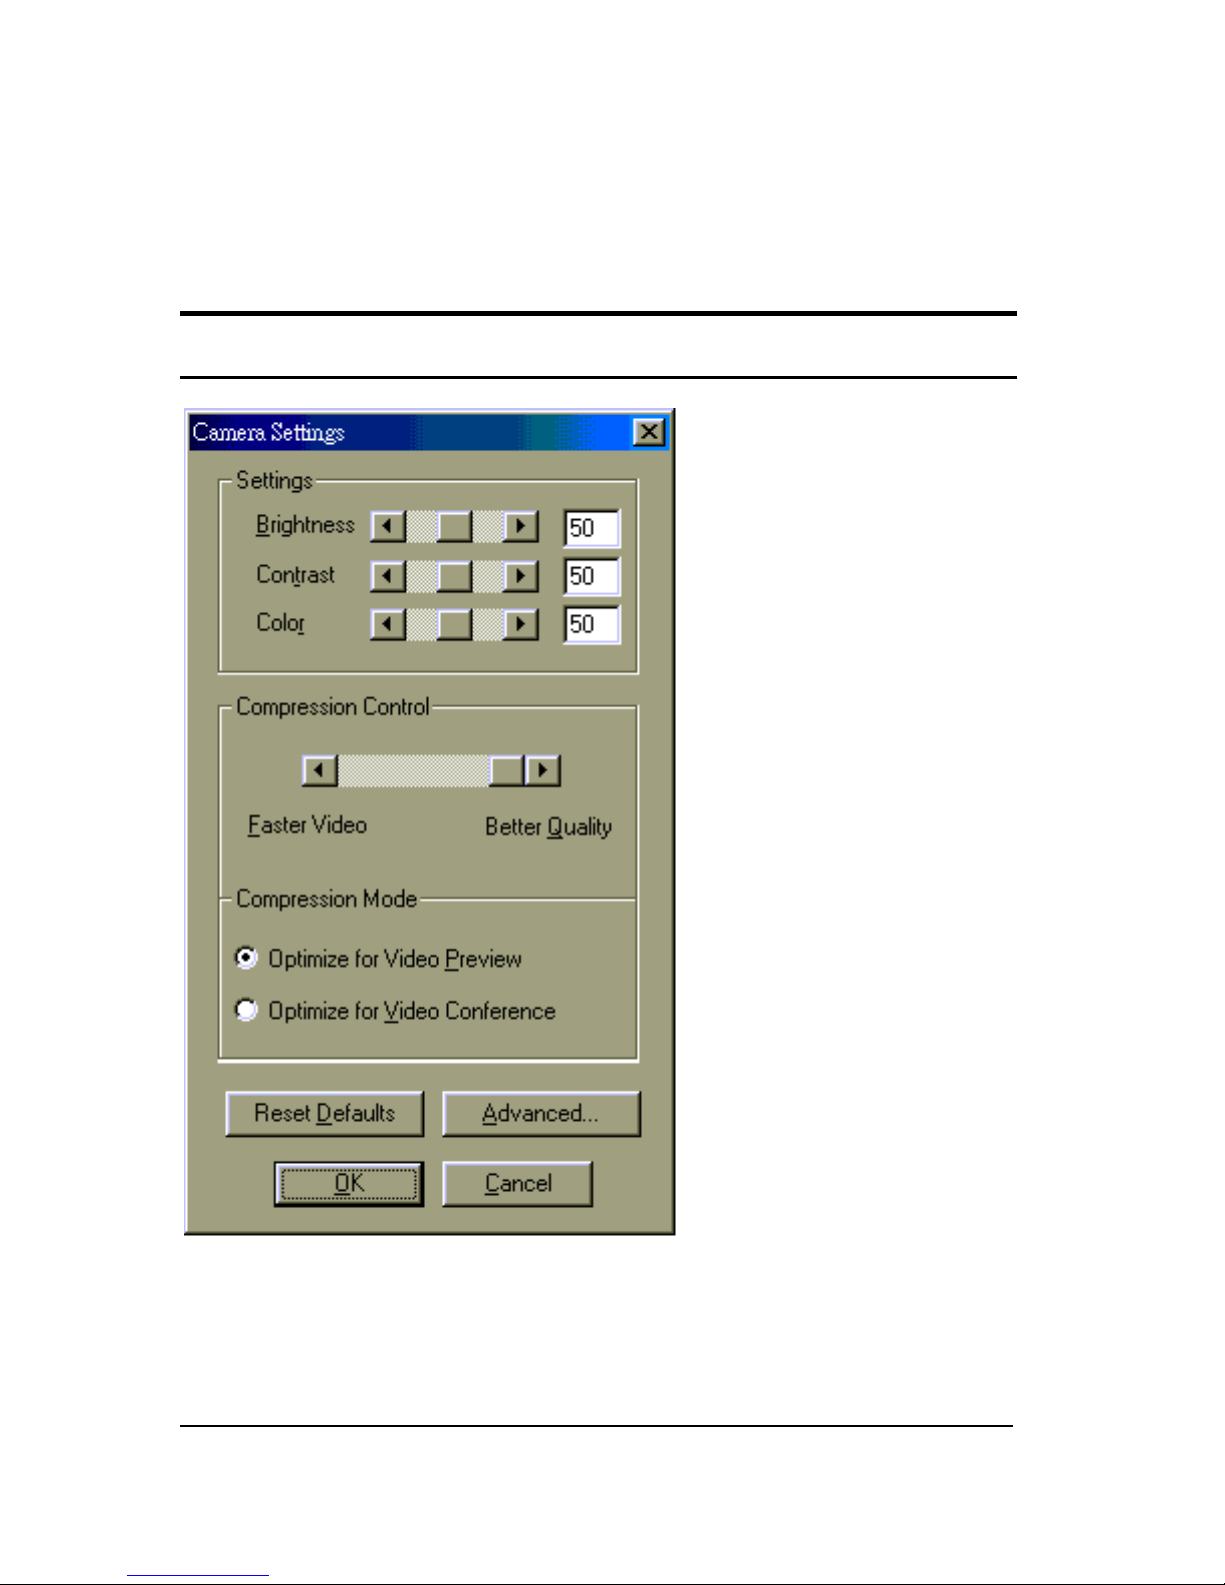
Source Settings
The Compression Control allows you to select the internal
compression rate, which trades off between video quality
Page 13

11
and data volume in your application. Sliding the
Compression Control bar to the left will generate less data
volume; lower video quality with faster performance.
Sliding the bar to the right will generate large data volume;
better video quality but lower performance.
In Compression Mode, two options are provided
Optimize for Video Preview
This preset option will provide the best video quality for local
applications, such as video viewing or video recording to a hard
drive.
Optimize for Video Conference
This option is internally preset and allows you to get high
compression rates and lower image quality. Choosing this
option will help you increase the camera performance for
on-line applications, such as video-conferencing over the
Internet.
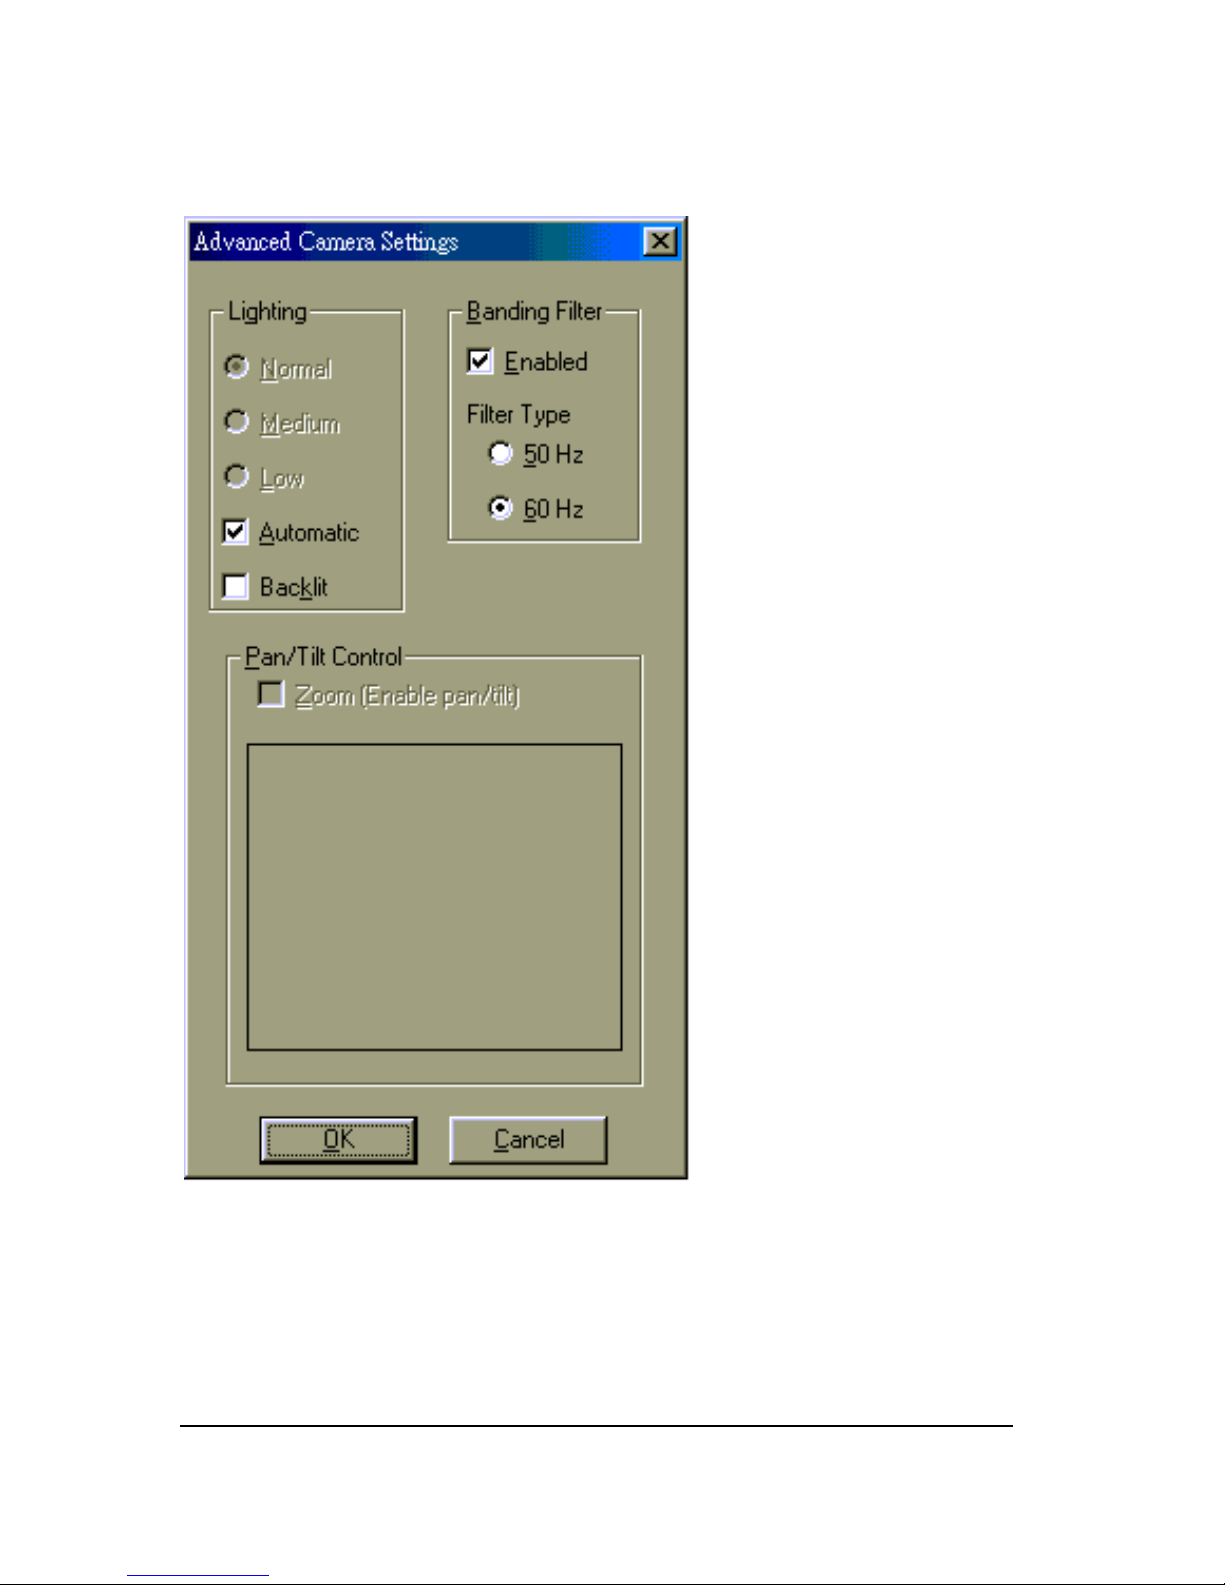
Advanced Camera Settings
In Video Source (or Video Settings) dialog box, an Advanced Icon is
selected to further adjust camera settings:
Page 14
12
Banding Filter
This helps to reduce flickering when used in a 50Hz/60Hz
environment.
Page 15
13
Lighting
To maximize the image quality you can adjust the lighting
compensation using backlit or automatic modes.
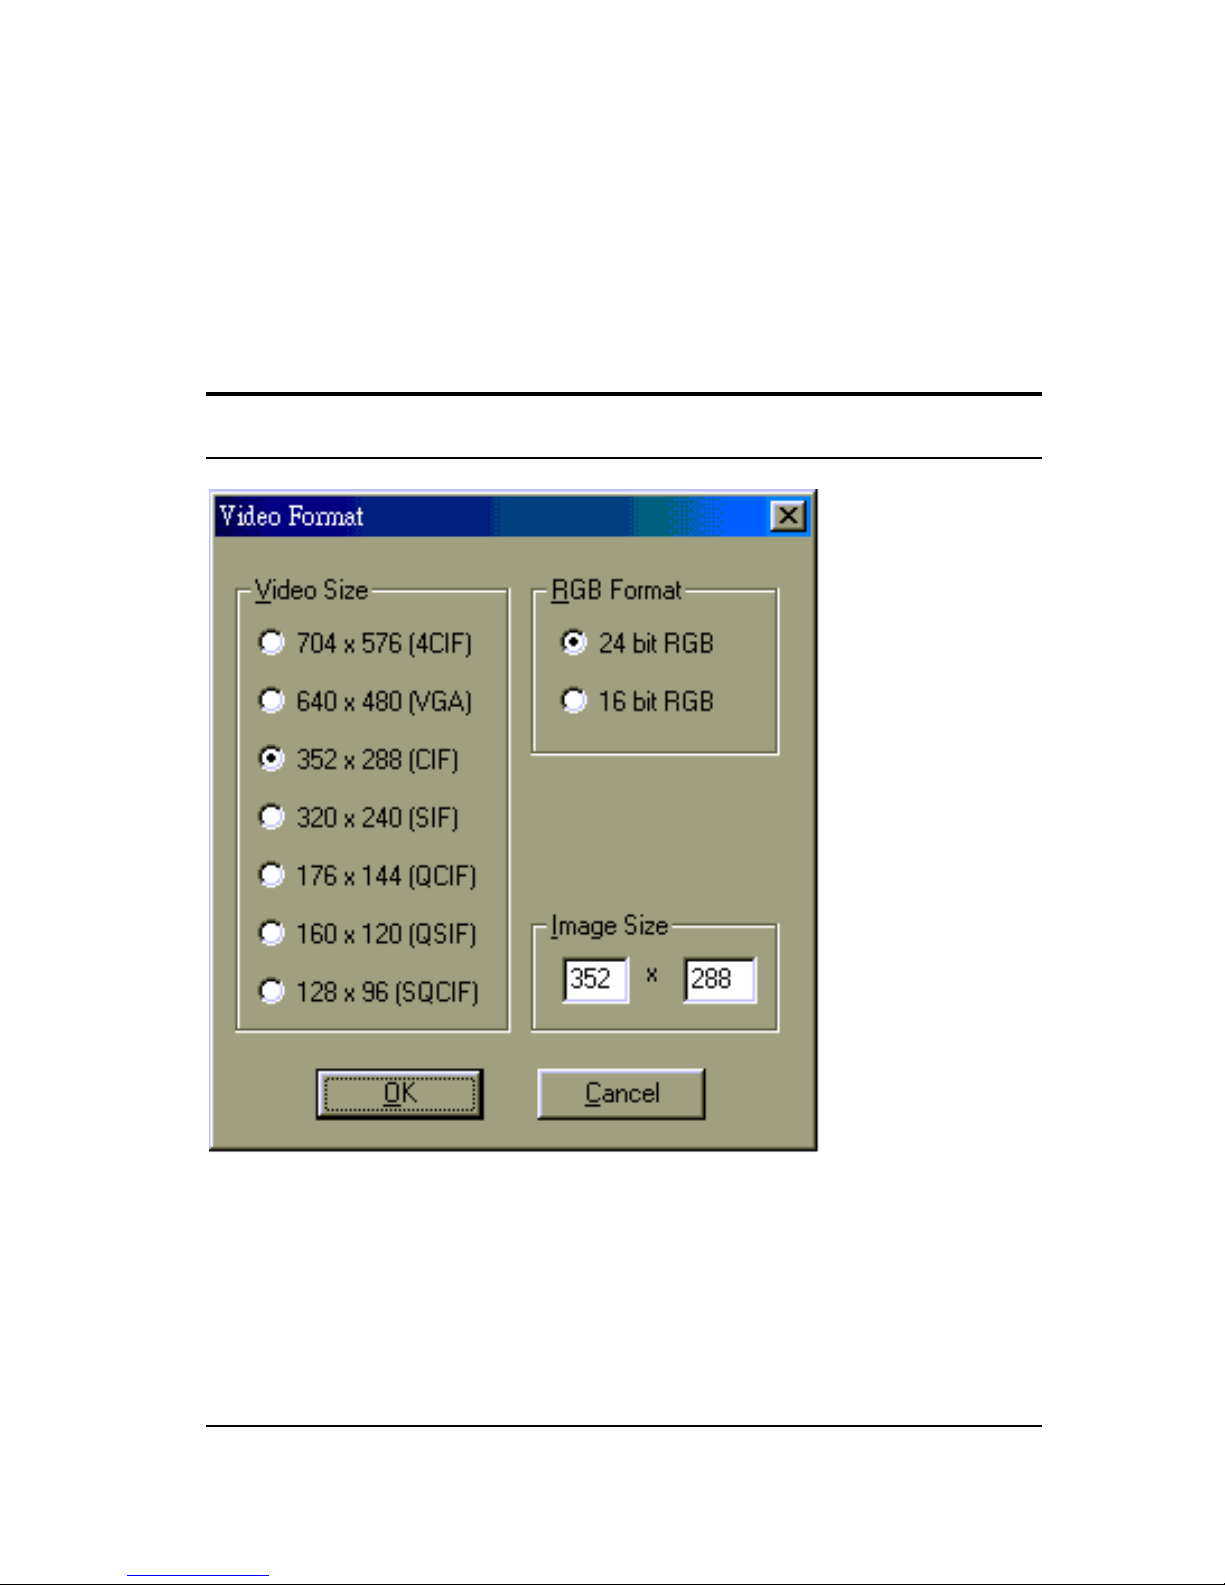
Video Format Settings
Video format settings allow you to set the incoming color depth as
24-bit or 16-bit RGB and choose from a myriad of image resolutions.
Please keep in mind that the higher the resolution and the higher the
RGB bits, the larger the video file size will be. We recommend you
choose a lower resolution for video-conferencing or recording video.
Page 16
14
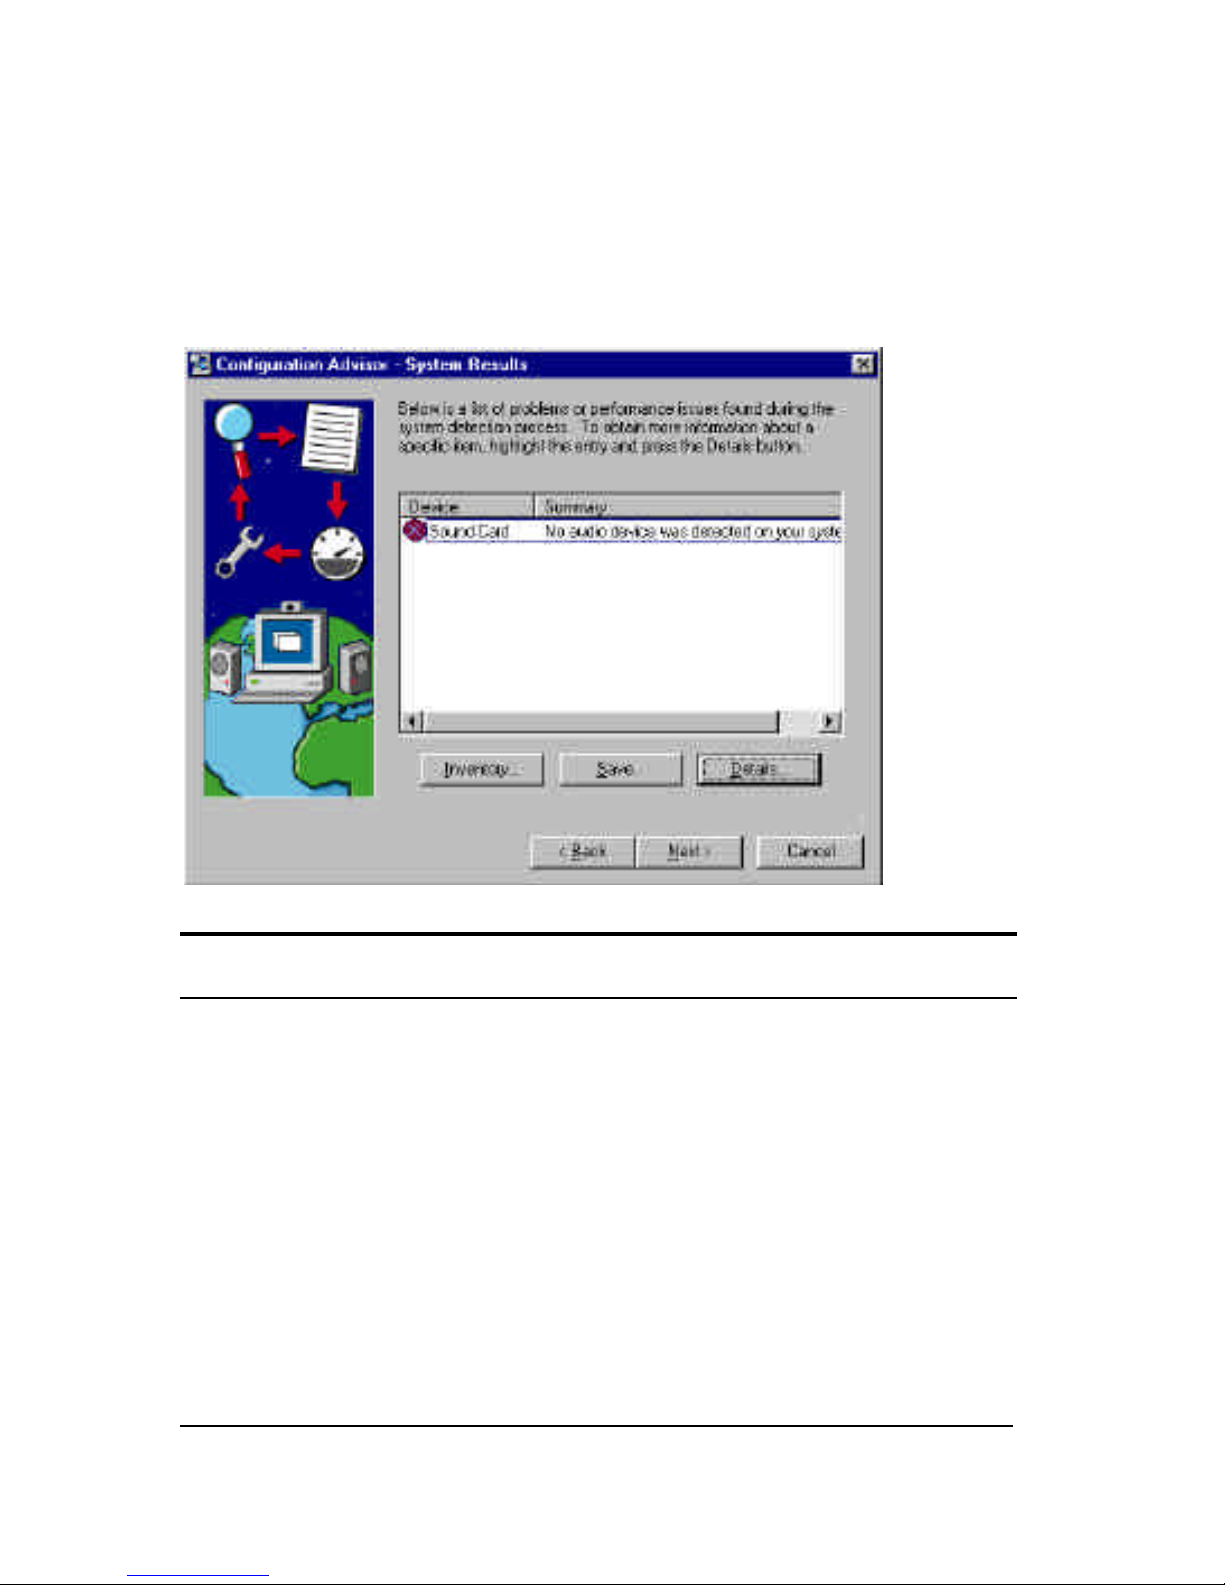
After this step the Configuration Advisor will check to
ensure that the installation went smoothly. It will provide
a list of any problems with links to help:
Setting Up IVL for the Internet
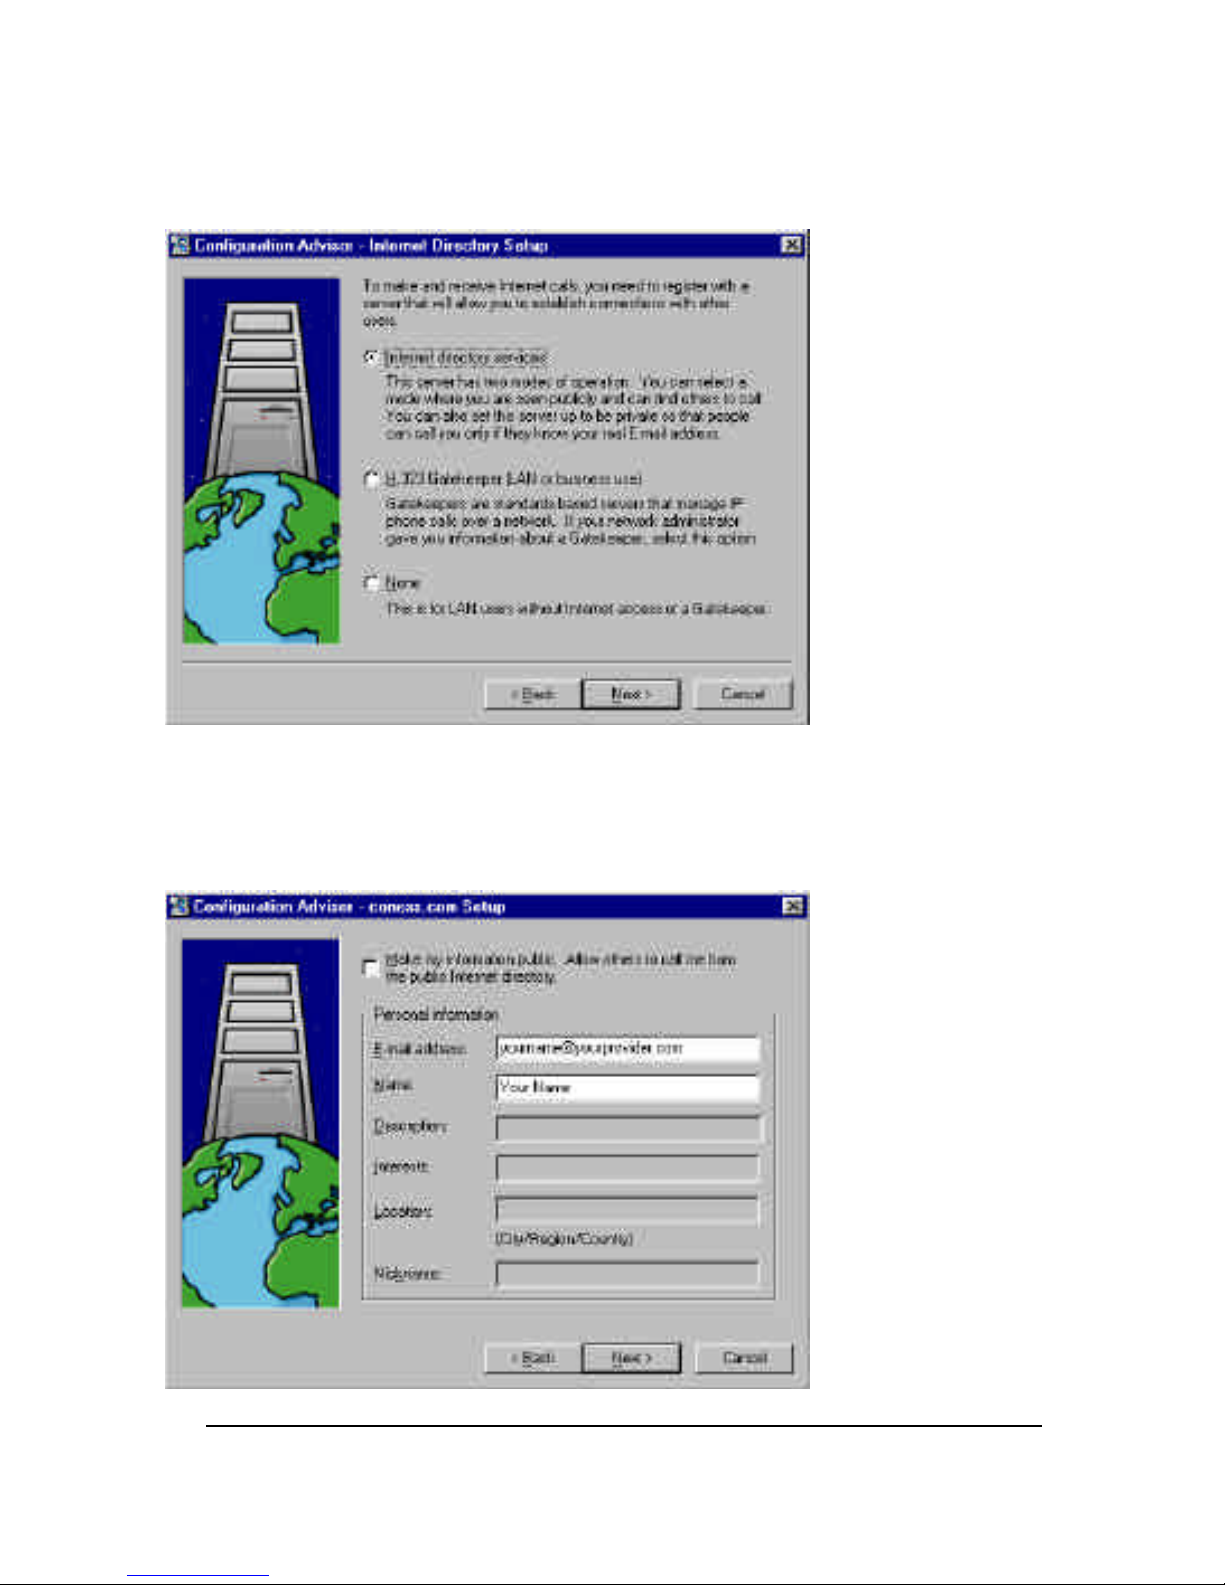
After choosing the desired Format and Source settings, you will
arrive at the Internet Directory Setup screen.
Most users will choose “Internet Directory Services”,
however, if you are on a workplace LAN and either (1) have
an MIS department that has set up a H.323 gateway or (2)
plan only to use the camera locally (NOT on the Internet)
you may wish to choose one of the other options.
Page 17
15
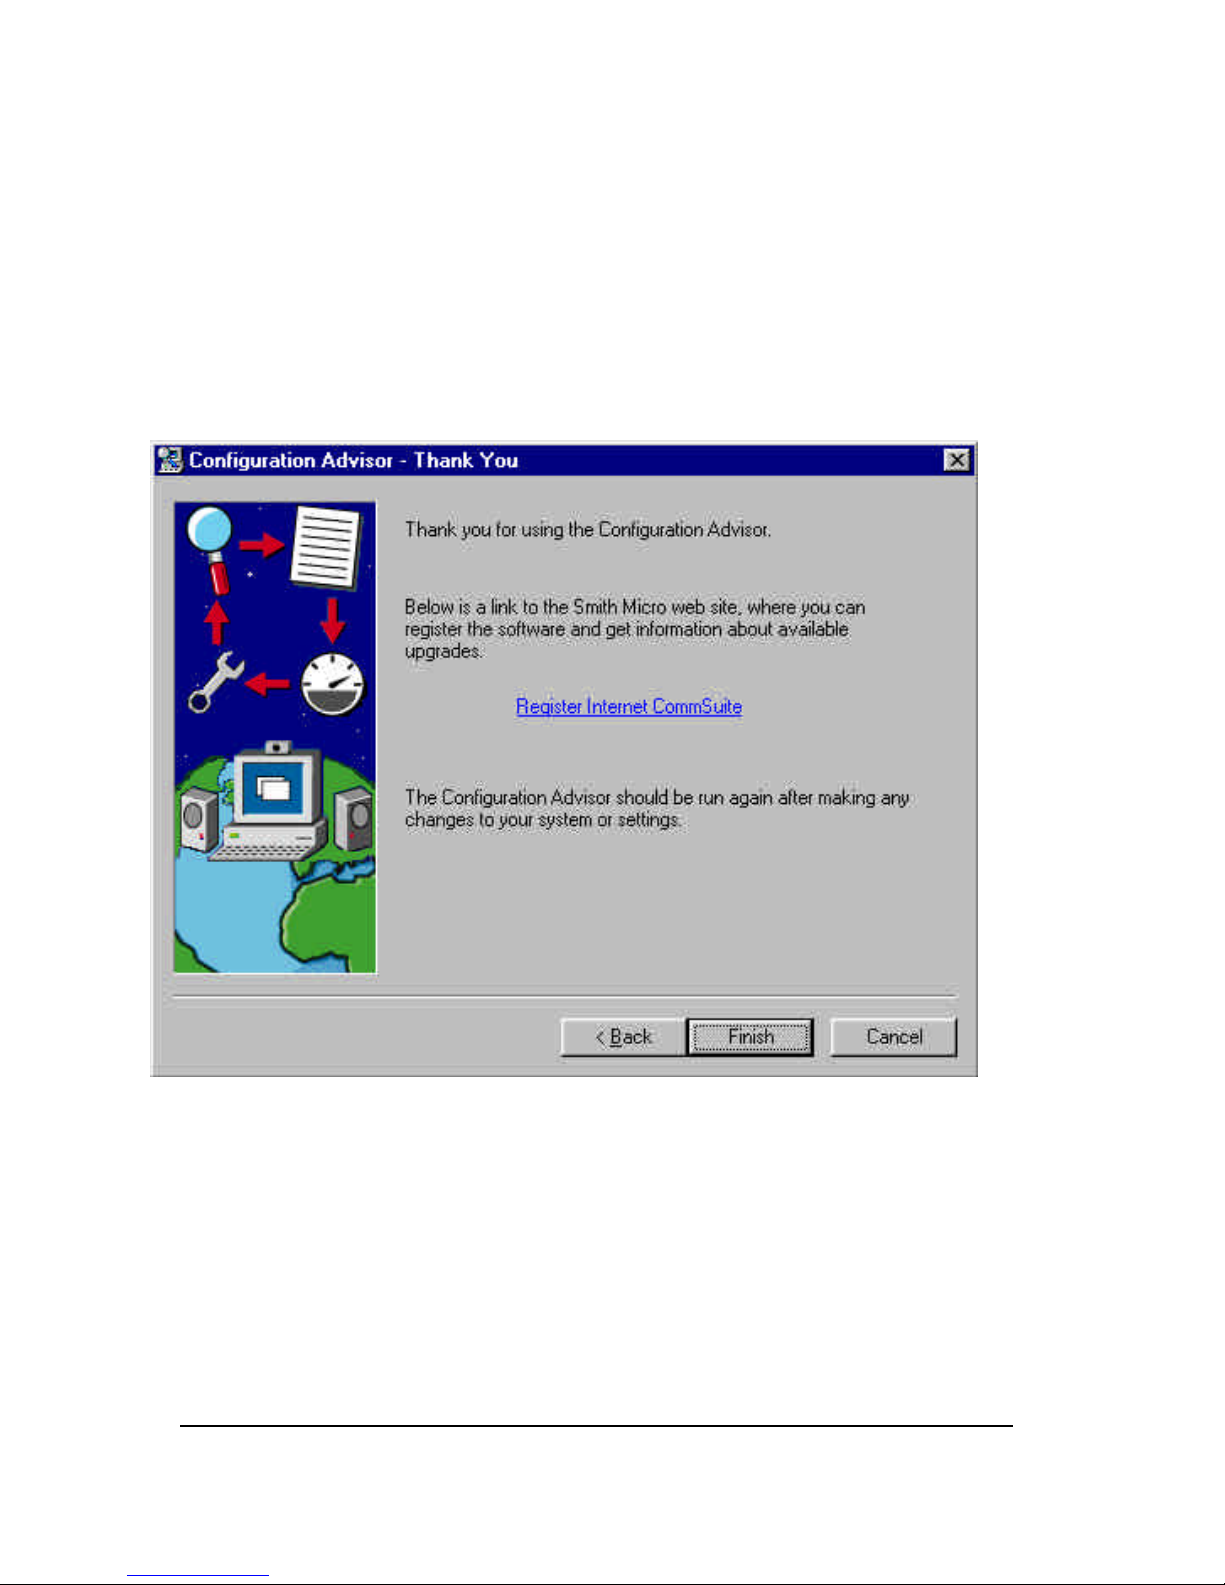
Next fill in your personal information so that people can
place calls to you from the Internet:
Page 18
16
That’s It! Just press “Finish” and you will be ready to use
the D-link DU-C300 with the included Internet Video Link
from Smith Micro Software!
Page 19

17
Specifications
Sensor 640 x 480 Color CMOS sensor
Minimum illumination 8 lux
System Interface USB port
Video Compression Proprietary video compression
Snap-shot button Active
Color Adjustment Brightness, Hue, Saturation
White balance Automatic
Driver Windows 95, Windows 98
Windows NT 5.0
Focus 5mm - 8
Power consumption 5V, 200mA max.
Operating Temperature 10 °C ~ 50 °C
Storage Temperature 0 °C~ 65 °C
Humidity 10% ~ 90% non-condensing
 Loading...