

Page 1

DRU-100C
USB Digital Video Camera
User's Manual
Rev.01 (August,2000)
M20000806
Print in Taiwan
Page 2

Table of Contents
Table of Contents
INTRODUCTION........................................................................................1
HARDWARE INSTALLATION................................................................2
INSTALLING THE CAMERA.....................................................................2
DRIVER INSTALLATION.........................................................................4
INSTALLING THE CAMERA DRIVERS....................................................4
QUALITY & FORMAT ADJUSTMENT..................................................6
DISPLAY UTILITY....................................................................................6
COLOR ADJUSTMENT ..............................................................................8
FORMAT ADJUSTMENT.........................................................................11
UNINSTALLING THE USB DIGITAL VIDEO CAMERA..................13
SPECIFICATIONS....................................................................................16
Page 3
1
1
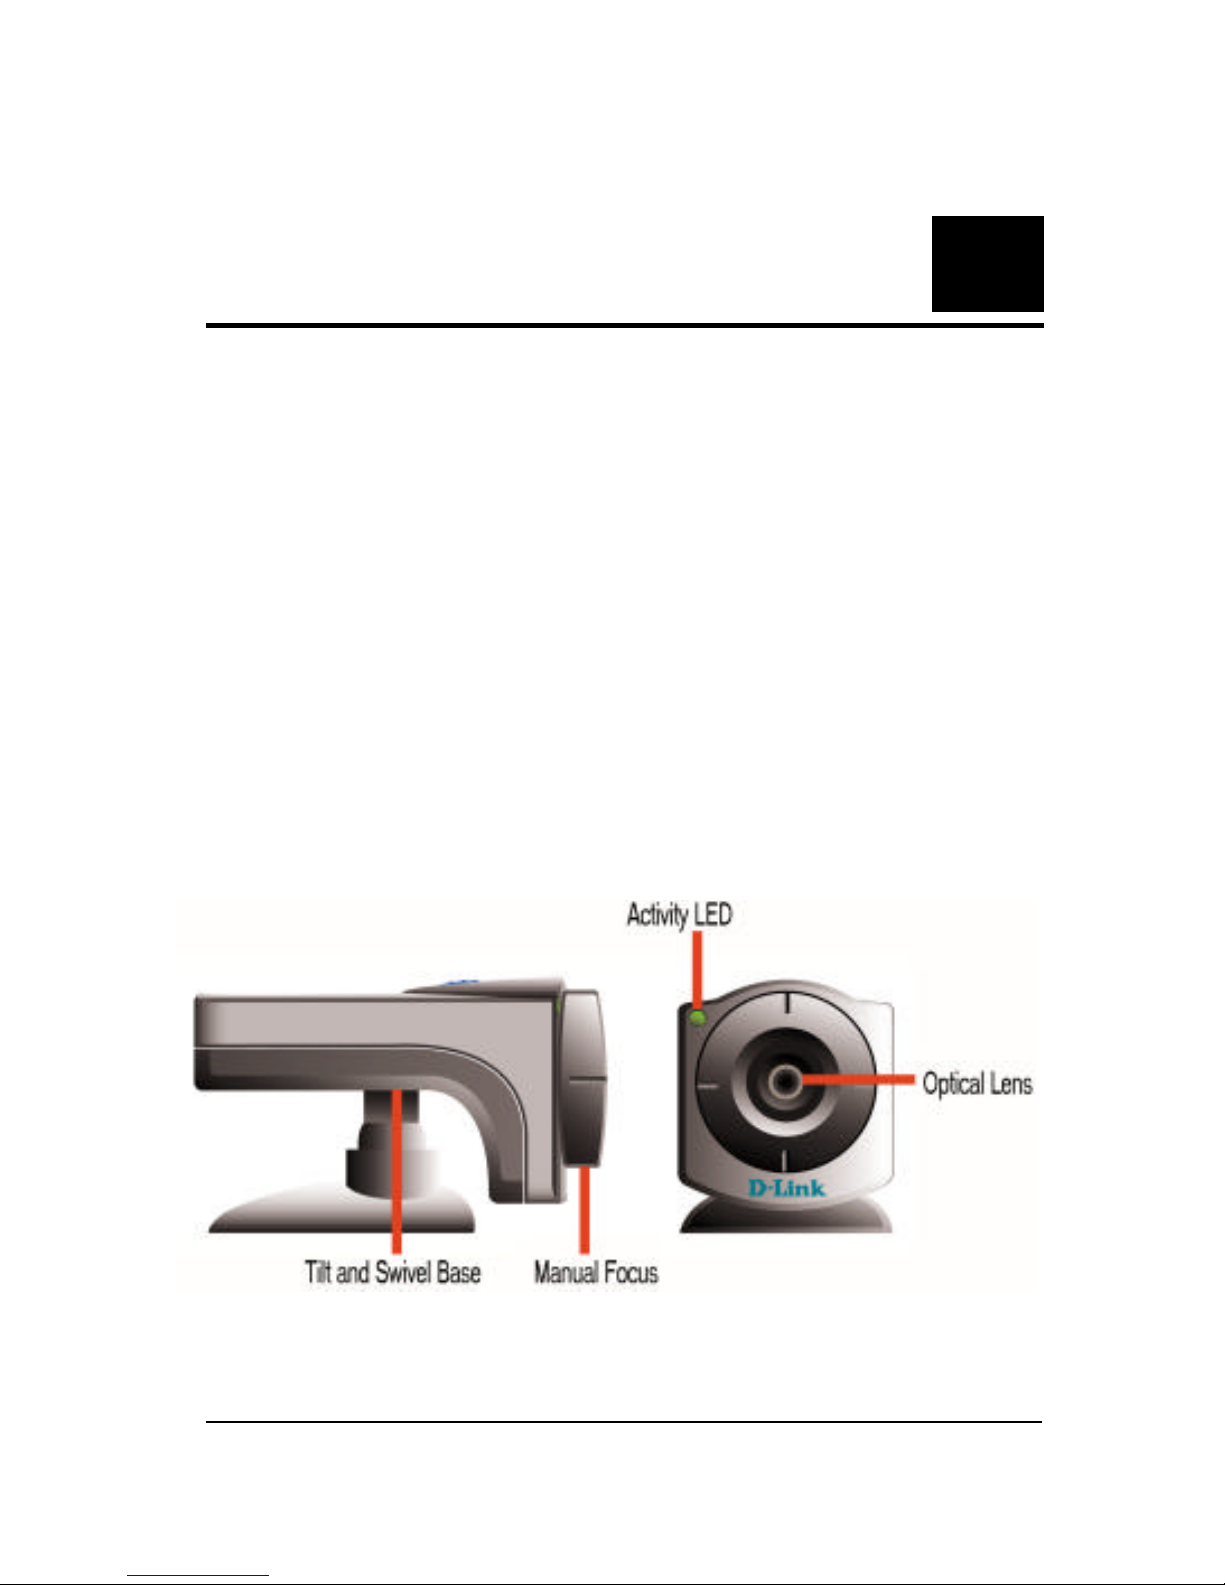
Introduction
Thank you for purchasing the D-Link DRU-100C USB Digital
Video Camera. Using state of the art technology, it can be
used with any Windows 98 or above PC for videoconferencing, to create multimedia presentations, or video
emails. Included in your package is Smith Micro’s Internet
CommSuite, a complete Video software package that will
allow you to get the most out of your new camera.
This guide will walk you through the steps necessary to install
your DRU-100C and configure Internet CommSuite.
Page 4
2
2
Hardware Installation
Installation of a D-Link DRU-100C requires installation of the
camera hardware itself, and then installation of the software
drivers.
Installing the Camera
Please verify that you have Windows 98 or Windows 2000 running
and working before attempting to install your DRU-100C.
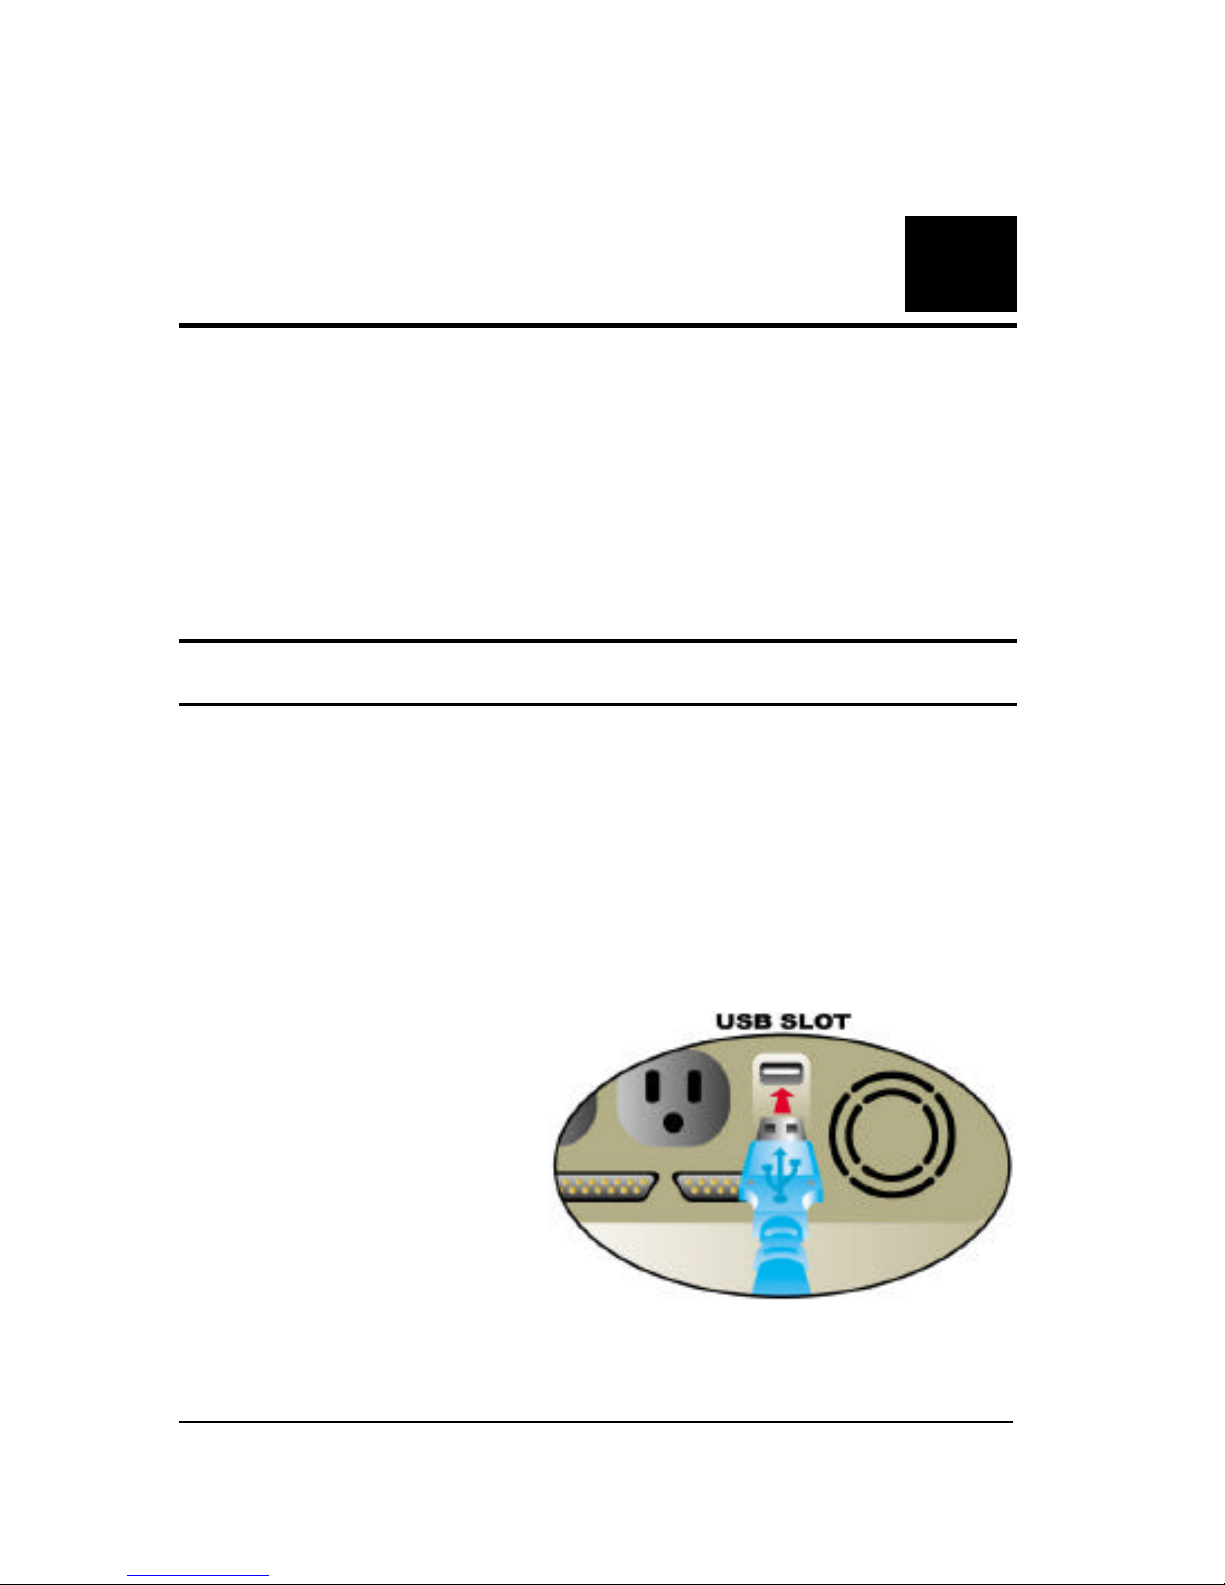
Install the camera by plugging its USB type ‘A’ connector into
an available USB port on your PC or on any USB hub attached
to your PC.
No power adapter is
required, the DRU100C is powered
directly by the USB
Bus.
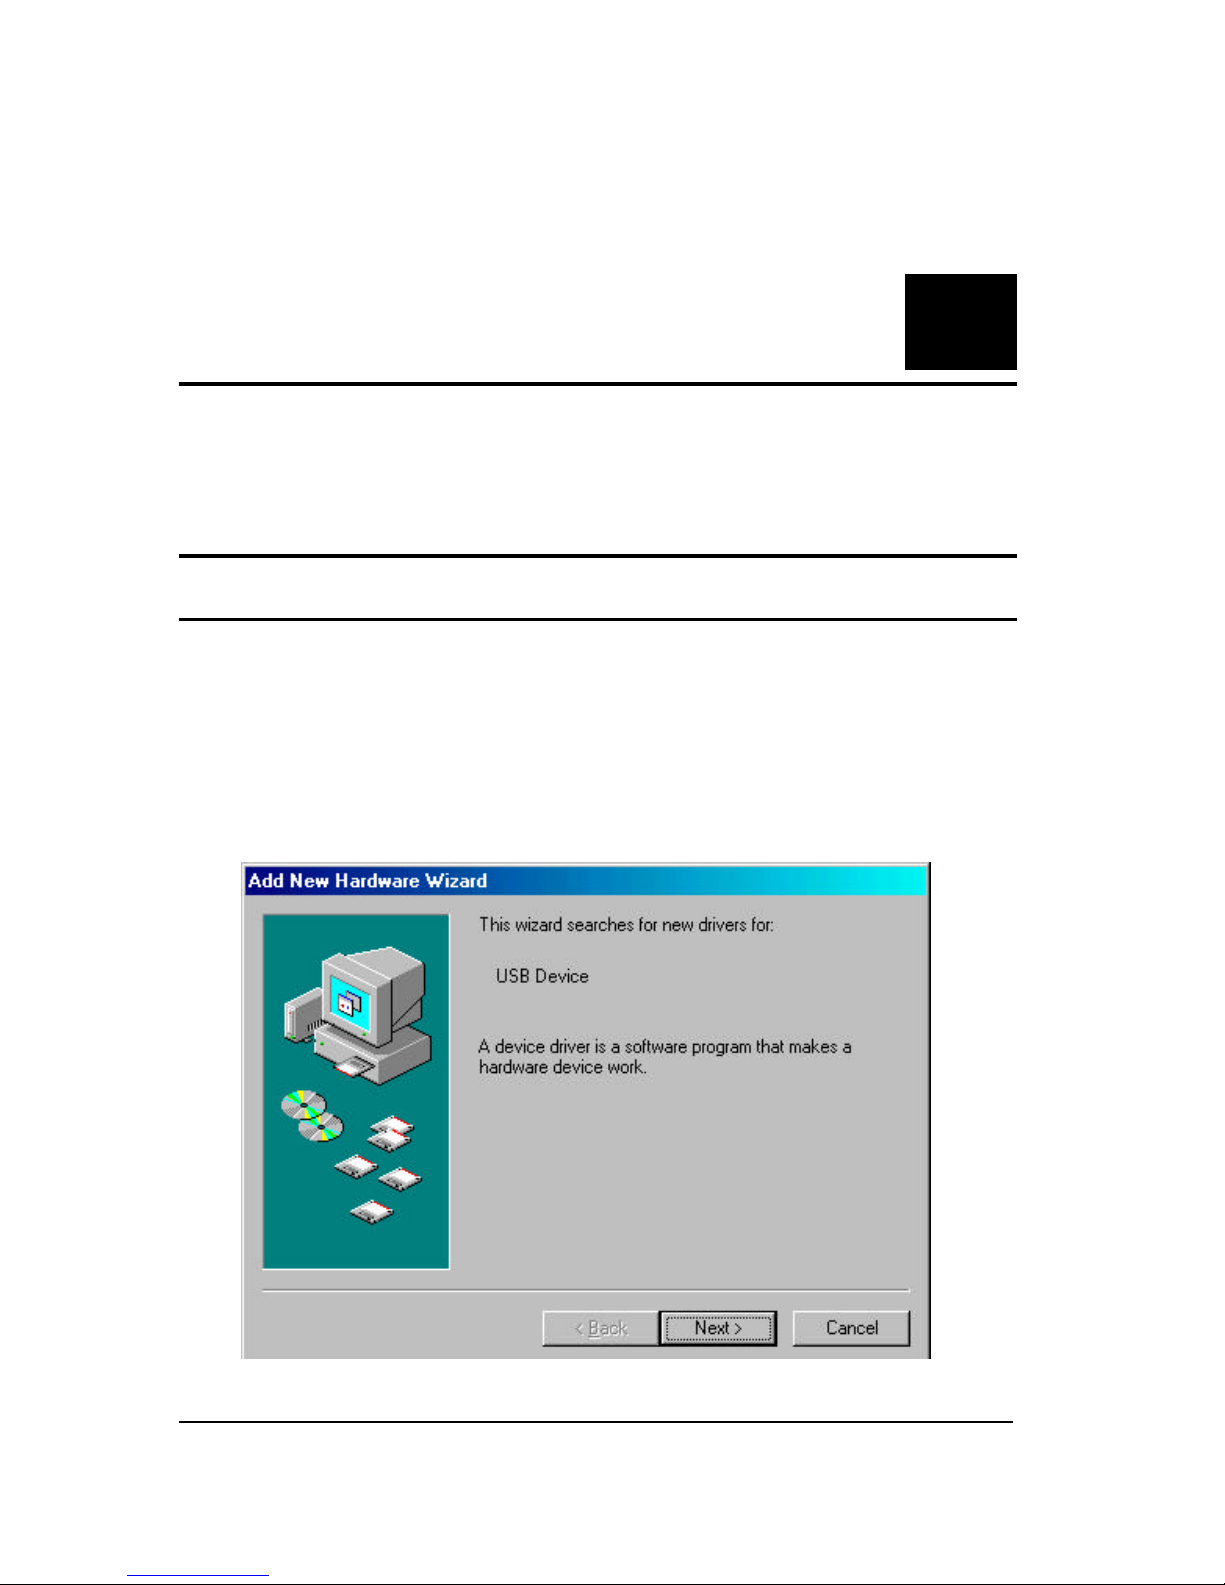
Once the camera has
been plugged in the Add
New Hardware Wizard
Page 5

3
will start automatically. This concludes the hardware
installation section of the manual.
Page 6
4
3
Driver Installation
Installing the Camera Drivers
Note: Please have your original Windows CD available, it may be
required to complete the installation.
Once the DRU-100C has been installed the New Hardware
Page 7
5
Wizard will launch:
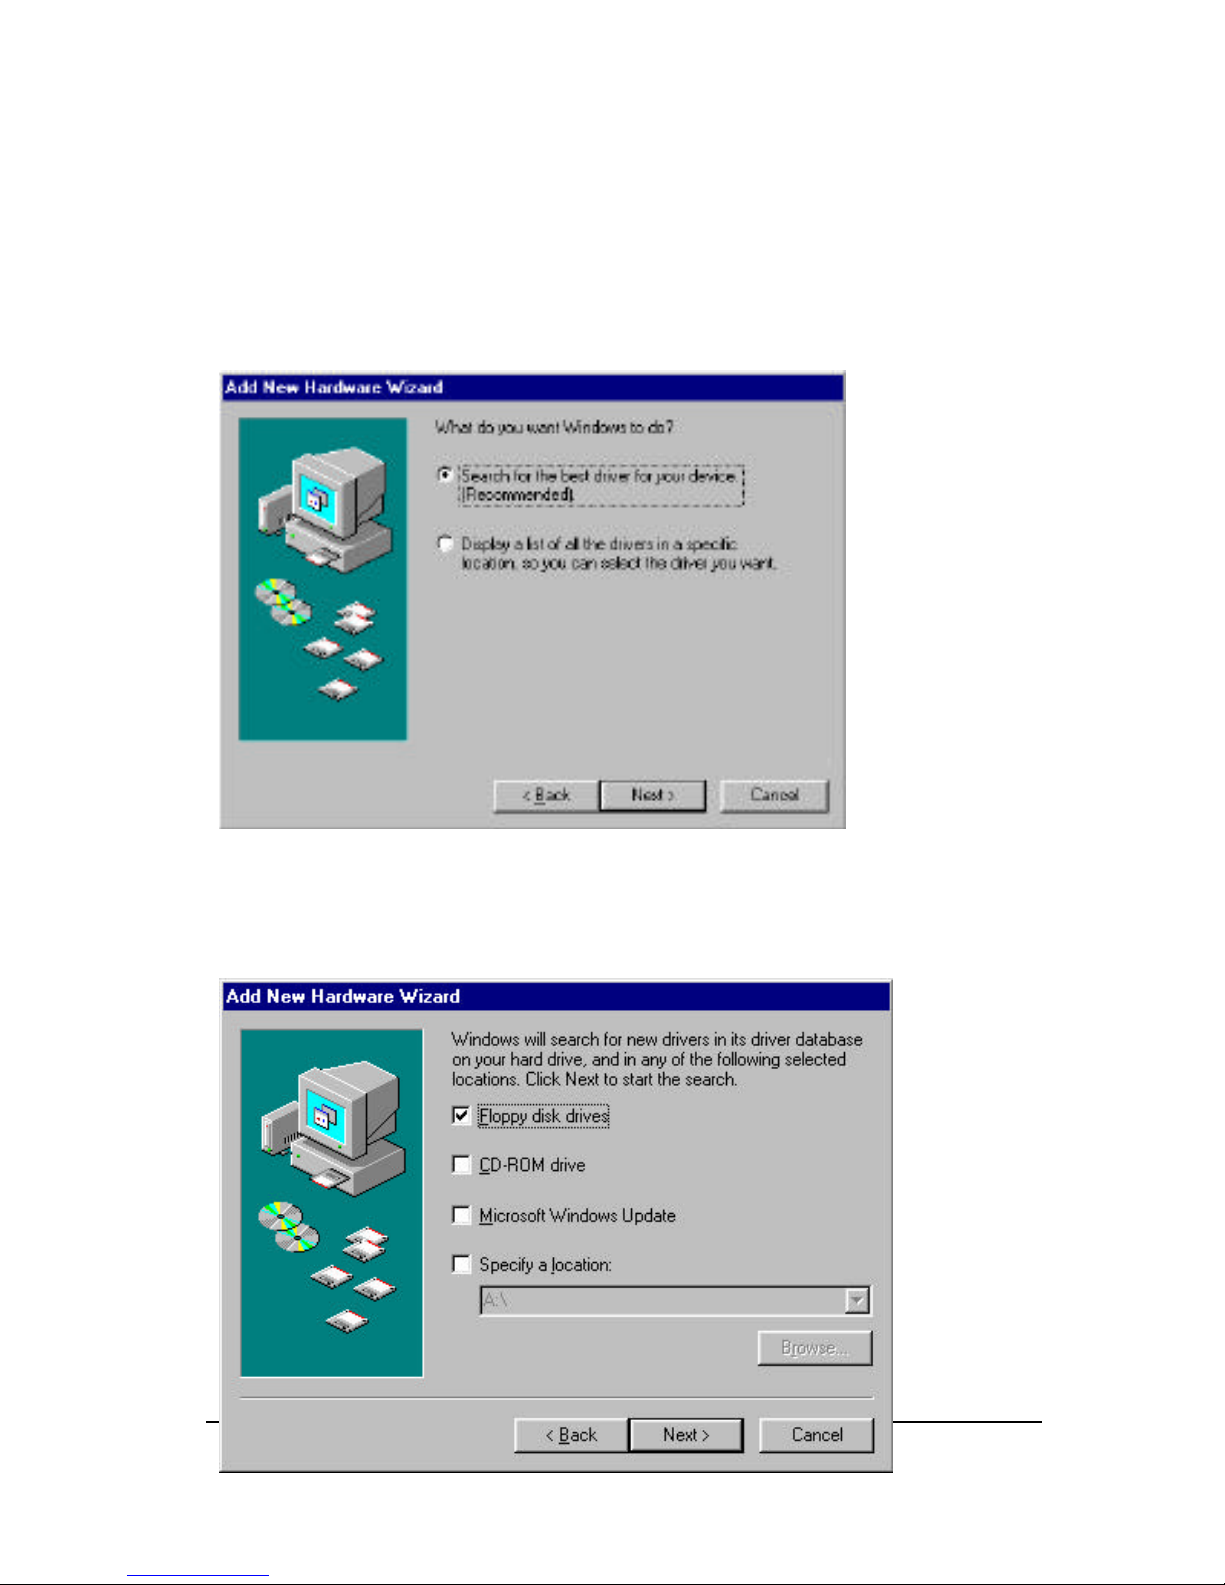
Once again press “Next>” so that your computer will search
for the best driver:
Make sure that the driver diskette that came with your camera
is in your floppy drive and that you have checked “Floppy disk
drives” and then press “Next>”:
Page 8
6
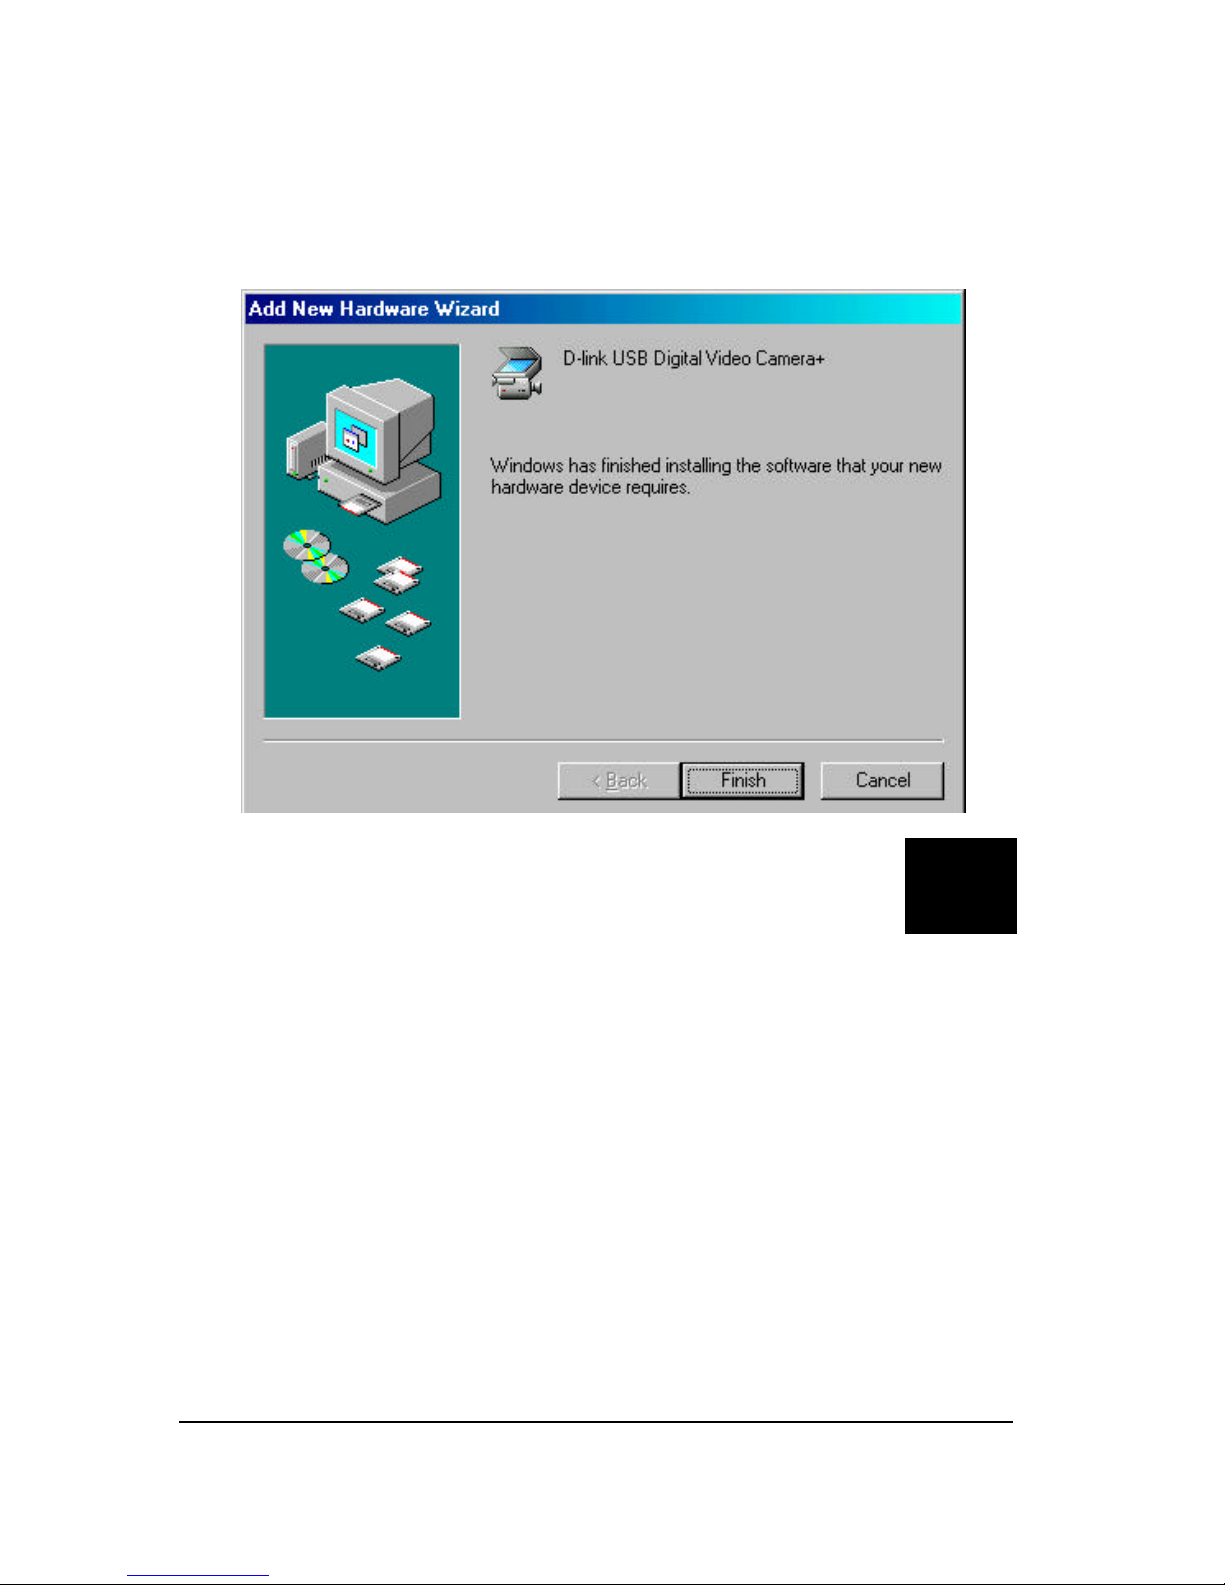
Once the driver has been installed click “Finish”:
Page 9

7
4
Quality & Format
Adjustment
Display Utility
Once the driver is installed successfully, it allo ws three options
of “PC Camera VFW Capture”, “PC Camera WDM
Capture”, and “Uninstall D-Link USB Digital Video
Camera+”. These programs are automatically installed to
\Program\Files directory. The display utility allows you to view
video images from your D-Link USB Digital Video Camera,
and adjust the parameters for best color quality.
To adjust for the best image quality, you need to run the “PC
Camera WDM Capture” display utility, click on windows Start
Menu/Programs/D-Link USB Digital Video
Camera+/Camera/PC Camera WDM Capture.
Page 10
8
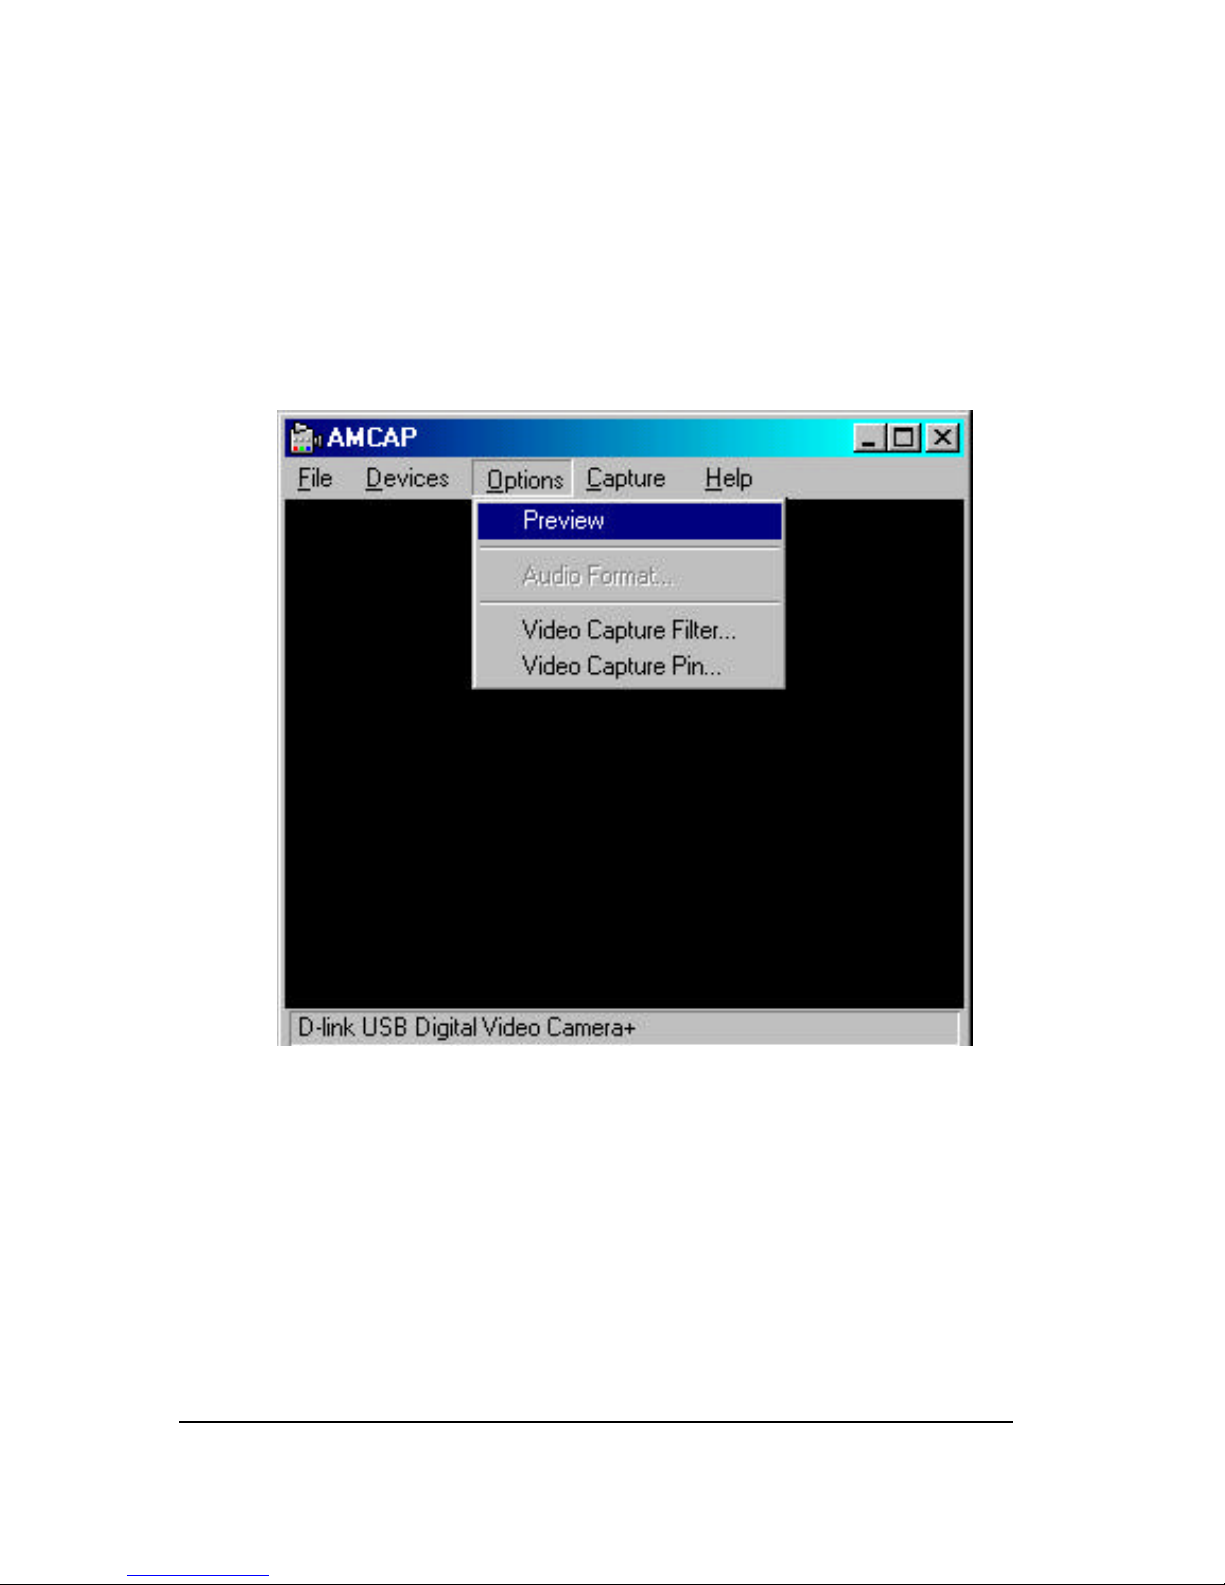
Select Options in the menu bar and in the selection item
choose Preview and this will activate the D-Link USB Digital
Video Camera to start capture images.
However, before you begin utilizing the D-Link USB Digital
Video Camera make sure there is enough lighting in the scene
and adjust the focus on the Digital Video Camera to gain
optimal image quality.
Page 11
9
Color Adjustment
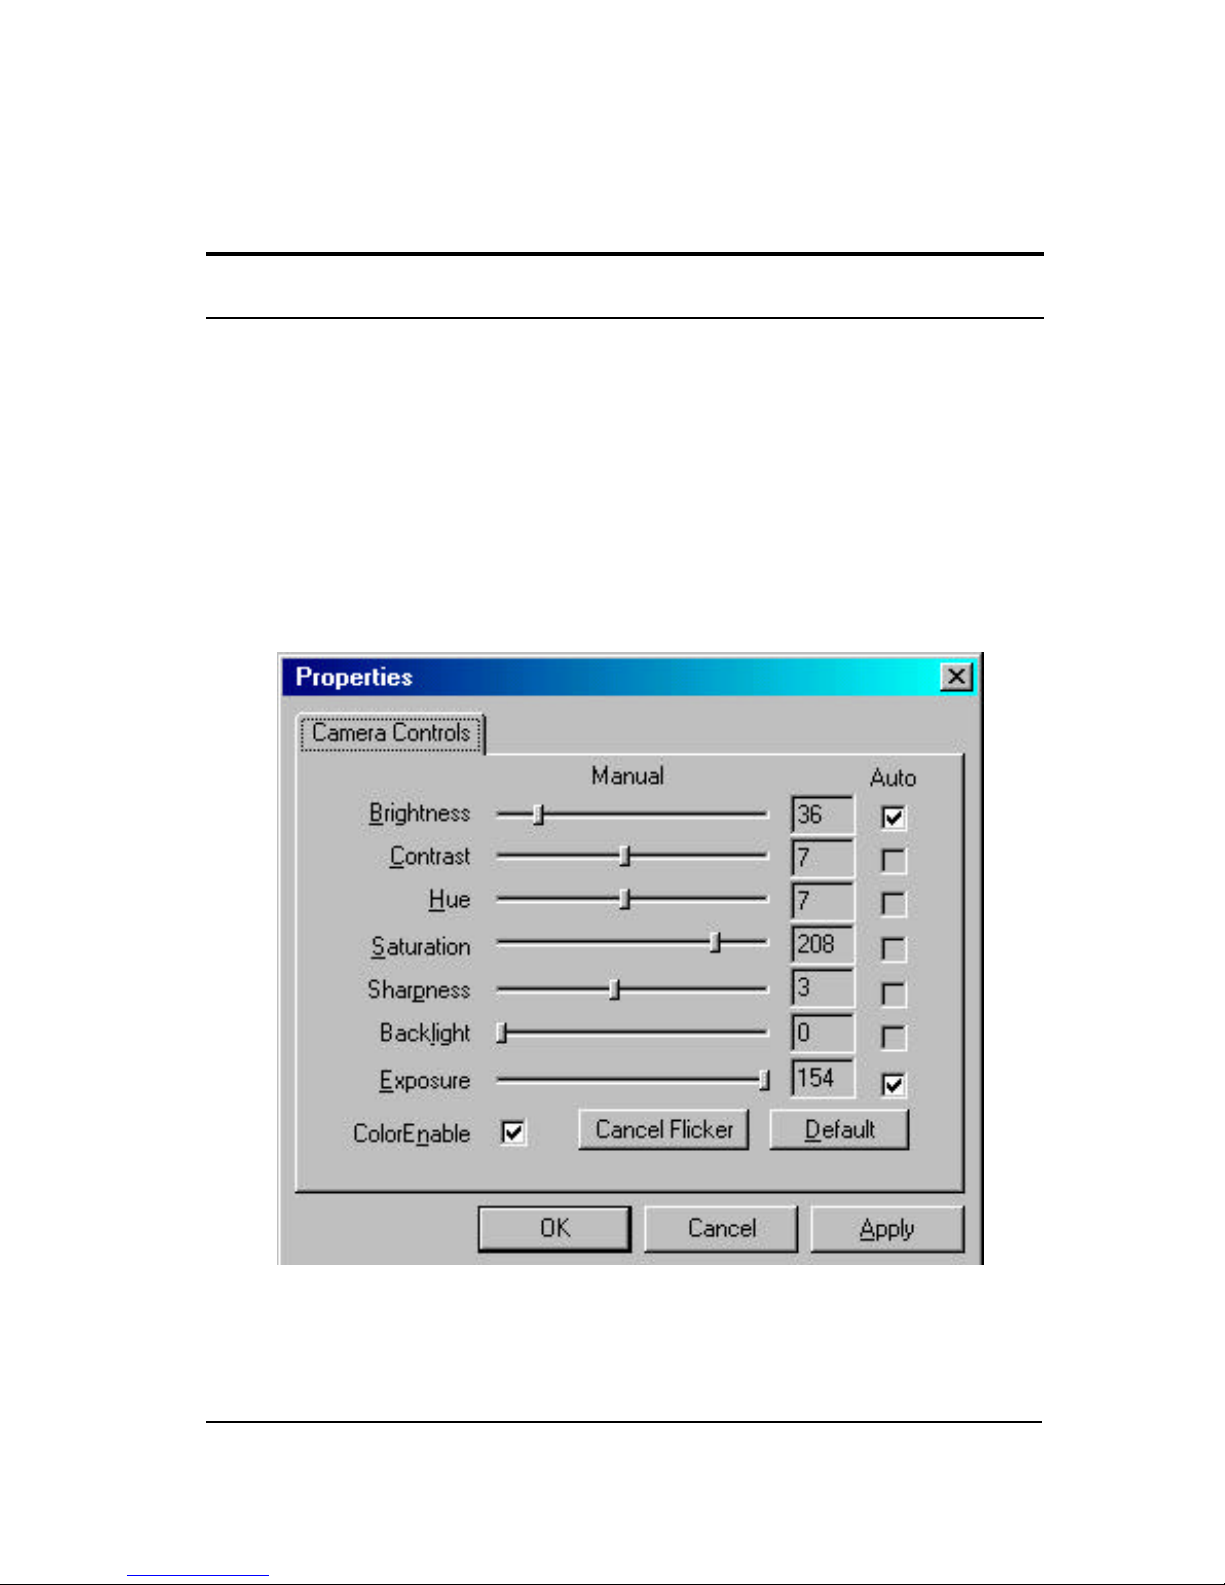
Once the D-Link USB Digital Video Camera is capturing
images you can start adjusting the colors by selecting the
Options in the menu bar and in the selection item choose
Video Capture Filter. A prompt screen will be displayed like
the one below:
Page 12

10
Under the Camera Controls tab, make the appropriate
adjustments from the menu list to fine tune the image related
parameters such as Brightness, Contrast, Saturation,
Sharpness, Hue, Backlight, and Exposure or set to Default.
Brightness tells how much white or black that exists in the
image. It is the amount of light reflected in proportion to the
amount absorbed by the material in the image. Therefore,
reflective objects are bright, and vise versa.
Contrast is the degree of difference in tone between the light
and dark parts of an image. The higher the contrast the
brighter the image and the lower the contrast the darker it will
become.
Saturation is an expression for the relative bandwidth of the
visible output from a light source. As saturation increases,
colors appear more pure and as it decreases, colors appear
more washed out.
Sharpness determines how crisp the image quality looks. For
example, when sharpness is high, the picture will look crisp and
edges will be well-defined.
Page 13

11
Hue in short means color, it is the wavelength of light that
gives a color its distinguished characteristics.
Backlight is the source light coming from the background, it
affects the picture quality in areas of brightness from the
background.
Exposure is recommended to be set at Auto or you can have
the option to adjust to your required capture image. Since most
cameras determine the exposure by averaging all the light that
enters the lens.
When the ColorEnable is activated it allows the user for color
display and if deactivated black and white images will appear
from the AMCAP screen.
Keep in mind whe n changes are made, click the Apply button
to refresh all the new details you have set and click OK to
return to the AMCAP Capture Screen.
Page 14
12
Format Adjustment
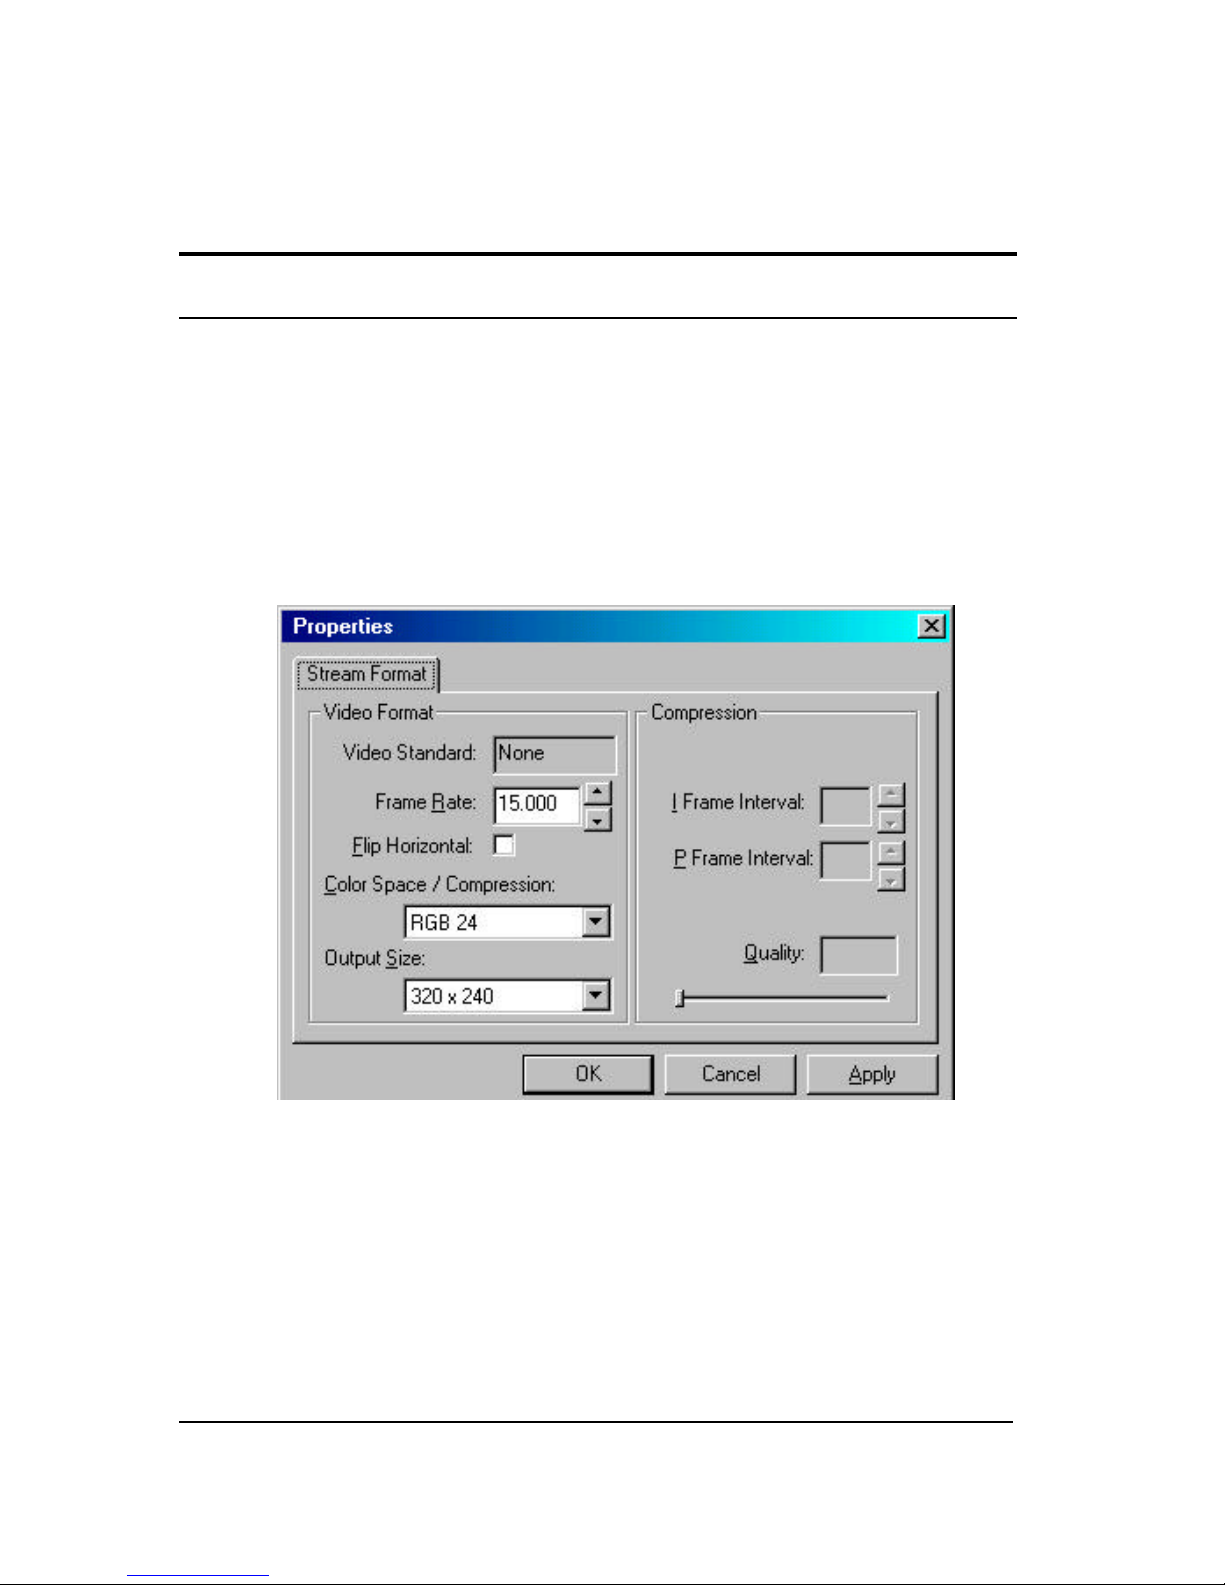
You can also format the image captured by selecting the
Options in the menu bar and in the selection item choose
Video Capture Pin. A prompt screen will be displayed like
the one below:
In the Frame Rate display you have the options from 7.5
frames per second (fps) up to 30 fps.
You can format the setting allowing incoming color depth as
24-bit RGB with the other choices of RGB 555 (16 bit) and
I420 in the Color Space/Compression.
Page 15

13
Output Size to set the video display size. There are various
formats available such as 176X144 (QCIF) and 352X288
(CIF).
However, keep in mind the higher the Frame Rate, Color
Space/Compression, and Output Size the larger the video file
size will be. Therefore, the lower resolution is recommended
for video-conferencing or video recording.
Once again when changes are made, click the Apply button to
refresh all the new details you have set and click OK to return
to the AMCAP Capture Screen.
Now you are ready to have fun with the new D-Link USB
Digital Video Camera and with the bundled software you will
be able to use the various video editing applications permitting
you image manipulation, editing, photo album, video mail, and
video conferencing capabilities.
Page 16
14
5
Uninstalling The D-Link
USB Digital Video
Camera
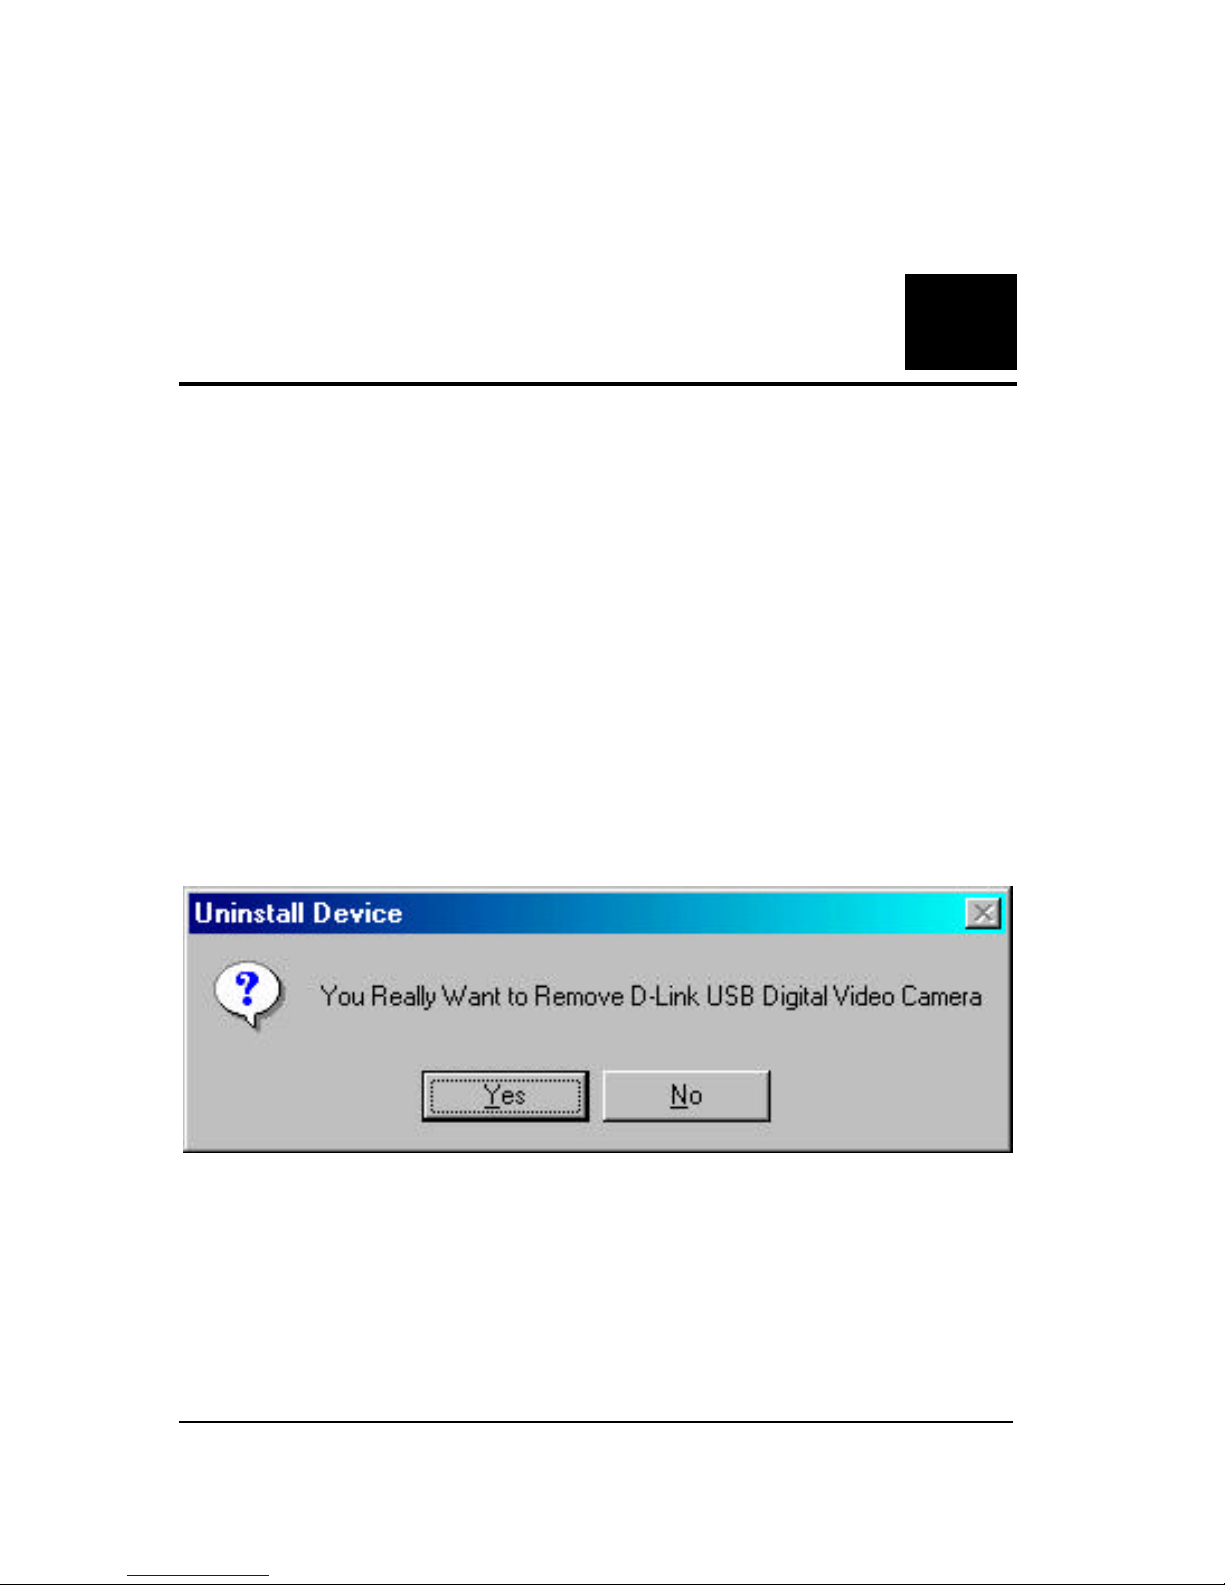
To uninstall your D-Link USB Digital Video Camera click on
windows Start Menu/Programs/D-Link USB Digital Video
Camera/Camera/Uninstall D-Link USB Digital Video
Camera+. A prompt screen will be displayed like the one
below:
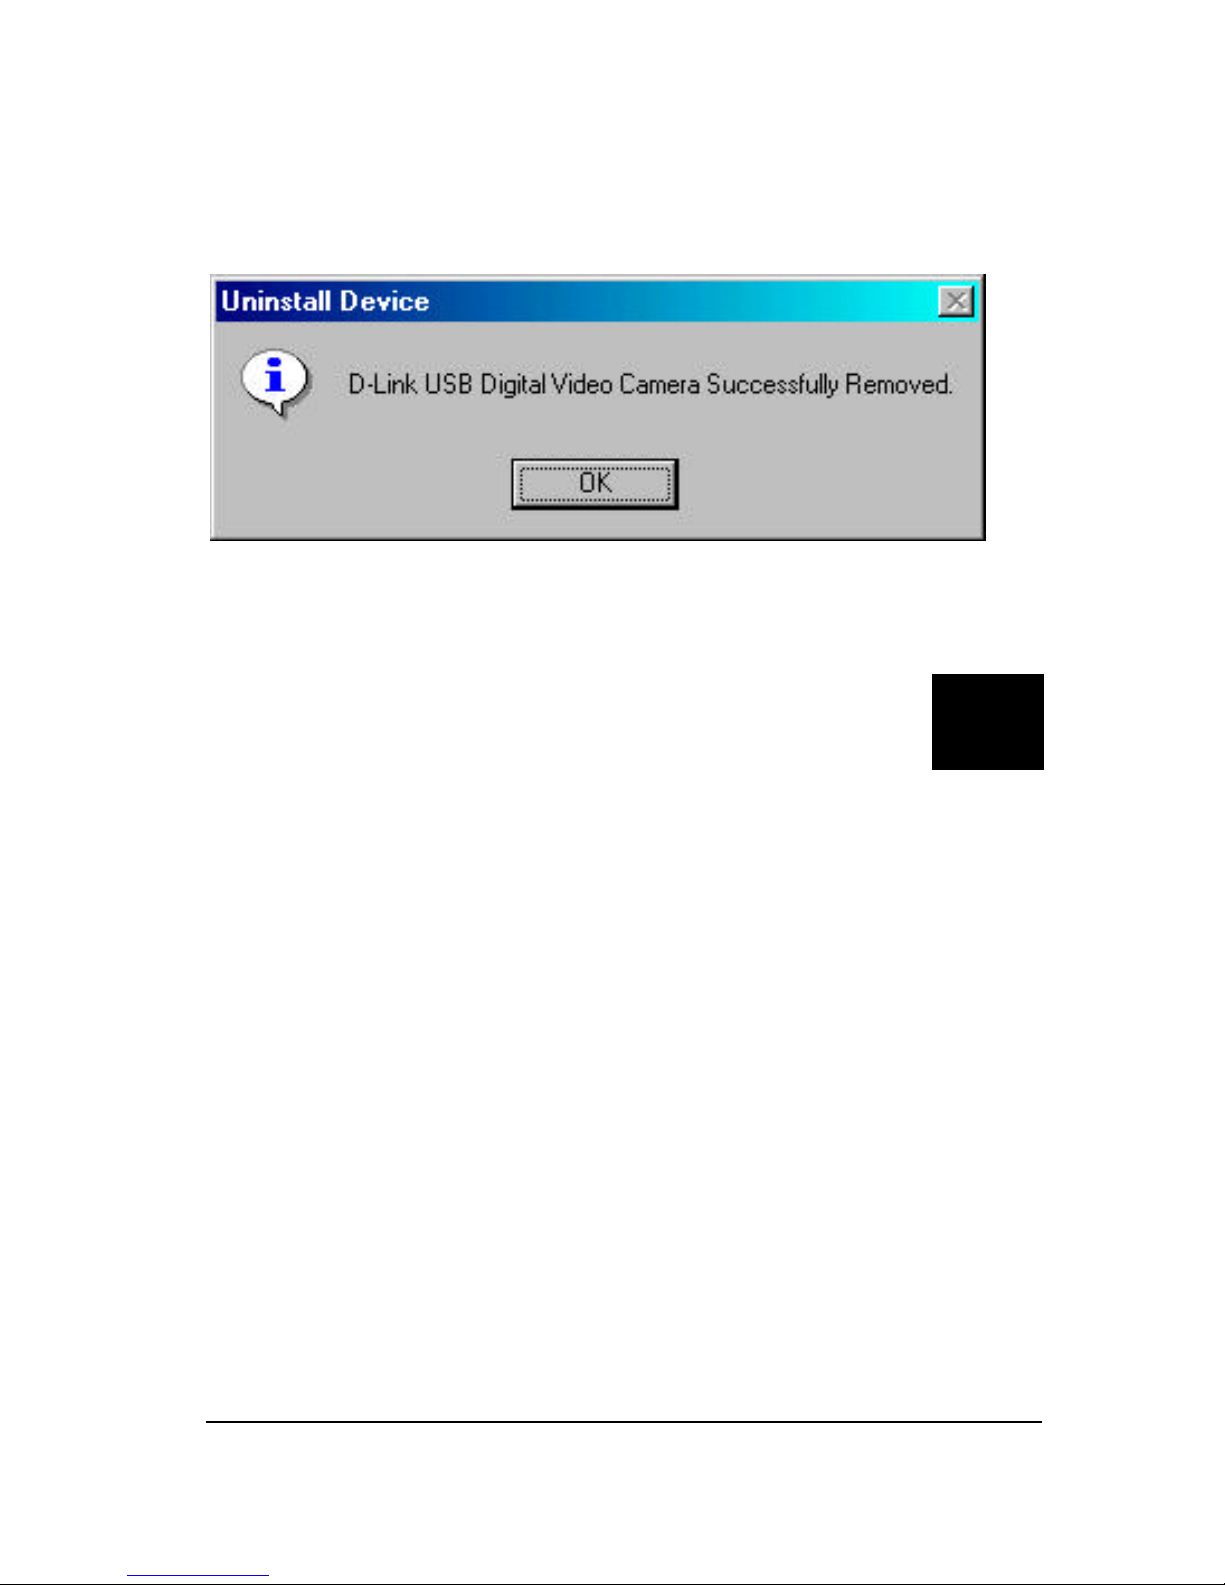
Click Yes if you want to remove the program from your
system. A new prompt will be displayed acknowledging the DLink USB Digital Video Camera has been successfully
removed.
Page 17
15
Click OK to finish the uninstall process.
Page 18

16
6
SPECIFICATIONS
Sensor 352 x 288 Color CMOS sensor
Minimum Illumination 8 lux
System Interface USB port
Video Compression Proprietary video compression
Snap-shot Button Yes
Color Adjustment Brightness, Hue, Saturation
White Balance Automatic
Driver Windows 98,Windows 2000
Lens F=6.0mm / f=1.8
Aspect Ratio 4:3
Power Consumption 5V, 200mA max.
Operating Temperature
10 °C ~ 50 °C
Storage Temperature
0 °C~ 65 °C
Humidity 10% ~ 90% non-condensing
 Loading...