

Page 1

Quick Installation Guide
DIR-655 – Xtreme N Gigabit Router
Version 1.0
Page 2
Chapter 1: How to setup DIR-655
IMPORTANT : Use only hard-wired network connections to do the setup.
Please disable Windows Firewall on your computer to avoid login problem
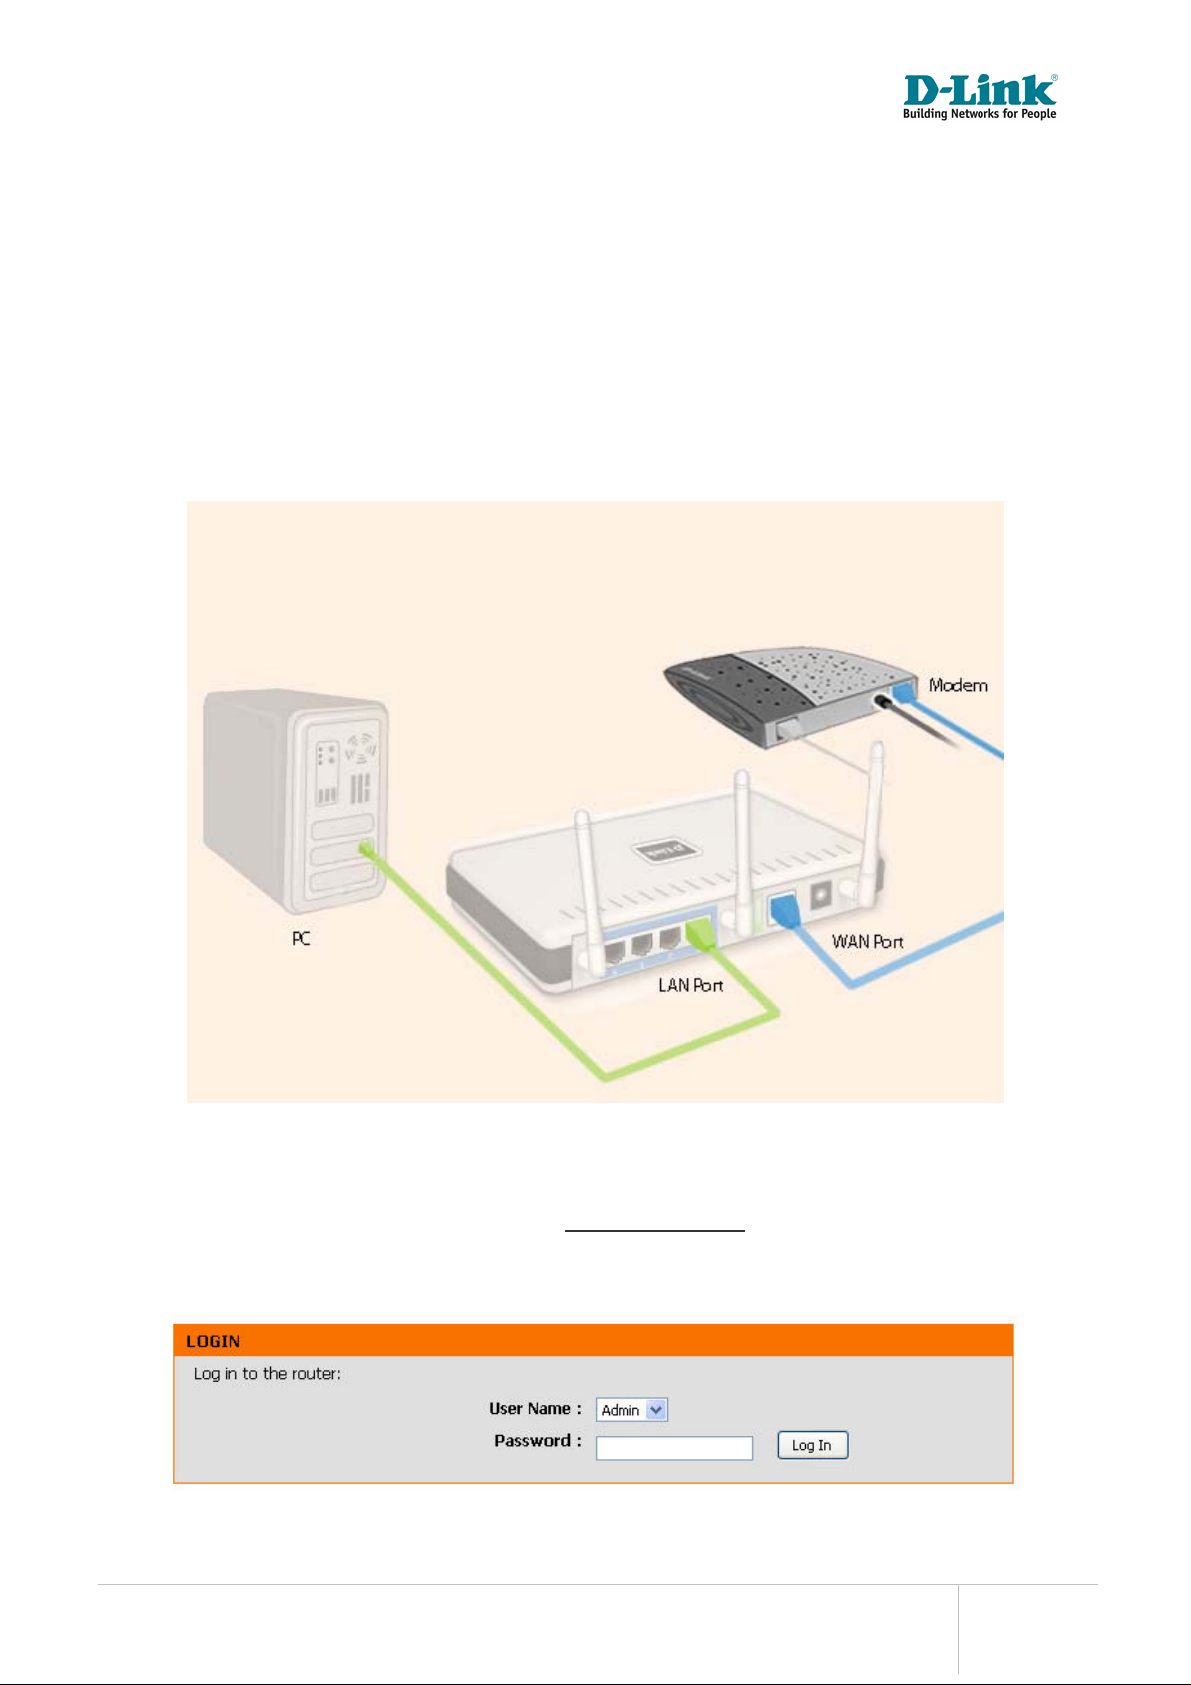
Step A : Please ensure that the Cable modem or ADSL modem is t urn off. Connect the supplied
blue Ethernet cable from the WAN port of DIR-655 to the modem, and then connect the Ethernet
cable from your computer into any of the 4 available LAN ports on DIR-655.
Please refer to the picture below.
Step B : Power up the modem first followed by DIR-655 router.
Step C : Launch Internet Explorer and enter http://192 .168.0.1
see the log in page. Select Admin as the User name and leave the Password field empty. Click the
“Log In” button.
in the Address\URL field. You will
DIR-655 Xtreme N Gigabit Router Quick Installation Guide Page 2 of 16
Page 3
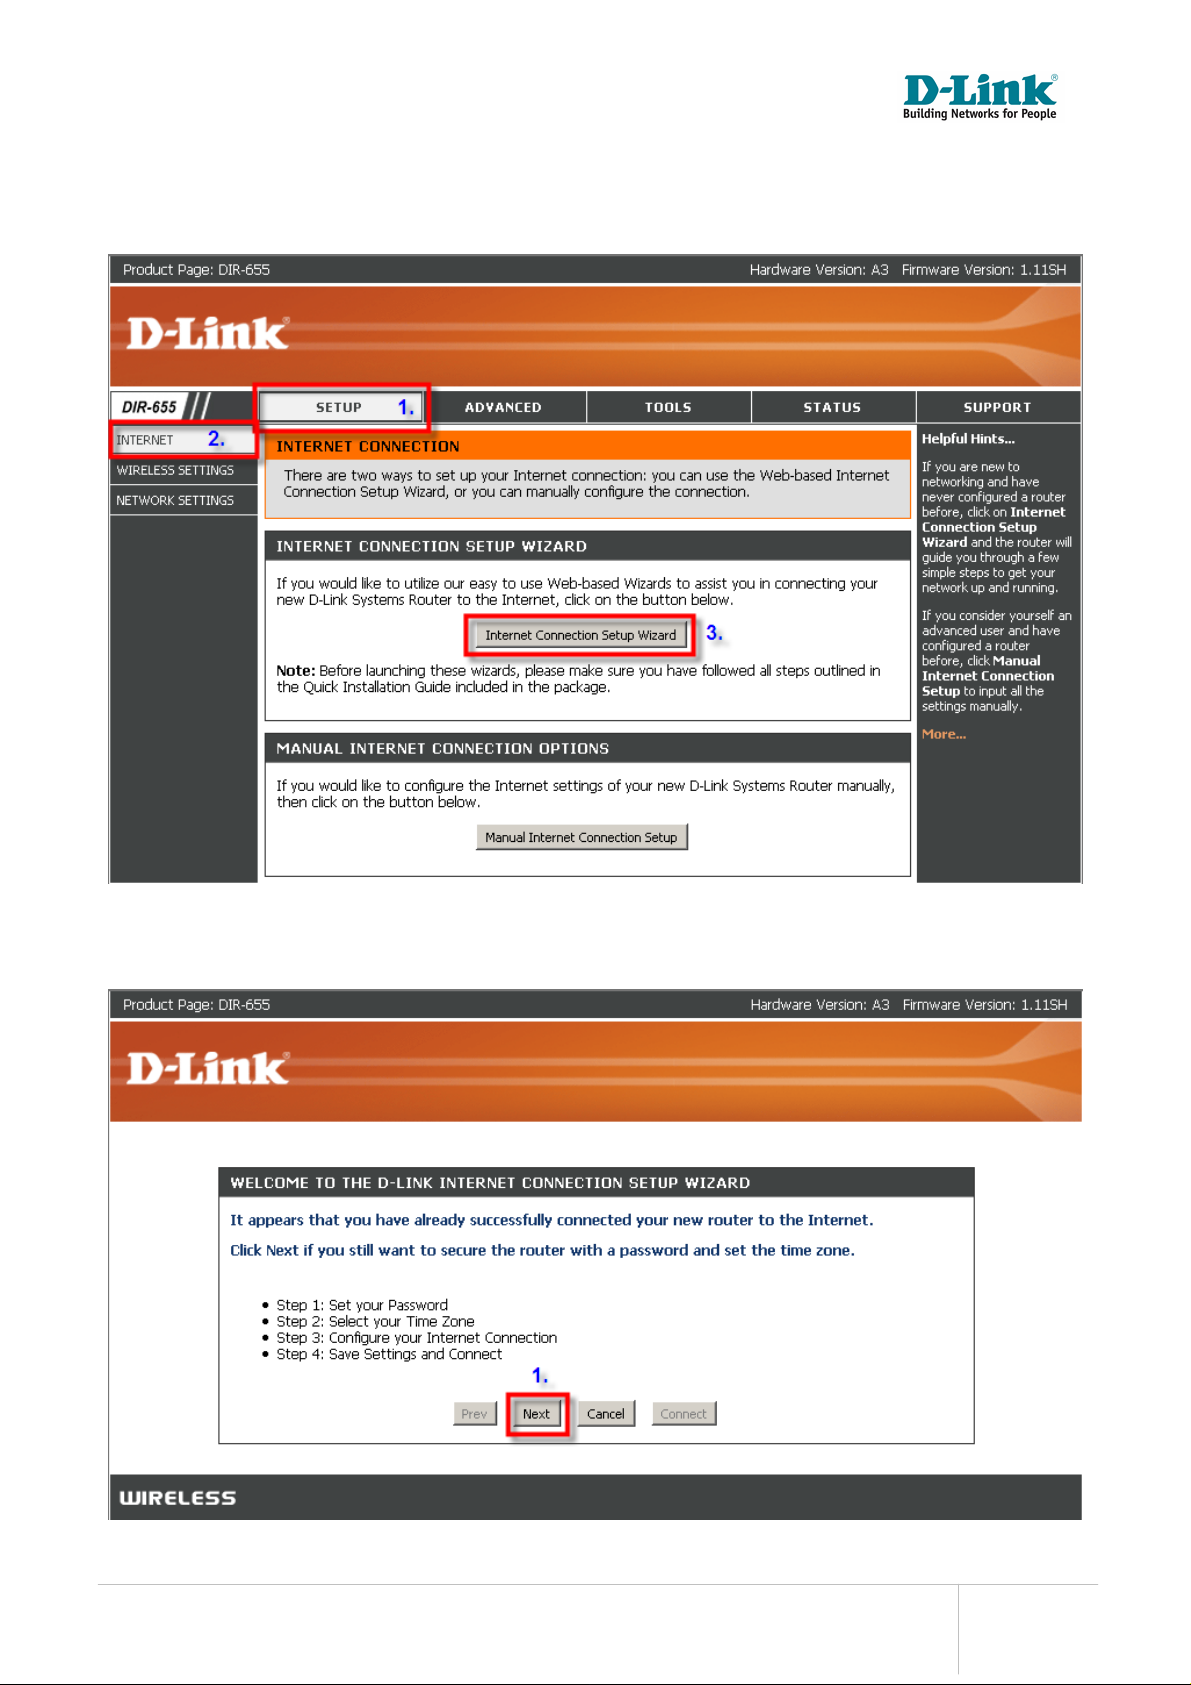
Step D : (1) Click “SETUP” from the top menu bar. (2) Click “INTERNET” from the left menu and
(3) Click “Internet Connection Setup Wizard” button.
Step E : To setup Internet Access, click “Next” button on the Welcome Screen.
DIR-655 Xtreme N Gigabit Router Quick Installation Guide Page 3 of 16
Page 4
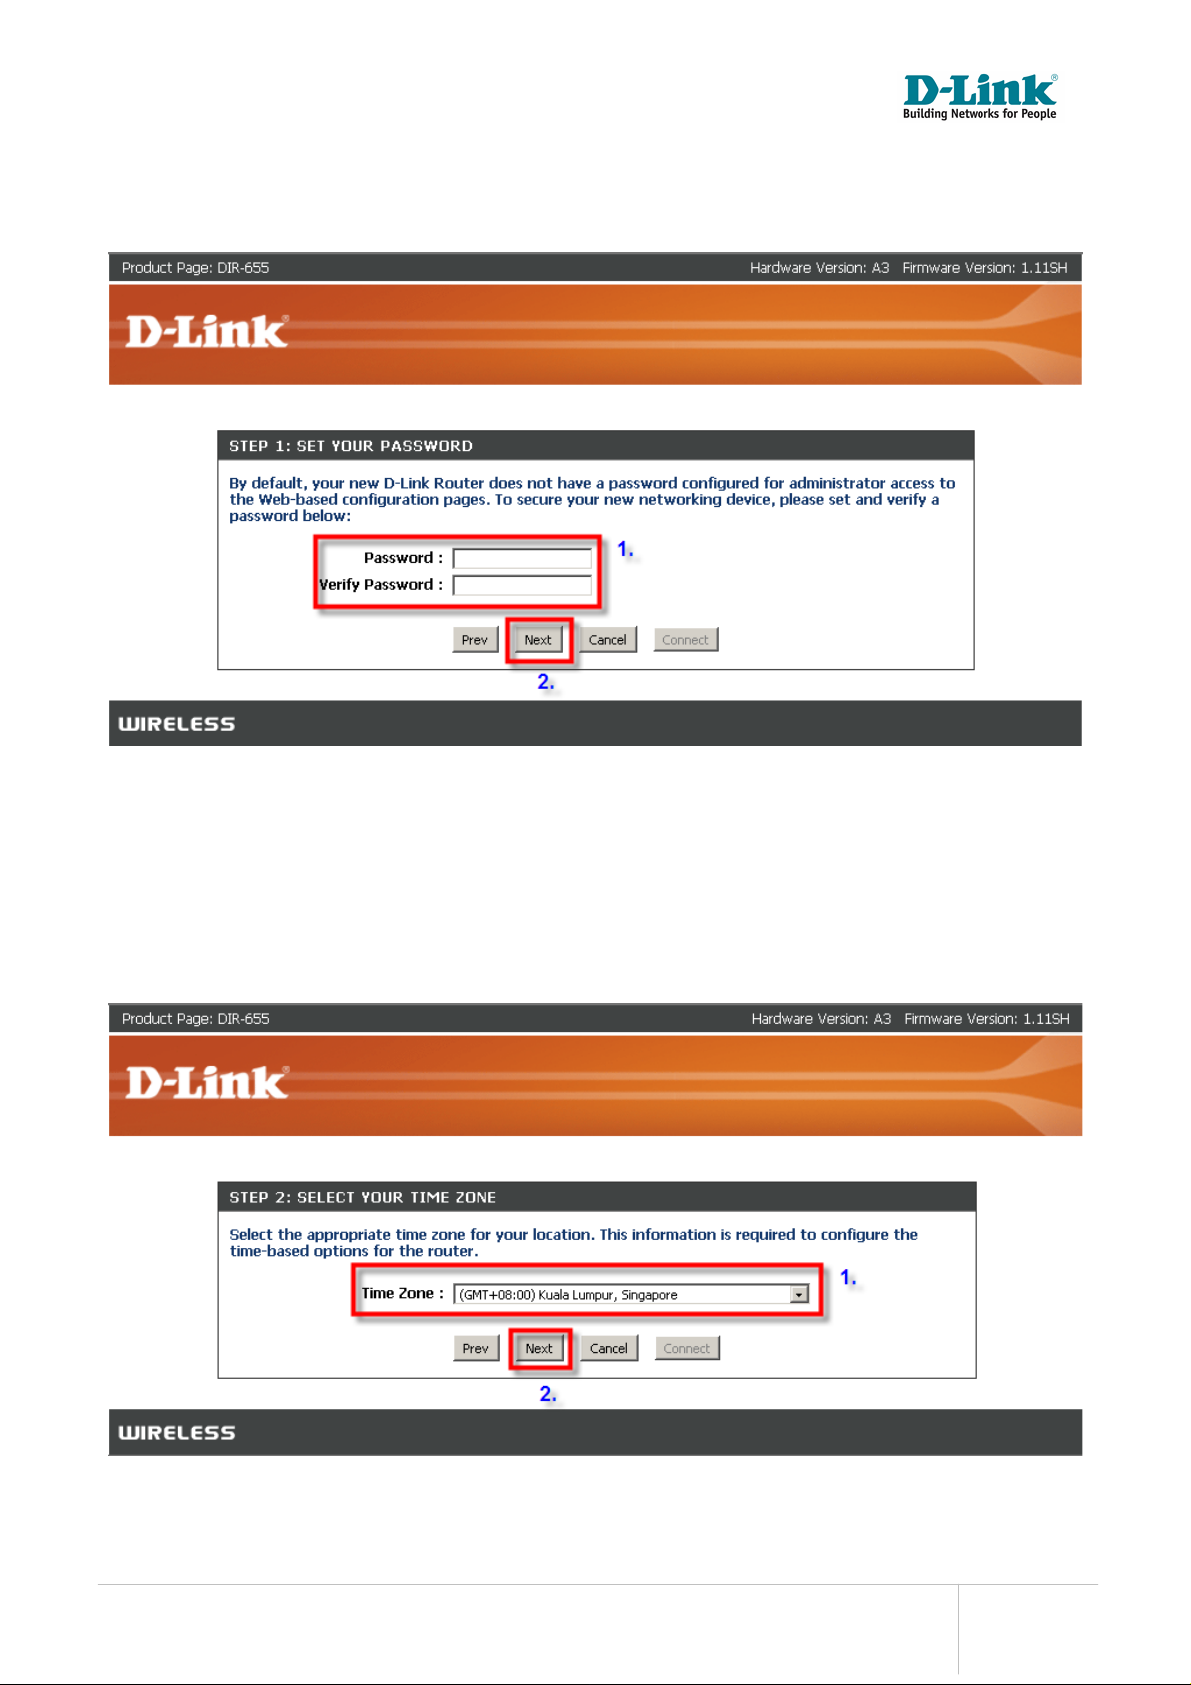
Step F : (1) To prevent un-authorized amendments to your DIR-655 router settings, secure it by
entering a password of your choice in the Password field. If you do not wish to secure your DIR655 router, leave the Password field empty. (2) Click “Next” button to continue.
NOTE : It is important that you remember the password of your router so that you are able to reconfigure your router again in future. If you had forgotten your password, locate the “Reset”
button behind the router. Press and hold the “Reset” button for 20 seconds in order to regain
access to the configuration options.
Step G : (1) Select your country from the “Time Zone” drop down list. (2) Click “Next” button to
continue.
DIR-655 Xtreme N Gigabit Router Quick Installation Guide Page 4 of 16
Page 5
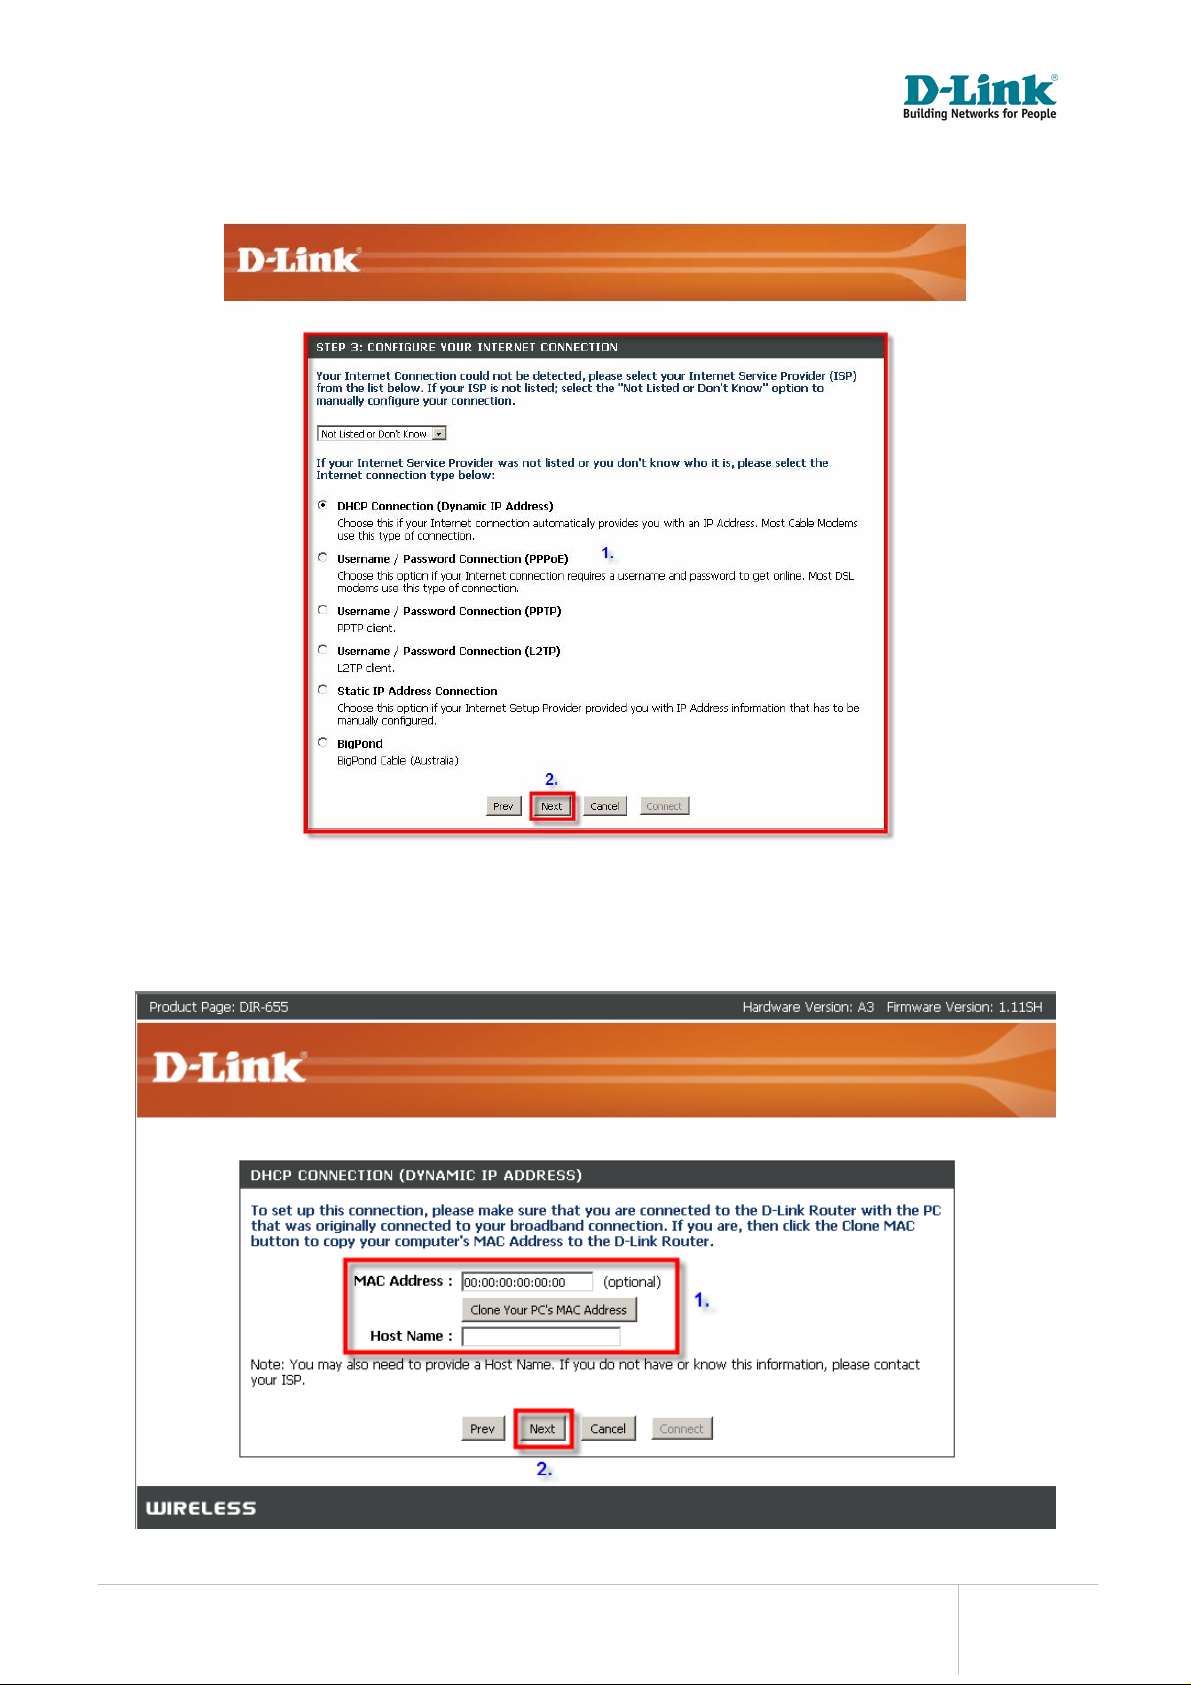
Step H : If you are a ADSL modem subscriber, please skip Step H – Step K and proceed to Step L.
If you are a Cable modem subscriber such as ‘StarHub MaxOnline’ (1) Please select “DHCP
Connection (Dynamic IP Address)” from the list and (2) Click “Next” button to proceed.
Step I : (1) Click “Clone Your PC’s MAC Address” if your Internet Service Provider requires it, else
simply ignore and (2) Click “Next” button.
DIR-655 Xtreme N Gigabit Router Quick Installation Guide Page 5 of 16
Page 6

Step J : Click the “Connect” button to complete setting Internet Access on your DIR-655 router.
Step K : (1) If you are shown with REBOOT NEEDED screen click the “Reboot Now” button so
that changes can take effect on your DIR-655 router. (2) If not, to secure your Wireless Network,
proceed to Chapter 2.
DIR-655 Xtreme N Gigabit Router Quick Installation Guide Page 6 of 16
Page 7

Step L : (1) Enter User Name and Password assigned by your ADSL Internet Service Pr ovider in
the field and (2) Click “Next” to continue.
IMPORTANT : Please enter User name and Password correctly as assigned by your Internet
Service Provider. Failure to do so may prevent your router from connecting to the Internet.
Step M : Click the “Connect” button to complete Internet Access setting on your DIR-655 router.
DIR-655 Xtreme N Gigabit Router Quick Installation Guide Page 7 of 16
Page 8

Step N : If you are shown with REBOOT NEEDED screen , click the “Reboot Now” button so that
changes can take effect on your DIR-655 router.
NOTE : To Secure your Wireless Network, proceed to Chapter 2
DIR-655 Xtreme N Gigabit Router Quick Installation Guide Page 8 of 16
Page 9

Chapter 2: How to secure your wireless network
Note: It is strongly recommended that you secure your wireless network to prevent intruders
from accessing your personal resources. Intrusion to your private network can have adverse
effects such as viewing your shared files, forging your identity online to commit crimes and etc.
Therefore, you are strongly advised to follow the following steps to secure your private network.
Step A : Launch Internet Explorer and enter http://192.168.0.1 in the Address\URL field. You will
see the log in page. Select Admin as the User name and leave the Password field empty. Click the
“Log In” button
Step B : If you prefer to secure your wireless network using WEP or WPA, pl ease skip Step B to
Step C and proceed to Step D.
To set up MAC Address Filtering (1) Click “ADVANCED” on the top menu bar and (2) Click
“NETWORK FILTER” on the left menu.
Page 10

Step C : (1) Under MAC FILTERING RULES and on the “Configure MAC Filtering below”
drop down list, select “Turn MAC Filtering ON and ALLOW computers listed to access the
network” (2) Under “MAC Address” field, enter the MAC address of the computers that you wish
to allow network access. (3) After you have keyed in all your MAC address of the computers you
wish to give access to, click the “Save Settings” button.
NOTE: Your wireless network is now secured. If you wish to secure your wireless network using
WPA or WEP, you may proceed to STEP D – STEP J. Else, your DIR-655 router set up is now
complete.
DIR-655 Xtreme N Gigabit Router Quick Installation Guide Page 10 of 16
Page 11

How to find computer MAC Address
To find the MAC address of your computer, on your Windows taskbar, click “Start” and click “Run”,
than enter “CMD” in the “Open” field and click “OK”.
In command prompt, type “ipconfig /all” and hit [Enter] on your keyboard.
DIR-655 Xtreme N Gigabit Router Quick Installation Guide Page 11 of 16
Page 12

Step D : To set up WEP or WPA, (1) click “Setup” on the top menu bar (2) select “WIRELESS
SETTINGS” from the left menu and (3) click on “Wireless Network Setup Wizard” button.
Step E : If you want to secure your wireless network using WPA, please skip Step E – Step G and
proceed to Step H. (1) Assign a name to your wireless network by entering it in the “Network
Name (SSID)” field. If you are a StarHub MaxOnline subscriber, you may enter SHXXXXXXX where
XXXXXXX is your StarHub account number. (2) Sel ect “Manually assign a network key” and (3)
Click “Next” button to continue.
DIR-655 Xtreme N Gigabit Router Quick Installation Guide Page 12 of 16
Page 13

Step F : Follow the instructions on the screen to select a WEP of your choice and (1) enter it into
the “Wireless Security Password” field and (2) click “Next” button to continu e.
Step G : (1) Ensure that you have set the “Wireless Network Name” and “Wep Key” of your choice
in previous step correctly. If it appears differently to what you have set, click “Prev” button to
amend. (2) If it is correct, click “Save” button to finish securing your wireless.
NOTE : Your DIR-655 set up is now secured and complete.
DIR-655 Xtreme N Gigabit Router Quick Installation Guide Page 13 of 16
Page 14

Step H : If you had chosen to use WPA from previous steps, (1) give a name to your wireless
network under “Network Name (SSID)”. If you are a StarHub MaxOnline subscriber, you may
enter SHXXXXXXX where XXXXXXX is your StarHub account number. (2) Click the radio button
on “Manually assign a network key, Use this Options if you prefer to create our own key” and (3)
Click the check box on “Use WPA encryption instead of WEP (WPA is strong er than WEP and all DLink wireless client adapters support WPA)” and (4) click “Next” button to continue.
Step I : Follow the instructions on the screen to select a WAP of your choice and (1) enter it into
the “Wireless Security Password” field and (2) click “Next” to continue.
DIR-655 Xtreme N Gigabit Router Quick Installation Guide Page 14 of 16
Page 15

Step J : Ensure that you have set the “Wireless Network Name (SSID)” and “Pr e-Shared Key” of
your choice in previous step correctly. If it is not what you have set ea rlier, click “Prev” button to
amend. If it is correct, click “Save” button to finish securing your wireless.
NOTE : Your DIR-655 set up is now secured and complete.
For more advanced set up instructions and questions, please refer to the Set Up Guide located in
the installation CD that came with the package.
DIR-655 Xtreme N Gigabit Router Quick Installation Guide Page 15 of 16
Page 16

Warranty
D-Link warrants that the hardware portion of the D-Link product described below (“Hardware”)
will be free from material defects in workmanship and materials under normal use from the date
of original retail purchase of the product.
To ensure that your product is covered under warranty, D-Link strongly recommend you to
register your warranty online at:
StarHub MaxOnline Subscribers http://www.dlink.com.sg/starhub
Others http://www.dlink.com.sg/warranty
Contacting Technical Support
Before you contact technical support, please have the following ready:
• Model number of the product (e.g. DIR-655)
• Hardware Revision (located on the label on the bottom of the router (e.g. A3))
• Serial Number (s/n number located on the label on the bottom of the router).
You can find software updates, user documentation and F.A.Q on the D-Link website
SINGAPORE SUPPORT
NOTE : If you have purchase D-Link product outside Singapore, please contact the following
support hotline or email to support@dlink.com.sg. Alternatively, you may also contact the
distributor or reseller which you have purchased D-Link product.
Other Support
INDONESIA Support Hotline : 62-21-573 1610
MALAYSIA Support Hotline : 1800-88 2880
PHILIPPINES Support Hotline : 65-6622 9355
THAILAND Support Hotline : 66-2719 8978/9
.
Technical Support
Hotline:
(65) 6622 9355
support@dlink.com.sg
DIR-655 Xtreme N Gigabit Router Quick Installation Guide - Warranty Page 16 of 16
 Loading...