

Page 1
Page 2
D-Link DGE-560T Quick Installation Guide2
Product Contents
Verify that your DGE-560T adapter package contains the following items.
If any items are missing, please contact your reseller.
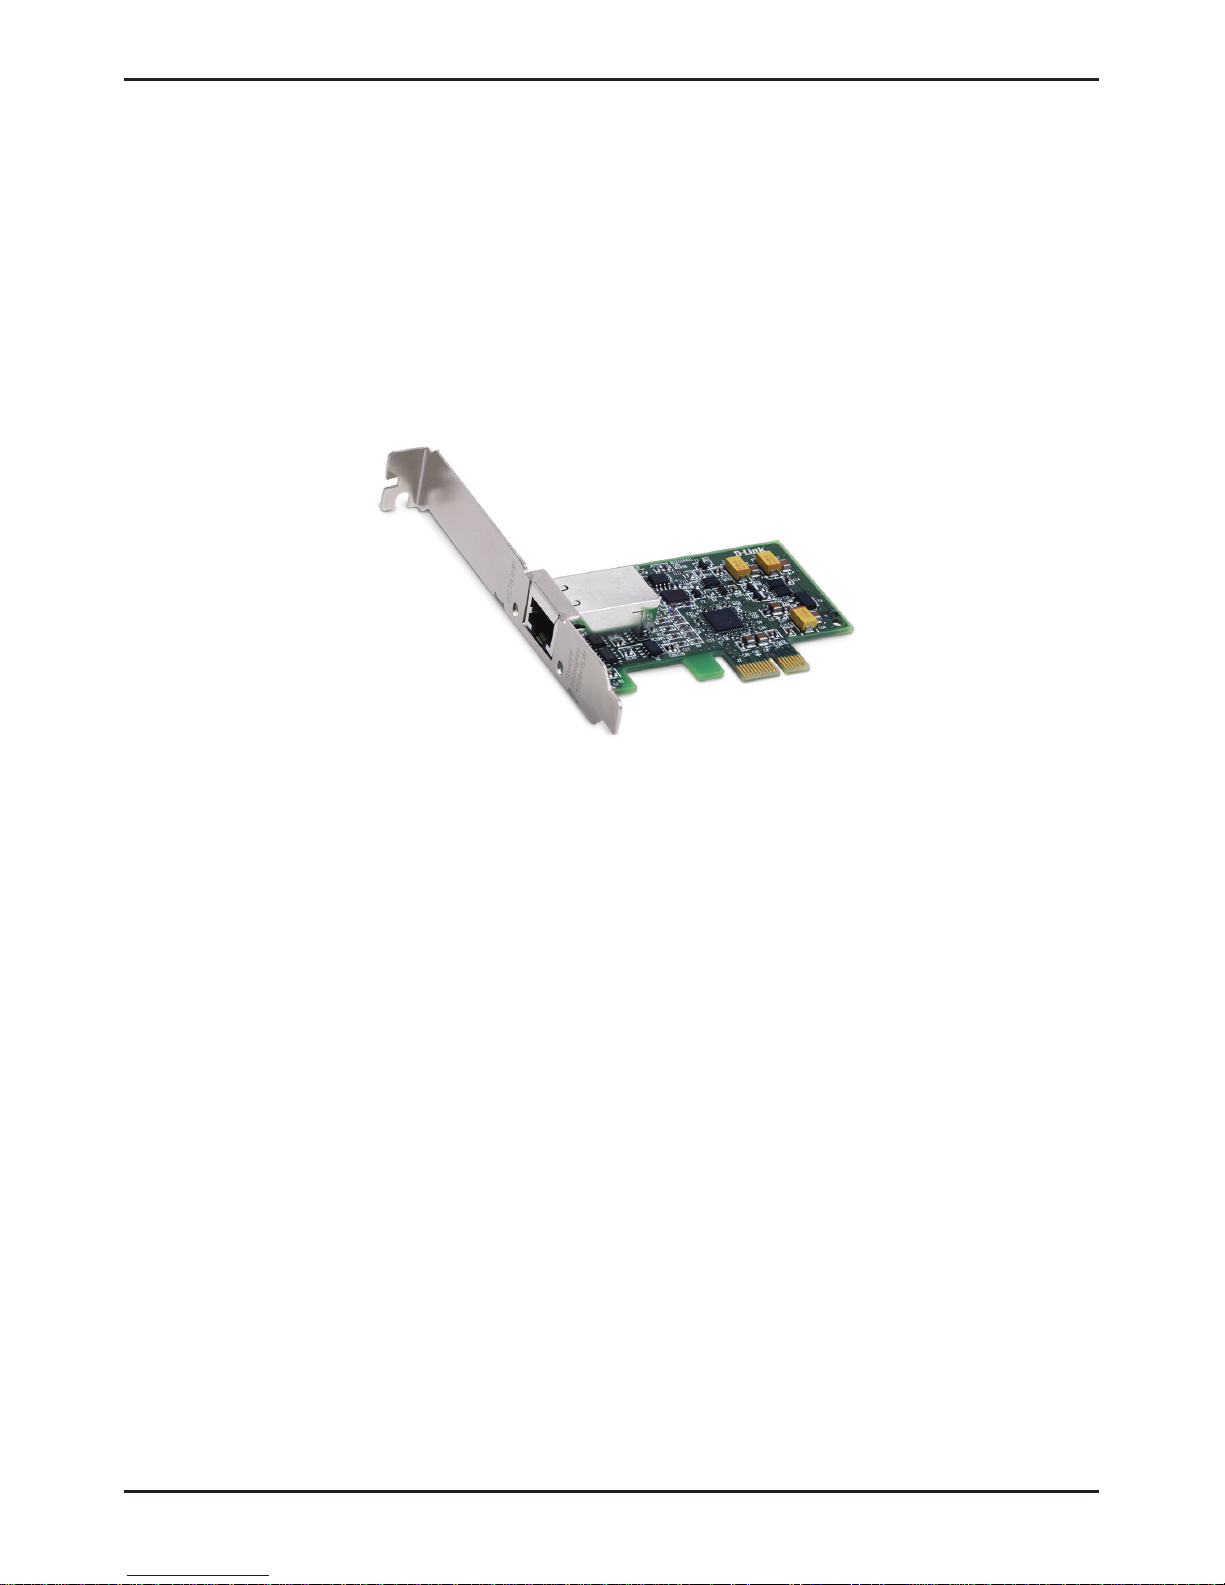
• D-Link DGE-560T Gigabit PCI Express Ethernet Adapter
• Drivers, Manual, and Warranty on CD
System Requirements
Before installing the DGE-560T, check your system for the following
minimum system requirements.
• One of the following operating systems:
• Windows® 2000 (service pack 4) • Windows® 2003
• Windows® XP (service pack 2) • Windows Vista
™
• Linux (2.4.13 or higher) • Netware 5.10
• FreeBSD 5.x (Intel x36) • Netware 6.x
• Pentium 150MHz or Faster
• 64MB RAM
• 32MB Free Hard Drive Space
• One Available PCI Express Slot (x1, x4, x8, or x16)
• CD-ROM Drive
Page 3

D-Link DGE-560T Quick Installation Guide 3
Introduction
Thank you for choosing the D-Link DGE-560T Gigabit PCI Express
Ethernet Adapter, the value leader among Fast Ethernet/Gigabit Ethernet
adapters.
With the D-Link DGE-560T, your PC can be connected to an Ethernet,
Fast Ethernet, or Gigabit Ethernet network. The PC must be equipped
with a PCI Express x1 expansion slot; alternatively the D-Link DGE-560T
can be installed in a PCI Express x4, x8 or x16 expansion slot.
The D-Link DGE-560T automatically detects the parameters of its
Ethernet environment, and automatically negotiates and determines its
own speed and duplex settings as required for maximum performance
within the environment. (The auto-negotiation function is effective only
when the D-Link DGE-560T is connected to the network by a device
(switch or hub) that also has auto-negotiation functionality.)
Inside its compact form, the D-Link DGE-560T holds an Ethernet controller,
network processing interface, and a direct port for connecting an RJ-45
network cable. The D-Link DGE-560T requires no pre-installation setup—
simply insert it into the PCI Express slot (for detailed information, please
refer to the Installation Guide).
The D-Link DGE-560T is supplied with an RJ-45 receptacle, which
receives the network cable. The direct port features full LED display for
linkage and activity states, speed, and transmitting and receiving data.
Page 4
D-Link DGE-560T Quick Installation Guide4
Connections and LEDs
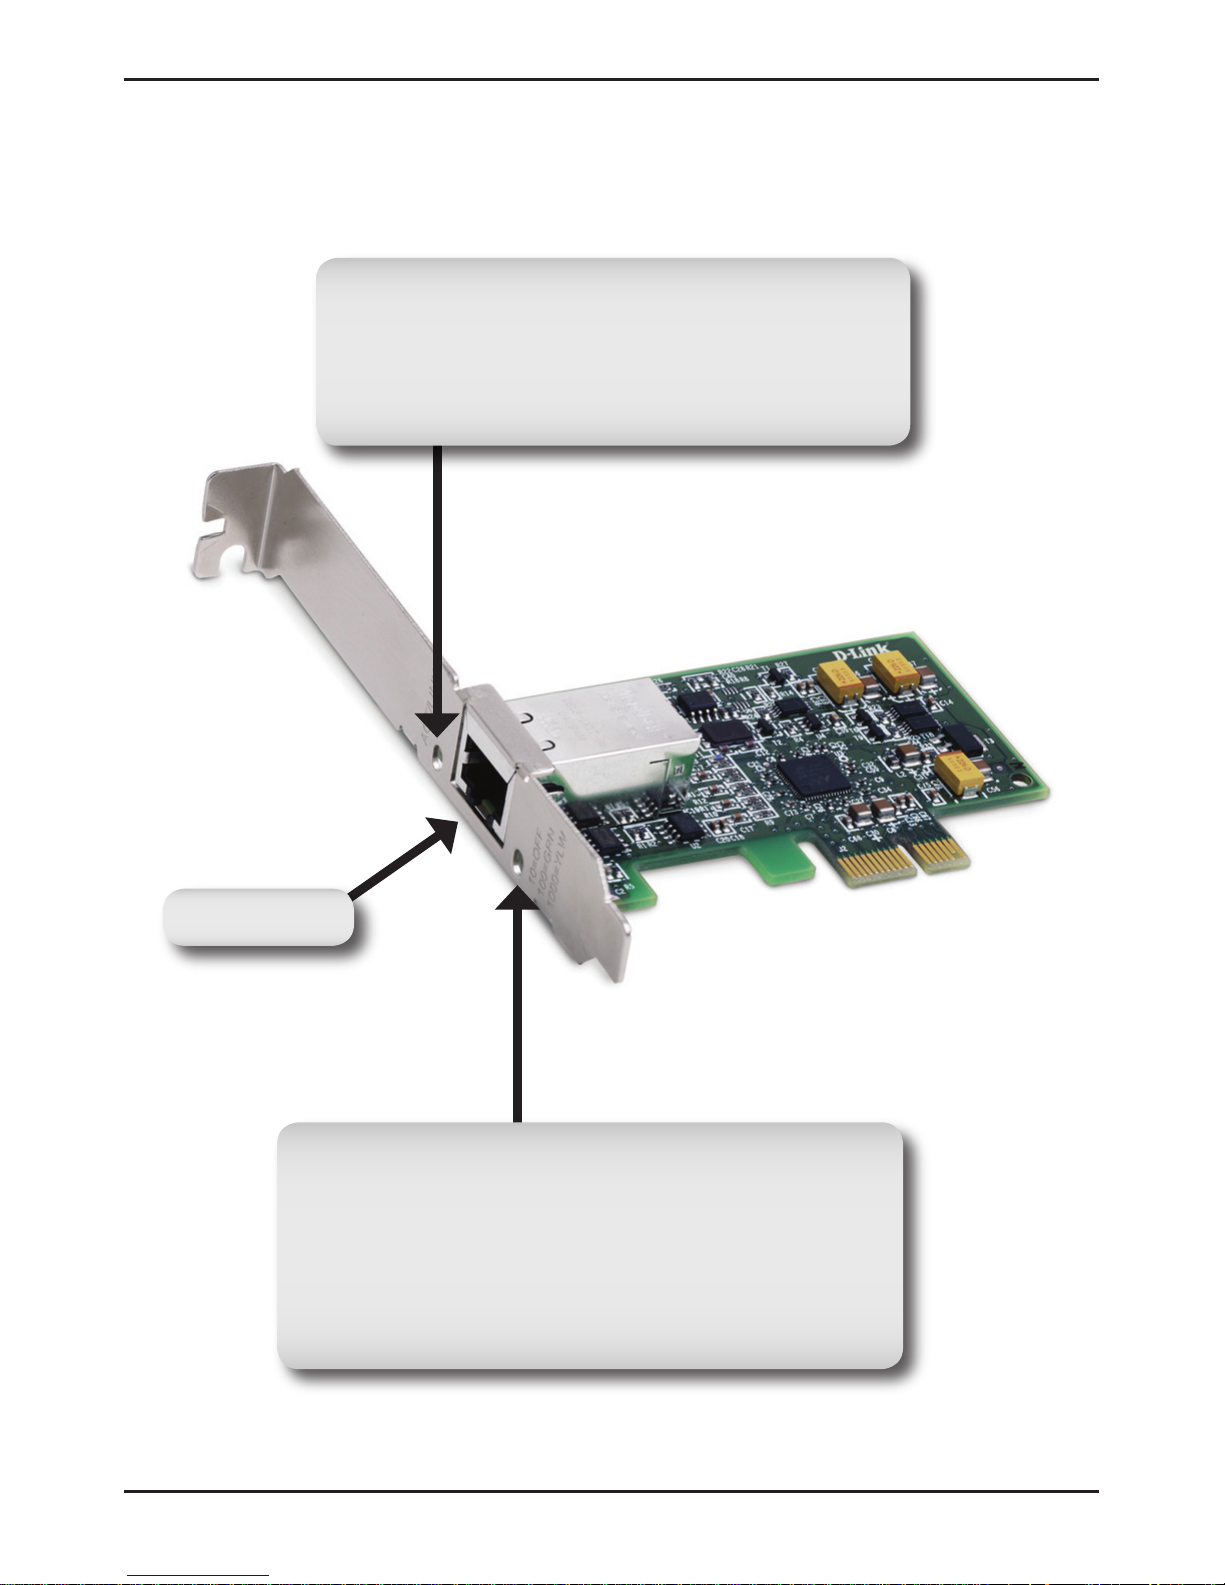
Ethernet Port
Activity/Link (ACT/Link)
This indicator lights green when the RJ-45 port is
connected to an Ethernet network. If the indicator
is blinking green, it is transmitting/receiving data to/
from the Ethernet network.
Speed Indicator
The indicator lights yellow when the port is connected
to a 1000Mbps Gigabit Ethernet Network and the
indicator lights green when the port is connected to
a 100Mbps Fast Ethernet Network. Otherwise, this
indicator remains off when the port is connected to a
10Mbps Ethernet Network.
Page 5
D-Link DGE-560T Quick Installation Guide 5
Driver Installation
Note: Do not install the adapter until you install the drivers.
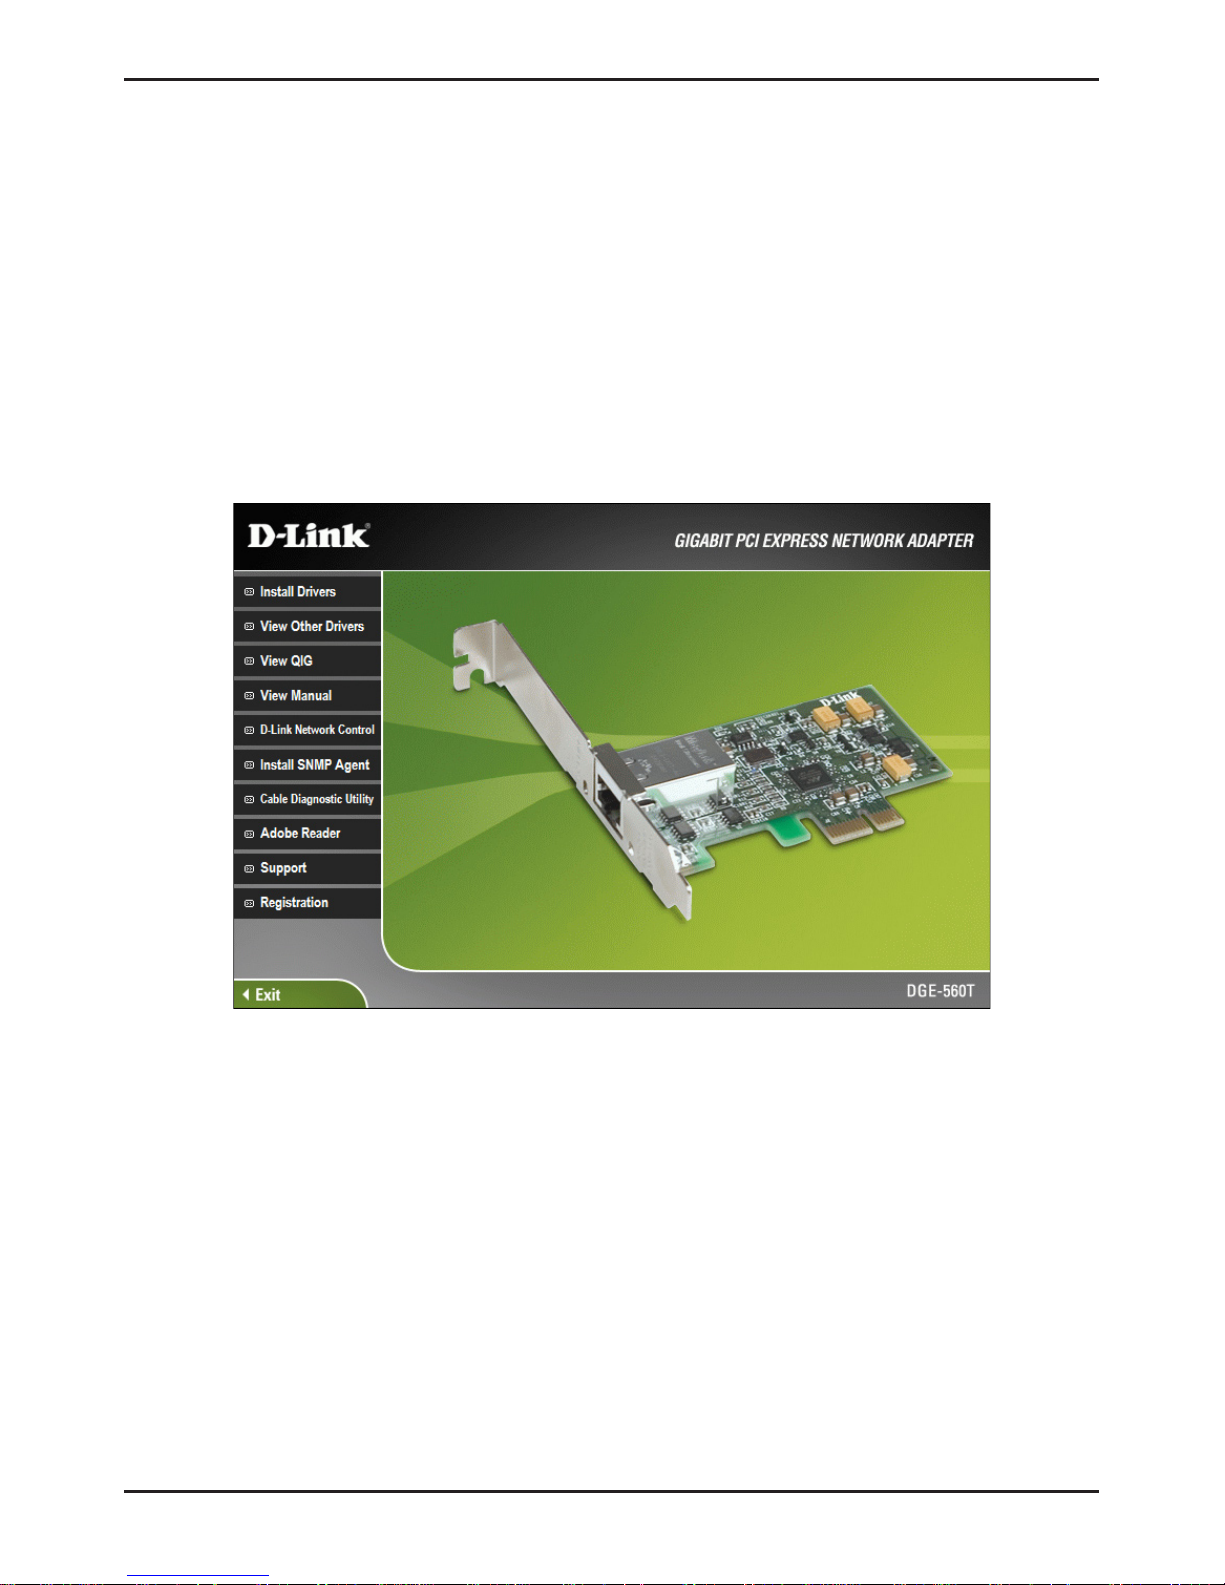
With your computer on, insert the D-Link CD into your CD-ROM Drive.
When the autorun screen appears, click Install Drivers.
If the Autorun CD function does not automatically start on your computer,
go to Start > Run. In the run command box type “D:\Autorun.exe” (where
D: represents the drive letter of your CD-ROM drive).
After a few moments, the Finish screen will appear. Click OK. Select No
if you are prompted to restart your computer. Shut down your computer.
Drivers for non-Windows® operating systems are located on the D-Link
CD, and can be accessed via the View Other Drivers button.
Please see the section “Alternate Driver Installation” in the manual for a
detailed description on installing drivers for a specific operating system.
Page 6
D-Link DGE-560T Quick Installation Guide6
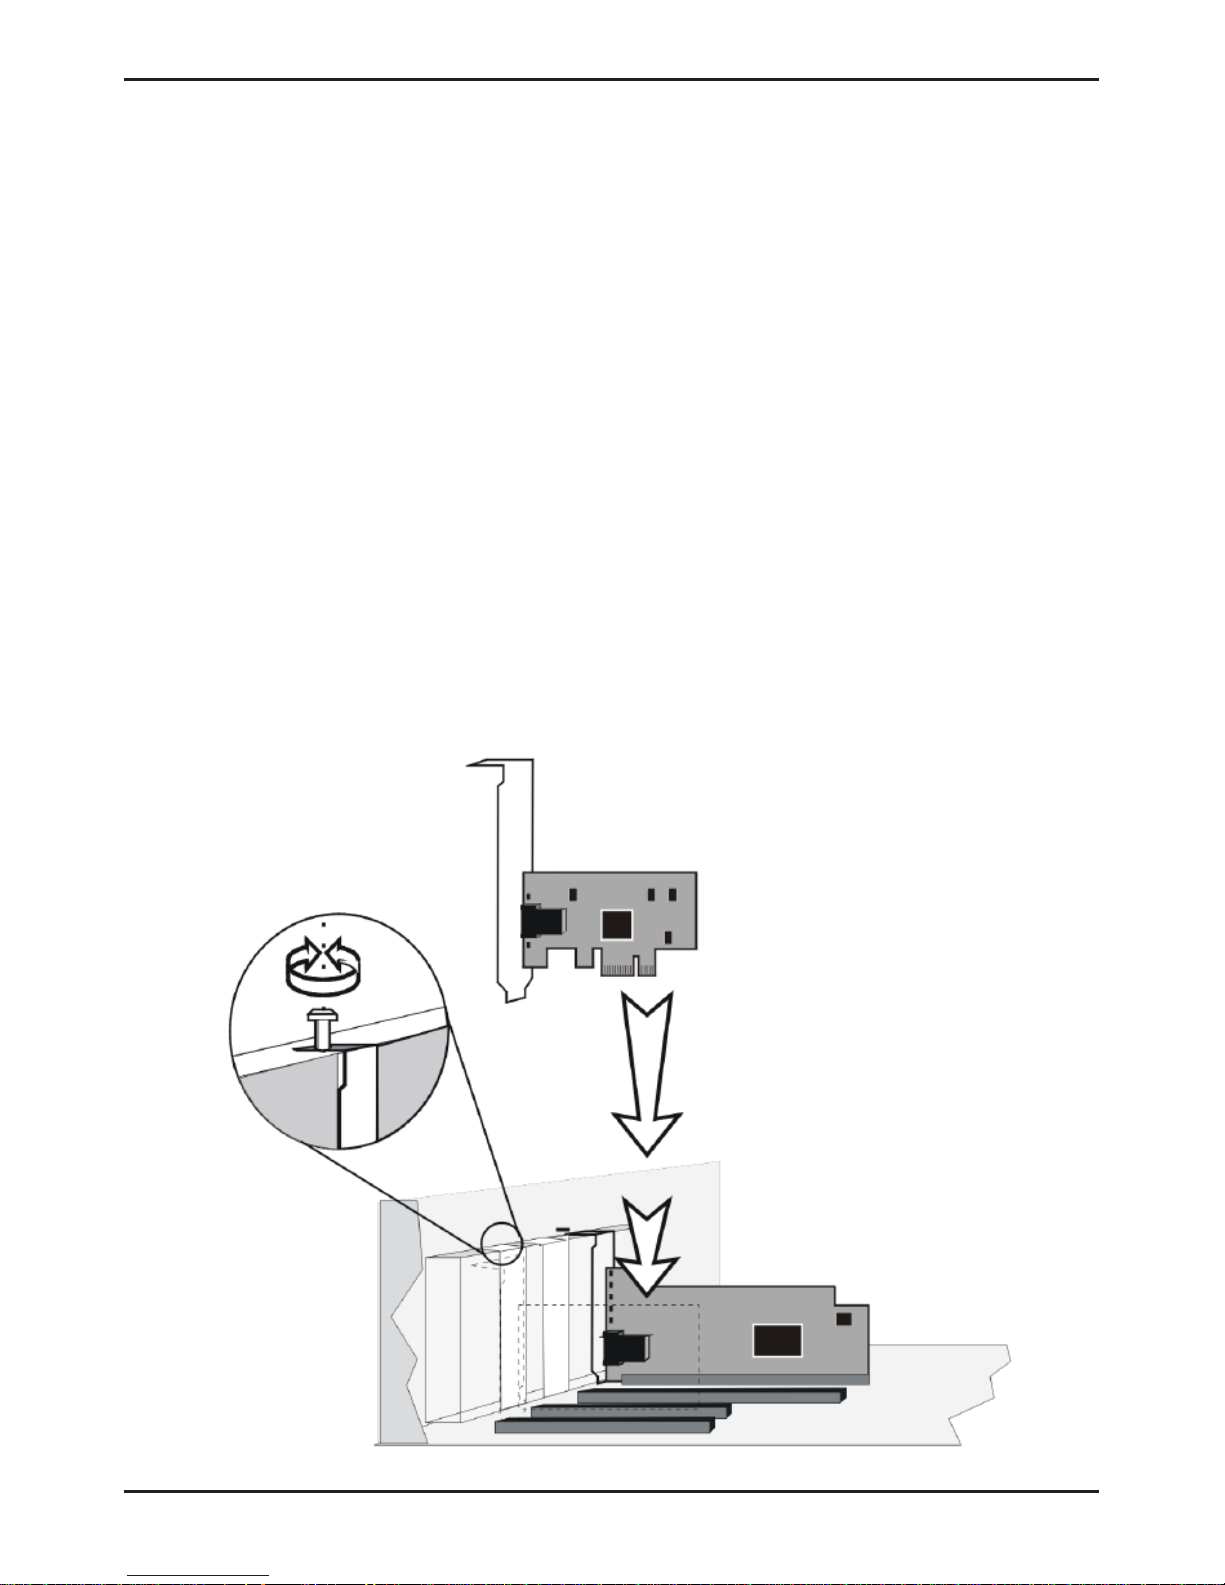
Hardware Installation
1. Shut down the computer and unplug the power cord.
2. Remove the chassis cover. If you are installing a network adapter in
a tower computer, we recommend to put the computer on its side in
order to be able to apply the correct force to insert the adapter into
the PCI Express slot.
3. Locate an empty PCI Express slot on the motherboard.
4. Insert the network adapter into the PCI Express slot and push it down
vertically into the slot until it is firmly seated.
5. Install the bracket screw to secure the network adapter to the
computer chassis.
Page 7

D-Link DGE-560T Quick Installation Guide 7
Additional Information
If you are encountering problems setting up your network adapter, please
refer to the manual located on the Autorun CD.
6. Replace the computer chassis cover. Reconnect the power and switch
the computer power on. If the BIOS section of your computer’s boot
program is plug-and-play compliant, then at power-up the BIOS will
automatically configure any newly installed adapter. Refer to page 16
in the manual for instructions to verify your installation.
Page 8
D-Link DGE-560T Quick Installation Guide8
Technical Support
D-Link’s website contains the latest user documentation and
software updates for D-Link products.
U.S. and Canadian customers can contact D-Link Technical
Support through our website or by phone.
United States
Telephone
(877) 453-5465
World Wide Web
http://support.dlink.com
Canada
Telephone
(800) 361-5265
World Wide Web
http://support.dlink.com
Version 1.1
September 24, 2007
Copyright ©2007 D-Link Corporation/D-Link Systems, Inc. All rights reserved. D-Link and the D-Link logo are registered trademarks
of D-Link Corporation or its subsidiaries in the United States and other countries. Other trademarks are the property of their respective
owners. Product specifications, size and shape are subject to change without notice, and actual product appearance may differ from that
depicted on the packaging. Visit www.dlink.com for more details.
 Loading...