

Page 1

1
Copyright@2015 HeliPal.com. All Rights Reserved
DJI Flamewheel F450 RTF Package
USER MANUAL
V1
Page 2

2
Copyright@2015 HeliPal.com. All Rights Reserved
DISCLAIMER
Please read this disclaimer carefully before using this product. This product is a
hobby with motors but not a toy which is not suitable for people under the age of
18. By using this product, you hereby agree to this disclaimer and signify that you
have read them fully. You agreed that you are responsible for your own conduct
and content while using this product, and for any consequences thereof.
Before you fly the drone
1) Make sure all connections are good, and keep children and animals away
during flying, firmware update, system calibration and parameter setup.
2) Always fly the drone away from unsafe conditions, such as obstacles, crowds,
high-voltage lines, etc.
3) Do not use in bad weathers such as rainy day, snow, windy (more than
moderate breeze), hail, lighting, tornadoes, hurricanes etc.
4) Check whether the propellers and the motors are installed correctly and firmly
before flight. Make sure the rotation direction of each propeller is correct.
5) Check whether all parts of the drone are in good condition before flight. Do not
fly with aging or broken parts.
6) Never overcharge LiPo batteries. Do not charge above 4.2V per cell. When the
battery is fully charged, disconnect it from the charger. Never leave the battery
charger unattended during charging.
7) Never discharge batteries to below 3.3V per cell
8) Remove batteries when not using the drone.
Page 3
3
Copyright@2015 HeliPal.com. All Rights Reserved
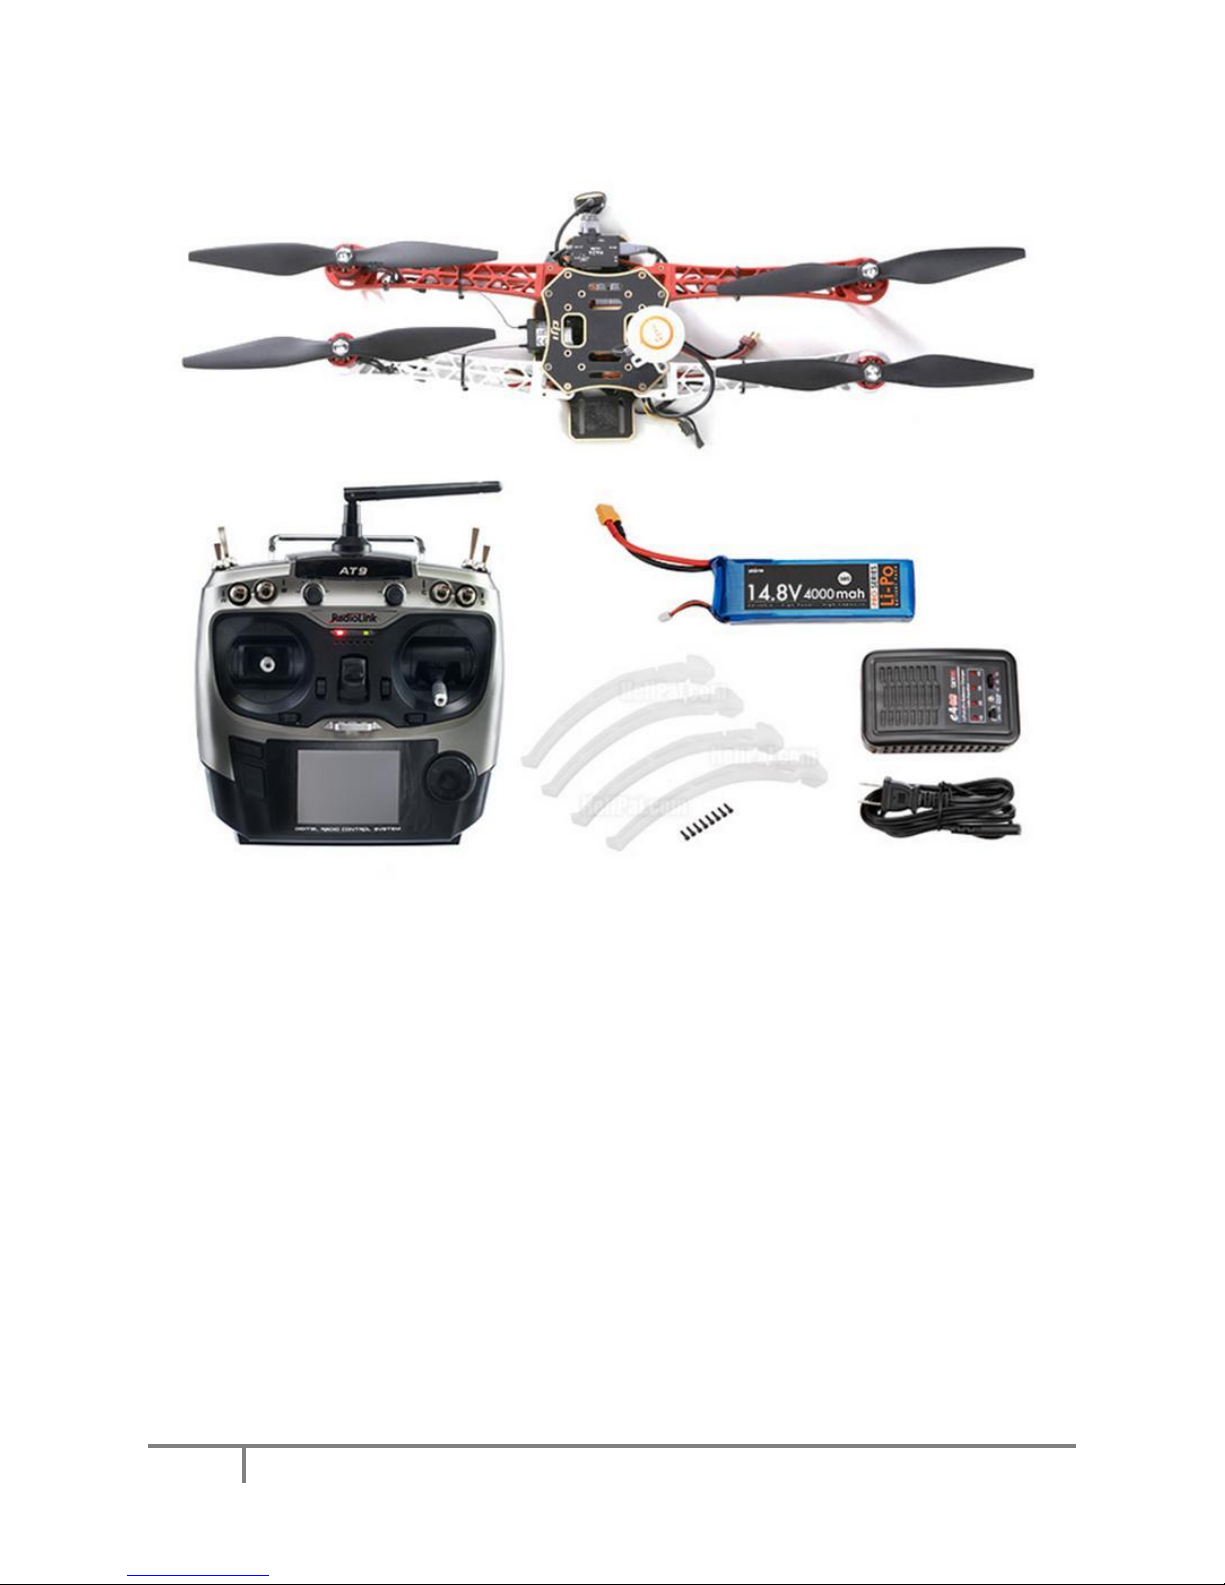
Package includes:
1. Fully Assembled DJI F450 GPS Drone (w/ NAZA Lite/ NAZA V2 GPS System)
2. RadioLink 2.4Ghz AT9 Radio System w/ R9D 9-Ch Receiver
3. 14.8V 4000mah 30C Li-Po Battery
4. 3pcs Clockwise Blade Propeller (1 of them are spare parts)
5. 3pcs Counter-Clockwise Blade Propeller (1 of them are spare parts)
6. SKYRC E4 Battery Charger
Page 4
4
Copyright@2015 HeliPal.com. All Rights Reserved
Quick Start
Page 5
5
Copyright@2015 HeliPal.com. All Rights Reserved
Page 6

6
Copyright@2015 HeliPal.com. All Rights Reserved
Control
Page 7

7
Copyright@2015 HeliPal.com. All Rights Reserved
Page 8

8
Copyright@2015 HeliPal.com. All Rights Reserved
Auto Go Home
If the drone has been started up correctly and the GPS signal is good (with 6 or
more satellites are found), the drone can undergo Go-Home features when it lost
signal with radio controller
1) If the attitude of the drone more than 20 meters, it will go home horizontally.
2) If the attitude of the drone below 20 meters, it will ascend to 20 meters and go
home horizontally.
3) If the attitude of the drone is below 20 meters and behind an object, there is
high risk of crash during ascends.
4) If the drone go home path is blocked by object, there is high risk of crash during
“auto-go home” process.
Important - How to take over the control again during “Auto Go Home”
When the drone is undergoing auto go home feature, you can take over the control
again by performing the following procedures.
If the transmitter is on, push the throttle stick to middle
position and then switch the G Switch Down(towards
you) and Up(away from you) and you can control the
drone again.
If the transmitter is off, push throttle stick to down position,
turn on the transmitter, push throttle to middle, switch the G
switch Down(towards you) and Up(away from you) to take over the control again.
Page 9

9
Copyright@2015 HeliPal.com. All Rights Reserved
Compass Calibration
Please follow the following procedures to calibrate the compass calibration
1) Switch the G switch up and down quickly for 6 to 10
times, The LED indicator on the drone will turn on
constantly yellow.
2) (Fig.1) Hold your Multi-rotor horizontal and rotate it
around the gravitational force line (about 360o) until the
LED on the drone changes to constant green, and then go to the next step.
3) (Fig.2) Hold your Multi-rotor vertically and rotate it (nose down & tail up) around
the gravitational force line (about 360 o) until the LED turns off, meaning the
calibration is finished
4) If the calibration was successful, calibration mode will exit automatically.
5) If the LED keeps flashing quickly Red, the calibration has failed. Switch the
control mode switch one time to cancel the calibration, and then re-start from
step 2.
NAZA V2 Manual
It is important to learn more about the NAZA GPS Controller. You can download the
manual here:
http://download.dji-innovations.com/downloads/nazam-v2/en/NAZA-MV2_Quick_Start_Guide_en.pdf
NAZA m Lite - http://download.dji-innovations.com/downloads/naza-m%20lite/en/NAZA-
M%20LITE_User_Manual_v2.00_en.pdf
Page 10

10
Copyright@2015 HeliPal.com. All Rights Reserved
Circuit Diagram
Page 11

11
Copyright@2015 HeliPal.com. All Rights Reserved
Page 12

12
Copyright@2015 HeliPal.com. All Rights Reserved
FAQ
Lost connection with radio controller
If you’re the drone cannot response to the radio controller stick travel, the connection between
radio controller and receiver may lost and you can try to re-bind them by following the procedure
below:
Press the switch inside the receiver twice with small screwdrivers to make LED indicator turns PURPLE to set the
control mode to D Bus Mode. (Skip this step if it is default in Purple light)
Use the small screwdrivers to press and hold the switch inside the receiver until it is flashing with light in Blue and
Purple, Switch on the radio controller, it will start searching for available receiver. Receiver will stop flashing while
the bind process complete and the radio controller will the signal strength on the screen
Page 13

13
Copyright@2015 HeliPal.com. All Rights Reserved
Radio Controller Parameters
If you reset your radio controller (AT9) setting, you can apply the setting below:
1) Press and Hold the controller wheel (With wordings
“PUSH”) to unlock the manual. Press and Hold Mode
Button to go into basic menu page
2) [STK-MODE] = 2 (Stick Mode)
[LockScreen] = 30s (Time to lock screen)
3) [TYPE] = AIRCRAFT
4) [SELECT] = 01
[NAME] = SRD-NAZA (Any name you want)
5) Go to [AUX-CH] -> ATTITUDE, apply the setting below:
[CH] = CH7 [SW3] = SwG [SW2] = NULL
[GPS] = 0% [ATTI.] = 50% [ATTI.] = 100%
6) [CH5] = VrA [CH6] = SwE [CH7] = -------
[CH8] = SwC [CH9] = SwA [CH10] = SwB
Page 14

14
Copyright@2015 HeliPal.com. All Rights Reserved
7) [CH7]->[L]= 56% (Move the toggle Switch G to lowest)
[CH7]->[H]= 56% (Move the toggle Switch G to highest)
8) [AUX2] = -13
9) [AUX1] = REV
[AUX2] = REV
[AUX3] = REV
10) [1] [TIME] = 10:00
[1] [MODE] = UP
[1] [ON][1] = ST-THK (Using Throttle Stick to start the
timer)
[1][ON] [2] = 15% ( Move the indicator over the value,
set throttle stick to around 15%, Press and hold “Push”
button to recognize the throttle value and move the
wheel to change the arrow sign)
[1][RESET] [1] = SwH (Using Switch H to responsible
for the reset timer action)
[1][RESET] [2] = DOWN (Using Switch H’s down action
to reset the timer)
 Loading...