

Page 1

DIET MANAGER
MANUAL
1 Diet Manager User’s Guide
Page 2

Digi - Star® LLC
SOFTWARE LICENSE AGREEMENT
IMPORTANT: The Digi-Star
that you agree with DIGI-STAR
AGREEMENT CAREFULLY, YOU WILL BE BOUND BY THE TERMS OF THIS AGREEMENT IF YOU INSTALL, OR IF YOU HAVE
DIGI-STAR
®
'S TECHNICAL STAFF OR AUTHORIZED REPRESENTATIVE INSTALL SOFTWARE FOR YOU. If you do not agree to the
®
software being installed by you or by our technical staff will be licensed to you, the licensee, on the condition
®
LLC ("Digi-Star") to the terms and conditions set forth in this legal agreement. PLEASE READ THIS
terms contained in this agreement, please return the disk package to your dealer for a full refund, or do not have a Digi-Star
authorized representative install this software. Once you have allowed the software to be installed you are bound by this agreement.
If you agree to these terms and conditions, Digi-Star
®
grants to you a nonexclusive license to use the accompanying software (the
"Software") and documentation. The Software and the documentation are referred to in this Agreement as the "Licensed Material".
1. Ownership
The Licensed Materials are the sole and exclusive property of Digi-Star
Provisions. By paying the license fee and by installing, or by allowing a Digi-Star
you do not become the owner of the Licensed Material according to the terms of this agreement.
2. License
The license granted to you by Digi-Star
®
in this agreement authorizes you to use the Software on any single computer, or any replacement for that
computer. The Software may not be used on a Network Server. A separate disk, licensed under an additional software agreement, is required for
any other computer on which you wish to load the Software. YOU MAY NOT USE, COPY, OR MODIFY THE LICENSED MATERIAL IN
WHOLE OR PART, EXCEPT AS EXPRESSLY PROVIDED IN THIS AGREEMENT.
3. Term
This Agreement is effective from the date on which you open the sealed disk package and installed the Software or have the Software installed by
®
Digi-Star
. This agreement may be terminated by you at any time by destroying the Licensed Material, together with all copies, modifications and
merged portions in any form. It will also terminate automatically if you fail to comply with any term of condition of this agreement.
4. Restrictions and Transfer
You may not sublicense, assign, share, rent, lease, or otherwise transfer your right to use the Licensed Material, nor any other rights granted to
you under this agreement, except stated in this paragraph. You may permanently transfer the software to any other party if the other party is
purchasing your business operation, the other party agrees to the terms and conditions of this agreement, you transfer all copies of the Licensed
Material to that party, or destroy those which are not transferred and that new party pays a license transfer fee of 25% of the original license fee.
By such transfer, you terminate the license granted to you in this agreement.
5. Restrictions against copying or modifying the Licensed Material
The Licensed Materials are copyrighted by Digi-Star
®
. Except as expressly permitted in this agreement, you may not copy or otherwise reproduce
the Licensed Materials. In no event does the limited copying or reproduction permitted under this Agreement include the right to decompile,
disassemble, or electrically transfer the Software in any form, in whole or in part, or of any modification of the Software, or any updated work
containing the Software, or any part thereof. You also agree not to remove any existing copyright notice of the License Materials.
6. Protection and Security
You agree to use your best efforts and take all reasonable steps to safeguard the License Materials to ensure that no unauthorized person has
access to them and that non authorized copying, publication, disclosure, or distribution of any of the Licensed Material is made. You
acknowledge that the Licensed Materials contain valuable, confidential, and trade secrets and that unauthorized use and copying are harmful to
®
Digi-Star
and its software suppliers, and that you have the confidential obligation on such valuable information and trade secrets.
7. Limited Warranty
®
Digi-Star
(ninety) days from the payment of the license fee, and if Digi-Star
to misuse, abuse, or use in defective equipment, Digi-Star
warrants that the media on which the Software is recorded will be free from defects in workmanship and materials for a period of 90
®
will replace the media. ALL IMPLIED WARRANTIES ON THE MEDIA,
INCLUDING IMPUTED WARRANTIES OF MERCHANTABILITY AND FITNESS FOR A PARTICULAR PURPOSE, ARE
LIMITED TO THE DURATION OF THE EXPRESS WARRANTY SET FORTH ABOVE.
IN NO EVENT WILL DIGI-STAR
®
OR ANY OTHER PARTY WHO HAS BEEN INVOLVED IN THE CREATION, PRODUCTION,
OR DELIVERY AND INSTALLATION OF THE LICENSE MATERIALS BE LIABLE FOR SPECIAL, DIRECT, INDIRECT, OR
CONSEQUENTIAL DAMAGES, IN NO EVENT SHALL DIGI-STAR
DAMAGE, OR LOSS TO YOU OR ANY OTHER PARTY EXCEED DIGI-STAR REPLACING THE MEDIA ON WHICH THE
LICENSED MATERIALS HAS SUPPLIED.
8. General
If any provision or of portion of a provision of this Agreement is determined to be invalid under any applicable law, it shall be deemed omitted
and the remaining provision and partial provisions of this Agreement shall continue in full force and effect.
This Agreement constitutes the entire agreement between the parties with respect to the subject matter hereof, and all prior agreements,
statements and undertakings are hereby expressly canceled.
®
technician or
®
and are protected by U.S. Copy Right Law and international Treaty
®
technical or authorized representative to install the software,
®
determines the media to be defective and provided the media was not subject
®
'S OR SUCH OTHER PARTY'S LIABILITY FOR ANY
2 Diet Manager User’s Guide
Page 3

TABLE OF CONTENTS
INTRODUCTION
Description..............................................................................................................5
Minimum System Requirements ......................................................................5
INSTALLING THE SOFTWARE
Before you Install....................................................................................................6
Read the License Agreement ..........................................................................6
Connecting the DataKey
Installing the Software ............................................................................................6
Diet Manager
Setting the Language.......................................................................................6
Selecting the Decimal ......................................................................................7
Entering the program Serial Number ...............................................................7
Find Comm.......................................................................................................7
Selecting the Date Format ...............................................................................7
Selecting the Weigh Mode ...............................................................................7
Installation ...............................................................................6
™
Docking Station .....................................................6
DIET MANAGER SETUP
Setting System Options ..........................................................................................8
Comm Port .......................................................................................................8
Load Sheet Header ..........................................................................................8
Entering/Updating Commodities.............................................................................9
Adding New Ingredients...................................................................................9
Modifying Ingredients .......................................................................................9
Changing Ingredient Cost ........................................................................9
Changing Dry Matter Percentage ............................................................9
Changing Moisture Test Date ................................................................10
Changing Ingredient Description ...........................................................10
Changing the Ingredient Code...............................................................10
Deleting Ingredients .......................................................................................10
Entering/Updating Recipes...................................................................................11
Determining How a Recipe is Loaded............................................................11
Adding New Recipes......................................................................................11
Modifying Recipes..........................................................................................12
Modifying an Ingredient..........................................................................12
Deleting Ingredients from a Recipe .......................................................12
Changing the Ingredient Loading Order ................................................12
Changing the Recipe Name...................................................................12
Deleting Recipes ............................................................................................12
Using Find ......................................................................................................13
Entering/Updating Corrals ....................................................................................13
Adding/Creating Corrals.................................................................................13
Modifying Corrals ...........................................................................................14
Changing Recipes .................................................................................14
Changing Number of Head ....................................................................14
Changing the Feed Call .........................................................................14
Deleting Corrals .............................................................................................14
Using Find ......................................................................................................14
Entering/Updating Wagons...................................................................................15
Adding Wagons..............................................................................................15
Modifying Wagons..........................................................................................15
Deleting a Wagon ..................................................................................15
Entering/Updating Operators................................................................................16
Adding New Operators...................................................................................16
Modifying Operators...............................................................................16
3 Diet Manager User’s Guide
Page 4

SENDING & RECEIVING DATA
Sending Feeding Data to the DataKey™...............................................................17
Selecting a Wagon .........................................................................................17
Selecting a Feeding .......................................................................................17
Printing Feed Sheets......................................................................................17
Setting the Feeding Order..............................................................................17
Sending Loads to the DataKey
™
....................................................................18
Sending a Single Load...........................................................................18
Sending One Wagon..............................................................................18
Reviewing Loads............................................................................................18
Appending Data to the DataKey
Receive Data from the DataKey
™
..................................................................19
™
.........................................................................19
Receive Data File Options .............................................................................19
Save to File Folder ................................................................................19
Save to File Name .................................................................................19
Verify Date of Feed Data .......................................................................19
Notify of Feed Call Change ...................................................................20
Display Data after Received ..................................................................20
Create Backup Copy .............................................................................20
Receive Data from the DataKey
View Data on the DataKey
™
™
..................................................................20
...........................................................................21
Recipe Requests ...................................................................................21
Corral Requests.....................................................................................21
Recipes Complete .................................................................................21
Corrals Complete...................................................................................21
DataKey Name ......................................................................................21
Clear DataKey
Test DataKey
Authorize DataKey
Example Excel
™
.............................................................................................21
™
...............................................................................................21
™
®
File .............................................................................................22
.......................................................................................22
REPORTS
Viewing Reports.............................................................................................23
Report Types/Definitions................................................................................23
Ingredient List ..........................................................................................23
Recipe List ...............................................................................................23
Corral Feeding List ..................................................................................24
Wagon List...............................................................................................24
Operator List............................................................................................24
Ingredient Usage .....................................................................................24
Ingredient Deviation by Recipe................................................................25
Corral Delivery Summary ........................................................................25
Corral Delivery Deviation.........................................................................25
DMI per Head by Corral...........................................................................26
Recipe Delivery by Corral........................................................................26
Customizing Reports......................................................................................27
4 Diet Manager User’s Guide
Page 5

Introduction
Welcome to the Diet Manager User’s Guide. Diet Manager is a software program designed to easily
utilize the EZ3500 Indicator and DataKey
allows you to set up specific recipes and pen deliveries for your herd. The program tracks and records each
step in the process including tracking each individual operator. The program outputs the completed loading
and feeding data into over 10 easy to read reports with selectable date ranges. This provides you with the
valuable data required to optimize your feeding system on a cost/production basis.
™
to track and record recipe loading and feeding. Diet Manager
The program is Windows based to allow you to get up and running quickly and start understanding and
controlling your feeding costs.
Minimum System Requirements
Make certain that your PC includes the following hardware and software. These are the minimum system
requirements to run Diet Manager
• A Pentium
• Microsoft Windows98, 2000, ME, XP or NT
• Adobe Acrobat Reader
• 100 Meg Free disk space
• 32 Meg Ram
• 3.5” Floppy Drive
• CD Drive
• A mouse
• A serial port
• Printer
• 28.8 modem
• Internet Service Provider
.
100 or better PC
A USB to Serial Port adapter can be used if your PC does not have a free serial port. The serial port must
be assigned to a port number 1 to 8. A higher comm. port setting will not work with the Diet Manager
program.
Please Note that certain programs can interfere with the operation of the serial port / Diet Manager
These programs include Palm Desktop and some auto ID systems and milk monitoring programs. If these
programs are installed and running on the PC you intend to use for the Diet Manager
be shut off when reading / writing to the DataKey
sequence may result in errors and lost data.
™
. Failure to shut these programs off during this
system, they must
.
5 Diet Manager User’s Guide
Page 6
Installing the Software
Before you Install
This section takes you through the necessary steps to install the software and hardware to run your system.
Please take some time to review this section before beginning the installation process.
Read the License Agreement
Read the Digi-Star License Agreement on the sheet accompanying the software and this manual. When
you break the seal on the CD, and install the software, you agree to the terms of the license agreement.
Connecting the DataKey™ Docking Station
The DataKey™ Docking Station is the interface device for the DataKey™. This device must be connected to
the computer running the Diet Manager
The DataKey
™
Docking Station must be connected and powered ON whenever the Diet Manager
is running.
To connect the device:
1. Connect the 9-pin connector to the serial 9-pin connector on the computer that will be running
the Diet Manager
2. Plug the power supply into an 115v/230v outlet. The power light on the DataKey
Station should be ON.
3. Insert the DataKey
Diet Manager Installation
The Diet Manager
programs. Insert the CD into the drive. If Auto Run is enabled on your computer, follow the installation
instructions.
If the installation screen does not appear, go to Start and select Run. From the Run menu, browse the CD
and select setup.exe. The install screen will now appear. Follow the installation instructions.
Install, connect and power On the DataKey
to start the Diet Manager
software setup.
software is shipped to you on a CD. To install the software, please close all other open
software. Failure to do so will result in an error during the initial phase of the
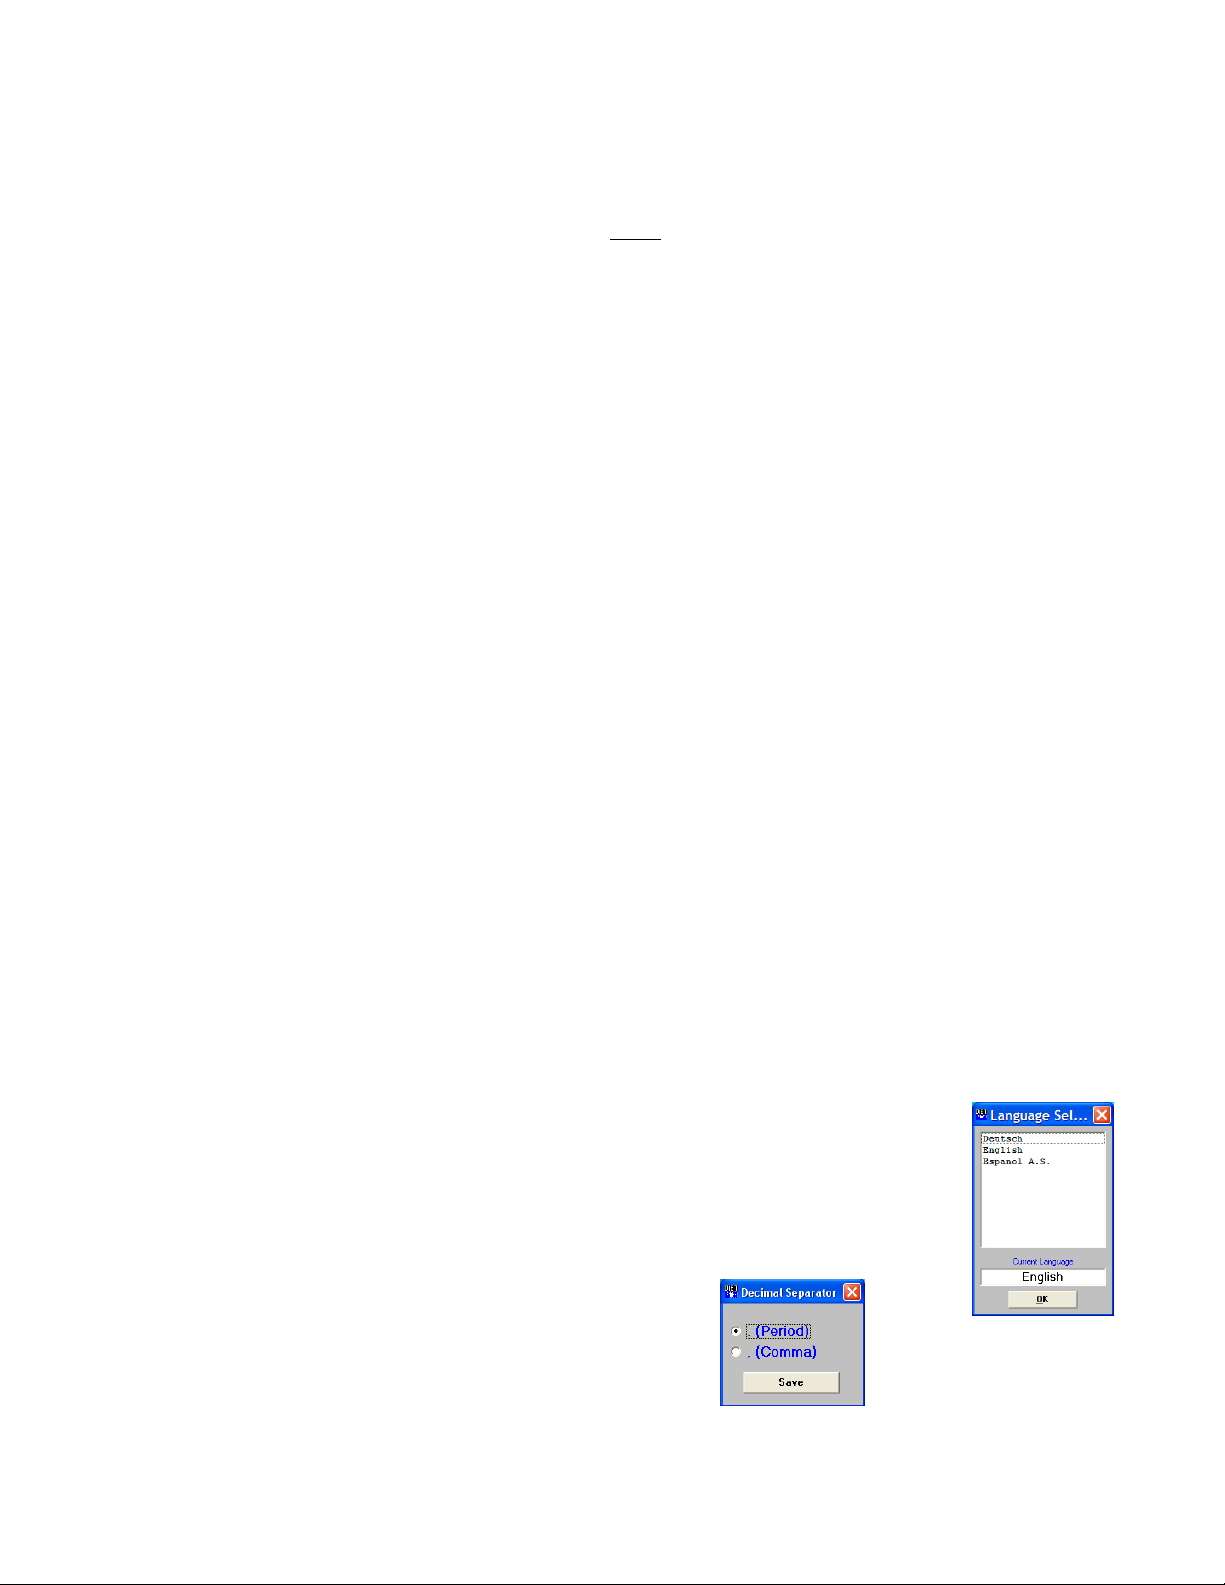
Selecting the program Language
After installation of the software, the first time that the Diet Manager™ program is
started, the Language Selection box will appear.
Note: The Language Selection can be changed at any time after initial setup.
To select a language from the list, click on the desired language
and click Ok to save your selection. The language selection can
be changed from within the Diet Manager
System, Language from the main menu.
software.
software.
™
into the slot on the front of the DataKey™ Docking Station.
™
Docking Station and Insert the DataKey™ before attempting
™
program by selecting
software
™
Docking
Selecting the Decimal Separator
This selection is for types of currency separators.
Select the Decimal Separator and click Save.
6 Diet Manager User’s Guide
Page 7
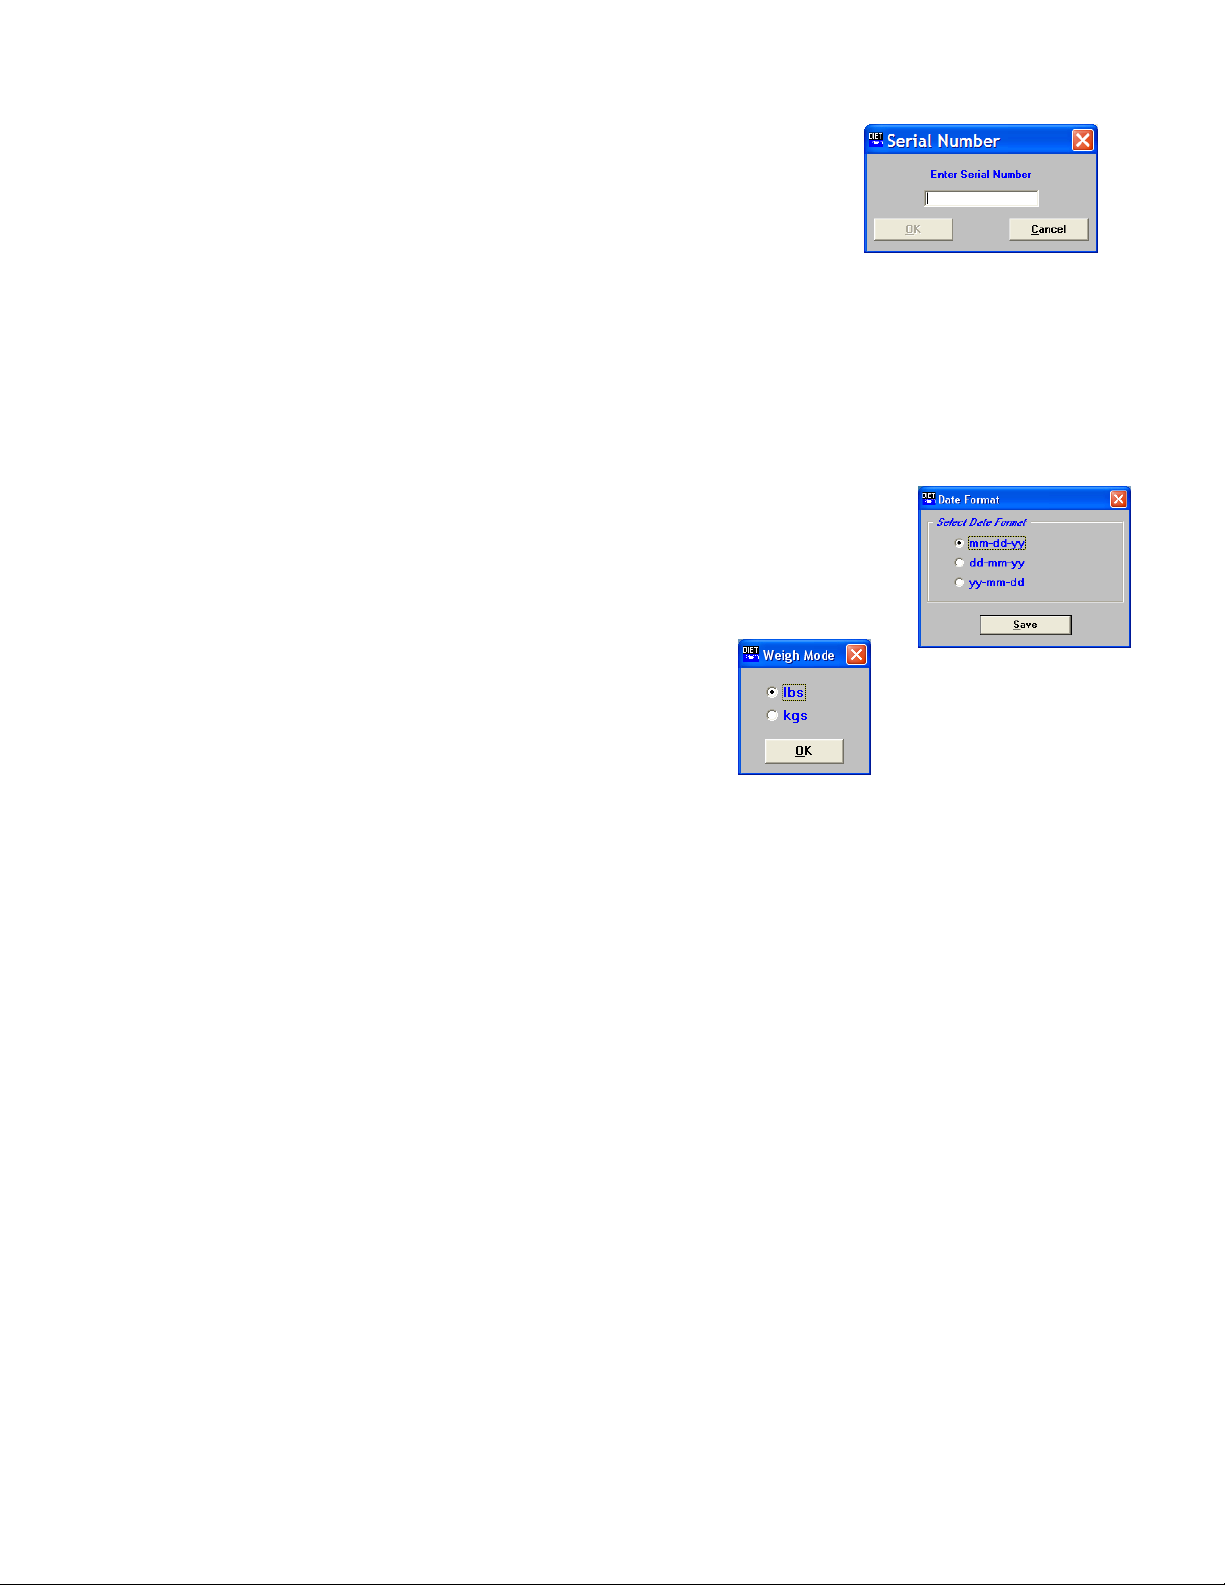
Entering the program Serial Number
After selecting the program language, enter the 6 digit serial number of
the program. This number can be found on the CD. Click Ok when
done.
Find Comm
After installation of the software, the first time you run the Diet Manager program, the Find Comm
program will automatically run. This program is designed to find the working comm. port and data transfer
device used with your system.
After clicking on Start, the program will begin searching for a working comm. Port and DataKey
search can take up to several minutes. After finding the comm. port and device, the program will update
the Diet Manager
A working DataKey
program and start the program.
™
must be inserted in the DataKey™ Docking Station.
Selecting the Date Format
Select the Date Format you wish to use and click Save.
Note: The selected Date Format should match the Date Format of the EZ3500 Indicator.
Weigh Mode
Select your Weigh Mode and click Ok.
™
. This
Note: The values entered will not convert if mode is changed later.
7 Diet Manager User’s Guide
Page 8

Diet Manager Setup
Setting the System Options
All System Options are accessible from the Main Menu, System.
Comm Port
To change the Comm Port, Select System from the Main Menu. From the drop-down menu, select Comm
Port. This will display the Find Comm Port Screen. Select Start to run the Find Comm Port.
Note: You must insert a DataKey
Load Sheet Header
To change the Load Sheet Header, Select System from the Main Menu. From the drop-down menu, select
Load Sheet Header. This will display the Load Sheet Header Screen. Enter your farm information; delete
any lines you do not wish to use and Click Save.
™
into the DataKey™ Docking Station before running Find Comm
8 Diet Manager User’s Guide
Page 9
Entering/Updating Commodities
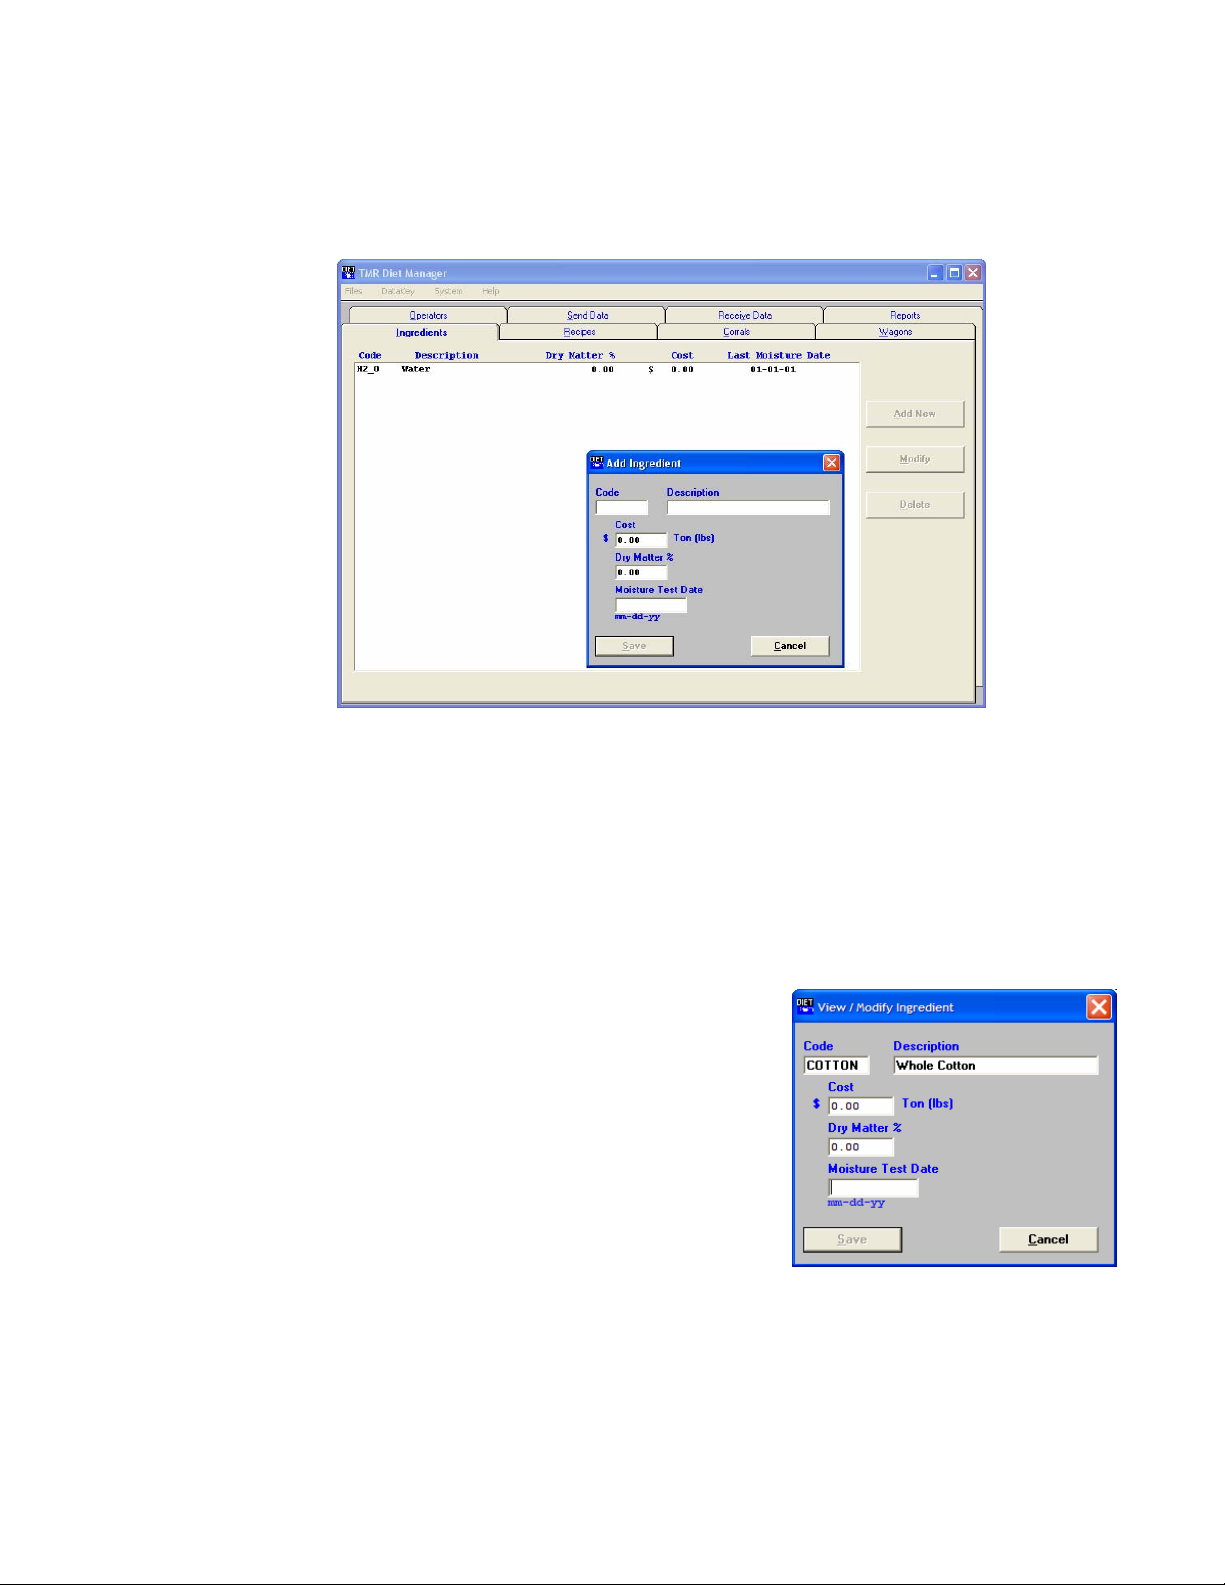
Adding New Ingredients
To access the Ingredient screen, Select the Ingredients tab, or from the Main Menu, select Files,
Ingredients. Click Add New to add an ingredient. This will display the Add Ingredient Screen.
Enter the Ingredient data.
Code – This is the 6 character name of the ingredient as displayed on the EZ3500 Indicator and/or Remote.
Description – Enter the full description of the Ingredient.
Cost – Enter the cost of the Ingredient, enetered in cost per lb, ton, kg, etc.
Dry Matter % – Enter the Dry Matter % of the Ingredient.
Moisture Test Date – Enter the date of the last Dry Matter test.
When complete, Click Save to save your entries or Cancel to exit without saving.
Note: Water is a default ingredient and cannot be deleted.
Changing the Ingredient Cost
To access the Ingredient screen, Select the Ingredients tab, or
from the Main Menu, select Files, Ingredients. To change an
Ingredient entry, either double-click on the ingredient or
highlight the Ingredient you wish to change by left clicking on
the Ingredient and then clicking on the Modify button to edit the
Ingredient entry. Either method will display the View/Modify
Ingredient Screen.
Make your change to the Ingredient Cost and click Save.
Changing the Dry Matter %
To access the Ingredient screen, Select the Ingredients tab, or from the Main Menu, select Files,
Ingredients. To change an Ingredient entry, either double-click on the ingredient or highlight the
Ingredient you wish to change by left clicking on the Ingredient and then clicking on the Modify button to
edit the Ingredient entry. Either method will display the View/Modify Ingredient Screen.
Make your change to the Dry Matter % and click Save to save your changes.
9 Diet Manager User’s Guide
Page 10

Changing the Moisture Test Date
To access the Ingredient screen, Select the Ingredients tab, or from the Main Menu, select Files,
Ingredients. To change an Ingredient entry, either double-click on the ingredient or highlight the
Ingredient you wish to change by left clicking on the Ingredient and then clicking on the Modify button to
edit the Ingredient entry. Either method will display the View/Modify Ingredient Screen.
Make your change to the Moisture Test Date and click Save to save your changes, or Cancel.
Changing the Ingredient Description
To access the Ingredient screen, Select the Ingredients tab, or from the Main Menu, select Files,
Ingredients. To change an Ingredient entry, either double-click on the ingredient or highlight the
Ingredient you wish to change by left clicking on the Ingredient and then clicking on the Modify button to
edit the Ingredient entry. Either method will display the View/Modify Ingredient Screen.
Make your change to the Ingredient Description and click Save to save your changes.
Changing the Ingredient Code
To access the Ingredient screen, Select the Ingredients tab, or from the Main Menu, select Files,
Ingredients. To change an Ingredient entry, either double-click on the ingredient or highlight the
Ingredient you wish to change by left clicking on the Ingredient and then clicking on the Modify button to
edit the Ingredient entry. Either method will display the View/Modify Ingredient Screen.
If a change is made to the Ingredient Code, the
following message will be displayed:
If you select Yes, a new ingredient will be created
using the Ingredient Code entered.
Deleting an Ingredient
To access the Ingredient screen, Select the Ingredients tab, or from the Main Menu, select Files,
Ingredients. To delete an Ingredient entry highlight the Ingredient you wish to delete by left clicking on
the Ingredient and then clicking on the Delete button.
The program will ask you to confirm the deletion. Select Yes to Delete the Ingredient.
If an Ingredient is in use in a Recipe, the following
message will be displayed:
An Ingredient used in a Recipe must first be deleted
from the Recipe or the Recipe itself must be deleted.
Once either of these steps have been taken, the
Ingredient can then be deleted from the Ingredients.
10 Diet Manager User’s Guide
Page 11

Entering/Updating Recipes
Determining How a Recipe is Loaded
Recipes can be loaded based on Actual Weight per Head or Dry Matter Intake per Head.
To change this setting, select Actual Weight or Dry Weight under the Build By heading on the Recipe
screen.
Actual Weight – Recipe is loaded as actual weight per
ingredient per head.
Dry Weight – Recipe is loaded as dry weight per ingredient per head.
Adding New Recipes
To access the Recipe screen, Select the Recipes tab, or from the Main Menu, select Files, Recipes. Click
New to add a Recipe.
Enter the Recipe data.
Recipe Name – This is the 6 character name of the Recipe as displayed on the EZ3500 Indicator and/or
Remote Display.
Premix / Grain Mix – This is a checkbox selection to signify if the Recipe is a Premix/Grain Mix.
Build By – This is a checkbox selection to determine how the recipe is built, by Actual weight or by Dry
Weight
Description – Enter the full description of the Recipe.
To Add an Ingredient to the Recipe, click on the Add Ingredient button. This will display the Add New
Ingredient to Recipe screen.
11 Diet Manager User’s Guide
Page 12

To add an Ingredient, Click on the Down Arrow in the Code / Description box. This will display a drop-
down menu selection of all the ingredients entered in the Ingredient screen. Select the ingredient to add by
clicking on the ingredient in the list. Enter the amount to load under either the Actual Wt./Head or Dry
Wt./Head depending on your selection made under the Build By selection.
Motion Weight – This setting prevents the ingredient or corral to advance if the weight is unstable or
moving. The motion weight is the amount of weight the display changes by for the “Motion” Arrow to
begin flashing. This allows the "Motion Weight Value" to be adjusted for each feedline. The indicator
uses the motion weight value to determine when the weight on the scale is changing rapidly. Motion
detection will activate when the weight displayed has moved more than "Motion Weight" (ex. 20lbs) in less
than "2 seconds".
This is different than the standard motion detection which activates when the weight displayed has moved
more than "2 display counts" in less than "2 seconds". The standard motion detection is selected whenever
the indicator is first turned ON or the "Motion Weight" value is set to "0". The "Motion Weight Value" has
a range from 000(OFF) to 999. The weight value is either lb or kg depending on setting for Display Units in
Long Form Setup.
To access this option: Enter short cut number 103 and press the [Select] key. Press [Select] key to toggle
on/off. Press the [On] key to save.
Tolerance Weight – This option is useful if you need to set different tolerance weights for individual
ingredients. The tolerance weight determines when the delay timer will begin. For example: if your
tolerance weight is 100 lbs/Kgs on corn silage, when you reach 100 remaining to load the “delay time” will
begin to count down.
This tolerance weight will over ride the tolerance set at the indicator for only ingredients that have a
tolerance weight entered from the software.
The auto-advance resets the "delay time" counter every time the weight moves out of the tolerance window.
If enabled, "motion detection" also resets the "delay time" counter
When complete, click Ok to save the ingredient. Repeat as required to enter the ingredients for the Recipe.
Modifying an Ingredient
To access the Recipe screen, Select the Recipes tab, or from the Main Menu, select Files, Recipes. To
change an Ingredient entry, either double-click on the ingredient or highlight the Ingredient you wish to
change by left clicking on the Ingredient and then clicking on the Modify Ingredient button to edit the
Ingredient entry. Either method will display the View/Modify Ingredient in Recipe Screen.
Make the required changes to either
the Actual Wt./Head, Dry Wt./Head
or change the Ingredient to be loaded.
When complete, click Ok to save the
changes.
Deleting an Ingredient
To access the Recipe screen, Select the Recipes tab, or from the Main Menu, select Files, Recipes. To
delete an Ingredient entry highlight the Ingredient you wish to delete by left clicking on the Ingredient and
then clicking on the Delete Ingredient button.
The program will ask you to confirm the deletion. Select Yes to Delete the Ingredient.
Changing the Ingredient Loading Order
To access the Recipe screen, Select the Recipes tab, or from the Main Menu, select Files, Recipes. To
change the Ingredient Loading order highlight the Ingredient you wish to move by left clicking on the
Ingredient and then clicking on the Move Up/Move Down button.
When complete, Click on Save to save the loading order.
12 Diet Manager User’s Guide
Page 13
The Loading order is the order in which the Ingredients are displayed on the EZ3500 Indicator and/or the
Remote Display. This order cannot be changed at the EZ3500.
Note: If the first Ingredient is selected, your only choice will be to move the Ingredient Down. If the last
Ingredient is selected, the only choice will be to move the Ingredient Up.
Changing a Recipe Name
To access the Recipe screen, Select the Recipes tab, or from the Main Menu, select Files, Recipes. To
change a Recipe Name, use the <<< Previous and Next >>> buttons to navigate to the Recipe. Change the
Recipe Name and click Save to save the new entry.
Note: Changing a Recipe Name creates a new Recipe.
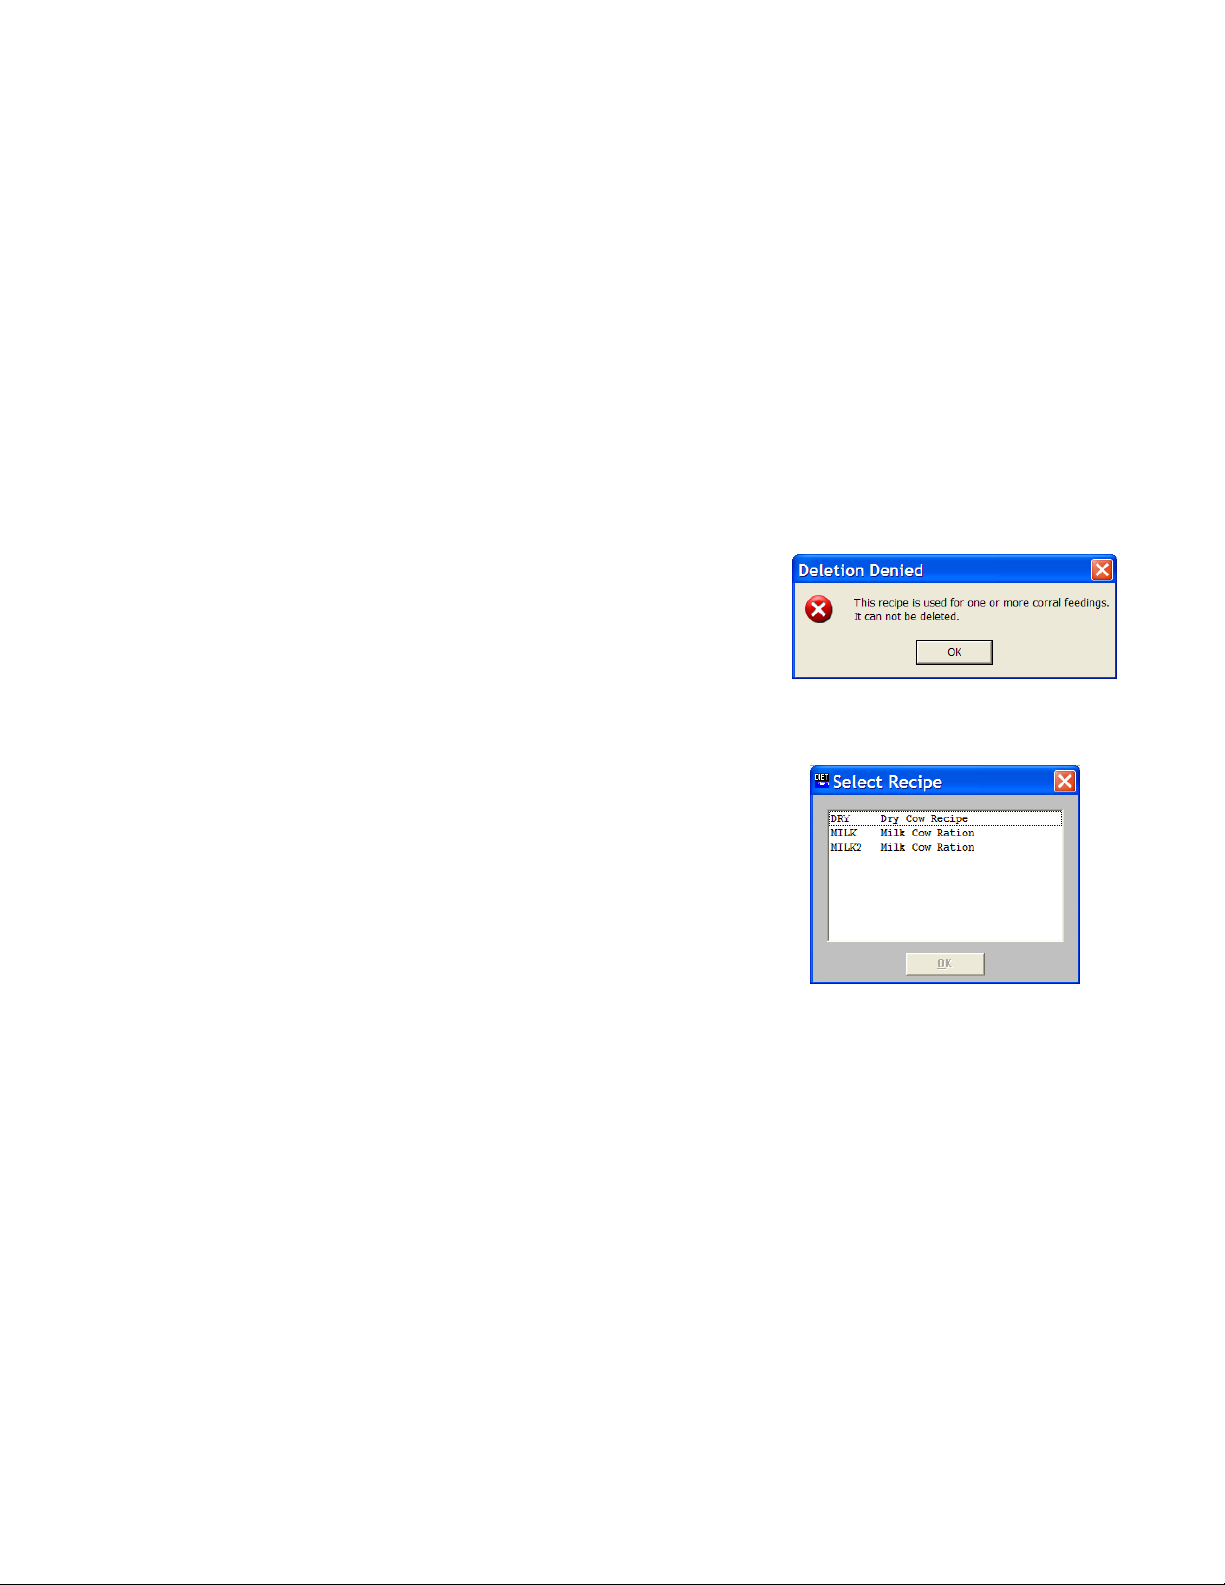
Deleting a Recipe
To access the Recipe screen, Select the Recipes tab, or from the Main Menu, select Files, Recipes. To
Delete a Recipe, use the <<< Previous and Next >>> buttons to navigate to the Recipe. Click on the
Delete button to remove the Recipe.
The program will ask you to confirm the deletion. Select Yes to Delete the Recipe.
If a Recipe is assigned to a Corral for feeding, the following
message will be displayed:
A Recipe used in a Corral Feeding must first be deleted from the
Corral. Once this has been done, the Recipe can then be deleted.
Using Find
To access the Recipe screen, Select the Recipes tab, or from the Main Menu, select Files, Recipes. Click
on the Find button in the lower corner of the display box.
This will display the Select Recipe screen. Click on the
Recipe you want to navigate to and click Ok. The Recipe
you selected will now be displayed.
Entering/Updating Corrals
Adding New Corrals
To access the Corral screen, Select the Corrals tab, or from the Main Menu, select Files, Corrals. Click
New to add a Corral.
13 Diet Manager User’s Guide
Page 14

Enter the Corral data.
Corral – This is the 6 character name of the Corral as displayed on the EZ3500 Indicator and/or Remote.
Number of Animals – Enter the number of animals in the corral.
Description – Enter the full description of the Recipe.
Each Corral can be fed 4 times per day. To Select the Recipe
to feed, click on the Down Arrow under the Recipe heading.
This will display a drop-down menu of the Recipes entered.
Click on the Recipe to feed. This will automatically input the
Feed Call by multiplieing the Actual Wt./Head by the number
of animals entered. Repeat as required for each feeding.
When complete, Click Save to save your entries.
Modifying a Corral
To access the Corral screen, Select the Corrals tab, or from the Main Menu, select Files, Corrals.
To change a Corral entry, enter the new data. Changing the Corral will create a new Corral.
Changing the Number of Head will increase / decrease the Feed Call.
Changing the Recipe Fed
To access the Corral screen, Select the Corrals tab, or from the Main Menu, select Files, Corrals.
To change the Recipe fed, use the <<< Previous and Next >>> buttons to navigate to the Corral. Select
the new Recipe from the drop-down menu. Click Save to save your changes.
Changing the Number of Head
To access the Corral screen, Select the Corrals tab, or from the Main Menu, select Files, Corrals.
To change the Number of Head, use the <<< Previous and Next >>> Buttons to navigate to the Corral.
Change the Number of Head of entering the new Number of Head. Changing the number of head will
automatically change the Feed Call. Click Save to save your changes.
Changing the Feed Call
To access the Corral screen, Select the Corrals tab, or from the Main Menu, select Files, Corrals.
To change the Feed Call, use the <<< Previous and Next >>> buttons to navigate to the Corral. Change
the Feed Call by entering the new call weight. Click Save to save your changes.
14 Diet Manager User’s Guide
Page 15

Deleting a Corral
To access the Corral screen, Select the Corrals tab, or from the Main Menu, select Files, Corrals. To
Delete a Corral, use the <<< Previous and Next >>> buttons to navigate to the Corral. Click on the Delete
button to remove the Corral.
The program will ask you to confirm the deletion. Select Yes to Delete the Corral.
Using Find
To access the Corral screen, Select the Corrals tab, or from the Main Menu, select Files, Corrals. Click
on the Find button.
This will display the Select Corral screen. Click
on the Corral you want to navigate to and click
Ok. The Corral you selected will now be
displayed.
Entering/Updating Wagons
Adding New Wagons
To access the Wagons screen, Select the Wagons tab, or from the Main Menu, select Files, Wagons. Click
New to add a Wagon.
Enter the Wagon data.
Wagon – This is the 6 character name of the Wagon.
15 Diet Manager User’s Guide
Page 16

Description – Enter the full description of the Wagon.
Wagon Status – Enter the status of the Wagon.
Load Size – Enter the maximum amount that can be loaded for each recipe.
When complete, click Save to save your settings.
Modifying a Wagon
To access the Wagons screen, Select the Wagons tab, or from the Main Menu, select Files, Wagons.
To change a Wagon entry, enter the new data. Changing the Wagon will create a new Wagon.
To Change the Load Size, enter the new maximum load size.
When complete, click Save to save your settings.
Deleting a Wagon
To access the Wagons screen, Select the Wagons tab, or from the Main Menu, select Files, Wagons. Click
on the Delete button to remove the Wagon.
The program will ask you to confirm the deletion. Select Yes to Delete the Wagon.
Entering/Updating Operators
Adding New Operators
To access the Operators screen, Select the Operators tab, or from the Main Menu, select Files, Operators.
Enter the Operator name in the entry field. Enter an Operator ID in the entry field. Up to 5 operators can
be entered. When complete, click Save.
Note: The Operator ID should match the ID entered at the EZ3500. To make this as easy as possible, a single
numerical digit is ussaully assigned to each Operator.
16 Diet Manager User’s Guide
Page 17

Modifying Operators
To access the Operators screen, Select the Operators tab, or from the Main Menu, select Files, Operators.
To change an Operator, simply over-write the existing entry and click Save to save your changes.
Sending Feeding Data to the DataKey™
To access the Send Data screen, Select the Send Data tab, or from the Main Menu, select DataKey™, Send
Data.
Selecting a Feeding
Select the Feeding to send. One feeding at a time may be sent or select All Feedings to send all feedings at
once.
Selecting a Wagon
Select the Wagon by clicking on the check-box for the specific Wagon.
17 Diet Manager User’s Guide
Page 18

Printing Feed Sheets
To print Feed Sheets, under Options, select Print Feed Sheet. Un-check the Store to DataKey™ check-
box to print feed sheets without sending data to the DataKey
™
.
Setting the Feeding Order
Set the Feeding Order by highlighting a Corral and clicking on the Move Corral Up or Move Corral
Down buttons.
The Feeding Order determines how the order of the Corrals is displayed on the EZ3500 Indicator. In the
example above, the Corrals would be fed in the order of Corral 1, Corral 2 and Corral 3.
If the selected wagon can mix more than the combined feed call for Corral 1 and 2 (8300), then these
Corrals will be combined into a single load. Loads will only be combined when the total load does not
exceed the Wagon capacity and when the Recipe to be fed is the same.
When the Feeding Order has been set, click on Save Feeding Order to save the order. A temporary change
can be made by changing the order and not clicking on Save Feeding Order. This sends the Corrals in the
order specified, but does not save the new order.
When the Feeding Order has been set, click on Make Loads. This combines loads and places them in the
right-hand window.
In the first example, Feeding 1, Corral 1
and 2 have been combined into a single
load of 8300. This will be followed by
a load of 2000 for Corral 3.
In this example, we have moved Corral 2
down to the last position in Feeding 1.
When the Make Loads Button is
clicked, the new Feeding Order results in
a single load for each Corral in Feeding 1.
The right-hand window is provided to review the Feeding Order and Corral grouping prior to
sending the data to the DataKey
data to the DataKey
™
. Make your required changes and click on the Make Loads Button to update the
™
. Changes to the Feeding Order can be made at any time prior to sending
right-hand window.
Note: No loads are sent until the Send Buttons are clicked.
Sending Loads to the DataKey™
When you are satisfied with the Feeding Order and grouping, click on Send All to send all the feeding data
to the DataKey
As the data is sent to the DataKey
™
.
™
, a green progress bar will track the percent complete.
18 Diet Manager User’s Guide
Page 19

When all the data has been sent to the DataKey
sent and the right-hand window will be blank.
™
, a message box will appear showing the status of the data
Sending a Single Load to the DataKey™
To send a single load at a time, highlight the load you want to send to the DataKey™ by clicking on it in the
right-hand window.
Click on the Send One Load button. This will send the selected load to the DataKey
will be sent.
™
. No other loads
Send One Wagon
The Send One Wagon selection automatically splits the loads between the wagons.
Send One Load
The Send One Load selection sends only the load highlighted.
Reviewing Loads
To review the Corrals in a combined load, double-click the load in the right-hand window. This will open a
new window that displays the feeding data for that load.
Appending data to the DataKey™
When feeding data exists on the DataKey
attempt is made to send additional feeding data to the
DataKey
To add the new data, click Yes.
™
, the following type message will appear;
™
and an
Receive Data from the DataKey™
To access the Receive Data screen, Select the Receive Data tab, or from the Main Menu, select DataKey™,
Receive Data.
19 Diet Manager User’s Guide
Page 20

Save to File Folder
This option sets the path that the received data will be saved to. The defualt location is C:\. To create a
differrent location, first create the location in Windows
®
. Next, enter the new file location.
Save to File Name
This option sets the File Name that the received data will be saved as. The defualt file name is the path
entered in Save to File Folder, date(mmddyy format).CSV.
To save the file to a differrent name, un-check the Use Defualt File Name and enter a file name in the Save
to File Name box.
When done, click Save Settings to save your entries.
Verify Date of Feed Data
This option will verify the date of the data on the DataKey™. A message box will appear for any data with
a date that is outside of 2 weeks of the date set on your computer.
Selecting Yes will flag the data with a column named Invalid Date.
No changes to the actual data will be made. Selecting No will read
the data as normal without the Invalid Date flag.
Notify of Feed Call Change
This option will display a message box
showing any feed call changes or head count
changes made at the EZ3500 Indicator.
Display Data after Received
This option will display the received data after read by Diet Manger™.
20 Diet Manager User’s Guide
Page 21

Note: The data cannot be edited in this screen.
Create Backup Copy
This option will create a backup copy of the data read from a DataKey™. The backup will be stored in the
installation directory for the Diet Manager
(mmddyy format).BAK.
™
program in the file folder Data. The file will be named: date
Receive Data from the DataKey™
To access the Receive Data screen, Select the Receive Data Tab, or from the Main Menu, select DataKey™,
Receive Data. Insert the DataKey
As the data is read, a green
progress bar will track the
percent complete. When
complete, the program will
ask if you want to clear the
data from the DataKey
™
.
Select Yes to erase the data
or No to exit without erasing
the data.
™
into the DataKey™ Docking Station and click the Receive Data Button.
View Data on DataKey™
To access the View Data on DataKey™ screen, from the Main Menu, select DataKey™, View Data on
DataKey
Insert the DataKey
DataKey
Read.
As the data is read, a green progress
bar will track the percent complete.
When complete, the available data to
view will be selectable under the
Available Data.
™
.
™
™
Docking Station and click
into the
Recipe Requests
Selecting Recipe Requests displays the Recipes called to be loaded. The Batch Number, Ingredients and
Call Weights are shown.
Corral Requests
Selecting Corral Requests displays the Corrals called to be fed. The Corral Number, Recipe, Call Weight
and Batch Number are shown.
21 Diet Manager User’s Guide
Page 22

Recipes Complete
Selecting Recipes Complete displays the completed Recipes. The Recipe, Date, Total Call Weight,
Loaded Weight, Ingredient Call Weight, Ingredient Loaded Weight and Batch Number are shown.
Corrals Complete
Selecting Corrals Complete displays the completed Corrals. The Corral, Date, Recipe, Call Weight, Fed
Weight, and Batch Number are shown.
DataKey™ Name
Selecting DataKey™ Name displays the DataKey™ Header. This file is for Digi-Star® informational
purposes only.
Clear DataKey™
To access the Clear DataKey™ screen, from the Main Menu, select DataKey™, Clear DataKey™.
Insert the DataKey
verify that you want to clear the DataKey
Note: Once a DataKey
™
into the DataKey™ Docking Station. The Diet Manager™ program will ask you to
™
has been cleared, the data cannot be recovered.
™
.
Test DataKey™
To access the Test DataKey™ screen, from the Main Menu, select DataKey™, Test DataKey™.
A message will appear asking you to verify that you want to Test the
DataKey
Select Yes to test the DataKey
Note: The DataKey
Select Run Test to begin the DataKey
™
and that tesing will destroy any data on the DataKey™.
™
™
test can take up to 1 minute to complete.
.
™
test.
Authorize DataKey™
To access the Authorize DataKey™ screen, from the Main Menu,
select DataKey
In the unlikely event that a DataKey
the Authorize DataKey
Header. Selecting this function will require an Authorization Code
provided by Digi-Star
click Authorize. The Diet Manager
DataKey
™
, Authorize DataKey™.
™
header file.
™
™
function will re-format the DataKey™
®
. Enter the code as provided by Dig-Star® and
Header file becomes corrupt,
™
program will re-format the
®
Example Excel
This file is an example of the CSV file created by Diet Manager™. The file has been opened in Microsoft
The first 22 records are data sent from the Diet Manager
®
Excel
records completed and returned from the EZ3500 Indicator.
File
and some formatting has been performed to assist in explaining the data fields.
™
to the DataKey™. The remaining records are
22 Diet Manager User’s Guide
Page 23

Wagon – Sent from Diet Manager™ as Wagon Number. Returned from EZ3500 as Truck Number entered
in Indicator. This can be changed to match the Diet Manager
™
program. Please see the document EZII
Shortcut numbers.
RS – Record Status. U = Undone, S = Done
I / P – Ingredient or Corral. I = Ingredient, P = Corral
Loaded – T = Wagon Loaded
Batch # - First digit represent the Feeding Number, last three digit are a sequencial number
I / P – Ingredient or Corral
Recipe – Recipe Code to be loaded / fed
Call Wt – Weight to be loaded or fed
Loaded Wt – Actual weight loaded or fed
Size / ID – Sent from Diet Manager
™
as maximum amount to load. Returned from EZ3500 as Operator ID.
Time – Time stamp of completed record
Date F – Date Format code
Date – Date stamp of completed record
# Head – Head Count as sent from Diet Manager
™
and as returned from EZ3500 Indicator
Call Chg – Call Weight change as returned from EZ3500 Indicator
Zone – Zone field
Mix Time – Mix Time as returned from EZ3500 Indicator (requires Mix Timer Option)
Gross Wt – Gross Weight as recorded on EZ3500 Indicator
Error – Error Messages
Reports
In the report list, select the desired report. You will now see the date range will highlight. Using the
“Select” button, select the start and end date on the calendar. Please note of what month and year the
calendar is displaying. Also note the broader the date span the longer it might take for the report to
generate.
23 Diet Manager User’s Guide
Page 24

Report Types/Definitions
Diet Manager offers over 10 reports to show you entered information such as ingredients and recipes, along
with the received date of actual ingredient usage and corral feeding.
Ingredient List
This report will list all
of the defined
ingredients in the
database along with
their cost and dry matter
percentage.
Recipe List
This report will show the
defined recipes listing all
of the ingredients used,
actual weight per head,
dry weight per head, cost
per ton and their
percentage of load.
Corral Feeding List
This report will show the
corrals and their feeding
schedule.
Wagon List
This report will show all
the defined wagons and
their load sizes for each
recipe.
24 Diet Manager User’s Guide
Page 25

Operator List
This report shows all of
the operators and their
log-in codes.
Ingredient Usage
This report will show the
usage of each ingredient
over the selected date
range.
Ingredient Deviation by Recipe
This report will show the deviation of ingredient loading by grouped recipe over the selected date range.
25 Diet Manager User’s Guide
Page 26

Corral Delivery Summary
This report shows recipe
deliveries made to the
selected corrals for the
selected date range.
Corral Delivery Devation
This report will show the
deviation of recipe
weights delivered to the
selected corrals for the
selected date range.
DMI per Head by Corral
This report will the
show the dry matter
intake per head by
corral for the selected
date range.
Recipe Delivery by Corral
This report will list all the recipes delivered to the corrals for the selected date range.
26 Diet Manager User’s Guide
Page 27

Customizing Reports
Date Range:
Select the desired date range to view feeding data.
Tolerance:
Reports will use this number by percent to display errors in color.
Positive errors will be displayed in BLUE and negative errors will be
displayed in RED.
27 Diet Manager User’s Guide
Page 28

Operators:
Select the operator to view only that persons feeding information.
Wagons:
Select the wagon to view only that mixers feeding information.
Corrals:
Select the corrals to view only that corrals feeding infromation.
Recipies:
Select the recipe to view only that recipies data.
28 Diet Manager User’s Guide
 Loading...