

Denver DVBS-202HD User Manual
~ 0 ~
MODEL NO.: DVBS-202HD
HD SATELLITE RECEIVER
User Manual
Please read this user manual before using or connecting this product.
And keep it handy for future reference.

~ 1 ~
User Manual
Precautions
Please read these precautions before operating this unit.
1. Power cord protection
To avoid any malfunctions of the unit, and to protect against electric shock, fire or personal
injury, please observe the following.
• Hold the plug firmly when connecting or disconnecting the AC power cord.
• Keep the AC power cord away from heating appliances.
• Never put any heavy object on the AC power cord.
• Do not attempt to repair the AC power cord in any way.
• Never make or change connections with the power switched on.
2.Placement
Avoid placing the unit in areas of:
•Direct sunlight or heating radiators
•High temperature (over 35℃) or high humidity (over 90%)
•Dust as the internal parts may be seriously damaged.
3.Non-use periods
When the unit is not being used, turn it off. When left unused for a long period of time, the unit
should be unplugged from the power source.
4.No fingers or other objects inside
• Touching internal parts of this unit is dangerous, and may cause serious damage to the unit.
Do not attempt to disassemble the unit.
• Do not put any foreign object in this unit.
5.Keep away from water
• Keep the unit away from flower vases, tubs, sinks, etc. if liquids are spilled into the unit,
serious damage could occur.

~ 2 ~
User Manual
INTRODUCTION
This user manual is intended to guide you through the operation for the DVB-S2 FTA High
Definition digital Terrestrial Receiver.
A password will be required when modifying advanced options in the Menu. The default
password is"000000".
MAIN FUNCTIONS AND FEATURES
1.Fully DVB-S/DVB-S2/MPEG-2/MPEG-4/H.264 compliant
2.SCART/HDMI output, USB 2.0
3.SCPC & MCPC receivable from C/Ku band satellites
4.DiSEqC 1.0/1.1/1.2/1.3(USALS) supported
5.Universal LNB, NIT search support
6.DiSEqC1.0/DiSEqC1.2 and USALS protocols
7.Electronic program guide(EPG), VBI Teletext, Support up to 64 satellites
8.Up to 2,500 transponders, Frequency range : 950-2150MHz
9.Auto / Manual Program search, Multi-language supported
10.USB 2.0, Software upgrade, Multimedia Playback, OTA software upgrade
11.Transmission mode: LDPC/BCH (DVB-S2) 8PSK/QPSK, DVB-S QPSK
12.Support up to 5000 channels
13.Support up full HD 1080P, HDMI 1.3
~ 3 ~
User Manual
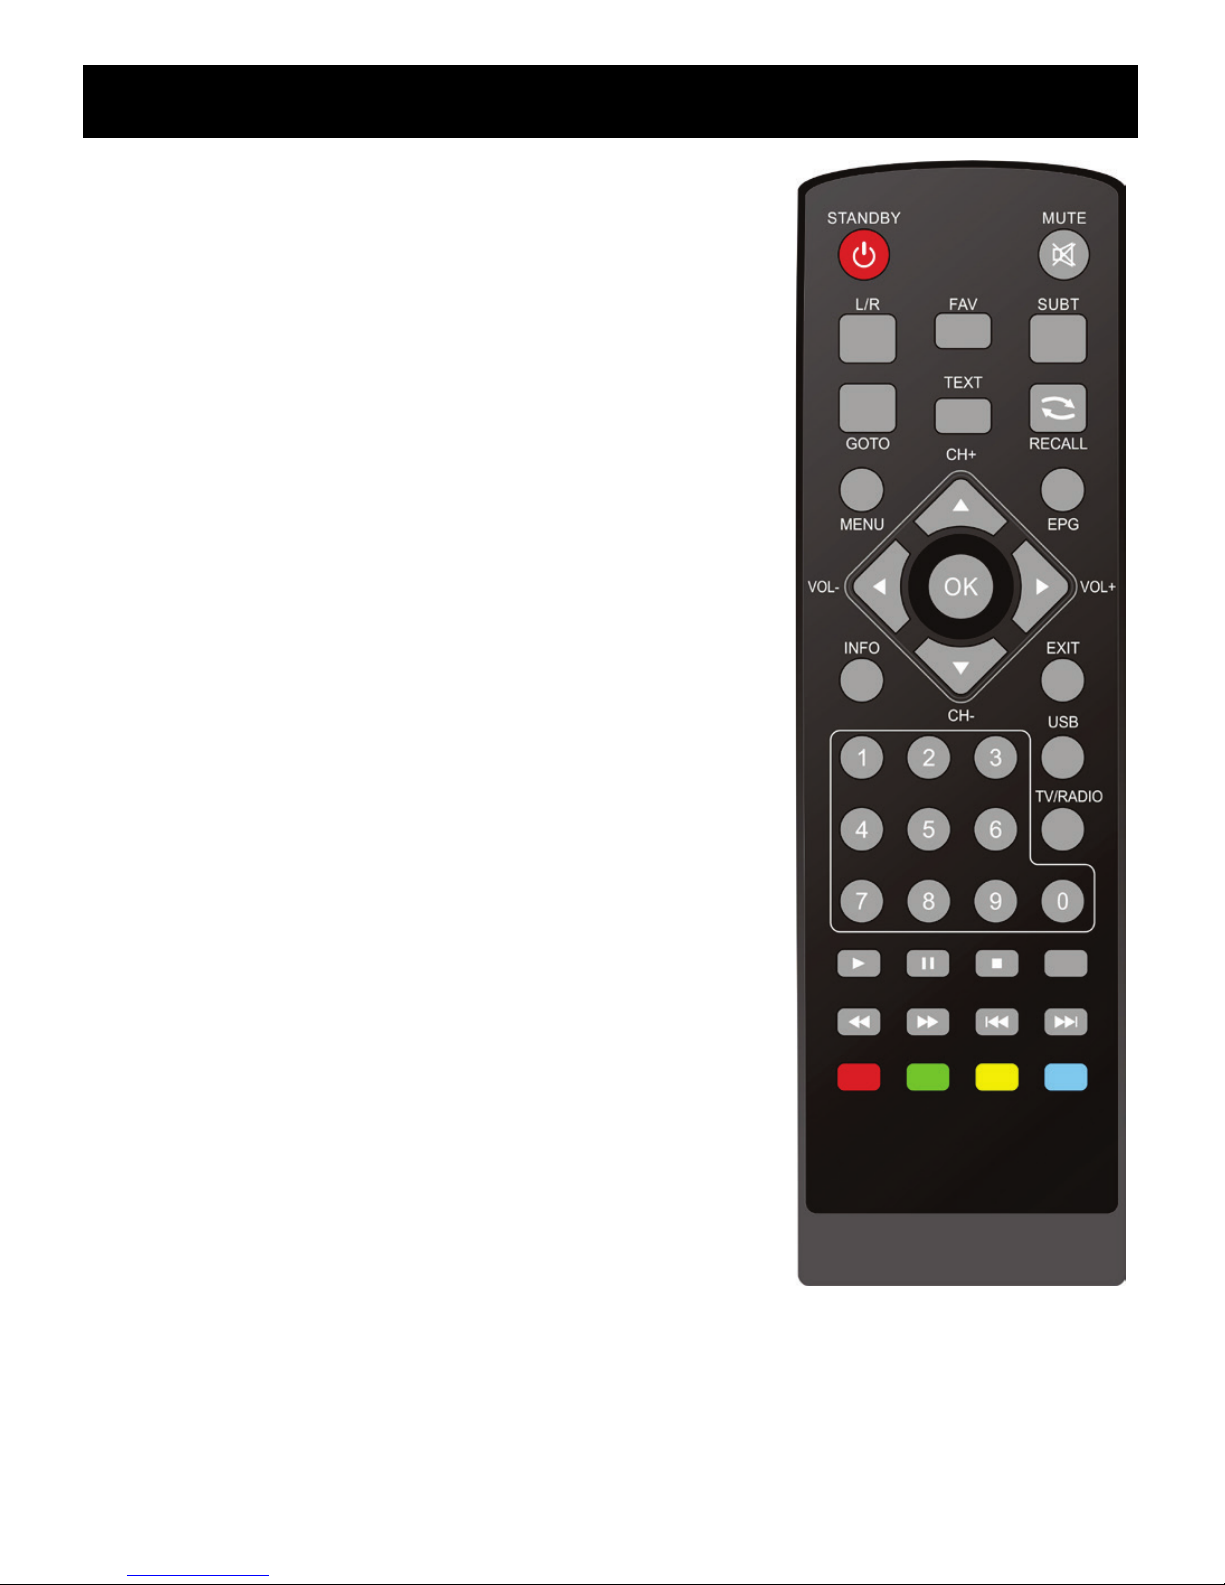
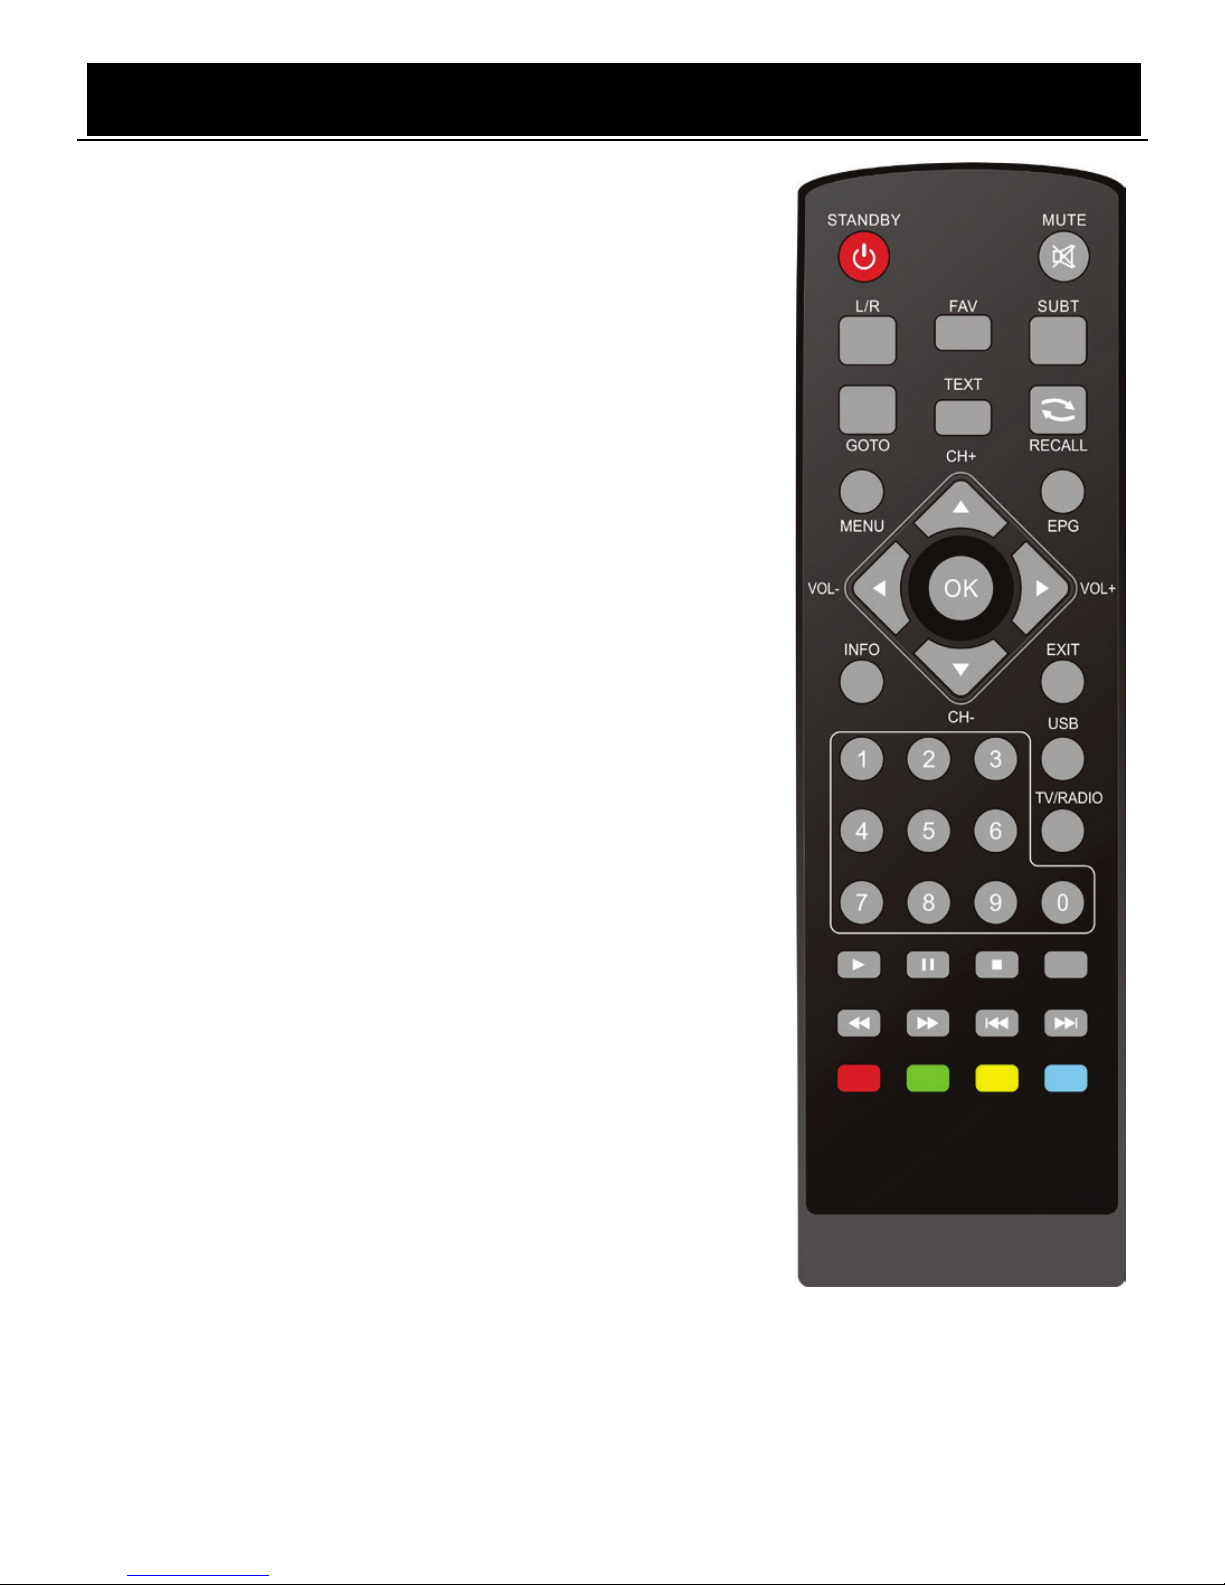
STANDBY: Turn on / off
Number Key: <0-9>
SUBT: Enter/exit subtitle menu
EPG: Electronic Program Guide
Menu: Enter main menu
Direction key: Up/down/left/right
OK: Confirm selection on operating menu
Or hot-key of “QUICK SELECT” in full-screen playing
VOL -/+ : Volume adjusting
TEXT : DVB-S2 teletext
GOTO: Go forward or backward under replaying recorded file
USB: Play previous USB media
INFO: Display program information in full-screen playing
Mute: Turn off / on voice.
Recall: Return to previous menu
L/R: Audio mode operation
EXIT: Go back directly to full screen display
CH+/CH-: Go next/previous channel.
FAV: Show favourites list
TV/RADIO: Switch between TV and Radio mode
PLAY/PAUSE: Pause/Play movie playing
Stop: Stop movie playing
PREV: Previous chapter
NEXT: Next chapter
FR: Rewind
FF: Fast forward
For color keys: Function keys in different window.
~ 4 ~
User Manual
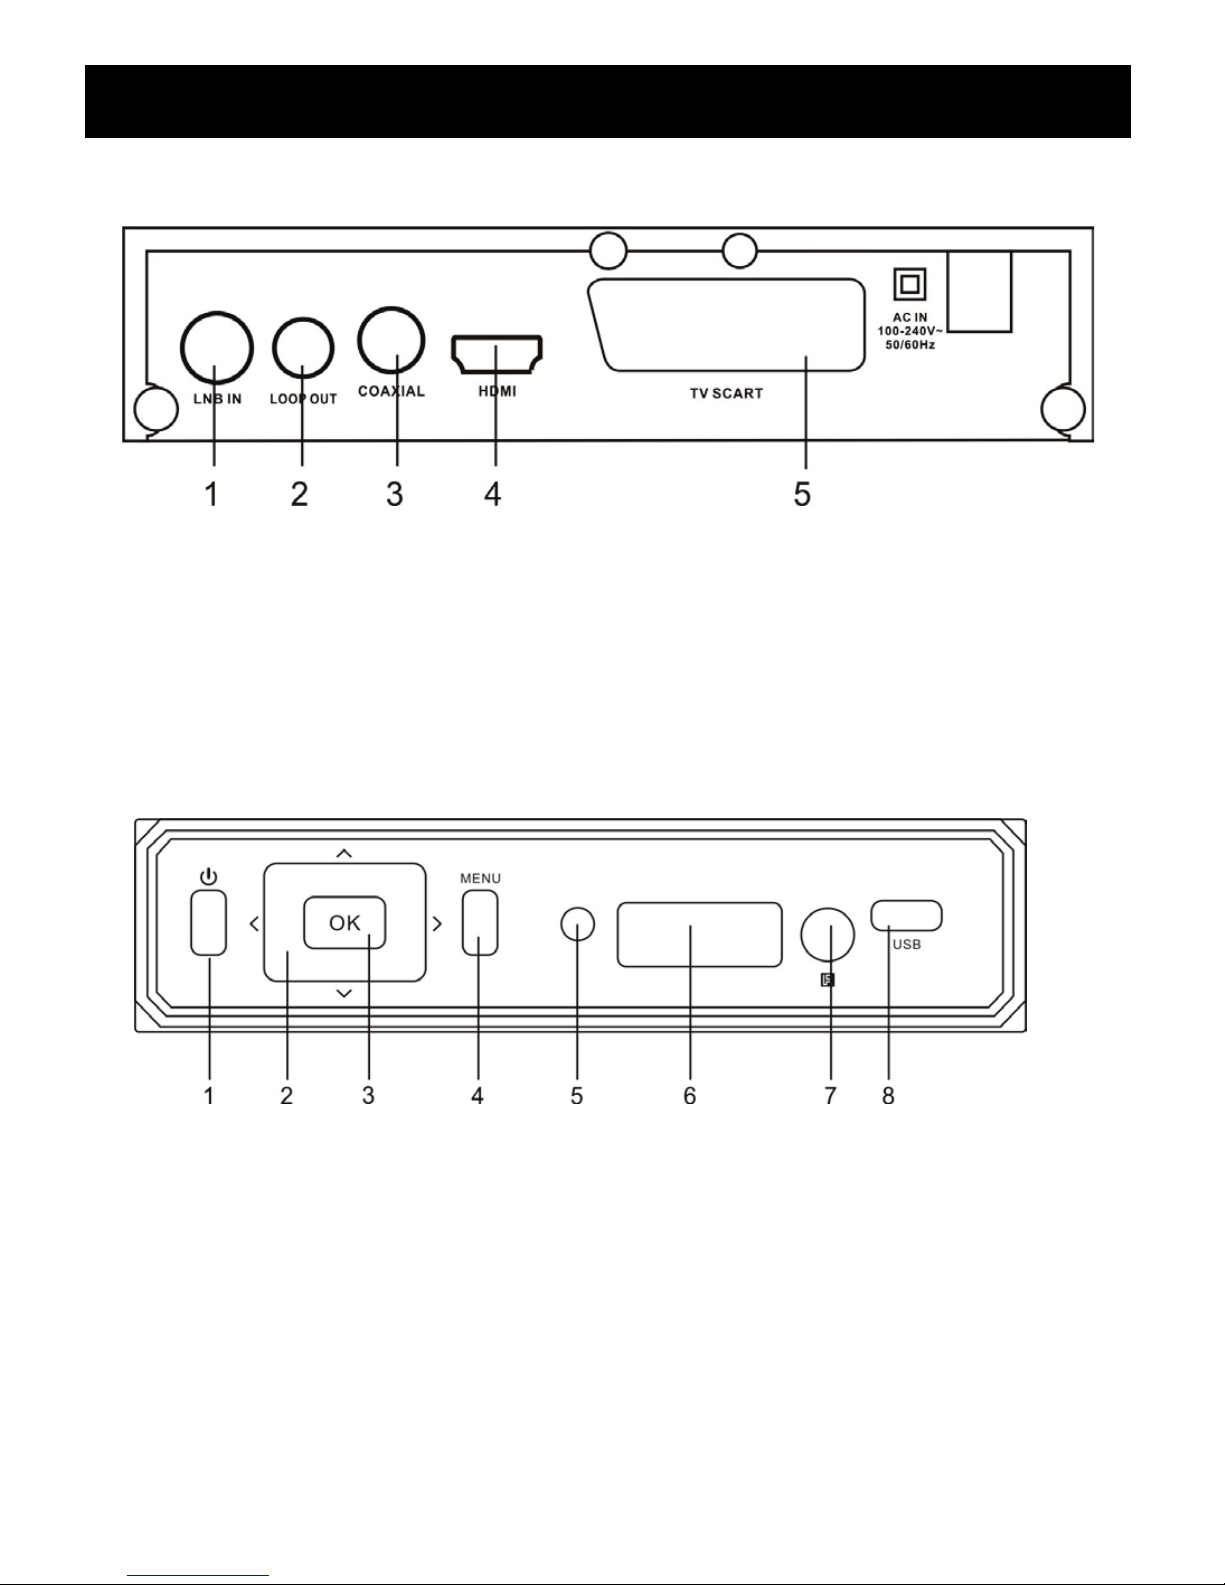
FRONT AND REAR PANEL
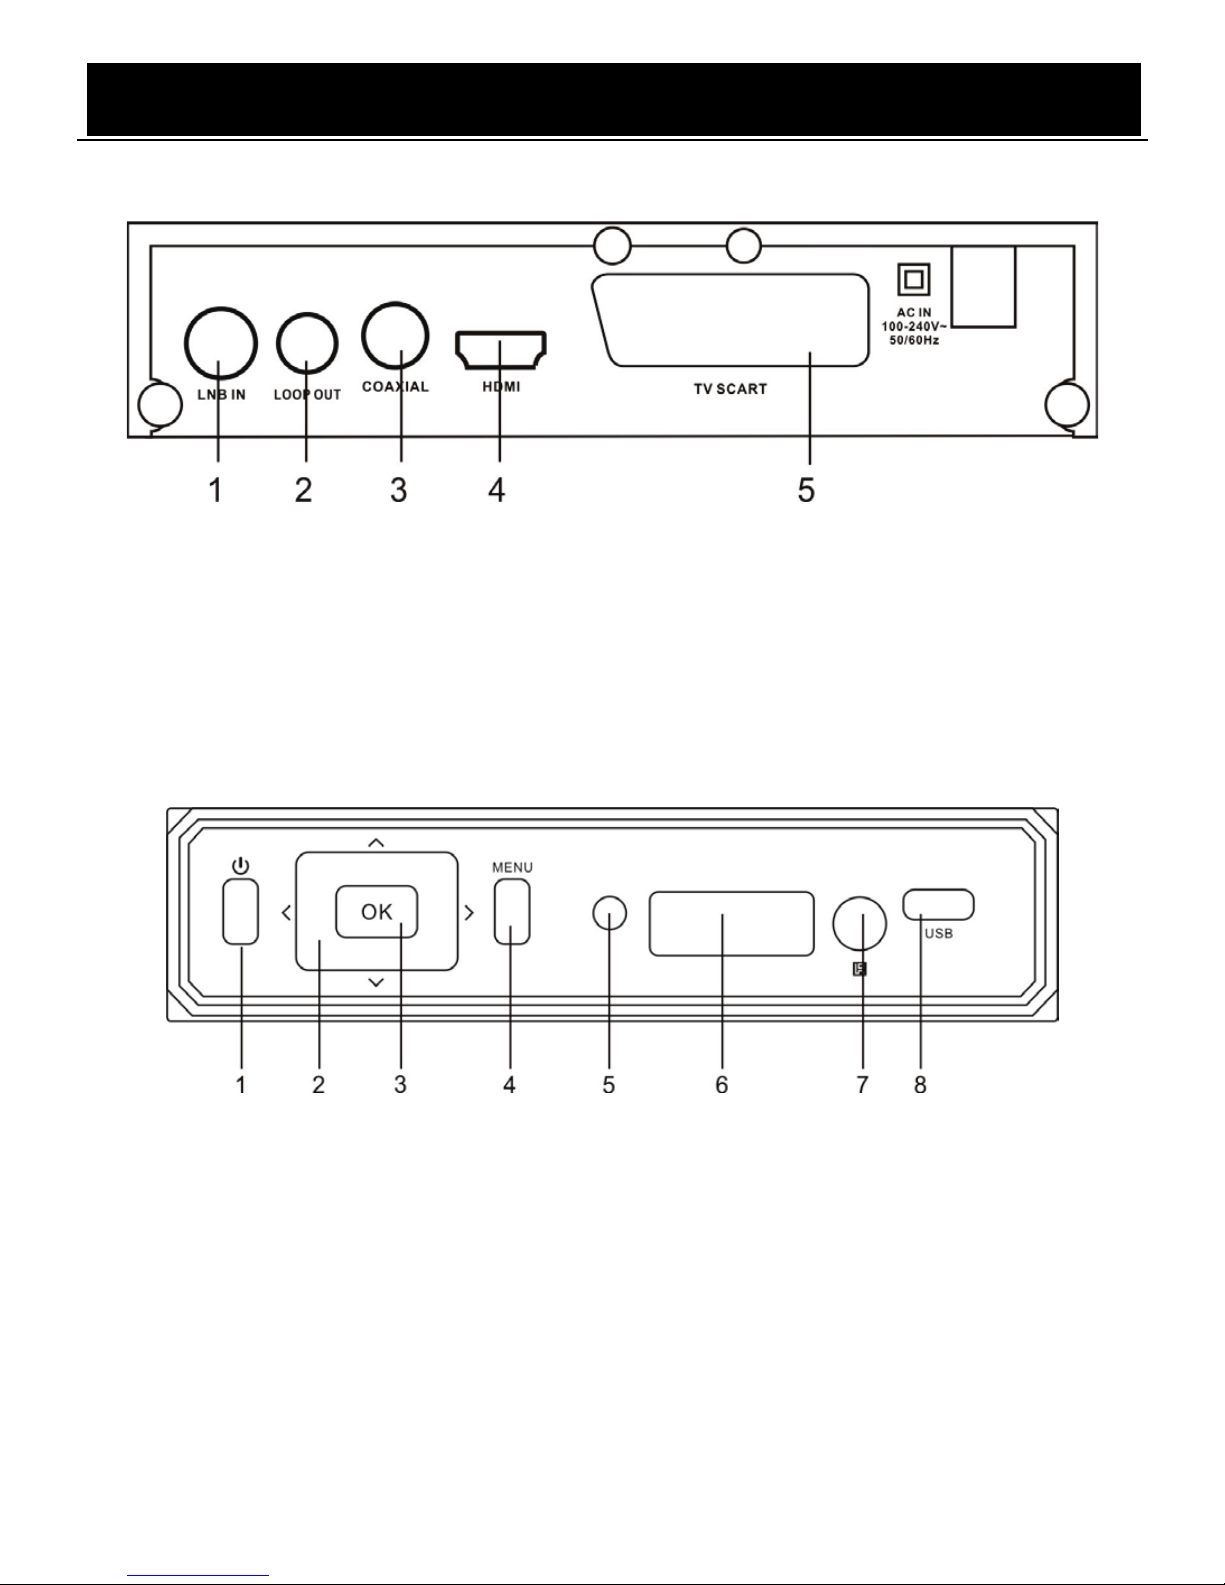
REAL PANEL
1. Connect to satellite antenna cable
2. LOOP OUT modulator with CH11, for old TV.
3. Connected to TV HDTV interface
4. Composite Video output
5. Analog audio output
6. Digital audio output
FRONT PANEL
1.Power on/off button
2.Direction button(Channel+/-, Volume +/-)
3.OK button
4.MENU button
5.Works signal light
6.LED display window
7.Remote control signal sensor
8. USB jack
‘
~ 5 ~
User Manual
INSTAL L AT I ON
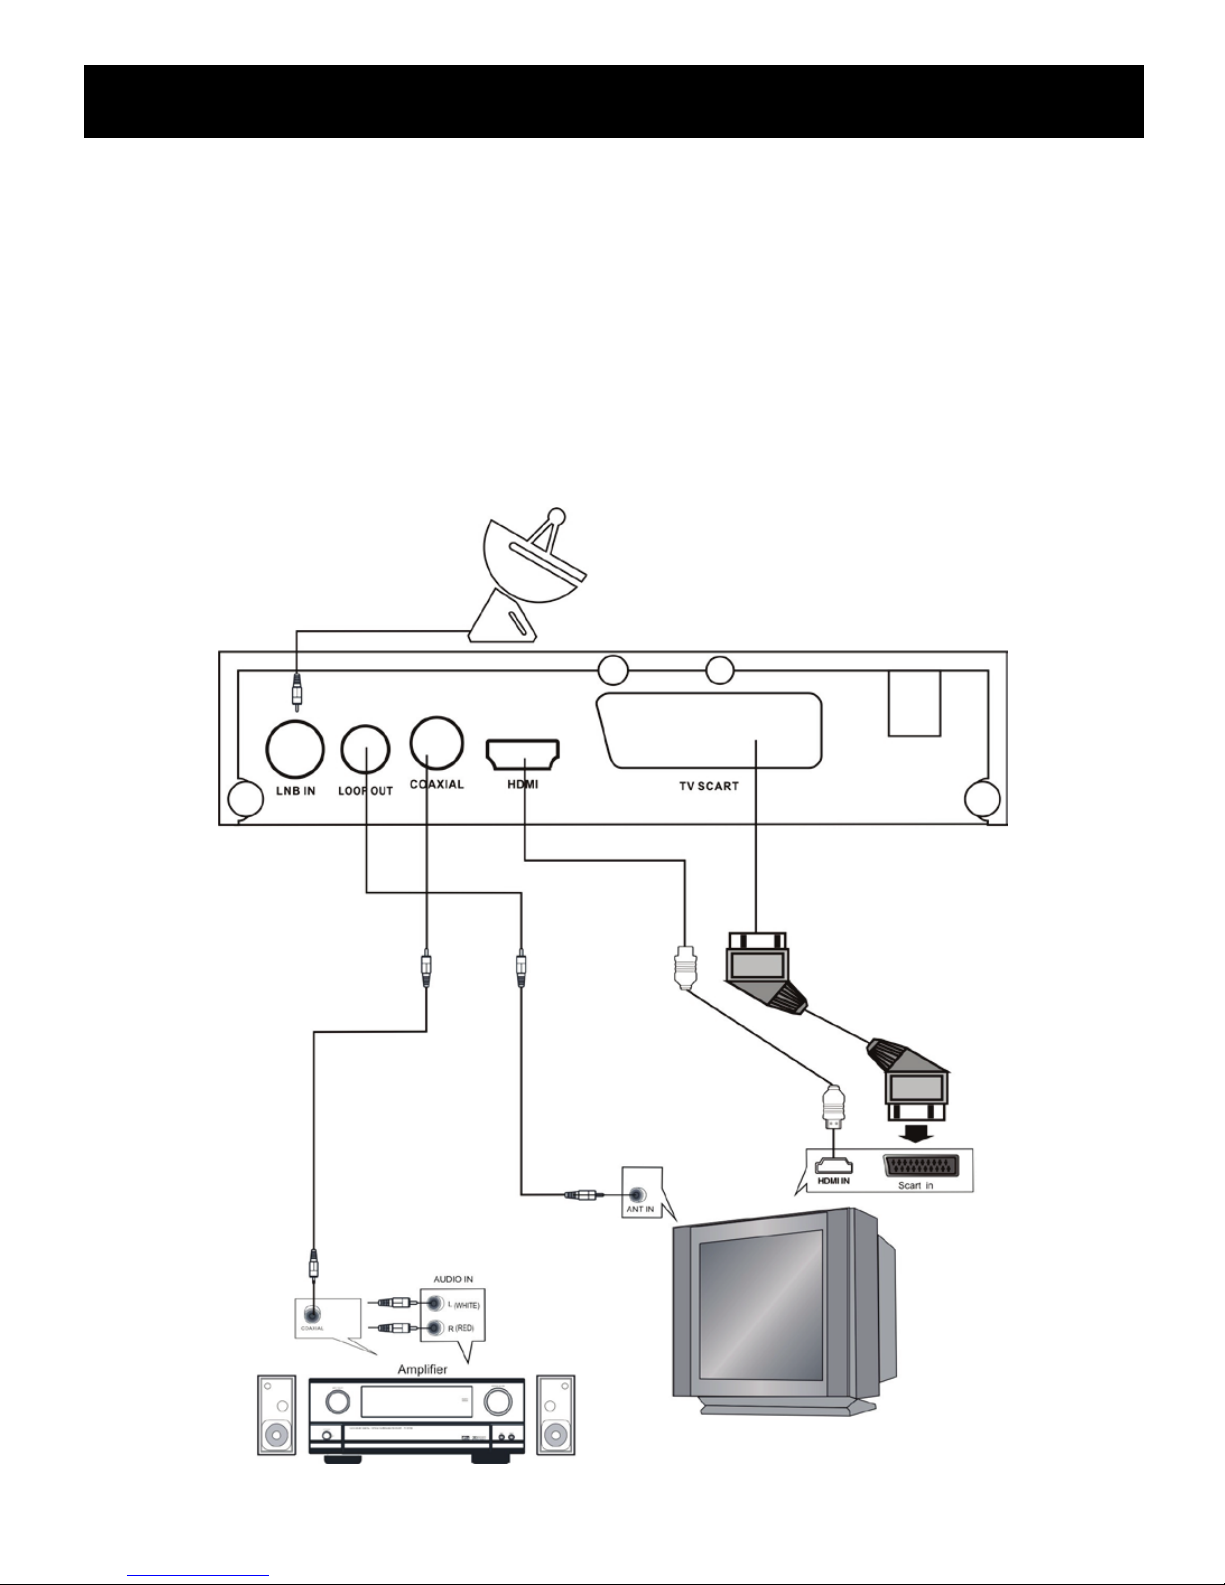
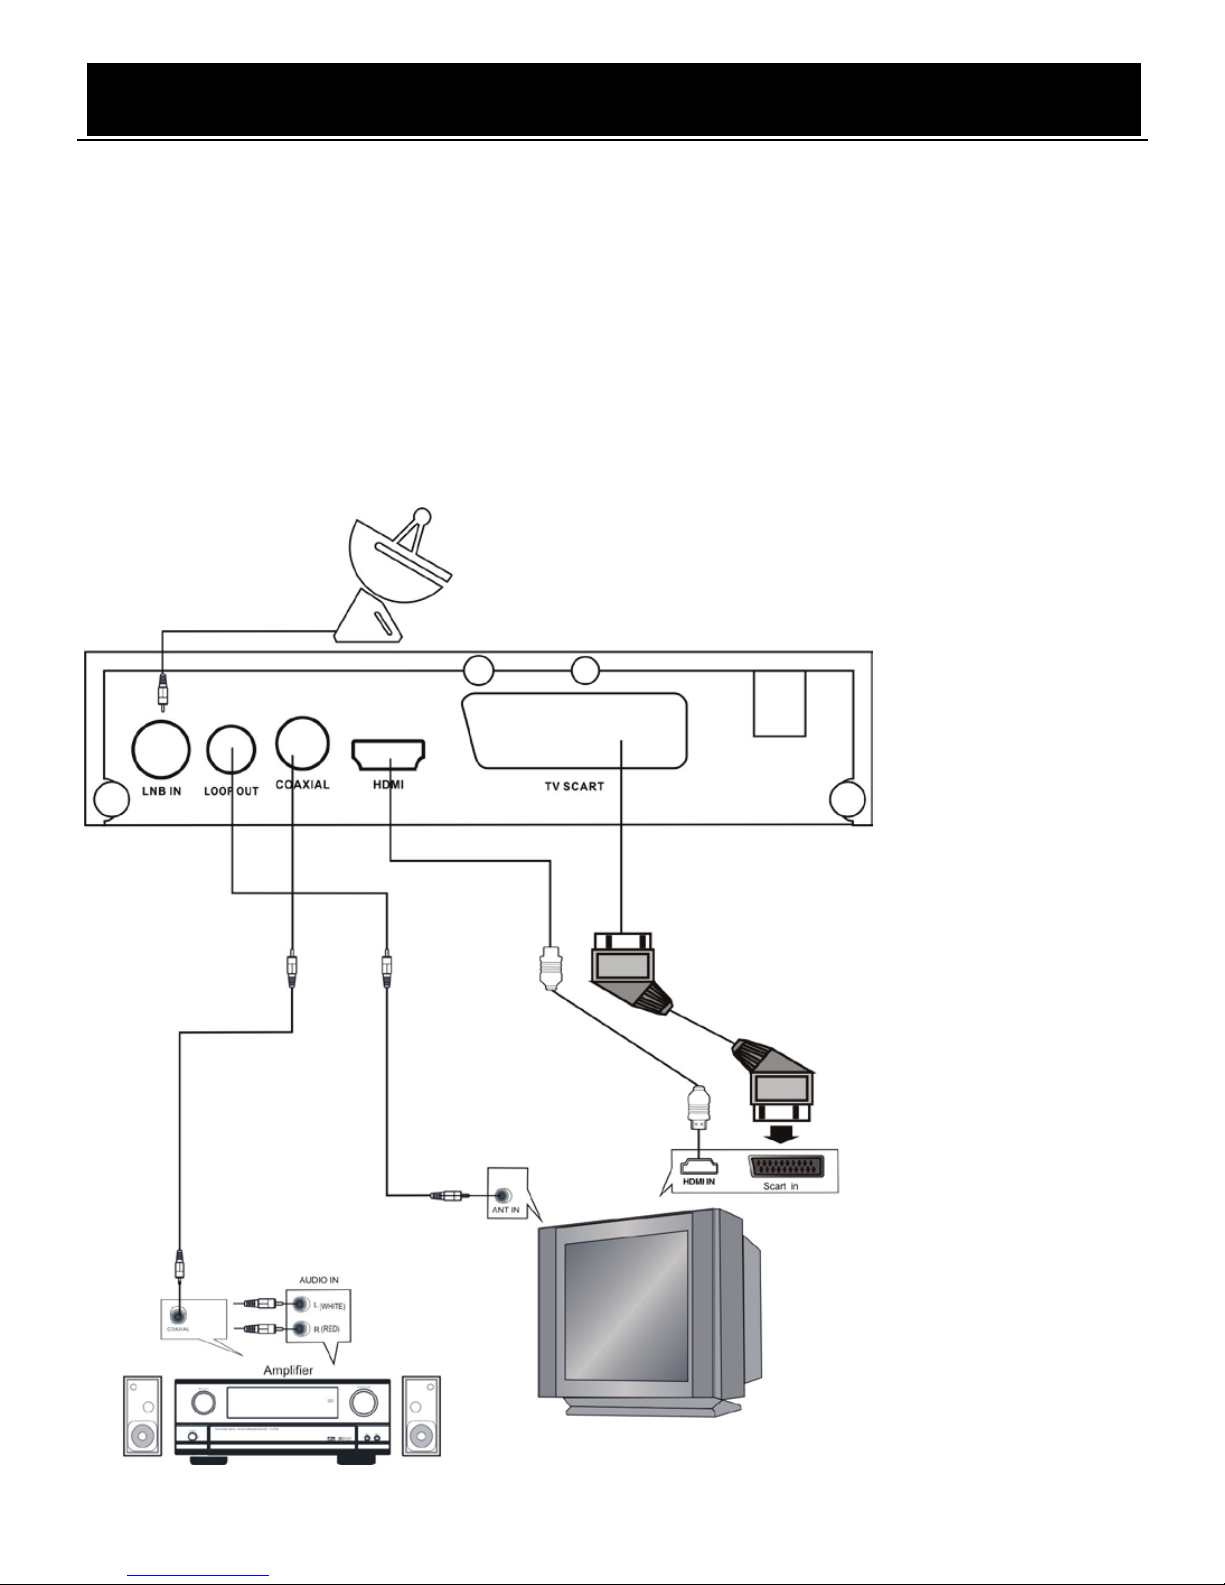
CONNECTING THE RECEIVER
Before you connect your STB to your TV please ensure that it’s is placed on a flat and stable
surface. Now that your STB is in position connect it to your TV and any other peripheral
devices. Please refer to the below diagram and your TVs user manual for cable installation
instructions.
Connect your STB to power on your TV and the STB before continuing to the initial set up
guide.
~ 6 ~
User Manual
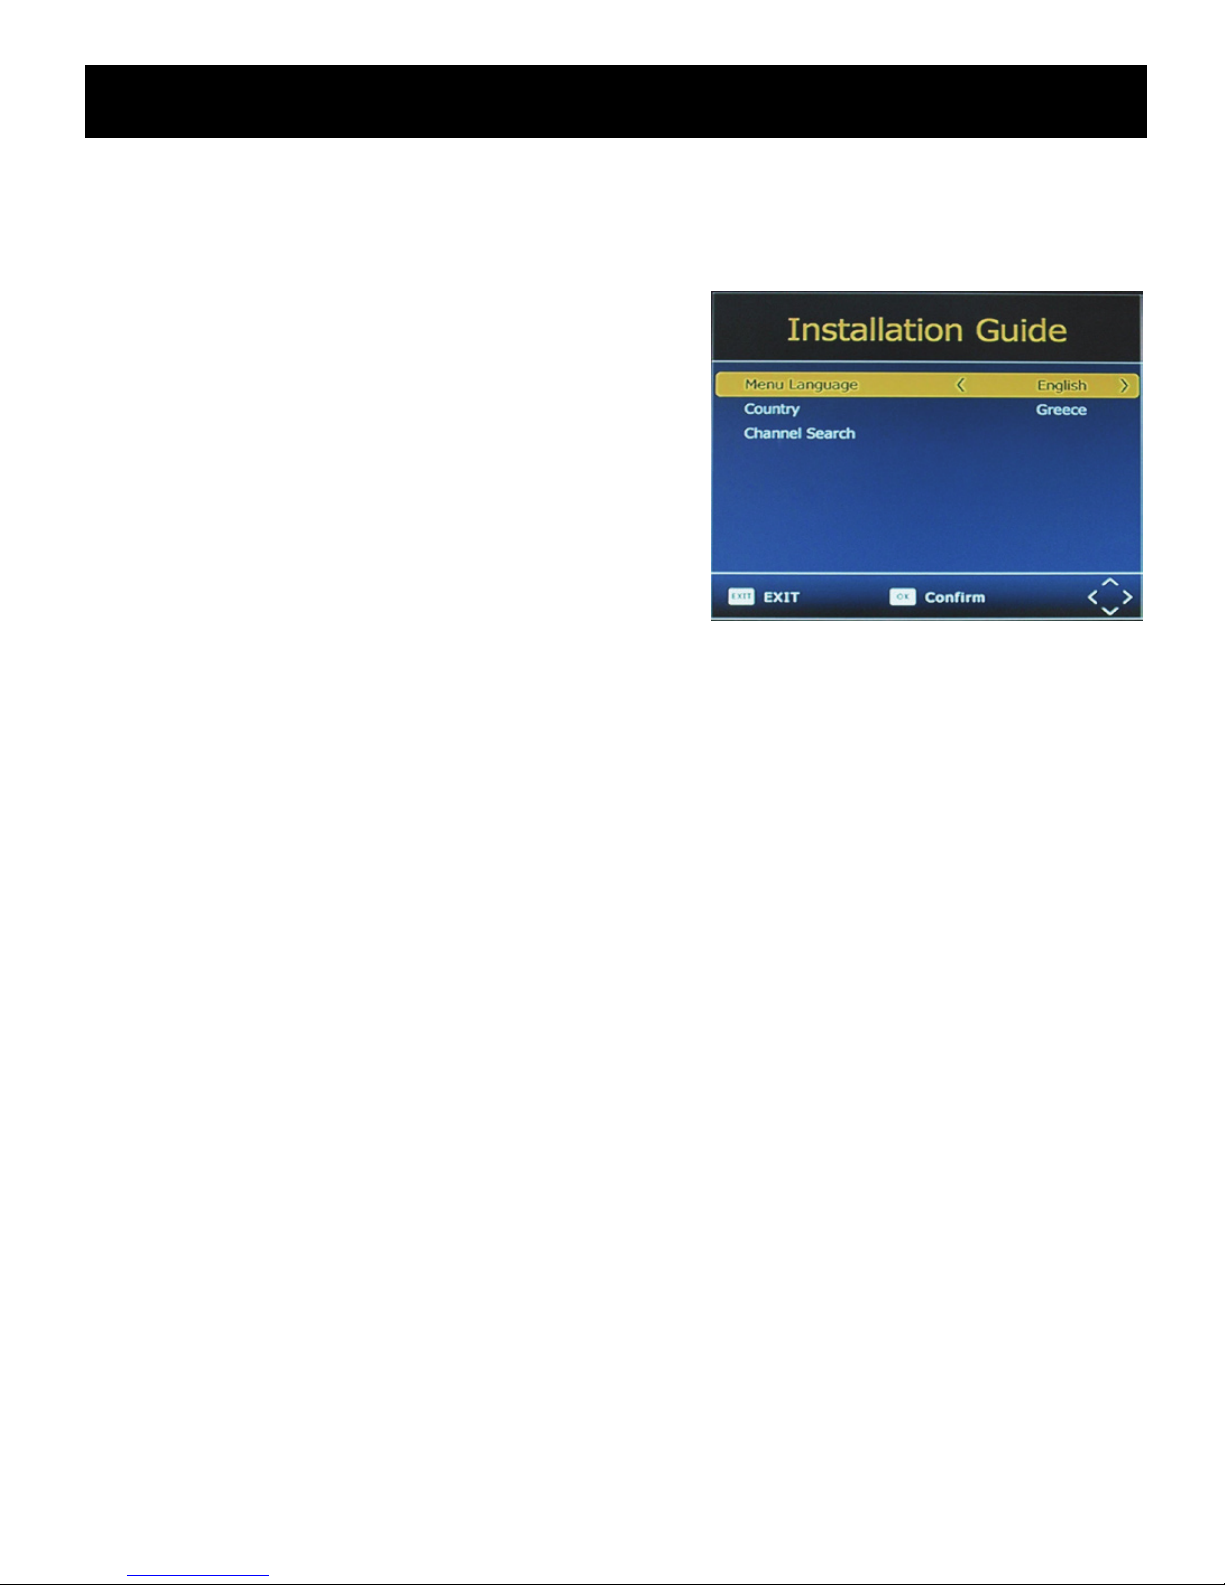
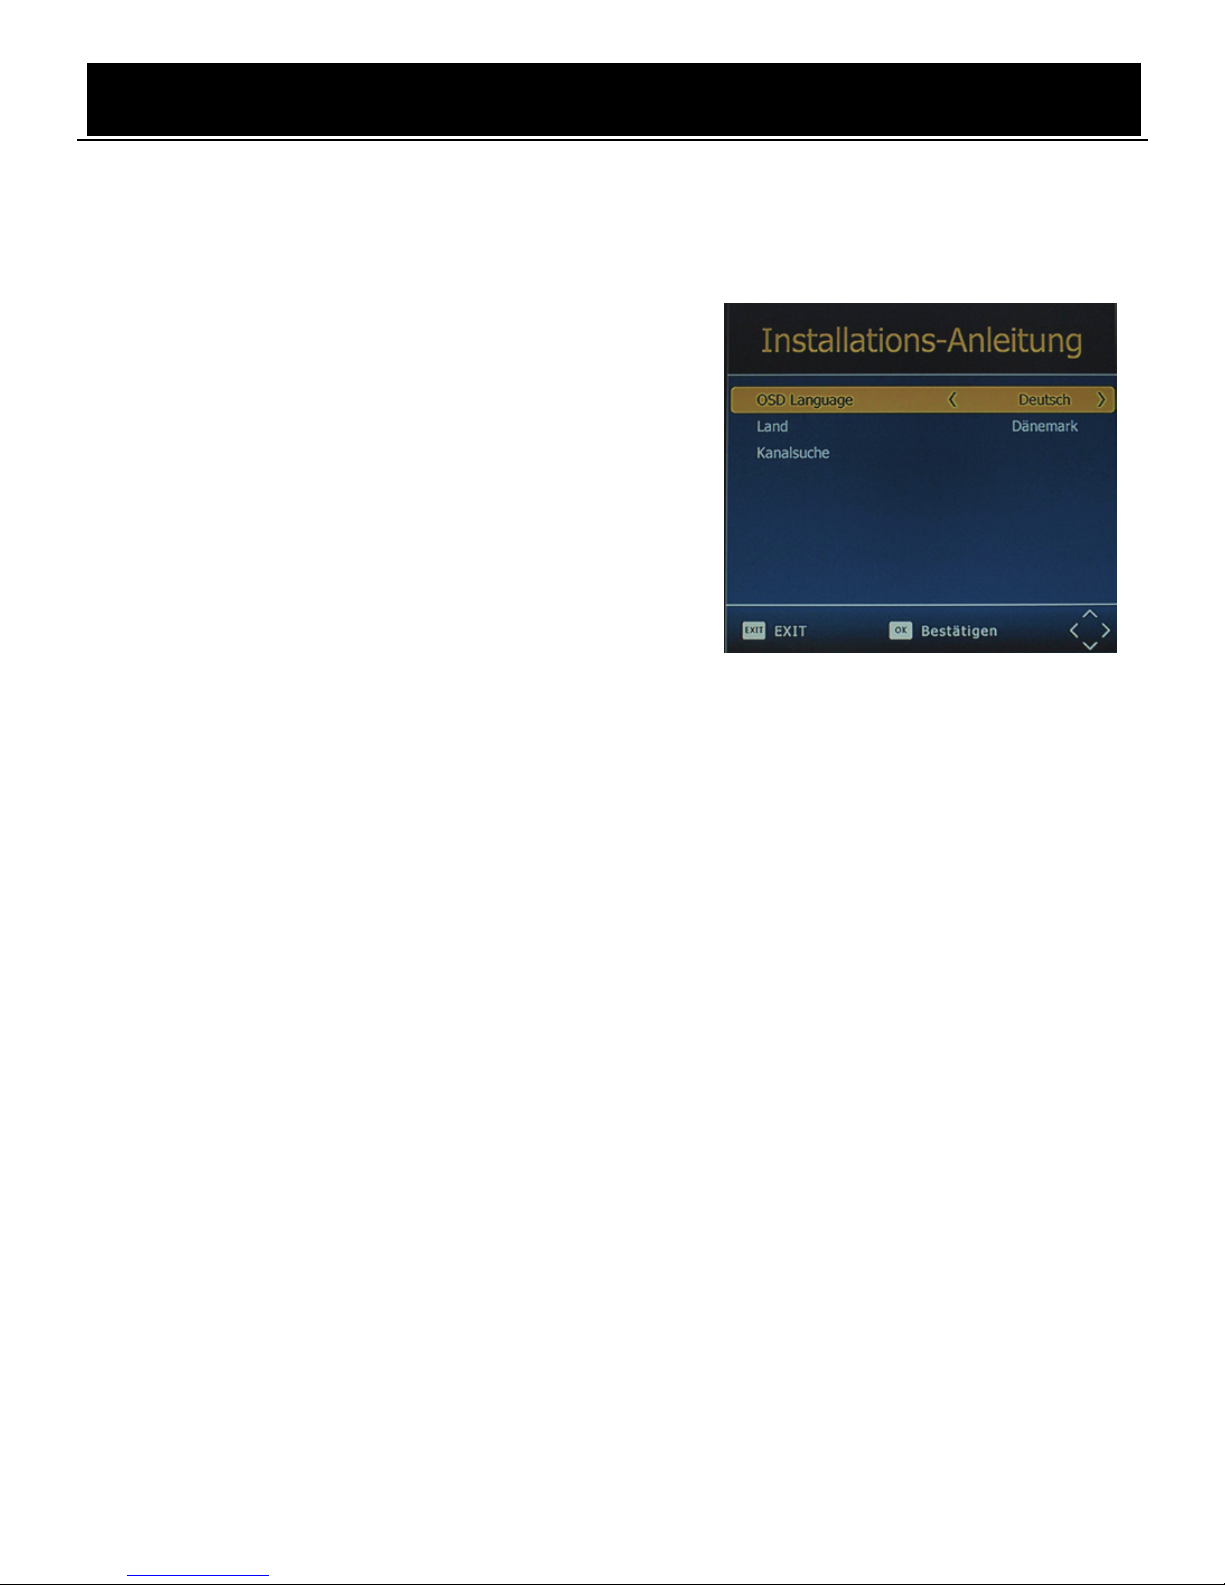
INSTALLATION GUIDE
If you are using the unit for the first time or have restored the unit to Factory Default, the
installation Guide Menu will appear on you TV screen. Follow the help information that at the
bottom of the window to select preference menu language and suitable country (region) and
start channel search.
(1) [OSD Language] Press RIGHT/LEFT
key to select a language.
(2) [Country] Press RIGHT/LEFT key to
select your country of residence.
(3) [Channel Search ] Press RIGHT/LEFT
or OK key to begin Automatic channel
search.
If no channels is found during the channel searching process, please check your antenna
connections and antenna are in working order, After the scanning process is completed the
receiver with automatically save the scanned channels and display the first channel in the list.
While you are using the unit, you can access the CHANNEL search menu to do the
AUTO/MANUAL channel search. Press MENU key on the remote and select [Channel Search]
using RIGHT/LEFT keys.
This Menu provides options to adjust the Search Channel settings. Press UP/DOWN to select
an option and press RIGHT/LEFT to adjust the settings. Press EXIT to exit the Menu.
MENU
MAIN MENU
Most functions are available in main menu. Follow the operation help information on the
bottom of the menu to modify the preference options. A password will be required when
modifying advanced options in the Menu. The Default password is “000000”.
Press the menu key on the remote control; you can access the Main Menu. There are 7 items
for setup. Use the LEFT and RIGHT keys to navigate through the menu. Select the desired
option and press the OK key or the RIGHT key to adjust the settings. Press the EXIT key to
exit the main menu.
~ 7 ~
User Manual
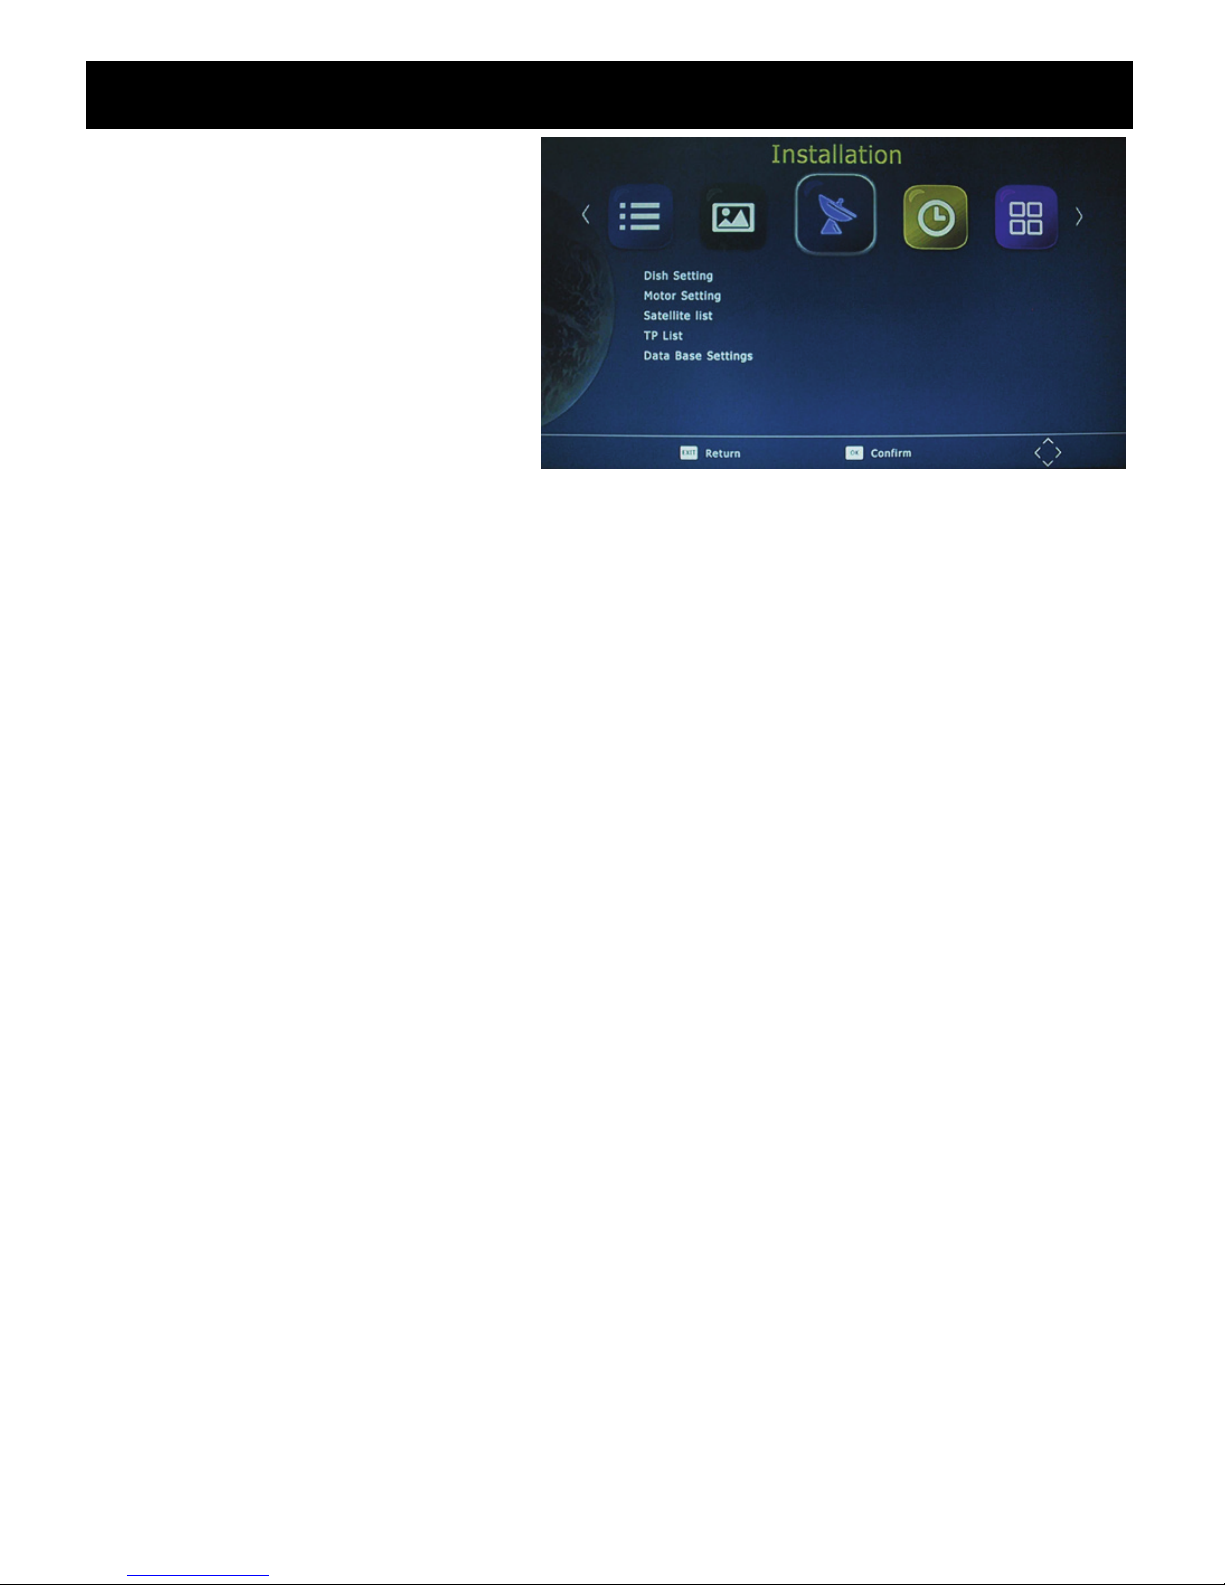
A. Installation
1.Dish Setting
In this menu, you can set detailed
parameters for selected satellites,
such as LNB Type, DiSEqC, 22K,
Motor and so on.
Satellite: It will list the satellites
which chosen in ‘Satellite Setting’
menu.
LNB:It should be match the type value of LNB you used, support 5150, 5170, 9750, 10600,
10750, 11300, 11475, 5150/5750, Universal(9750/10600), Universal F(9750/10750) and
USER LNB which allow you to define it by yourself.
Transponder:It will list the existed TP list and try to lock the signal with the current
parameters.
DiSEqC 1.0:If you are using DiSEqC 1.0 switcher, you should set it to match your DiSEqC
switcher. There are None, 1/4, 2/4, 3/4, 4/4, ToneburstA and ToneburstB for your option.
DiSEqC 1.1:If you are using DiSEqC 1.1 switcher, you should set it to match your DiSEqC
switcher. There are None, 1/16, 2/16, 16/16 for option.
22K Tone:If you are using 22K switcher, you should set it to match your 22K switcher. There
are ON, Off and None for option when the LNB type is not the Universal type, while 22K Tone
will be Auto when LNB type is set to Universal.
Polarization:Horizontal or Vertical.
Motor:It support DiSEqC1.2 and USALS motor both.
Unicable:This function is used for some customer, especially in Turkey.
There is a table to show the signal Strength and Quality of current TP of current satellite with
current parameters.
(RED): Press this button to jump to ‘TP Manager’ menu directly.
(GREEN):Press this button to jump to ‘Auto Scan’ menu directly.
2.Motor Setting
3.Satellite List
4.TP List
5.Data Base Settings
a.Save the program list to the USB device
b.Restore the list of programs that are saved in the USB to the machine.
~ 8 ~
User Manual
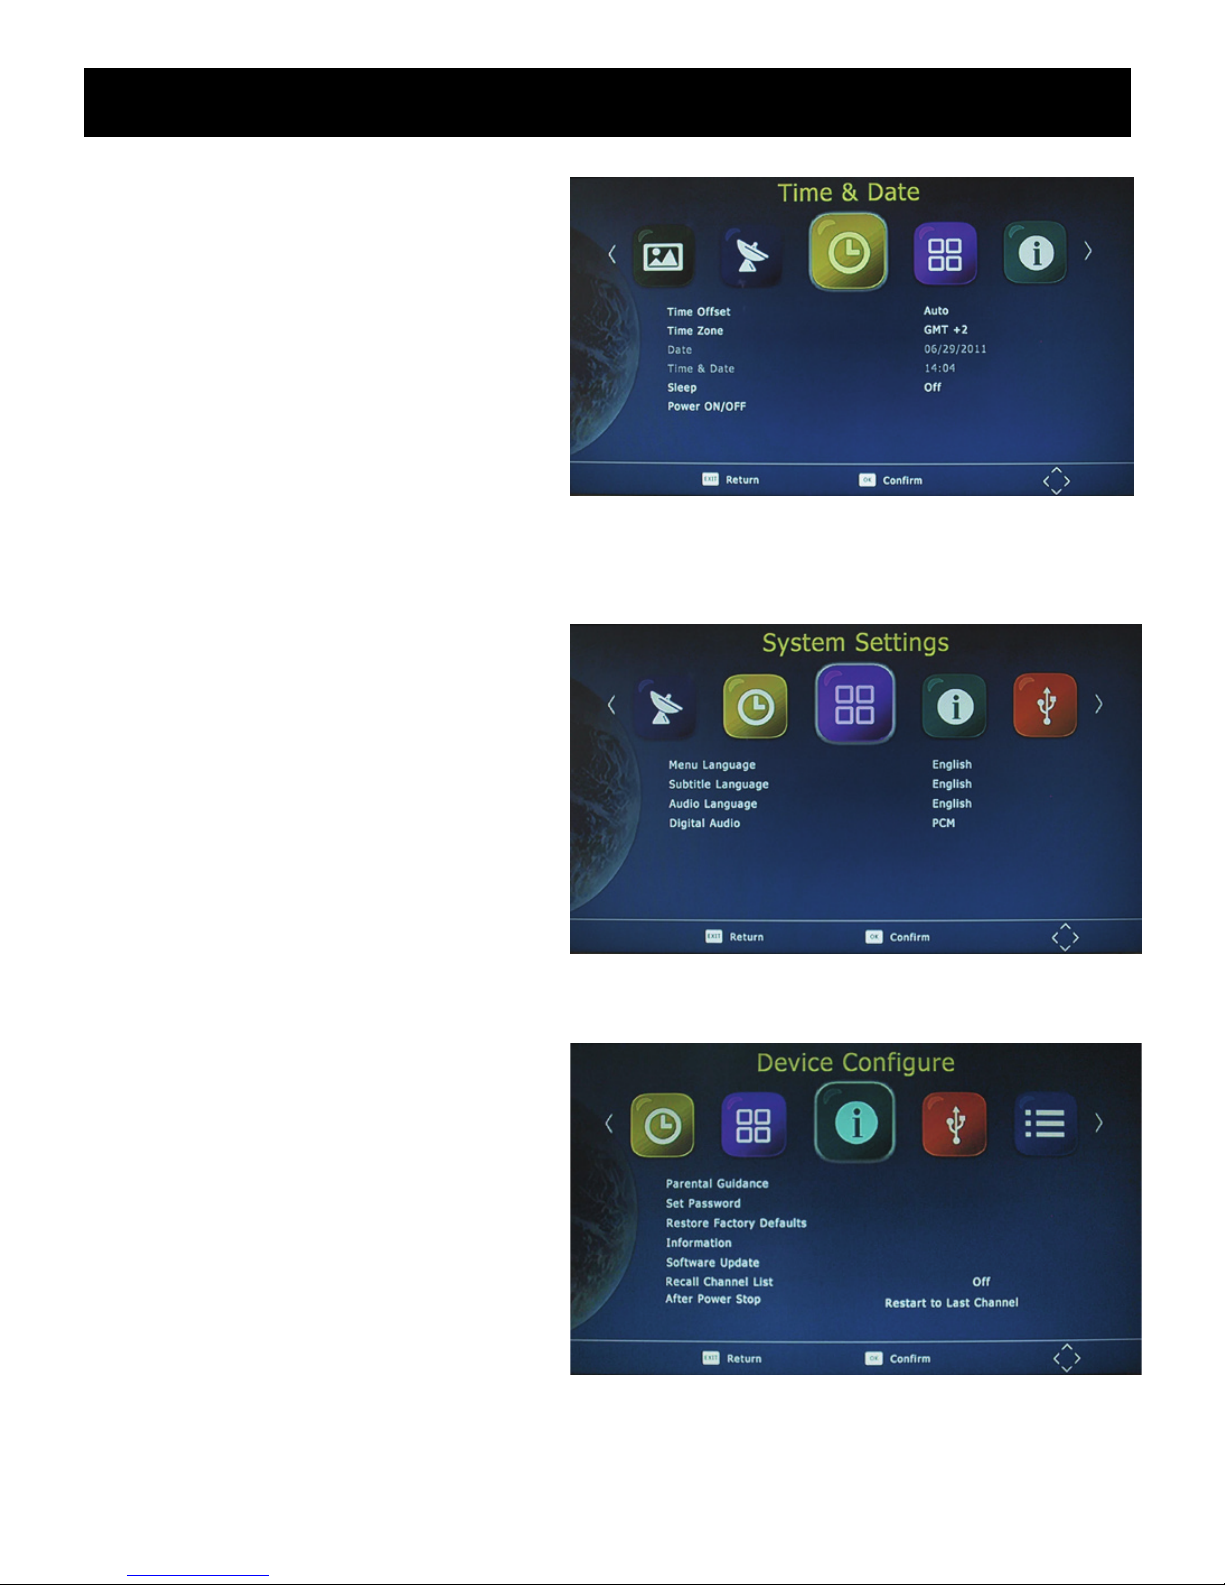
B. Time & Date
1.Time Offset
Select auto or manual for GMT offset
adjustments.
2.Time Zone
Select the Time Zone offset when
[Time Offset] IS TO MANUAL.
3.Date
4.Time & Date
5.Sleep
Select the desired time for the Auto-shut off function (from 1 hour to 12 hours or set it to Off).
6.Power ON/OFF
C. System Settings
1.Menu Language
Change the ON Screen Display
language.
2.Subtitle Language
Select the subtitle language.
3.Audio Language
If the program has multi-languages.
Set your preference here.
4.Digital Audio
D. Device Configure
1.Parental Guidance
The options for setting up the age
reference starts from 4 years to 18
years. To access this function you will
require to input a code. The default
password is “ 000000”. This function
can also be deactivated simply by
setting it to OFF.
2.Set Password
It allows you to modify the default password, which is “ 000000”.
~ 9 ~
User Manual
3.Restore Factory Defaults
It allows you to restore the unit to its default factory settings. You will be asked to enter your
password “ 000000”. Press “ OK” key once done.
Note: This function will delete all your saved channels and your personal settings.
4.Information
You can check the software version of your unit.
5.Software Update
The USB port is also used to perform a software Update
COPY THE SOFTWARE UPDATE FILE FROM YOU PC TO A USB FLASH DRIVE
1.To upgrade your unit via USB, plug the USB compactible drive to the PC and backup the
entire data of the USB drive. Right click the USB drive and select Format item. Format at USB
drive as FAT32 file system.
NOTE: To perform a software upgrade of the Receiver, please ensure the USB Flash Drive or
Portable hard disk is in FAT32 file system format. The USB port for software updates is not
compatible with USB Flash drives or Portable Hard Disk Drives in NTFS, FAT16 or U3 PRO
File System formats.
2, Press MENU, move right to enter SYSTEM SET UP, move down to enter SOFTWARE
UPDATE. Press ENTER and enter USB drive, choose update file name.
NOTE: Please do not remove the USB drive from the receiver or power off the receiver during
the upgrade process. This may damage the receiver.
6.Recall Channel List
7.After Power Stop
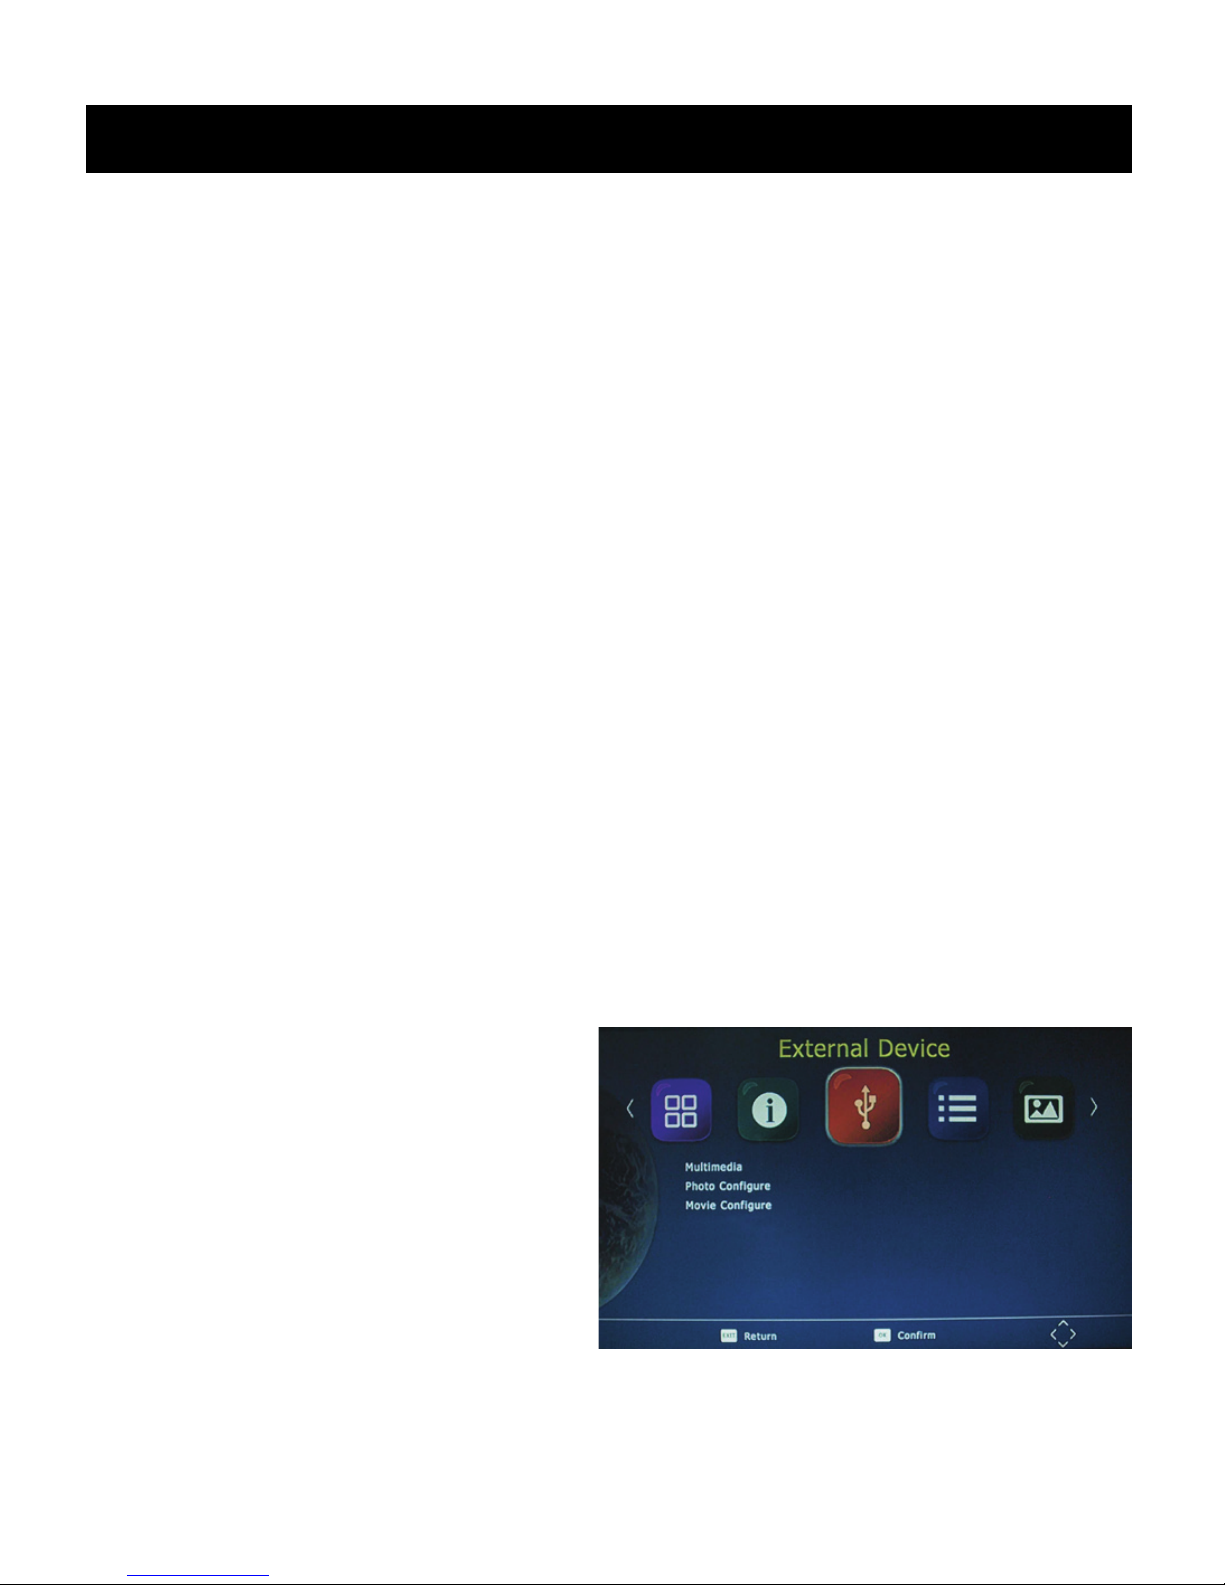
E. External Device
1.Multimedia
While in TV mode, press the “ USB”
button to access to the Multimedia menu.
The menu contains 4 different icons:
Music, Photo, Movie and Records.
Music Playing: Select “ MUSIC” icon,
move the cursor to enter the path of the desired audio file. Press the OK button to play the
selected audio file.
~ 10 ~
User Manual
Photo Viewing: Choose PHOTO icon, and enter the path of the desired photo files. Press OK
button to view the desired photo files.
Movie Playing: Choose MOVIE icon, and move the cursor to choose the path of the desired
video files. Press the OK button to play the desired video files.
Records Playing: Select Records icon. Select the recorded file you want to play, press OK to
begin playback. Press the RECALL key to move up to the next Folder. Press the RED key to
switch between Preview and Full screen modes. Use the YELLOW key to delete the file you
don’t want. Press the GREEN key to rename the recorded file if desired.
2.Photo Configure
You can adjust the slide time, slide mode and aspect ration here.
3.Movie Configure
You can set the Aspect Ratio , Subtitle Specific, Subtitle background and Subtitle Font-colour
here.
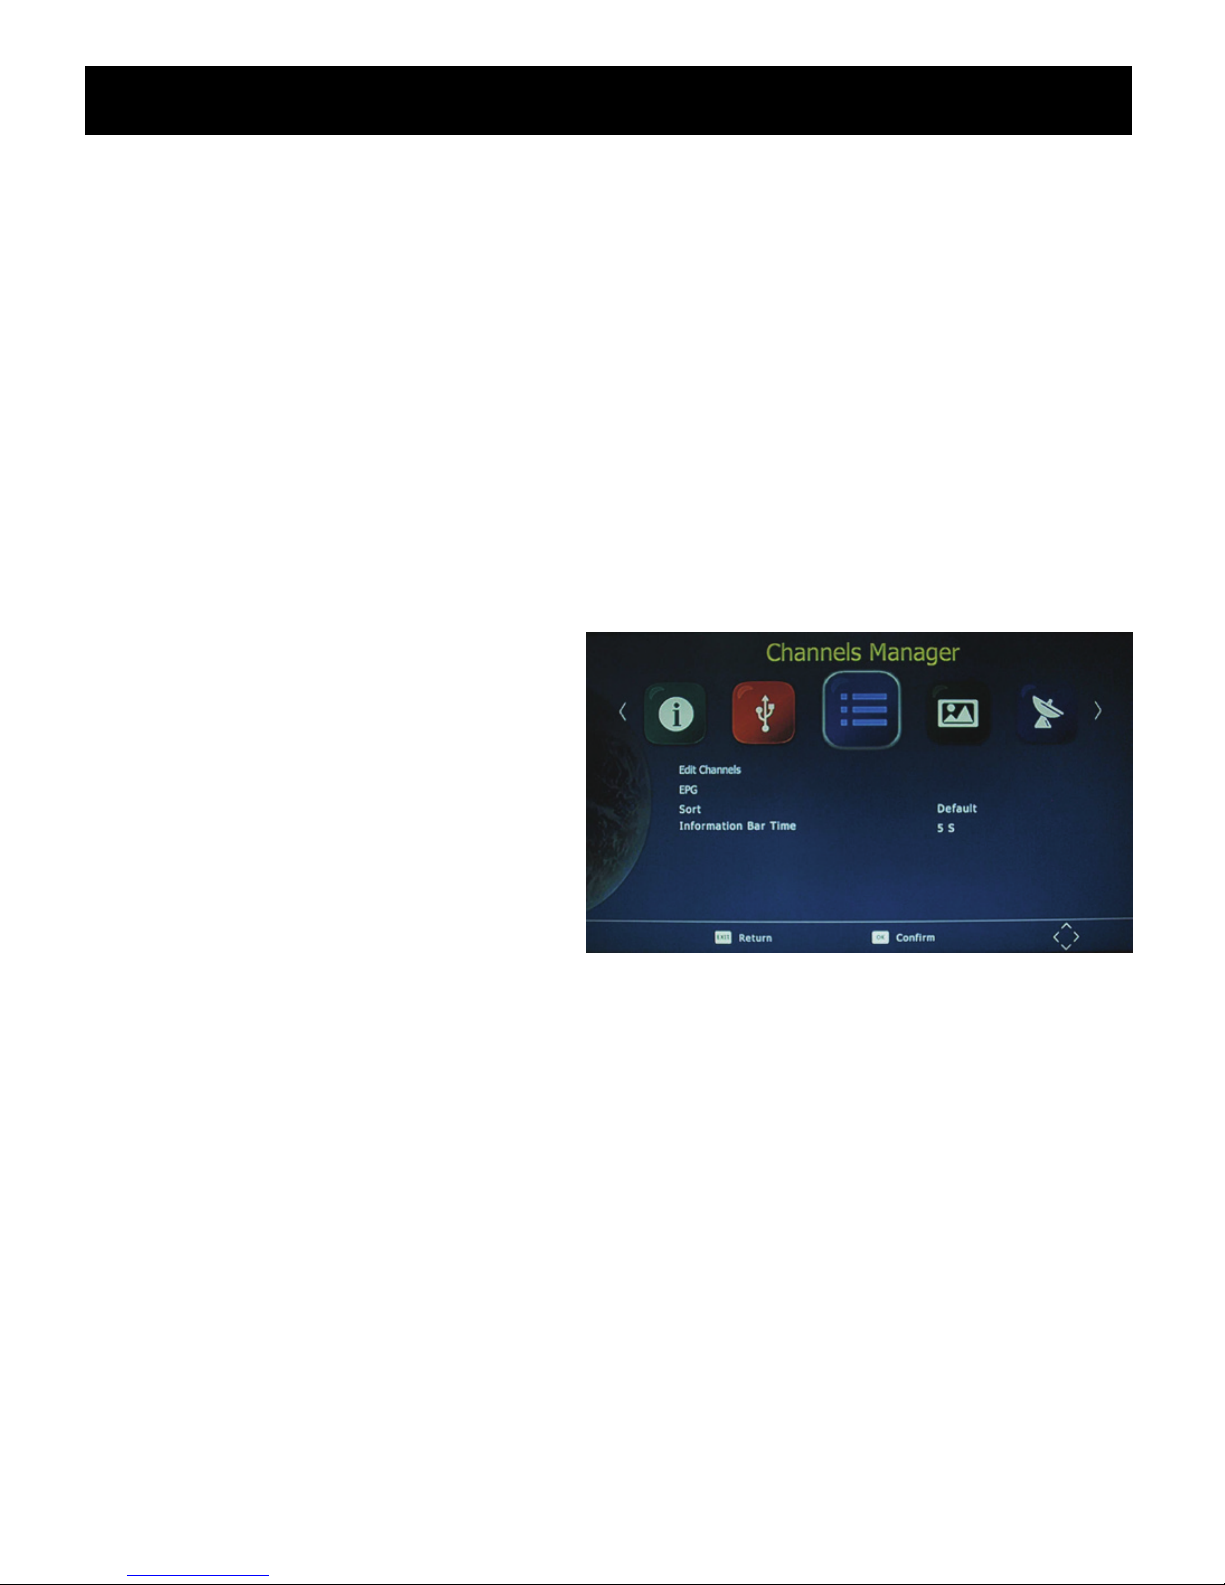
F. Channels Manager
1.Edit Channels
To edit your channels (to lock, Skip,
favorite, move or delete a program), you
need to enter a password. Enter the
default password “000000”. The master
unlock password is “888888”.
2.EPG
The EPG is an on-screen TV guide that shows scheduled programs seven days in advance
for every tuned channel. Press the EPG key on the Remote Control to access the Electronic
Program Guide.
3.Sort
Note: it’s important to deactivate the LCN function while sorting out the position of the
channels. The “ Sort” function allows you to sort the channels by different methods:
By LCN: This will sort the channels by ascending order.
By Service name: This will sort the channels in alphabetical order.
By Service ID: This will sort the channels by Service ID.
By ONID: This will sort the channels according tot eh ONID.
~ 11 ~
User Manual
4. Bar time
Press bar time to change the display time of the information when switching the channels.
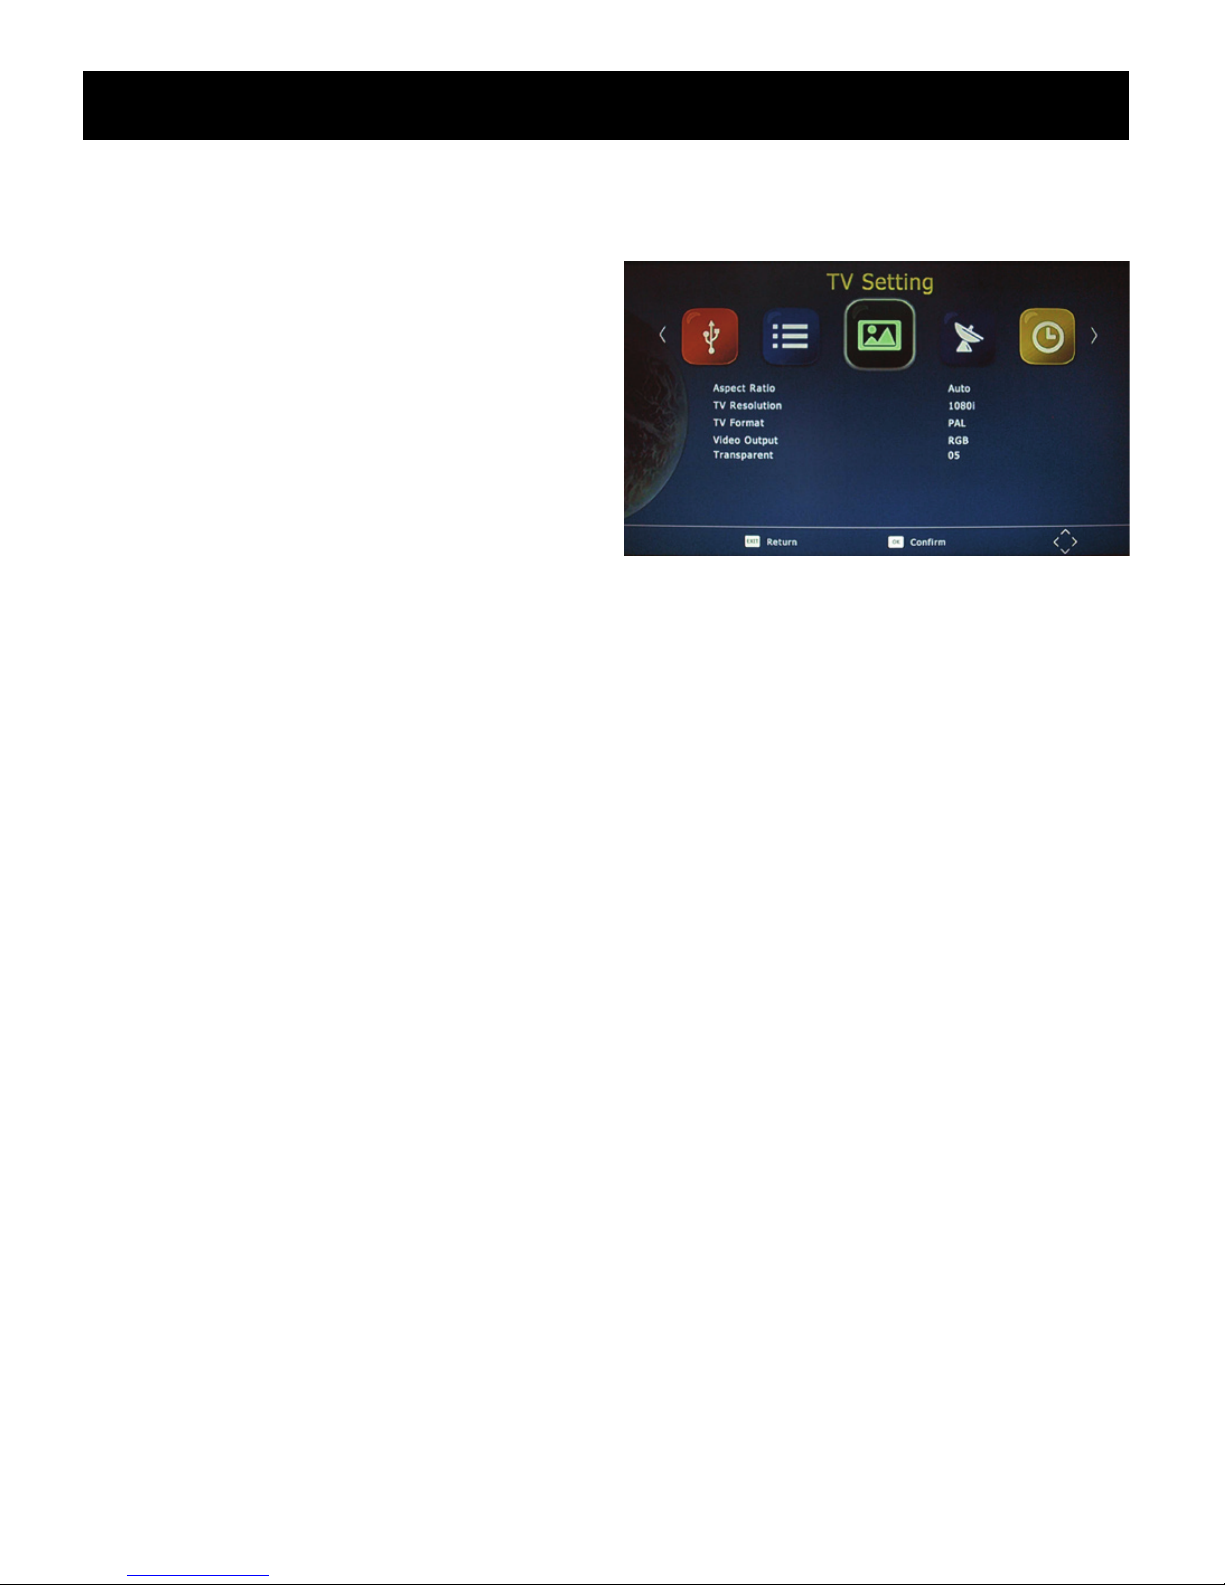
G. TV Setting
1.Aspect Ratio
The aspect ratio of the video can be 4:3
(also know as Anamorphic Image) or 16:9
(also know as widescreen TV). Normally the
aspect ratio of standard definition video
should be 4:3 and the high definition video
should be 16:9. In order to get excellent
quality on the TV set, press the MENU key
to enter the menu, and choose the aspect ratio setup menu to set suitable aspect ratio. The
screenshot of the aspect ratio window is illustrated below.
2.TV Resolution
You can choose different resolution according to your TV: 576i, 576p, 720p, 1080i, 1080p.
3.TV Format
TV format: PAL/NTSC
4.Video Output
CVBS, RGB
5. Transparent
Press transparent to change the background of the menu.
Daily use
INFO. KEY
Press “ INFO” key to display the Information banner while viewing TV programs Information
banner:
L/R KEY
Some programs may have multilingual audio language and this audio broadcast may be on a
different audio mode such as Stereo, Left or Right. All the available audio languages will be
displayed on the audio track window when you press the L/R key. The Screenshot illustrates
this below. If there is no audio output after you have selected the audio language. It indicates
that there is no audio on the current audio mode, so you have to select the previous audio
mode.

~ 12 ~
User Manual
SUBT KEY
Certain programs have multilingual subtitle information. All available subtitle languages will be
displayed in the subtitle information window when you press the SUBT key. The screenshot
illustrates this below. Follow the help information in the subtitle window to select preferred
subtitle.
PREV/NEXT KEY & F.R./F.F. KEY
The PREV/NEXT key and F.R./F.F. key can be used during playback of multimedia programs
from your external USB device. Press the PRE/NEXT key to go to the previous/next program
and F.R./F.F. key to fast forward or rewind during playback.
EPG
Press EPG key to display the on screen electronic program guide.
This displays a 7 day Electronic Program Guide for all programs being broadcast from all
broadcasters.
TV CHANNEL AND RADIO CHANNEL LIST
Press OK key to display all TV channels or all Radio channels. Follow the help information at
the bottom of the window to select preferred channel.
FAVOURITE CHANNEL
Setting up Favourite TV or Radio Channels:
You Can add preferred channels to a favourite’s channel list. Press the Menu key to access
the Program Edit Menu. The Favourite channel option allows you to classify the channels by
different genre: Movies/News/Sports/Music. Press the “ FAV” or “ OK” key to confirm your
selection. A heart shaped symbol will appear next to that channel which confirms your
selection.
Disable Favourite TV or Radio Channels:
Press the Menu key to access the Program Edit Menu. The list of the favourite channels will
be displayed. Highlight the desired channel to disabled. Press” FAV” button, select the
“ Disable” option and press the “ FAV” or “ OK” key to cancel. Press the “ Exit” key to exit the
menu.

~ 13 ~
User Manual
View Favourite Channel:
While in normal viewing mode, press the “FAV” key to access to your favourite channel menu.
Press the LEFT or RIGHT keys on your remote to access to the classified Sub-Menu
(Movies/News/Sports/Music). Press the UP or DOWN keys to browse through your favourite
channels. Press the “OK” key to select your favourite channel.
Delete a TV or RADIO Program:
Press the Menu key to access the Program Edit Menu. Select the program you wish to delete
and press the “BLUE” key on your remote. A warning message will appear on your TV screen.
Press the “OK” key to confirm the deletion of the channel. Repeat the above procedure to
delete further channels.
Skip TV or RADIO Channel:
Press the Menu key to access the Program Edit Menu. Select the channel you would like to
“Skip” and press the “GREEN” key on your remote. A skip symbol will appear. Now the
channel is marked as a SKIP. To save your settings and exit the menu, press the “Exit” key.
Move a TV or RADIO Program:
Press the Menu key to access the Program Edit Menu. Select the desired channel you wish to
move and press the “RED” key on your remote. A “MOVE” symbol will appear on your TV
screen. Press the UP or DOWN keys to move the channel to the desired position. Press the
“ OK” key to the confirm your selection . Repeat the above process to move further channels.
WARNING:
To use the USB for media playback Function, Instant recording function, TV program guide
timer recording function, TIMESHIFT function, Playback recorded program function and
Multimedia player function it is necessary to connect an external device such as a USB flash
drive or an external hard disk drive to the USB port. The maximum capacity of HDD supported
by the STB is up to a size of 500GB. It support FAT32 and NTFS file formats.
1) Multimedia player
MENU+ multimedia you can now select to view photos, play mp3 music files and view movie
files via the multimedia player/known supported files are outlined below.
NTFS,FAT32 and FAT16 file systems are supported.

~ 14 ~
User Manual
2) Format portable hard disk
A format hard disk function has also been provided Formatting a hard disk will permanently
delete all the data on the hard disk. it is strongly recommended to backup all the data before
formatting you hard disk drive.
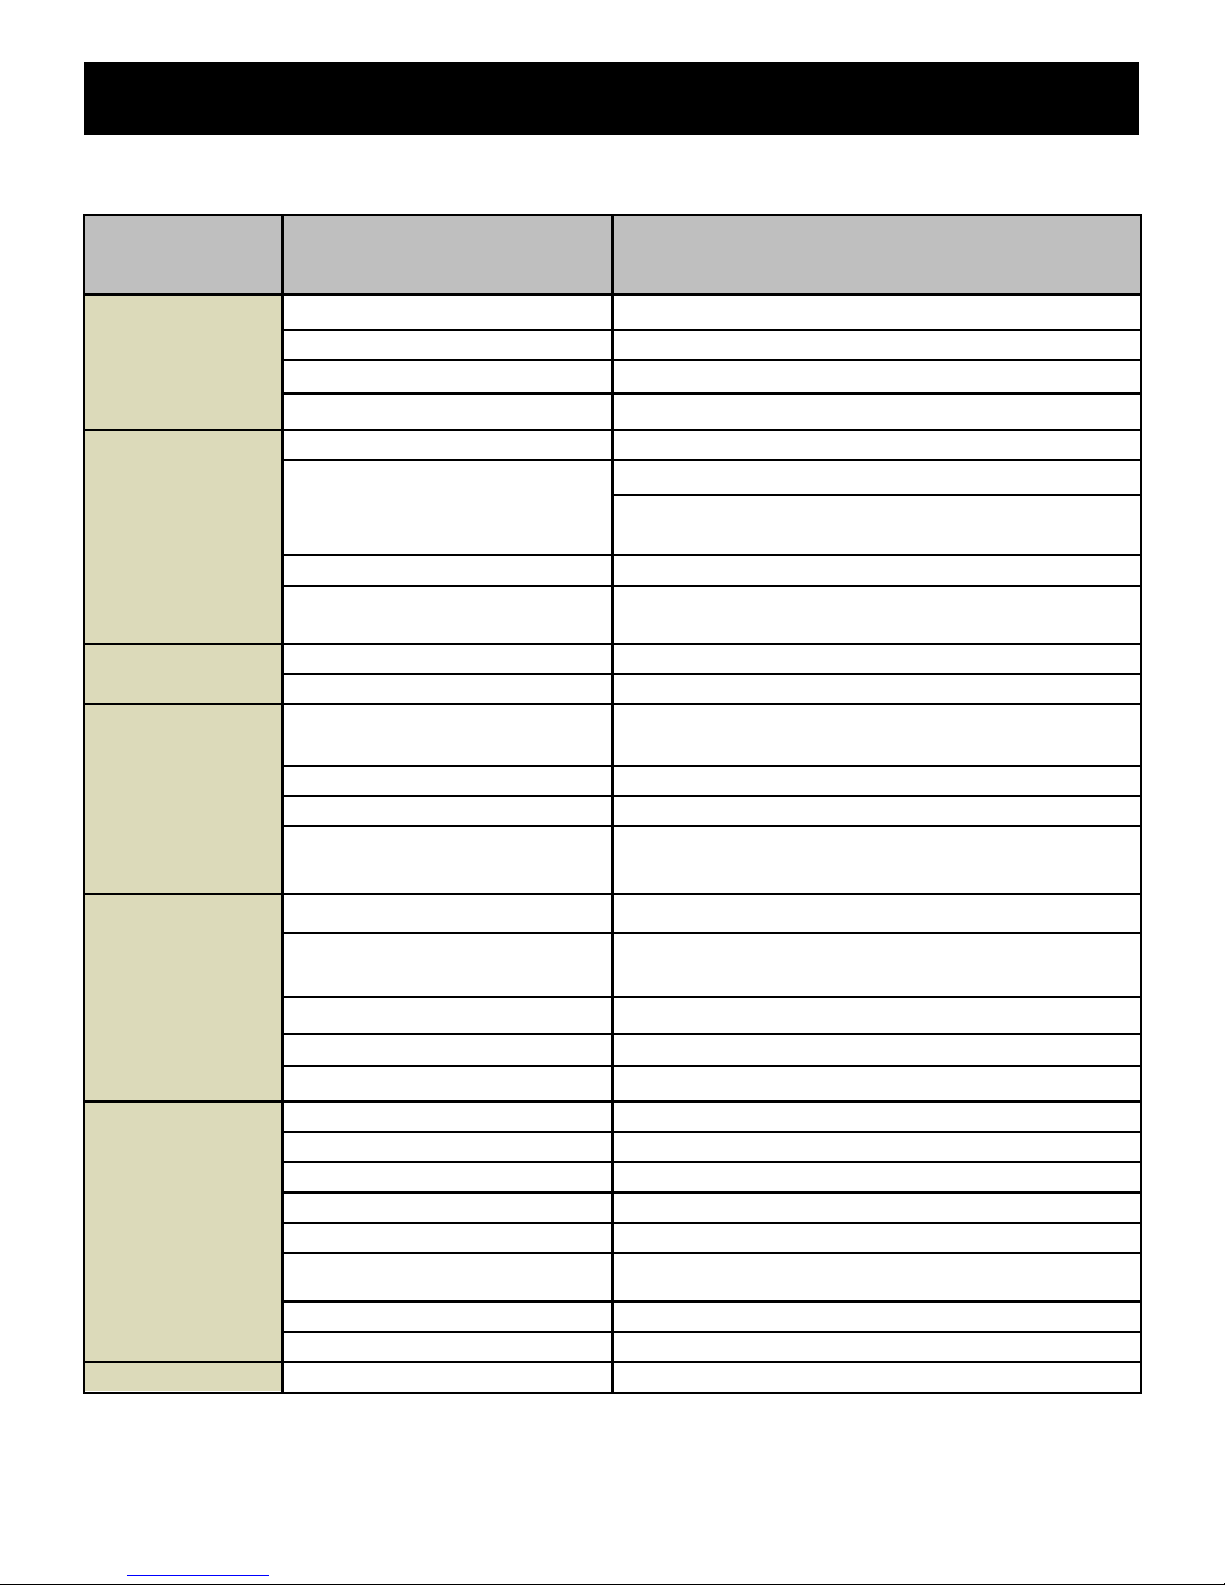
Troubleshooting
The below table is s list of common problems that many occur with your receiver.
player Supported file
photo JPEG,BMP PNG
music
mp3 aac
movice Avi, mpg, dat, vob, mkv, mjpeg
fault Possible cause
Power on, but
nothing displayered
on screen
Unit not turned on at
mains switch
Ensure power plug is plugged into
wall scoket and switch is on
TV picture drops out
and thr unit
displayers "NO
signal"
Antenna is not
properly connected or
you are in a bad
reception area
Talk to your local TV antenna
technician about recwption
problems in your area and whether
a new antenna woule benefit you
Receiving digital TV
but m
issing some
channels
Antenna is not
properly connected or
you are in a bad
reception area
Talk to your local TV antenna
technician about recwption
problems in your area and whether
a new antenna woule benefit you
Remote is not
working
Batteries are flat or
there is interference
Talk to your local TV antenna
technician about recwption
problems in your area and whether
a new antenna woule benefit you
~ 15 ~
User Manual
SPECIFICATIONS
SECTION ITEM DESCRIPTION
DVB-S/S2
TUNER
Input Frequency: 950 ~2150MHz
Loop out frequency:
950 ~2150 MHz
Input level: -80~-20dBm
Input impedance 75 Ω
CHANNEL
DECODING
Demodulation QPSK, 8PSK
FEC mode
DVB-S: 1/ 2, 2/3, 3/4, 5/6. 7/8
DVB-S2: 1/2, 3/5, 2/3, 3/4, 4/5, 5/6, 8/9, 9/10
(QPSK) 3/5, 2/3, 3/4, 5/6, 8/9, 9/10 (8PSK)
Symbol Rate DVB-S: 2.0~ 45 MS/s
Demodulation
QPSK, 8PSK, DVB-S2: 10-30 Mb/s (QPSK),
10-31Mb/s (8PSK)
DEMULTIPLE
XER
Standard ISO/IEC 13818-1
Input Max. Bit Stream Rate
100Mbps(Serial)/12.5MBps(Parallel)
VIDEO
DECODING
Standard ISO/IEC 13818-2, MPEG-2 MP@ML, MPEG-4
AVC (MP L4.1)
Aspect ratio
4:3, 16:9
Video format
PAL-B / NTSC-M / PAL-N / PAL-M
Video resolution 1080P, 1080I,720P,480P/576P,480i/576i SD
compatible
AUDIO
DECODING
Standard
ISO/IEC 13818-3
Decoding MPEG-1 Layer I and II, MPEG-2, MPEG-4
AAC
Output mode LPCM, RAW
Sampling frequency 32, 44.1, 48KHz
Volume level
24 Levels
AV OUTPUT
Video de-emphasis
CCIR REC.405-1, 625LINES
Video bandwidth 5.5MHz
Video output impedance
75Ω
Video output level
1.0Vp-p
Audio output
Stereo
Audio output frequency
20Hz~ 20KHz
Audio output impedance
Low
Audio output level
A 1.0Vrms ± 2dB into 10K.
OTHERS
Power input Spec.
AC100-240V~50/60Hz. Max.8W

~ 16 ~
ALL RIGHTS RESERVED, COPYRIGHT DENVER ELECTRONICS A/S
Electric and electronic equipment and included batteries contains materials, components and
substances that can be hazardous to your health and the environment, if the waste material (discarded
electric and electronic equipment and batteries) is not handled correctly.
Electric and electronic equipment and batteries is marked with the crossed out trash can symbol, seen
below. This symbol signifies that electric and electronic equ
ipment and batteries should not be
disposed of with other household waste, but should be disposed of separately.
As the end user it is important that you submit your used batteries to the approriate and designated
facility. In this manner you make sure that the batteries are recycled in accordance with legislature and
will not harm the environment.
All cities have established collection points, where electric and electronic equipment and batteries can
either be submitted free of charge a
t recycling stations and other collection sites, or be collected from
the households. Additional information is available at the technical department of your city.
Imported by:
DENVER ELECTRONICS A/S
Omega 5A, Soeften,
DK-8382 Hinnerup,
Denmark
www.facebook.com/denverelectronics
Bedienungsanleitung
HD SATELLITEN-RECEIVER
MODELL-NR.: DVBS-202HD
Lesen Sie diese Bedienungsanleitung vor dem Gebrauch und
Anschluss dieses Produkts durch.
Bewahren Sie die Bedienungsanleitung gut auf.

Bedienungsanleitung
~ 1 ~
Sicherheitsvorkehrungen
Lesen Sie diese Sicherheitswarnungen vom dem Gebrauch des Geräts durch.
1. Netzkabelschutz
Um Fehlfunktionen des Geräts zu vermeiden und um vor Stromschlägen, Feuer oder
Verletzungen zu schützen, beachten Sie die nachfolgenden Hinweise.
• Halten Sie den Netzstecker gut fest, während Sie das AC-Netzkabel anschließen oder
trennen.
• Halten Sie das AC-Netzkabel von Heizgeräten fern.
• Stellen Sie keine schweren Gegenstände auf das AC-Netzkabel.
• Versuchen Sie nicht, das AC-Netzkabel zu reparieren.
• Anschlüsse dürfen nicht vorgenommen oder geändert werden, während das Gerät
eingeschaltet ist.
2. Standort
Vermeiden Sie Standorte mit:
• Direkter Sonneneinstrahlung oder Heizkörpern
• Hohen Temperaturen (über 35°c) oder hoher Feuchtigkeit (über 90%)
• Staub, da dadurch die inneren Komponenten ernsthaft beschädigt werden könnten.
3. Nichtgebrauch
Schalten Sie das Gerät während des Nichtgebrauchs aus. Falls Sie das Gerät längere Zeit
nicht verwenden werden, trennen Sie das Gerät vom Netzstrom.
4. Finger und Gegenstände fernhalten
• Das Berühren innerer Gerätekomponenten ist gefährlich und kann ernsthafte
Geräteschäden verursachen. Versuchen Sie nicht, das Gerät auseinanderzubauen.
• Stecken Sie keine fremden Gegenstände in das Gerät.
5. Von Wasser fernhalten
• Halten Sie das Gerät von Blumenvasen, Badewannen, Waschbecken usw. fern. Falls
Flüssigkeiten über dem Gerät ausgeschüttet werden, kann dies ernsthafte Schäden
verursachen.

Bedienungsanleitung
~ 2 ~
EINLEITUNG
Diese Bedienungsanleitung ist ein Leitfaden für den Gebrauch des digitalen, terrestrischen
DVB-S2 FTA High Definition Receivers.
Für die Änderung erweiterter Menüoptionen ist ein Passwort erforderlich. Das Standard-Passwort
lautet „000000“.
HAUPTFUNKTIONEN UND PRODUKTMERKMALE
1. Vollständig kompatibel mit DVB-S/DVB-S2/MPEG-2/MPEG-4/H.264
2. SCART/HDMI-Ausgang, USB 2.0
3. SCPC- & MCPC-Empfang via C/Ku-Band-Satelliten
4. Unterstützt DiSEqC 1.0/1.1/1.2/1.3 (USALS)
5. Unterstützt universales LNB und NIT-Suche
6. DiSEqC1.0/DiSEqC1.2 und USALS Protokolle
7. Elektronische Programmzeitschrift (EPG), VBI-Videotext, unterstützt bis zu 64 Satelliten
8. Bis zu 2.500 Transponder, Frequenzbereich: 950-2150 MHz
9. Autom./Manuelle Programmsuche, unterstützt mehrere Sprachen
10. USB 2.0, Softwareaktualisierung, Multimedia-Wiedergabe, OTA-Softwareaktualisierung
11. Übertragungsmodus: LDPC/BCH (DVB-S2) 8PSK/QPSK, DVB-S QPSK
12. Unterstützt bis zu 5000 Kanäle
13. Unterstützt Full HD 1080P, HDMI 1.3
Bedienungsanleitung
~ 3 ~
STANDBY: Ein-/Ausschalten
Number Key: <0-9>
SUBT: Untertitelmenü öffnen/beenden
EPG: Elektronische Programmzeitschrift
Menu: Hauptmenü öffnen
Navigationstasten: Aufwärts/Abwärts/Links/Rechts
OK: Auswahl im aktuellen Menü bestätigen oder
Tastenkombination für „SCHNELLAUSWAHL“ im
Vollbild-Wiedergabemodus
VOL -/+: Lautstärke einstellen
TEXT: DVB-S2 Videotext
GOTO: Rück- oder Vorlauf während der Wiedergabe einer
aufgenommenen Datei
USB: Vorheriges USB-Medium wiedergeben
INFO: Programminformationen im Vollbild-Wiedergabemodus
anzeigen
Mute: Ton aus-/einschalten.
Recall: Zum vorherigen Menü zurückkehren
L/R: Betrieb im Audiomodus
EXIT: Direkt zum Vollbild-Wiedergabemodus zurückkehren
CH+/CH-: Zum nächsten/vorherigen Sender springen.
FAV: Favoritenliste anzeigen
TV/RADIO: Umschalten zwischen TV- und Radiomodus
WIEDERGABE/PAUSE: Wiedergabe Films
unterbrechen/starten
Stopp: Wiedergabe Films beenden.
PREV: Vorheriges Kapitel
NEXT: Nächstes Kapitel
SCHNELLER RÜCKLAUF: Schneller Rücklauf
SCHNELLER VORLAUF: Schneller Vorlauf
Farbtasten: Funktionstasten in unterschiedlichen
Anzeigefenstern.
Bedienungsanleitung
~ 4 ~
FRONTBLENDE UND GERÄTERÜCKSEITE
RÜCKSEITE
1. Anschluss des Satelliten-Antennenkabels
2. LOOP-OUT Modulator mit CH11, für ältere Fernsehgeräte.
3. Verbindung mit HDTV-Anschluss des Fernsehers
4. FBAS-Videoausgang
5. Analoger Audioausgang
6. Digitaler Audioausgang
FRONTBLENDE
1. Betrieb EIN/AUS
2. Navigationstaste (Kanal+/-, Lautstärke +/-)
3. OK-Tast e
4. MENÜ-Ta ste
5. Betriebsanzeige
6. LED-anzeigefenster:
7. Fernsensor
8. USB-port
Bedienungsanleitung
~ 5 ~
INSTALLATION
ANSCHLUSS DES RECEIVERS
Stellen Sie Ihre Set-Top-Box auf einen flachen und stabilen Untergrund, bevor Sie diese mit
Ihrem Fernsehgerät verbinden. Verbinden Sie das Gerät dann mit Ihrem Fernsehgerät und
anderen Peripheriegeräten. Beziehen Sie sich auf das untenstehende Diagramm und
informieren Sie sich in der Bedienungsanleitung des Fernsehers über den Anschluss von
Kabeln.
Schließen Sie die Set-Top-Box an, um das Fernsehgerät und die Set-Top -Box vor dem
erstmaligen Setup einzuschalten.
Bedienungsanleitung
~ 6 ~
INSTALLATIONSFÜHRER
Beim ersten Einschalten oder nach einer Rückstellung zu den Werkseinstellungen wird der
Installationsführer angezeigt. Befolgen Sie die Anleitungen unten am Bildschirmrand, um die
Menüsprache und Ihr Land (Region) auszuwählen und um die Sendersuche zu starten.
(1) [OSD Language] Drücken Sie die
Navigationstasten RECHTS/LINKS zur
Auswahl der Sprache.
(2) [Country] Drücken Sie die
Navigationstasten RECHTS/LINKS zur
Auswahl Ihres Landes.
(3) [Sendersuche] Drücken Sie die Pfeiltasten
RECHTS/LINKS oder OK, um die
automatische Sendersuche zu starten.
Falls während der Sendersuche keine Sender
gefunden werden, überprüfen Sie, ob die Antenne richtig verbunden und funktionsfähig ist.
Nach Abschluss der Sendersuche speichert der Receiver die gefundenen Sender
automatisch und schaltet anschließend den ersten Sender in der Liste ein.
Öffnen Sie während des Gebrauchs des Geräts das Menü der SENDER-Suche, um die
AUTOMATISCHE/MANUELLE Sendersuche durchzuführen. Drücken Sie die Taste MNEU
auf der Fernbedienung und wählen Sie dann mit den Pfeiltasten RECHTS/LINKS die Option
[Sendersuche].
Das Menü enthält Optionen zur Konfiguration der Sendersuche. Drücken Sie die Pfeiltasten
aufwärts/abwärts zur Auswahl einer Option und drücken Sie die Pfeiltasten rechts/links, um
die Einstellung zu ändern. Drücken Sie EXIT, um das Menü zu verlassen.
MENÜ
HAUPTMENÜ
Im Hauptmenü haben Sie Zugriff auf die meisten Funktionen. Folgen Sie den Anleitungen unten
in der Menüanzeige, um Optionen je nach Bedarf zu ändern. Für die Änderung erweiterter
Menüoptionen ist ein Passwort erforderlich. Das Standard-Passwort lautet „000000“.
Drücken Sie die Taste MENU auf der Fernbedienung, um das Hauptmenü zu öffnen. Im
Hauptmenü sind 7 Setupoptionen enthalten. Navigieren Sie mit den Pfeiltasten LINKS und
RECHTS durch das Menü. Wählen Sie die gewünschte Option und drücken Sie die Taste OK
oder die RECHTE Pfeilaste, um die Einstellungen zu konfigurieren. Drücken Sie die Taste
EXIT, um das Hauptmenü zu verlassen.
Bedienungsanleitung
~ 7 ~
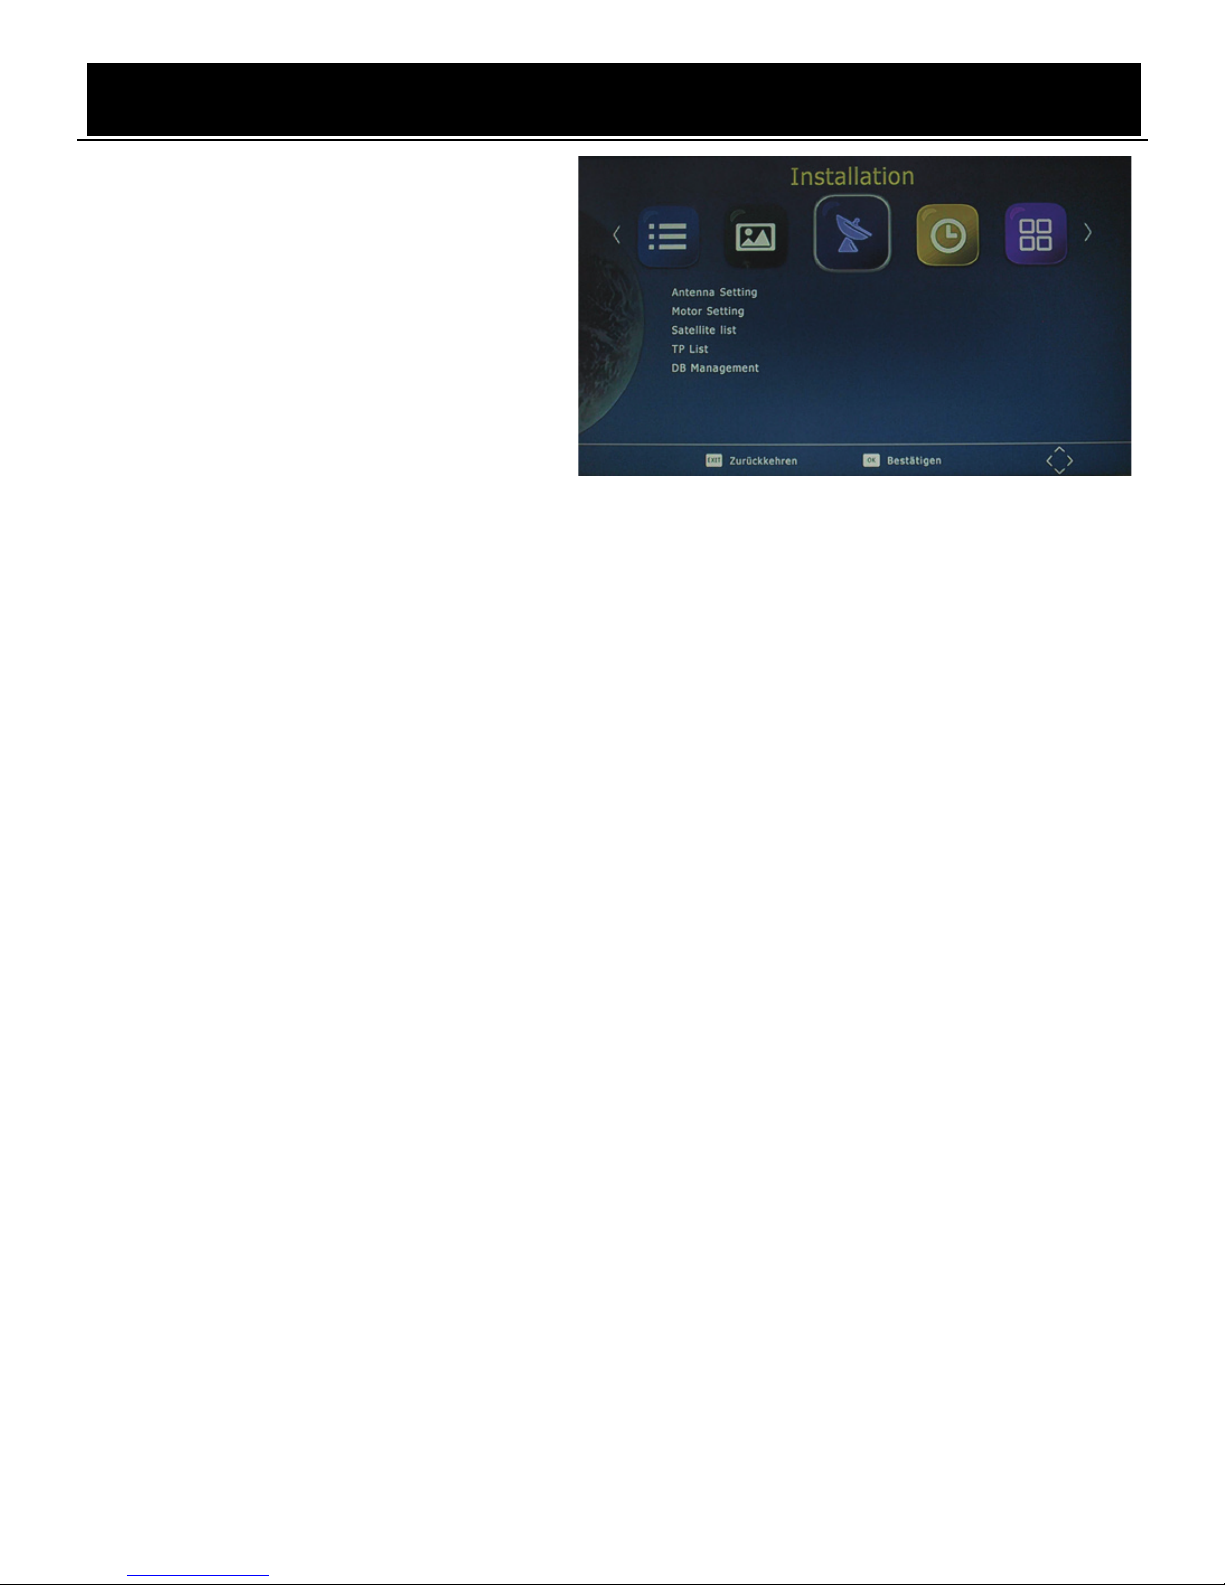
A. Installation
1. Einstellungen der
Satellitenschüssel
In diesem Menü können Sie detaillierte
Parameter für ausgewählte Satelliten
einstellen, u.a. LNB-Typ, DiSEqC, 22K,
Motor usw.
Satellite: Es werden alle Satelliten
aufgelistet, die Sie im Menü
„Einstellungen der Satellitenschüssel“ ausgewählt haben.
LNB: Dieser Wert sollte mit dem von Ihnen ausgewählten LNB-Typ übereinstimmen;
unterstützt 5150, 5170, 9750, 10600, 10750, 11300, 11475, 5150/5750, Universal
(9750/10600), Universal F (9750/10750) und BENUTZER-LNB; letztere Option ermöglicht
Ihnen eine benutzerdefinierte Einstellung.
Transponder: Das System zeigt die bestehende TP-Liste an und versucht, das Signal mit
den aktuellen Parametern zu sichern.
DiSEqC 1.0: Falls Sie einen DiSEqC 1.0 Schalter verwenden, müssen Sie die Einstellung
gemäß Ihrem DiSEqC-Schalter vornehmen. Verfügbare Optionen: Ohne, 1/4, 2/4, 3/4, 4/4,
ToneburstA und ToneburstB.
DiSEqC 1.1: Falls Sie einen DiSEqC 1.1 Schalter verwenden, müssen Sie die Einstellung
gemäß Ihrem DiSEqC-Schalter vornehmen. Verfügbare Optionen: Ohne, 1/16, 2/16, 16/16.
22K-Ton: Falls Sie einen 22K-Schalter verwenden, müssen Sie die Einstellung gemäß dem
22K-Schalter vornehmen. Falls es sich bei Ihrem LNB-Typ nicht um den universalen Typen
handelt, sind die Optionen EIN, Aus und Ohne verfügbar. Bei universalem LNB wird für
22K-Ton die Option Automatisch eingestellt.
Polarisation: Horizontal oder Vertikal.
Motor: Unterstützt sowohl DiSEqC1.2 als auch USALS.
Unicable-Verfahren: Diese Funktion ist für bestimmte Kunden, insbesondere in der Türkei,
verfügbar.
In einer Tabelle werden die Signalstärke und die Signalqualität des aktuellen Satelliten-TP mit
den aktuellen Parametern angezeigt.
(ROT): Drücken Sie diese Taste, um direkt zum Menü „TP-Manager“ zu springen.
(GRÜN): Drücken Sie diese Taste, um zum Menü „Automatischer Scan“ zu springen.
2. Motoreinstellungen
3. Satellitenliste
4. TP-Liste
Bedienungsanleitung
~ 8 ~
5. Datenbankeinstellungen
a. Speichern Sie die Senderliste auf einem USB-Gerät.
b. Stellen Sie die auf dem USB-Gerät gespeicherte Senderliste wieder auf dem Gerät her.
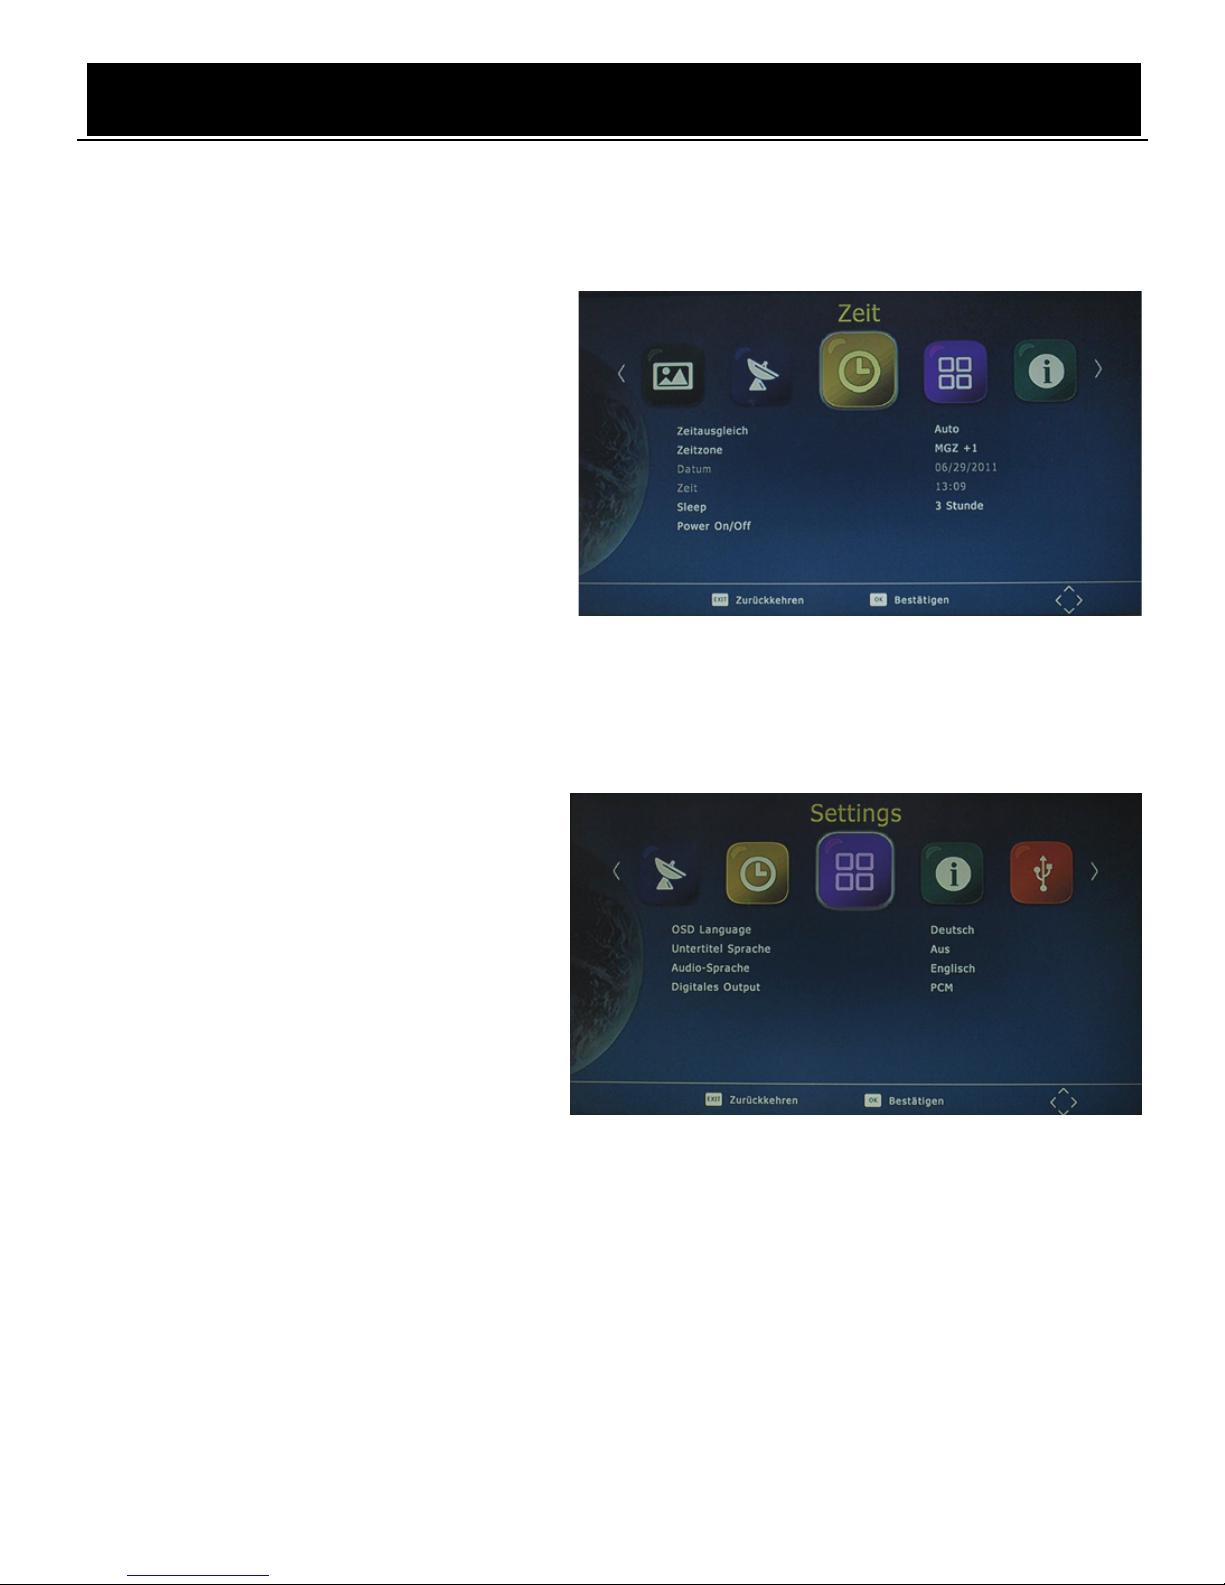
B. Uhrzeit und Datum
1. GMT-Abweichung
Wählen Sie Auto oder Manual für die
Einstellung der GMT-Abweichung.
2. Zeitzone
Wählen Sie die Abweichung der
Zeitzone mit der Einstellung von [Time
Offset] auf Manual.
3. Datum
4. Uhrzeit und Datum
5. Sleep-Timer
Stellen Sie die Zeit bis zur automatischen Abschaltung ein (zwischen 1 Stunde und 12
Stunden, oder Aus).
6. Taste EIN/AUS
C. Systemeinstellungen
1. Menüsprache
Sprache für die Bildschirmanzeige
auswählen.
2. Untertitelsprache
Hier stellen Sie die Untertitelsprache ein.
3. Audiosprache
Falls ein Programm über mehrere
Sprachen verfügt, wählen Sie hier Ihre bevorzugte Sprache aus.
4. Digitalton

Bedienungsanleitung
~ 9 ~
D. Gerät konfigurieren
1. Jugendschutz
Option zum Einstellen des Mindestalters;
wählen Sie einen Wert zwischen 4 und
18 Jahren. Sie benötigen ein Passwort,
um auf diese Option zugreifen zu
können. Das Standard-Passwort lautet
„000000“. Sie können diese Funktion
auch über die Option AUS deaktivieren.
2. Passwort einstellen
Sie haben die Möglichkeit, das Standard-Passwort „000000“ zu ändern.
3. Rückstellung zu den Werkseinstellungen
Stellen Sie das Gerät mit dieser Option auf die Werkseinstellungen zurück. Sie werden
aufgefordert, das Passwort „000000“ einzugeben. Drücken Sie zum Abschluss einmal die
Taste „OK“.
Hinweis: Diese Funktion löscht alle gespeicherten Sender und persönlichen Einstellungen.
4. Information
Überprüfen Sie die Software-Version Ihres Geräts.
5. Softwareaktualisierung
Der USB-Port wird auch für die Aktualisierung der Software verwendet.
ÜBERTRAGEN SIE DIE SOFTWARE-AKTUALISIERUNGSDATEI VOM PC AUF EIN
USB-FLASHGERÄT.
1. Um Ihre Gerät via USB zu aktualisieren, schließen Sie ein USB-fähiges Gerät an den PC
an und sichern Sie alle auf dem USB-Gerät gespeicherten Daten auf dem PC. Klicken
Sie mit der rechten Maustaste auf das USB-Laufwerk und wählen Sie die Option
Formatieren. Formatieren Sie das USB-Gerät als FAT32-Dateisystem.
HINWEIS: Für die Aktualisierung Ihres Receivers benötigen Sie ein USB-Flashgerät oder
eine mobile Festplatte mit FAT32-Dateisystem. Der USB-Port für die Softwareaktualisierung
ist nicht mit USB-Flashgeräten oder mobilen Festplatten kompatibel, die die Systemformate
NTFS, FAT16 oder U3 PRO verwenden.
2. Drücken Sie die Taste MENU. Navigieren Sie nach rechts zur Option SYSTEM-SETUP
und nach unten zur Option SOFTWAREAKTUALISIERUNG. Drücken Sie ENTER, um
das USB-Laufwerk zu öffnen. Wählen Sie die Option Dateiname aktualisieren.
HINWEIS: Während des Aktualisierungsvorgangs dürfen weder das USB-Gerät getrennt noch
der Receiver ausgeschaltet werden. Anderenfalls könnte der Receiver beschädigt werden.
Bedienungsanleitung
~ 10 ~
6. Senderliste aufrufen
7. Nach Stromausfall
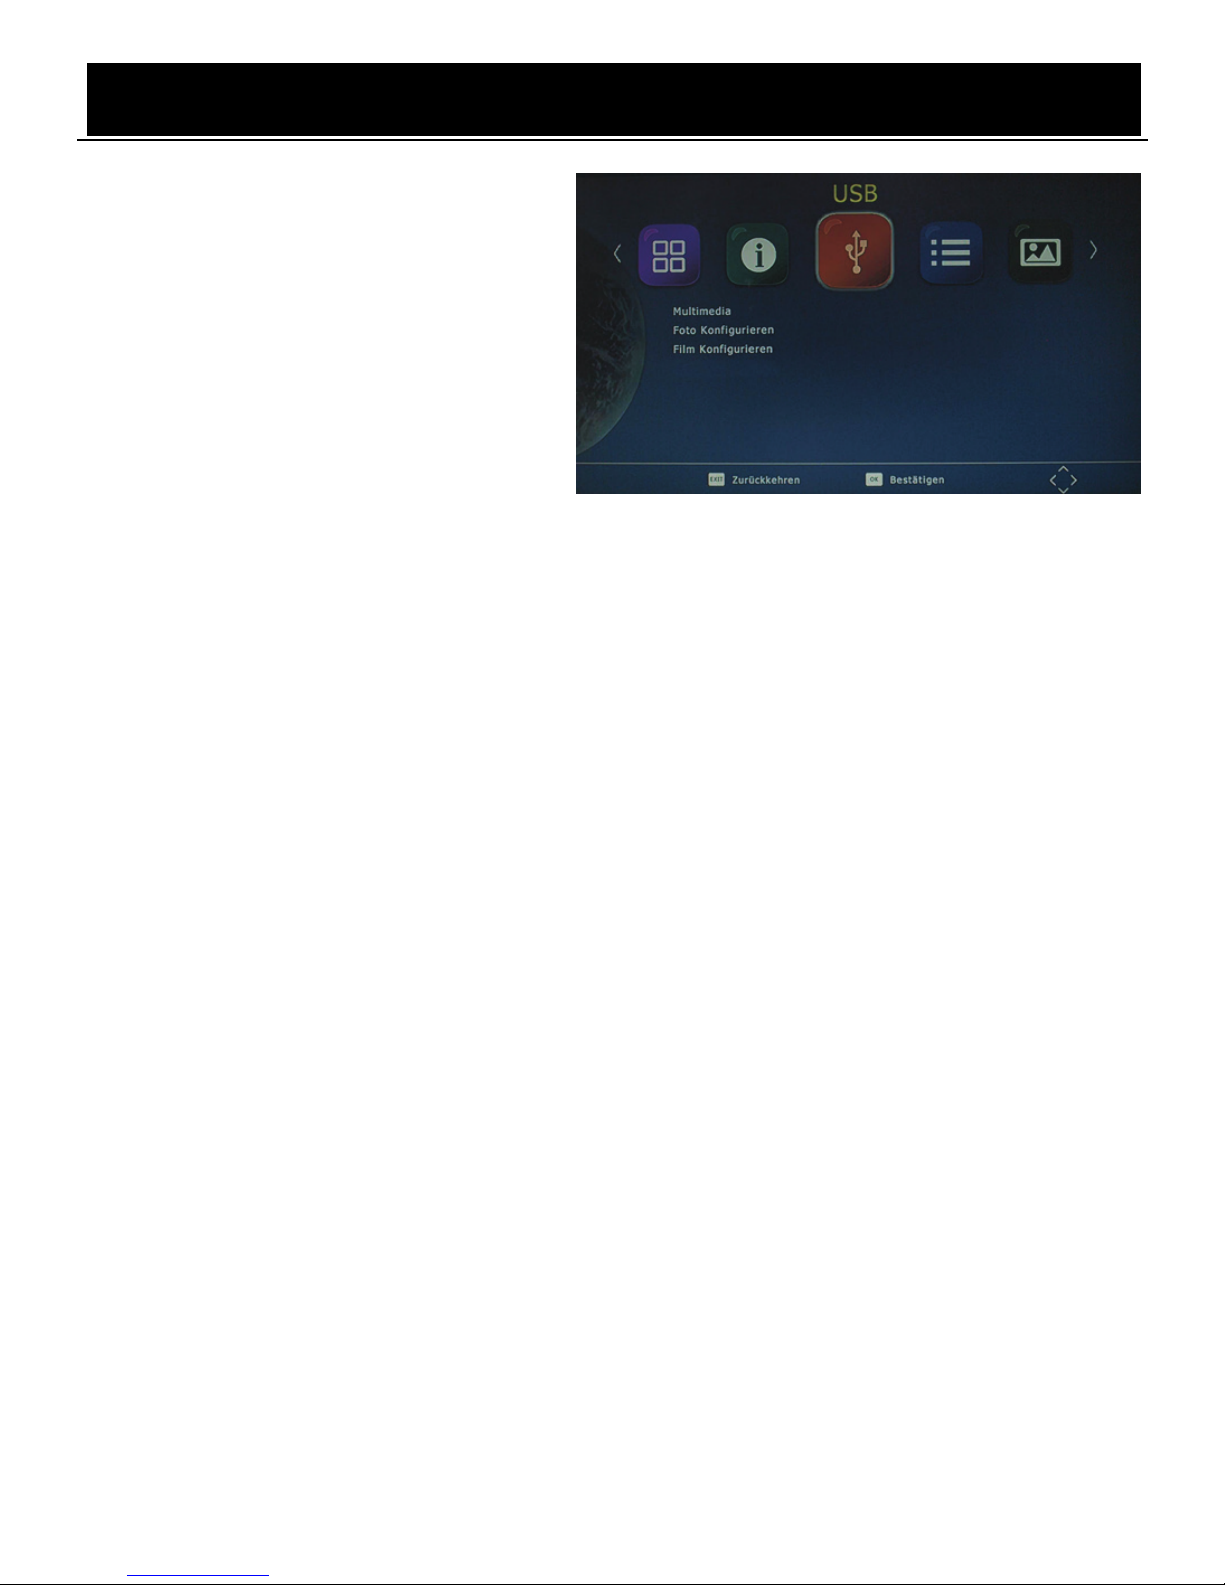
E. Externes Gerät
1. Multimedia
Drücken Sie im TV-Modus die Taste
„USB“, um das Multimedia-Menü zu
öffnen. In dem Menü finden Sie 4
unterschiedliche Icons: Musik, Foto,
Film und Aufnahme.
Musikwiedergabe: Wählen Sie das Icon „MUSIK“ und bewegen Sie den Cursor
entsprechend, um den Pfad der gewünschten Audiodatei einzugeben. Drücken Sie OK, um
die ausgewählte Audiodatei wiederzugeben.
Fotos anzeigen: Wählen Sie das Icon FOTO und geben Sie den Pfad für die gewünschten
Fotodateien ein. Drücken Sie OK, um die ausgewählten Fotodateien anzuzeigen.
Filme abspielen: Wählen Sie das Icon FILM und bewegen Sie den Cursor entsprechend, um
den Pfad der gewünschten Videodatei einzugeben. Drücken Sie OK, um die ausgewählte
Videodatei wiederzugeben.
Aufzeichnungen wiedergeben: Wählen Sie das Aufnahme-Icon. Wählen Sie die
gewünschte Aufnahmedatei aus und drücken Sie OK für die Wiedergabe. Drücken Sie die
Taste RECALL, um zum nächsten Ordner zu gelangen. Drücken Sie die ROTE Taste, um
zwischen der Vorschau und der Vollbildanzeige umzuschalten. Drücken Sie die GELBE Taste,
um unerwünschte Dateien zu löschen. Drücken Sie die GRÜNE Taste, um eine
aufgenommene Datei umzubenennen.
2. Bildanzeige konfigurieren
Sie können die Anzeigedauer, den Anzeigemodus und das Bildseitenformat für die einzelnen
Bilder einstellen.
3. Filmwiedergabe konfigurieren
Sie können die Optionen Bildseitenformat, Untertitelparameter, Untertitel-Hintergrundfarbe
und Untertitel-Schriftfarbe einstellen.
Bedienungsanleitung
~ 11 ~
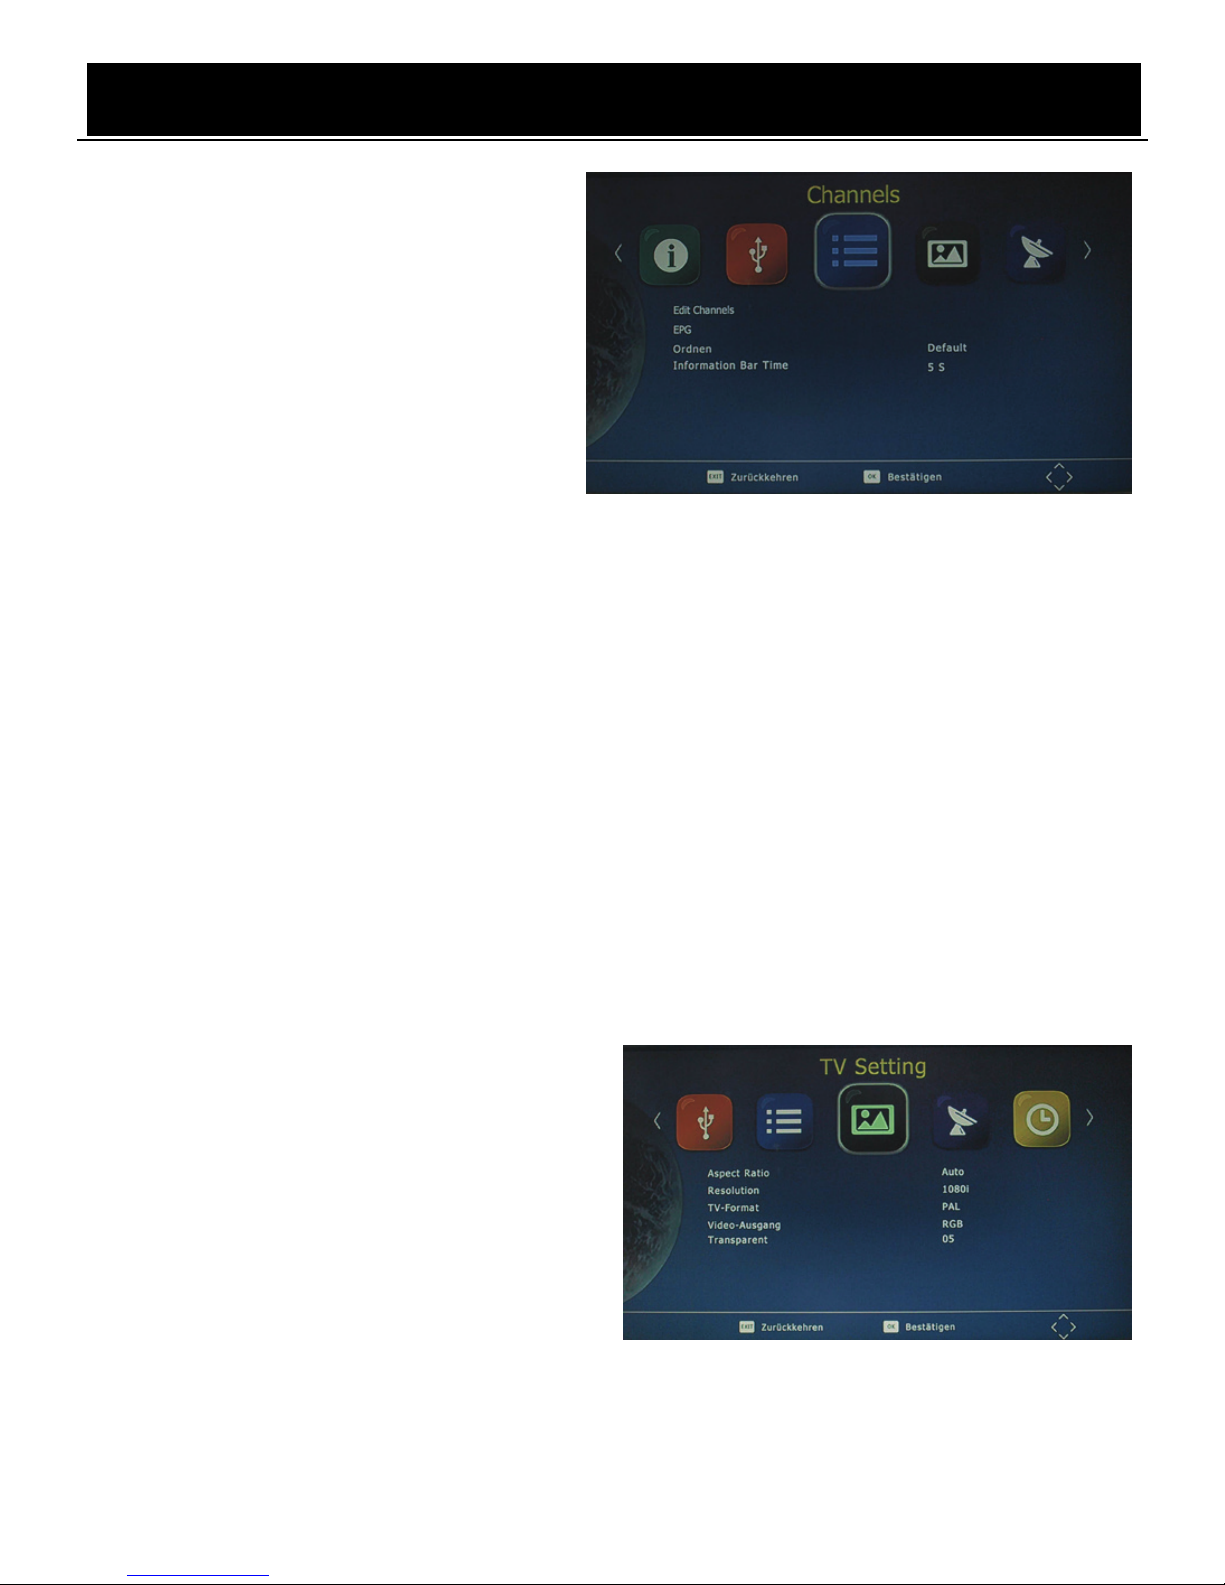
F. Kanäle verwalten
1. Sender bearbeiten
Für die Bearbeitung von Sendern
(Sperren, Überspringen, Favorit,
Verschieben oder Löschen) benötigen Sie
ein Passwort. Das Standard-Kennwort
lautet „000000“. Das Master-Kennwort
zum Entsperren lautet „888888“.
2. EPG
EPG ist ein Programmführer für die nächsten sieben Tage. Drücken Sie die Taste EPG auf
der Fernbedienung, um die elektronische Programmzeitschrift zu öffnen.
3. Sortierung
Hinweis: Es ist wichtig, dass Sie während der Sortierung der Sender die LCN-Funktion
deaktivieren. Mit der Funktion „Sortieren“, können Sie die Sender anhand unterschiedlicher
Methoden ordnen:
Nach LCN: Sender werden in aufsteigender Reihenfolge sortiert.
Nach Name des Dienstes: Sender werden alphabetisch geordnet.
Nach Service-ID: Sender werden nach Service-ID sortiert.
Nach ONID: Sender werden nach ONID sortiert.
4. Anzeigedauer
Drücken Sie auf Anzeigedauer, um die Dauer für die Anzeige von Informationen einzustellen,
wenn Sie zwischen Sendern umherschalten.
G. TV-Einstellungen
1. Bildseitenformat
Wählen Sie für Ihr Video die Option 4:3 (auch
anamorphotisches Bild) oder 16:9 (auch
Breitbildformat). Wählen Sie für Videos
herkömmlicher Auflösung die Option 4:3 und
für hochauflösende Videos die Option 16:9.
Um eine hervorragende Qualität an Ihrem
Fernseher zu gewährleisten, drücken Sie die
Tast e MENU zum Öffnen des Menüs und wählen Sie dann das Menü für das Bildseitenformat
aus, um die entsprechenden Einstellungen vorzunehmen. Nachfolgend finden Sie eine Abbildung
des Menüs für das Bildseitenformat.

Bedienungsanleitung
~ 12 ~
2. Auflösung
Wählen Sie je nach Fernsehgerät unterschiedliche Auflösungen aus: 576i, 576p, 720p, 1080i,
1080p.
3. TV-Format
TV-Format: PAL/NTSC
4. Videoausgang
CVBS, RGB
5. Transparent
Wählen Sie Transparent, um den Hintergrund des Menüs zu ändern.
Täglicher Gebrauch
INFO-TASTE
Drücken Sie die Taste „INFO“, um während der Fernsehwiedergabe den Informationsbanner
einzublenden:
Taste L/R
Einige Programme unterstützen mehrere Audiosprachen sowie unterschiedliche Audiomodi
wie z.B. Stereo, Links oder Rechts. Drücken Sie die Taste L/R, um all verfügbaren
Audiosprachen im Fenster des Audiotracks anzuzeigen. Nachfolgend finden Sie eine
entsprechende Abbildung. Falls nach der Auswahl der Audiosprache kein Ton wiedergegeben
wird, ist im aktuellen Audiomodus kein Audio verfügbar. Sie müssen in solch einem Fall den
vorherigen Audiomodus auswählen.
TASTE SUBT
Bestimmte Sender verfügen über mehrsprachige Untertitel. Drücken Sie die Taste SUBT, um
alle verfügbaren Untertitelsprachen im Informationsfenster der Untertitel anzuzeigen.
Nachfolgend finden Sie eine entsprechende Abbildung. Folgen Sie den Informationen im
Anzeigefenster, um die gewünschte Untertitelsprache auszuwählen.
Tasten ZURÜCK/WEITER & SCHNELLER RÜCKLAUF/VORLAUF
Verwenden Sie die Tasten ZURÜCK/WEITER und SCHNELLER RÜCKLAUF/VORLAUF
während der Wiedergabe von Multimedia-Dateien, die auf auf einem externen USB-Gerät
gespeichert sind. Drücken Sie die Tasten ZURÜCK/WEITER, um zur vorherigen/nächsten
Datei zu gelangen, und drücken Sie die Tasten SCHNELLER RÜCKLAUF/VORLAUF, um die
Wiedergabe vor- oder zurückzuspulen.
 Loading...