

Page 1
Page 2

CONTENTS
Important Safeguards …………………………………………..…......... ……… 1
Frequently Asked Questions ………………………………………………………4
Control Buttons ………………………………………………….…………… 5
Control Functions ……………………………………………….... …………… 5
Glossary of Terms………………………………………........... .... ………………… 8
Technical Specifications……………………………..………............... ………… 9
Page 3

Important Safeguards
IMPORTANT SAFEGUARDS
DANGER- Indicates an imminently hazardous situation, which, if not avoided, will result in death
or serious injury. Usage of this signal word is limited to the most extreme situations.
WARNING- Indicates a potentially hazardous situation, which, if not avoided, could result in death
or serious injury.
CAUTION-indicates a potentially hazardous situation, which if not avoided, may result in
minor/moderate injury or product/property damage. it also alerts against unsafe practices.
WARNING: To reduce the risk of fire or shock hazard, do not expose this product to rain or
moisture.
WARNING: To prevent the risk of electric shock, do not remove cover. No user-serviceable parts
inside. Refer servicing to qualified personnel.
READ ALL INSTRUCTIONS BEFORE USE.
WARNING—To reduce the risk of fire, electric shock, or serious personal injury:
HEED WARNINGS. Adhere to all warnings in the operating instructions and on the
z
Digital photo frame itself.
WATER AND MOISTURE. Do not use the unit water or expose to rain or moisture.
z
ATTACHMENTS. Use only manufacturer-recommended attachments or accessories.
z
ACCESSORIES. Do not place the Digital Photo Frame on an unstable cart, stand, tripod,
z
bracket, or table. The unit may fall, causing injury to you and serious damage to the product.
VENTILATION. Position the Digital Photo Frame so that its locatio n does not interfere with
z
its proper ventilation. For example, the unit should not be situated on a bed, sofa, tug or similar
surface that may block the ventilation opening, or placed in a built-in installation, such as a
book-case or cabinet, that may impede the flow of air through the ventilation openings.
HEAT. Position the digital Photo Frame away from sources of high heat such as radiators or
z
stoves.
POWER CORD PROTECTION. Don’t walked on the power cord, and pay particular attention
z
to the point where the cord attaches to the Digital Photo Frame.
NON-USE. Unplug the power cord from the outlet when the unit is not in use.
z
AVOIDING SURGES. For added protection during li ghtning storm, unplug the Digital Photo
z
Frame from the wall outlet to prevent damage to the product due to power line surges.
OVERLOADING. Do not overload wall outlets or extension cords.
z
OBJECT AND LIQUID ENTRY. Do not place objects onto or spill liquids on or inside the
z
Digital Photo Frame.
DAMAGE REQUIRING SERVICE. Seek service by qualified service personnel when:
z
--The power supply has been damaged.
--Liquid has been spilled onto the Digital Photo Frame.
--The unit has been exposed to rain.
--The unit does not operate normally, or exhibits a marked change in performance.
--The unit has been dropped or physically damaged
Signal Word Definitions
Page 4

SERVICING. Do not attempt to service the Digital Photo Frame beyond those means
z
described in these operating instructions. All other servicing should be referred to qualified
service personnel.
CAUTION—To reduce the risk of personal injury or product/property damage:
CLEANING. Clean the outer surface of the Digital Photo Frame (excluding the screen)gently
z
using a soft cloth dampened with water. Clean the screen only with a specified cleaning
solution for use with products such as laptops and computer monitors. These are available at
most retail consumer electronics stores. Do not clean the inside of the unit
Condensation
If cold water is poured into a glass, water droplets form on the outside of the glass. This is called
condensation. Condensation may occur on internal operating parts of the product. Condensation
occurs:
When the product is brought from the outdoors into a warm room, or if it is in a cold room
z
which is heated quickly.
If the unit is moved occur, the product may not operate properly if condensation occurs. Wait1-
z
2 hours (to allow the internal parts to adjust to the surrounding temperature) before using the
product.
SAVETHESEINSTRUCTIONSFORFUTUREREFERENCE
Frequently asked questions
Q: How to set my Digital Photo Frame?
A: The Digital photo Frame setup is very easy afte r following up the Users’ Manual Direction. just
plug the power adapter into the power jack( back side of the Digital Photo Frame) and plug the power
cord into a standard 100-240 volt AC electrical outlet. Next, insert a memory card into the card slot
and slide the power Switch to ON.
.Q: What kind of memory card does the Digital Photo Frame read?
A: The Digital photo Frame can read all the popular memory cards including the large capacity of
32MB-4GB and above, which included MMC/SD/MS card.
Q: What kind of media format does the Digital Photo Frame support?
A: The Digital Photo Frame can support JPEG picture format
Q: The adaptor of the Digital Photo Frame already be connected, why it is still no display?
A: The Adapter doesn’t be connected to the Photo Frame or the Power Switch is not in the ON
position.
Page 5
Q:I already insert the memory card into the Digital Photo Frame, why can’t see any image?
A: Firstly, make sure that the memory card is same as mentioned above. Secondly, turn off the Digital
Photo Frame and make sure that the memory card is inserted correctly . Thirdly, restart the frame, the
Digital Photo Frame will read your memory card automatically, finally, make sure that you select the
correct Mode from the next menu: photo for still images.
NOTE: Some digital cameras save images in non-standard format. Please refer to your camera’s
instruction manual for details.
Q: Does the Digital Photo Frame support all JPEG format?
A: No, the Digital Photo Frame only support the standard JPEG format.
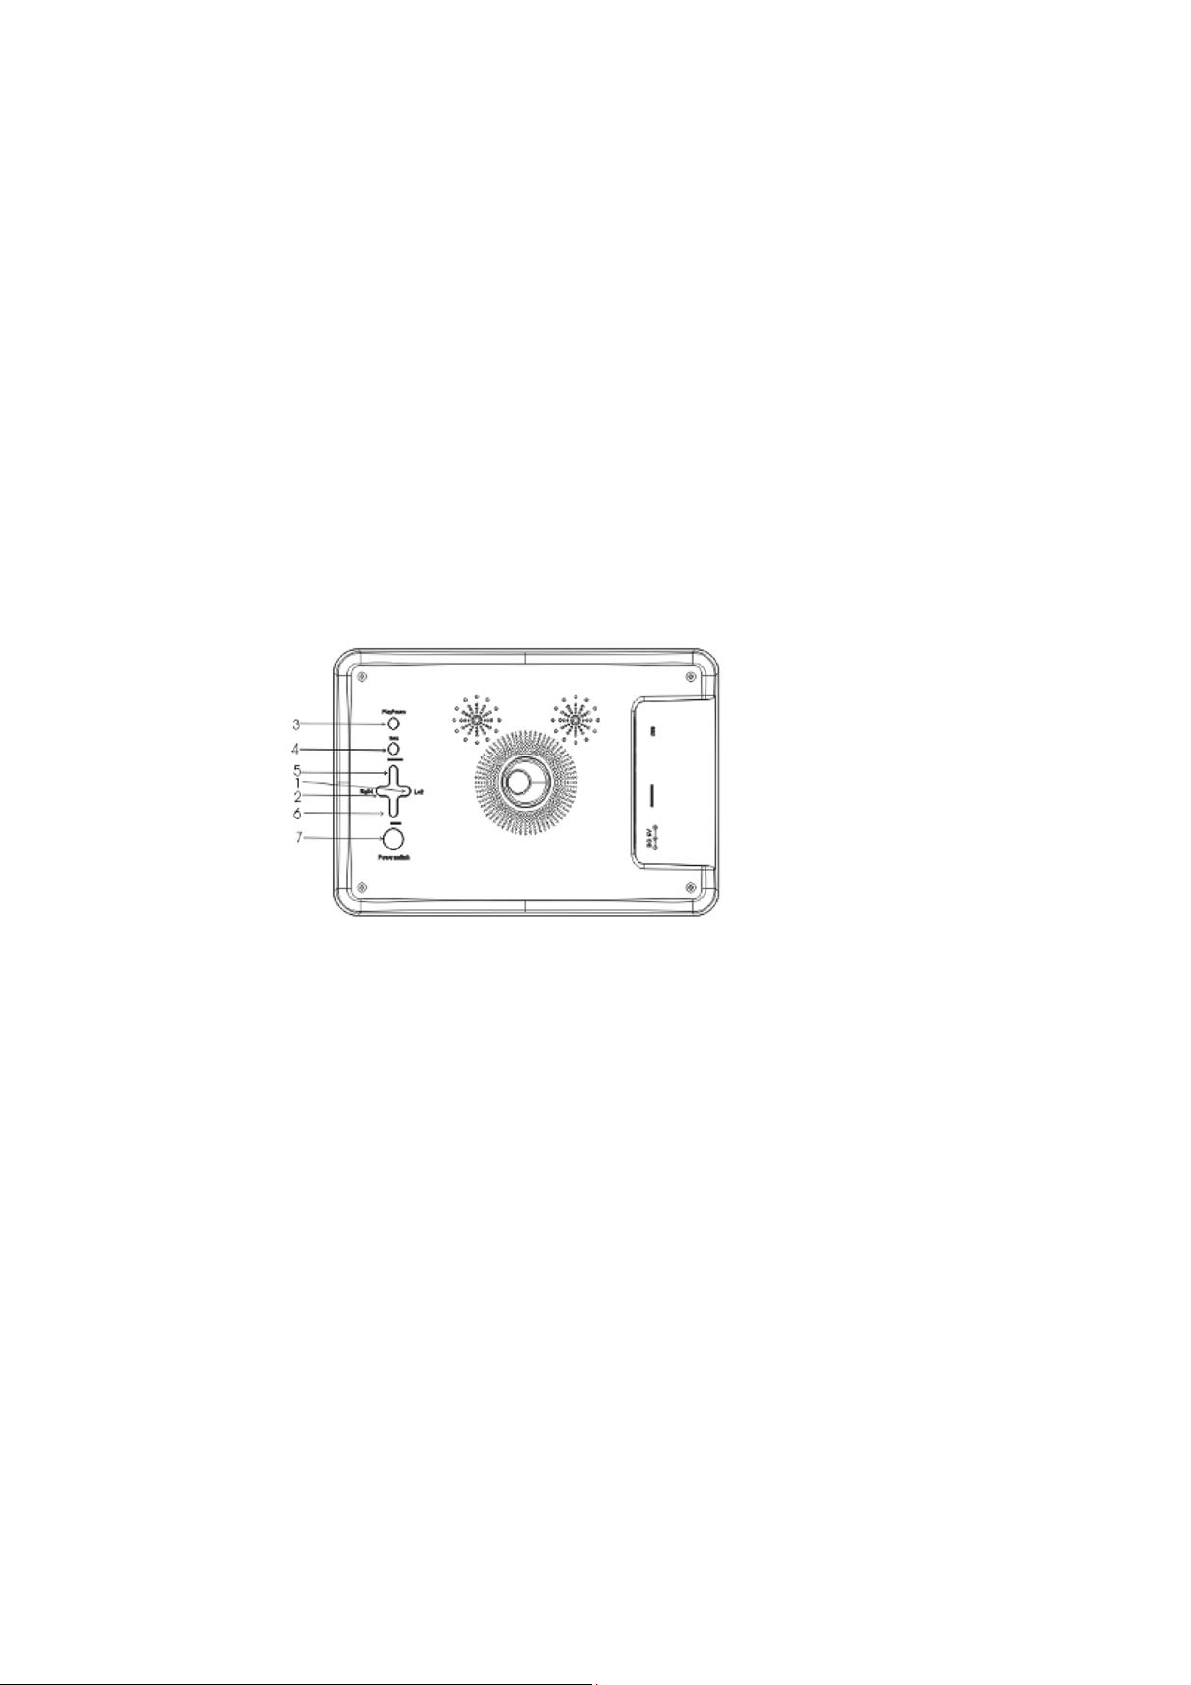
Control buttons
1. Left / Last
2.Right / Next
3. Play/pause/confirm
4. Menu
5. Switch, clock/calendar
6. Exit
7. Power sw i tch,
long press to switch on / off
Control Functions
Photo
Insert the power firstly, long press “Power switch” to switch on.
Before to play, confirm the file source come from U disk or SD/MMC/MS card. Press Left/Right key
to select.
In the Photo mode, six images will be showed one time on the screen for easy image selection.
Page 6
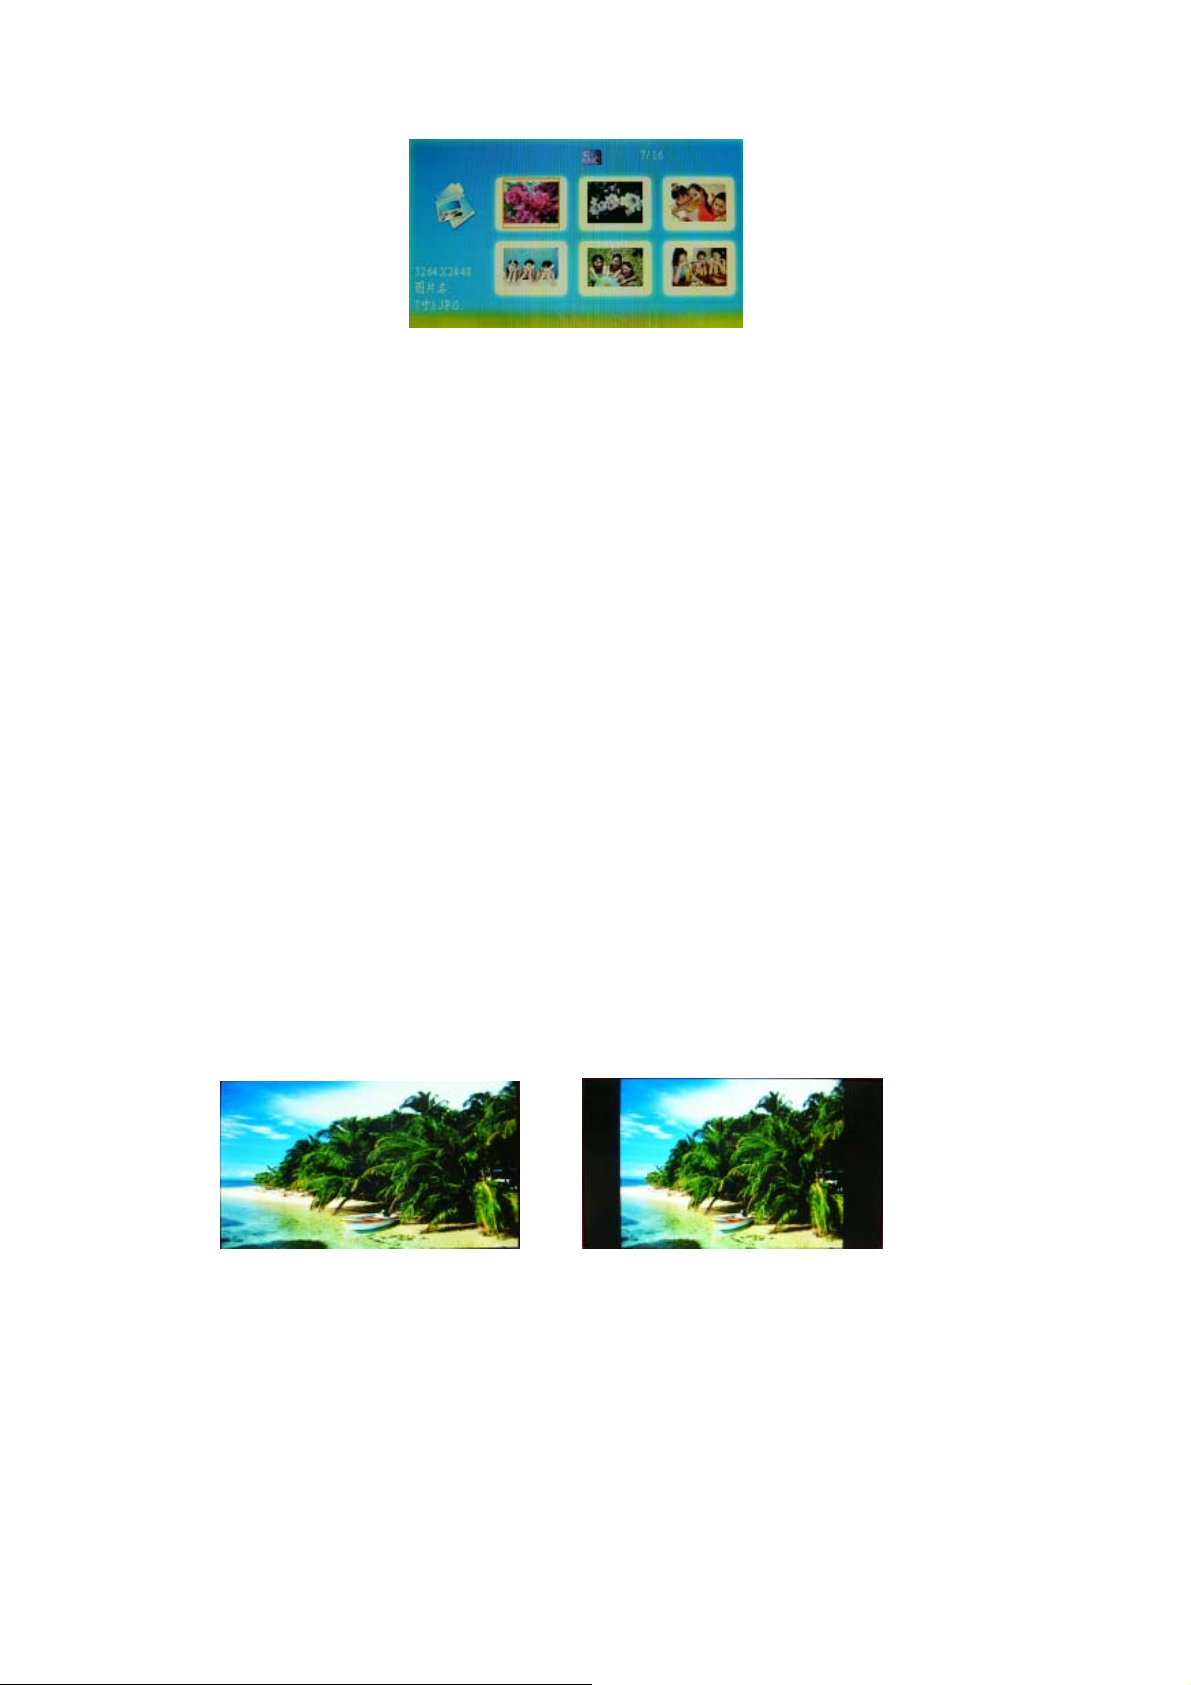
Select the image by pressing Left or Right button.
Press Play to confirm, then can view the selected image.
Press Exit button return to the thumbnail state.
View images
When viewing an image, press the Left button to view the previous image.
When viewing an image, press the Right button to view the next image.
Setup menu
Press Menu button to enter the setup menu.
Select the function by pressing Left and Right button.
Press Play button to confirm.
Press Exit button to exit from the menu.
Image Size
Press Menu butt on to enter, select Image Size by pressing Left and Right button, press Play to
confirm, then press Left and Right to select. There are three options: Auto Fit (4:3), Optimal
(16:9,full screen) or Full (16:9, extend the pictures ratio basic on the full screen 16:9).Select the
mode you want to set , then Exit.
Play:
It will enter the selected picture when you press Play button for the first time. Press again, it
will enter to play; when the picture is playing automatically it will pause if you press again.
Press again it will continue to play automatically.
Slide show Effect
) 1 Random
Page 7
2) Split horizontal in 3) Split horizontal out
4) Jalousie 5) Split vertical in
6) Split vertical out 7) Radiation
8) Surround 9) Fade
10) Refresh from left to right 11)Refresh from up to down
12) Translation from down to up 13)Roll from down to up
14) Roll from up to down ) 15 Brick
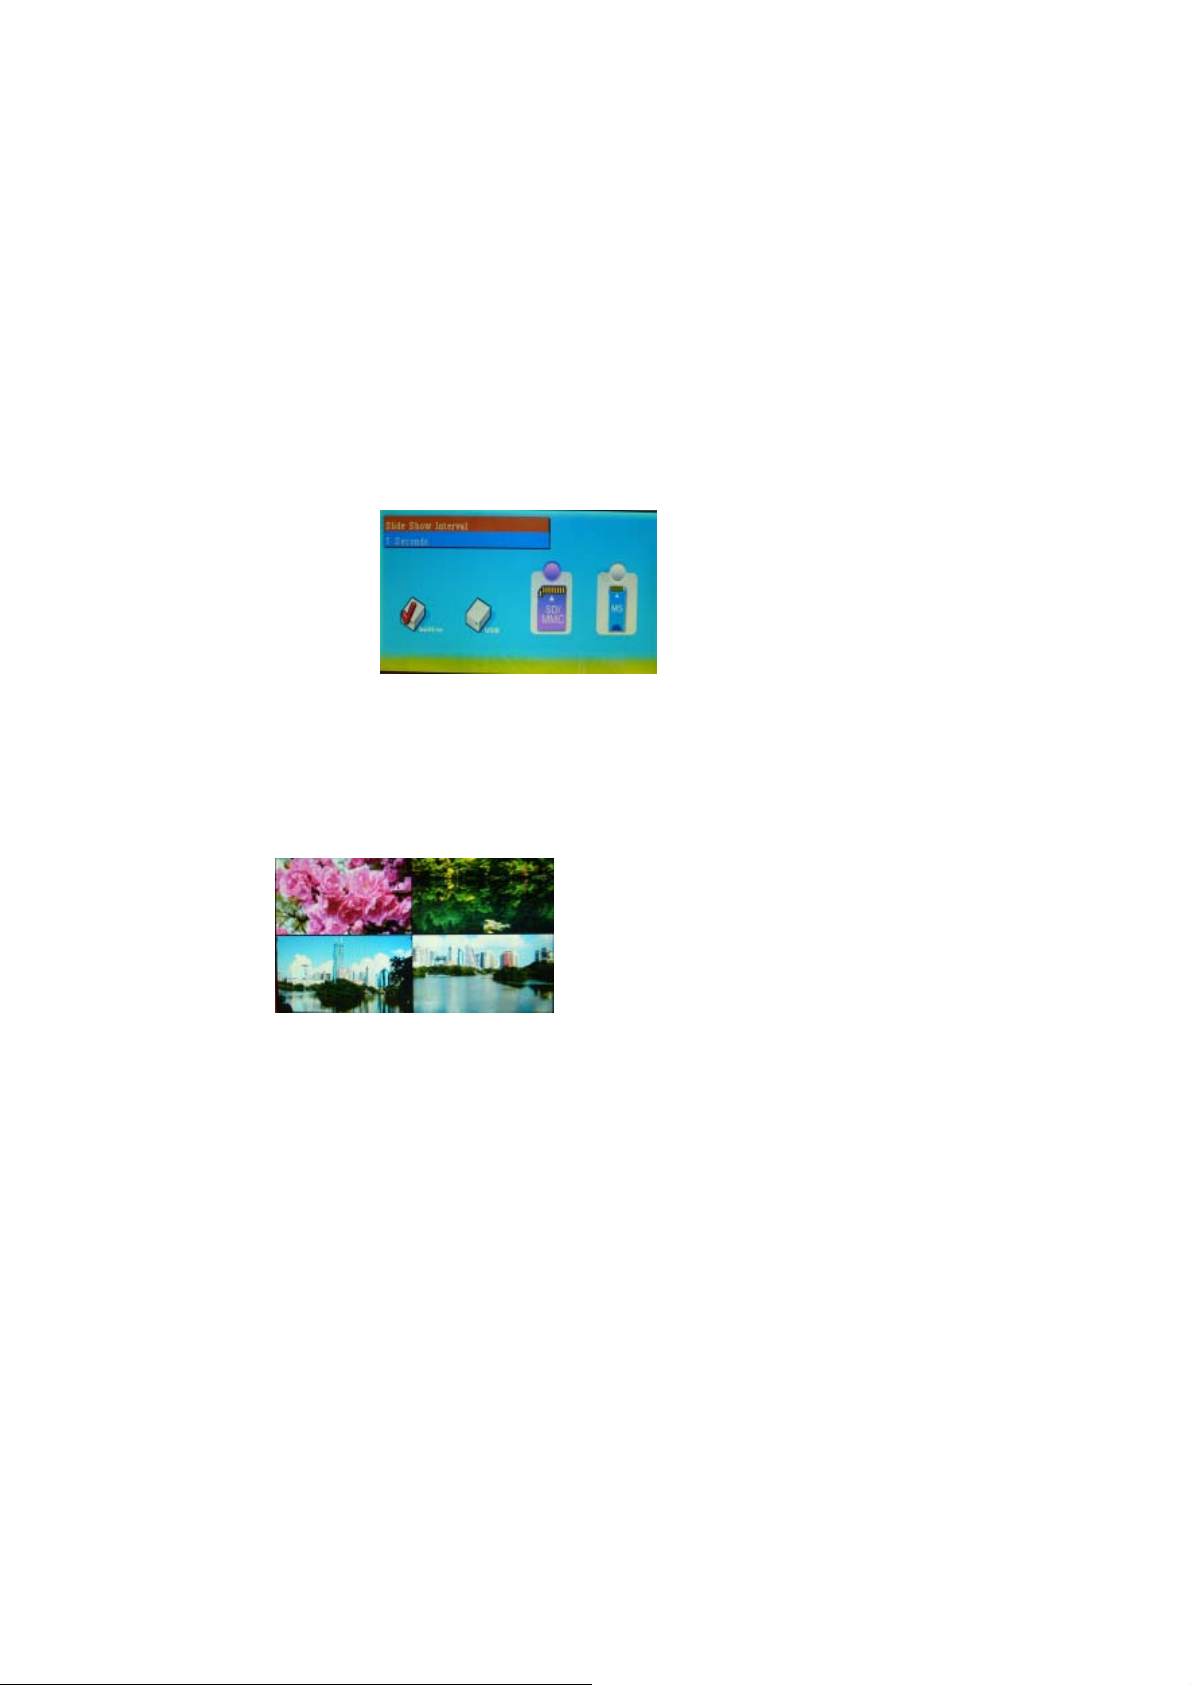
Slide Show interval
Press Menu button to enter, select the Slide Show interval, then press Play to confirm.Press Left /Right to
adjust the time you want to set(There are options from 1Second ~3 hours). Press Play to confirm, then exit.
Split Slide show
Press Menu button to enter,
On/Off,press Play to confirm and press again to exit. Will show as below when play picture again.
select
Split Slide show,then press Play to confirm; there have 2 options:
Start the Slide show
Press Menu button to enter, select
be played automatic.
start the Slide show,
then press Play to confirm and the picture s will
Rotate
Press Pause when playing picture, then press Menu button to enter. Select the rotate function, then
press Play to rotate 90 degrees clockwise per time, press again rotate 90 degrees gain. After finished,
press Exit to exit.
Zoom
Press Pause when playing picture, then press Menu and select Zoom function. The image can be enlarged
up to 5 times by press PLAY button continuously, on the 6
th
times it will revert to the original size.
Save picture
Page 8

Press Pause when playing picture, then press Menu and select this function, press Play to confirm. There
are two options: YES/NO. Press Play to confirm the selection, then exit.
Delete File
Select the file you want to delete when return to 6 thumbnail pictures display. Press Menu button to enter
and select the file, then press Play to confirm. There are two options: YES/NO. Press Play to confirm the
selection, then exit.
Format memory
Press Menu button to enter, select Format memory and press Play to confirm. There are two options:
YES/NO, press Play to confirm the selection, then exit.
Reset setting
Select this function and confirm, all the setting will return to the original setting.
Language
Press Menu button to enter, select the language you want to set, p ress Play to confirm, then exit.
1)English 4)Italian
2)German 5)Polish
3) Spanish 6)Swedish
7)Finnish
Brightness, Contrast, Color and Tint
Adjust Brightness, Contrast, Color and Tint for the display screen.
Press Menu button to enter, select the function and press Play to confirm, then exit.
)1 Brightness: Press confirm button to enter and adjust the Brightness by pressing Left and Right button,
then press Play to confirm, then exit.
)2 Contrast: Press confirm button to enter and adjust the Contrast by pressing Left and Right button,
then press Play to confirm, then exit.
)3 Color: Press confirm button to enter then adjust the Color by pressing Left and Right button, then press
Play to confirm, then exit.
)4 Tint: Press confirm button to enter then adjust the Tint by pressing Left and Right button, then press
Play to confirm, then exit.
Time
Press Menu button unde r the main interface, select Time and press Play to select Year/Month/Day. Press
Play again and set the Time by Left or Right button, press Play to confirm and save.
Page 9
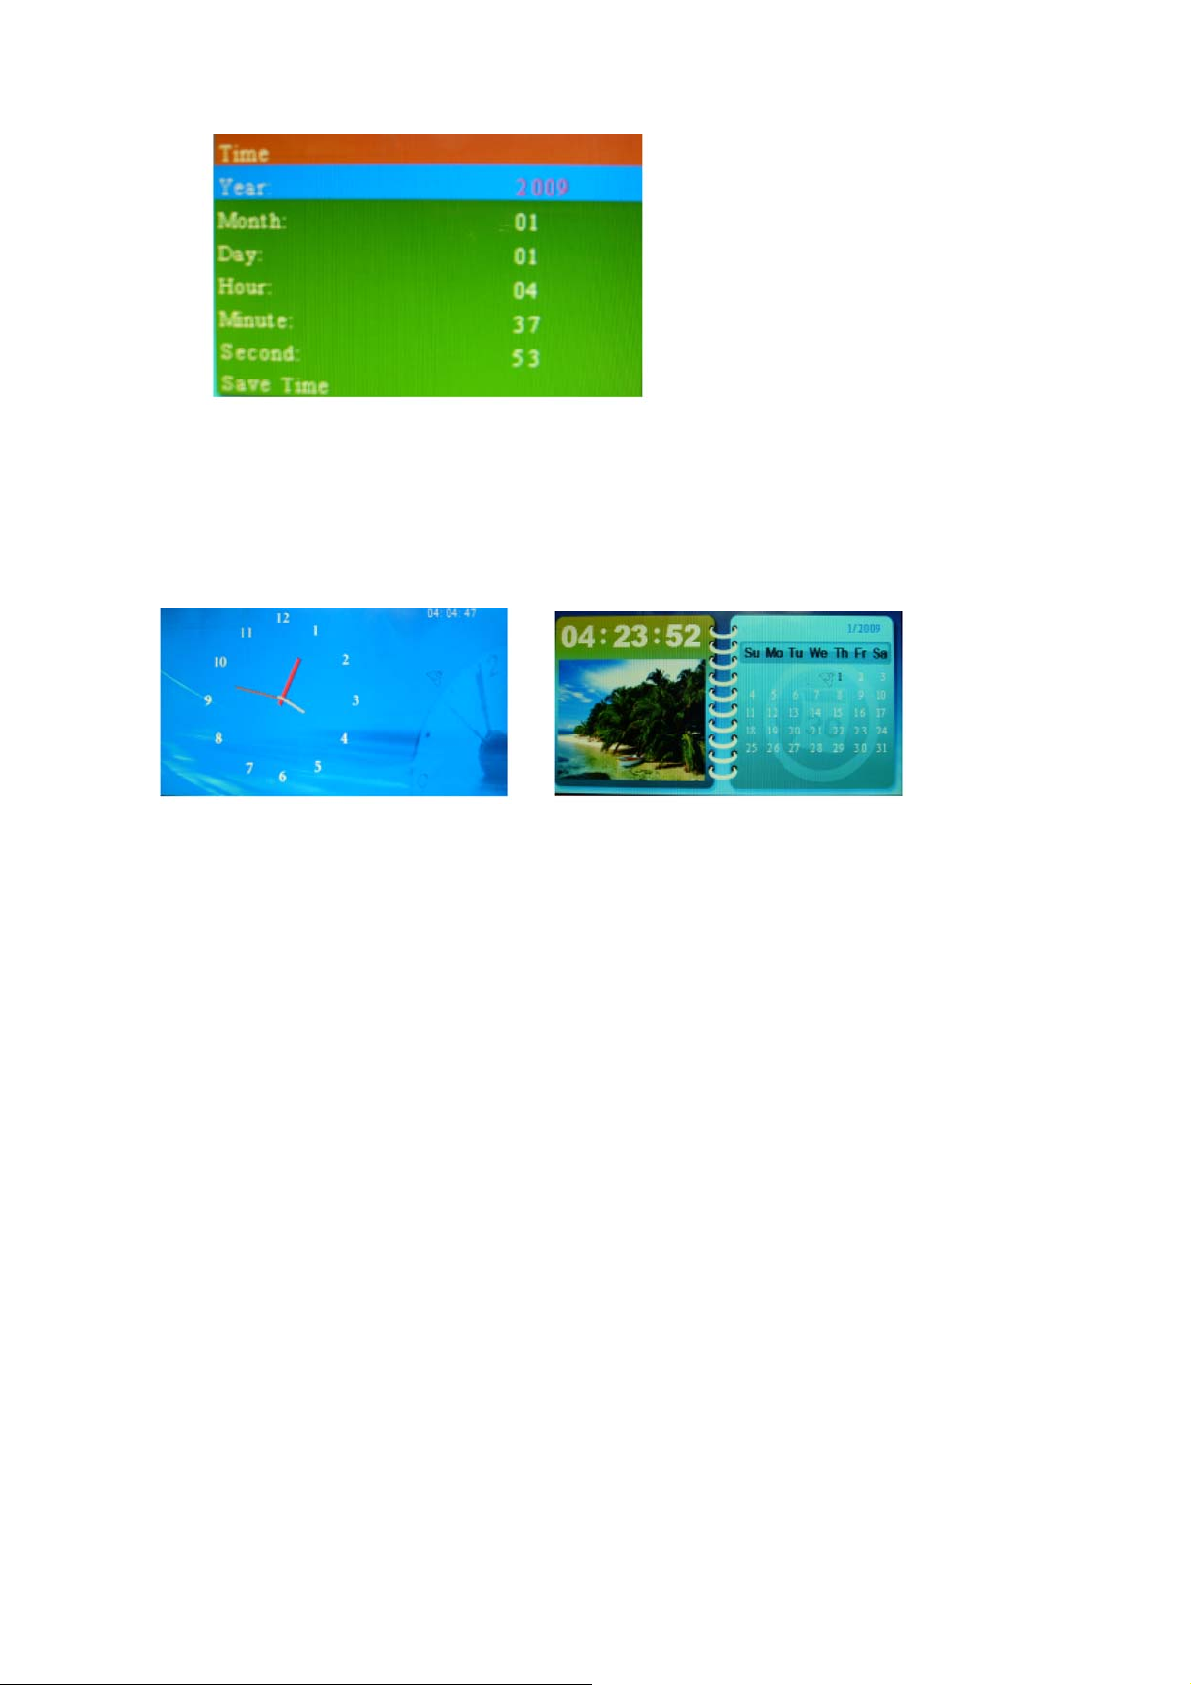
Press Switch to switch to analog clock, press the second time will switch to the calendar mode, press
Exit to exit.
Long press “Power switch”to switch off. The clock / calendar time cann’t resume the reset settings
after power off.
Glossary of terms
Aspect Ratio
Tee ratio of the length of an image to its width. Most computer screens and digital cameras shoot images that
have an aspect ratio of 4:3./ 16:9
35mm film and some digital cameras shoot images that have an aspect ratio 3:2.
BITMAP
A type of graphics format that specifies a number of pixels and then specifies what color those pixels are.
BMP
An uncompressed bitmapped file format used with Microsoft Windows.
Downsampling
The process of reducing the size of an image by decreasing the resolution (number of pixels) in an image.
Memory Card
The system used to store images by most digital cameras. Is different with a computer memory card, this
card can retains data safely.
JPEG
Joint photographic Experts Group; the development group for a compressed 24-bit color image storage
format that also bears its name.
Page 10

Mega Pixel
One million pixels. A high mega pixel rating typically equates to a high maximum performance for graphics,
or better quality pictures for digital cameras.
Resolution
The amount of pixels that are displayed on a screen measured in pixels horizontal by pixels vertical,
such as 1024*768. The higher the resolution, the more pixels and greater detail can be displayed.
Lower resolution Are interpolated and may lose detail.
Slideshow
A display of a series of selected images.
Thumbnail
A small representation of a larger graphic often used to display several graphics at once
and allowing easy Sorting through images.
Technical specifications
Input formats: MMC/SD/MS
Supported file formats: JPEG
Display 7”LCD monitor,Resolution:480*234
Viewing mode: Full-screen 16:9/4:3 Stand Standard Aspect Ratio, Slide show, or
thumbnail.
Power input: 100-240VAC, 50/60Hz
Power output: 5VDC, 1A
Accessories: User manual, Adapter
Model number: DPF-593
Page 11
Electric and electronic equipment contains
materials, components and substances that can
be hazardous to your health and the
environment, if the waste material (discarded
electric and electronic equipment) is not handled
correctly.
Electric and electronic equipment is marked with
the crossed out trash can symbol, seen below.
This symbol signifies that electric and electronic
equipment should not be disposed of with other
household waste, but should be disposed of
separately.
All cities have established collection points,
where electric and electronic equipment can
either be submitted free of charge at recycling
stations and other collection sites, or be collected
from the households. Additional information is
available at the technical department of your city.
ALL RIGHTS RESERVED
DENVER ELECTRONICS A/S
WWW
. DENVER - ELECTRONICS . COM
 Loading...