

Denon DCD-50 Owners Manual
Contents Connections Playback Settings Tips Appendix
.
DCD-50
COMPACT DISC PLAYER
Owner’s Manual
You can print more than one page of a PDF onto a single sheet of paper.
Front panel Display Rear panel Remote Index
1
Contents Connections Playback Settings Tips Appendix
Contents
Accessories
Features
High quality
High performance
Part names and functions
Front panel
Display
Rear panel
Remote control unit
4
Connections
5
Connections
5
Installing this unit
5
Installing horizontally
6
Installing vertically
6
Before using the remote control unit
8
Operating range of the remote control unit
9
Connecting a digital device
10
Connecting an analog device
Connecting the power cord
13
14
14
15
17
18
19
20
21
Front panel Display Rear panel Remote Index
2
Contents Connections Playback Settings Tips Appendix
Playback
Basic operation
Turning the power on
Switching the display’s brightness
Playing CDs
Playing CDs
Playing tracks in a specific order (Program playback)
Playing DATA CDs (MP3 and WMA files)
Playing files
Settings
Other settings
Auto Standby
Auto Play
Tips
23
23
23
24
24
26
27
28
30
30
31
Tips
Troubleshooting
Appendix
Playable media
Discs
Files
Playback order of MP3/WMA files
About discs and files
Cautions on using media
Loading Discs
Cautions on Loading Discs
How to handle media
Cleaning discs
Explanation of terms
Trademark information
Specifications
Index
33
34
38
38
38
39
40
41
41
41
42
42
43
44
45
48
Front panel Display Rear panel Remote Index
3
Warranty
(for North America model
only)
Quick Start Guide CD-ROM
(Owner’s Manual)
Safety Instructions
Power cord
Remote control unit
(RC-1205) (built-in battery)
Coaxial digital cable
Caps (silver) (x4)
Contents Connections Playback Settings Tips Appendix
Thank you for purchasing this Denon product. To ensure proper operation, please read this owner’s manual carefully before using the product.
After reading this manual, be sure to keep it for future reference.
Accessories
Check that the following parts are supplied with the product.
.
Front panel Display Rear panel Remote Index
4
Contents
Features
Connections Playback Settings Tips Appendix
High quality
A new style of CD player with Denon's trademark quality,
0
containing a high-precision 32-bit D/A converter
The D/A converter is a key element of sound quality, so this product
contains our 32bit/192kHz D/A converter, renowned for its high degree
of precision, to bring you the best sound quality possible.
This unit can be combined with our high-quality PMA-50 Class D
0
integrated amplifier to achieve a high degree of reproducibility
even for extremely weak signals
Our high-quality PMA-50 Class D integrated amplifier contains
Advanced AL32 Processing, Denon's unique analog waveform
reproduction technology. Use it with this unit to get the most out of our
exceptional sound quality that is both sensitive and powerful to a
degree that belies the size of the enclosure.
High performance
This new design is the optimal match for our PMA-50 integrated
0
amplifier
Supports vertical installation
0
This unit can be placed either vertically or horizontally.
The orientation of the display changes automatically to match the
orientation in which this unit is placed.
The operating mechanism of the CD slot allows smooth and steady
opening and closing whether this unit is placed vertically or horizontally.
Supports MP3 and WMA file playback
0
This unit can play back MP3 and WMA files recorded on CD-R and CDRW discs.
The high-visibility organic EL display can show information such as the
track name and artist name when playing back MP3s and WMAs.
The auto standby function reduces power consumption
0
This unit comes with a system remote control that can also
0
operate the PMA-50
Front panel Display Rear panel Remote Index
5
qw e
rtyuioQ0
Contents
Connections Playback Settings Tips Appendix
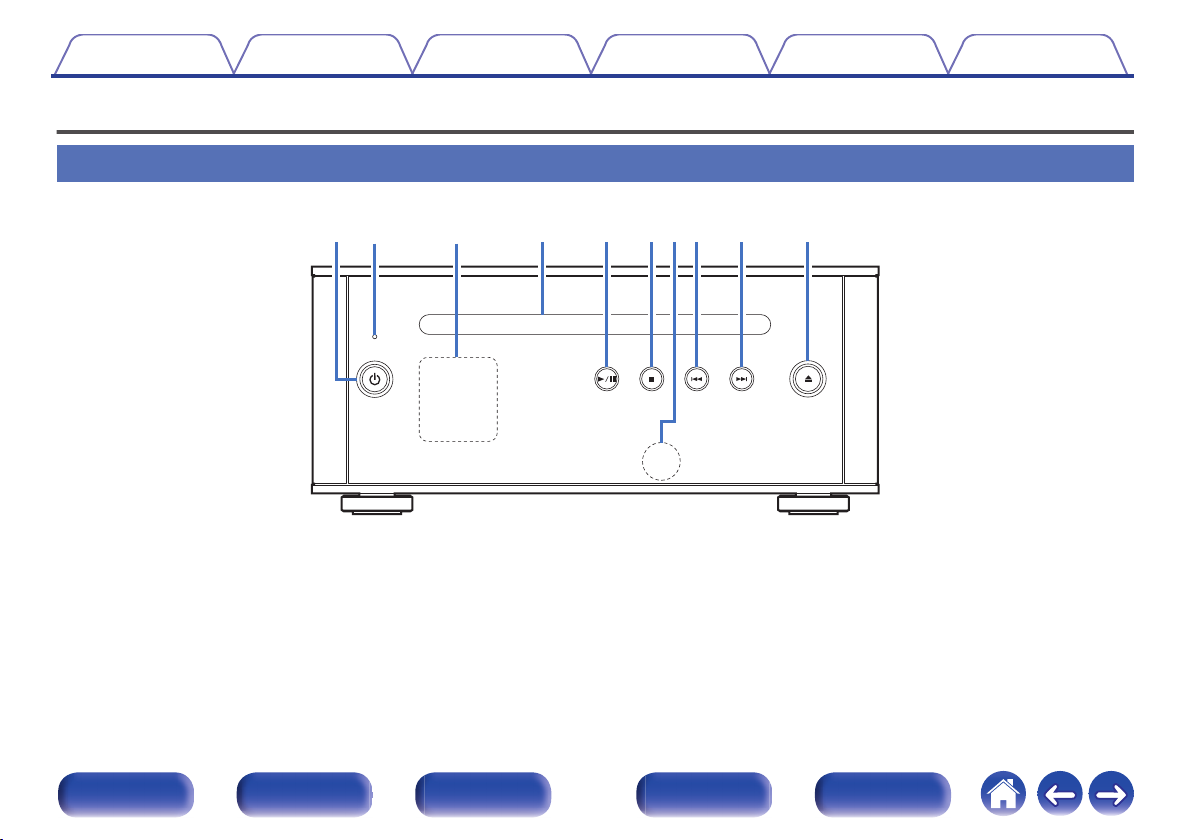
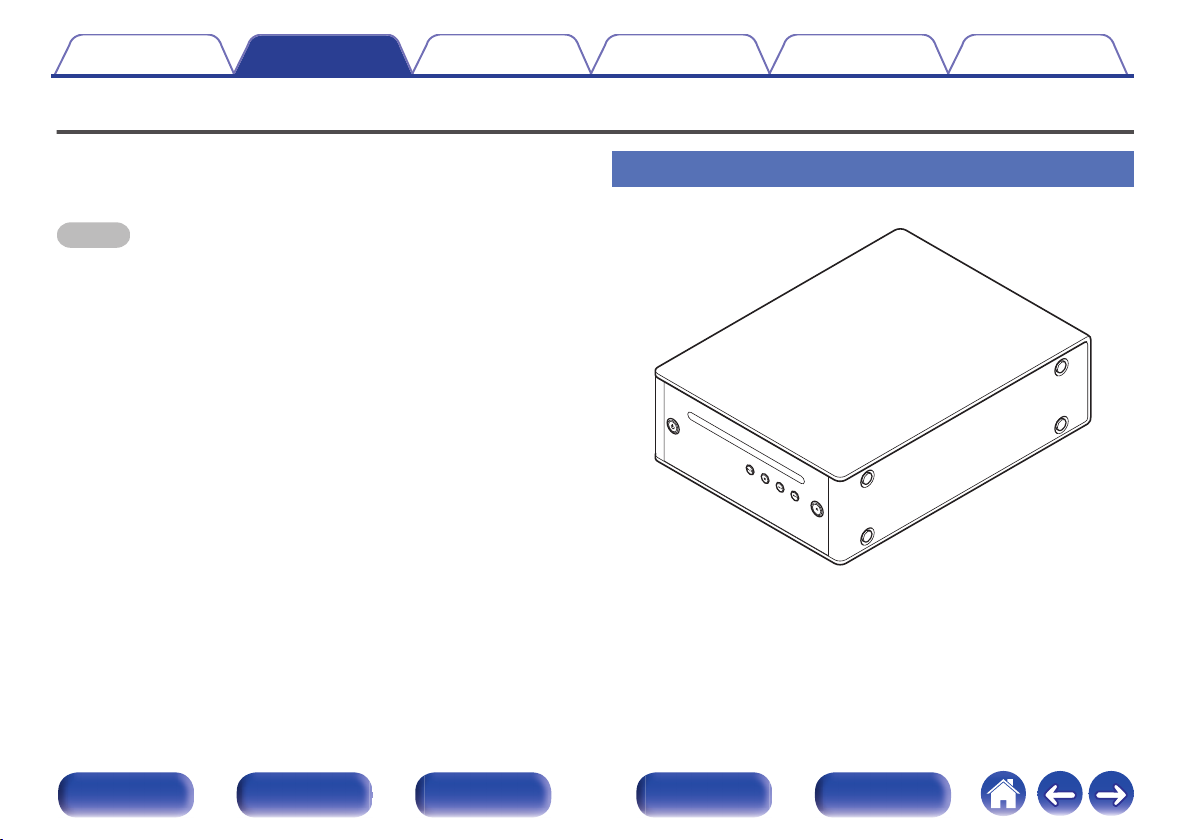
Part names and functions
Front panel
.
Front panel Display Rear panel Remote Index
6
q w e
r t y u i o Q0 Q1 Q1
Contents Connections Playback Settings Tips Appendix
.
Power operation button (X)
A
This turns the power on/to standby. (v p. 23)
The power status is indicated as follows.
Power on: Display lit
0
Standby: Display off
0
Protection circuit indicator
B
This blinks when the protection circuit has operated. (v p. 34)
Display
C
This displays various pieces of information. (v
CD slot (v p. 41)
D
Play/pause button (1 / 3)
E
Plays the track/Pauses the track.
Stop button (2)
F
Stops playback.
Front panel Display Rear panel Remote Index
Remote control sensor
G
This receives signals from the remote control unit. (v
Reverse-skip button (8)
H
Returns to the start of the currently playing track.
Forward-skip button (9)
I
Plays the next track.
CD Eject button (5)
J
Ejects the disc.
p. 8)
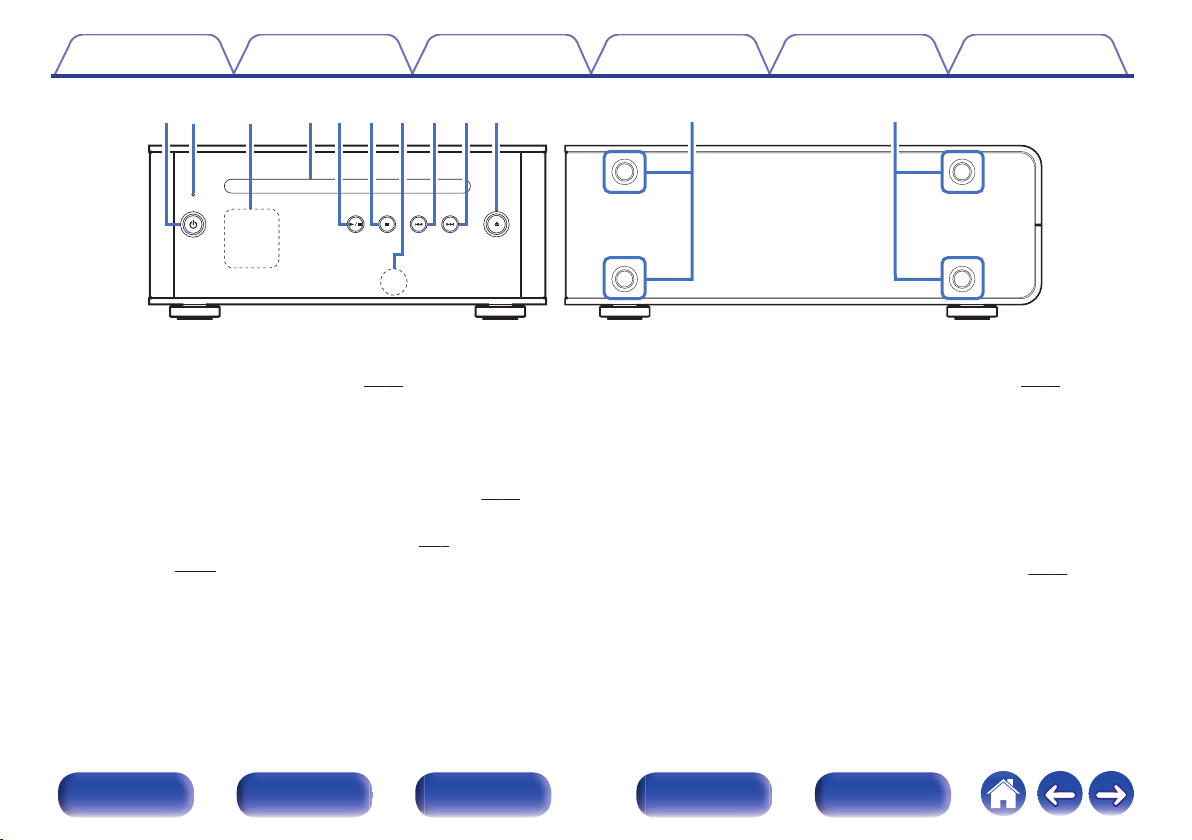
Installation holes for vertical installation feet
K
These are used when the unit is installed vertically. (v
7
p. 18)
p. 15)
Track xx
Track
mm:ss
song tle
xx/XX
mm:ss
xx tracks
Total
mm:ss
Contents Connections Playback Settings Tips Appendix
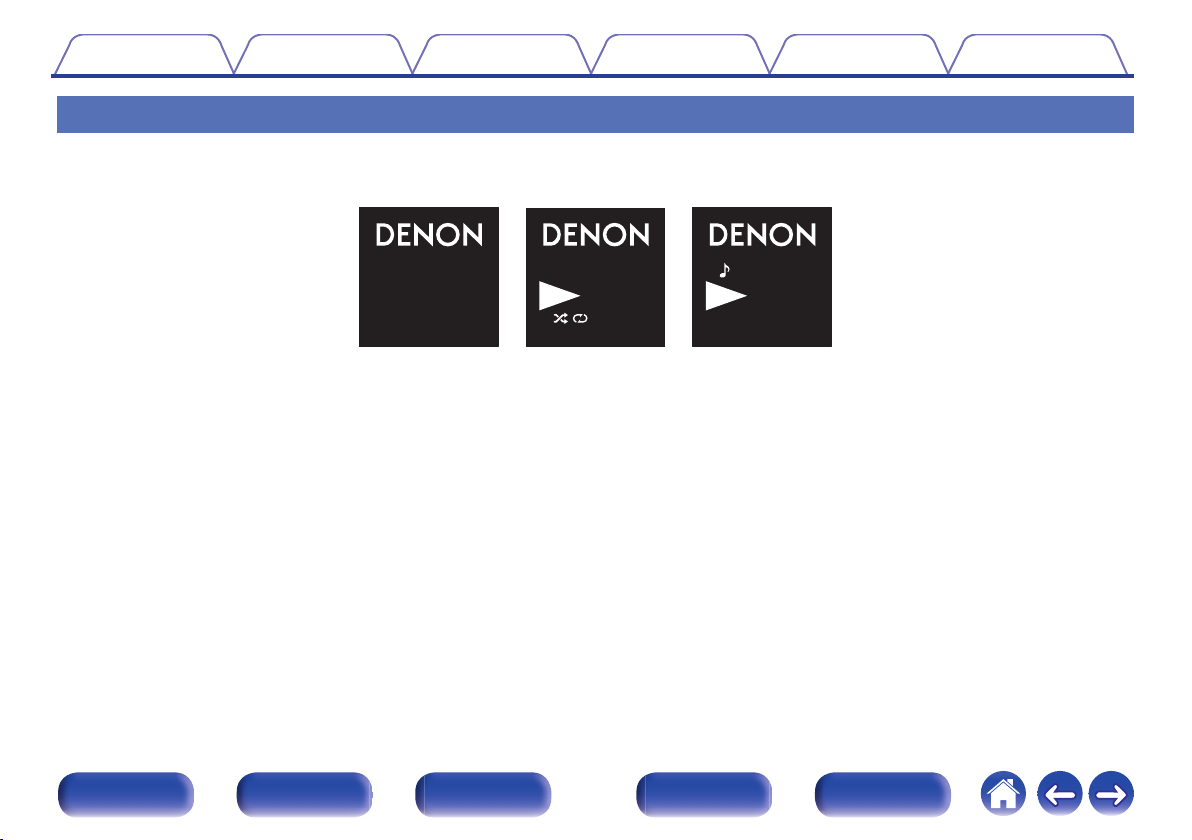
Display
The display automatically rotates to match the installation orientation.
Display sample
Description of icon
P: random
z: repeat all
u: repeat 1
v: track
t: folder
Front panel Display Rear panel Remote Index
.
8
q w e
Contents Connections Playback Settings Tips Appendix
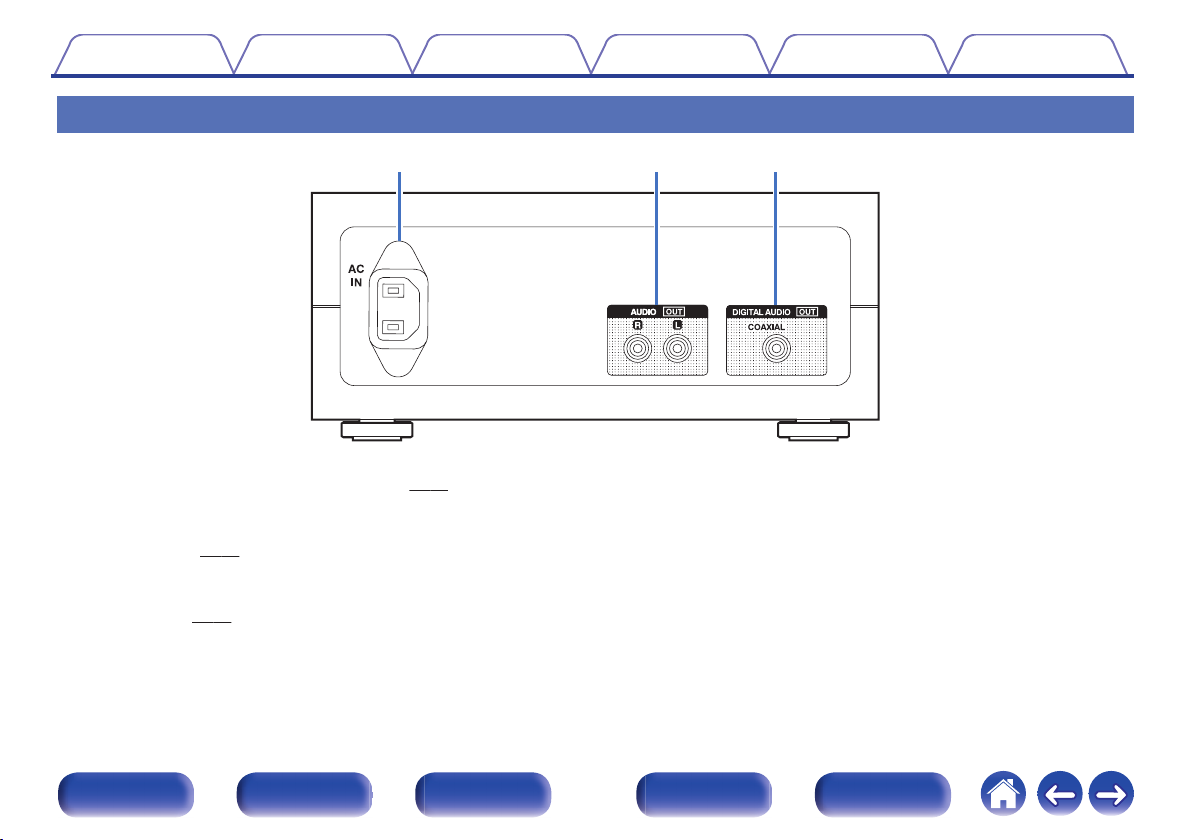
Rear panel
.
AC inlet (AC IN)
A
Used to connect the supplied power cord. (v
AUDIO OUT connectors (AUDIO OUT)
B
Used to connect an amplifier equipped with analog audio input
connectors. (v
DIGITAL AUDIO OUT connector (COAXIAL)
C
Used to connect an amplifier equipped with digital audio input
connector. (v
p. 20)
p. 19)
p. 21)
Front panel Display Rear panel Remote Index
9
AMP
AMP
VOLUME
VOLUME
INFO
INFOD
IMMER
IMMER
AMP POWER
AMP POWER
CD POWER
CD POWER
AMP
AMP
SE
TUP
TUP
MODE
MODE
PROGRAM
PROGRAM
ENTER
ENTER
CLEAR
CLEAR
1 2 3
4 5 6
7 8 9
+10
+10 0
q
w
e
r
t
y
Contents Connections Playback Settings Tips Appendix
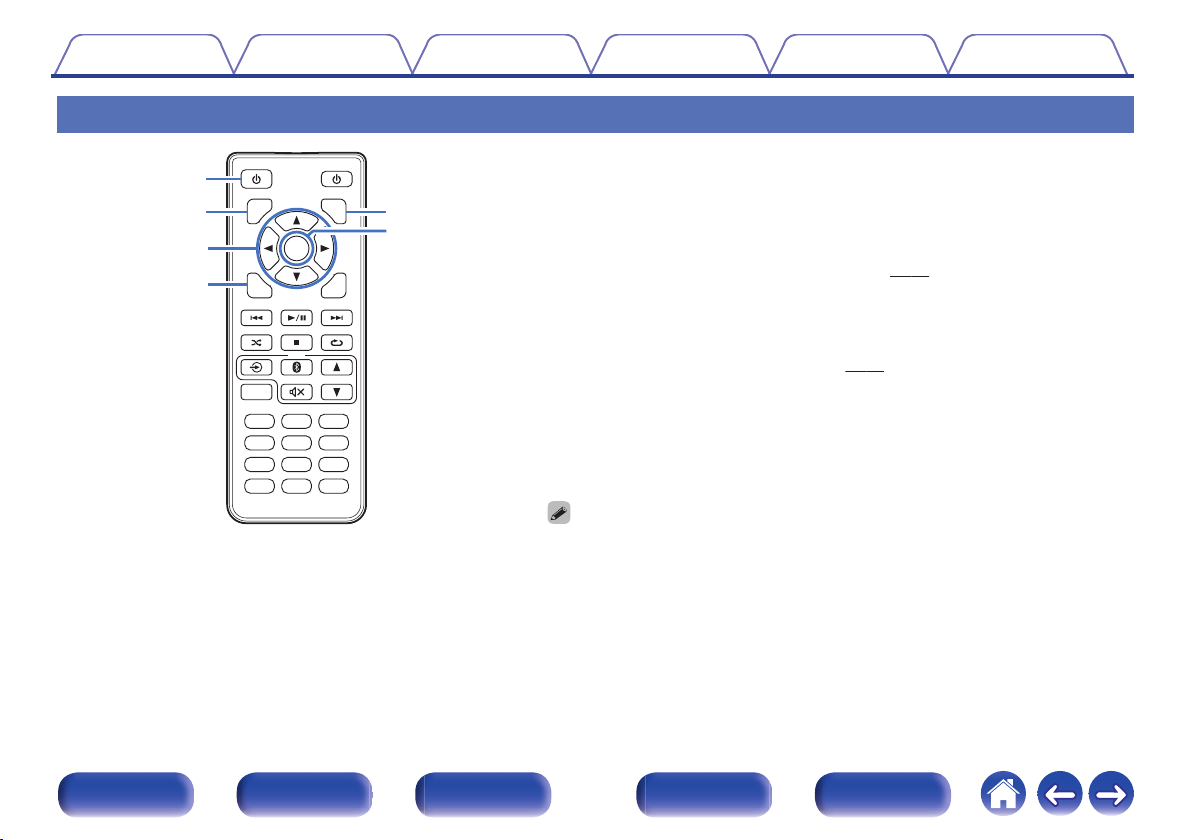
Remote control unit
Operating this unit
o
Power operation button (CD POWER X)
A
This turns the power on/to standby.
DIMMER button
B
Adjust the display brightness of this unit. (v p. 23)
Cursor buttons (df0 1)
C
These select folders or files on a data CD.
MODE button
D
This switches the playback mode. (v
INFO button
E
p. 27)
This switches the track information shown in the display during playback. This
switches the playback time display.
ENTER button
F
This determines the selection.
The DIMMER button also controls the Denon's Integrated Amplifier PMA-50, so the PMA-50
0
can be operated simultaneously with the DCD-50. When the two units have different settings,
press and hold in the button for lease 2 seconds to reset them both to the default setting, then
make the desired setting.
The display brightness is set to “Normal” by default.
0
Front panel Display Rear panel Remote Index
10

AMP
AMP
VOLUME
VOLUME
INFO
INFOD
IMMER
IMMER
AMP POWER
AMP POWER
CD POWER
CD POWER
AMP
AMP
SE
TUP
TUP
MODE
MODE
PROGRAM
PROGRAM
ENTER
ENTER
CLEAR
CLEAR
1 2 3
4 5 6
7 8 9
+10
+10 0
i
u
Q1
Q2
o
Q0
Contents
Connections Playback Settings Tips Appendix
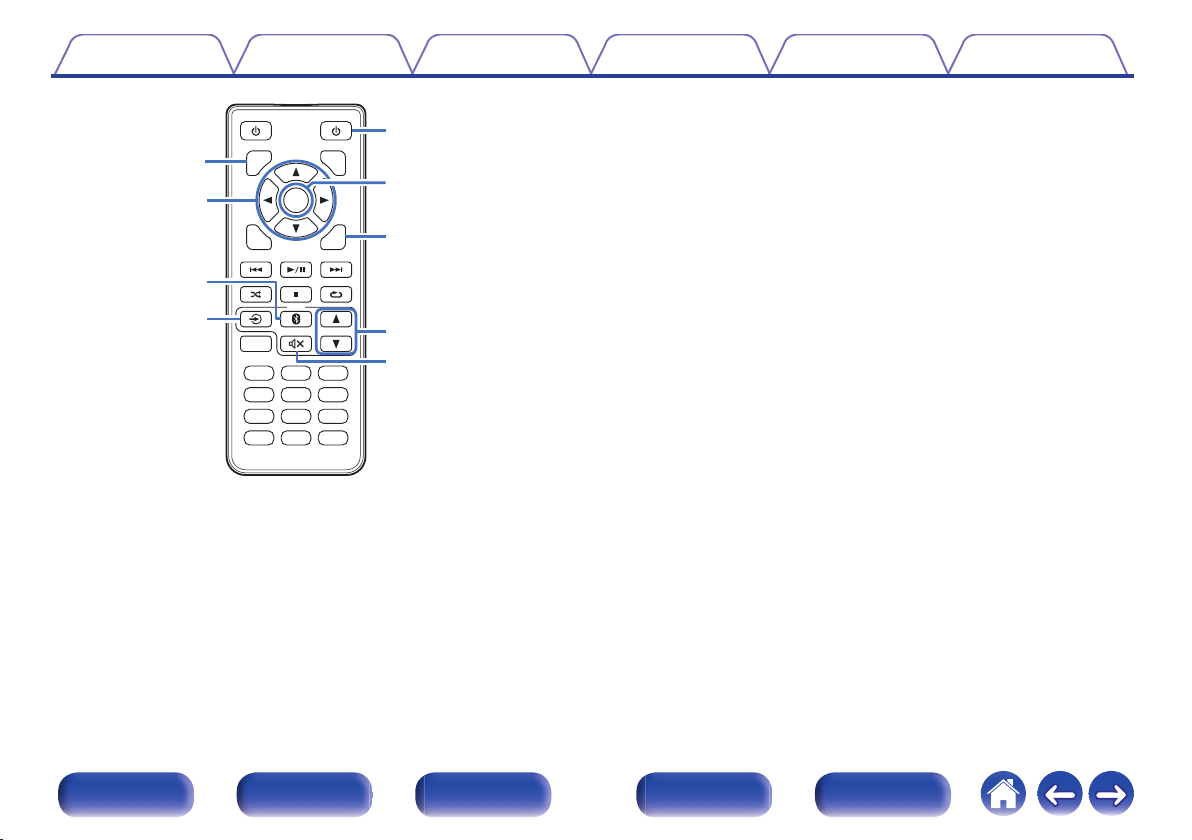
System buttons
G
These perform playback related operations.
Skip buttons (8 / 9)
0
Play/pause button (1 / 3)
0
Stop button (2)
0
H
Random button (P)
Switches the random playback.
PROGRAM button
I
This sets program playback. (v p. 26)
Number buttons (0~9, +10)
J
These enter numbers into the unit.
K
Repeat button (L)
Switches the repeat playback.
CLEAR button
L
This clears the program registration.
Front panel Display Rear panel Remote Index
11
AMP
AMP
VOLUME
VOLUME
INFO
INFOD
IMMER
IMMER
AMP POWER
AMP POWER
CD POWER
CD POWER
AMP
AMP
SE
TUP
TUP
MODE
MODE
PROGRAM
PROGRAM
ENTER
ENTER
CLEAR
CLEAR
1 2 3
4 5 6
7 8 9
+10
+10 0
q
t
u
i
o
w
r
e
y
Contents
Connections Playback Settings Tips Appendix
Amplifier operations
o
DIMMER button
A
Adjust the display brightness.
Cursor buttons (df0 1)
B
These select menu items.
C
Bluetooth button (V)
This switches the input to Bluetooth of PMA-50. This is also pressed during the
pairing operation.
D
Input source switching button (q)
This switches input sources of PMA-50.
AMP POWER button (X)
E
This turns the power of PMA-50 on/to standby.
ENTER button
F
This determines the selection.
AMP SETUP button
G
The setting menu is displayed on the display of PMA-50.
VOLUME buttons (df)
H
These adjusts the volume level.
Mute button (:)
I
This mutes the output audio of PMA-50.
Front panel Display Rear panel Remote Index
12
R
L
R
L
Contents Connections Playback Settings Tips Appendix
Connections
Connections
Contents
o
Installing this unit 14
Connecting a digital device 19
Connecting an analog device 20
Connecting the power cord 21
NOTE
Do not plug in the power cord until all connections have been completed.
0
Do not bundle power cords together with connection cables. Doing so can result in
0
humming or noise.
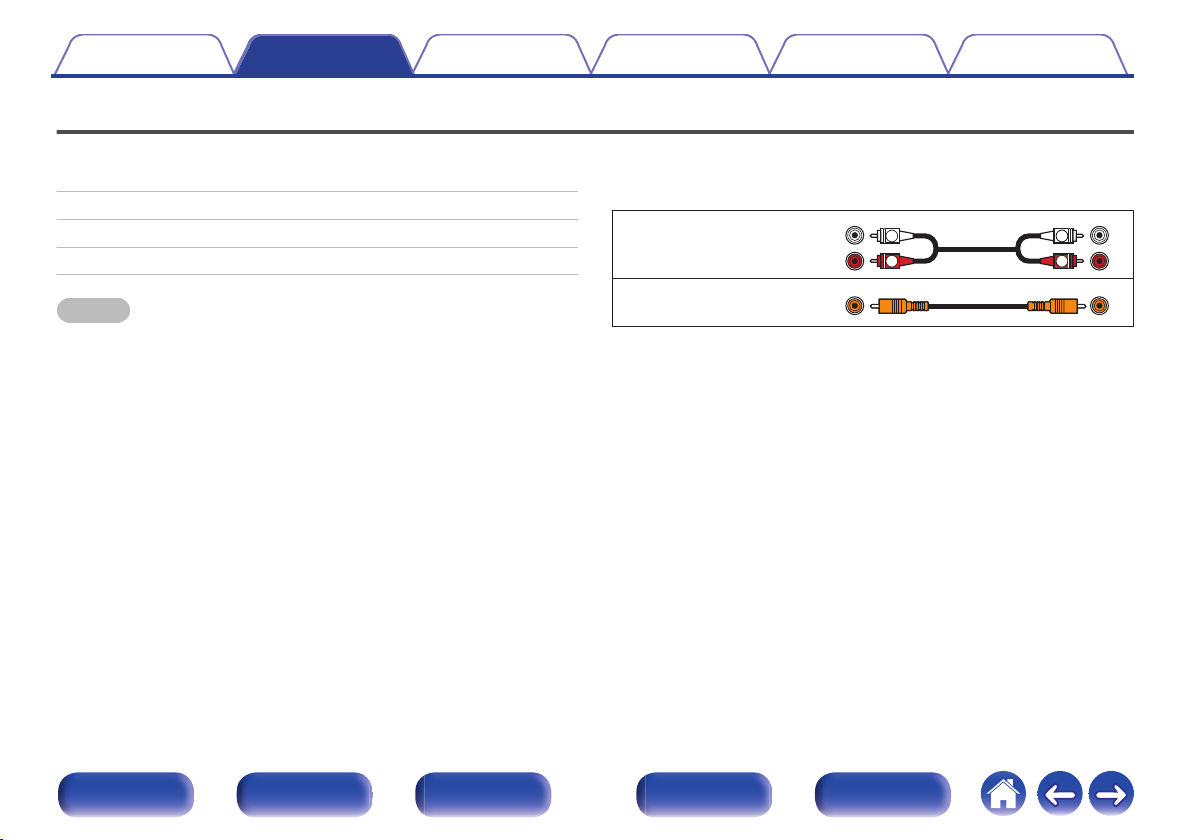
Cables used for connections
o
Provide necessary cables according to the devices you want to
connect.
Audio cable
.
Coaxial digital cable
(supplied)
.
Front panel Display Rear panel Remote Index
13
Contents
Connections Playback Settings Tips Appendix
Installing this unit
This unit can be installed in two ways - horizontally or vertically. You can
select how to install this unit according to the installation place and your
preference.
NOTE
Choose how you want to install this unit and install it correctly before playing back
0
discs.
Installing horizontally
The feet are initially attached to the unit for horizontal installation.
.
Front panel Display Rear panel Remote Index
14
Contents
Connections Playback Settings Tips Appendix
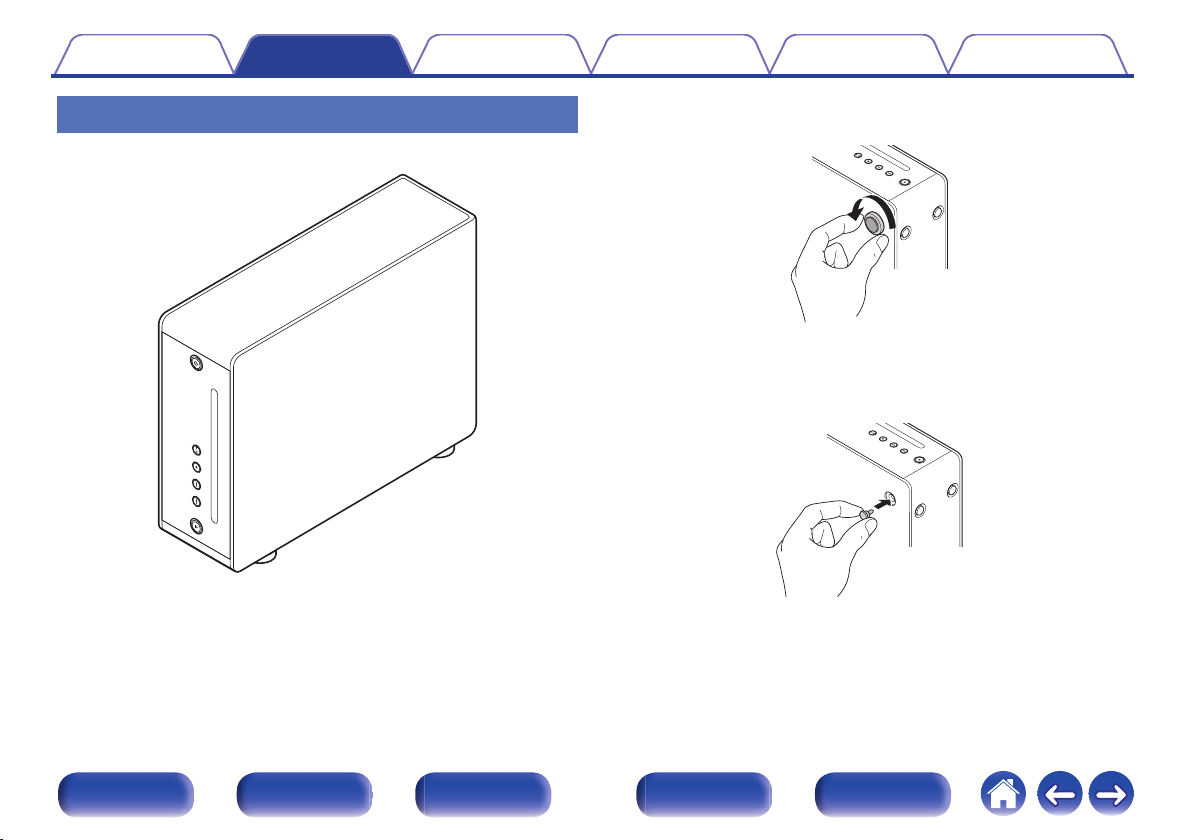
Installing vertically
This orientation is suitable for placing a narrow place.
.
Remove the feet.
1
.
Rotate each of the 4 feet counter-clockwise to remove.
Insert the supplied caps (silver) into the holes from
2
which the feet were removed.
.
Front panel Display Rear panel Remote Index
15
 Loading...