

Page 1

100 Corporate Drive Mahwah, NJ 07430
Service Bulletin
No. : DZ09-129
Date: October 2, 2009
_____________________________________________________________
Model: DBP-2010CI, DBP-1610
Subject: Correction of the firmware of DPMS (Denon Product Management
Server).
Countermeasure is applicable only upon claim from the customer.
Symptom: 1) The digital coaxial output is interrupted when the customer skips
the track while pausing at CD.
2) The analog output signal is distorted when playing the high frequency signal
(10~20kHz) of LPCM-Multi, Dolby Digital 2ch/5.1ch, or dts 5.1ch.
Solution:
Please do not use Proxy for updating in the Network environment! If customer
uses setting of Proxy, the unit doesn’t update the firmware properly.
Caution: It is necessary to initialize the unit before the update work begins. The
customer has to initialize their BD Player. Please update the firmware after you
confirm this matter to the customer beforehand.
Preparing for updating: (Refer to the Instruction Manual.)
1) Turn the Power Supply of the unit off.
2) Connect the Ethernet terminal of the unit to the Network line by Ethernet
straight cable. (Don't use Ethernet cross cable.)
3) The connection of the network recommends the Ethernet cable for certain
update.
4) Turn the Power Supply of the unit on.
We corrected the firmware so that no malfunction occurs.
______________________________________________________________________________________
The information contained in this document is intended for the exclusive use by DENON Authorized Service Centers and their
employees. This document may contain information that is privileged, confidential and may be protected from disclosure under
applicable laws and terms of the DENON Service Agreement. Any distribution, disclosure, dissemination or copying of this
document and the information it contains is prohibited. No responsibility will be accepted by DENON for any damage, injury or loss
resulting from the misuse of the information contained in this document.
CONFIDENTIALITY NOTICE:
Page 2
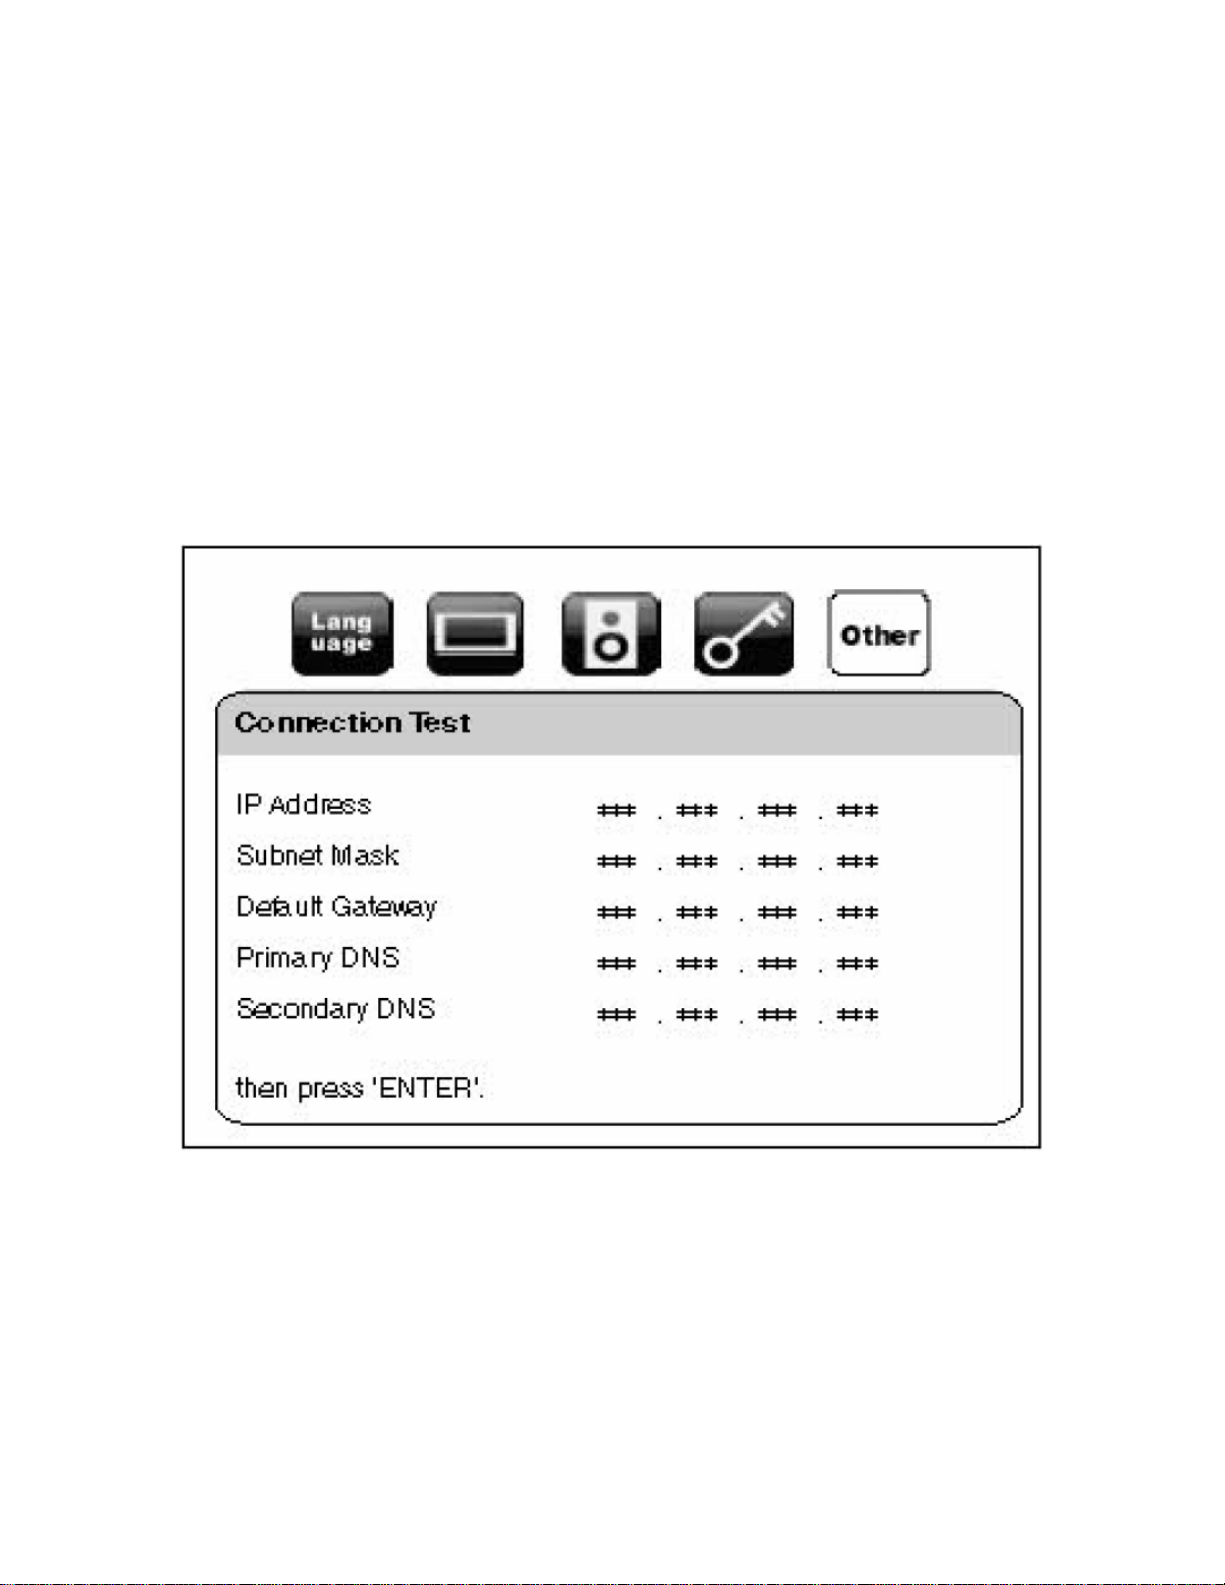
Connection Test: After you made IP address/DNS settings or when a LAN cable
is connected, always perform the connection test to check if the connection is
correctly made.
1) Press "SETUP" button in stop mode.
2) Use "△/▽" buttons to select "CUSTOM" button, then press "ENTER" button.
3) Use "△/▽" buttons to select "Other" button, then press "ENTER" button.
4) Use "△/▽" buttons to select "Network Connection", then press "ENTER"
button.
5) Use "△/▽" buttons to select "Connection Test", then press "ENTER" button.
6) Connection test will start automatically and the test result will appear right after
the connection test finishes. "Testing...": The test is in progress. "Pass":
Connection test is successfully completed. "Fail": Connection test failed. Check
the connection settings.
7) Press "ENTER" button to go to the list of network status confirmation screen.
8) Press "ENTER" button to go back to the previous screen or press "SETUP"
button to exit.
______________________________________________________________________________________
CONFIDENTIALITY NOTICE:
The information contained in this document is intended for the exclusive use by DENON Authorized Service Centers and their
employees. This document may contain information that is privileged, confidential and may be protected from disclosure under
applicable laws and terms of the DENON Service Agreement. Any distribution, disclosure, dissemination or copying of this
document and the information it contains is prohibited. No responsibility will be accepted by DENON for any damage, injury or loss
resulting from the misuse of the information contained in this document.
Page 3

Updating the firmware via DPMS:
1) Use "△/▽" buttons to select "Network Update", then press "ENTER" button.
2) Use "△/▽" buttons to select "Yes", then press "ENTER" button.
3) The unit will start checking for the latest firmware version.
4) Confirmation message will appear.
5) Use "△/▽" buttons to select "Yes", then press "ENTER" button.
6) The unit will start downloading the latest firmware version.
7) When the download completes, confirmation message will appear.
8) Press "ENTER" button.
9) The unit will start updating the firmware version.
10) It may take a while to complete the updating.
11) Please wait until "100%" appears on the front panel display.
12) After updating finishes, the unit will restart and open the disc tray
automatically.
Caution!
1) Do not unplug the AC cord or LAN cable while executing the Network Update.
2) All settings will remain the same even if you update the firmware version.
______________________________________________________________________________________
CONFIDENTIALITY NOTICE:
The information contained in this document is intended for the exclusive use by DENON Authorized Service Centers and their
employees. This document may contain information that is privileged, confidential and may be protected from disclosure under
applicable laws and terms of the DENON Service Agreement. Any distribution, disclosure, dissemination or copying of this
document and the information it contains is prohibited. No responsibility will be accepted by DENON for any damage, injury or loss
resulting from the misuse of the information contained in this document.
Page 4

3) The disc tray will open automatically after updating finishes. This is not a
malfunction.
Confirmation of the version
Confirmation of the "FE/BE" version:
1) Press the "OPEN/CLOSE" button and close the Disc Tray.
2) Please confirm! "NO DISC" on the FL Display.
3) Press the buttons on the remote control in the order of "1", "2", "3", "4" and
"DISPLAY".
4) The following information appears on the GUI.
5) To exit this mode, press "POWER OFF" button.
Cautions during the rewriting operation:
1) Please do not turn off the Power of the unit during the rewriting operation.
2) If the Display isn’t turning into the following version of the firmware during the
rewriting operation, wait longer than 10 minutes after closing the Disc Tray.
______________________________________________________________________________________
CONFIDENTIALITY NOTICE:
The information contained in this document is intended for the exclusive use by DENON Authorized Service Centers and their
employees. This document may contain information that is privileged, confidential and may be protected from disclosure under
applicable laws and terms of the DENON Service Agreement. Any distribution, disclosure, dissemination or copying of this
document and the information it contains is prohibited. No responsibility will be accepted by DENON for any damage, injury or loss
resulting from the misuse of the information contained in this document.
Page 5

Then, turn off the Power of the unit and start the rewriting operation from the
beginning again.
Cautions during the updating operation:
1) Do not turn off the "DHCP" setting when you update the unit. (Initialization is
turning on.) Please execute it under the guidance of the IT staff with computer
skills when the setting of "DHCP" is unavoidably turned off by limiting the
electronic environment, and you set IP Address, the subnet mask, the default
gateway, and DNS, etc. for yourself. When a mistake is made in the setting with
"DHCP" turned off, the unit might not operate, and in the worst situation the unit
can be damaged. Please do not touch the setting of "DHCP" except in special
circumstances
2) When the customer uses a "Netgear router 614 Series" for updating, "uPnP"
have to deactivate in the router.
3) Please do not turn off the Power of the unit or pull out AC cord during the
updating operation.
4) If the Display has a fixed indication during the updating operation, wait longer
than total update time. Then, turn off the Power of the unit and start the updating
operation from the beginning again.
5) The unit doesn't break down while updating it when the power supply of the
unit is turned off or the cable of the Internet is pulled out.
6) Please execute initialization when it is not improved. Still, please repair by
service when it is not improved.
7)Even·with·a·broadband·connection·to·the·Internet,·approximately·1·hour·is·requ
ired·for·the·updating·procedure·to·be·completed.Once·updating·starts,·normal·op
erations·on·the·DVDA1UDCI/A1UD·cannot·be·performed·until·updating·is·comple
ted.·Also,·setting·items·of·the·GUI·menu·of·DVDA1UDCI/A1UD·or·setting·items·of
·the·image·adjustment·may·be·initialized.
Serial Number Range:
Please apply the above modification to the production models in the following
serial numbers. We already applied this modification to another region models.
(Last 5 Digits)
______________________________________________________________________________________
CONFIDENTIALITY NOTICE:
The information contained in this document is intended for the exclusive use by DENON Authorized Service Centers and their
employees. This document may contain information that is privileged, confidential and may be protected from disclosure under
applicable laws and terms of the DENON Service Agreement. Any distribution, disclosure, dissemination or copying of this
document and the information it contains is prohibited. No responsibility will be accepted by DENON for any damage, injury or loss
resulting from the misuse of the information contained in this document.
 Loading...