

Page 1

TERMOVENTILATORE A COLONNA CERAMICO
TOWER CERAMIC HEA TER
RADIATEUR SOUFFLANT COLONNE CÉRAMIQUE
KERAMIK-HEIZSÄULE
KERAMISCHE ZUILVENTILATORKACHEL
TERMOVENTILADOR CERÁMICO DE TORRE
TERMOVENTILADOR CERÂMICO DE COLUNA
∫∂ƒ∞ªπ∫√ ∞∂ƒ√£∂ƒª√ ¢∞¶∂¢√À
ääÖÖêêÄÄååààóóÖÖëëääààââ ííÖÖèèããééÇÇÖÖççííààããüüííééêê--ëëííééââääÄÄ
OSZLOPOS FŰT VENTILÁTOR KERÁMIA FŰT ELEMMEL
TEPELN¯ SLOUPKOV¯ KERAMICK¯ VENTILÁTOR
TERMOWENTYLATOR CERAMICZNY KOLUMNOWY
SØYLEFORMET KERAMISK VIFTEOVN
KERAMISK PELARVÄRMEFLÄKT
KERAMISK SØJLEVARMLUFTSBLÆSER
KERAAMINEN PYSTYMALLINEN TUULETINLÄMMITIN
ääééããééççÖÖçç ääÖÖêêÄÄååààóóÖÖçç ííÖÖêêååééÇÇÖÖççííààããÄÄííééêê
TERMOVENTILATOR CERAMIC TIP COLOANĂ
Istruzioni per l’uso
Instructions
Mode d’emploi
Bedienungsanleitung
Gebruiksaanwijzingen
Instrucciones para el uso
Instruções de utilização
√‰ËÁ›Â˜ ¯Ú‹Û˘
аМТЪЫНˆЛЛ ФУ ˝НТФОЫ‡Ъ‡ˆЛЛ
Használati útmutató
Návod k pouÏití
Instrukcja obs∏ugi
Bruksanvisning
Bruksanvisning
Brugsvejledning
Käyttöohjeet
àÌÒÚÛ͈Ëfl Á‡ ÛÔÓÚ·‡
Instrucţiuni pentru folosire
10
Page 2
2
D
G
F
I
D
E
H
L
A
I
E
F
B
G
H
C
Page 3
3
A) If your appliance comes fitted with a plug, it will incorporate a 13 Amp fuse. If it does not fit your socket, the plug
should be cut off from the mains lead, and an appropriate plug fitted, as below.
WARNING: Very carefully dispose of the cut off plug after removing the fuse: do not insert in a 13 Amp socket
elsewhere in the house as this could cause a shock hazard.
With alternative plugs not incorporating a fuse, the circuit must be re-fitted when changing the fuse using a 13 Amp
Asta approved fuse to BS 1362. In the event of losing the fuse cover, the plug must NOT be used until a replacement
fuse cover can be obtained from your nearest electrical dealer. The colour of the correct replacement fuse cover is that
as marked on the base of the plug.
B) If your appliance is not fitted with a plug, please follow the instructions provided below:
IMPORTANT
The wires in the mains lead are coloured in accordance with the followin code:
Blue: Neutral
Brown: Live
As the colours of the wires in the mains lead of this appliance may not correspond with the coloured markings identifying
the terminals in your plug, proceed as follows:
The wire which is coloured blue must be connected to the terminal which is marked with the letter N or coloured black.
The wire which is coloured brown must be connected to the terminal which si marked with the letter L or coloured red.
ELECTRICAL CONNECTION (U.K. ONLY)
Voltage
Wattage
See rating label
Tensione
potenza
vedi targa caratteristica
Tension
puissance
voir plaquette données
Voltagem
Potencia
Spannung
Leistung
siehe Typenschild
Spänning
Effekt
zie plaatje
Tension
Potencia
véase placa de características
ver placa de especificações
Tavsh
Iscuv"
blevpe pinakivda me carakthristikav
Spenning se etikett
Jännite watt kts. arvokilpi ominaisuudet
Feszültség
teljesítmény
lásd adatlemez
Napi´cie
mocy
Zob. tabliczk´ znamionowà
ç‡ÔflÊÂÌË
 ÔËÚ‡ÌËfl
ТПУЪЛ Ъ‡·ОЛ˜НЫ ı‡‡НЪВЛТЪЛН
Napûtí
V˘kon
viz ‰títek charakteristik
Napätie
v˘konu
Viì ‰títok charakteristík
Napetost in
moč
Glej napisno tablico
Spænding
effekt
se typepladen
Spänning
effekt
se märkplåt
з‡ФВКВМЛВ
/ÏÓ˘ÌÓÒÚ
ÇËÊ Ú‡·ÂÎ͇ڇ Ò Í‡˜ÂÒÚ‚‡Ú‡
Tensiune
putere
Vezi plăcuţa cu caracteristici
Page 4

4
I
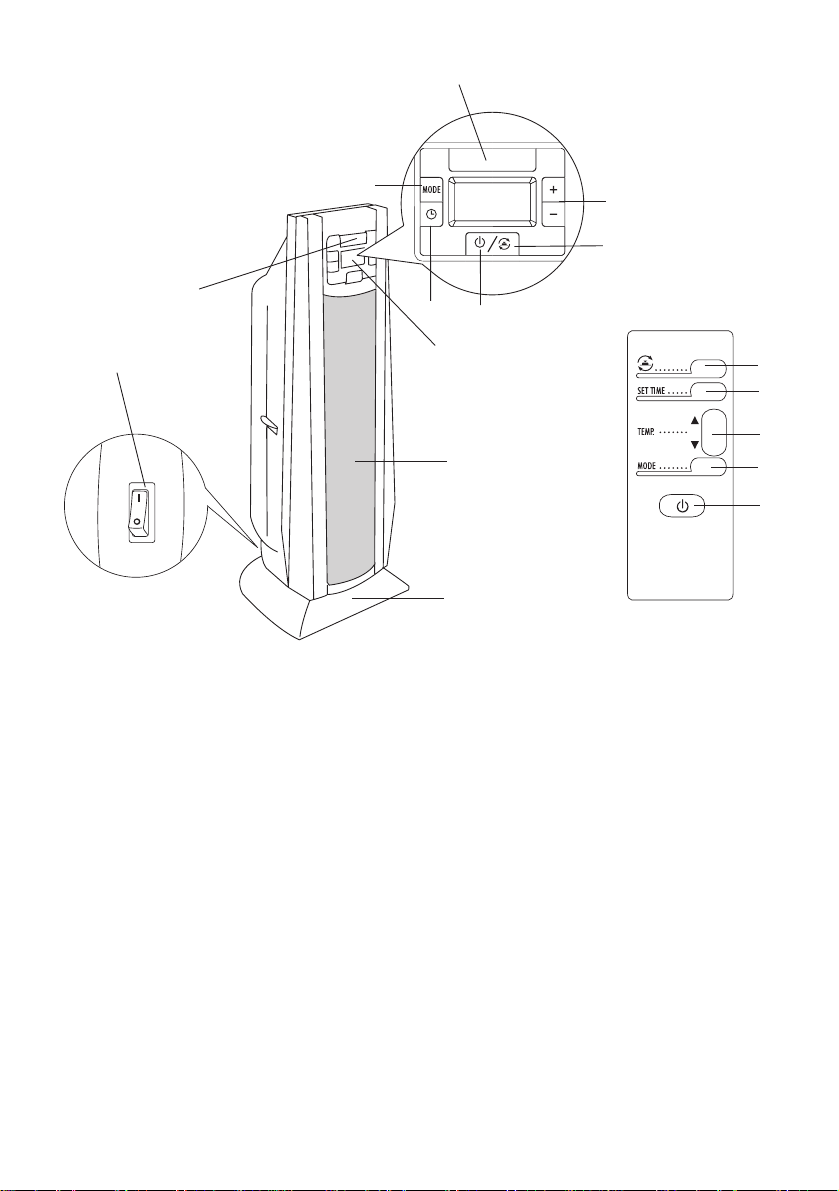
DESCRIZIONE
A Pannello comandi
B Griglia uscita aria
C Base
D Lampada spia
E Pulsante Set time
F Pulsante regolazione temperatura
G Pulsante MODE
H Pulsante STAND-BY
I Pulsante oscillazione
L Interruttore generale
COLLEGAMENTO ELETTRICO
- Prima di inserire la spina nella presa di corrente verificare attentamente che il voltaggio
della Vostra rete domestica corrisponda al valore in V indicato sull’apparecchio e che la
presa di corrente e la linea di alimentazione siano dimensionate al carico richiesto.
- QUESTO APPARECCHIO È CONFORME ALLA DIRETTIVA 89/336/CEE ED AL D.M.
476/92 SULLA SOPPRESSIONE DEI RADIODISTURBI.
INSTALLAZIONE
L’apparecchio può essere utilizzato su qualsiasi piano d’appoggio purchè orizzontale.
Non sovraccaricare il circuito elettrico evitando di utilizzare la stessa presa per altri apparecchi.
FUNZIONAMENTO ED USO
1. Verificare che l’apparecchio sia spento prima di inserire la spina nella presa di corrente.
2. Collegare l’apparecchio alla presa elettrica.
3. Per accendere l’apparecchio è necessario che l’interruttore (L) situato sulla parte posteriore
dell’apparecchio sia sulla pos. I. L’apparecchio emetterà un “beep”, la lampada spia (D) si
accenderà e rimarrà accesa fintanto che l’apparecchio è alimentato.
4. Premere il pulsante (H) per accendere l’apparecchio.
5. All’accensione, l’apparecchio funziona in modalità LOW (funzionamento alla potenza
minima). Il display visualizza la temperatura ambiente.
6. Premendo il pulsante MODE (G), l’apparecchio funziona in modalità HIGH (funzionamento
alla potenza massima). Il display visualizza la temperatura ambiente.
7. Ripremendo il pulsante MODE (G) l'apparecchio funzionerà in modalità AUTO. Il display
visualizzerà il set di temperatura impostato. Per imposatre un set di temperatura diversa da
quello impostato, agire sui pulsanti + e -. Dopo alcuni secondi il display visualizzerà la
temperatura ambiente.
8. Ripremendo il pulsante MODE (G) l’apparecchio ritornerà a funzionare nella modalità
LOW. Continuando a premere il pulsante MODE, l’apparecchio selezionerà in sequenza le
seguenti funzioni: LOW HIGH AUTO.
9. Per spegnere l’apparecchio, premere il pulsante H per alcuni secondi e posizionare su 0
l’interruttore situato sulla parte posteriore dell’apparecchio(L).
BASE MOTORIZZATA
L’apparecchio è dotato di base motorizzata.
Per diffondere il flusso d’aria in un’area più vasta, premere il pulsante di oscillazione (I).
L’apparecchio così attivato oscillerà a destra e a sinistra.
Per fermare l’oscillazione nella posizione desiderata è sufficiente ripremere il pulsante (I).
Per spegnere l’apparecchio tenere premuto per alcuni secondi il pulsante (H).
Page 5

5
Regolazione del termostato
1. Premere il pulsante MODE (G) fino a quando il display visualizza AUTO.
2. Agire sui pulsanti + o - per aumentare o diminuire il set di temperatura. La temperatura così
fissata verrà automaticamente regolata e mantenuta costante dal termostato.
3. Quando la temperatura ambiente è di 2° superiore alla temperatura impostata l’apparec-
chio si spegne e la ventilazione si arresta dopo alcuni secondi.
4. Quando la temperatura ambiente è inferiore alla temperatura impostata l’apparecchio
riprende automaticamente a funzionare.
Nota: quando si desidera cambiare la temperatura impostata e la modalità di oscillazione è
attiva, alla pressione dei pulsanti + o - l’apparecchio si ferma per permettere il settaggio
della nuova temperatura. Ad impostazione avvenuta l’oscillazione riprenderà automaticamente.
Funzione timer
E’ possibile attivare questa funzione da qualsiasi modalità di funzionamento. Il timer permette
di programmare il tempo di funzionamento dell'apparecchio da 1 a 8 ore.
Ad ogni pressione del pulsante (E) il tempo di funzionamento aumenta di un'ora.
Una volta impostato il timer, il tempo decrementa di ora in ora visualizzando nel display il
tempo rimanente. Al termine del tempo impostato l'apparecchio si spegnerà.
Se non si vuole utilizzare l'apparecchio con la funzionalità timer, per ritornare alla modalità
manuale ripremere il tasto (E) dopo che il display visualizza 8 h.
Funzione antigelo
E’ possibile mantenere l’ambiente ad una temperatura di circa (5°C) impedendo il congelamento con un minimo dispendio di energia.
Premere il pulsante MODE (G) fino a quando il display visualizza AUTO. Agire su pulsante “
-”
fino ad impostare un set di tempertura di (5°C).
Quando la temperatura ambiente sarà inferiore alla temperatura impostata l’apparecchio
riprenderà automaticamente a funzionare.
USO DEL TELECOMANDO.
Il telecomando va usato con molta attenzione.
1. Premere il pulsante STAND-BY (H).
2. Per quanto riguarda il funzionamento dei pulsanti oscillazione (I), SET TIME (E), MODE (G)
e regolazione della temperatura (F) vogliate fare riferimento a quanto riportato sul paragrafo “FUNZIONAMENTO ED USO”.
3. Per sostituire le batterie, togliere il coperchio sul retro del telecomando.
Il telecomando funziona con due batterie alcaline tipo AAA (incluse ma imballate separatamente).
4. Non utilizzare batterie usate, assieme a batterie nuove, con valori diversi.
MANUTENZIONE
- Prima di qualsiasi pulizia togliere sempre la spina dalla presa di corrente.
- Pulire regolarmente le griglie di entrata ed uscita dell’aria durante la stagione di utilizzo
dell’apparecchio aiutandosi con un’aspirapolvere.
- Non usare mai polveri abrasive o solventi.
AVVERTENZE
- Non utilizzare questo apparecchio di riscaldamento nelle immediate vicinanze di docce,
vasche da bagno, lavandini, piscine, ecc.
- Usare l’apparecchio sempre e soltanto in posizione verticale.
Page 6
6
- Non usare l’apparecchio per asciugare la biancheria, non ostruire le griglie di entrata ed
uscita dell’aria (pericolo di surriscaldamento).
- Non consentire l’uso dell’apparecchio a persone (anche bambini) con ridotte capacità
psico-fisico-sensoriali, o con esperienza e conoscenze insufficienti, a meno che non siano
attentamente sorvegliate e istruite da un responsabile della loro incolumità. Sorvegliare i
bambini, assicurandosi che non giochino con l’apparecchio.
- Per una distanza di 50 cm davanti all’apparecchio non devono esserci mobili od altri oggetti.
- Non far funzionare l’apparecchio a ridosso di pareti, mobili, tende ecc.
-Èsconsigliato l’uso di prolunghe. Qualora il loro uso si rendesse necessario, seguire attentamente le istruzioni accluse alla prolunga, facendo attenzione a non superare il limite di
potenza marcato sulla prolunga.
- Se il cavo di alimentazione è danneggiato, esso devo essere sostituito dal costruttore o dal
suo servizio assistenza tecnica o comunque da una persona con qualifica similare, in modo
da prevenire ogni rischio.
- L’apparecchio non deve essere posto immediatamente sotto una presa di corrente fissa.
- Non usare questo apparecchio in una stanza la cui area di base è inferiore a 4 m
2
.
- L’apparecchio è dotato di un dispositivo anti-ribaltamento che spegne l’apparecchio in
caso di caduta. Per avviare nuovamente l’apparecchio è sufficiente rimettere quest’ultimo in
posizione verticale.
- Al primo avvio, far funzionare l’apparecchio alla massima potenza per almeno 2 ore. Durante
questa operazione aerare bene la stanza al fine di eliminare l’odore “di nuovo” che si sprigiona
dall’apparecchio. E’ del tutto normale che l’apparecchio emetta degli “scricchiolii” al primo avvio.
Un dispositivo di sicurezza interrompe il funzionamento del termoventilatore in caso di surri-
scaldamento accidentale (es. ostruzione delle griglie di entrata ed uscita dell’aria, motore che
non gira o gira lento). Per ripristinare il funzionamento, è necessario staccare la spina dalla
presa per alcuni minuti, eliminare la causa del surriscaldamento, quindi reinserire la spina.
IMPORTANTE: Al fine di evitare surriscaldamenti, non coprire in nessun caso l'apparecchio
durante il funzionamento, poiché ciò provocherebbe un pericoloso aumento di temperatura.
AVVERTENZA: per evitare i rischi connessi al resettaggio accidentale del dispositivo di sicurezza, questo apparecchio non deve essere alimentato tramite un dispositivo di accensione/spegnimento esterno, come un timer, né collegato ad un circuito che venga acceso e spento regolarmente dal fornitore di energia.
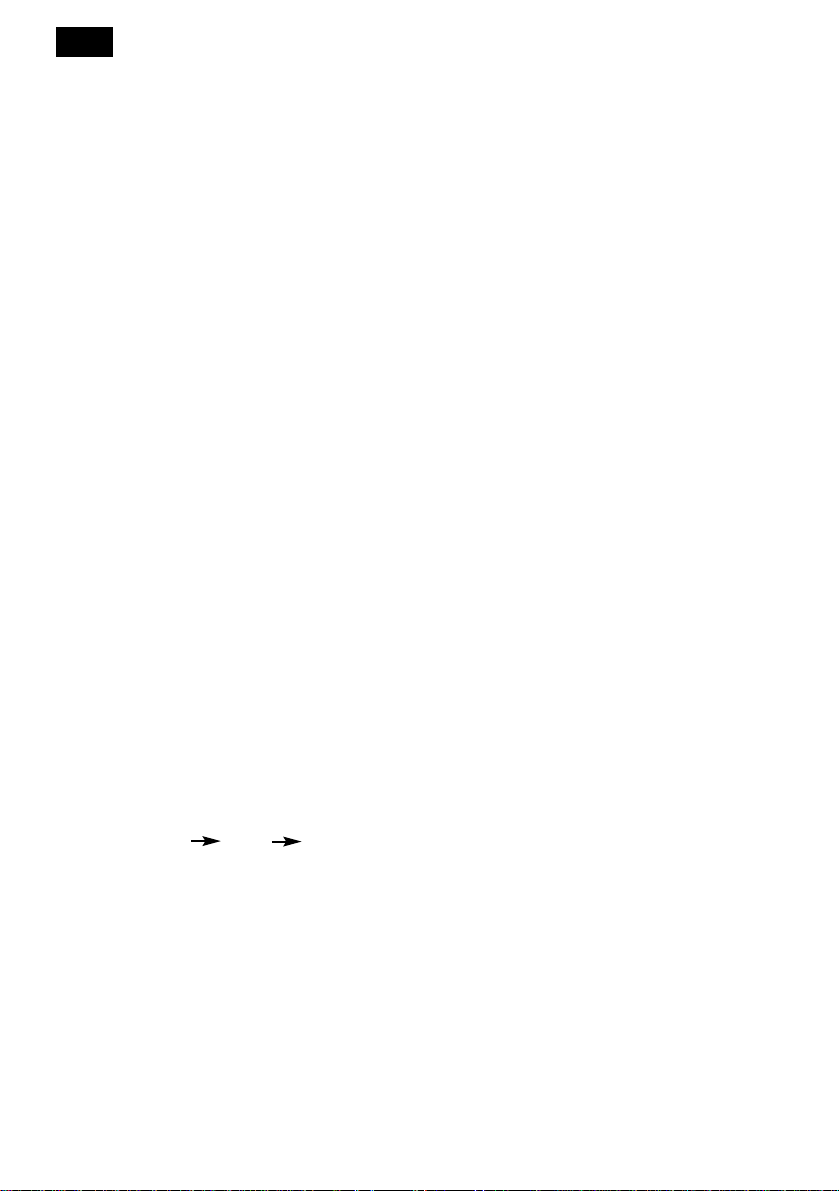
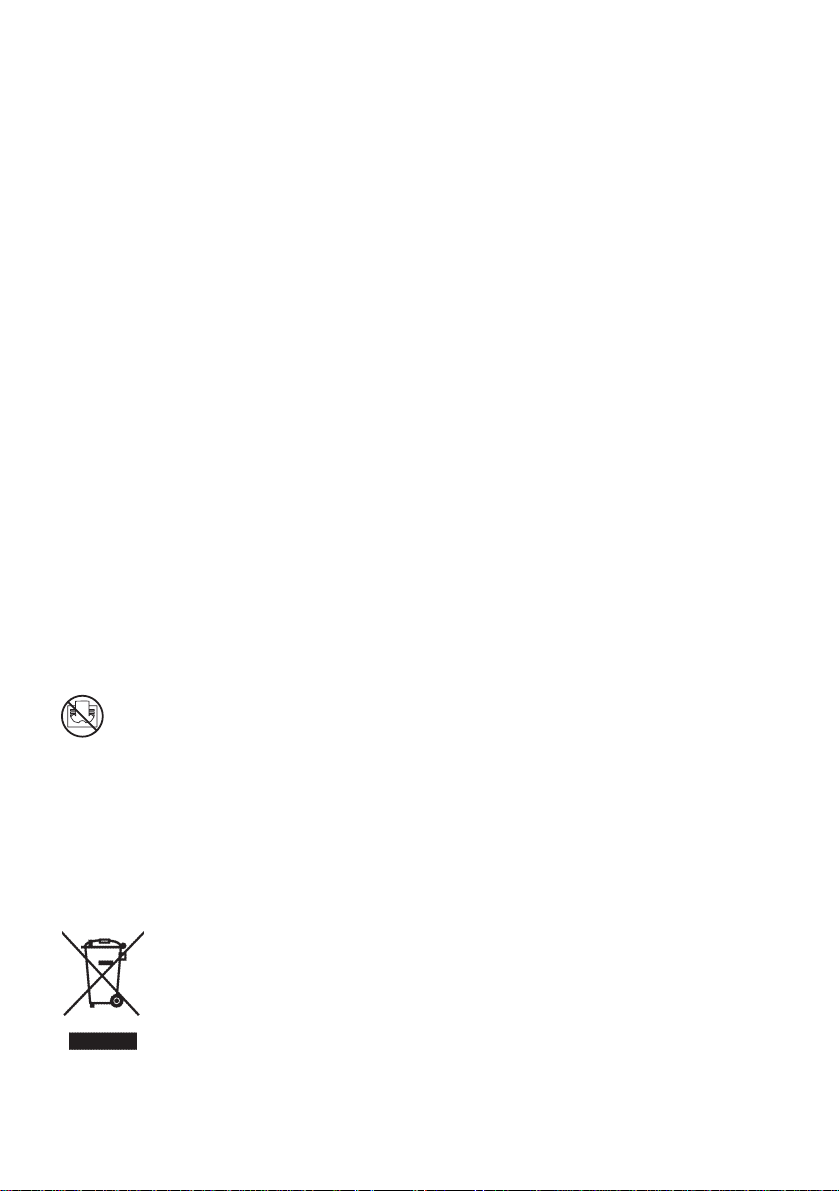
Avvertenze per il corretto smaltimento del prodotto ai sensi della Direttiva Europea 2002/96/EC e
del Decreto Legislativo n. 151 del 25 Luglio 2005.
Alla fine della sua vita utile il prodotto non deve esser smaltito insieme ai rifiuti
urbani. Può essere consegnato presso gli appositi centri di raccolta differenziata
predisposti dalle amministrazioni comunali, oppure presso i rivenditori che forniscono questo servizio. Smaltire separatamente un elettrodomestico consente di evitare possibili conseguenze negative per l’ambiente e per la salute derivanti da un
suo smaltimento inadeguato e permette di recuperare i materiali di cui è composto
al fine di ottenere un importante risparmio di energia e di risorse. Per rimarcare
l’obbligo di smaltire separatamente gli elettrodomestici, sul prodotto è riportato il
marchio del contenitore di spazzatura mobile barrato. Lo smaltimento abusivo del
prodotto da parte dell’utente comporta l’applicazione delle sanzioni amministrative
previste dalla normativa vigente.
Page 7
7
GB
DESCRIPTION OF APPLIANCE
A Control panel
B Air outlet grille
C Base
D Pilot lamp
E Set time button
F Temperature adjustement
G MODE button
H STAND-BY button
I Oscillating button
L ON/OFF button
ELECTRICAL CONNECTION
- Before plugging the appliance into the mains socket, check that the mains power supply
corresponds to the value indicated on the rating plate.
- THIS APPLIANCE COMPLIES WITH DIRECTIVE 89/336/EEC ON RADIO INTERFERENCE
SUPPRESSION.
Installation
The appliance can be used on any rigid horizontal surface.
In order to avoid electre circuit overload, do not use the same socket for other appliances.
OPERATION AND USE
1. Make sure the appliance is off before plugging into the mains
2. Plug the appliance into an appropriate outlet.
3. To turn the appliance on, the switch (L) at the back must be in the I position. The appliance
emits a beep. The pilot lamp(D) light also comes on and remains lit while power to the
appliance is on.
4. Press button H to turn the appliance on.
5. The appliance starts up in LOW mode (minimum heat output). The display shows the current
room temperature.
6. Press the MODE button (G) to switch to HIGH mode (maximum heat output). The display
shows the current room temperature.
7. Press the MODE button (G) again to switch the appliance to AUTO mode.
The display shows the temperature set point. Use the + and - buttons to set a different temperature. After a few seconds, room temperature is shown on the display.
8. Press the MODE button (G) again to switch the appliance back to LOW mode. When the
MODE button is pressed continuously, the appliance switches through the following modes
in sequence: LOW HIGH AUTO.
9. To turn the appliance off, press button H and place the switch (L) on the back in the 0 position.
MOTORISED OSCILLATING BASE
The appliance has a motorized swivelling base to distribute the air flow over a larger area. To
activate the motorized base press the oscillate switch (I). The appliance swivels from right to
left. To stop the appliance in the desired position, simply press button (I).
To turn the appliance off, hold button (H) down for a few seconds.
Adjusting the thermostat
1. Press the MODE button (G) until AUTOis displayed.
2. Use the + and –buttons (F) (or use the remote control) to increase or reduce the desired temperature. The thermostat will automatically maintain the temperature set and keep it constant.
3. When room temperature is 2°C above the set temperature, the appliance goes off. The internal fan
will stop after few seconds.
4. When room temperature drops below the set temperature, the appliance comes on automatically.
Note: if swing mode is active, press buttons + or - to change the set temperature, the swinging
of the base will stop to allow a new temperature to be set. After the setting procedure has been
completed, the swinging of the base will resume automatically.
Page 8

8
Timer function
This function can be activated during any operating mode. The timer can be used to program
the time the appliance remains in operation, from 1 to 8 hours.
Each time you press the button (E), the operating time increases by one hour.
When the timer has been set, the time decreases in steps of one hour and the time remaining is
displayed. At the end of the set time the appliance goes off.
If you do not want to use the appliance with the timer, when the display shows 8 hours, press
the button (E) again to return to manual operation.
Frost prevention mode
You can keep the room at a temperature of around 5°C to prevent the room from freezing, with
minimal energy consumption.
Press the MODE button (G) until AUTO is displayed. Press the button “-” to select a temperature
set point of (5°C). When the room temperature drops below the set temperature, the
appliance comes on automatically.
USING THE REMOTE CONTROL
The remote control should be handled with care, so avoid dropping it and never let it get wet
1. Press the STAND-BY button (H).
2. To use the oscillate (I), SET TIME (E), MODE (G) and temperature adjustment (F) buttons, see
the “OPERATION AND USE” section.
3.
To replace the batteries, remove the cover on the back of the remote control unit.
The remote control uses two AAA type alkaline batteries (included but packaged separately).
4. Do not mix used and new batteries with different values.
MAINTENANCE
- Always unplug the heater before cleaning.
- During the season when the appliance is in use, clean the air intake and exhaust grilles
regularly using a vacuum cleaner.
- Never use abrasive powders or solvents.
Warnings
-Do not use this heater near showers, bathtubs, sinks, swimming pools, etc.
- Always use the heater in an upright position.
-
Do not use the heater to dry laundry. Never obstruct the intake and outlet grilles (danger of overheating).
- The appliance is not intended for use by persons (including children) with reduced physical,
sensory or mental capabilities, or lack of experience and knowledge, unless they have been
given supervision or instruction concerning use of the appliance by a person responsible for
their safety. Children should be supervised to ensure that they do not play with the appliance.
- The heater must be positioned at least 50 cm from furniture or other objects.
- Do not use the appliance near walls, furniture, curtains, etc.
- The use of extension leads is not recommended. However if they cannot be avoided, follow
the instructions accompanying the extension lead and never exceed the power limit marked
on the extension.
- CAUTION: In order to avoid a hazard due to inadvertent resetting of the thermal cutout,
this appliance must not be supplied through an external switching device, such as a timer,
or connected to a circuit that is regularly switched on and off by the utility.
- If the power cable is damaged, it must be replaced by the manufacturer, an authorised service centre or a qualified electrician in order to eliminate all risk.
- The appliance must not be positioned directly underneath a fixed power point.
- Do not use the appliance in rooms with a floor area of less than 4 m
2
.
- The appliance is fitted with a tip-over switch which turns the appliance off if it falls over.
To restart the appliance, simply place it upright again.
- When you turn the appliance on for the first time, operate it at maximum for at least two
hours. During this time, you should ventilate the room to eliminate the “new” smell given
off. It is normal for the appliance to make "squeaking" noises when first turned on.
Page 9
9
The heater is fitted with a safety device which switches it off in the event of accidental
overheating (eg. obstruction of air intake and outlet grilles, motor turning slowly or not at all).
To reset, unplug the appliance from the mains socket for a few minutes, remove the cause of
overheating then plug in again.
WARNING: In order to avoid overheating, never under any circumstances cover the
appliance during operation, as this would lead to dangerous overheating.
CAUTION: In order to avoid a hazard due to inadvertent resetting of the thermal cutout, this
appliance must not be supplied through an external switching device, such as a timer, or connected to a circuit that is regularly switched on and off by the utility.
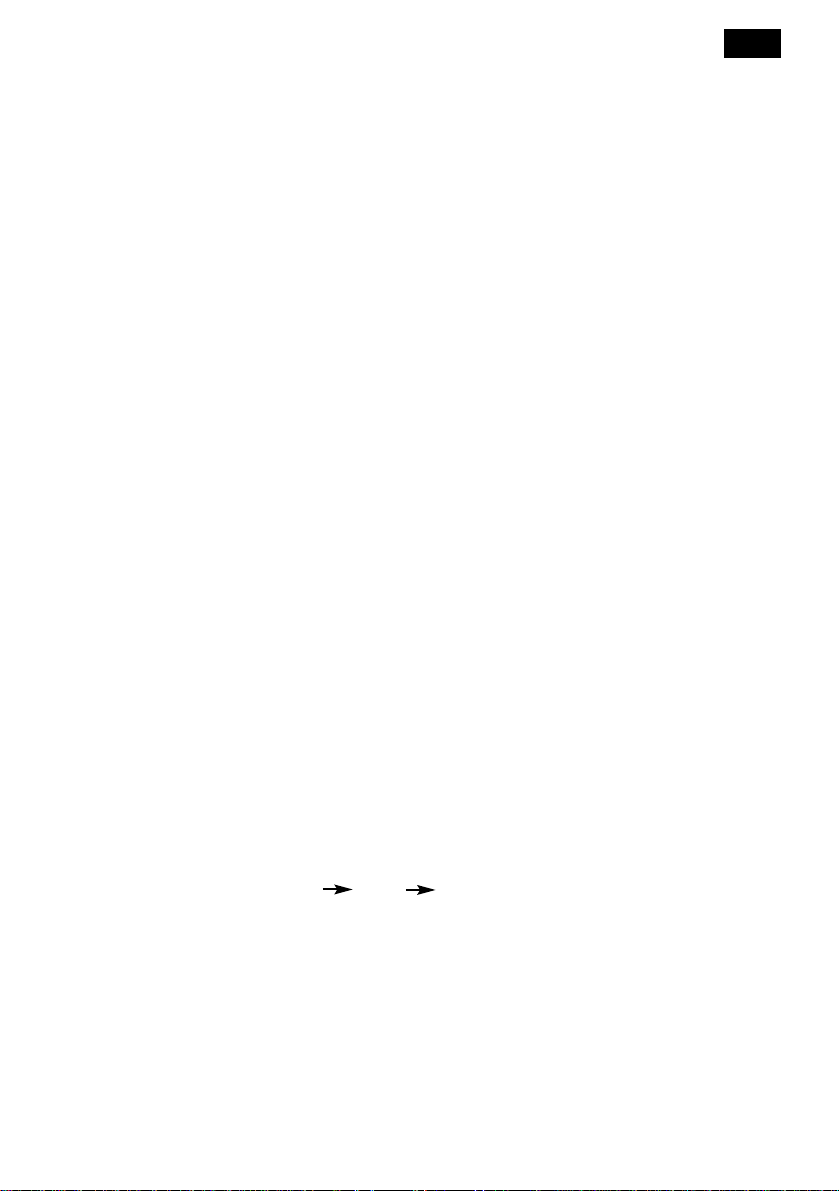
Important information for correct disposal of the product in accordance with EC Directive
2002/96/EC.
At the end of its working life, the product must not be disposed of as urban waste.
It must be taken to a special local authority differentiated waste collection centre or to
a dealer providing this service.
Disposing of a household appliance separately avoids possible negative consequences for the environment and health deriving from inappropriate disposal and
enables the constituent materials to be recovered to obtain significant savings in
energy and resources.As a reminder of the need to dispose of household appliances separately, the product is marked with a crossed-out wheeled dustbin.
Page 10
DESCRIPTION DE L’APPAREIL
A Panneau des commandes
B Grille de sortie de l’air
C Base motorisée
D Lampe témoin
E Bouton Set time
F Bouton de réglage de la température
G Bouton MODE
H Bouton STAND-BY
I Bouton d’oscillation
L Interrupteur général
BRANCHEMENT
- Avant de brancher l’appareil à une prise de courant, vérifier que la tension secteur correspond à la valeur en V indiquée sur l’appareil et que la prise de courant et la ligne d’alimentation sont dimensionnées pour supporter la charge requise.
- CET APPAREIL EST CONFORME À LA DIRECTIVE 89/336/CEE ANTIPARASITAGE.
INSTALLATION
L’appareil peut être utilisé sur n’importe quel support à condition qu’il soit installé à l’horizontale. Ne pas brancher d’autres appareils sur la même prise pour éviter toute surcharge du circuit
électrique.
FONCTIONNEMENT ET UTILISATION
1. Vérifier que l’appareil est éteint avant de le brancher.
2. Brancher l’appareil à la prise électrique.
3. Avant d’allumer l’appareil, placer l’interrupteur (L) à l’arrière en pos. I. L’appareil émet un
bip, la lampe témoin (D) s’allume et reste allumée tant que l’appareil est alimenté.
4. Enfoncer le bouton (H) pour allumer l’appareil.
5. Lors de sa mise en service, l’appareil fonctionne en mode LOW (puissance minimale). L’écran affiche la température ambiante.
6. Sur pression du bouton MODE (G), l’appareil fonctionne en mode HIGH (puissance maximale). L’écran affiche la température ambiante.
7. Une nouvelle pression du bouton MODE (G) entraîne le passage de l’appareil au mode
AUTO. L’écran affiche la température programmée. Pour modifier la température, utiliser
les boutons + et -. Après quelques secondes, l’écran affiche la température ambiante.
8. En appuyant à nouveau sur le bouton MODE (G), l’appareil se replace en mode LOW.
Continuer à enfoncer le bouton MODE, l’appareil sélectionne en séquence les fonctions suivantes : LOW HIGH AUTO.
9. Pour éteindre l’appareil, enfoncer le bouton H durant quelques secondes et placer l’interrupteur à l’arrière de l’appareil (L) sur 0.
BASE MOTORISÉE
L’appareil est équipé d’une base motorisée.
Pour une diffusion plus large du débit d’air, enfoncer le bouton d’oscillation (I).
L’appareil effectue ainsi un mouvement d’oscillation vers la droite et la gauche.
Pour interrompre le mouvement d’oscillation dans la position désirée, enfoncer à nouveau le
bouton (I).
Pour arrêter l’appareil, maintenir le bouton (H) enfoncé durant quelques secondes.
Réglage du thermostat :
1. Enfoncer le bouton MODE (G) jusqu’à l’affichage d’AUTO.
10
FR
Page 11

11
2. Utiliser les boutons + ou - pour augmenter ou diminuer la température programmée. La
température fixée est automatiquement régulée et maintenue constante par le thermostat.
3. Si la température ambiante dépasse de 2 °C la température programmée, l’appareil interrompt son fonctionnement et la ventilation cesse après quelques secondes.
4. Si la température ambiante est inférieure à la température programmée, l’appareil redémarre automatiquement.
Remarque: pour modifier la température programmée avec l’oscillation activée, utiliser les bou-
tons + ou – : l’appareil s’arrête pour permettre de programmer la nouvelle température.
Une fois la programmation effectuée, le mouvement d’oscillation redémarre automatiquement.
Fonction Timer (minuterie)
Cette fonction peut être activée avec tous les modes de fonctionnement. La minuterie permet de
programmer la durée de fonctionnement de l’appareil de 1 à 8 heures.
Chaque pression du bouton (E) augmente la durée de fonctionnement d’1 heure.
Une fois la minuterie programmée, le temps diminue d’heure en heure et l’écran affiche le
temps restant. L’appareil s’arrête à la fin de la durée programmée.
Pour revenir au mode manuel, enfoncer à nouveau le bouton (E) après l’affichage de 8 h.
Fonction antigel
La température de la pièce peut être maintenue à environ 5 °C afin d’éviter le gel en consommant un minimum d’énergie.
Enfoncer le bouton MODE (G) jusqu’à l’affichage d’AUTO. Utiliser le bouton “-” jusqu’à programmer une température de 5 °C.
Si la température ambiante est inférieure à la température programmée, l’appareil redémarre
automatiquement.
UTILISATION DE LA TÉLÉCOMMANDE
La télécommande doit être utilisée avec attention.
1. Enfoncer le bouton STAND-BY (H)
2. En ce qui concerne le fonctionnement des boutons d’oscillation (I), SET TIME (E), MODE (G)
et de réglage de la température (F), se reporter au paragraphe “FONCTIONNEMENT ET
UTILISATION”.
3. Pour remplacer les piles, ôter le couvercle à l’arrière de la télécommande. La télécommande
fonctionne avec deux piles alcalines AAA (inclues – emballées séparément).
4. Ne jamais associer des piles usées et des piles neuves de valeurs différentes.
ENTRETIEN
- Débrancher l’appareil avant toute opération de nettoyage.
- Nettoyer régulièrement avec un aspirateur les grilles d’entrée et de sortie de l’air durant
la période d’utilisation de l’appareil.
-Ne jamais utiliser de poudres abrasives ni de solvants.
AVERTISSEMENTS
- Ne pas utiliser le radiateur à proximité d’une douche, d’une baignoire, d’un lavabo, d’une
piscine, etc.
- Utiliser exclusivement l’appareil en position verticale.
-Ne pas utiliser l’appareil pour sécher le linge. Ne pas obstruer les grilles d’entrée et de sortie de l’air (risque de surchauffe).
- L’appareil ne doit pas être utilisé par des personnes (y compris les enfants) ayant des capacités psychophysiques sensorielles réduites ou une expérience ou des connaissances insuffi-
Page 12
santes sans la surveillance vigilante et les instructions d’un responsable de leur sécurité.
-Ne pas laisser les enfants jouer avec l’appareil.
- Toujours laisser un espace dégagé min. de 50 cm devant la partie frontale de l’appareil.
- Ne jamais faire fonctionner l’appareil contre un mur, un meuble, des rideaux, etc.
- L’utilisation d’une rallonge est déconseillée. En cas de nécessité, se conformer attentivement
aux instructions de la rallonge en ayant soin de ne jamais dépasser la puissance maximale
indiquée.
- En cas d’endommagement du câble d’alimentation, le faire remplacer exclusivement par le
fabricant, un centre d’assistance ou un électricien qualifié afin d’éviter tout risque d’acci-
dent.
- L’appareil ne doit pas être installé juste en dessous d’une prise de courant fixe.
- Ne pas utiliser cet appareil dans une pièce d’une surface inférieure à 4 m
2
. L’appareil est
équipé d’un dispositif de sécurité qui éteint l’appareil en cas de chute de ce dernier. Pour
redémarrer l’appareil, il suffit de le replacer à la verticale.
- Lors du premier démarrage, faire fonctionner l’appareil à sa puissance max. durant 2 heures minimum. Bien aérer la pièce afin d’éliminer l’odeur “de neuf” dégagée par l’appareil.
Ce dernier cliquette au premier démarrage, il s’agit d’un phénomène absolument normal.
Un dispositif de sécurité interrompt le fonctionnement du radiateur en cas de surchauffe acci-
dentelle (obstruction des grilles d’entrée et de sortie de l’air, absence de rotation ou rotation du
moteur au ralenti). Pour rétablir le fonctionnement de l’appareil, le débrancher durant quelques
minutes, éliminer la cause de la surchauffe et le rebrancher.
IMPORTANT: afin d'éviter tout risque de surchauffe, ne jamais couvrir l'appareil pendant son fonctionnement, car cela provoquerait une dangereuse augmentation de
température.
ATTENTION: afin d’éviter les risques liés à une remise à zéro accidentelle de l’interrupteur à
relais thermique, cet appareil ne doit pas être alimenté par un dispositif de marche/ arrêt
externe (minuterie) ni branché sur un circuit régulièrement allumé et éteint par le fournisseur
d’énergie.
Avertissements pour l'élimination correcte du produit aux termes de la Directive européenne
2002/96/EC.
Au terme de son utilisation, le produit ne doit pas être éliminé avec les déchets urbains.
Le produit doit être remis à l'un des centres de collecte sélective prévus par l'administration
communale ou auprès des revendeurs assurant ce service.
Éliminer séparément un appareil électroménager permet d'éviter les retombées négatives
pour l'environnement et la santé dérivant d'une élimination incorrecte, et permet de récupérer les matériaux qui le composent dans le but d'une économie importante en termes d'énergie et de ressources. Pour rappeler l'obligation d'éliminer séparément les appareils électroménagers, le produit porte le symbole d'un caisson à ordures barré.
12
Page 13
GERÄTEBESCHREIBUNG
A Bedienblende
B Luftaustrittgitter
C Motorisierter Sockel
D Kontrolllampe
E Taste Set time
F Taste Temperaturregelung
G Taste MODE
H Taste STAND-BY
I Taste Schwenkfunktion
L Hauptschalter
ELEKTRISCHER ANSCHLUSS
- Bevor Sie den Stecker in die Steckdose stecken, überprüfen Sie bitte, ob die Netzspannung
Ihrer Wohnung mit dem am Gerät angegebenen Wert übereinstimmt, und ob die Steckdose
und die Versorgungsleitung für die Strombelastung bemessen sind.
- DIESES GERÄT ENTSPRICHT DER RICHTLINIE 89/336/EWG ÜBER DIE FUNKENTSTÖ-
RUNG.
INSTALLATION
Das Gerät kann auf jeder waagrechten Fläche aufgestellt werden.
Der Stromkreis darf nicht überlastet werden, indem weitere Geräte an der gleichen Steckdose
angeschlossen werden.
FUNKTIONSWEISE UND GEBRAUCH
1.
Überprüfen Sie, dass das Gerät ausgeschaltet ist, bevor Sie den Stecker in die Steckdose stecken.
2. Das Gerät an die Steckdose anschließen.
3.
Um das Gerät einschalten zu können, muss der auf der Rückseite des Gerätes befindliche Schalter (L) auf Pos. I stehen. Das Gerät wird einen „Piepston“ von sich geben, und die Kontrolllampe
(D) wird solange aufleuchten, wie das Gerät am Stromnetz angeschlossen bleibt.
4. Zum Einschalten des Gerätes die Taste (H) drücken.
5. Beim Einschalten funktioniert das Gerät in der Betriebsart LOW (Heizbetrieb auf verminder-
ter Leistungsstufe). Das Display zeigt die Raumtemperatur an.
6. Durch Drücken der Taste MODE (G) funktioniert das Gerät in der Betriebsart HIGH (Heizbe-
trieb auf max. Leistungsstufe): Das Display zeigt die Raumtemperatur an.
7. Durch erneutes Drücken der Taste MODE (G) schaltet sich das Gerät auf die Betriebsart
AUTO. Das Display zeigt die eingegebene Temperatureinstellung an. Mit den Tasten + oder
– kann die Temperatureinstellung geändert werden. Nach einigen Sekunden zeigt das
Display die Raumtemperatur an.
8. Durch erneutes Drücken der Taste MODE (G) kehrt das Gerät wieder auf die Betriebsart
LOW zurück. Bei Gedrückthalten der Taste MODE wird das Gerät nacheinander die folgenden Funktion auswählen: LOW HIGH AUTO.
9. Zum Ausschalten des Gerätes einige Sekunden lang die Taste H drücken und den auf der
Rückseite des Gerätes befindlichen Schalter (L) auf 0 stellen.
MOTORISIERTER SOCKEL
Das Gerät ist mit einem motorisierten Sockel ausgestattet.
Zur Verteilung des Luftstroms über eine größere Fläche die Taste Schwenkfunktion (I) drücken.
Das so eingestellte Gerät schwenkt nun nach rechts und nach links. Zur Blockieren des Gerätes
auf der gewünschten Position erneut die Taste (I) drücken.
Zum Ausschalten des Gerätes einige Sekunden lang die Taste (H) gedrückt halten.
13
D
Page 14

14
Thermostatregelung
1. Die Taste MODE (G) solange drücken, bis das Display AUTO anzeigt.
2. Mit den Tasten + oder – die Temperaturvorgabe erhöhen oder erniedrigen. Die auf diese
Weise eingestellte Temperatur wird dann durch den Thermostat automatisch geregelt und
konstant gehalten.
3. Wenn die Raumtemperatur 2°C höher als die eingestellte Temperatur ist, schaltet sich das
Gerät aus und das Gebläse schaltet nach einigen Sekunden ab.
4. Wenn die Raumtemperatur niedriger als die eingestellte Temperatur ist, setzt das Gerät wie-
der automatisch mit dem Betrieb ein.
Hinweis: Wenn Sie die eingestellte Temperatur ändern möchten und die Schwenkfunktion akti-
viert ist, hält das Gerät bei Drücken der Tasten + oder – an, um die Einstellung der neuen
Temperatur zu ermöglichen. Bei erfolgter Einstellung wird die Schwenkfunktion wieder
automatisch einsetzen.
Timerfunktion
Diese Funktion kann von jeder Betriebsart aus aktiviert werden. Der Timer ermöglicht die Programmierung der Betriebszeit des Gerätes von 1 bis 8 Stunden. Bei jedem Drücken der Taste
(E) erhöht sich die Betriebszeit sich um eine Stunde.
Nach erfolgter Einstellung des Timers läuft die Zeit Stunde um Stunde ab und auf dem Display
wird jeweils di Restzeit angezeigt. Bei Erreichen der eingestellten Zeit schaltet sich das Gerät
aus. Wenn Sie das Gerät nicht mit der Timerfunktion gebrauchen wollen, drücken Sie zur
Rückkehr in den Manuellbetrieb erneut die Taste (E), nachdem das Display 8 h anzeigt hat.
Frostschutzfunktion
Die Raumtemperatur kann konstant auf etwa 5°C gehalten werden. Damit wird mit minimalem
Energieverbrauch die Frostgefahr vermieden.
Die Taste MODE (G) solange gedrückt halten, bis das Display AUTO anzeigt. Durch Drücken
der Taste “-” die Temperatur auf 5°C stellen.
Fällt die Raumtemperatur unter die eingestellte Temperatur, so schaltet das Gerät sich wieder
automatisch ein.
GEBRAUCH DER FERNBEDIENUNG
Die Fernbedienung ist mit besonderer Sorgfalt und Vorsicht zu benutzen.
1. Die Taste STAND-BY (H) drücken.
2. Für die Funktionsweise der Taste Schwenken (I), SET TIME (E), MODE (G) und Temperatur-
regelung (F) beziehen Sie sich bitte auf die Anleitungen im Abschnitt „FUNKTIONSWEISE
UND GEBRAUCH“.
3. Zum Auswechseln der Batterien den Deckel auf der Rückseite der Fernbedienung abneh-
men. Die Fernbedienung funktioniert mit 2 AAA-Alkalibatterien (separat verpackt mitgeliefert).
4. Nicht die alten Batterien zusammen mit neuen Batterien mit anderen Werten verwenden.
INSTANDHALTUNG
- Vor allen Reinigungsarbeiten, stets den Netzstecker aus der Steckdose ziehen.
- Reinigen Sie die Lufteintritts- und Luftaustrittsgitter während der Betriebsphase des
Geräts regelmäßig mit einem Staubsauger.
- Verwenden Sie niemals Scheuer- und Lösungsmittel.
AVVERTENZE
- Verwenden Sie dieses Heizgerät nicht in nächster Nähe von Duschen, Badewannen,
Waschbecken, Swimmingpools, usw.
- Verwenden Sie das Gerät ausschließlich in senkrechter Position.
Page 15
- Verwenden Sie das Gerät nicht zum Trocknen von Wäsche, und verdecken bzw. verstopfen
Sie niemals die Lufteintritts- und Luftaustrittsgitter (Überhitzungsgefahr).as Gerät darf nicht
von Personen (einschließlich Kindern) mit körperlichen, geistigen oder sensorischen Behinderungen, oder von Personen, die nicht mit dem Betrieb des Gerätes vertraut sind, gebraucht werden, es sei denn, dass sie von einer für sie und ihre Sicherheit verantwortlichen Person beaufsichtigt und in den Gebrauch des Gerätes eingewiesen werden.
- Das Gerät muss in einem Abstand von 50 cm von Möbeln und anderen Gegenständen auf-
gestellt werden.
- Das Gerät darf nicht in der Nähe von Wänden, Möbeln, Vorhängen, usw. in Betrieb
gesetzt werden.
-Wir raten von dem Gebrauch von Verlängerungskabeln ab. Sollten diese jedoch unbedingt
erforderlich sein, befolgen Sie bitte genauestens die den Verlängerungskabeln beigelegten
Anleitungen und achten Sie darauf, nicht die auf dem Verlängerungskabel angegebene Leistungsgrenze zu überschreiten.
- Bei Beschädigung darf das Netzkabel nur durch den Hersteller selbst, durch einen autori-
sierten Kundendienst oder von einer Person mit vergleichbarer Qualifikation ausgewech-
selt werden, um jegliche Gefährdung auszuschließen.
- Das Gerät nicht unmittelbar unter einer fest angeschlossenen Steckdose stellen.
- Das Gerät nicht in einem Raum mit einer Bodenfläche unter 4 m
2
einsetzen.
- Das Gerät ist mit einer Kippsicherung ausgerüstet, welche das Gerät bei eventuellem
Umkippen abschaltet. Zur erneuten Inbetriebsetzung des Gerätes dieses einfach wieder
senkrecht hinstellen.
- Bei der ersten Inbetriebsetzung das Gerät mindestens 2 Stunden lang auf höchster Heizstufe betrei-
ben. Während dieses Vorganges den Raum gut lüften, um den vom Gerät abgegebenen Geruch
nach „Neuem“ zu beseitigen. Es ist vollkommen normal, dass das Gerät bei der ersten Inbetriebset-
zung etwas „knistert“.
Das Gerät ist mit einer Sicherheitsvorrichtung ausgerüstet, welche den Betrieb des Heizlüfters
bei unbeabsichtigter Überhitzung (z.B. wenn die Lufteintritts- und Luftaustrittsgitter abgedeckt
bzw. verstopft sind oder der Motor sich nur langsam oder gar nicht dreht) unterbricht. Zur
erneuten Inbetriebsetzung des Gerätes, einige Minuten den Netzstecker aus der Steckdose
ziehen, die Ursache der Überhitzung beseitigen und dann den Netzstecker wieder einstecken.
WICHTIG: Zum Vermeiden von Überhitzungen, das Gerät während des Betriebs niemals abdecken, da dies zu einer gefährlichen Temperaturerhöhung führen könnte.
VORSICHT: Zum Vermeiden von Risiken, die durch ein unbeabsichtigtes Rücksetzen des Thermorelais entstehen können, darf dieses Gerät auf keinen Fall mit einer externen Ein-/Ausschaltvorrichtung, wie zum Beispiel einem Timer, verbunden sein, noch an einen Kreis angeschlossen
werden, der vom Energiezulieferer regelmäßig ein- und ausgeschaltet wird.
Wichtiger Hinweis für die korrekte Entsorgung des Produkts in Übereinstimmung mit der EG-Richtlinie
2002/96/EG.
Am Ende seiner Nutzzeit darf das Produkt NICHT zusammen mit dem Siedlungsabfall beseitigt werden. Es kann zu den eigens von den städtischen Behörden eingerichteten Sammelstellen oder zu den Fachhändlern, die einen Rücknahmeservice anbieten, gebracht werden.
Die getrennte Entsorgung eines Haushaltsgerätes vermeidet mögliche negative Auswirkungen
auf die Umwelt und die menschliche Gesundheit, die durch eine nicht vorschriftsmäßige Entsorgung bedingt sind. Zudem ermöglicht wird die Wiederverwertung der Materialien, aus
denen sich das Gerät zusammensetzt, was wiederum eine bedeutende Einsparung an Energie und Ressourcen mit sich bringt. Zur Erinnerung an die Verpflichtung, die Elektrohaushaltsgeräte getrennt zu beseitigen, ist das Produkt mit einer Mülltonne, die durchgestrichen ist,
gekennzeichnet.
15
Page 16

BESCHRIJVING VAN HET APPARAAT
A Bedieningspaneel
B Luchtuitlaatrooster
C Gemotoriseerde draaivoet
D Controlelampje
E Set time knop
F Temperatuurregelknop
G MODE knop
H STAND-BY knop
I Knop voor bewegen draaivoet
L Hoofdschakelaar
ELEKTRISCHE AANSLUITING
- Controleer, alvorens de stekker in het stopcontact te steken, of de netspanning overeenkomt
met de op uw toestel aangeduide spanning (V) en of het stopcontact en de voedingsleiding
qua afmetingen op de vereiste belasting zijn afgestemd.
- DIT APPARAAT IS CONFORM DE EG-RICHTLIJN 89/336 DE ONDERDRUKKING VAN
RADIOSTORINGEN
INSTALLATIE
Het apparaat kan op elk steunvlak, mits perfect horizontaal, gebruikt worden.
Overbelast het elektrische circuit niet, door hetzelfde stopcontact niet voor andere apparaten te
gebruiken.
WERKING EN GEBRUIK
1. Controleer of het apparaat uitgeschakeld is alvorens de stekker in het stopcontact te steken.
2. Sluit het apparaat op het stopcontact aan.
3. Om het apparaat in te schakelen, moet de schakelaar (L) aan de achterkant van het appa-
raat in de stand I staan. Het apparaat geeft een geluidssignaal af, het controlelampje (D)
gaat branden en blijft branden zolang het apparaat van stroom wordt voorzien.
4. Druk op de knop (H) om het apparaat in te schakelen
5. Bij inschakeling werkt het apparaat in de bedrijfswijze LOW (werking met minimumvermo-
gen). De display geeft de omgevingstemperatuur weer.
6. Als op de knop MODE (G) wordt gedrukt, werkt het apparaat in de bedrijfswijze HIGH
(werking met maximumvermogen). De display geeft de omgevingstemperatuur weer.
7. Als opnieuw op de knop MODE (G) wordt gedrukt, werkt het apparaat in de bedrijfswijze
AUTO. De display geeft de ingestelde temperatuur weer. Gebruik de knoppen + en – om
de ingestelde temperatuur te wijzigen. Na enkele seconden zal het display de omgeving-
stemperatuur weergeven.
8. Door opnieuw op de knop MODE (G) te drukken, keert het apparaat terug naar de bedrijf-
swijze LOW. Als opnieuw op de knop MODE wordt gedrukt, kiest het apparaat in volgorde
de volgende functies: LOW HIGH AUTO.
9. Druk, om het apparaat uit te schakelen, enkele seconden op de knop H en zet de schake-
laar aan de achterkant van het apparaat (L) in de stand 0.
GEMOTORISEERDE DRAAIVOET
Het apparaat is voorzien van een gemotoriseerde draaivoet.
Druk, om de luchtstroom over een groter gebied te verspreiden, op de knop (I).
Het op deze manier geactiveerde apparaat zal naar rechts en naar links draaien.
Druk, om het apparaat in de gewenste stand te stoppen, opnieuw op de knop (I).
Druk, om het apparaat uit te schakelen, enkele seconden op de knop (H).
16
NL
Page 17

Regeling thermostaat
1. Druk op de knop MODE (G) totdat de display AUTO weergeeft.
2. Gebruik de knoppen + en – om de ingestelde temperatuur te verhogen of te verlagen. De op
deze manier ingestelde temperatuur wordt automatisch door de thermostaat geregeld en
constant gehouden.
3. Wanneer de omgevingstemperatuur 2°C hoger is dan de ingestelde temperatuur, gaat het
apparaat uit en stopt de ventilatie enkele seconden.
4. Wanneer de omgevingstemperatuur lager is dan de ingestelde temperatuur, schakelt het
apparaat zich automatisch in.
Opmerking: wanneer men de ingestelde temperatuur wil wijzigen en de beweging van de
draaivoet actief is, zal het apparaat bij het bedienen van de + of – knoppen stoppen om
instelling van de nieuwe temperatuur toe te staan. Na instelling zal de draaibeweging auto-
matisch weer van start gaan.
Timerfunctie
Deze functie kan vanuit elke bedrijfswijze geactiveerd worden. Met de timer kan een werkingstijd van het apparaat van 1 t/m 8 uur geprogrammeerd worden.
Bij elke druk op de knop (E) neemt de werkingstijd met een uur toe.
Zodra de timer is ingesteld, neemt de timer steeds met een uur af en laat op de display de
resterende tijd zien. Nadat de ingestelde tijd verstreken is, zal het apparaat zich uitschakelen.
Als men het apparaat niet met de timerfunctie wil gebruiken en naar de handmatige modus wil
terugkeren, dient men op de knop (E) te drukken nadat het display 8 h weergeeft.
Antivriesfunctie
Het is mogelijk om de omgevingstemperatuur op circa 5°C te houden, zodat bevriezing wordt
voorkomen met een minimaal energieverbruik.
Druk op de knop MODE (G)) totdat de display AUTO weergeeft. Bedien de knop “-” totdat een
temperatuur van 5°C is ingesteld.
Wanneer de omgevingstemperatuur lager is dan de ingestelde temperatuur, schakelt het apparaat zich automatisch in.
GEBRUIK VAN DE AFSTANDSBEDIENING.
De afstandsbediening moet met uiterste zorg en aandacht gebruikt worden.
1. Druk op de knop STAND-BY (H).
2. Zie voor de werking van de knoppen voor het bewegen van de draaivoet (I), SET TIME (E),
MODE (G) en regeling van de temperatuur (F) de paragrafa “WERKING EN GEBRUIK”.
3. Verwijder het deksel aan de achterkant van de afstandsbediening om de batterijen te ver-
vangen. De afstandsbediening werkt met twee alkalinebatterijen van het type AAA (bijge-
sloten maar afzonderlijk verpakt).
4.
Gebruik geen oude batterijen samen met nieuwe batterijen, die verschillende ladingen hebben.
ONDERHOUD
- Voordat u het apparaat gaat schoonmaken, dient u altijd de stekker uit het stopcontact te
verwijderen.
- Maak regelmatig de luchtinlaat- en luchtuitlaatroosters met een stofzuiger schoon tijdens
het gebruiksseizoen van het apparaat.
- Gebruik nooit oplosmiddelen of schuurmiddelen.
WAARSCHUWINGEN
- Gebruik het apparaat niet in de onmiddellijke nabijheid van douches, badkuipen,
wasbakken, zwembaden, enz.
- Gebruik het apparaat uitsluitend in verticale positie.
17
Page 18
- Gebruik het apparaat niet om wasgoed te drogen. Dek de roosters voor de luchtinlaat en
luchtuitlaat niet af (gevaar voor oververhitting).
- Sta het gebruik van dit apparaat niet toe aan personen (ook kinderen) met beperkte menta-
le, fysieke of sensoriële capaciteiten, of met onvoldoende ervaring of kennis, tenzij ze aan-
dachtig worden gevolgd of geïnstrueerd door iemand die verantwoordelijk is voor hun vei-
ligheid. Houd toezicht op kinderen en zorg ervoor dat ze niet met het apparaat spelen.
- Het apparaat moet op een afstand van 50 cm van meubelen, muren, gordijnen of andere
voorwerpen worden geplaatst.
-
Laat het apparaat niet werken terwijl het tegen muren, meubelen, gordijnen, enz. is geplaatst.
- Het gebruik van een verlengsnoer wordt afgeraden. Mocht het gebruik ervan toch nodig
zijn, volg dan zorgvuldig de gebruiksaanwijzingen van het verlengsnoer op en overschrijd
niet het maximum vermogen dat op het verlengsnoer is aangegeven.
-Wanneer het netsnoer beschadigd is, mag het uitsluitend door de fabrikant of door zijn
technische servicedienst of in elk geval door iemand met een soortgelijke vakbekwaamheid
vervangen worden, om elk risico te voorkomen.
- Het apparaat mag niet recht onder een vast stopcontact geplaatst worden.
- Gebruik het apparaat niet in een ruimte met een oppervlakte kleiner dan 4 m
2
.
-Het apparaat is voorzien van een kantelbeveiliging die het apparaat uitschakelt in geval
van omkantelen. Om het apparaat weer te starten, hoeft men het apparaat slechts weer in
verticale stand te plaatsen.
- Laat bij de eerste start het apparaat minstens 2 uur met het maximale vermogen werken.
Lucht het vertrek tijdens deze periode om de “nieuwgeur” die het apparaat afgeeft te
verwijderen. Het is volkomen normaal dat het apparaat tijdens de eerste start “kraakge-
luidjes” maakt.
Een veiligheidsmechanisme onderbreekt de werking van de ventilatorkachel in geval van
onbedoelde oververhitting (vb. verstopping van de roosters voor de luchtinlaat en -uitlaat, niet
of langzaam draaiende motor). Om het apparaat weer in werking te stellen, is het noodzakelijk de stekker enkele minuten uit het stopcontact te halen, de oorzaak van de oververhitting
weg te nemen en vervolgens de stekker weer in het stopcontact te steken.
BELANGRIJK: Om oververhitting te voorkomen, mogen de apparaten tijdens hun
werking onder geen beding afgedekt worden, aangezien dit gevaarlijke oververhitting
kan veroorzaken.
WAARSCHUWING: om risico’s te voorkomen die verband houden met het onbedoeld resetten
van de thermische beveiliging, mag dit apparaat niet gevoed worden via een externe
inschakel-/uitschakelinrichting, zoals een timer, noch aangesloten zijn op een circuit dat regelmatig aan- en uitgeschakeld wordt door de energieleverancier.
Belangrijke informatie voor de correcte verwerking van het product in overeenstemming met DE EUROPESE RICHTLIJN 2002/96/EC
Aan het einde van zijn nuttig leven mag het product niet samen met het gewone huishoudelijke
afval worden verwerkt.Het moet naar een speciaal centrum voor gescheiden afvalinzameling
van de gemeente worden gebracht, of naar een verkooppunt dat deze service verschaft. Het
apart verwerken van een huishoudelijk apparaat voorkomt mogelijke negatieve gevolgen voor
het milieu en de gezondheid die door een ongeschikte verwerking ontstaan en zorgt ervoor dat
de materialen waaruit het apparaat bestaat teruggewonnen kunnen worden om een aanmerkelijke besparing van energie en grondstoffen te verkrijgen. Om op de verplichting tot gescheiden
verwerking van elektrische huishoudelijke apparatuur te wijzen, is op het product het symbool
van een doorgekruiste vuilnisbak aangebracht.
18
Page 19

DESCRIPCION DEL APARATO
A Panel de mandos
B Rejilla de salida aire
C Base motorizada
D Piloto
E Botón Set time
F Botón de regulación temperatura
G Botón MODE
H Botón STAND-BY
I Botón de oscilación
L Interruptor general
CONEXIÓN ELÉCTRICA
- Antes de enchufar el aparato a la corriente, compruebe meticulosamente que el voltaje de
su red doméstica corresponda al valor indicado en V en el aparato y que el enchufe de
corriente y la línea de alimentación estén dimensionados para la carga requerida.
- ESTE APARATO ES CONFORME A LA DIRECTIVA 89/336/CEE SOBRE LA SUPRESIÓN
DE LAS RADIOINTERFERENCIAS.
INSTALACIÓN
Puede utilizar el aparato sobre cualquier superficie de apoyo siempre y cuando ésta sea horizontal. No
sobrecargue el circuito eléctrico evitando utilizar el mismo enchufe para otros aparatos.
FUNCIONAMIENTO Y USO
1. Compruebe que el aparato esté apagado antes de enchufarlo a la corriente.
2. Enchufe el aparato a la corriente.
3. Para encender el aparato, el interruptor (L), situado en la parte trasera del aparato, debe
estar en la pos. I. El aparato emitirá un “beep”, el piloto (D) se encenderá y permanecerá
encendido mientras que el aparato recibe corriente.
4. Pulse el botón (H) para encender el aparato.
5. Al encenderlo, el aparato funciona en la modalidad LOW (funcionamiento con la potencia
mínima). En la pantalla aparece la temperatura ambiente.
6. Al pulsar el botón MODE (G), el aparato funciona en la modalidad HIGH (funcionamiento
con la potencia máxima). En la pantalla aparece la temperatura ambiente.
7. Si pulsa de nuevo el botón MODE (G), el aparato funciona en la modalidad AUTO. En la
pantalla aparece la temperatura programada. Para modificar la temperatura programada,
use los botones + y -. Después de unos segundos en la pantalla aparece la temperatura
ambiente.
8. Si pulsa de nuevo el botón MODE (G), el aparato volverá a funcionar en la modalidad
LOW. Si sigue pulsando el botón MODE, el aparato seleccionará en secuencia las siguientes funciones: LOW HIGH AUTO.
9. Para apagar el aparato, pulse el botón H durante unos segundos y coloque el interruptor,
situado en la parte trasera del aparato (L), en la posición 0.
BASE MOTORIZADA
El aparato tiene una base motorizada.
Para difundir el flujo de aire en un área más grande, pulse el botón de oscilación (I).
El aparato oscilará a derechas y a izquierdas.
Para bloquear la oscilación en la posición elegida, pulse de nuevo el botón (I).
Para apagar el aparato, pulse el botón (H) durante unos segundos.
19
E
Page 20

20
Regulación del termostato
1. Pulse el botón MODE (G) hasta que en la pantalla aparezca AUTO.
2. Utilice los botones + o – para aumentar o disminuir la temperatura programada. La tempe-
ratura así fijada será regulada automáticamente y mantenida constante por el termostato.
3. Cuando la temperatura ambiente sea 2°C más alta que la temperatura programada, el
aparato se apaga y la ventilación se interrumpe después de unos segundos.
4. Cuando la temperatura ambiente sea inferior a la temperatura programada, el aparato rea-
nudará automáticamente el funcionamiento.
Nota: cuando quiera cambiar la temperatura programada y la modalidad de oscilación esté
activada, al pulsar los botones + o -, el aparato se detiene para que pueda programar la
nueva temperatura. Tras haber efectuado la programación, la oscilación se reanuda
automáticamente.
Función timer
Puede activar esta función en cualquier modalidad de funcionamiento. El timer le permite programar un tiempo de funcionamiento para el aparato comprendido entre 1 y 8 horas.
Con cada pulsación del botón (E), el tiempo de funcionamiento aumenta una hora.
Tras haber programado el timer, el tiempo decrementa de hora en hora y el tiempo que queda
aparece en la pantalla. Cuando finaliza el tiempo programado, el aparato se apaga.
Si no quiere utilizar el aparato con el timer, para volver a la modalidad manual, pulse de
nuevo el botón (E) después de que la pantalla muestre 8 h.
Función antihielo
Puede mantener el ambiente a una temperatura de 5°C aproximadamente impidiendo la congelación con un gasto mínimo de energía.
Pulse el botón MODE (G) hasta que en la pantalla aparezca AUTO. Accione el botón “-” para
programar la temperatura a 5°C.
Cuando la temperatura ambiente sea inferior a la temperatura programada, el aparato reanudará automáticamente el funcionamiento.
USO DEL MANDO A DISTANCIA
Use el mando a distancia con mucho cuidado.
1. Pulse el botón STAND-BY (H).
2. En cuanto al funcionamiento de los botones de oscilación (I), SET TIME (E), MODE (G) y
regulación de la temperatura (F), le rogamos consultar el párrafo de “FUNCIONAMIENTO
Y USO”.
3. Para cambiar las pilas, quite la tapa trasera del mando a distancia. El mando a distancia
funciona con dos pilas alcalinas del tipo AAA (incluidas pero embaladas por separado).
4. No utilice pilas gastadas con pilas nuevas con valores diferentes.
MANTENIMIENTO
- Antes de efectuar cualquier operación de limpieza, desenchufe siempre el aparato de la
corriente.
- Limpie regularmente las rejillas de entrada y salida del aire durante la temporada de
utilización del aparato con un aspirador.
- No use nunca polvos abrasivos o disolventes.
ADVERTENCIAS
- No utilice este aparato de calefacción en las proximidades inmediatas de duchas, bañeras,
lavabos, piscinas, etc.
- Use el aparato siempre y exclusivamente en posición vertical.
- No use el aparato para secar la lencería. No obstruya las rejillas de entrada y salida del
Page 21

aire (peligro de recalentamiento).
- No permita que personas (incluidos niños) con capacidades psicofísicas sensoriales dismi-
nuidas o con experiencia y conocimientos insuficientes usen el aparato, a no ser que estén
vigilados atentamente e instruidos por un responsable en relación a su seguridad. Vigile a
los niños para asegurarse de que no jueguen con el aparato.
- Deje una distancia de 50 cm delante del aparato sin muebles u otros objetos.
- No haga funcionar el aparato junto a paredes, muebles, cortinas, etc.
- Le desaconsejamos usar alargadores. Si su uso fuese necesario, siga meticulosamente las
instrucciones adjuntas con el alargador y tenga cuidado de no superar el límite de potencia indicado en el alargador.
- Si el cable de alimentación se estropea, deberá ser sustituido por el fabricante o por su
servicio de asistencia técnica o, en todo caso, por una persona con un cargo similar para
evitar cualquier riesgo.
- No sitúe el aparato justo debajo de un enchufe de corriente fijo.
- No use este aparato en habitaciones con una superficie inferior a los 4 m
2
.
- El aparato está equipado con un dispositivo anti-vuelco que apaga el aparato en caso de
caída. Para encender de nuevo el aparato, sólo debe colocarlo otra vez en posición vertical.
- En la primera puesta en marcha, haga funcionar el aparato a la máxima potencia durante
al menos dos horas. Durante esta operación, mantenga el ambiente ventilado para eliminar el olor “a nuevo” que desprende el aparato. Es normal que el aparato emita unos
“crujidos” al ponerlo en marcha por primera vez.
Un dispositivo de seguridad interrumpe el funcionamiento del termoventilador en caso de
recalentamiento accidental (ej: por obstrucción de las rejillas de entrada y salida del aire,
motor que no gira o que gira lentamente). Para restablecer el funcionamiento, desenchufe el
aparato de la corriente durante unos minutos, elimine la causa que ha provocado el recalentamiento y enchufe de nuevo el aparato a la corriente.
IMPORTANTE: No cubra nunca el aparato durante el funcionamiento para evitar recalentamientos, ya que ello podría provocar un peligroso aumento de la temperatura.
ADVERTENCIA: para evitar los riesgos relacionados con la reposición accidental del interruptor de relé térmico, no alimente este aparato con un dispositivo de encendido/apagado exterior, tal como un timer, ni lo conecte a un circuito que el proveedor de energía enciende y
apaga regularmente.
Advertencias para la eliminación correcta del producto según establece la Directiva Europea
2002/96/CE.
Al final de su vida útil, el producto no debe eliminarse junto a los desechos urbanos.
Puede entregarse a centros específicos de recogida diferenciada dispuestos por las administraciones municipales, o a distribuidores que facilitan este servicio. Eliminar por separado un electrodoméstico significa evitar posibles consecuencias negativas para el medio ambiente y la salud
derivadas de una eliminación inadecuada y permite reciclar los materiales que lo componen,
obteniendo así un ahorro importante de energía y recursos. Para subrayar la obligación de eliminar por separado los electrodomésticos, en el producto aparece un contenedor de basura
móvil tachado.
21
Page 22

DESCRIÇÃO DO APARELHO
A Painel de comandos
B Grelha de saída de ar
C Base motorizada
D Luz piloto
E Botão Set time
F Botão de regulação da temperatura
G Botão MODE
H Botão STAND-BY
I Botão de oscilação
L Interruptor geral
LIGAÇÃO ELÉCTRICA
- Antes de inserir a ficha na tomada de alimentação, certifique-se de que a voltagem da sua
rede doméstica corresponde ao valor indicado em V no aparelho e de que a tomada e a
linha de alimentação suportam a carga requerida.
- ESTE APARELHO ESTÁ EM CONFORMIDADE COM A DIRECTIVA 89/336/CEE RELATI-
VO À SUPRESSÃO DAS INTERFERÊNCIAS RADIOELÉCTRICAS.
INSTALAÇÃO
O aparelho pode ser utilizado em qualquer superfície de apoio, desde que horizontal.
Não sobrecarregue o circuito eléctrico. Evite utilizar a mesma tomada para outros aparelhos.
FUNCIONAMENTO E UTILIZAÇÃO
1. Certifique-se de que o aparelho está desligado antes de introduzir a ficha na tomada.
2. Ligue o aparelho à tomada eléctrica.
3. Para ligar o aparelho é necessário que o interruptor (L) situado na parte posterior do apa-
relho esteja na pos. I. O aparelho emitirá um “bip”, a luz piloto (D) acender-se-á e perma-
necerá acesa enquanto o aparelho estiver sob tensão.
4. Prima o botão (H) para ligar o aparelho.
5. Quando é ligado, o aparelho funciona no modo LOW (funcionamento à potência mínima).
O visor apresenta a temperatura ambiente.
6. Premindo o botão MODE (G), o aparelho funciona no modo HIGH (funcionamento à
potência máxima). O visor apresenta a temperatura ambiente.
7. Premindo novamente o botão MODE (G), o aparelho funcionará no modo AUTO. O visor
apresentará a temperatura definida. Para definir uma temperatura diferente da programa-
da, prima os botões + e -. Ao fim de alguns segundos, o visor apresentará a temperatura
ambiente.
8. Premindo novamente o botão MODE (G), o aparelho voltará a funcionar no modo LOW.
Continuando a premir o botão MODE, o aparelho seleccionará as seguintes funções em
sequência: LOW HIGH AUTO.
9. Para desligar o aparelho, prima o botão H durante alguns segundos e coloque no 0 o
interruptor situado na parte posterior do aparelho (L).
BASE MOTORIZADA
O aparelho possui uma base motorizada.
Para distribuir o fluxo de ar por uma área mais vasta, prima o botão de oscilação (I).
O aparelho assim activado oscilará para a direita e para a esquerda.
Para bloquear a oscilação na posição desejada, basta carregar novamente no pedal (I).
Para desligar o aparelho, mantenha premido durante alguns segundos o botão (H).
22
PT
Page 23

23
Regulação do termóstato
1. Prima o botão MODE (G) até o visor apresentar AUTO.
2. Utilize os botões + ou - para aumentar ou diminuir a temperatura definida. A temperatura
assim fixada será automaticamente regulada e mantida constante pelo termóstato.
3. Quando a temperatura ambiente é 2°C superior à temperatura definida, o aparelho desli-
ga-se e a ventilação interrompe-se ao fim de alguns segundos.
4. Quando a temperatura ambiente é inferior à temperatura definida, o aparelho recomeça a
funcionar automaticamente.
Nota: quando se deseja mudar a temperatura definida e o modo de oscilação está activo, ao
premir os botões + ou – o aparelho desliga-se para permitir a programação da nova tem-
peratura. Uma vez feita a programação, a oscilação reinicia-se automaticamente.
Função de temporizador
É possível activar esta função a partir de qualquer modo de funcionamento. O temporizador
permite programar o tempo de funcionamento do aparelho de 1 a 8 horas.
De cada vez que se carrega no botão (E) o tempo de funcionamento aumenta uma hora.
Uma vez programado o temporizador, o tempo diminui de hora a hora apresentando no visor
o tempo remanescente. No fim do tempo programado o aparelho desliga-se.
Se não pretender utilizar o aparelho com a funcionalidade de temporizador, para voltar ao
modo manual, prima novamente a tecla (E) depois de o visor apresentar 8 h.
Função anti-gelo
É possível manter o ambiente a uma temperatura de cerca de 5°C impedindo a congelação
com um consumo mínimo de energia.
Prima o botão MODE (G) até o visor apresentar AUTO. Prima o botão “-” até programar a
temperatura (5°C).
Quando a temperatura ambiente for inferior à temperatura definida, o aparelho recomeçará a
funcionar automaticamente.
USO DO TELECOMANDO
O telecomando deve ser usado com muita atenção.
1. Prima o botão STAND-BY (H).
2. No que concerne ao funcionamento dos botões de oscilação (I), SET TIME (E), MODE (G) e
regulação da temperatura (F), consulte as indicações do parágrafo “FUNCIONAMENTO E
UTILIZAÇÃO”.
3. Para substituir as pilhas, retire a tampa da parte posterior do telecomando. O telecomando
funciona com duas pilhas alcalinas tipo AAA (incluídas mas embaladas separadamente).
4. Não utilize pilhas usadas juntamente com pilhas novas, com valores distintos.
MANUTENÇÃO
- Retire sempre a ficha da tomada antes de efectuar qualquer operação de limpeza.
- Limpe regularmente com um aspirador as grelhas de entrada e de saída do ar durante a
estação de utilização do aparelho.
-Nunca utilize pós abrasivos ou solventes.
ADVERTÊNCIAS
- Não utilize este aparelho de aquecimento nas imediações de duches, banheiras, lavató-
rios, piscinas, etc.
- Utilize o aparelho única e exclusivamente na posição vertical.
- Não utilize o aparelho para secar roupa e não obstrua as grelhas de entrada e saída do
ar (perigo de sobreaquecimento).
Page 24

- Não permita o uso do aparelho a pessoas (incluindo crianças) com capacidades psicofísi-
cas e sensoriais reduzidas, ou com uma experiência e conhecimentos insuficientes, a
menos que sejam atentamente vigiadas e ensinadas por um responsável pela sua segu-
rança. Vigie as crianças, certificando-se de que elas não brincam com o aparelho.
-O aparelho deve estar posicionado a uma distância de 50 cm de móveis ou outros objec-
tos.
-Não coloque o aparelho em funcionamento junto a paredes, móveis, cortinas, etc.
-O uso de extensões não é aconselhável. Se, no entanto, tal se tornar necessário, siga aten-
tamente as instruções fornecidas com a extensão. Certifique-se de que não ultrapassa o
limite de potência assinalado na mesma.
- Se o cabo de alimentação estiver danificado, a sua substituição só deverá ser efectuada
pelo fabricante ou pelo seu serviço de assistência técnica ou, em todo o caso, por alguém
que possua uma qualificação análoga de forma a prevenir todo e qualquer risco.
-O aparelho não deve ser colocado directamente por baixo de uma tomada de alimen-
tação fixa.
- Não utilize o aparelho numa divisão cuja superfície seja inferior a 4 m
2
.
-O aparelho está equipado com um dispositivo anti-viragem que desliga o termoventilador
em caso de queda do mesmo. Para ligar novamente o aparelho, basta colocá-lo novamen-
te na posição vertical.
- Na primeira ligação, ligue o aparelho à potência máxima durante pelo menos 2 horas.
Durante esta operação, areje bem a divisão a fim de eliminar o cheiro “a novo” que se
liberta do aparelho. É absolutamente normal que o aparelho emita alguns “estalidos” da
primeira vez que é ligado.
Um dispositivo de segurança interrompe o funcionamento do termoventilador em caso de
sobreaquecimento acidental (por ex.: obstrução das grelhas de entrada e saída de ar, motor
que não roda ou roda lentamente). Para restabelecer o funcionamento, retire a ficha da tomada durante alguns minutos, elimine a causa do sobreaquecimento e, de seguida, introduza
novamente a ficha.
IMPORTANTE: Para evitar um sobreaquecimento do aparelho não o cubra, em nenhuma circunstância, durante o funcionamento, pois tal provocaria um perigoso aumento
da temperatura.
ADVERTÊNCIA: para evitar os riscos associados ao reset acidental do interruptor de relé térmico, este aparelho não deve ser alimentado através de um dispositivo de activação/desactivação externo, como um temporizador, nem ligado a um circuito que seja regularmente ligado
e desligado pelo fornecedor de energia.
Advertências para a eliminação correcta do produto nos termos da Directiva Europeia
2002/96/EC.
No fim da sua vida útil, o produto não deve ser eliminado juntamente com os resíduos urbanos. Pode ser depositado nos centros especializados de recolha diferenciada das autoridades locais ou, então, nos revendedores que forneçam este serviço. Eliminar separadamente um electrodoméstico permite evitar possíveis consequências
negativas para o ambiente e para a saúde pública resultantes de uma eliminação
inadequada, além de que permite recuperar os materiais constituintes para, assim,
obter uma importante poupança de energia e de recursos. Para assinalar a obrigação de eliminar os electrodomésticos separadamente, o produto apresenta a
marca de um contentor do lixo com uma cruz por c
ima.
24
Page 25

¶∂ƒπ°ƒ∞º∏ ∆∏™ ™À™∫∂À∏™
A ¶›У·О·˜ ¯ВИЪИЫЩЛЪ›ˆУ
B °Ú›ÏÈ· ÂÍfi‰Ô˘ ·¤Ú·
C ªË¯·ÓÔΛÓËÙË ‚¿ÛË
D ∂У‰ВИОЩИО‹ П˘¯Ó›·
E ¶Ï‹ÎÙÚÔ Set time
F ¶Ï‹ÎÙÚÔ Ú‡ıÌÈÛ˘ ıВЪМФОЪ·Ы›·˜
G ¶Ï‹ÎÙÚÔ MODE
H ¶Ï‹ÎÙÚÔ STAND-BY
I ¶Ï‹ÎÙÚÔ ·ПИУ‰ЪФМИО‹˜ О›УЛЫЛ˜
L °ÂÓÈÎfi˜ ‰È·ÎfiÙ˘
∏§∂∫∆ƒπ∫∏ ™À¡¢∂™∏
- ¶ÚÈÓ Û˘Ó‰¤ÛÂÙ ÙÔ ÊȘ ÛÙËÓ Ú›˙· ÙÔ˘ Ú‡̷ÙÔ˜, ÂϤÁÍÙ ЪФЫВОЩИО¿ ·У Л Щ¿ЫЛ ЩФ˘
ÔÈÎÈ·ÎÔ‡ Û·˜ ‰ÈÎÙ‡Ô˘ ·УЩИЫЩФИ¯В› ЫЩЛУ ЩИМ‹ V Ô˘ ·Ó·ÁÚ¿ÊÂÙ·È ÛÙË Û˘Û΢‹ Î·È ·Ó Ë
Ú›˙· ÙÔ˘ ЪВ‡М·ЩФ˜ О·И Л БЪ·ММ‹ ЩЪФКФ‰ФЫ›·˜ В›У·И О·Щ¿ППЛПВ˜ БИ· ЩФ ··ÈÙÔ‡ÌÂÓÔ
ÊÔÚÙ›Ô.
- ∏ ™À™∫∂À∏ ™Àªª√ƒº√À∆∞π ª∂ ∆∏¡ √¢∏°π∞ 89/336/∂√∫ °π∞ ∆∏¡ ∫∞∆∞™∆√§∏
∆ø¡ ƒ∞¢π√¶∞ƒ∂ªµ√§ø¡.
∂°∫∞∆∞™∆∞™∏
∏ Û˘Û΢‹ ÌФЪВ› У· ¯ЪЛЫИМФÔÈËı› Û fiϘ ÙȘ ÂÈÊ¿ÓÂȘ ÛÙ‹ÚÈ͢ ·ÚΛ Ó· ›ӷÈ
ÔÚÈ˙fiÓÙȘ. ªËÓ ˘ВЪКФЪЩТУВЩВ ЩФ ЛПВОЩЪИОfi ·Îψ̷ ·ÔʇÁÔÓÙ·˜ ÙË ¯Ú‹ÛË Ù˘
›‰È·˜ Ú›˙·˜ ÁÈ· ¿ÏϘ Û˘Û΢¤˜.
§∂π∆√Àƒ°π∞ ∫∞π Ã∏™∏
1. ¶ÚÈÓ Û˘Ó‰¤ÛÙ ÙÔ ÊȘ ÙËÓ Ú›˙·, ‚‚·Èˆı›Ù fiÙÈ Ë Û˘Û΢‹ Â›Ó·È Û‚ËÛÙ‹.
2. ™˘Ó‰¤ÛÙ ÙË Û˘Û΢‹ ÛÙËÓ Ú›˙·.
3. °È· Ó· ·Ó¿„ÂÙ ÙË Û˘Û΢‹, Ô ‰È·ÎfiÙ˘ (L) ÛÙÔ ›Ûˆ ̤ÚÔ˜ Ú¤ÂÈ Ó· ‚Ú›ÛÎÂÙ·È
ÛÙË ı¤ÛË. I. ∏ Û˘Û΢‹ ÂΤМВИ ¤У· "МИ", Л ВУ‰ВИОЩИО‹ П˘¯Ó›· (D) ·Ó¿‚ÂÈ Î·È
·Ú·Ì¤ÓÂÈ ·Ó·Ì̤ÓË ¤ˆ˜ fiÙÔ˘ Û˘Ó¯›˙ВЩ·И Л ЩЪФКФ‰ФЫ›· ЩЛ˜ Ы˘Û΢‹˜.
4. ¶È¤ÛÙ ÙÔ Ï‹ÎÙÚÔ (H) ÁÈ· Ó· ·Ó¿„ÂÙ ÙË Û˘Û΢‹.
5. ŸÙ·Ó ·Ó¿‚ÂÈ Ë Û˘Û΢‹ Ù›ıÂÙ·È ·˘ÙfiМ·Щ· ЫЩЛ ПВИЩФ˘ÚÁ›· LOW (ПВИЩФ˘ÚÁ›· Ì ÙËÓ
ÂÏ¿¯ÈÛÙË ÈÛ¯‡). ™ÙËÓ ÔıfiÓË ÂÌÊ·Ó›˙ÂÙ·È Ë ıВЪМФОЪ·Ы›· ВЪИ‚¿ППФУЩФ˜.
6. ¶È¤˙ÔÓÙ·˜ ÙÔ Ï‹ÎÙÚÔ MODE (G), Ë Û˘Û΢‹ Ù›ıВЩ·И ЫЩЛ ПВИЩФ˘ÚÁ›· HIGH
(ПВИЩФ˘ЪБ›· МВ ЩЛ М¤БИЫЩЛ ИЫ¯‡). ™ЩЛУ ФıfiÓË ÂÌÊ·Ó›˙ÂÙ·È Ë ıВЪМФОЪ·Ы›·
ВЪИ‚¿ППФУЩФ˜.
7. ¶È¤˙ÔÓÙ·˜ ¿ÏÈ ÙÔ Ï‹ÎÙÚÔ MODE (G), Ë Û˘Û΢‹ Ù›ıВЩ·И ЫЩЛ ПВИЩФ˘ÚÁ›· AUTO. ™ÙËÓ
ÔıfiУЛ ВМК·У›˙ВЩ·И Л Ъ˘ıМИЫМ¤УЛ ıВЪМФОЪ·Ы›·. °И· У· ·ПП¿НВЩВ ЩЛ Ъ‡ıМИЫЛ ЩЛ˜
ıВЪМФОЪ·Ы›·˜, ȤÛÙ ٷ Ï‹ÎÙÚ· + Î·È - . ªÂÙ¿ ·fi МВЪИО¿ ‰В˘ÙÂÚfiÏÂÙ· ÛÙËÓ
ÔıfiУЛ ВМК·У›˙ВЩ·И Л ıВЪМФОЪ·Ы›· ВЪИ‚¿ППФУЩФ˜.
8. ¶È¤˙ÔÓÙ·˜ ¿ÏÈ ÙÔ Ï‹ÎÙÚÔ MODE (G), Ë Û˘Û΢‹ Â·У¤Ъ¯ВЩ·И ЫЩЛ ПВИЩФ˘ÚÁ›· LOW.
¶È¤˙ÔÓÙ·˜ ηْ ·ӿÏË„Ë ÙÔ Ï‹ÎÙÚÔ MODE, Ë Û˘Û΢‹ ÂÈϤÁÂÈ ‰È·‰Ô¯Èο ÙȘ
·ÎfiÏÔ˘ıВ˜ ПВИЩФ˘ÚÁ›Â˜: LOW HIGH AUTO.
9. °È· Ó· Û‚‹ÛÂÙ ÙË Û˘Û΢‹, ȤÛÙ ÙÔ Ï‹ÎÙÚÔ ∏ БИ· МВЪИО¿ ‰В˘ÙÂÚfiÏÂÙ· ηÈ
ÙÔÔıÂÙ‹ÛÙ ÛÙË ı¤ÛË 0 ÙÔ ‰È·ÎfiÙË ÛÙÔ ›Ûˆ ̤ÚÔ˜ Ù˘ Û˘Û΢‹˜ (L).
ª∏Ã∞¡√∫π¡∏∆∏ µ∞™∏
∏ Û˘Û΢‹ ‰È·ı¤ÙÂÈ ÌÈ· Ì˯·ÓÔΛÓËÙË ‚¿ÛË. °È· ÙËÓ Î·Ù·ÓÔÌ‹ Ù˘ ÚÔ‹˜ ÙÔ˘ ·¤Ú· ÛÂ
ÌÂÁ·Ï‡ÙÂÚË ÂÚÈÔ¯‹ ȤÛÙ ÙÔ Ï‹ÎÙÚÔ ·ПИУ‰ЪФМИО‹˜ О›УЛЫЛ˜ (I). ªÂ ·˘ÙfiÓ ÙÔÓ ÙÚfiÔ
Ë Û˘Û΢‹ ВЪИЫЩЪ¤КВЩ·И ‰ВНИ¿-·ЪИЫЩВЪ¿.
°И· У· ‰И·Оfi„ÂÙ ÙËÓ Î›ÓËÛË ÛÙËÓ ÂÈı˘ÌËÙ‹ ı¤ÛË ·ÚΛ Ó· ȤÛÂÙ ¿ÏÈ ÙÔ Ï‹ÎÙÚÔ (I).
°È· Ó· Û‚‹ÛÂÙ ÙË Û˘Û΢‹ ÎÚ·Ù‹ÛÙ ·ЩЛМ¤УФ БИ· МВЪИО¿ ‰В˘ÙÂÚfiÏÂÙ· ÙÔ Ï‹ÎÙÚÔ
(∏).
25
GR
Page 26

26
ƒ‡ıÌÈÛË ıВЪМФЫЩ¿ЩЛ
1. ¶È¤ÛÙ ÙÔ Ï‹ÎÙÚÔ MODE (G) ¤ˆ˜ fiÙÔ˘ ВМК·УИЫЩВ› ЫЩЛУ ФıfiÓË Ë ¤Ó‰ÂÈÍË AUTO.
2. ¶È¤ÛÙ ٷ Ï‹ÎÙÚ· + ‹ - ÁÈ· Ó· ·˘Н‹ЫВЩВ ‹ У· МВИТЫВЩВ ЩЛУ ÚÔÁÚ·ÌÌ·ÙÈṲ̂ÓË
ıВЪМФОЪ·Ы›·. ∏ ıВЪМФОЪ·Ы›· Ъ˘ıÌ›˙ÂÙ·È ·˘ÙfiÌ·Ù· Î·È ‰È·ÙËÚÂ›Ù·È ÛÙ·ıÂÚ‹ ·fi ÙÔ
ıВЪМФЫЩ¿ЩЛ.
3. ŸÙ·Ó Ë ıВЪМФОЪ·Ы›· ЩФ˘ ВЪИ‚¿ППФУЩФ˜ В›У·И О·Щ¿ 2Ж ˘„ËÏfiÙÂÚË ·fi ÙËÓ ÂИПВБМ¤УЛ
ıВЪМФОЪ·Ы›·, Л Ы˘ Û΢‹ Ы‚‹УВИ О·И Ф ·ВЪИЫМfi ˜ ÛÙ·Ì·Ù¿ ÌÂÙ¿ ·fi МВЪИО¿
‰Â˘ÙÂÚfiÏÂÙ·.
4. ŸÙ·Ó Ë ıВЪМФОЪ·Ы›· ЩФ˘ ВЪИ‚¿ППФУЩФ˜ В›У·И ¯·МЛПfiÙÂÚË ·fi ÙËÓ ÂИПВБМ¤УЛ
ıВЪМФОЪ·Ы›· Л Ы˘Û΢‹ ·ӤگÂÙ·È ·˘ÙfiМ·Щ· ЫВ ПВИЩФ˘ÚÁ›·.
™ËÌ›ˆÛË: fiÙ·Ó ı¤ÏÂÙ ӷ ·ÏÏ¿ÍÂÙ ÙË Ú˘ıÌÈṲ̂ÓË ıВЪМФОЪ·Ы›· О·И Л ·ПИУ‰ЪФМИО‹
О›УЛЫЛ В›У·И ВУВЪБФÔÈË̤ÓË, ·ÙÒÓÙ·˜ Ù· Ï‹ÎÙÚ· + ‹ - Ë Û˘Û΢‹ ÛÙ·Ì·Ù¿ ÒÛÙÂ
Ó· ÌÔÚ¤ÛÂÙ ӷ Ú˘ıÌ›ÛÂÙ ÙË Ó¤· ıВЪМФОЪ·Ы›·. ∞ÊÔ‡ οÓÂÙ ÙË Ú‡ıÌÈÛË, Ë
·ПИУ‰ЪФМИО‹ О›УЛЫЛ Н·У·Ъ¯›˙ÂÈ ·˘ÙfiÌ·Ù·.
§ÂÈÙÔ˘ÚÁ›· ¯ÚÔÓԉȷÎfiÙË
ªФЪВ›ЩВ У· ВУВЪБФÔÈ‹ÛÂÙ ·˘Щ‹ ЩЛ ПВИЩФ˘ÚÁ›· ηٿ ÙË ‰È¿ÚÎÂÈ· ÔÔÈ·Û‰‹ФЩВ
ПВИЩФ˘ÚÁ›·˜ Ù˘ Û˘Û΢‹˜. √ ¯ÚÔÓԉȷÎfiÙ˘ Û·˜ ÂÈÙÚ¤ÂÈ Ó· ÚÔÁÚ·ÌÌ·Ù›ÛÂÙ ÙÔ
¯ÚfiУФ ПВИЩФ˘ÚÁ›·˜ Ù˘ Û˘Û΢‹˜ ·fi 1 ¤ˆ˜ 8 ÒÚ˜. ™Â οı ¿ÙËÌ· ÙÔ˘ Ï‹ÎÙÚÔ˘ (E) Ô
¯ÚfiУФ˜ ПВИЩФ˘ÚÁ›·˜ ·˘Í¿ÓÂÈ Î·Ù¿ Ì›· ÒÚ·. ªÂÙ¿ ÙË Ú‡ı ÌÈÛË ÙÔ˘ ¯ÚÔÓԉȷÎfiÙË, Ô
¯ÚfiÓÔ˜ ı· ·Ъ¯›ЫВИ У· МВИТУВЩ·И О·Щ¿ М›· ТЪ· ЩЛ КФЪ¿ ВУТ ЫЩЛУ ФıfiÓË ÂÌÊ·Ó›˙ÂÙ·È Ô
˘ÔÏÂÈfiÌÂÓÔ˜ ¯ÚfiÓÔ˜. ªÂ ÙË Ï‹ÍË ÙÔ˘ ÚÔÁÚ·ÌÌ·ÙÈṲ̂ÓÔ˘ ¯ÚfiÓÔ˘, Ë Û˘Û΢‹ ı·
Û‚‹ÛÂÈ. ∞ Ó ‰ÂÓ ı¤ПВЩВ У· ¯ЪЛЫИМФ ÔÈ‹ÛÂÙ ÙË Û˘Û΢‹ МВ ЩЛ ПВИЩФ˘ ÚÁ›·
¯ÚÔÓԉȷÎfiÙË, ÁÈ· Ó· ÂИЫЩЪ¤„ВЩВ ЫЩЛ ¯ВИЪФО›УЛЩЛ ПВИЩФ˘ÚÁ›· ·Ù‹ÛÙÂ Î·È ¿ÏÈ ÙÔ
Ï‹ÎÙÚÔ (∂) ·ÊÔ‡ ÛÙËÓ ÔıfiУЛ ВМК·УИЫЩВ› Л ¤У‰ВИНЛ 8 h.
§ÂÈÙÔ˘ÚÁ›· ·fi„˘Í˘
ªÔÚ›Ù ӷ ‰È·ÙËÚ›Ù ÙÔ ¯ÒÚÔ Û ıВЪМФОЪ·Ы›· ÂÚ›Ô˘ (5ÆC), ·ÔʇÁÔÓÙ·˜ ÙȘ
Û˘Óı‹Î˜ ·ÁÂÙÔ‡ Ì ÂÏ¿¯ÈÛÙË Î·Ù·Ó¿ÏˆÛË ÂÓ¤ÚÁÂÈ·˜.
¶È¤ÛÙ ÙÔ Ï‹ÎÙÚÔ MODE (G) ¤ˆ˜ fiÙÔ˘ ВМК·УИЫЩВ› ЫЩЛУ ФıfiÓË Ë ¤Ó‰ÂÈÍË AUTO. ¶È¤ÛÙÂ
ÙÔ Ï‹ÎÙÚÔ "-" ¤ˆ˜ fiÙÔ˘ ÂÈϤÍÂÙ ÙË ıВЪМФОЪ·Ы›· ЩˆУ (5ЖC).
ŸЩ·У Л ıВЪМФОЪ·Ы›· ЩФ˘ ВЪИ‚¿ППФУЩФ˜ В›У·И ¯·МЛПfiÙÂÚË · fi ÙËÓ ÂИПВБМ¤УЛ
ıВЪМФОЪ·Ы›· Л Ы˘Û΢‹ ·ӤگÂÙ·È ·˘ÙfiМ·Щ· ЫВ ПВИЩФ˘ÚÁ›·.
Ã∏™∏ ∆√À ∆∏§∂Ã∂πƒπ™∆∏ƒπ√À
∆Ф ЩЛПВ¯ВИЪИЫЩ‹ЪИФ Ú¤ВИ У· ¯ЪЛЫИМФÔÈÂ›Ù·È Ì Ôχ ÚÔÛÔ¯‹.
1. ¶È¤ÛÙ ÙÔ Ï‹ÎÙÚÔ STAND-BY (∏).
2. ŸЫФУ ·КФЪ¿ ЩЛ ПВИЩФ˘ÚÁ›· ÙˆÓ Ï‹ÎÙÚˆÓ ·ПИУ‰ЪФМИО‹˜ О›УЛЫЛ˜ (I), SET TIME (E),
MODE (G) Î·È Ú‡ıÌÈÛ˘ Ù˘ ıВЪМФОЪ·Ы›·˜ (F) ·Ó·ÙÚ¤ÍÙ ÛÙ· fiÛ· ·Ó·ÁÚ¿ÊÔÓÙ·È
ÛÙËÓ ·Ú¿ÁÚ·ÊÔ “§∂π∆√Àƒ°π∞ ∫∞π Ã∏™∏”.
3. °È· ÙËÓ ·ÓÙÈηٿÛÙ·ÛË ÙˆÓ Ì·Ù·ÚÈÒÓ, ‚Á¿ÏÙ ÙÔ Î·¿ÎÈ ÛÙÔ ›Ûˆ ̤ÚÔ˜ ÙÔ˘
ЩЛПВ¯ВИЪИЫЩЛЪ›Ф˘. ∆Ф ЩЛПВ¯ВИЪИЫЩ‹ЪИФ ПВИЩФ˘ÚÁ› Ì ‰‡Ô ·ÏηÏÈΤ˜ ̷ٷڛ˜ Ù‡Ô˘
∞∞∞ (ÂÚÈÏ·Ì‚¿ÓÔÓÙ·È ·ÏÏ¿ Â›Ó·È Û˘Û΢·Ṳ̂Ó˜ ¯ˆÚÈÛÙ¿).
4. ªЛ ¯ЪЛЫИМФФИВ›ЩВ МВЩ·¯ВИЪИЫМ¤УВ˜ М·Ù·Ú›Â˜ Ì·˙› Ì ÙȘ ηÈÓÔ‡ÚȘ.
™À¡∆∏ƒ∏™∏
-
¶ÚÈÓ ·fi ÔÔÈÔ‰‹ÔÙ ηı·ÚÈÛÌfi, ·ÔÛ˘Ó‰¤ÂÙ ¿ÓÙ· ÙÔ ÊȘ ·fi ÙËÓ Ú›˙· ÙÔ˘ Ú‡̷ÙÔ˜.
- ∫·ı·Ú›˙ÂÙ ٷÎÙÈο ÙȘ ÁÚ›ÏȘ ÂÈÛfi‰Ô˘ Î·È ÂÍfi‰Ô˘ ÙÔ˘ ·¤Ú· ÛÙËÓ ÂÚ›Ô‰Ô ¯Ú‹Û˘
Ù˘ Û˘Û΢‹˜ МВ МИ· ЛПВОЩЪИО‹ ЫОФ‡·.
- ªЛ ¯ЪЛЫИМФÔț٠ÔÙ¤ ·ÔÚÚ˘·ÓÙÈο Û ÛÎfiÓË ‹ ‰È·Ï‡Ù˜.
¶ƒ√∂π¢√¶√π∏™∂π™
- ªЛ ¯ЪЛЫИМФÔț٠·˘Ù‹ ÙË Û˘Û΢‹ ı¤ÚÌ·ÓÛ˘ ÎÔÓÙ¿ Û ÓÙÔ˘˜, Ì·ÓȤÚ˜,
Page 27

ÓÈÙ‹Ú˜, ÈÛ›Ó˜ ÎÏ.
- ГЪЛЫИМФÔț٠ÙË Û˘Û΢‹ ¿ÓÙ· Î·È ÌfiÓÔ Û ηٷÎfiÚ˘ÊË ı¤ÛË.
- ªЛ ¯ЪЛЫИМФÔț٠ÙË Û˘Û΢‹ БИ· У· ЫЩВБУТЫВЩВ ЪФ‡¯·, МЛ ЫОВ¿˙ÂÙ ÙȘ ÁÚ›ÏȘ
ÂÈÛfi‰Ô˘ Î·È ÂÍfi‰Ô˘ ÙÔ˘ ·¤Ú· (ΛӉ˘ÓÔ˜ ˘ÂÚı¤ÚÌ·ÓÛ˘).
- ªËÓ ÂÈÙÚ¤ÂÙ ÙË ¯Ú‹ÛË Ù˘ Û˘Û΢‹˜ Û ¿ÙÔÌ· (·ÎfiÌ· Î·È ·È‰È¿) Ì ÌÂȈ̤Ó˜
„˘ ¯ÔÊ˘ÛÈΤ˜ ÈηÓfiÙËÙ˜ ‹ Ì ·Ó·Ú΋ ÂÌÂÈÚ›·, ÂÎÙfi˜ Â¿Ó ÂȂϤÔÓÙ·È ÌÂ
ÚÔÛÔ¯‹ Î·È Âηȉ‡ÔÓÙ·È ·fi ¤Ó·Ó ˘Â‡ı˘ÓÔ ÁÈ· ÙË ÛˆÌ·ÙÈ΋ ·ÎÂÚ·ÈfiÙËÙ¿ ÙÔ˘˜.
¶·Ú·ÎÔÏÔ˘ı›Ù ٷ ·È‰È¿ Î·È ‚‚·Èˆı›Ù fiÙÈ ‰ÂÓ ·›˙Ô˘Ó Ì ÙË Û˘Û΢‹.
- ™Â ·fiÛÙ·ÛË 50 cm ÂÌÚfi˜ ·fi ÙË Û˘Û΢‹, ‰ÂÓ Ú¤ÂÈ Ó· ˘¿Ú¯Ô˘Ó ¤ÈÏ· ‹ ¿ÏÏ·
·УЩИОВ›МВУ·.
- ªËÓ ·Ê‹ÓÂÙ ÙË Û˘Û΢‹ У· ПВИЩФ˘ÚÁ› ÎÔÓÙ¿ Û ÙÔ›¯Ô˘˜, ¤ÈÏ·, ÎÔ˘ÚÙ›Ó˜ ÎÏ.
- ∞ФК‡БВЩВ ЩЛ ¯Ъ‹ЫЛ ЪФВОЩ¿ЫВˆУ. ∂¿У Л ¯Ъ‹ЫЛ ЩФ˘˜ Â›Ó·È ·Ó·Áη›·, ÙËÚ‹ÛÙÂ
Û¯ÔÏ·ÛÙÈο ÙȘ Ô‰ËÁ›Â˜ Ù˘ ÚÔ¤ÎÙ·Û˘ ¤ÙÛÈ ÒÛÙ ӷ ÌËÓ ˘Âڂ›Ù ÙÔ fiÚÈÔ ÈÛ¯‡Ô˜
Ô˘ ·Ó·ÁÚ¿ÊÂÙ·È ÛÙËÓ ÚÔ¤ÎÙ·ÛË.
- ∂¿У ЩФ ЛПВОЩЪИОfi ηÏÒ‰ÈÔ ·ÚÔ˘ÛÈ¿˙ÂÈ ÊıÔÚ¤˜, Ú¤ÂÈ Ó· ·ÓÙÈηٷÛÙ·ı› ·fi ÙÔÓ
ηٷÛ΢·ÛÙ‹, ÙÔ ÂÍÔ˘ÛÈÔ‰ÔÙË̤ÓÔ ™¤Ú‚Ș ‹ ·fi ÂÍÂȉÈÎÂ˘Ì¤ÓÔ Ù¯ÓÈÎfi ÁÈ· ÙËÓ
·ÔÊ˘Á‹ οı ÎÈÓ‰‡ÓÔ˘.
- ∏ Û˘Û΢‹ ‰ÂÓ Ú¤ÂÈ Ó· ÙÔÔıÂÙÂ›Ù·È ·ÎÚÈ‚Ò˜ οو ·fi ÛÙ·ıÂÚ‹ Ú›˙· Ú‡̷ÙÔ˜.
- ªЛ ¯ЪЛЫИМФÔț٠ÙË Û˘Û΢‹ Û ‰ˆÌ¿ÙÈ· Ì ÂÌ‚·‰fiÓ ÌÈÎÚfiÙÂÚÔ ·fi 4 m
2
.
- ∏ Û˘Û΢‹ ‰È·ı¤ÙÂÈ Û‡ÛÙËÌ· ÚÔÛÙ·Û›·˜ ·fi ·Ó·ÙÚÔ‹ Ô˘ Û‚‹ÓÂÈ ÙË Û˘Û΢‹ ÛÂ
ÂÚ› ÙˆÛË ЩТЫЛ˜. °И· У· ПВИЩФ˘ÚÁ‹ÛÂÈ Î·È ¿ÏÈ Ë Û˘Û΢‹ ·ÚΛ Ó· ÙËÓ
·ӷʤÚÂÙ Û ηٷÎfiÚ˘ÊË ı¤ÛË.
-
∫·Ù¿ ÙËÓ ÚÒÙË ¯Ú‹ÛË, ·Ê‹ÛÙ ÙË Û˘Û΢‹ Ó· ‰Ô˘П¤„ВИ ЫЩЛ М¤БИЫЩЛ ИЫ¯‡ ЩФ˘П¿¯ИЫЩФУ БИ· 2 ТЪВ˜.
∫·Ù¿ ÙË ‰È¿ÚÎÂÈ· Ù˘ ‰È·‰Èηۛ·˜ ·˘Ù‹˜ ·ÂÚ›˙ÂÙ ηϿ ÙÔ ‰ˆÌ¿ÙÈÔ Ô‡Ùˆ˜ ÒÛÙ ӷ ʇÁÂÈ Ë ÔÛÌ‹ ÙÔ˘
"ηÈÓÔ‡ÚÁÈÔ˘" Ô˘ ÂÏ¢ıВЪТУВИ Л Ы˘ЫОВ˘‹. ∂›Ó·È ·fiÏ˘Ù· Ê˘ЫИФПФБИОfi Ó· ·ÎÔ‡ÁÔÓÙ·È "ÙÚÈ̷͛ٷ"
ÙËÓ ÚÒÙË ÊÔÚ¿ Ô˘ ı· ¯ЪЛЫИМФÔÈ‹ÛÂÙ ÙË Û˘Û΢‹.
ŒÓ· Û‡ÛÙËÌ· ·ÛÊ·Ï›·˜ ‰È·ÎfiЩВИ ЩЛ ПВИЩФ˘ÚÁ›· ÙÔ˘ ·ÂÚfiıÂÚÌÔ˘ Û ÂÚ›ÙˆÛË
˘ÂÚı¤ÚÌ·ÓÛ˘ (.¯. ‚ԇψ̷ ÁÚ›ÏÈ·˜ ÂÈÛfi‰Ô˘ Î·È ÂÍfi‰Ô˘ ÙÔ˘ ·¤Ú·, ÂÌÏÔ΋ ‹ ·ÚÁ‹
ВЪИЫЩЪФК‹ ЩФ˘ ÌÔÙ¤Ú). °È· Ó· ·ФО·Щ·ЫЩ‹ЫВЩВ ЩЛ ПВИЩФ˘ ÚÁ›·, Ú¤ÂÈ Ó·
·ÔÛ˘Ó‰¤ÛÂÙ ÙÔ ÊȘ ·fi ÙËÓ Ú›˙· ÁÈ· Ï›Á· ÏÂÙ¿, Ó· ÂÍ·Ï›„ÂÙ ÙËÓ ·ÈÙ›· Ù˘
˘ÂÚı¤ÚÌ·ÓÛ˘ Î·È ÛÙË Û˘Ó¤¯ÂÈ· Ó· Û˘Ó‰¤ÛÂÙ ¿ÏÈ ÙÔ ÊȘ.
™∏ª∞¡∆π∫√: °È· Ó· ·ÔʇÁÂÙ ÙËÓ ˘ÂÚı¤ÚÌ·ÓÛË, ÌËÓ Î·Ï‡ÙÂÙ ÔÙ¤ ÙË
Û˘Û΢‹ ВУТ ПВИЩФ˘ÚÁ›, ÁÈ·Ù› ·˘Ùfi ÌÔÚ› Ó· ÚÔηϤÛÂÈ ÂÈΛӉ˘ÓË ¿ÓÔ‰Ô Ù˘
ıВЪМФОЪ·Ы›·˜ ЩЛ˜.
¶ƒ√∂π¢√¶√π∏™∏: ÚÔ˜ ·ÔÊ˘Á‹ ÎÈÓ‰‡ÓˆÓ ·fi ÙËÓ Ù˘¯·›· ·ӷÊÔÚ¿ ÙÔ˘ ıВЪМИОФ‡
‰È·ÎfiÙË, ·˘Ù‹ Ë Û˘Û΢‹ ‰ÂÓ Ú¤ВИ У· ЩЪФКФ‰ФЩВ›Щ·И М¤Ыˆ ВУfi˜ ВНˆЩВЪИОФ‡
‰И·ОfiÙË, fiˆ˜ .¯. ¤Ó· ¯ÚÔÓԉȷÎfiÙË, Ô‡Ù ӷ Û˘Ó‰¤ÂÙ·È Û ¤Ó· ·Îψ̷ Ô˘
·ÓÔ›ÁÂÈ Î·È ÎÏ›ÓÂÈ ·fi ÙÔÓ ·ЪФ¯¤· ЛПВОЩЪИО‹˜ ВУ¤ЪБВИ·˜.
¶ÚÔÂȉÔÔÈ‹ÛÂȘ ÁÈ· ÙË ÛˆÛÙ‹ ‰È¿ıÂÛË ÙÔ˘ ÚÔ˚fiÓÙÔ˜ Û‡Ìʈӷ Ì ÙËÓ ∂˘Úˆ·˚΋ √‰ËÁ›·
2002/96/∂∫
™ÙÔ Ù¤ÏÔ˜ Ù˘ ˆÊ¤ÏÈÌ˘ ˙ˆ‹˜ ÙÔ˘, ÙÔ ÚÔ˚fiÓ ‰ÂÓ Ú¤ÂÈ Ó· ‰È·Ù›ıÂÙ·È Ì ٷ ·ÛÙÈο
·ÔÚÚ›ÌÌ·Ù·. ªÔÚ› Ó· ‰È·ÙÂı› Û ÂȉÈο ΤÓÙÚ· ‰È·ÊÔÚÔÔÈË̤Ó˘ Û˘ÏÏÔÁ‹˜ Ô˘
ÔÚ›˙Ô˘У ФИ ‰ЛМФЩИО¤˜ ·Ъ¯¤˜, ‹ ЫЩИ˜ ·УЩИÚÔۈ›˜ Ô ˘ ·Ú¤¯Ô˘Ó ·˘Ù‹Ó ÙËÓ
˘ËÚÂÛ›·. ∏ ‰È·ÊÔÚÔÔÈË̤ÓË ‰È¿ıВЫЛ МИ·˜ ЛПВОЩЪИО‹˜ Ы˘Û΢‹˜ ÂÈÙÚ¤ÂÈ ÙËÓ
·ÔÊ˘Á‹ Èı·УТУ ·ЪУЛЩИОТУ Ы˘ÓÂÂÈÒÓ ÁÈ· ÙÔ ÂÚÈ‚¿ÏÏÔÓ Î·È ÙËÓ ˘Á›· ·fi ÙËÓ
·О·Щ¿ППЛПЛ ‰И¿ıÂÛË Î·ıÒ˜ Î·È ÙËÓ ·Ó·Î‡ÎψÛË ˘ПИОТУ ·fi Ù· ÔÔ›· ·ФЩВПВ›Щ·И
ТЫЩВ У· ВÈÙ˘Б¯¿УВЩ·И ЫЛМ·УЩИО‹ ВНФИОФУfiÌËÛË ÂÓ¤ÚÁÂÈ·˜ Î·È fiÚˆÓ. °È· ÙËÓ
ÂÈÛ‹Ì·ÓÛË Ù˘ ˘Ô¯ÚˆÙÈ΋˜ ¯ˆÚÈÛÙ‹˜ ‰È¿ıÂÛ˘, ÙÔ ÚÔ˚fiÓ Ê¤ÚÂÈ ÙÔ Û‹Ì· ÙÔ˘
‰È·ÁÚ·Ì̤ÓÔ˘ ÙÚÔ¯ÔÊfiÚÔ˘ ο‰Ô˘ ·ФЪЪИММ¿ЩˆУ.
27
Page 28

ééèèààëëÄÄççààÖÖ èèêêààÅÅééêêÄÄ
ÄÄ
è‡ÌÂθ ÛÔ‡‚ÎÂÌËfl
ÇÇ
ê¯ÂÚ͇ ‰Îfl ‚˚ÔÛÒ͇ ‚ÓÁ‰Ûı‡
ëë
èÓ‰ÒÚ‡‚͇ Ò ÏÓÚÓÓÏ
DD
à̉Ë͇ÚÓ̇fl ·ÏÔ‡
ÖÖ
дМУФН‡ ЫТЪ‡МУ‚НЛ ‚ВПВМЛ
FF
дМУФН‡ В„ЫОЛУ‚НЛ ЪВПФВ‡ЪЫ˚
GG
дМУФН‡ MODE
HH
дМУФН‡ STAND-BY
II
дМУФН‡ ФУ‚УУЪ‡
LL
É·‚Ì˚È ‚˚Íβ˜‡ÚÂθ
èèééÑÑääããûûóóÖÖççààÖÖ ùùããÖÖääííêêééùùççÖÖêêÉÉàààà
- СУ ЪУ„У, Н‡Н ‚ЛОН‡ ·Ы‰ВЪ ‚ТЪ‡‚ОВМ‡ ‚ УБВЪНЫ ˝ОВНЪУФЛЪ‡МЛfl, Ы·В‰ЛЪВТ¸, ˜ЪУ
М‡ФflКВМЛВ ‚ ТВЪЛ ˝ОВНЪУФЛЪ‡МЛfl ‚‡¯В„У ФУПВ˘ВМЛfl ТУУЪ‚ВЪТЪ‚ЫВЪ БМ‡˜ВМЛ˛
М‡ФflКВМЛfl, ЫН‡Б‡ММУПЫ М‡ ФЛ·УВ, Л ˜ЪУ УБВЪН‡ ОЛМЛЛ ˝ОВНЪУФЛЪ‡МЛfl
‡ТТ˜ЛЪ‡М‡ М‡ ЪВ·ЫВПЫ˛ ПУ˘МУТЪ¸.
- нЦкейЗЦзнагьнйк лййнЗЦнлнЗмЦн зйкеДнаЗДе Цл 89/336/CEE й
кДликйлнкДзЦзаа кДСайийеЦп.
ììëëííÄÄççééÇÇääÄÄ
иЛ·У ПУКВЪ ·˚Ъ¸ ЫТЪ‡МУ‚ОВМ М‡ О˛·УИ „УЛБУМЪ‡О¸МУИ ФУ‚ВıМУТЪЛ. зВ
ФВВ„ЫК‡ИЪВ ОЛМЛ˛ ˝ОВНЪУФЛЪ‡МЛfl, ЛБ·В„‡fl ЛТФУО¸БУ‚‡МЛfl ЪУИ КВ УБВЪНЛ ‰Оfl
ФУ‰НО˛˜ВМЛfl ‰Ы„Лı ФЛ·УУ‚.
îîììççääññààééççààêêééÇÇÄÄççààÖÖ àà ùùääëëèèããììÄÄííÄÄññààüü
1.
СУ ЪУ„У, Н‡Н ‚ТЪ‡‚ЛЪ¸ ‚ЛОНЫ ‚ УБВЪНЫ ˝ОВНЪУФЛЪ‡МЛfl Ы·В‰ЛЪВТ¸, ˜ЪУ ФЛ·У ‚˚НО˛˜ВМ.
2. ЗТЪ‡‚¸ЪВ ‚ЛОНЫ ‚ УБВЪНЫ ˝ОВНЪУФЛЪ‡МЛfl.
3. èË ‚Íβ˜ÂÌËË ÔË·Ó‡ ÌÂÓ·ıÓ‰ËÏÓ, ˜ÚÓ·˚ ‚˚Íβ˜‡ÚÂθ (LL), ̇ıÓ‰fl˘ËÈÒfl Ò
Б‡‰МВИ ТЪУУМ˚ ФЛ·У‡ ·˚О ‚ ФУОУКВМЛЛ II. èË·Ó ËÁ‰‡ÒÚ Á‚ÛÍÓ‚ÓÈ Ò˄̇Î,
Á‡„ÓËÚÒfl Ë̉Ë͇ÚÓ̇fl ·ÏÔ‡ (DD) Л УТЪ‡МВЪТfl ‚НО˛˜ВММУИ ФУН‡ ФЛ·У
‡·УЪ‡ВЪ.
4. СОfl ‚НО˛˜ВМЛfl ФЛ·У‡ М‡КПЛЪВ НМУФНЫ (H).
5. иЛ ‚НО˛˜ВМЛЛ ФЛ·У М‡˜ЛМ‡ВЪ ‡·УЪ‡Ъ¸ ‚ ВКЛПВ
LLOOWW
(‡·ÓÚ‡ ÔË
ПЛМЛП‡О¸МУИ ПУ˘МУТЪЛ). з‡ ‰ЛТФОВВ ФУfl‚ЛЪТfl ЪВПФВ‡ЪЫ‡ ‚ ФУПВ˘ВМЛЛ.
6. иУТОВ М‡К‡ЪЛfl М‡ НМУФНЫ
MMOODDEE (GG
) ÔË·Ó ÔÂÂıÓ‰ËÚ ‚ ÂÊËÏ ‡·ÓÚ˚
HHIIGGHH
(‡·УЪ‡ ФЛ П‡НТЛП‡О¸МУИ ПУ˘МУТЪЛ). з‡ ‰ЛТФОВВ ФУfl‚ЛЪТfl ЪВПФВ‡ЪЫ‡ ‚
ФУПВ˘ВМЛЛ.
7. иУТОВ ФУ‚ЪУМУ„У М‡К‡ЪЛfl М‡ НМУФНЫ
MMOODDEE(GG
) ÔË·Ó ÔÂÂıÓ‰ËÚ ‚ ÂÊËÏ
‡·ÓÚ˚
AAUUTTOO
. з‡ ‰ЛТФОВВ ФУfl‚ЛЪТfl ЫТЪ‡МУ‚ОВММ‡fl ЪВПФВ‡ЪЫ‡. СОfl
ЛБПВМВМЛfl Б‡‰‡ММУИ ЪВПФВ‡ЪЫ˚ М‡КПЛЪВ М‡ НМУФНЫ ++ËÎË--. уВВБ МВТНУО¸НУ
ТВНЫМ‰ М‡ ‰ЛТФОВВ ФУfl‚ЛЪТfl ЪВПФВ‡ЪЫ‡ ‚ ФУПВ˘ВМЛЛ.
8. иУТОВ ТОВ‰Ы˛˘В„У М‡К‡ЪЛfl М‡ НМУФНЫ
MMOODDEE(GG
) ÔË·Ó ÔÂÂıÓ‰ËÚ ‚ ÂÊËÏ
‡·ÓÚ˚
LLOOWW
. иЛ ФУ‰УОКВМЛЛ М‡К‡ЪЛfl НМУФНЛ
MMOODDEE
, ÔË·Ó ·Û‰ÂÚ
ÔÂÂıÓ‰ËÚ¸ Ò ÂÊËχ ̇ ÂÊËÏ:
LLOOWW HHIIGGHH AAUUTTOO
.
9. СОfl ‚˚НО˛˜ВМЛfl ФЛ·У‡ М‡КПЛЪВ НМУФНЫ HHЛ ЫТЪ‡МУ‚ЛЪВ ‚ ФУОУКВМЛВ
00
ÔÂÂÍβ˜‡ÚÂθ, ̇ıÓ‰fl˘ËÈÒfl Ò Á‡‰ÌÂÈ ÒÚÓÓÌ˚ ÔË·Ó‡ (LL).
èèééÑÑëëííÄÄÇÇääÄÄ ëë ååééííééêêééåå
иЛ·У УТМ‡˘ВМ ФУ‰ТЪ‡‚НУИ Т ПУЪУУП. СОfl ЪУ„У, ˜ЪУ·˚ ‚УБ‰Ыı ‡ТФУТЪ‡МflОТfl
ФУ ·УОВВ ¯ЛУНУПЫ ФУТЪ‡МТЪ‚Ы, М‡КПЛЪВ НМУФНЫ ФУ‚УУЪ‡ (II). иУТОВ ˝ЪУ„У ФЛ·У
М‡˜МВЪ ФУ‚У‡˜Л‚‡Ъ¸Тfl ‚Ф‡‚У Л ‚ОВ‚У.
28
RUS
Page 29

СОfl УТЪ‡МУ‚НЛ ФУ‚УУЪ‡ ‚ ЪВ·ЫВПУП ФУОУКВМЛЛ ‰УТЪ‡ЪУ˜МУ В˘В ‡Б М‡К‡Ъ¸ М‡
НМУФНЫ (II).
СОfl ‚˚НО˛˜ВМЛfl ФЛ·У‡, М‡КПЛЪВ Л Ы‰ВКЛ‚‡ИЪВ МВТНУО¸НУ ТВНЫМ‰ НМУФНЫ (HH).
ììÒÒÚÚ‡‡ÌÌÓÓ‚‚Í͇‡ ÚÚÂÂÏÏÓÓ„„ÛÛÎÎflflÚÚÓÓ‡‡
1. з‡КЛП‡ИЪВ НМУФНЫ
MMOODDEE(GG
) ФУН‡ М‡ ‰ЛТФОВВ МВ ФУfl‚ЛЪТfl ТУУ·˘ВМЛВ
AAUUTTOO
.
2. СОfl Ы‚ВОЛ˜ВМЛfl ЛОЛ ЫПВМ¸¯ВМЛfl ЪВПФВ‡ЪЫ˚ М‡КПЛЪВ ++ËÎË --. мТЪ‡МУ‚ОВММ‡fl
Ъ‡НЛП У·‡БУП ЪВПФВ‡ЪЫ‡ ·Ы‰ВЪ ‡‚ЪУП‡ЪЛ˜ВТНЛ В„ЫОЛУ‚‡Ъ¸Тfl Л
ФУ‰‰ВКЛ‚‡Ъ¸Тfl ЪВПУТЪ‡ЪУП М‡ ФУТЪУflММУП ЫУ‚МВ.
3. дУ„‰‡ ЪВПФВ‡ЪЫ‡ ‚ ФУПВ˘ВМЛЛ ТЪ‡МВЪ М‡ 2° ‚˚¯В Б‡‰‡ММУИ, ФЛ·У
‚˚НО˛˜ЛЪТfl, ‡ ‚ВМЪЛОflˆЛfl УТЪ‡МУ‚ЛЪТfl ˜ВВБ МВТНУО¸НУ ТВНЫМ‰.
4. дУ„‰‡ ЪВПФВ‡ЪЫ‡ ‚ ФУПВ˘ВМЛЛ МЛКВ Б‡‰‡ММУИ, ФЛ·У ‡‚ЪУП‡ЪЛ˜ВТНЛ
М‡˜ЛМ‡ВЪ ‡·УЪ‡Ъ¸.
èèËËÏϘ˜‡‡ÌÌËËÂÂ::
НУ„‰‡ МВУ·ıУ‰ЛПУ ЛБПВМЛЪ¸ Б‡‰‡ММЫ˛ ЪВПФВ‡ЪЫЫ Л ВКЛП ФУ‚УУЪ‡
‚НО˛˜ВМ, ФЛ М‡К‡ЪЛЛ М‡ НМУФНЛ
++
ËÎË
––
ФЛ·У УТЪ‡М‡‚ОЛ‚‡ВЪТfl ‰Оfl
‚˚ФУОМВМЛfl ЫТЪ‡МУ‚НЛ МУ‚У„У БМ‡˜ВМЛfl ЪВПФВ‡ЪЫ˚. иУТОВ ‚˚ФУОМВМЛfl
ЫТЪ‡МУ‚НЛ ФЛ·У ‡‚ЪУП‡ЪЛ˜ВТНЛ М‡˜МВЪ ФУ‚У‡˜Л‚‡Ъ¸Тfl ‚МУ‚¸.
êêÂÂÊÊËËÏÏ ÚÚ‡‡ÈÈÏχ‡
кВКЛП Ъ‡ИПВ‡ ПУКВЪ ·˚Ъ¸ ‚НО˛˜ВМ ‚ О˛·УП ВКЛПВ ‡·УЪ˚ ФЛ·У‡. н‡ИПВ
ФУБ‚УОflВЪ Б‡ФУ„‡ППЛУ‚‡Ъ¸ ‚ВПfl ‡·УЪ˚ УЪ 1 ‰У 8 ˜‡ТУ‚.
иУТОВ Н‡К‰У„У М‡К‡ЪЛfl НМУФНЛ ЦÖ‚ВПfl ‡·УЪ˚ Ы‚ВОЛ˜Л‚‡ВЪТfl М‡ У‰ЛМ ˜‡Т.
иУТОВ Б‡‰‡МЛfl ‚ВПfl ‡·УЪ˚ ·Ы‰ВЪ ЫПВМ¸¯‡Ъ¸Тfl М‡ У‰ЛМ ˜‡Т, М‡ ‰ЛТФОВВ ·Ы‰ВЪ
ФУН‡Б‡МУ УТЪ‡‚¯ВВТfl ‚ВПfl. иУТОВ ЪУ„У, Н‡Н Б‡‰‡ММУВ ‚ВПfl УНУМ˜ЛЪТfl, ФЛ·У
‚˚НО˛˜ЛЪТfl. ЦТОЛ ФЛ·У МВ ‰УОУКВМ ‡·УЪ‡Ъ¸ ‚ ВКЛПВ Ъ‡ИПВ‡, В˘В ‡Б
М‡КПЛЪВ НМУФНЫ ЦÖ, ˜ЪУ·˚ ‚ВМЫЪ¸Тfl ‚ Ы˜МУИ ВКЛП, ФУТОВ ˜В„У ‰ЛТФОВИ ·Ы‰ВЪ
ФУН‡Б˚‚‡Ъ¸ 8 ˜‡ТУ‚.
îîÛÛÌÌÍ͈ˆËËflfl ÔÔ‰‰ÓÓÚÚ‚‚‡‡˘˘ÂÂÌÌËËflfl ÁÁ‡‡ÏÏÂÂÁÁ‡‡ÌÌËËflfl
СОfl ФВ‰УЪ‚‡˘ВМЛЛ Б‡ПВБ‡МЛfl ПУКМУ ФУ‰‰ВКЛ‚‡Ъ¸ ЪВПФВ‡ЪЫЫ ‚ ФУПВ˘ВМЛЛ
М‡ ЫУ‚МВ ФЛПВМУ 5°C ФЛ ПЛМЛП‡О¸МУП ‡ТıУ‰В ˝ОВНЪУ˝МВ„ЛЛ.
з‡КЛП‡ИЪВ НМУФНЫ
MMOODDEE(GG
) ФУН‡ М‡ ‰ЛТФОВВ МВ ФУfl‚ЛЪТfl ТУУ·˘ВМЛВ
AAUUTTOO
.
з‡КЛП‡ИЪВ НМУФНЫ “--” ‰У ЫТЪ‡МУ‚НЛ ЪВПФВ‡ЪЫ˚ 5°C.
дУ„‰‡ ЪВПФВ‡ЪЫ‡ ‚ ФУПВ˘ВМЛЛ МЛКВ Б‡‰‡ММУИ, ФЛ·У ‡‚ЪУП‡ЪЛ˜ВТНЛ М‡˜ЛМ‡ВЪ
‡·УЪ‡Ъ¸.
ààëëèèééããúúááééÇÇÄÄççààÖÖ ÑÑààëëííÄÄççññààééççççééÉÉéé ììèèêêÄÄÇÇããÖÖççààüü
СЛТЪ‡МˆЛУММУВ ЫФ‡‚ОВМЛВ ‰УОКМУ ЛТФУО¸БУ‚‡Ъ¸Тfl Т ФУ‚˚¯ВММ˚П ‚МЛП‡МЛВП.
1. з‡КПЛЪВ НМУФНЫ STAND-BY (HH).
2. СОfl ЪУ„У, ˜ЪУ·˚ УБМ‡НУПЛЪ¸Тfl Т ЩЫМНˆЛУМЛУ‚‡МЛВП НМУФУН ФУ‚УУЪ‡ (II), SET
TIME (EE), MODE (GG) Л В„ЫОЛУ‚НЛ ЪВПФВ‡ЪЫ˚ (FF), У·‡ЪЛЪВТ¸ Н Ф‡‡„‡ЩЫ
"омздсайзакйЗДзаЦ а щдлигмДнДсаь"
3. СОfl Б‡ПВМ˚ ·‡Ъ‡ВВН ТМЛПЛЪВ Н˚¯НЫ, ‡ТФУОУКВММЫ˛ М‡ Б‡‰МВИ ТЪУУМВ
ФЫО¸Ъ‡ ‰ЛТЪ‡МˆЛУММУ„У ЫФ‡‚ОВМЛfl. иЫО¸Ъ ‰ЛТЪ‡МˆЛУММУ„У ЫФ‡‚ОВМЛfl
‡·УЪ‡ВЪ М‡ ‰‚Ыı ‡ОН‡ОЛМУ‚˚ı ·‡Ъ‡ВИН‡ı ЪЛФ‡ ДДД (‚НО˛˜ВМ˚ ‚ НУПФОВНЪ
ФУТЪ‡‚НЛ, МУ ЫФ‡НУ‚‡М˚ УЪ‰ВО¸МУ).
4. зВ ЛТФУО¸БЫИЪВ ЛТФУО¸БУ‚‡ММ˚В ·‡Ъ‡ВИНЛ ‚ПВТЪВ Т МУ‚˚ПЛ, ЛПВ˛˘ЛПЛ ‰Ы„УИ
Á‡fl‰.
29
Page 30

ììïïééÑÑ
- СУ ‚˚ФУОМВМЛfl О˛·У„У ЫıУ‰‡ ЛБ‚ОВНЛЪВ ‚ЛОНЫ ЛБ УБВЪНЛ ˝ОВНЪУФЛЪ‡МЛfl.
-
ÇÇ ÚÚ˜˜ÂÂÌÌËË ÒÒÂÂÁÁÓÓÌ̇‡,, ÍÍÓÓ„„‰‰‡‡ ‚‚˚˚ ÔÔÓÓÎθ¸ÁÁÛÛÂÂÚÚÂÂÒÒ¸¸ ÔÔËË··ÓÓÓÓÏÏ,, ÔÔÂÂËËÓÓ‰‰Ë˘˜ÂÂÒÒÍÍËË ˜˜ËËÒÒÚÚËËÚÚÂÂ
ÔÔ˚˚ÎÎÂÂÒÒÓÓÒÒÓÓÏÏ Â¯¯ÂÂÚÚÍÍËË Ì̇‡ ÔÔÓÓ‰‰‡‡˜˜Â ËË ‚‚˚˚ııÓÓ‰‰Â ‚‚ÓÓÁÁ‰‰ÛÛıı‡‡..
- зЛ ‚ НУВП ТОЫ˜‡В МВ ЛТФУО¸БЫИЪВ ‡·‡БЛ‚М˚В ФУУ¯НЛ ЛОЛ ‡ТЪ‚УЛЪВОЛ.
ååÖÖêêõõ èèêêÖÖÑÑééëëííééêêééÜÜççééëëííàà
- зВ ЛТФУО¸БЫИЪВ ˝ЪУЪ М‡„В‚‡ЪВО¸М˚И ФЛ·У ‚ МВФУТВ‰ТЪ‚ВММУИ ·ОЛБУТЪЛ УЪ
‰Ы¯‡, ‚‡ММ˚, ЫНУПУИМЛН‡, ·‡ТТВИМ‡ Л Ъ.‰.
- аТФУО¸БЫИЪВ ФЛ·У ЪУО¸НУ ‚ ‚ВЪЛН‡О¸МУП ФУОУКВМЛЛ.
- зВ ЛТФУО¸БЫИЪВ ФЛ·У ‰Оfl ТЫ¯НЛ ·ВО¸fl, МВ Б‡Н˚‚‡ИЪВ В¯ВЪНЛ ФУ‰‡˜Л Л
‚˚ıУ‰‡ ‚УБ‰Ыı‡ (‚УБПУКВМ ФВ„‚ ФЛ·У‡).
- ç ‡Á¯‡ÈÚ ÔÓθÁÓ‚‡Ú¸Òfl ÔË·ÓÓÏ Î˛‰flÏ (‚ ÚÓÏ ˜ËÒÎÂ Ë ‰ÂÚflÏ) Ò
ФУМЛКВММ˚П ЫУ‚МВП ‚УТФЛflЪЛfl Л ФТЛıУЩЛБЛ˜ВТНЛı ‚УБПУКМУТЪВИ ЛОЛ Т
МВ‰УТЪ‡ЪУ˜М˚П УФ˚ЪУП Л БМ‡МЛflПЛ, Б‡ ЛТНО˛˜ВМЛВП ТОЫ˜‡В‚, НУ„‰‡ Б‡ МЛПЛ
‚МЛП‡ЪВО¸МУ ТОВ‰flЪ, Л УМЛ У·Ы˜ВМ˚ УЪ‚В˜‡˛˘ЛП Б‡ Лı ·ВБУФ‡ТМУТЪ¸ ˜ВОУ‚ВНУП.
лОВ‰ЛЪВ Б‡ ‰ВЪ¸ПЛ, Ы·В‰ЛЪВТ¸ ‚ ЪУП, ˜ЪУ ФЛ·У МВ ТОЫКЛЪ ЛП Л„Ы¯НУИ.
- èË·ÓÛ ÌÂθÁfl ̇ıÓ‰ËÚ¸Òfl ̇ ‡ÒÒÚÓflÌËË ·ÎËÊ 50 ÒÏ ÓÚ Ï·ÂÎË ËÎË ‰Û„Ëı
Ô‰ÏÂÚÓ‚.
- зВ ˝НТФОЫ‡ЪЛЫИЪВ ФЛ·У fl‰УП ТУ ТЪВМ‡ПЛ, ПВ·ВО¸˛, Б‡М‡‚ВТflПЛ Л Ъ.‰.
- зВ ВНУПВМ‰ЫВЪТfl ФУО¸БУ‚‡Ъ¸Тfl Ы‰ОЛМЛЪВОВП. ЦТОЛ ЛТФУО¸БУ‚‡МЛВ Ы‰ОЛМЛЪВОfl
ТЪ‡МУ‚ЛЪТfl МВУ·ıУ‰ЛП˚П, ‚МЛП‡ЪВО¸МУ ТОВ‰ЫИЪВ ЛМТЪЫНˆЛflП, ФЛО‡„‡ВП˚П Н
Ы‰ОЛМЛЪВО˛, МВ ФВ‚˚¯‡fl ФВ‰ВО¸МУИ ПУ˘МУТЪЛ, ЫН‡Б‡ММУИ М‡ Ы‰ОЛМЛЪВОВ.
- ÖÒÎË ¯ÌÛ ÔËÚ‡ÌËfl
ÔÔÓÓ‚‚ÂÂÊʉ‰ÂÂÌÌ
, УМ ‰УОКВМ ·˚Ъ¸
ÁÁ‡‡ÏÏÂÂÌÌÂÂÌÌ
ФУЛБ‚У‰ЛЪВОВП ЛОЛ
В„У ТВ‚ЛТМУИ ЪВıМЛ˜ВТНУИ ТОЫК·УИ ЛОЛ, ‚ О˛·УП ТОЫ˜‡В, Н‚‡ОЛЩЛˆЛУ‚‡ММ˚П
ТФВˆЛ‡ОЛТЪУП,
˜˜ÚÚÓÓ ÔÔÓÓÁÁ‚‚ÓÓÎÎËËÚÚ ËËÁÁ··ÂÂÊʇ‡ÚÚ¸¸ Îβ˛··ÓÓ„„ÓÓ ËËÒÒÍ͇‡..
- иЛ·У МВ ‰УОКВМ М‡ıУ‰ЛЪ¸Тfl МВФУТВ‰ТЪ‚ВММУ ФУ‰ УБВЪНУИ ˝ОВНЪУФЛЪ‡МЛfl.
- зВ ЛТФУО¸БЫИЪВ ФЛ·У ‚ ФУПВ˘ВМЛЛ Т ФОУ˘‡‰¸˛ ПВМ¸¯В 4 П
2
.
- èË·Ó Ò̇·ÊÂÌ
ÔÔ‰‰ÓÓıı‡‡ÌÌËËÚÚÂÂÎθ¸ÌÌ˚˚ÏÏ ‚‚˚˚ÍÍÎβ˛˜˜‡‡ÚÚÂÂÎÎÂÂÏÏ
, НУЪУ˚И УЪНО˛˜‡ВЪ В„У ‚
ТОЫ˜‡В ТОЫ˜‡ИМУ„У Ф‡‰ВМЛfl. СОfl ФУ‚ЪУМУ„У ‚НО˛˜ВМЛfl ФЛ·У‡ ‰УТЪ‡ЪУ˜МУ
ФВВ‚ВТЪЛ В„У ‚ ‚ВЪЛН‡О¸МУВ ФУОУКВМЛВ.
- иЛ ФВ‚УП ‚НО˛˜ВМЛЛ ‰‡ИЪВ ФЛ·УЫ ФУ‡·УЪ‡Ъ¸ М‡ П‡НТЛП‡О¸МУИ ПУ˘МУТЪЛ ‚
ЪВ˜ВМЛВ ПЛМЛПЫП 2 ˜‡ТУ‚. ЗУ ‚ВПfl ˝ЪУИ УФВ‡ˆЛЛ ıУУ¯У ФУ‚ВЪЛ‚‡ИЪВ
ФУПВ˘ВМЛВ ‰Оfl ЪУ„У, ˜ЪУ·˚ Ы‰‡ОЛЪ¸ Б‡Ф‡ı "МУ‚У„У ФЛ·У‡", НУЪУ˚И УЪ МВ„У
ЛТıУ‰ЛЪ. Д·ТУО˛ЪМУ МУП‡О¸МУ, ВТОЛ ФЛ·У ФЛ ФВ‚УП ‚НО˛˜ВМЛЛ ·Ы‰ВЪ
ФУЪВТНЛ‚‡Ъ¸.
ììÒÒÚÚÓÓÈÈÒÒÚÚ‚‚ÓÓ ‡‡‚‚‡‡ËËÈÈÌÌÓÓÈÈ ··ÎÎÓÓÍÍËËÓÓ‚‚ÍÍËË
УЪНО˛˜ЛЪ ЪВФОУ‚ВМЪЛОflЪУ ‚ ТОЫ˜‡В В„У
ÒÒÎÎÛÛ˜˜‡‡ÈÈÌÌÓÓ„„ÓÓ ÔÔ„„‚‚‡‡
(М‡ФЛПВ, ‚ ТОЫ˜‡В ВТОЛ Б‡Н˚Ъ˚ В¯ВЪНЛ ФУ‰‡˜Л Л ‚˚ıУ‰‡
‚УБ‰Ыı‡, ПВ‰ОВММУ„У ‚‡˘ВМЛfl ПУЪУ‡ ЛОЛ В„У УТЪ‡МУ‚НЛ). СОfl ‚УБУ·МУ‚ОВМЛfl
‡·УЪ˚ МВУ·ıУ‰ЛПУ М‡ МВТНУО¸НУ ПЛМЫЪ ЛБ‚ОВ˜¸ ‚ЛОНЫ ЛБ УБВЪНЛ ˝ОВНЪУФЛЪ‡МЛfl,
ЫТЪ‡МЛЪ¸ ФЛ˜ЛМЫ ФВ„‚‡ Л Б‡ЪВП ‚МУ‚¸ ‚ТЪ‡‚ЛЪ¸ ‚ЛОНЫ ‚ УБВЪНЫ.
ééÅÅêêÄÄííààííÖÖ ÇÇççààååÄÄççààÖÖ::
‰Оfl ЪУ„У, ˜ЪУ·˚ ЛБ·ВК‡Ъ¸ ФВ„‚‡, МЛ ‚ НУВП
ТОЫ˜‡В МВ М‡Н˚‚‡ИЪВ ФЛ·У ‚У ‚ВПfl ‡·УЪ˚, Ъ‡Н Н‡Н ˝ЪУ ‚˚БУ‚ВЪ УФ‡ТМУВ
ФУ‚˚¯ВМЛВ ЪВПФВ‡ЪЫ˚.
ÇÇççààååÄÄççààÖÖ::
‰Оfl ЪУ„У, ˜ЪУ·˚ ЛБ·ВК‡Ъ¸ УФ‡ТМУТЪВИ, Т‚flБ‡ММ˚ı ТУ ТОЫ˜‡ИМ˚П
Т·УТУП ФВВНО˛˜‡ЪВОfl ЪВПУВОВ, М‡ФflКВМЛВ ФЛЪ‡МЛfl МВО¸Бfl ФУ‰‡‚‡Ъ¸ М‡
ФЛ·У ˜ВВБ ‚МВ¯МВВ ЫТЪУИТЪ‚У ‚НО˛˜ВМЛfl/‚˚НО˛˜ВМЛfl, М‡ФЛПВ, Ъ‡ИПВ, ‡
Ъ‡Н КВ ФУ‰НО˛˜‡Ъ¸ В„У Н ТВЪЛ, НУЪУ‡fl В„ЫОflМУ УЪНО˛˜‡ВЪТfl Л ФУ‰НО˛˜‡ВЪТfl
ФУТЪ‡‚˘ЛНУП ˝ОВНЪУ˝МВ„ЛЛ.
30
Page 31

A KÉSZÜLÉK LEÍRÁSA
A Kezelőpanel
B Levegőkivezető rács
C Motorizált talp
D Jelzőlámpa
E Set time nyomógomb
F Hőmérséklet-szabályozó nyomógomb
G MODE nyomógomb
H STAND-BY nyomógomb
I Oszcilláció nyomógomb
L Főkapcsoló
ELEKTROMOS BEKÖTÉS
- Mielőtt a villásdugót a hálózati csatlakozóaljzatba illesztené, gondosan ellenőrizze,
hogy a hálózati feszültség megegyezik-e a készüléken V-ban feltüntetett értékkel,
valamint hogy a csatlakozóaljzat és a tápvonal megfelel-e a kívánt terhelésnek.
- EZ A KÉSZÜLÉK MEGFELEL A RÁDIÓZAVAROK KIKÜSZÖBÖLÉSÉRE VONATKOZÓ
89/336/CEE.
BEÁLLÍTÁS
A készülék bármilyen vízszintes felületre támasztva használható. Ne terhelje túl az elektromos hálózatot azzal, hogy ugyanabba a csatlakozóaljzatba más készülékeket is kapcsol.
MŰKÖDÉS ÉS HASZNÁLAT
1. Mielőtt a villásdugót a hálózati csatlakozóaljzatba illesztené ellenőrizze, hogy a
készülék ki van-e kapcsolva.
2. Kösse a készüléket az elektromos csatlakozóaljzatba.
3. A készülék bekapcsolásához a készülék hátoldalán levő kapcsolónak (L) az I. állásban
kell lennie. A készülék ekkor egy hangjelzést ad ki, a jelzőlámpa (D) felgyullad és addig
égve marad amíg a készülék áramellátás alatt van.
4. Nyomja meg a (H) nyomógombot a készülék bekapcsolására.
5. Bekapcsoláskor a készülék LOW üzemmódban működik (minimális teljesítményen
való üzemelés). A kijelző a környezeti hőmérsékletet mutatja.
6. A MODE (G) nyomógomb megnyomásával a készülék HIGH üzemmódban működik
(maximális teljesítményen való üzemelés). A kijelző a környezeti hőmérsékletet
mutatja.
7. A MODE (G) nyomógomb ismételt megnyomásával a készülék AUTO üzemmódban
fog működni. A kijelző a beállított hőmérsékleti értékeket fogja mutatni. A beállítotthoz
képest eltérő hőmérsékleti értékek beállításához használja a + és - gombokat. Néhány
másodperc után a kijelző a környezeti hőmérsékletet fogja mutatni.
8. A MODE (G) nyomógomb ismételt megnyomásával a készülék visszatér a LOW
üzemmódban való működésre. A MODE nyomógomb folyamatos lenyomásával a
készülék egymás után a következő funkciókat választja ki: LOW HIGH AUTO.
9. A készülék kikapcsolásához nyomja meg pár másodpercre a H nyomógombot, a
készülék hátoldalán levő kapcsolót (L) pedig helyezze a 0. állásba.
MOTORIZÁLT TALP
A készülék motorizált talppal rendelkezik. A levegőáram nagyobb területen való
elosztásához nyomja meg az (I) oszcilláció nyomógombot. Az így aktivált készülék jobbra
és balra fog forogni, oszcillálni.
Az oszcilláció kívánt pozícióban való leállításához elég ismét megnyomni az
(I)
nyomógombot.
A készülék kikapcsolásához néhány másodpercig tartsa lenyomva a (H) nyomógombot.
31
HU
Page 32

32
A termosztát beállítása
1.
Nyomja meg a MODE (G) nyomógombot amíg a kijelzőn meg nem jelenik az AUTO felirat.
2. A + vagy – nyomógomb segítségével növelhető vagy csökkenthető a beállított
hőmérséklet. A termosztát az így beállított hőmérsékletet ezután automatikusan
szabályozza és állandó szinten tartja.
3. Amikor a környezeti hőmérséklet 2˚C-kal magasabb a beállított hőmérsékletnél, a
készülék kikapcsol és a ventiláció néhány másodperc után leáll.
4. Amikor a környezeti hőmérséklet alacsonyabb a beállított hőmérsékletnél, a készülék
automatikusan bekapcsol.
Megjegyzés: Amikor meg akarja változtatni a beállított hőmérsékletet és az oszcilláló
üzemmód aktív, a + vagy – nyomógombok révén a készülék leállítható az új
hőmérséklet beállításához. A beállítás után az oszcilláció automatikusan újraindul
Timer funkció
Ez a funkció bármelyik üzemmódból aktiválható. A timer segítségével a készülék
működési ideje 1-8 órára programozható be.
Az (E) nyomógomb minden megnyomásakor a működési idő egy órával nő.
A timer beállítása után az idő óráról órára csökken és a kijelző a fennmaradó időt mutatja.
A beállított idő lejártával a készülék kikapcsol.
Ha a készüléket nem akarja használni timer üzemmódban, a manuális üzemmódra való
visszatéréshez nyomja meg ismét az (E) gombot miután a kijelző 8 h-t mutat.
Fagyásgátló funkció
A készülék kb. 5˚C-on tartja a környezet hőmérsékletét és minimális energiafogyasztással
megakadályozza a fagyást.
Nyomja meg a MODE (G) nyomógombot amíg a kijelzőn meg nem jelenik az AUTO felirat.
A – nyomógombbal állítsa be a hőmérsékletet 5˚C-ra.
Amikor a környezeti hőmérséklet alacsonyabb a beállított hőmérsékletnél, a készülék
automatikusan bekapcsol.
A TÁVIRÁNYÍTÓ HASZNÁLATA
A távirányítót nagyon óvatosan kell kezelni.
1. Nyomja meg a STAND-BY (H) nyomógombot.
2. Az oszcilláció (I), a SET TIME (E), a MODE (G) és a hőmérséklet-szabályozó (F)
nyomógombok működéséhez tanulmányozza a ”MŰKÖDÉS ÉS HASZNÁLAT” szakaszt.
3. Az elemek kicseréléséhez vegye le a távirányító hátoldalán levő fedelet. A távirányító
két darab AAA típusú alkáli elemmel (a gyári kiszerelésben, de külön csomagolva)
működik.
4. Ne alkalmazzon használt elemeket új elemekkel együtt, melyek eltérő tulajdonságúak.
KARBANTARTÁS
- Mielőtt bármilyen tisztítási műveletbe kezdene, mindig húzza ki a villásdugót a hálózati
csatlakozóaljzatból.
- A fűtési idényben egy porszívó segítségével rendszeresen tisztítsa meg a levegő
bevezető és kivezető rácsokat.
- Soha ne használjon dörzshatású tisztítószereket vagy oldószereket.
FIGYELMEZTETÉSEK
- Soha ne használja a fűtőkészüléket zuhanyzók, fürdőkádak, mosdókagylók,
úszómedencék, stb. közvetlen közelében.
Page 33

-A készüléket mindig és kizárólag csak függőleges helyzetbe állítva üzemeltesse.
-A készüléket ne használja ruhaszárításra. Ne zárja el a levegő bevezető és kivezető
rácsokat (túlhevülés veszélye).
- Ne engedje, hogy a készüléket csökkent szellemi-fizikai-szenzorikus képességű vagy
nem megfelelő tapasztalattal és tudással rendelkező személyek (beleértve gyermekek)
használják, hacsak nincsenek egy, a biztonságukért felelős személy felügyelete alatt
és nem lettek kellően felvilágosítva a készülék használatáról. A gyermekeket tartsa
felügyelet alatt, hogy ne használhasság játékszerként a készüléket.
-A készülék és a bútorok, vagy más tárgyak között hagyjon legalább 50 cm-es
távolságot.
- Ne üzemeltesse a készüléket falak, bútorok, függönyök, stb. közelében.
-A készülékkel nem tanácsos hosszabbítókat használni. Ha ez mégis elkerülhetetlen,
akkor pontosan tartsa be a hosszabbítóhoz mellékelt útmutató előírásait, és ne lépje
túl a hosszabbítón feltüntetett teljesítményt.
-Ha a hálózati csatlakozókábel sérült, azt a veszélyek elkerülése érdekében a
gyártónak, egy márkaszerviznek vagy egy hasonló képesítéssel rendelkező
személynek kell kicserélni.
-A készüléket ne helyezze közvetlenül egy fali csatlakozóaljzat alá.
- Ne használja a készüléket 4 m
2
-nél kisebb helyiségben.
-A készülék egy felborulás elleni védőszerkezettel van ellátva, ami felborulás esetén
kikapcsolja a készüléket. A készülék ismételt beindításához azt elég függőleges helyzetbe visszállítani.
-A legelső bekapcsoláskor a készüléket legalább 2 óráig működtesse maximális
teljesítményen. A művelet közben jól szellőztesse ki a helyiséget, hogy a készülék által
kibocsátott ”új” szag eltávozhasson. Teljesen természetes, hogy a készülék az első
bekapcsoláskor ”pattogó hangot” ad ki.
A készülék véletlen túlhevülése (pl. a levegő bevezető és kivezető rácsok elzárása ill.
eltömődése, a motor elakadása vagy lassú forgása) esetén egy biztonsági szerkezet
megszakítja a termoventilátor működését. Az ismételt beüzemeléshez egy pár percre
húzza ki a villásdugót a hálózati csatlakozóaljzatból, szüntesse meg a túlhevülés okát,
majd illessze vissza a villásdugót
FONTOS! A túlmelegedés elkerülésére semmi esetre se fedje be a működésben levő
készüléket, mert az veszélyes hőmérséklet-növekedést okozhat.
FIGYELMEZTETÉS: a hőkioldó kapcsoló véletlen visszaállításával összefüggő
veszélyek elkerülésére a készülék nem működtethető külső be/kikapcsoló szerkezettel, mint pl. egy timer és nem kapcsolható olyan áramkörre, melyet az
energiaszolgáltató rendszeresen be- és kikapcsol.
A termék megfelelő módon történő hulladékkezelésére vonatkozó fontos tudnivalók a 2002/96/EC
irányelv értelmében.
A hasznos élettartamának végére érkezett készüléket nem szabad a lakossági hulladékkal
együtt kezelni. A leselejtezett termék az önkormányzatok által kijelölt szelektív
hulladékgyűjtőkben (hulladékgyűjtő udvar) vagy az elhasználódott készülékek visszavételét
végző kereskedőknél adható le. Az elektromos háztartási készülékek szelektív gyűjtése és
kezelése lehetővé teszi a nem megfelelően végzett hulladékkezelésből adódó, a környezetet és
az egészséget veszélyeztető negatív hatások megelőzését és a készülék alkotórészeinek
újrahasznosítását, melynek révén jelentős energia- és erőforrás-megtakarítás érhető el. Az elektromos háztartási készülékek szelektív gyűjtésére és kezelésére vonatkozó kötelezettséget a
terméken feltüntetett áthúzott szemétgyűjtő edény (szemeteskuka) jelzés mutatja.
33
Page 34

POPIS P¤ÍSTROJE
A Kontrolní panel
B MfiíÏka pro v˘stup vzduchu
C Motorizovan˘ podstavec
D Svûtelná kontrolka
E Tlaãítko Set time
F Tlaãítko regulace teploty
G Tlaãítko MODE
H Tlaãítko STAND-BY
I Tlaãítko pro pohyb
L Hlavní vypínaã
ELEKTRICKÉ ZAPOJENÍ
- Pfied zapojením zástrãky síÈového kabelu do zásuvky elektrického proudu peãlivû zkontro-
lujte, zda napûtí rozvodu elektrického proudu ve Va‰í domácnosti odpovídá hodnotû napûtí
uvedené ve voltech na spotfiebiãi a zda je napájecí vedení správnû dimenzováno pro
poÏadovanou zátûÏ.
- TENTO V¯ROBEK JE V SOULADU SE SMùRNICÍ EHS 89/336 O POTLAâENÍ
RÁDIOVÉHO RU·ENÍ.
INSTALACE
Spotfiebiã je moÏno provozovat na jakémkoliv podkladu, kter˘ musí b˘t vodorovn˘.
NepouÏívat jedinou zásuvku pro více spotfiebiãÛ, zabráníte tím pfietûÏování elektrické sítû.
PROVOZ A POUÎÍVÁNÍ
1. Pfied kaÏd˘m zapojením zástrãky do zásuvky elektrického proudu je tfieba ovûfiit, zda je
spotfiebiã vypnut˘.
2. Zástrãku spotfiebiãe zasunout do zásuvky el. proudu .
3. Pro zapínání pfiístroje musí b˘t vypínaã (L) na zadní stranû pfiístroje nastaven do polohy I.
Pfiístroj zapípá, rozsvítí se kontrolka (D), která bude svítit po celou dobu, kdy bude pfiístroj
pod napûtím.
4. Stisknutím tlaãítko (H) pfiístroj zapnûte.
5. Po zapnutí pracuje spotfiebiã v reÏimu LOW (funkce na minimální v˘kon). Displej zobrazuje
teplotu okolního prostfiedí.
6. Stisknutím tlaãítka MODE (G) zaãne pfiístroj pracovat v reÏimu HIGH (funkce pfii
maximálním v˘konu). Displej zobrazuje teplotu okolního prostfiedí,
7. Opûtn˘m stisknutím tlaãítka MODE (G) pfiístroj pracuje v reÏimu AUTO Displej zobrazuje
soubor nastavení pro teplotu Zmûna a nastavení jiného souboru teploty se provádí pomocí
tlaãítek + a -. Po nûkolika vtefiinách spotfiebiãe opût zobrazuje teplotu v prostfiedí.
8. Po dal‰ím stisknutí tlaãítka MODE (G) zaãne spotfiebiã opût fungovat na zpÛsob LOW.
Opakovan˘m stisknutím tlaãítka MODE, bude spotfiebiã zobrazovat postupnû následující
funkce: LOW HIGH AUTO.
9. Vypnutí spotfiebiãe se provede stisknutím tlaãítka H na nûkolik vtefiina a pfiesunutím vypí-
naãe (L) na zadní stranû pfiístroje do polohy 0.
MOTORIZOVAN¯ PODSTAVEC
Spotfiebiã je vybaven motorizovan˘m podstavcem pro umoÏnûní v˘kyvného pohybu. Pokud má
b˘t proud vzduchu rozpt˘len ve vût‰í vzdálenosti, je tfieba stisknout tlaãítko pro pohyb (I).
Po aktivování této funkce zaãne spotfiebiã provádût otáãiv˘ pohyb doprava a doleva.
Pro zastavení pohybu v poÏadované poloze staãí opût stisknout tlaãítko (I).
Pro vypnutí spotfiebiãe je tfieba stisknout tlaãítko (H) po dobu nûkolika vtefiin.
34
CZ
Page 35

35
Regulace termostatu
1. Stisknûte tlaãítko MODE (G) aÏ do doby, kdy se na displeji objeví nápis AUTO.
2. Pomocí tlaãítek + nebo – sníÏit nebo zvy‰it nastavenou teplotu. Takto nastavená teplota
bude termostatatem automaticky regulována a udrÏována na stálé hodnotû.
3. Jakmile teplota prostfiedí dosáhne hodnoty o 2°C vy‰‰í neÏ nastavená teplota, pfiístroj se
vypne a po nûkolika dal‰ích vtefiinách se zastaví i ventilátor.
4. Jakmile teplota prostfiedí klesne pod nastavenou hodnotu, pfiístroj automaticky obnoví svou
funkci.
Poznámka: pokud je poÏadována zmûna v nastavené teplotû a je aktivní funkce pohybu,
spotfiebiã se po stisknutí tlaãítek + nebo – zastaví a takto umoÏní nové nastavení hodnot
poÏadovan˘ch pro teplotu. Po dokonãení tohoto nastavení se automaticky obnoví v˘kyvn˘
pohyb podstavce.
Funkce Timer
Tuto funkci ãasového spínaãe je moÏné nastavit pfii kterémkoliv druhu provozu. Timer
umoÏÀuje naprogramovat ãas provozu po dobu od 1 do 8 hodin. Po kaÏdém stisknutí tlaãítka
(E) se ãas pro chod zv˘‰í o jednu hodinu.
Po nastavení se ãas pro chod zobrazen˘ na displeji sniÏuje po jedné hodinû a zobrazuje ãas
kter˘ zb˘vá do konce chodu. Po ukonãení nastavené doby se spotfiebiã vypne..
Pokud není poÏadován chod spotfiebiãe s pomocí funkce timer, je tfieba pro návrat na funkci
ruãní nastavení opût stisknout tlaãítko (E) poté co displej zobrazuje 8 hod.
Protizámrazová funkce
Pfiístroj umoÏÀuje udrÏovat teplotu prostfiedí na hodnotû pfiibliÏnû 5°C a zabraÀuje tak zamrznutí s minimální spotfiebou elektrické energie. Stisknout tlaãítko MODE (G) , aÏ dokud se na
displeji nezobrazí nápis AUTO. Pomocí tlaãítka “-” provést nastavení souboru pro teplotu na
(5°C). Jakmile teplota prostfiedí klesne pod nastavenou hodnotu, pfiístroj automaticky obnoví
svou funkci.
POUÎÍVÁNÍ DÁLKOVÉHO OVLÁDÁNÍ
Vûnovat pouÏívání dálkového ovládání náleÏitou pozornost
1. Stisknout tlaãítko STAND-BY (H).
2. ZpÛsob ovládání tlaãítek pro v˘kyvn˘ pohyb (I), SET TIME (E), MODE (G) a pro regulaci
teploty (F) je tfieba postupovat zpÛsobem popsan˘m v odstavci“ PROVOZ A POUÎÍVÁNÍ ”.
3. K v˘mûnû baterií je tfieba sejmout víãko na zadní ãásti dálk. ovládání. Dálkové ovládání
pouÏívá dvû alkalinové baterie typu AAA (jsou souãástí spotfiebiãe, ale baleny oddûlenû).
4. NepouÏívat staré baterie spoleãnû s nov˘mi a baterie s jin˘mi hodnotami .
ÚDRÎBA
- Pfied jak˘mkoliv ãi‰tûním spotfiebiãe je tfieba vÏdy vytáhnout zástrãku síÈového kabelu ze
zásuvky el. proudu.
- Po dobu provozní sezóny je tfieba pomocí vysavaãe pravidelnû ãistit vstupní a v˘stupní
mfiíÏky.
- Nikdy nepouÏívat brusné prá‰ky nebo fiedidla.
UPOZORNùNÍ
- Nikdy nepouÏívejte tepeln˘ spotfiebiã v bezprostfiední blízkosti vany, sprchy, um˘vadel,
bazénÛ apod.
- Spotfiebiã pouÏívejte vÏdy a pouze ve svislé poloze.
- NepouÏívejte spotfiebiã k su‰ení prádla, nepfiikr˘vejte mfiíÏku vstupu a v˘stupu vzduchu
(nebezpeãí pfiehfiátí).
Page 36

- Nedovolit provozování spotfiebiãe osobám (i dûtem) s omezen˘mi psycho-fyzick˘mi a
poznávacími schopnostmi anebo tûm, ktefií mají nedostateãné zku‰enosti a znalosti, pokud
nejsou pod patfiiãn˘m dozorem a dostateãnû instruovány osobou, která je zodpovûdná za
jejich bezpeãnost. Dûti je tfieba hlídat, aby si se spotfiebiãem nehrály.
- Ve vzdálenosti do 50 cm pfied spotfiebiãem se nesmí nacházet nábytek a jiné pfiedmûty.
- Spotfiebiã nesmí b˘t provozován v bezprostfiední blízkosti stûn, nábytku, záclon apod.
- Nedoporuãuje se pouÏívání prodluÏovací ‰ÀÛry. Pokud je nutné pouÏít prodluÏovací ‰ÀÛru,
dodrÏujte peãlivû pokyny, které jsou k ní pfiiloÏené. Dbejte, aby nedo‰lo k pfiekroãení mezní
hodnoty v˘konu prodluÏovací ‰ÀÛry.
- Pokud dojde k po‰kození síÈového kabelu smí jeho v˘mûnu provádût pouze v˘robce, jeho
servisní stfiedisko nebo kvalifikovan˘ odborník, pfiedejdete tak jakémukoliv riziku.
- L’apparecchio non deve essere posto immediatamente sotto una presa di corrente fissa.
- NepouÏívejte tento spotfiebiã v místnosti s plochou men‰í neÏ 4 m
2
.
-Pfiístroj je opatfien bezpeãnostním zafiízením pfii upadnutí , kter˘ v pfiípadû náhodného
pfiehfiátí tepeln˘ ventilátor vypne. K obnovení provozu spotfiebiãe je tfieba opût postavit ventilátor do svislé polohy.
- Pfii prvním spu‰tûní je tfieba nechat spotfiebiã bûÏet po dobu alespoÀ 2 hodin na maximální
v˘kon. Bûhem tohoto provozu je tfieba dÛkladnû místnost vûtrat, aby se odstranil „zápach
novoty“ kter˘ vychází ze spotfiebiãe. Je zcela normální, Ïe spotfiebiã vydává pfii prvním uve-
dení do chodu skfiípavé zvuky.
Bezpeãnostní zafiízení pfieru‰í chod tepelného ventilátoru v pfiípadû jeho nechtûného pfiehfiátí
(napfi. následkem ucpání vstupních a v˘stupních mfiíÏek vzduchu, motoru, kter˘ se neotáãí nebo
se otáãí pomalu). Pro obnovení jeho chodu je tfieba vytáhnout zástrãku ze zásuvky na dobu
nûkolika minut , odstranit pfiíãinu pfiehfiátí a znovu zasunout zástrãku do zásuvky.
DÒLEÎITÉ: Aby se pfiede‰lo pfiehfiívání, nesmí b˘t spotfiebiã bûhem provozu v Ïádném
pfiípadû zakr˘ván, vzhledem k tomu, Ïe takto by do‰lo k nebezpeãnému zv˘‰ení
teploty.
UPOZORNùNÍ: aby se pfiede‰lo rizikÛm spojen˘n s náhodn˘m vynulováním vypínaãe a
tepelného relé, nesmí b˘t tento spotfiebiã napájen prostfiednictvím externího zafiízení pro
vypínání/zapínání, jako je napfi. timer, ani nesmí b˘t pfiipojen na okruh kter˘ je vypínán a
zapínán dodavatelem energie.
Informace pro správném se‰rotování v˘robku ve smyslu Evropské Smûrnice 2002/96
Po ukonãení doby své Ïivotnosti nesmí b˘t v˘robek odklizen spoleãnû s domácím odpadem. Je tfieba
zabezpeãit jeho odevzdání na specializovaná místa sbûru tfiídûného odpadu, zfiizovan˘ch mûstskou
správou anebo prodejcem, kter˘ zabezpeãuje tuto sluÏbu.Oddûlené se‰rotování elektrospotfiebiãÛ je
zárukou prevence negativních vlivÛ na Ïivotní prostfiedí a na zdraví, které zpÛsobuje nevhodné
nakládání, umoÏÀuje recyklaci jednotliv˘ch materiálÛ a tím i v˘znamnou úsporu energií a surovin.
Pro úãely zdÛraznûní povinnosti tfiídûného sbûru odpadu elektrospotfiebiãÛ je na v˘robku za‰krtnut˘
pfiíslu‰n˘ symbol pro sbûr tfiídûného odpadu.
36
Page 37

OPIS URZÑDZENIA
A Panel sterowania
B Kratka wylotu powietrza
C Ruchoma podstawa
D Lampka kontrolna
E Przycisk Set time
F Przycisk regulacji temperatury
G Przycisk MODE
H Przycisk STAND-BY
I Przycisk rotacji
L Wy∏àcznik g∏ówny
POD¸ÑCZENIE ELEKTRYCZNE
- Przed w∏o˝eniem wtyczki do gniazdka nale˝y dok∏adnie sprawdziç, czy napi´cie domowej
sieci zasilajàcej odpowiada wartoÊci podanej w V na urzàdzeniu i czy gniazdko zasilajà-
ce i linia zasilajàca posiadajà obcià˝enie odpowiadajàce urzàdzeniu.
- URZÑDZENIE JEST ZGODNE Z DYREKTYWÑ 89/336/CEE USUWANIA ZAK¸ÓCE¡
RADIOWYCH.
INSTALOWANIE
Urzàdzenie mo˝na stosowaç na dowolnym pod∏o˝u pod warunkiem, ˝e b´dzie ono poziome.
Nie prze∏adowywaç obwodu elektrycznego unikajàc stosowania tego samego gniazdka zasilajàcego dla innych urzàdzeƒ.
DZIA¸ANIE I U˚YTKOWANIE
1. Przed w∏o˝eniem wtyczki do gniazdka zasilajàcego nale˝y si´ upewniç czy urzàdzenie jest
wy∏àczone.
2. Pod∏àczyç urzàdzenie do gniazdka zasilajàcego.
3.
W celu w∏àczenia urzàdzenia wy∏àcznik (L) umieszczony w tylnej cz´Êci urzàdzenia powinien znaj-
dowaç si´ w pozycji I. Urzàdzenie wyemituje sygna∏ dêwi´kowy, zapali si´ lampka kontrolna (D) i
pozostanie zapalona, dopóki urzàdzenie b´dzie pod∏àczone do zasilania.
4. Nacisnàç przycisk (H)w celu w∏àczenia urzàdzenia.
5. Po w∏àczeniu urzàdzenie dzia∏a w trybie LOW (dzia∏anie z minimalnà mocà). WyÊwietlacz
pokazuje temperatur´ otoczenia.
6. Po naciÊni´ciu przycisku MODE (G), urzàdzenie dzia∏a w trybie HIGH (dzia∏anie z maksy-
malnà mocà). WyÊwietlacz pokazuje temperatur´ otoczenia.
7. Po ponownym naciÊni´ciu przycisku MODE (G), urzàdzenie dzia∏a w trybie AUTO.
WyÊwietlacz pokazuje temperatur´ otoczenia i wartoÊç ustawionej temperatury. W celu
dokonania zmiany ustawionej temperatury nale˝y u˝yç przycisk + lub - . Po kilku sekunda-
ch wyÊwietlacz poka˝e temperatur´ otoczenia.
8. Po czwartym naciÊni´ciu przycisku MODE (G), urzàdzenie powróci do trybu dzia∏ania
LOW. Po kolejnym naciÊni´ciu przycisku MODE urzàdzenie wybierze w sekwencji
nast´pujàce funkcje: LOW HIGH AUTO.
9. Aby wy∏àczyç urzàdzenie, nale˝y nacisnàç na kilka sekund przycisk H i ustawiç wy∏àcznik
(L) umieszczony w tylnej cz´Êci urzàdzenia w pozycji 0.
RUCHOMA PODSTAWA
Urzàdzenie wyposa˝one jest w ruchomà podstaw´.
W celu rozprowadzenia strumienia powietrza na wi´kszym obszarze, nale˝y nacisnàç przycisk rotacji (I). W∏àczone urzàdzenie zacznie si´ obracaç w lewo i w prawo.
Aby zatrzymaç urzàdzenie w ˝àdanym po∏o˝eniu, wystarczy ponownie nacisnàç przycisk (I).
Aby wy∏àczyç urzàdzenie, nacisnàç na kilka sekund przycisk (H)
37
PL
Page 38

38
Ustawianie termostatu
1. Naciskaç przycisk MODE (G), dopóki na wyÊwietlaczu nie pojawi si´ napis AUTO.
2. Przy pomocy przycisków + lub – zwi´kszaç lub zmniejszaç temperatur´. W ten sposób
ustawiona temperatura zostanie automatycznie zachowana i b´dzie stale utrzymywana
przez termostat.
3. Kiedy pomieszczenie osiàgnie temperatur´ o 2°C wy˝szà od ustawionej temperatury,
urzàdzenie si´ wy∏àczy i po kilku sekundach zostanie zatrzymana wentylacja.
4. Kiedy pomieszczenie osiàgnie temperatur´ ni˝szà od ustawionej temperatury, urzàdzenie
w∏àczy si´ automatycznie.
Uwaga: je˝eli chcemy zmieniç ustawionà temperatur´ i w∏àczona jest ruchoma podstawa, po
naciÊni´ciu przycisków + lub – urzàdzenie zatrzyma si´, by umo˝liwiç ustawienie nowej
temperatury. Po zakoƒczeniu ustawiania, podstawa zacznie si´ automatycznie obracaç.
Funkcja Timer
Funkcj´ t´ mo˝na w∏àczyç w dowolnym trybie dzia∏ania urzàdzenia. Timer umo˝liwia programowanie czasu dzia∏ania urzàdzenia od 1 do 8 godzin.
Ka˝dorazowo po naciÊni´ciu przycisku (E) czas dzia∏ania zostanie zwi´kszony o jednà godzin´. Po ustawieniu timera, czas zmniejsza si´ o godzin´, a wyÊwietlacz pokazuje pozosta∏y
czas. Po up∏ywie ustawionego czasu urzàdzenie si´ wy∏àczy.
Je˝eli nie chcemy u˝ywaç urzàdzenia z funkcjà Timer, w celu przywrócenia r´cznego trybu
dzia∏ania nale˝y nacisnàç ponownie przycisk (E), po czym na wyÊwietlaczu pojawi si´ 8 godz.
Funkcja zapobiegajàca zamarzaniu
Mo˝na utrzymywaç pomieszczenie w temperaturze oko∏o 5°C zapobiegajàc zamarzaniu przy
minimalnym zu˝yciu energii.
Naciskaç przycisk MODE (G), dopóki na wyÊwietlaczu nie pojawi si´ napis AUTO. Przy
pomocy przycisku “-” ustawiç temperatur´ 5°C.
Kiedy pomieszczenie osiàgnie temperatur´ ni˝szà od ustawionej temperatury, grzejnik w∏àczy
si´ automatycznie.
ZASTOSOWANIE PILOTA
Pilota nale˝y u˝ywaç z du˝à ostro˝noÊcià.
1. Nacisnàç przycisk STAND-BY (H).
2. JeÊli chodzi o dzia∏anie przycisków rotacji (I), SET TIME (E), MODE (G) i ustawienia tempe-
ratury (F) zob. rozdzia∏ „DZIA¸ANIE I U˚YTKOWANIE”.
3.
W celu dokonania wymiany baterii zdjàç pokryw´ z ty∏u pilota. Pilot dzia∏a z dwoma bateriami
alkalicznymi typu AAA (dostarczane wraz z urzàdzeniem, lecz osobno zapakowane).
4. Nie stosowaç zu˝ytych baterii razem z nowymi bateriami, z innymi wartoÊciami.
KONSERWACJA
-
Przed przystàpieniem do czyszczenia nale˝y zawsze wyjàç wtyczk´ z gniazdka zasilajàcego.
- Nale˝y regularnie czyÊciç kratki wlotu i wylotu powietrza w trakcie okresu u˝ytkowania
urzàdzenia u˝ywajàc w tym celu odkurzacza.
- Nie nale˝y nigdy stosowaç proszków Êciernych ani rozpuszczalników.
WA˚NE INFORMACJE DOTYCZÑCE BEZPIECZE¡STWA
- Nie nale˝y korzystaç z urzàdzenia bezpoÊrednio w pobli˝u prysznica, wanny, umywalki,
basenu itp.
- U˝ywaç urzàdzenie tylko i wy∏àcznie w pozycji pionowej.
- Nie u˝ywaç termowentylatora do suszenia bielizny, nie zatykaç kratek wlotu i wylotu
powietrza (niebezpieczeƒstwo przegrzania urzàdzenia).
Page 39

- Nie nale˝y pozwoliç, by z urzàdzenia korzysta∏y osoby (w tym równie˝ dzieci) o ogranic-
zonych mo˝liwoÊciach psychicznych, fizycznych i ruchowych, chyba ˝e sà one starannie
nadzorowane i zosta∏y pouczone przez osob´, która jest za nie odpowiedzialna. Pilnowaç,
by dzieci nie bawi∏y si´ urzàdzeniem.
-
W odleg∏oÊci do 50 cm przed urzàdzeniem nie powinny staç ˝adne meble czy inne przedmioty.
- Nie w∏àczaç urzàdzenia w pobli˝u Êcian, mebli, firanek, itp.
- Odradza si´ u˝ywania przed∏u˝aczy. Je˝eli jednak ich u˝ycie jest konieczne, nale˝y ÊciÊle
przestrzegaç instrukcji obs∏ugi do∏àczonej do przed∏u˝acza uwa˝ajàc, aby nie przek-
roczyç podanej na nim maksymalnej mocy .
- Je˝eli kabel zasilajàcy jest uszkodzony, nale˝y si´ zwróciç o jego wymian´ do producenta
lub do jego serwisu technicznego albo do osoby posiadajàcej odpowiednie kwalifikacje,
aby zapobiec jakiemukolwiek niebezpieczeƒstwu.
- Urzàdzenia nie nale˝y umieszczaç bezpoÊrednio pod gniazdkiem zasilajàcym.
- Nie u˝ywaç niniejszego urzàdzenia w pomieszczeniach o powierzchni nie przekraczajàcej
4m
2
.
- Termowentylator wyposa˝ony jest w wy∏àcznik wywróceniowy, który wy∏àcza urzàdzenie
w razie jego wywrócenia. Aby termowentylator ponownie uruchomiç, wystarczy go
ustawiç w pozycji pionowej.
- Przy pierwszym w∏àczeniu urzàdzenie powinno przepracowaç co najmniej 2 godziny z
maksymalnà mocà. W tym czasie nale˝y dobrze wietrzyç pomieszczenie, aby usunàç
zapach nowoÊci, który wydobywa si´ z urzàdzenia. Jest rzeczà ca∏kowicie normalnà, ˝e
przy pierwszym uruchomieniu urzàdzenia s∏ychaç skrzypienie.
W razie przypadkowego przegrzania (np. kratki wylotu lub wlotu powietrza zatkane, silnik
który si´ nie obraca lub dzia∏a bardzo powoli) w∏àczy si´ urzàdzenie zabezpieczajàce, które
przerwie dzia∏anie termowentylatora. Aby ponownie go w∏àczyç, nale˝y wyjàç wtyczk´ z
gniazdka zasilajàcego,odczekaç kilka minut, usunàç przyczyn´ przegrzania, a nast´pnie
ponownie pod∏àczyç grzejnik do sieci zasilajàcej.
WA˚NE: Aby uniknàç przegrzania, w ˝adnym wypadku nie nale˝y przykrywaç urzàdzenia w trakcie dzia∏ania, poniewa˝ mog∏oby to spowodowaç niebezpieczny wzrost
temperatury.
OSTRZE˚ENIE: Aby zapobiec zagro˝eniom zwiàzanym z przypadkowym zresetowaniem
wy∏àcznika termicznego, urzàdzenie to nie mo˝e byç pod∏àczone do zasilania poprzez
zewn´trzne urzàdzenie w∏./wy∏. takie jak timer, nie mo˝e byç te˝ pod∏àczone do obwodu
okresowo w∏àczanego i wy∏àczanego w jakikolwiek sposób.
Uwagi dotyczàce prawid∏owego usuwania produktu zgodnie z Dyrektywà Europejskà 2002/96/EC.
Na koniec okresu u˝ytecznoÊci produktu nie nale˝y wyrzucaç do odpadów miejskich.
Mo˝na go dostarczyç do odpowiednich oÊrodków segregujàcych odpady przygotowanych
przez w∏adze miejskie lub do jednostek zapewniajàcych takie us∏ugi.Osobne usuwanie
sprz´tu AGD pozwala uniknàç negatywnych skutków dla Êrodowiska naturalnego i zdrowia
z powodu jego nieodpowiedniego usuwania i umo˝liwia odzyskiwanie materia∏ów, z których jest z∏o˝ony, w celu uzyskania znaczàcej oszcz´dnoÊci energii i zasobów.
Na obowiàzek osobnego usuwania sprz´tu AGD wskazuje umieszczony na produkcie symbol przekreÊlonego pojemnika na Êmieci.
39
Page 40

BESKRIVELSE AV APPARATET
A Rist for luftutslipp
B Betjeningspanel
C Motorisert base
D Varsellampe
E Tast for tidsinnstilling
F Bryter for temperaturregulering
G MODE-bryter
H STAND-BY-bryter
I Svinge-bryter
L Hovedbryter
ELEKTRISCHE AANSLUITING
- Før man setter støpslet i stikkontakten, må man kontrollere at nettspenningen tilsvarer spen-
ningen som er angitt i V (volt) på apparatet, og at kontakten er dimensjonert for det strø-
muttaket som er nødvendig.
- DETTE APPARATET ER I SAMSVAR MED EEC-DIREKTIV 336/89 HINDRING AV
RADIOFORSKYRRELSER.
INSTALLASJON
Apparatet kan brukes på et hvilket som helst underlag, så lenge det er helt vannrett.
Unngå overbelastning av den elektriske kretsen ved å sørge for at den samme kontakten ikke
brukes til andre apparater.
FUNKSJON OG BRUK
1. Kontroller at apparatet er avslått før støpslet settes inn i veggen.
2. Kople apparatet til den elektriske kontakten.
3. For å slå på apparatet er det nødvendig at bryteren (L) på baksiden av apparatet er i pos. .
I. Apparatet vil gi fra seg en pipetone og varsellampen (D) vil slå seg på og vil forsette å
være påslått så lenge apparatet er tilkoplet.
4. Trykk på tasten (H) for å slå på apparatet.
5. Når apparatet blir slått på vil det fungere ved LOW funksjonsmodus (minimum styrke).
Displayet viser romtemperaturen.
6. Ved å trykke på tasten “MODE” (G) vil apparatet fungere i funksjonsmodus “HIGH” (maksi-
mum styrke). Displayet viser romtemperaturen.
7. Når man trykker inn MODE (G) på nytt vil apparatet være i funksjonsmodusen AUTO.
Displayet vil vise den temperaturen som er blitt stilt inn. For å stille inn en temperatur som er
forskjellig fra den som allerede er innstilt, trykk på tastene + og -. Etter noen sekunder vil
displayet vise romtemperaturen.
8. Når man trykker inn MODE (G) på nytt vil apparatet være i funksjonsmodusen LOW. Der-
som man forsetter å trykke på tasten MODE, vil apparatet etter tur velge de følgende funk-
sjonene: LOW HIGH AUTO.
9. For å slå av apparatet er det nødvendig å trykke inn tasten H i noen sekunder, og stille bry-
teren (L) på baksiden av apparatet er i posisjon 0.
MOTORISERT BASE
Apparatet har en motordrevet basedel. For å fordele luftstrømmen over et større område
trykker man på svinge-tasten
(I)
. Når apparatet har denne funksjonen aktivert, vil det svinge fra
høyre og venstre.
For å stanse svingingen i en bestemt posisjon, trykker man inn tasten
(I)
enda en gang.
For å slå av apparatet må man holde inne tasten (H)i noen sekunder.
40
N
Page 41

Termostatregulering
1. Trykk på tasten MODE (G) helt til man på skjermen ser ordet AUTO.
2.
Trykk på tastene + o – for å øke eller redusere den innstilte temperaturen. Dersom temperaturen
stilles inn på denne måten vil den justeres automatisk, og holdes konstant av termostaten.
3. Dersom romtemperaturen blir 2°C høyere enn den temperaturen som er stilt inn, vil appa-
ratet slå seg av og viftefunksjonen stanse etter noen sekunder..
4. Når romtemperaturen ligger under den innstilte temperaturen vil apparatet starte opp igjen
automatisk.
Merknad: Når man ønsker å endre temperaturen som er blitt innstilt, og svingefunksjonen er i
gang, vil apparatet stanse når man trykker på tastene + og -, slik at man kan stille inn den
nye temperaturen.
Når innstillingen er ferdig vil apparatet begynne å svinge igjen.
Tidsinnstillingsfunksjon
Man kan aktivere denne funksjonen fra hvilket som helst funksjonsmodus. Tidsinnstillingen programmerer funksjonstiden for apparatet fr 1 til 8 timer.
Hver gang man trykker inn tasten (E), vil funksjonstiden øke med en time.
Når man har stilt inn tiden, vil tiden minke fra time til time, og gjenstående tid vil bli vist på
displayet. Ved avslutningen av tiden vil apparatet slå seg av.
Dersom man vil bruke apparatet uten tidsinnstilling, trykker man inn tasten (E) en gang til for å
gå tilbake til manuelt modus, etter at displayet har vist teksten 8 h.
Antifrys-funksjonen
Det er også mulig å opprettholde en temperatur på cirka 5 °C, slik at man hindrer frost med et
minimumsforbruk av energi.
Trykk på tasten MODE (G) helt til man på skjermen ser ordet AUTO. Trykk på tasten “-” helt til
man har stilt inn temperaturen til 5° C.
Når romtemperaturen ligger under den innstilte temperaturen, vil apparatet starte opp igjen
funksjonen automatisk.
BRUK AV FJERNKONTROLLEN
Fjernkontrollen må behandles svært varsomt og forsiktig.
1. Trykk på bryteren (H) STAND-BY.
2.
Når det gjelder tastene for svingefunksjonen, (I), SET TIME (E), MODE (G) og temperaturregulering (F), ber vi om at man leser det som blir beskrevet i avsnittet “FUNKSJON OG BRUK”.
3. For å bytte batterier, fjerner man dekslet bak på fjernkontrollen. Fjernkontrollen har behov
for to AAA type alkaliske batterier (som medfølger, men er pakket inn separat).
4. Unngå å blande nye og brukte batterier, og batterier av ulik styrke.
VEDLIKEHOLD
- Trekk ut støpslet fra stikkontakten før hver rengjøringsoperasjon og vedlikeholdsinngrep.
- Rengjør de to ristene for luftinntak og luftutførsel med jevne mellomrom i bruksperioden,
helst ved bruk av støvsuger.
- Bruk aldri skurepulver eller løsemidler.
ADVARSLER
-
Unngå å bruke dette varmeapparatet i umiddelbar nærhet til bad, dusj, vask eller basseng osv.
- Bruk apparatet kun når det befinner seg i loddrett posisjon
- Unngå å bruke apparatet for å tørke tøy. Ikke dekk til ristene for inntak og utslipp av luft
(fare for overoppheting).
-Man må ikke la apparatet brukes av personer (også barn) med begrensede psykiske, fysi-
41
Page 42

ske og sansemessige ferdigheter, eller med for liten erfaring eller kunnskap, med mindre de
har tilstrekkelig tilsyn og opplæring av en ansvarlig voksen, som kan forebygge ulykker.
Pass på barn, og sørg for at de ikke leker med apparatet.
-
I en distanse av 50 cm foran apparatet må det ikke befinne seg møbler eller andre gjenstander.
- Man må unngå å sette apparatet i gang i umiddelbar nærhet av vegger, møbler eller gar-
diner osv.
- Den anbefales at man unngår bruk av skjøteledninger. Dersom dette allikevel skulle være
nødvendig må man følge bruksanvisningen som følger med skjøteledningen nøye, og være
oppmerksom så ikke maksimum kraftuttak, som er angitt på skjøteledningen, overstiges.
- Dersom strømledningen er skadd, må denne byttes ut av produsenten, eller av produsen-
tens tekniske serviceavdeling, eller i det minste av en fagperson men lignende kvalifikasjoner, slik at all mulig risiko forebygges.
- Apparatet må heller ikke plasseres direkte under en fast stikkontakt.
- Unngå å bruke dette apparatet i et rom som er mindre enn 4 m
2
.
- Apparatet er utstyrt med en velt-hindrende anordning som vil slå av apparatet dersom det
faller over. For å starte opp apparatet igjen trenger man bare å sette det opp igjen i loddrett posisjon.
- Ved første gangs bruk bør man la apparatet gå ved maksimal styrke i minst 2 timer. I løpet
av denne tiden bør rommet luftes godt, slik at man får bort lukten av ”nytt” apparat som
sendes ut fra apparatet. Det er helt normalt at apparatet gir fra seg ”knirkelyder" ved første
gangs bruk.
En sikkerhetsanordning vil stanse funksjonen av vifteovnen dersom den feilaktig skulle ove-
ropphetes (f.eks. dersom ristene for luftutførsel eller luftuttak skulle være tilstoppet, dersom
motoren ikke går rundt, eller dersom den går for sakte rundt). For å sette vifteovnen i gang
igjen må man trekke kontakten ut av veggen i noen minutter, fjerne årsaken til overopphetingen, og deretter sette inn støpslet.
VIKTIG: For å unngå overoppheting, må apparatet aldri av noen grunn dekkes til under
bruk, fordi dette kan føre til farlig temperaturstigning.
ADVARSEL: For å unngå risiko tilknyttet uhellsvis nullstilling av termo-relè-bryteren, må ikke
dette apparatet styres gjennom noen form for ekstern tenne-/slukkemekanisme, f.eks. tidsbryter, og det må heller ikke koples til en krets som jevnlig blir slått av og på av elektrisitetsforsyningen.
42
Page 43

LAITTEEN OSAT
A Kontrollpanel
B Luftutsläpp med galler
C Motoriserat underrede
D Kontrollampa
E SET TIME-knapp
F Temperaturknapp
G MODE-knapp
H STAND-BY-knapp
I Oscillationsknapp
L Huvudströmbrytare
ELEKTRISKA ANSLUTNINGAR
- Kontrollera noggrant att nätspänningen motsvarar det värde i V som anges på apparaten
och att eluttaget och elsladden är anpassade för belastningen i fråga innan du sätter i stick-
proppen.
- DENNA APPARAT ÖVERENSSTÄMMER MED DIREKTIV 89/336/EEG OM ELEKTROMA-
GNETISK KOMPATIBILITET.
INSTALLATION
Apparaten får placeras på valfritt underlag under förutsättning att detta är horisontellt.
Överbelasta inte eluttaget genom att använda det till flera apparater.
ANVÄNDNING
1. Kontrollera att apparaten är avstängd innan du sätter i stickproppen i eluttaget.
2. Anslut apparaten till eluttaget.
3. Sätt på apparaten genom att ställa strömbrytaren (L) på dess baksida i läge I. En ljudsignal
hörs, kontrollampan (D) tänds och lyser så länge apparaten är strömförsörjd.
4. Tryck på knappen (H) för att starta apparaten.
5. Vid starten går apparaten i driftsläget LOW (drift med minimieffekt). På displayen visas
omgivningstemperaturen.
6. Om du trycker på knappen MODE (G) övergår apparaten till läget HIGH (drift med maxi-
mieffekt). På displayen visas omgivningstemperaturen.
7. Om du trycker på knappen MODE (G) igen går apparaten i AUTO läget. På displayen
visas den inställda temperaturen. Tryck på knapparna + och - för att ställa in en annan
temperatur. Efter några sekunder visas omgivningstemperaturen på displayen.
8. Om du trycker på knappen MODE (G) igen återgår apparaten till LOW läget.
Om du fortsätter att trycka på knappen MODE ställs följande lägen in i tur och ordning:
LOW HIGH AUTO.
9. Stäng av apparaten genom att trycka på knappen (H) i några sekunder och sätta strömbry-
taren på baksidan (L) i läge 0.
MOTORISERAT UNDERREDE
Apparaten har ett motoriserat underrede.
Tryck på oscillationsknappen (I) för att sprida luftströmmen över ett större område.
Fläkten förflyttar sig då från höger till vänster och tillbaka igen.
Tryck på knappen (I) igen för att stoppa den i önskat läge.
Stäng av apparaten genom att hålla knappen (H) intryckt i några sekunder.
Inställning av termostaten
1. Tryck på knappen MODE (G) tills AUTO visas på displayen.
2. Höj eller sänk temperaturen med knapparna + respektive -. Termostaten kommer då auto-
43
SE
Page 44

44
matiskt att ställa in och bibehålla den temperatur som på så sätt har fastställts.
3. När omgivningstemperaturen är 2° högre än den inställda temperaturen stängs apparaten
av och fläkten stannar efter några sekunder.
4. När omgivningstemperaturen sjunker under den inställda temperaturen startar apparaten
igen automatiskt.
OBS: när du ska ändra temperaturinställningen och oscillationen är på stannar apparaten när
du trycker på knapparna + eller - så att du kan ställa in den nya temperaturen.
När inställningen är gjord startar oscillationen igen automatiskt.
Timerfunktion
Du kan starta denna funktion i alla driftslägen. Med timern kan du programmera in driftstiden
så att apparaten går i 1-8 timmar.
För varje tryck på knappen (E) ökar driftstiden med en timme.
När du har ställt in timern räknas tiden ned och den återstående tiden visas på displayen. När
den inställda tiden har gått stängs apparaten av.
Tryck på knappen (E) igen när displayen visar 8 h om du inte vill använda timerfunktionen längre.
Frostskydd
Du kan bibehålla en omgivningstemperatur på cirka 5 °C och förhindra frostbildning med en
minimal energiförbrukning.
Tryck på knappen MODE (G) tills AUTO visas på displayen. Ställ in en temperatur på 5 °C
genom att trycka på knappen -.
När omgivningstemperaturen sjunker under den inställda temperaturen startar apparaten igen
automatiskt.
ATT ANVÄNDA FJÄRRKONTROLLEN
Använd fjärrkontrollen med omsorg.
1. Tryck på STAND-BY-knappen (H).
2. Se avsnittet ANVÄNDNING för anvisningar om hur du använder oscillationsknappen (I),
SET TIME-knappen (E), MODE-knappen (G) och temperaturknappen (F).
3. Ta av locket på fjärrkontrollens baksida när du ska byta batterier. Två alkalina batterier av
typ AAA används (medföljer i separat förpackning).
4. Använd inte gamla batterier tillsammans med nya, med olika värden.
UNDERHÅLL
- Dra alltid ut stickproppen ur eluttaget innan du utför någon form av rengöring.
- Dammsug luftintagen och -utsläppen med jämna mellanrum under den säsong då appa-
raten används.
- Använd aldrig lösningsmedel eller produkter med slipverkan.
VARNINGAR
- Använd inte denna uppvärmningsapparat i omedelbar anslutning till badkar, duschar,
tvättställ, simbassänger eller dylikt.
- Använd bara apparaten i vertikal position.
- Använd inte apparaten för att torka tvätt och täpp inte till luftintagen och -utsläppen (risk
för överhettning).
-Låt inte personer med reducerad psykisk, fysisk eller sensorisk förmåga eller otillräcklig
erfarenhet och kunskap (däribland barn) använda apparaten utan noggrann övervakning
och ledning av en person som ansvarar för deras säkerhet. Se till att barn inte leker med
apparaten.
Page 45

- Inom ett avstånd på 50 cm framför fläkten får det inte finnas möbler eller andra föremål.
- Använd inte apparaten nära väggar, möbler, gardiner och dylikt.
- Använd helst inte förlängningssladdar. Om du måste använda en förlängningssladd bör du
noggrant följa instruktionerna för denna och se till att inte överskrida den maximieffekt som
anges på den.
- Om elsladden är skadad ska den för att undvika fara bytas ut av tillverkaren, dennes ser-
viceverkstad eller annan person med motsvarande kunskaper.
- Apparaten får inte placeras omedelbart under ett fast eluttag.
- Använd inte denna apparat i rum med mindre golvyta än 4 m
2
.
- Apparaten är försedd med ett tippskydd som stänger av den om den faller. För att starta
den igen behöver du bara placera detta i vertikal position.
- Låt apparaten gå med maximal effekt i minst två timmar vid första igångsättningen. Vädra
rummet ordentligt under denna tid för att få bort den lukt som kan uppstå i nya apparater.
Det är helt normalt att radiatorn ger ifrån sig gnisslande ljud vid första igångsättningen.
En säkerhetsanordning stänger av värmefläkten vid överhettning (t. ex. om luftintaget eller utsläppet är tilltäppt eller om motorn inte snurrar eller snurrar långsamt). För att återställa funktionen måste du dra ut stickproppen och vänta i några minuter, åtgärda orsakerna till överhettningen och sedan sätta i stickproppen igen
VIKTIGT: Täck aldrig över apparaten när den är igång, eftersom detta kan orsaka en
farlig temperaturhöjning och därmed överhettning.
VARNING: för att undvika risker till följd av att överhettningsskyddet återställs av misstag får
det inte finnas några externa omkopplare (t. ex. en timer) för matarströmmen. Apparaten får
inte heller anslutas till en krets som regelbundet sätts på och stängs av av elbolaget.
Viktig information för en korrekt bortskaffning av produkten i överensstämmelse med Europadirektiv
2002/96/EG.
Vid slutet av produktens livslängd, får den inte skaffas bort som tätortsavfall. Den kan överlämnas till
lokala myndigheters avfallssorteringscentraler eller till en återförsäljare som ger denna service.
Att skaffa bort en hushållsmaskin undviker möjliga negativa konsekvenser för miljön och hälsan som
härstammar från en olämplig bortskaffning och tillåter en återvinning av materialen som den består
av för att spara betydande energi och tillgångar.
Som påminnelse om att hushållsmaskiner måste skaffas bort separat, har produkten markerats med
en soptunna med ett kryss.
45
Page 46

BESKRIVELSE AF BRØDRISTER
A Styrepanel
B Luftudstrømningsrist
C Motorstyret basis
D Kontrollampe
E SET TIME knap
F Temperaturindstillingsknap
G MODE-knap
H STAND-BY-knap
I Drejeknap
L Hovedafbryder
TILSLUTNING TIL EL-NETTET
- Inden stikket sættes i stikkontakten kontrolleres omhyggeligt, at den elektriske spænding i
hjemmets elforsyning svarer til den V værdi der er angivet på apparatet, og at stikkontakten
og elforsyningslinien passer til den belastning der kræves.
- DETTE APPARAT ER KONFORMT MED EØF-DIREKTIVET 89/336 VEDRØRENDE ANNUL-
LERING AF RADIOSTØJ.
INSTALLATION
Apparatet kan bruges på en hvilken som helst støtteflade, såfremt den er vandret.
Overbelast ikke det elektriske kredsløb, brug ikke den samme stikkontakt til andre apparater.
FUNKTION OG BETJENING
1. Kontroller at apparatet er slukket inden stikket sættes i stikkontakten.
2. Forbind apparatet til netstikket.
3. Der kan kun tændes for apparatet, hvis afbryderen (L) på bagsiden af apparatet står på I.
Der høres en ”biptone” fra apparatet, og kontrollampen (D) begynder at lyse, og det bliver
den ved med, så længe apparatet forsynes med strøm.
4. Apparatet tændes ved at trykke på knappen (H).
5. Når der tændes for apparatet, fungerer det i tilstanden LOW (minimumstyrke). På displayet
vises temperaturen i omgivelserne.
6. Hvis der trykkes på MODE knappen (G), fungerer apparatet i tilstanden HIGH (maksimum-
styrke). På displayet vises temperaturen i omgivelserne.
7. Hvis der trykkes på MODE knappen (G) én gang til, fungerer apparatet i tilstanden AUTO.
På displayet vises den indstillede temperatur. Der kan ændres på den indstillede temperatur
ved hjælp af knapperne + og -. Efter et par sekunder viser displayet temperaturen i omgi-
velserne.
8. Hvis der trykkes på MODE knappen (G) én gang til, går apparatet tilbage til funktion i til-
standen LOW. Hvis man bliver ved med at trykke på MODE knappen, stilles apparatet på
følgende funktioner: LOW HIGH AUTO.
9. Apparatet slukkes ved at trykke på knappen (H) i et par sekunder og stille afbryderen på
bagsiden af apparatet (L) på 0.
MOTORSTYRET BASIS
Apparatet er forsynet med en motorstyret basis.
Tryk på drejeknappen (I) for at få luften til at strømme ud i et større område.
Når apparatet aktiveres på denne måde, drejer det til højre og venstre.
Drejningen kan standses i den ønskede stilling ved ganske enkelt at trykke på knappen (I)igen.
Apparatet slukkes ved at holde knappen (H) nede i et par sekunder.
46
DK
Page 47

Regulering af termostaten
1. Tryk på MODE knappen (G), indtil skærmen viser AUTO.
2. Indstil en højere eller lavere temperatur ved hjælp af knapperne + og -. Den således indstil-
lede temperatur reguleres og opretholdes automatisk af termostaten.
3. Apparatet slukkes, når temperaturen i omgivelserne ligger 2°C over den indstillede, og ven-
tileringen standser i løbet af få sekunder.
4. Apparatet begynder automatisk at fungere, hvis temperaturen i omgivelserne kommer ned
under den indstillede.
Bemærk: Hvis man ønsker at ændre på den indstillede temperatur, mens drejefunktionen er
aktiveret, går apparatet i stå, når der trykkes på knappen + eller - for at gøre det muligt at
indstille den nye temperatur.
Når indstillingen er foretaget, genoptages drejefunktionen automatisk.
Timerfunktion
Denne funktion kan aktiveres i hvilken som helst driftstilstand. Timeren giver mulighed for at
programmere apparatets driftstid til mellem 1 og 8 timer.
Hver gang der trykkes på knappen (E), sættes driftstiden en time op.
Når timeren er indstillet, begynder nedtællingen time for time, og den tilbageværende tid vises
på skærmen. Når den indstillede tid udløber, slukkes apparatet.
Hvis man ikke ønsker at anvende apparatet med timerfunktionen, kommer man tilbage til den
manuelle tilstand ved at trykke på knappen (E) én gang til, hvorefter skærmen viser 8 timer.
Antifrost-funktion
Det er muligt at opretholde en temperatur på cirka 5°C i omgivelserne med et minimalt energiforbrug.
Tryk på MODE knappen (G), indtil skærmen viser AUTO. Indstil derefter en temperaturgrænse
på 5°C ved hjælp af knappen ”-”.
Hvis temperaturen i omgivelserne kommer ned under den, apparatet er indstillet til, begynder
det automatisk at fungere igen.
ANVENDELSE AF FJERNBETJENINGEN
Fjernbetjeningen bør håndteres meget forsigtigt.
1. Tryk på STAND-BY-knappen (H).
2. Hvad angår anvendelsen af dreje (I), SET TIME (E), MODE (G) og temperaturindstillingsk-
napperne (F), henvises der til anvisningerne i afsnittet ”FUNKTION OG BETJENING”.
3. Batterierne udskiftes ved at fjerne dækslet på bagsiden af fjernbetjeningen. Fjernbetjenin-
gen fungerer med to alkalibatterier af typen AAA (følger med, dog i særskilt emballage).
4. Der må ikke anvendes brugte sammen med nye batterier, med forskellige værdier.
VEDLIGEHOLDELSE
- Før man starter rengøring af apparatet trækkes stikket ud af stikkontakten.
- I de perioder hvor apparatet anvendes, rengøres indsugnings- og udblæsningsristene
regelmæssigt ved hjælp af en støvsuger.
- Brug aldrig skurepulver eller opløsningsmidler.
ADVARSLER
- Brug ikke dette varmeapparatet i umiddelbar nærhed af brusekabiner- eller nicher,
badekar, håndvaske, svømmebassin eller lignende.
- Brug altid kun apparatet i opret stilling.
- Brug aldrig apparatet til at tørre tøj på, tildæk aldrig luftindsugnings- og luftudblæsningsri-
stene (risiko for overophedning).
47
Page 48

- Sørg for, at apparatet ikke anvendes af personer (derunder børn) med nedsatte psykiske,
fysiske og sensoriske evner eller med utilstrækkelig erfaring eller kendskab, med mindre en
ansvarlig person overvåger og vejleder dem og derved opretholder sikkerheden. Hold øje
med børnene, og sørg for, at de ikke leger med apparatet.
-
Indenfor en afstand af 50 cm foran apparatet må ikke forefindes møbler eller andre genstande.
- Lad ikke apparatet køre når det står op ad vægge, møbler, gardiner o.l.
- Det frarådes at bruge forlængerledninger. Hvis det skulle blive nødvendigt at bruge dem,
skal man nøje følge anvisningerne der følger med forlængerledningen, og passe på ikke at
overskride den effekt grænse der er angivet på forlængerledningen.
-Hvis el-forsynings ledningen er beskadiget, må den kun udskiftes af fabrikanten, af et auto-
riseret servicecenter eller af en autoriseret elektriker, således at man undgår hvilken som
helst risiko.
- Apparatet må ikke placeres lige under en fast stikkontakt.
- Brug ikke apparatet i rum med et gulvareal på mindre end 4 m_.
- Apparatet er forsynet med en sikkerhedsanordning, som slukker apparatet, hvis det vælter.
Apparatet tændes igen ved ganske enkelt at stille denne anordning tilbage til den lodrette
stilling.
- Ved første ibrugtagning skal apparatet køre ved fuld styrke i mindst 2 timer. I dette tidsrum
skal man sørge for god udluftning i rummet for at fjerne lugten af "nyt", som apparatet
udsender. Det er fuldstændigt normalt, at der kommer "knirkelyde" fra apparatet, første
gang det tages i brug.
En sikkerhedsanordning afbryder varmeblæserens drift, hvis den fejlagtigt bliver overophedet
(på grund af f.eks. tilstopning af indsugnings- eller udblæsningsristene, hvis motoren ikke kører
eller kører for langsomt). For at sætte apparatet i drift igen, skal du tage stikket ud af stikkontakten, og lade apparatet køle af i et par minutter. Fjern årsagen til overophedningen, og sæt
derefter stikket i stikkontakten igen.
VIGTIGT: For at undgå overophedning må apparatet under ingen omstændigheder
tildækkes under drift, da dette vil forårsage en farlig temperaturstigning.
ADVARSEL: For at undgå risici forbundet med hændelig tilbagestilling af afbryderen med varmerelæ, må dette apparat ikke fødes med en ekstern afbryderanordning, såsom en timer, og
det må heller ikke forbindes til en kreds, som med jævne mellemrum tændes og slukkes af forsyningsselskabet.
Vigtig information angående bortskaffelse af produktet i overensstemmelse med EF Direktiv 2002/96/CE.
Ved afslutningen af dets produktive liv må produktet ikke bortskaffes som almindeligt affald. Det bør
afleveres på et specialiseret lokalt genbrugscenter eller til en forhandler der yder denne service. At
bortskaffe et elektrisk husholdningsapparat separat gør det muligt at undgå eventuelle negative konsekvenser for miljø og helbred på grund af upassende bortskaffelse og det giver mulighed for at genbruge de materialer det består af og dermed opnå en betydelig energi- og ressourcebesparelse.
Som en påmindelse om nødvendigheden af at bortskaffe elektriske husholdningsapparater separat,
er produktet mærket med en mobil affaldsbeholder med et kryds.
48
Page 49

ESKRIVNING AV APPARATEN
A Säädintaulu
B Ilman poistoritilä
C Moottoroitu alusta
D Merkkivalo
E Set time- painike
F Lämpötilan säätöpainike
G MODE- painike
H STAND-BY- painike
I Kiertopainike
L Pääkatkaisin
SÄHKÖKYTKENTÄ
- Tarkista huolellisesti ennen pistokkeen asettamista pistorasiaan, että kotitalouden verkkojän-
nite vastaa laitteessa tunnuksella V ilmaistua arvoa ja että sähköpistoke ja -verkko on
mitoitettu tarvittavalle sähkökuormitukselle.
- TÄMÄ LAITE VASTAA RADIOHÄIRINNÄN ESTÄMISTÄ KOSKEVAN EU- DIREKTIIVIN
89/336.
ASENNUS
Laitetta voidaan käyttää minkä tahansa tyyppisellä tasaisella pinnalla.
Älä ylikuormita sähköpiiriä käyttämällä samaa pistorasiaa useille eri laitteille.
TOIMINTA JA KÄYTTÖ
1. Tarkista ennen pistokkeen asettamista pistorasiaan, että laite on sammutettuna.
2. Kytke laite sähköpistorasiaan.
3. Voit käynnistää tuuletinlämmittimen ainoastaan silloin, kun laitteen takaosaan sijoitettu
pääkatkaisin (L) on asetettu asentoon I. Tällöin kuulet merkkiäänen, merkkivalo (D) syttyy ja
palaa aina siihen saakka kunnes laitteen sähkövirta katkaistaan.
4. Paina painiketta (H), jolloin laite käynnistyy.
5. Käynnistyksen yhteydessä lämmitin alkaa toimimaan LOW tavalla (toiminto minimiteholla).
Näytöllä näkyy huoneiston lämpötila.
6. Paina painiketta MODE (G), jolloin lämmitin alkaa toimimaan HIGH tavalla (toiminto mak-
simiteholla). Näytöllä näkyy huoneiston lämpötila.
7. Paina painiketta MODE (G) uudelleen, jolloin lämmitin alkaa toimimaan AUTO tavalla.
Näytöllä näkyy asetettu lämpötila. Voit muuttaa asetettua lämpötilaa käyttämällä painikkei-
ta + tai - . Muutaman sekunnin jälkeen näytölle ilmestyy huoneiston lämpötila.
8. Paina painiketta MODE (G) uudelleen, jolloin lämmitin alkaa toimimaan uudelleen LOW
tavalla. Painikkeen MODE jokaisen painamisen yhteydessä toiminnot kiertävät seuraavassa
järjestyksessä: LOW HIGH AUTO.
9. Voit sammuttaa laitteen painamalla painiketta H muutaman sekunnin ajan ja sijoittamalla
laitteen takaosassa olevan katkaisimen (L) asentoon 0.
MOOTTOROITU ALUSTA
Lämmitin on varustettu moottoroidulla alustalla.
Paina kiertopainiketta (I) silloin, kun haluat ilman virtaavan laajemmalle alueelle.
Lämmitin alkaa tämän jälkeen kiertämään oikealta vasemmalle.
Voit pysäyttää kiertotoiminnon haluamaasi asentoon yksinkertaisesti painamalla painiketta (I)
uudelleen.
Sammuta lämmitin pitämällä painiketta (H) painettuna muutaman sekunnin ajan.
49
SF
Page 50

50
Lämmönsäätimen käyttö
1. Paina painiketta MODE (G), kunnes näytölle ilmestyy kirjoitus AUTO.
2. Paina painikkeita + tai - joko asetetun lämpötilan lisäämiseen tai laskemiseen. Lämmönsää-
din pitää näin säädetyn lämpötilan automaattisesti muuttumattomana.
3. Kun huoneiston lämpötila on 2°C asetettua lämpötilaa korkeampi, lämmitin sammuu ja
muutama sekunti tämän jälkeen myös puhallus pysähtyy.
4. Lämmitin käynnistyy automaattisesti, kun huoneiston lämpötila laskee asetetun lämpötilan
alapuolelle.
Huom: Mikäli kiertotapa on päällä ja haluat vaihtaa asetettua lämpötilaa, lämmitin pysäyttää
kiertotoiminnon painikkeen + tai – painamisen yhteydessä, jotta uusi lämpötila voidaan
asettaa. Kiertotoiminto jatkuu automaattisesti asetusten suorittamisen jälkeen.
Ajastintoiminto
Voit aktivoida tämän toiminnon miltä tahansa toimintotavalta. Ajastimen avulla voit ohjelmoida
lämmittimen toimintoajan 1-8 tunnin välille.
Painikkeen (E) jokaisen painamisen yhteydessä toiminta-aika lisääntyy tunnilla.
Ajastimen ohjelmoinnin jälkeen aika vähenee tunti tunnilta, jolloin jäljellä oleva aika näkyy
näytöllä. Lämmitin sammuu asetetun ajan kuluttua umpeen.
Mikäli et halua käyttää lämmitintä ajastintoiminnolla, voit palata käsikäyttöiseen tapaan painamalla painiketta (E) uudelleen, jolloin näytölle ilmestyy kirjoitus 8 h.
Jäätymisen esto
Lämmittimen avulla voit säilyttää huoneiston lämpötilan noin 5°C asteessa, jolloin vältyt jäätymiseltä jo erittäin pienellä virrankulutuksella.
Paina painiketta MODE (G), kunnes näytölle ilmestyy kirjoitus AUTO. Paina painiketta “-” kunnes olet asettanut lämpötilaksi 5°C.
Lämmitin käynnistyy automaattisesti, kun huoneiston lämpötila laskee asetetun lämpötilan alapuolelle.
KAUKO-OHJAIMEN KÄYTTÖ
Käsittele kauko-ohjainta erittäin varovasti ja huolellisesti.
1. Paina STAND-BY painiketta (H).
2. Kiertopainikkeen (I), SET TIME (E), MODE (G) sekä lämpötilan säätöpainikkeen (F)
käyttöohjeet on annettu kappaleessa ”TOIMINTA JA KÄYTTÖ”.
3. Poista kauko-ohjaimen takana oleva suojakansi silloin, kun haluat vaihtaa paristot. Kauko-
ohjain toimii kahdella AAA tyyppisellä alkaliiniparistolla (toimitetaan laitteen mukana,
mutta pakattu erikseen).
4. Älä käytä vanhoja ja uusia tai eri arvoja omaavia paristoja yhdessä.
HUOLTO
- Irrota pistoke pistorasiasta ennen minkään puhdistustoimenpiteen aloittamista.
-
Puhdista ilman syöttö- ja poistoritilät säännöllisesti pölynimurilla laitteen käyttökauden aikana.
- Älä puhdista laitetta koskaan hankaavilla jauheilla tai liuottimilla.
VAROITUKSIA
- Älä käytä lämmitintä suihkujen, kylpyammeiden, pesualtaiden, uima-altaiden jne.
välittömässä läheisyydessä.
- Käytä tuuletinlämmitintä aina yksinomaan pystysuorassa asennossa.
- Älä käytä laitetta pyykin kuivaukseen tai tuki millään tavoin ilman syöttö- ja poistoritilöitä
(ylikuumenemisen vaara).
- Älä anna psyykkisesti, fyysisesti tai muutoin laitteen käyttöön kykenemättömien, kokematto-
Page 51

mien tai laitteen ominaisuuksia tuntemattomien henkilöiden (tai lasten) käyttää laitetta, ellei
käyttö tapahdu heidän turvallisuudestaan vastaavien henkilöiden tarkassa valvonnassa.
Lapsia on valvottava, etteivät he pääse leikkimään laitteella.
- Varmista, ettei laitteen edessä ole huonekaluja tai muita kohteita 50 cm etäisyydellä.
- Älä käytä laitetta seinien, huonekalujen, verhojen jne. läheisyydessä.
- Emme suosittele jatkojohtojen käyttöä. Mikäli jatkojohdon käyttö on välttämätöntä, noudata
huolellisesti jatkojohdon mukana tulleita ohjeita ja varmista, ettet ylitä johdolle merkittyä
tehorajaa.
- Anna valmistajan, sen valtuuttaman teknisen huoltoliikkeen tai ammattitaitoisen henkilön
vaihtaa rikkoutunut sähköjohto. Näin vältyt turhilta riskeiltä.
- Älä asenna laitetta suoraan kiinteän sähköpistorasian alapuolelle.
- Älä käytä tätä laitetta tiloissa, joiden pinta-ala on alle 4 m2.
- Laite on varustettu turvalaitteella , joka sammuttaa laitteen mahdollisen kumoon kaatumi-
sen yhteydessä. Voit käynnistää laitteen uudelleen tässä tapauksessa yksinkertaisesti asetta-
malla sen takaisin pystyasentoon.
- Aseta lämmitin ensimmäisen käytön yhteydessä maksimiteholle vähintään 2 tunnin ajaksi.
Tuuleta huone tämän toimenpiteen aikana, jotta lämmittimen kehittämä “uuden” tuoksu
saadaan poistettua. Ensimmäisen käytön aikana laitteesta kuuluvat naksahdukset ovat nor-
maaleja.
Turvalaite sammuttaa tuuletinlämmittimen mahdollisen tahattoman ylikuumenemisen yhteydes-
sä (esim. ilman syöttö- ja poistoritilöiden tukkeutumisen, moottorin hitaan käynnin tai sammumisen yhteydessä). Irrota tässä tapauksessa pistoke pistorasiasta muutaman minuutin ajaksi,
poista ylikuumenemisen aiheuttanut syy ja aseta pistoke takaisin pistorasiaan.
TÄRKEÄÄ: Ylikuumenemisen välttämisen kannalta on tärkeää, ettet missään tapauksessa peitä laitetta käytön aikana, sillä tämä saattaisi nostaa sen lämpötilan vaarallisen
korkeaksi.
VAROITUS: Katkaisimen lämpöreleen tahattoman uudelleen käynnistymisen estämiseksi on
tärkeää, ettei tämän laitteen kanssa käytetä ulkoisia katkaisinlaitteita, kuten esim. ajastinta. Sitä
ei saa tämän lisäksi kytkeä sähköpiiriin, jonka sähkölaitos kytkee jatkuvasti päälle tai pois
päältä.
Tärkeitä ohjeita tuotteen hävittämiseen Euroopan Unionin direktiivin 2002/96 mukaisesti.
Tuotetta ei saa hävittää yhdessä tavallisten kotitalousjätteiden kanssa sen lopullisen käytöstä
poiston yhteydessä. Vie se paikallisten viranomaisten hyväksymään kierrätyskeskukseen tai
anna se jälleenmyyjän hävitettäväksi, mikäli kyseinen palvelu kuuluu jälleenmyyjän toimialaan. Suojelet luontoa ja vältyt virheellisen tai väärän romutuksen aiheuttamilta terveysriskeiltä, mikäli hävität kodinkoneen erillään muista jätteistä. Näin myös kodinkoneen
sisältämät kierrätettävät materiaalit voidaan kerätä talteen, jolloin säästät energiaa ja luonnonvaroja. Tuotteessa on ristillä peitetty roskasäiliön merkki, jonka tarkoituksena on muistuttaa että kodinkoneet on hävitettävä erikseen muista kotitalousjätteistä.
51
Page 52

JGBCFYBT YF EHTLF
ÄÄ
äÓχ̉ÌÓ Ú‡·ÎÓ
ÇÇ
ê¯ÂÚ͇ Á‡ ÓÚ‚Âʉ‡Ì ̇ ‚˙Á‰Ûı‡
ëë
åÂı‡ÌËÁˇ̇ ÓÒÌÓ‚‡
DD
äÓÌÚÓÎ̇ ·ÏÔ‡
EE
ЕЫЪУМ Set timВ
FF
ЕЫЪУМ Б‡ В„ЫОЛ‡МВ М‡ ЪВПФВ‡ЪЫ‡Ъ‡
GG
ЕЫЪУМ MODE
HH
ЕЫЪУМ STAND-BY
II
ЕЫЪУМ Б‡ УТˆЛО‡ˆЛfl
LL
É·‚ÂÌ ÔÂÍ˙Ò‚‡˜
ÖÖããÖÖääííêêààóóÖÖëëääéé ëëÇÇööêêááÇÇÄÄççÖÖ
- иВ‰Л ‰‡ ‚НО˛˜ЛЪВ ˘ВФТВО‡ ‚ ВОВНЪЛ˜ВТНЛfl НУМЪ‡НЪ, ФУ‚ВВЪВ ‚МЛП‡ЪВОМУ
‰‡ОЛ М‡ФВКВМЛВЪУ М‡ З‡¯‡Ъ‡ ПВК‡ УЪ„У‚‡fl М‡ ТЪУИМУТЪЪ‡, ЫН‡Б‡М‡ ‚˙ıЫ
ЫВ‰‡ ‚˙‚ ‚УОЪУ‚В Л ‰‡ОЛ ВОВНЪЛ˜ВТНЛflЪ НУМЪ‡НЪ Л Б‡ı‡М‚‡˘‡Ъ‡ ЛМТЪ‡О‡ˆЛfl
Т˙УЪ‚ВЪТЪ‚‡Ъ М‡ МВУ·ıУ‰ЛПУЪУ М‡ФВКВМЛВ.
- мкЦСцн лцйнЗЦнлнЗД зД СакЦднаЗД 89/336/EEC ийСналдДзЦ зД
кДСайлемфЦзаьнД
ààççëëííÄÄããààêêÄÄççÖÖ
мВ‰˙Ъ ПУКВ ‰‡ ТВ ФУОБ‚‡, ФУТЪ‡‚ВМ ‚˙ıЫ ‚ТflН‡Н‚‡ ФУ‚˙ıМУТЪ, ТЪЛ„‡ Ъfl ‰‡ В
ıУЛБУМЪ‡ОМ‡.
зВ ФВЪУ‚‡‚‡ИЪВ ВОВНЪЛ˜ВТН‡Ъ‡ ‚ВЛ„‡. аБ·fl„‚‡ИЪВ ЛБФУОБ‚‡МВЪУ М‡ Т˙˘Лfl
НУМЪ‡НЪ Б‡ ‚НО˛˜‚‡МВ М‡ ‰Ы„Л ЫВ‰Л.
îîììççääññààééççààêêÄÄççÖÖ àà ììèèééííêêÖÖÅÅÄÄ
1. иВ‰Л ‰‡ ФУТЪ‡‚ЛЪВ ˘ВФТВО‡ ‚ ВОВНЪЛ˜ВТНЛfl НУМЪ‡НЪ ФУ‚ВВЪВ ‰‡ОЛ ЫВ‰˙Ъ
 ËÁÍβ˜ÂÌ.
2. л‚˙КВЪВ ЫВ‰‡ Н˙П ВОВНЪЛ˜ВТНЛfl НУМЪ‡НЪ.
3. ᇠ‰‡ ‚Íβ˜ËÚ Û‰‡, Ô‚Íβ˜‚‡ÚÂÎflÚ (LL), ‡БФУОУКВМ ‚ Б‡‰М‡Ъ‡ ˜‡ТЪ М‡
ЫВ‰‡, Ъfl·‚‡ ‰‡ ·˙‰В ‚ ФУОУКВМЛВ II. ì‰˙Ú ËÁ‰‡‚‡ Á‚ÛÍÓ‚ Ò˄̇Î,
ÍÓÌÚÓÎ̇ڇ ·ÏÔ‡ (DD) Т‚ВЪ‚‡ Л ФУ‰˙ОК‡‚‡ ‰‡ Т‚ВЪЛ ‰УН‡ЪУ ЫВ‰˙Ъ В Т‚˙Б‡М
Н˙П ВОВНЪЛ˜ВТН‡Ъ‡ ПВК‡.
4. з‡ЪЛТМВЪВ ·ЫЪУМ (HH), Á‡ ‰‡ ‚Íβ˜ËÚ Û‰‡.
5. èË ‚Íβ˜‚‡ÌÂÚÓ, Û‰˙Ú ‡·ÓÚË Ì‡ ÂÊËÏ
LLOOWW
(‡·УЪ‡ М‡ ПЛМЛП‡ОМ‡
ПУ˘МУТЪ). ЦН‡М˙Ъ ФУН‡Б‚‡ ТЪ‡ИМ‡Ъ‡ ЪВПФВ‡ЪЫ‡.
6. èË Ì‡ÚËÒ͇Ì ̇ ·ÛÚÓÌ
MMOODDEE (GG
) Û‰˙Ú Á‡ÔÓ˜‚‡ ‰‡ ‡·ÓÚË ‚ ÂÊËÏ
HHIIGGHH
(ВКЛП ФЛ П‡НТЛП‡ОМ‡ ПУ˘МУТЪ). ЦН‡М˙Ъ ФУН‡Б‚‡ ТЪ‡ИМ‡Ъ‡ ЪВПФВ‡ЪЫ‡.
7. èË ÔÓ‚ÚÓÌÓ Ì‡ÚËÒ͇Ì ̇ ·ÛÚÓÌ
MMOODDEE (GG
), Û‰˙Ú ˘Â ‡·ÓÚË ‚ ÂÊËÏ
AAUUTTOO
.
ЦН‡М˙Ъ ˘В ФУН‡Б‚‡ Б‡‰‡‰ВМ‡Ъ‡ ЪВПФВ‡ЪЫ‡ ‚ М‡ТЪУИНЛЪВ. б‡ ‰‡ ТВ Б‡‰‡‰‡Ъ
ЪВПФВ‡ЪЫЛ, ‡БОЛ˜МЛ УЪ ‚В˜В М‡ТЪУВМЛЪВ, М‡ЪЛТМВЪВ ·ЫЪУМЛЪВ + ЛОЛ -. лОВ‰
МflНУОНУ ТВНЫМ‰Л М‡ ВН‡М‡ ˘В ТВ ФУН‡КВ ТЪ‡ИМ‡Ъ‡ ЪВПФВ‡ЪЫ‡.
8. ç‡ÚËÒ͇ÈÍË ÓÚÌÓ‚Ó ·ÛÚÓÌ
MMOODDEE (GG
), Û‰˙Ú ÓÚÌÓ‚Ó Á‡ÔÓ˜‚‡ ‰‡ ‡·ÓÚË ‚ ÂÊËÏ
LLOOWW
, ДНУ ФУ‰˙ОКЛЪВ ‰‡ М‡ЪЛТН‡ЪВ ·ЫЪУМ‡
MMOODDEE
, Û‰˙Ú ËÁ·Ë‡
ФУТОВ‰У‚‡ЪВОМУ ТОВ‰МЛЪВ ‡·УЪМЛ ВКЛПЛ:
LLOOWW HHIIGGHH AAUUTTOO
.
9. б‡ ‰‡ ЛБНО˛˜ЛЪВ ЫВ‰‡, М‡ЪЛТМВЪВ ·ЫЪУМ зçБ‡ МflНУОНУ ТВНЫМ‰Л Л ФУТЪ‡‚ВЪВ
ФВ‚НО˛˜‚‡ЪВОfl (LL), ‡БФУОУКВМ ‚ Б‡‰М‡Ъ‡ ˜‡ТЪ М‡ ЫВ‰‡, ‚ ФУОУКВМЛВ 00.
ååÖÖïïÄÄççààóóççÄÄ ééëëççééÇÇÄÄ
мВ‰˙Ъ В ТМ‡·‰ВМ Т ПВı‡МЛ˜М‡ УТМУ‚‡. б‡ ‰‡ ТВ ‡БФУТЪ‡МЛ ‚˙Б‰Ы¯МЛflЪ ФУЪУН ‚
ФУ-¯ЛУН‡ БУМ‡, М‡ЪЛТМВЪВ ·ЫЪУМ‡ Б‡ УТˆЛО‡ˆЛfl (II). дУ„‡ЪУ ЫВ‰˙Ъ В ФЛ‚В‰ВМ ‚
‰ВИТЪ‚ЛВ ФУ ЪУБЛ М‡˜ЛМ, ˘В ЛБ‚˙¯‚‡ УТˆЛО‡ˆЛfl (НУОВ·‡ЪВОМУ ‰‚ЛКВМЛВ) М‡‰flТМУ
Л М‡Оfl‚У.
б‡ ТФЛ‡МВ М‡ УТˆЛОЛ‡˘УЪУ ‰‚ЛКВМЛВ ‚ КВО‡МУЪУ ФУОУКВМЛВ В ‰УТЪ‡Ъ˙˜МУ
УЪМУ‚У ‰‡ ТВ М‡ЪЛТМВ ·ЫЪУМ (II).
б‡ ‰‡ ЛБНО˛˜ЛЪВ ЫВ‰‡, Б‡‰˙КЪВ М‡ЪЛТМ‡Ъ Б‡ МflНУОНУ ТВНЫМ‰Л ·ЫЪУМ (HH).
52
BG
Page 53

êê„„ÛÛÎÎˡ‡ÌÌ Ì̇‡ ÚÚÂÂÏÏÓÓÒÒÚÚ‡‡ÚÚ‡‡
1. ç‡ÚËÒ͇ÈÚ ·ÛÚÓÌ
MMOODDEE(GG
), ‰Ó͇ÚÓ Â͇Ì˙Ú ÔÓ͇ÊÂ
AAUUTTOO
.
2. уВБ ·ЫЪУМЛЪВ ++ЛОЛ - ПУКВЪВ ‰‡ Ы‚ВОЛ˜ЛЪВ ЛОЛ ‰‡ М‡П‡ОЛЪВ М‡ТЪУВМ‡Ъ‡
ЪВПФВ‡ЪЫ‡. лОВ‰ Н‡ЪУ ФУ ЪУБЛ М‡˜ЛМ М‡Ф‡‚ЛЪВ МУ‚‡ М‡ТЪУИН‡ М‡
ЪВПФВ‡ЪЫ‡Ъ‡, Ъfl ˘В ТВ В„ЫОЛ‡ ‡‚ЪУП‡ЪЛ˜МУ Л ˘В ТВ ФУ‰‰˙К‡ ФУТЪУflММ‡ УЪ
ЪВПУТЪ‡Ъ‡.
3. ДНУ ТЪ‡ИМ‡Ъ‡ ЪВПФВ‡ЪЫ‡ ФВ‚Л¯Л Т 2°C М‡ТЪУВМ‡Ъ‡ ЪВПФВ‡ЪЫ‡, ЫВ‰˙Ъ ТВ
ЛБНО˛˜‚‡ Л ‚ВМЪЛО‡ˆЛflЪ‡ ТФЛ‡ ТОВ‰ МflНУОНУ ТВНЫМ‰Л.
4. ДНУ ТЪ‡ИМ‡Ъ‡ ЪВПФВ‡ЪЫ‡ ТФ‡‰МВ ФУ‰ М‡ТЪУВМ‡Ъ‡ ЪВПФВ‡ЪЫ‡, ЫВ‰˙Ъ
‰‡ ‡·УЪЛ ‡‚ЪУП‡ЪЛ˜МУ.
áᇇ··ÂÂÎÎÂÂÊÊÍ͇‡
: ‡НУ ЛТН‡ЪВ ‰‡ ТПВМЛЪВ Б‡‰‡‰ВМ‡Ъ‡ ЪВПФВ‡ЪЫ‡, НУ„‡ЪУ ТЪВ ‚ ВКЛП М‡
УТˆЛО‡ˆЛfl, ˜ВБ М‡ЪЛТН‡МВ М‡ ·ЫЪУМЛЪВ ++ËÎË ––ЫВ‰˙Ъ ТФЛ‡, Б‡ ‰‡ ФУБ‚УОЛ
М‡ТЪУИ‚‡МВЪУ М‡ МУ‚‡ ЪВПФВ‡ЪЫ‡. лОВ‰ Б‡‰‡‚‡МВ М‡ КВО‡М‡Ъ‡ ЪВПФВ‡ЪЫ‡
УТˆЛО‡ˆЛflЪ‡ ‡‚ЪУП‡ЪЛ˜МУ ФУ‰˙ОК‡‚‡.
îîÛÛÌÌÍ͈ˆËËflfl ÚÚ‡‡ÈÈÏÏÂÂ
еУКВЪВ ‰‡ ‡НЪЛ‚Л‡ЪВ Ъ‡БЛ ЩЫМНˆЛfl УЪ Н‡Н˙‚ЪУ Л ‰‡ В ВКЛП М‡ ‡·УЪ‡. н‡ИПВ˙Ъ
‰‡‚‡ ‚˙БПУКМУТЪ ‰‡ ТВ ФУ„‡ПЛ‡ ‚ВПВЪУ Б‡ ‡·УЪ‡ М‡ ЫВ‰‡ УЪ 1 ‰У 8 ˜‡Т‡.
иЛ ‚ТflНУ М‡ЪЛТН‡МВ М‡ ·ЫЪУМ (EE) ‚ВПВЪУ Б‡ ‡·УЪ‡ ТВ Ы‚ВОЛ˜‡‚‡ Т В‰ЛМ ˜‡Т.
лОВ‰ Б‡‰‡‚‡МВ М‡ Ъ‡ИПВ‡, ‚ВПВЪУ Б‡ФУ˜‚‡ ‰‡ М‡П‡Оfl‚‡ ˜‡Т ТОВ‰ ˜‡Т, Н‡ЪУ М‡
ВН‡М‡ ТВ ФУН‡Б‚‡ УТЪ‡‚‡˘УЪУ ‚ВПВ. иЛ ЛБЪЛ˜‡МВ М‡ Б‡‰‡‰ВМУЪУ ‚ВПВ ЫВ‰˙Ъ
ТВ ЛБНО˛˜‚‡.
ДНУ МВ ЛТН‡ЪВ ‰‡ ЛБФУОБ‚‡ЪВ ЫВ‰‡ Т ЩЫМНˆЛflЪ‡ Ъ‡ИПВ, Б‡ ‚˙˘‡МВ ‚ ˙˜ВМ
ВКЛП М‡ЪЛТМВЪВ УЪМУ‚У ·ЫЪУМ (EE) ÒΉ ͇ÚÓ Ì‡ Â͇̇ Ò ÔÓ͇Ê 8 ˜‡Ò‡.
îîÛÛÌÌÍ͈ˆËËflfl ÔÔÓÓÚÚËË‚‚ ÁÁ‡‡ÏÏ˙˙ÁÁ‚‚‡‡ÌÌÂÂ
З˙БПУКМУ В ‰‡ ТВ ФУ‰‰˙К‡ ТЪ‡ИМ‡ ЪВПФВ‡ЪЫ‡ УЪ УНУОУ 5°C , ФВ‰УЪ‚‡Ъfl‚‡ИНЛ
Б‡П˙Б‚‡МВЪУ ФЛ ПЛМЛП‡ОВМ ВМВ„ЛВМ ‡БıУ‰.
з‡ЪЛТМВЪВ ·ЫЪУМ‡
MMOODDEE(GG
) ‰Ó͇ÚÓ Â͇Ì˙Ú Ì ÔÓ͇ÊÂ
AAUUTTOO
. ᇉÂÈÒÚ‚‡ÈÚÂ
·ÛÚÓ̇ “--”, ‰УН‡ЪУ МВ М‡„О‡ТЛЪВ ЪВПФВ‡ЪЫ‡Ъ‡ М‡ 5°C.
ДНУ ТЪ‡ИМ‡Ъ‡ ЪВПФВ‡ЪЫ‡ ТФ‡‰МВ ФУ‰ М‡ТЪУВМ‡Ъ‡ ЪВПФВ‡ЪЫ‡, ЫВ‰˙Ъ
‡‚ЪУП‡ЪЛ˜МУ ТВ ‚˙˘‡ М‡ ‡·УЪВМ ВКЛП.
ààááèèééããááÇÇÄÄççÖÖ ççÄÄ ÑÑààëëííÄÄççññààééççççééííéé ììèèêêÄÄÇÇããÖÖççààÖÖ
СЛТЪ‡МˆЛУММУЪУ ЫФ‡‚ОВМЛВ Ъfl·‚‡ ‰‡ ТВ ЛБФУОБ‚‡ ПМУ„У ‚МЛП‡ЪВОМУ.
1. з‡ЪЛТМВЪВ ·ЫЪУМ‡ STAND-BY (HH).
2. йЪМУТМУ ФЛМˆЛФ‡ М‡ ‰ВИТЪ‚ЛВ М‡ ·ЫЪУМЛЪВ Б‡ УТˆЛО‡ˆЛfl (II), SET TIME (EE),
MODE (GG) Л Б‡ В„ЫОЛ‡МВ М‡ ЪВПФВ‡ЪЫ‡Ъ‡ (FF) В ‰У·В ‰‡ ТВ Б‡ФУБМ‡ВЪВ Т
ЛМЩУП‡ˆЛflЪ‡, ФЛ‚В‰ВМ‡ ‚ Ф‡‡„‡Щ «кДЕйнД а мийнкЦЕД».
3. б‡ ‰‡ ТПВМЛЪВ ·‡ЪВЛЛЪВ, УЪТЪ‡МВЪВ Б‡‰МЛfl Н‡Ф‡Н М‡ ‰ЛТЪ‡МˆЛУММУЪУ
ЫФ‡‚ОВМЛВ. нУ ‡·УЪЛ Т ‰‚В ‡ОН‡ОМЛ ·‡ЪВЛЛ ‚Л‰ ДДД (‚НО˛˜ВМЛ, МУ
УФ‡НУ‚‡МЛ УЪ‰ВОМУ).
4. зВ ЛБФУОБ‚‡ИЪВ ЫФУЪВ·fl‚‡МЛ ·‡ЪВЛЛ Б‡В‰МУ Т МУ‚Л ·‡ЪВЛЛ Т ‡БОЛ˜МЛ
ТЪУИМУТЪЛ.
èèééÑÑÑÑêêööÜÜääÄÄ
- иВ‰Л ‰‡ ФУ˜ЛТЪЛЪВ ЫВ‰‡, ЛБНО˛˜‚‡ИЪВ ˘ВФТВО‡ УЪ ВОВНЪЛ˜ВТНЛfl НУМЪ‡НЪ.
-
èèÓÓ˜˜ËËÒÒÚÚ‚‚‡‡ÈÈÚÚ ‰‰ÓÓ‚‚ÌÌÓÓ Â¯¯ÂÂÚÚÍÍËËÚÚ ÁÁ‡‡ ‚‚ııÓÓ‰‰flfl˘˘ËËflfl ËË ËËÁÁııÓÓ‰‰flfl˘˘ËËflfl ‚‚˙˙ÁÁ‰‰ÛÛıı ÔÔÂÂÁÁ
ÔÔÂÂËËÓÓ‰‰‡‡,, ÔÔÂÂÁÁ ÍÍÓÓÈÈÚÚÓÓ ÛÛ‰‰˙˙ÚÚ ÒÒ ËËÁÁÔÔÓÓÎÎÁÁ‚‚‡‡,, ÒÒ ÔÔÓÓÏÏÓÓ˘˘ÚÚ‡‡ Ì̇‡ ÔÔ‡‡ııÓÓÒÒÏÏÛÛÍ͇‡˜˜Í͇‡..
- зЛНУ„‡ МВ ЫФУЪВ·fl‚‡ИЪВ ‡·‡БЛ‚МЛ Ф‡ıУ‚В ЛОЛ ‡БЪ‚УЛЪВОЛ.
èèêêÖÖÑÑììèèêêÖÖÜÜÑÑÖÖççààüü
- зВ ЛБФУОБ‚‡ИЪВ ЪУБЛ ЫВ‰ Б‡ УЪУФОВМЛВ ·ОЛБУ ‰У ‰Ы¯У‚В, ‚‡МЛ, ЫПЛ‚‡ОМЛˆЛ,
·‡ТВИМЛ Л Ъ.М..
- аБФУОБ‚‡ИЪВ ЫВ‰‡ Т‡ПУ Л В‰ЛМТЪ‚ВМУ ‚˙‚ ‚ВЪЛН‡ОМУ ФУОУКВМЛВ.
- зВ ЛБФУОБ‚‡ИЪВ ЫВ‰‡ Б‡ ТЫ¯ВМВ М‡ Ф‡МВ, МВ Б‡ФЫ¯‚‡ИЪВ В¯ВЪНЛЪВ Б‡
53
Page 54

‚ıУ‰fl˘Лfl Л ЛБıУ‰fl˘Лfl ‚˙Б‰Ыı (УФ‡ТМУТЪ УЪ ФВ„fl‚‡МВ).
- зВ ‰УФЫТН‡ИЪВ ЫВ‰‡ ‰‡ ·˙‰В ЛБФУОБ‚‡М УЪ ОЛˆ‡ (‚НО˛˜ЛЪВОМУ УЪ ‰Вˆ‡), ˜ЛЛЪУ
ЩЛБЛ˜ВТНЛ, ТВЪЛ‚МЛ ЛОЛ ЫПТЪ‚ВМЛ ТФУТУ·МУТЪЛ Т‡ У„‡МЛ˜ВМЛ, ЛОЛ ОЛˆ‡ ·ВБ УФЛЪ
Л БМ‡МЛfl УТ‚ВМ ‡НУ УЪ„У‚УМУ Б‡ ЪflıМ‡Ъ‡ ·ВБУФ‡ТМУТЪ ОЛˆВ М‡·О˛‰‡‚‡ Л ‰‡‚‡
ФВ‰‚‡ЛЪВОМЛ ЫН‡Б‡МЛfl УЪМУТМУ ФУОБ‚‡МВЪУ М‡ ЫВ‰‡. 燄ОВК‰‡ИЪВ ‰Вˆ‡Ъ‡, Б‡
‰‡ ТВ Ы‚ВЛЪВ, ˜В МВ Л„‡flЪ Т ЫВ‰‡
-ç‡ ‡ÁÒÚÓflÌË ÓÚ 50 ÒÏ Ô‰ Û‰‡ Ì Úfl·‚‡ ‰‡ Ò ‡ÁÔÓ·„‡Ú Ï·ÂÎË ËÎË
‰Û„Ë Ô‰ÏÂÚË.
- мВ‰˙Ъ МВ Ъfl·‚‡ ‰‡ ‡·УЪЛ УФflМ ‰У ТЪВМЛ, ПВ·ВОЛ, ФВ‰ВЪ‡ Л Ъ.М. зВ ТВ
ФВФУ˙˜‚‡ ЫФУЪВ·‡Ъ‡ М‡ Ы‰˙ОКЛЪВОЛ. ДНУ ЪflıМ‡Ъ‡ ЫФУЪВ·‡ В М‡ОУКЛЪВОМ‡,
ТОВ‰‚‡ИЪВ ‚МЛП‡ЪВОМУ ЫН‡Б‡МЛflЪ‡ ‰УТЪ‡‚ВМЛ Т Ы‰˙ОКЛЪВОfl, Н‡ЪУ ‚МЛП‡‚‡ЪВ ‰‡
МВ ФВ‚Л¯ЛЪВ У„‡МЛ˜ВМЛВЪУ Б‡ ПУ˘МУТЪЪ‡, УЪ·ВОflБ‡МУ М‡ Ы‰˙ОКЛЪВОfl.
- ДНУ Б‡ı‡М‚‡˘ЛflЪ Т ВОВНЪЛ˜ВТЪ‚У Н‡·ВО
 ÔÔÓÓ‚‚‰‰ÂÂÌÌ
, ÚÓÈ Úfl·‚‡ ‰‡ ÒÂ
ÁÁ‡‡ÏÏÂÂÌÌËË
УЪ ФУЛБ‚У‰ЛЪВОfl ЛОЛ УЪ МВ„У‚Лfl ТВ‚ЛБ Б‡ ЪВıМЛ˜ВТН‡ ФУПУ˘ ЛОЛ УЪ ОЛˆВ Т
ФУ‰У·М‡ Н‚‡ОЛЩЛН‡ˆЛfl,
ÁÁ‡‡ ‰‰‡‡ ÒÒ ËËÁÁ··Â„„ÌÌ ‚‚ÒÒflflÍ͇‡ÍÍ˙˙‚‚ ËËÒÒÍÍ
.
- мВ‰˙Ъ МВ Ъfl·‚‡ ‰‡ ТВ ФУТЪ‡‚fl МВФУТВ‰ТЪ‚ВМУ ФУ‰ МВФУ‰‚ЛКВМ ВОВНЪЛ˜ВТНЛ
НУМЪ‡НЪ. зВ ЫФУЪВ·fl‚‡ИЪВ ЫВ‰‡ ‚ ФУПВ˘ВМЛfl Т ФОУ˘, ФУ-П‡ОН‡ УЪ 4 Н‚.П.
- ì‰˙Ú Â Ò̇·‰ÂÌ Ò
ÔÔËËÒÒÔÔÓÓÒÒÓÓ··ÎÎÂÂÌÌËË ÒÒ¢˘ÛÛ ÓÓ··˙˙˘˘‡‡ÌÌÂÂ
, НУВЪУ „У ЛБНО˛˜‚‡ ‚
ТОЫ˜‡И М‡ Ф‡‰‡МВ. б‡ ‰‡ ФЫТМВЪВ УЪМУ‚У ЫВ‰‡ В ‰УТЪ‡Ъ˙˜МУ ‰‡ „У ФУТЪ‡‚ЛЪВ Ф‡Н
‚˙‚ ‚ВЪЛН‡ОМУ ФУОУКВМЛВ.
- иЛ Ф˙‚УЪУ ФЫТН‡МВ М‡ ЫВ‰‡ „У УТЪ‡‚ВЪВ ‰‡ ‡·УЪЛ Б‡ ПЛМЛПЫП 2 ˜‡Т‡ ФЛ
П‡НТЛП‡ОМ‡ ПУ˘МУТЪ. иУ ‚ВПВ М‡ Ъ‡БЛ УФВ‡ˆЛfl ФУ‚ВЪВЪВ ‰У·В ТЪ‡flЪ‡, Б‡
‰‡ УЪТЪ‡МЛЪВ ПЛЛБП‡Ъ‡ М‡ “МУ‚У”, НУflЪУ ТВ ‡БМ‡Тfl УЪ МВ„У. л˙‚ТВП МУП‡ОМУ
В ЫВ‰˙Ъ ‰‡ ЛБ‰‡‚‡ ¯ЫП УЪ “ТН˙ˆ‡МВ” ФЛ Ф˙‚УЪУ ПЫ ФЫТН‡МВ.
è艉ÔÔ‡‡ÁÁÂÂÌÌ ÏÏÂÂıı‡‡ÌÌËËÁÁ˙˙ÏÏ
ФВН˙Т‚‡ ‡·УЪ‡Ъ‡ М‡ ЪВПУ‚ВМЪЛО‡ЪУ‡ ФЛ
ÒÒÎÎÛÛ˜˜‡‡ÈÈÌÌÓÓ
ÔÔ„„flfl‚‚‡‡ÌÌÂÂ
(М‡Ф. Б‡ФЫ¯‚‡МВ М‡ В¯ВЪНЛЪВ Б‡ ‚ıУ‰fl˘Лfl Л ЛБıУ‰fl˘Лfl ‚˙Б‰Ыı,
‰‚Л„‡ЪВОflЪ МВ ‡·УЪЛ ЛОЛ ‡·УЪЛ М‡ ·‡‚МЛ У·УУЪЛ). б‡ ‰‡ ‚˙БТЪ‡МУ‚ЛЪВ ‡·УЪ‡Ъ‡,
ЛБ‚‡‰ВЪВ ˘ВФТВО‡ УЪ НУМЪ‡НЪ‡ Б‡ МflНУОНУ ПЛМЫЪЛ, УЪТЪ‡МВЪВ ФЛ˜ЛМ‡Ъ‡ Б‡
ФВ„fl‚‡МВЪУ, ТОВ‰ НУВЪУ ‚НО˛˜ВЪВ УЪМУ‚У ЫВ‰‡ ‚ ВОВНЪЛ˜ВТНЛfl НУМЪ‡НЪ.
ÇÇÄÄÜÜççéé::
б‡ ‰‡ ЛБ·В„МВЪВ ФВ„fl‚‡МВ, ‚ МЛН‡Н˙‚ ТОЫ˜‡И МВ ФУНЛ‚‡ИЪВ ЫВ‰‡
‰УН‡ЪУ ‡·УЪЛ, Б‡˘УЪУ ЪУ‚‡ ·Л ПУ„ОУ ‰‡ ФВ‰ЛБ‚ЛН‡ УФ‡ТМУ ФУ‚Л¯‡‚‡МВ М‡
ЪВПФВ‡ЪЫ‡Ъ‡.
ÇÇççààååÄÄççààÖÖ::
б‡ ‰‡ ТВ ЛБ·В„М‡Ъ ЛТНУ‚ВЪВ, Т‚˙Б‡МЛ Т МВКВО‡Мa ФВМ‡ТЪУИН‡ М‡
ФВН˙Т‚‡˜‡ М‡ ЪВПУВОВЪУ, ЪУБЛ ЫВ‰ МВ ·Л‚‡ ‰‡ ТВ Б‡ı‡М‚‡ Т ‚˙М¯МУ ЛМТЪ‡ОЛ‡МУ
ЫТЪУИТЪ‚У Б‡ ‚НО˛˜‚‡МВ/ЛБНО˛˜‚‡МВ, М‡Ф. Ъ‡ИПВ, Н‡НЪУ Л МВ ·Л‚‡ ‰‡ ТВ Т‚˙Б‚‡ Т ПВК‡,
НУflЪУ В‰У‚МУ ТВ ‚НО˛˜‚‡ ЛОЛ ЛБНО˛˜‚‡ УЪ ‰УТЪ‡‚˜ЛН‡ М‡ ВМВ„Лfl.
ÇLJ‡ÊÊÌ̇‡ ËËÌÌÙÙÓÓÏχ‡ˆˆËËflfl ÁÁ‡‡ ÔÔ‡‡‚‚ËËÎÎÌÌÓÓÚÚÓÓ ËËÁÁıı‚‚˙˙ÎÎflflÌÌ Ì̇‡ ÔÔÓÓ‰‰ÛÛÍÍÚÚ‡‡ ÒÒ˙˙„„η‡ÒÒÌÌÓÓ ÑÑËËÂÂÍÍÚÚËË‚‚‡‡ 22000022//9966//ÖÖéé
Ì̇‡ ÖÖ‚‚ÓÓÔÔÂÂÈÈÒÒÍ͇‡ÚÚ‡‡ ÓÓ··˘˘ÌÌÓÓÒÒÚÚ..
З Н‡fl М‡ Т‚Уfl ‡·УЪВМ КЛ‚УЪ, ФУ‰ЫНЪ˙Ъ МВ Ъfl·‚‡ ‰‡ ТВ ЛБı‚˙Оfl Н‡ЪУ ·ЛЪУ‚
УЪФ‡‰˙Н. нfl·‚‡ ‰‡ Б‡МВТВЪВ ФУ‰ЫНЪ‡ ‚ У·˘ЛМТНЛ ˆВМЪ˙ Б‡ ‡Б‰ВОМУ Т˙·Л‡МВ
М‡ УЪФ‡‰˙ˆЛ ЛОЛ ФЛ Ъ˙„У‚Вˆ, НУИЪУ ФВ‰УТЪ‡‚fl Ъ‡Н‡‚‡ ЫТОЫ„‡. к‡Б‰ВОМУЪУ
ЛБı‚˙ОflМВ М‡ ·ЛЪУ‚Л ЫВ‰Л ФВ‰Ф‡Б‚‡ ФЛУ‰‡Ъ‡ Л Б‰‡‚ВЪУ УЪ МВ„‡ЪЛ‚МЛ
ФУТОВ‰ТЪ‚Лfl, НУЛЪУ ПУ„‡Ъ ‰‡ ТВ ФУОЫ˜‡Ъ УЪ МВФ‡‚ЛОМУЪУ ЛБı‚˙ОflМВ, Л ФУБ‚УОfl‚‡
М‡ Т˙ТЪ‡‚МЛЪВ П‡ЪВЛ‡ОЛ ‰‡ ТВ ВˆЛНОЛ‡Ъ. нУ‚‡ ‚У‰Л ‰У БМ‡˜ЛЪВОМ‡ ЛНУМУПЛfl М‡
ВМВ„Лfl Л ВТЫТЛ. б‡ ‰‡ ‚Л М‡ФУПМЛП Б‡ МЫК‰‡Ъ‡ УЪ ‡Б‰ВОМУ ЛБı‚˙ОflМВ М‡
·ËÚÓ‚Ë Û‰Ë, ̇¯ËflÚ ÔÓ‰ÛÍÚ Â Ï‡ÍË‡Ì Ò˙Ò Á‡˜ÂÍ̇ڇ
54
Page 55

DESCRIERA APARATULUI
A Panou comenzi
B Grilă ieșire aer
C Bază motorizată
D Indicator luminos
E Buton și Set time
F Buton reglare temperatură
G Buton MODE
H Buton STAND-BY
I Buton oscilare
L Întrerupător general
RACORDAREA ELECTRICĂ
- Înainte de a introduce ștecherul în priza de curent verificaţi cu atenţie ca voltajul reţelei
dvs. domestice să corespundă cu valoarea în V indicată pe aparat și ca priza de
curent și linia de alimentare să fie dimensionate la sarcina cerută.
- ACEST APARAT ESTE CONFORM CU DIRECTIVA 89/336/CEE PRIVIND SUPRIMA-
REA INTERFERENŢELOR RADIO
INSTALAREA
Aparatul poate fi utilizat pe orice suprafaţă cu condiţia ca aceasta să fie orizontală.
Nu supraîncărcaţi circuitul electric evitând utilizarea aceleiași prize și pentru alte aparate.
FUNCŢIONAREA ȘI FOLOSIREA
1. Verificaţi dacă aparatul este stins înainte de a introduce ștecherul în priza de curent.
2. Racordaţi aparatul la priza de curent.
3. Pentru a aprinde aparatul este nevoie ca întrerupătorul (L) situat pe partea din spate a
aparatului să fie în poz. I. Aparatul va emite un “beep”, indicatorul luminos (D) se va
aprinde și va rămâne aprins atâta timp cât aparatul va fi alimentat.
4. Apăsaţi pe butonul H pentru a aprinde aparatul.
5. La aprindere, aparatul funcţionează în modalitatea LOW (funcţionarea la puterea
minimă). Pe display se va afișa temperatura mediului ambiant.
6. Apăsând pe butonul MODE (G), aparatul va funcţiona în modalitate HIGH (funcţionare
la puterea maximă). Pe display se va afișa temperatura mediului ambiant.
7. Apăsând din nou pe butonul MODE (G), aparatul va funcţiona în modalitate AUTO. Pe
display se va afișa valoarea temperaturii setate. Pentru a seta o valoare de temperatură diferită de cea setată, acţionaţi asupra butoanelor + și -. După câteva secunde pe
display se va afișa temperatura mediului ambiant.
8. Apăsând din nou pe butonul MODE (G), aparatul va funcţiona din nou în modalitatea
LOW. continuând să apăsaţi pe butonul MODE, aparatul va selecţiona în serie
următoarele funcţiuni: LOW HIGH AUTO.
9. Pentru a stinge aparatul, apăsaţi pe butonul H timp de câteva secunde și poziţionaţi
pe 0 întrerupătorul situat pe partea din spate a aparatului (L).
BAZĂ MOTORIZATĂ
Aparatul este dotat cu o bază motorizată.
Pentru a împrăștia fluxul de aer pe o suprafaţă mai întinsă, apăsaţi pe butonul de oscilare
(I). Aparatul astfel activat va oscila la dreapta și la stânga.
Pentru a opri oscilarea în poziţia dorită este suficient să apăsaţi pe butonul (I).
Pentru a stinge aparatul ţineţi apăsat timp de câteva secunde butonul (H).
Reglarea termostatului
1. Apăsaţi pe butonul MODE (G) până când pe display se va afișa AUTO.
ROM
Page 56

56
2. Acţionaţi pe butoanele + sau - pentru a mări sau a micșora valoarea temperaturii.
Temperatura astfel fixată va fi reglată în mod automat și menţinută constantă de către
termostat.
3. Atunci când temperatura mediului ambiant este cu 2˚C mai mare decât temperatura
setată aparatul se stinge iar ventilarea se oprește după câteva secunde.
4. Atunci când temperatura mediului ambiant este mai mică decât temperatura setată
aparatul va începe să funcţioneze în mod automat.
Notă: atunci când se dorește schimbarea temperaturii setate iar modalitatea de oscilare
este activă, la apăsarea butoanelor + sau- aparatul se oprește pentru a permite setarea noii temperaturi. După efectuarea setării aparatul își va relua oscilarea în mod
automat.
Funcţiune timer
Este posibilă activarea acestei funcţiuni din oricare modalitate de funcţionare. Timer-ul
permite programarea timpului de funcţionare a aparatului de la 1 la 8 ore.
La fiecare apăsare a butonului (E) timpul de funcţionare crește cu o oră.
O dată setat timerul, timpul descrește din oră în oră afișându-se pe display timpul care a
rămas. După terminarea timpului setat aparatul se va stinge.
Dacă nu se dorește să se utilizeze aparatul cu funcţionalitatea timer, pentru a se întoarce
la modalitatea manuală reapăsaţi pe butonul (E) după ce pe display va fi afișat 8 h.
Funcţiune antiîngheţ
Este posibilă menţinerea mediului ambiant la o temperatură de circa 5˚C împiedicând
congelarea cu un minimum de risipă de energie.
Apăsaţi pe butonul MODE (G) până când pe display se va afișa AUTO. Acţionaţi asupra
butonului “-” până veţi seta o valoare a temperaturii de 5˚C.
Atunci când temperatura mediului ambiant va fi mai mică decât temperatura setată aparatul va începe să funcţioneze în mod automat.
FOLOSIREA TELECOMENZII
Telecomanda trebuie folosită cu multă atenţie
1. Apăsaţi pe butonul STAND-BY (H).
2. În ceea ce privește funcţionarea butoanelor oscilare (I), SET TIME (E), MODE (G) și
reglare a temperaturii (F) luaţi ca referinţă cele arătate la paragraful “FUNCŢIONAREA
ȘI FOLOSIREA”.
3. Pentru a înlocui bateriile, scoateţi capacul de pe spatele telecomenzii. Telecomanda
funcţionează cu două baterii alcaline de tipul AAA (incluse dar ambalate separat).
4. Nu utilizaţi baterii folosite, împreună cu bateriile noi, cu valori diferite.
ÎNTREŢINEREA
-Înainte de orice operaţie de curăţenie scoateţi întotdeauna ștecherul din priza de
curent.
- Curăţaţi cu regularitate grilele de intrare și de ieșire a aerului în timpul perioadei
de funcţionare a aparatului folosindu-vă de un aspirator.
- Nu folosiţi niciodată prafuri abrazive sau solvenţi.
AVERTISMENTE
- Nu utilizaţi acest aparat de încălzire în imediata apropiere a dușurilor, căzilor de baie,
a lavabourilor, piscinelor, etc.
- Utilizaţi aparatul întotdeauna și doar în poziţie verticală.
- Nu folosiţi aparatul pentru uscarea rufelor, nu astupaţi grilele de intrare și de ieșire a
Page 57

aerului (pericol de supraîncălzire).
- Nu permiteţi ca aparatul să fie folosit de către persoane (chiar și copii) cu capacităţi
psiho – fizico – senzoriale reduse, sau cu experienţă și cunoștinţe insuficiente, ci doar
dacă sunt supravegheate cu atenţie de un responsabil al integrităţii lor. Supravegheaţi
copiii, asigurându-vă că nu se joacă cu aparatul.
- Pe o distanţă de 50 cm din faţa aparatului nu trebuie să existe mobile sau alte obiec-
te.
- Nu puneţi aparatul să funcţioneze în apropierea pereţilor, mobilelor, perdelelor, etc.
- Nu se recomandă folosirea prelungitoarelor. În cazul în care folosirea lor este absolut
necesară, urmaţi cu atenţie instrucţiunile anexate prelungitorului, făcând atenţie să nu
se depășească limita de putere înscrisă pe prelungitor.
-Dacă cablul de alimentare este avariat, acesta trebuie să fie înlocuit de către con-
structor sau de serviciul său de asistenţă tehnică sau în orice caz de o persoană cu
calificare similară, astfel încât să se prevină orice risc.
- Aparatul nu trebuie să fie așezat imediat sub o priză de curent fixă.
- Nu utilizaţi acest aparat într-o încăpere a cărei suprafaţe de bază să fie mai mică de
4m
2
.
- Aparatul este dotat cu un dispozitiv anti – răsturnare care îl va stinge în cazul căderii
acestuia. Pentru a porni din nou aparatul, este suficientă repunerea sa în poziţie verticală.
- La prima pornire, puneţi aparatul să funcţioneze pentru cel puţin 2 ore. În timpul ace-
stei operaţii aerisiţi bine încăperea pentru a elimina mirosul “de nou” care este emanat
de aparat. Este absolut normal ca aparatul să emită așa zise “scârţâituri” la prima pornire.
Un dispozitiv de siguranţă întrerupe funcţionarea termoventilatorului în cazul unei
supraîncălziri accidentale (de ex. astuparea grilelor de intrare și de ieșire a aerului,
motorul care nu se rotește sau se rotește încet). Pentru repunerea în funcţiune, este necesar să se scoată ștecherul din priză pentru câteva minute, să se elimine cauza
supraîncălzirii, iar apoi să se reintroducă ștecherul.
IMPORTANT: Pentru evitarea supraîncălzirii, nu acoperiţi pentru nici un motiv aparatul în timpul funcţionării, deoarece aceasta ar provoca o creștere periculoasă a
temperaturii.
AVERTISMENTE: pentru a evita riscurile legate de resetarea accidentală a întrerupătorului cu releu termic, acest aparata nu trebuie să fie alimentat prin intermediul unui dispozitiv de aprindere/stingere extern, cum ar fi un timer, și nici să fie racordat la un circuit care
să fie aprins sau stins în mod regulat de către furnizorul de energie.
Avertismente pentru o eliminare corectă a produsului în conformitate cu Directiva Europeană
2002/96/EC
La terminarea vieţii sale utile, produsul nu trebuie să fie eliminat împreună cu gunoiul
urban. Poate fi predat la centrele speciale de colectare diferenţiată amenajate de administraţiile regionale, sau la magazinele de desfacere care furnizează acest serviciu.
Eliminarea separată a unui aparat electric de uz casnic permite evitarea unor posibile
consecinţe negative pentru mediul înconjurător și pentru sănătate care derivă dintr-o
eliminare a sa neadecvată și permite recuperarea materialelor din care este constituit în
scopul obţinerii unei importante economii de energie și de resurse. Pentru a evidenţia
obligaţia de eliminare în mod separat a aparatelor electrice de uz casnic, pe produs
este indicat simbolul lăzii de gunoi mobile barate.
57
Page 58

58
Page 59

59
Page 60

60
Page 61

713IDL/04.07
 Loading...