

Page 1
OWNERS' MANUAL
inQUini
R
PAC 02 U Portable Windowless
Air-Conditioner
IMPORTANT: NOTE MAINTENANCE NEEDS ON PAGE 11
DeLonghi
Page 2

IMPORTANT INFORMATION
When using electrical appliances, basic safety precautions should
always be followed, including the following:
- Read all instructions.
- To protect against fire, electrical shock and personal injury, do not
immerse cord, plug or appliance in water or other liquid.
- Close supervision is necessary when any appliance is used by or
near children.
- Do not operate with a damaged cord or plug, or after the appliance
malfunctions, or has been damaged in any manner. Return the
appliance to the nearest authorized service facility for examination,
repair or adjustment.
- The use of accessory attachments or spare parts not recommended
by the appliance manufacturer may result in fire, electrical shock or
personal injury.
- Do not use outdoors.
- Do not use the appliance for other than the intended use.
- Do not place any strain on the power cord. Avoid twisting and/or tangling.
- Ensure that outlet vent of exhaust hose is kept clear and obstruction free.
- Ensure that ventilation holes on the rear of the machine and front lou
vers are not blocked.
- The Pinguino should not be installed where the atmosphere could
contain combustible gases.
- Avoid using Pinguino in oily or sulphurous atmospheres or near sour
ces of heat.
- Wail at least 3 minutes before restarting, after the air-conditioner has
been switched off or the thermostat setting changed.
- Before moving the air-conditioner, empty water from collecting tray .
After transportation, wait at least 1 hour before switching on appliance
- Do not place hot or heavy objects on the appliance.
- Clean air filter every week (see instructions at page 12).
- Important: If you need to use an extension cord, please be sure to
use a heavy duty extension cord (minimum 14 gauge).
SAVE THESE INSTRUCTIONS
Page 3

Dear user,
We thank you for purchasing the
Pinguino air-conditioner and congra
tulate you on your wise choice.
For optimal results please read this
manual carefully before installing or
operating.
We know that the Pinguino will main
tain your environment pleasingly
comfortable at all times.
With best wishes
De Longhi S.p.A.
If you have any questions about the operation
or service of your Pinguino, please call our
toll-free service number 1-800-322-3848.
Page 4
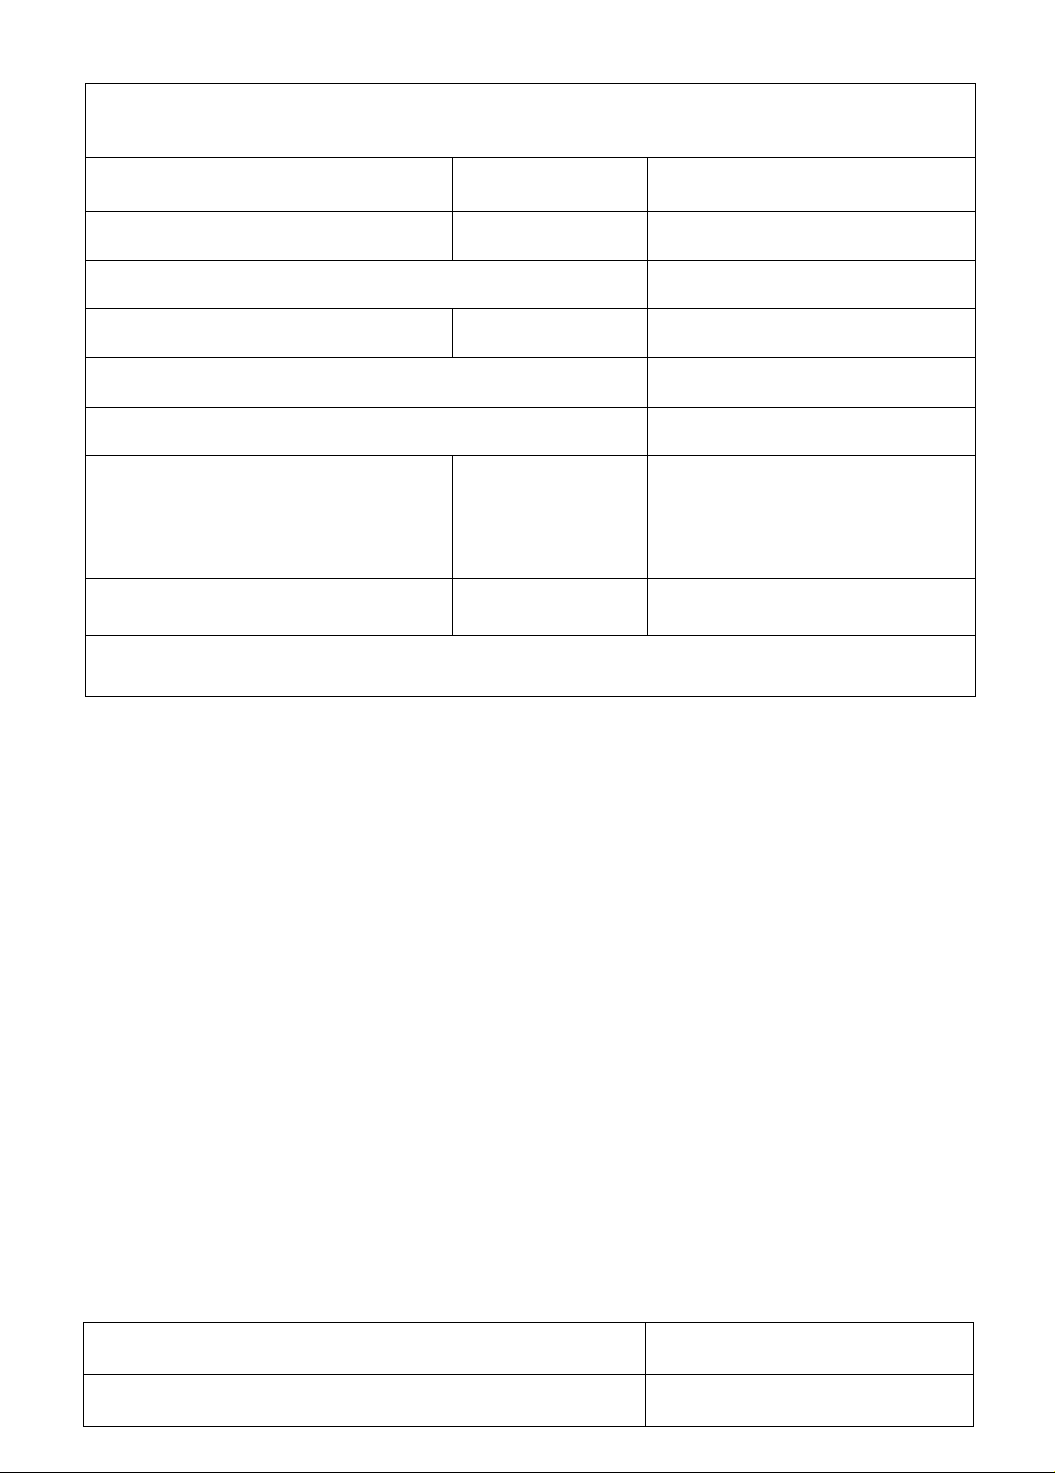
SPECIFICATIONS
Power supply voltage
Frequency
Cooling capacity: (')
Fan speeds
Max air flow capacily
Dehumidification quotient (*)
Dimensions; width
height
depth
Net weight lb. (kg)
’Data according to pending standard testing procedures subject !o review by the U S. Dept, of
in. (mm)
in. (mm)
in. (mm)
Energy.
115 V VERSION IS UL APPROVED
V
w
see rating label
60
see rating label
2
360 cu.m/h
see rating label
22731 (560)
30 (735)
15“'/.« (390)
97 (44)
A HE (High efficiency) system with low energy consumption has been installed on this appliance.
Such system needs about 4 minutes, once the appliance has been started, to produce cold air.
OPTIMUM OPERATING RANGE
ROOM TEMPERATURE
ROOM HUMIDITY FACTOR
70"F-90"F (2rC - 32”C)
< 80%
Page 5
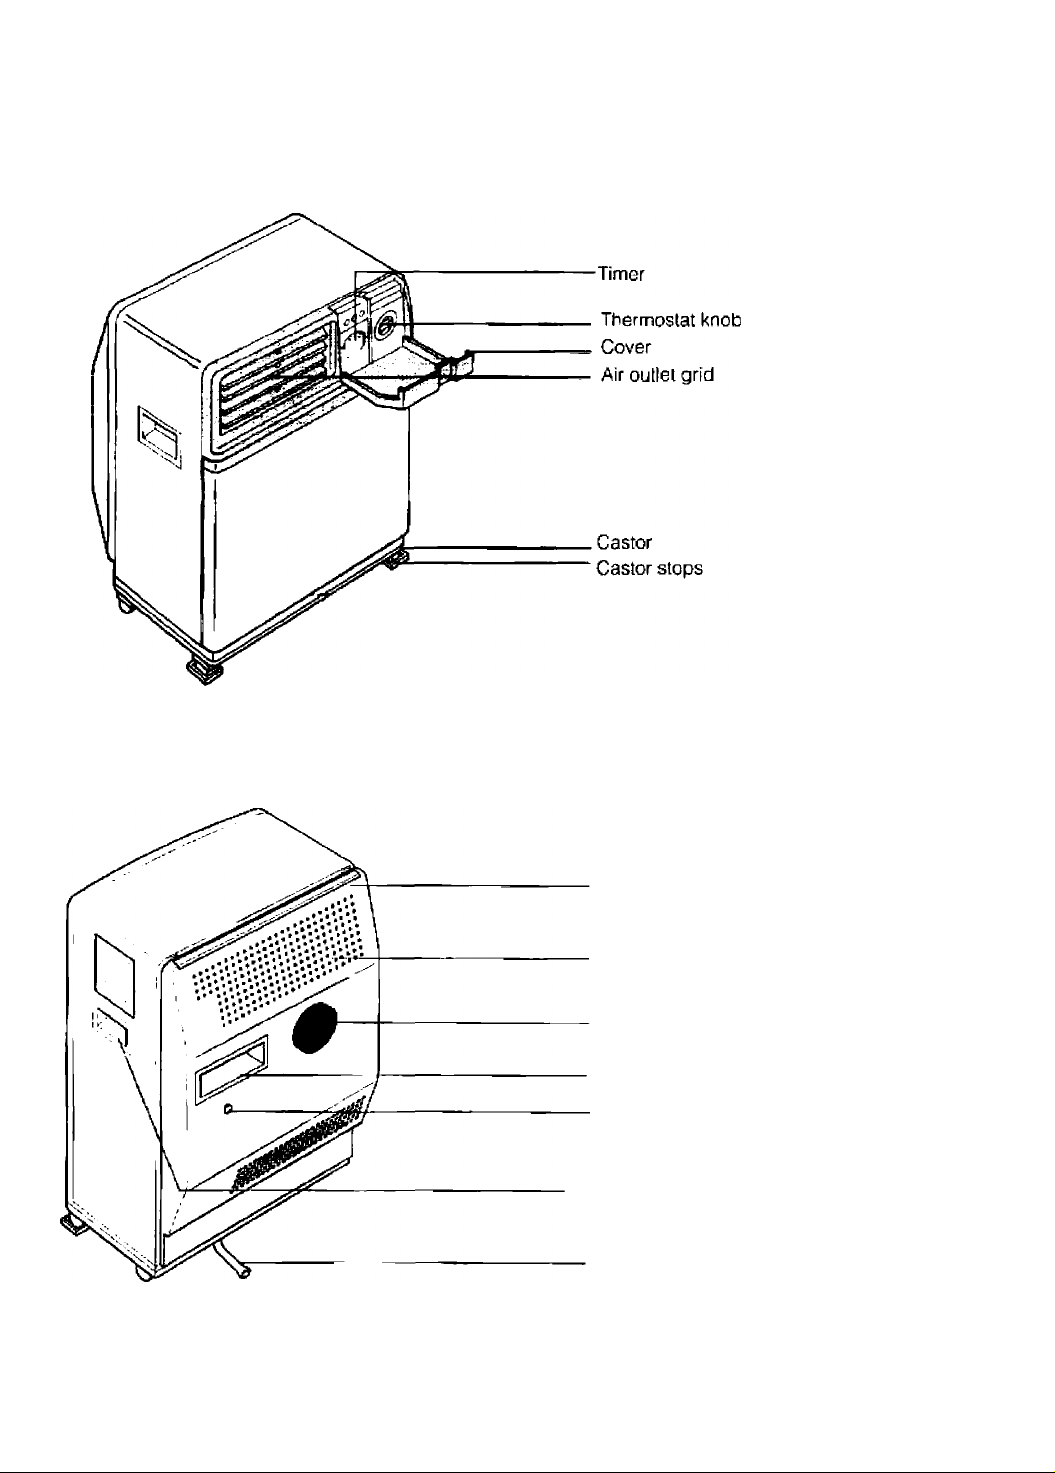
ILLUSTRATED MAIN FEATURES LIST
Air filter
Air intake grid
Exaust hose
Power cable comp.
Manual reset red button
Handle
Water collecting tray
drainage tube
Page 6

ILLUSTRATED ACCESSORY LIST
C ) )3
---------------------------
DESCRIPTION
Exhaust hose
Stopper + flange
Caster stop
Window nozzle
Suction pad
^
Adjustable window bracket
SUPPLIED
1
3
2
1
2
2
ACCESSORY CHECK
Check that all parts listed in Table above are included
Page 7

PERMANENT INSTALLATION
The Pinguino accessories include two sets of flan
ges and sloppers, to be mounted in different loca
tions (two different rooms).
Permanent instafiation outlet holes must be in an
exterior wall and opening diameter should not
exceed 3"'/p
INSIDE
fig. 2
INSIDE ■ . j
OUTSIDE
i
n
1
A1
in a window pane
1 • * ■.
-P »^11
4 ««
OUTSIDE
r
INSIDE
i<a 3
OUTSIDE
h
through the wooden base-sec
tion of a door or window
f»Q. 4
CO
. ■ . _ f ^ ■
r- * *‘,r-
• ' — . • f _ ■ ^
A3
through the wall
In case of permanent installation, air
discharged from rear hose has been
extracted from the room where the applian
ce is installed
Check that the room {especially if small) is
not "air-tight"; a drop in pressure would
cause irregular functioning, which could
consequently activate reset switch Air
entering through door and window cracks
IS normally sufficient. If deemed, necessary
leave a door ajar (approx, 1 cm is enough).
Page 8

TEMPORARY iNSTALLATION
Note: In both cases (pernnanenl and temporary installations) make sure that the Pinguino is positio
ned on level ground. If necessary use the two caster stops for the front casters
A temporary insEallalicn
makes it easy to use Pinguino
in any room, provided there is
a window or a door: it allows
you to use the Pinguino imrinedialely
Suction pad may be used to
keep window or door closed.
In any case, for maximum
coooling efficiency the win
dow should be closed as
much as possible.
SET UP INSTRUCTION
For permanent installation place the Pinguino near the outlet opening in wall or window (where it is
meant to be used) The diagram below shows the correct way to install the exhaust hose.
p Walci cüliecisai this poqnt 2) Bend Ihia seclim Sf Bend this scclion
t
t
гю a
NO
VES ves
Page 9

ELECTRICAL CONNECTION
Check that the power supply voltage corrispond to the voltage shown
in the rating iadeS,
Important: If you need to use and extension cord, please be sure to
use a heavy duty extension cord (minimum 14 gauge),
Before connecting the Pmguino to power supply, make sure that all
switches on the front control panel are in the OFF position,
Remove power cord found in storage compartment at rear of the air-
conditioner and plug into wall socket
FINAL CHECK
In order to obtain the maximum performance from your air-conditioner make sure that:
11^
c-
s.
(10. 10
Doors and windows of room to be airconditioned are closed (with the excep
tion of temporary installation where a par
tially opened window is necessary).
Shade the room as far as possible from
direct sunlight by drawing curtains and/or
lowering blinds or shutters, for economical
and efficient air-cooling
Ensure that intake and outlet vents are not
blocked,
Make sure there are no sources of heal in
the room,
Page 10

CONTROL PANEL
“Alarm" pilot light
Tirner ofi/oit pilot light
A © ®
ONiOFF
pilot light
L J
ON/OFF
bullon
~T
3) - 0»
tinner ON/OFF
button
1“:—~
Selaoting Ian
epeocJ button
Tirner notches
SETTING THE TIMER
The programmer/timer, like all clacks, must be
set to the exact time. It for example it is 4 00
p.m , turn the dial in a clockwise direction (fol
lowing the direction of the arrow) until the num
ber 4 is lined up with the arrow pointer (the
arrows indicates 4:00 p.m, approximately).
Note;Never turn Ihe dial in an anti-clockwise
direction!
The timer is in effect, an electric clock and
works only if the plug is connected to the power
supply. Whenever the plug is disconnected or
there is a power failure, the programmer stops
(the clock IS then “slow"'} and must be re-set.
The unit can be used in either programmed or
non-programmed mode.
Thermostat knob
PROGRAMMED MODE
1) Press the timer ON/OFF button.
Set the operating times by pushing out the not
2)
ches on the dial corresponding to the period
required {each notch represents 15 mins.).
Check that the timer indicates the correct
3)
time (see instructions on setting).
The unit will now switch on and off each
operating lime
o.g. irom 9 to 11 a.m.
day at the selected times.
Note: To override the programmed operating
times, simply release the ON/OFF key.
NON-PROGRAMMED MODE
I) TIMER ON/OFF button must be released
AIR-CONDITIONING
1. Press the ON-OFF button (J) to start the appiiance.
2. Set thermostat knob at max. cold.
3. Choose desired temperature. For universal consumer convenience, the temperature is shown
by spaced marks rather than in degrees. It is recommended that the thermostat be placed on
max. cold until room temperature has reached the desired level of comfort, then slowly turn the
thermostat knob clockwise until the thermostat shuts off the compressor while ventilation conti
nues, In so doing, you wilt have programmed your appliance on to this exact level of comfort
which the thermostat will automalicaly maintain After an initial period of use, consumers will be
able to judge immediately the required setting for reaching the temperature desired in a room.
SWITCHING OFF
1 To turn the the appliance off, press ON/OFF button CD
With The appliance on cooling, air humidity in Ihe room is automatically reduced and condensate
eliminated through the exahust hose
10
Page 11

MAINTENANCE
CLEANING OF EXTERNAL HOUSING
fig. 16
Clean with a damp cloth and dry thoroughly
with a clean dry cloth.
CONTROLS AT THE BEGINNING OF THE SEASON
Carefully follow installa
tion procedure.
i«g. «7
Use only mild soap and water.
Do not use chemical cleaners.
Check for any defects in
power cord and plug.
tig 18
11
Page 12

AIR FILTER CLEANING
Maintenance of air filter
A dogged air filter reduces the quantity of circulaling air and the efficiency of the appiiance
Clean filter every week using a vacuum clea
ner
Removal and replacement of air filter
Gently pull filler upwards.
Push down to replace,
t
I V i'
iig 20
Remove dust with a Rinse with running
vac uum c tea ner wa I er
Cleaning procedure
To remove dust deposited on filter, use a vacuum cleaner. It it is very dirty, soak in lukewarm water
and rinse thouroghly The temperature ol the water must be kept below 1Q4“F (40"C). After washing,
leave filter to dry before replacing
fig 21
END OF SEASON OPERATIONS
Disconnect plug.
1)
Remove plug from drainage tube, to empty
2)
water collecting tray
Remove exhaust hose.
3)
Clean lilier and dry well before replacing.
4)
5) Cover appliance with a polyethylene bag to
prevent dust from entering.
You can use the polyethylene bag included
into the packaging.
fig. 22
flg 23
12
Page 13

TROUBLESHOOTING
PROBLEMS
The Pinguino does not
work:
The appliance functions
for only brief periods
because reset switch
activates
ON/OFF switch keeps activating
The Pinguino produces
cold air but room does
not maintain comfortable
temperature:
CAUSE
power failure
plug is disconnected
ON/OFF switch is off
Timer buttori is in ON position
exhaust hose blocked
exhaust hose twisted or bent
ventilation holes on the rear of
the machine or front louvers
blocked
condenser fan has jammed
safety ball cock has activated
window open
air exhaust hose has become
disconnected
thermostat set too low
air filter blocked
source of heal in room [hea
ter, lamp, etc,) or room is
overcrowed with people
SOLUTION
insert plug
switch on
release the TIMER key
Check for obstruction of air
outlet vent
eliminate irregularities
remove obstacles to allow
proper airflow
Call Service Centre
Drain off condansate water
through drainage tube
Turn off and call Service Centro
close window
re-insert exhaust hose
set thermostat to higher num
ber
clean filter
remove source of heat
SERVICJNG
In case of malfunction turn off and disconnect the Pinguino irons power outlet and contact our Service
Centre for qualified assistance, toll-free number 1-800-322-3848. (Should troubleshooting checklist
fail to remedy malfunction, manufacturer does advise customers against unqualified servicing).
13
Page 14

FOR UNITED STATES ONLY:
We warrant each DEIONGHI AIR-COIMDITIONER to be free from defects in material and
workmanship. Our obligalion under this warrarly is !o provide one year pans and labor
tree from purchase date, with an addiliortal tour (3) years on any part of (tie sealed system
consisting of the compressor, evaporator, condenser and factory connected refrigerant
tubing. This warranty shall apply only if the AIR-CONDITIONER is used in accordance with
Ihe factory directions which accompany it, and on Alternating Current (AC) circuit. This
warranty is in lieu of all other warranties and représentations, expressed or implied, and all
other obligations or liabilities on our pad. We do not authorise any other person or com
pany to assume for us any liability in connection with the sale or use of our AIR-CONDI
TIONER This warranly shall not apply to assume for us any liability in connection with the
sale or use of our AIR-CONDITIONER. This warranly shall not apply to any AIR-CONDITIO
NER i,vhich shall have been repaired or altered outside our factory nor shall it apply to any
AIR-CONDITlONER which has been subiecled to misuse, negligence or accidentsIf repairs become necessary or spare parts are needed, píese write to:
LIMITED WARRANTY
SERVICE
PH. N 1-800-32 2-384S
DE'LONGHI AMERICA INC.
625 WASHINGTON AVENUE
CARLSTADT. NJ Q7072
H
 Loading...