

Page 1
FAN HEATER
INSTRUCTIONS FOR USE
SAVE THESE INSTRUCTIONS
TERMOVENTILADOR
INSTRUCCIONES PARA EL USO
REPASE Y GUARDE ESTAS INSTRUCCIONES
LEA CUIDADOSAMENTE ESTE INSTRUCTIVO ANTES DE USAR SU APARATO
MODEL/MODELO:
HVY1030/HVY1030BL/HVY1030OR
Register this product on-line and receive a free trial issue of Cook's Illustrated. Visit
www.delonghiregistration.com
Visit www.delonghi.com for a list of service centers near you.
Registre este producto en línea y reciba un ejemplar gratis de Cook's Illustrated. Visite
www.delonghiregistration.com
Visite www.delonghi.com para ver la lista de centros de servicios cercanos a usted.
ELECTRIC CHARACTERISTICS/ CARACTERISTICAS ELECTRICAS
120 V~ 60 Hz 1 500 W
Page 2
2
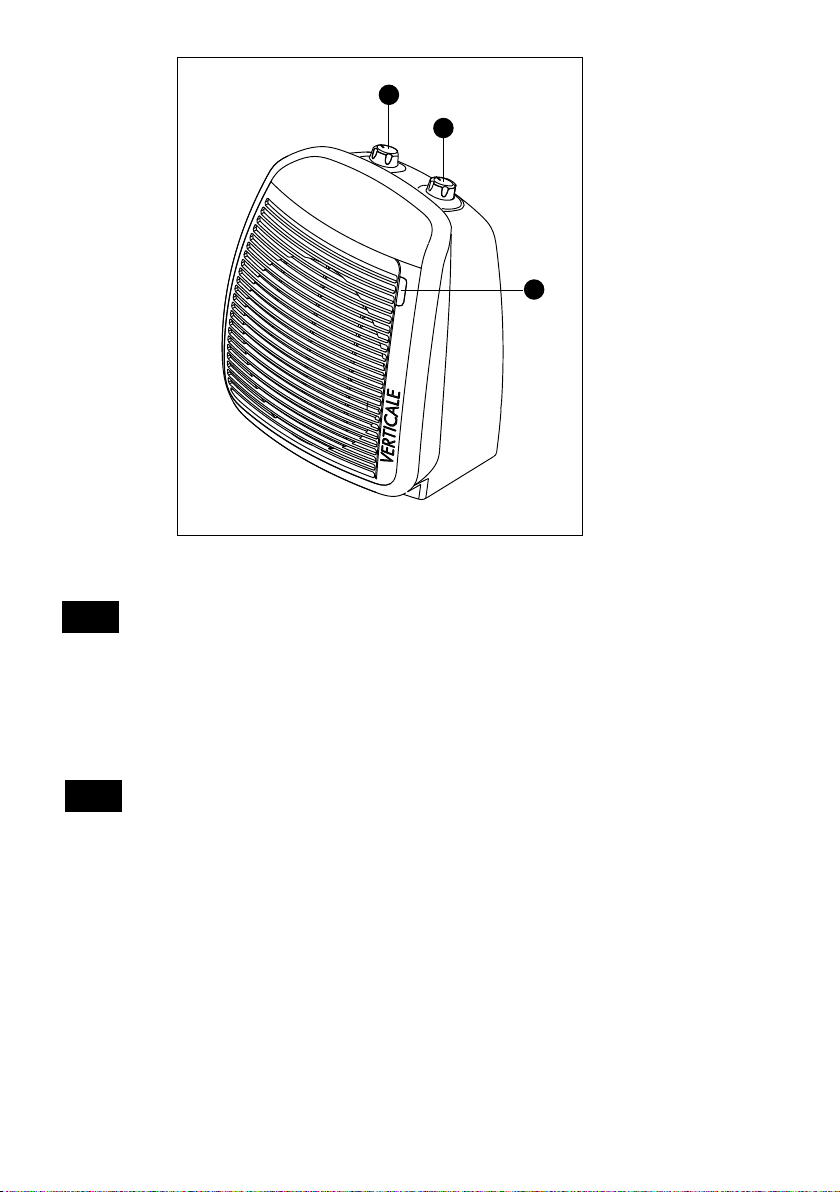
1- Room thermostat
2- Function selector
3- Pilot lamp
1- Termostato ambiente
2- Selector de funciones
3- Luz piloto
EN
ES
1
2
3
Page 3

3
IMPORTANT SAFEGUARDS
When using electrical appliances, basic pr
ecautions should always be followed to reduce risk of fire, electric
shock, and injury to persons, including the following:
1. Read all instructions carefully before using the appliance.
2. This appliance gets very hot when in use. To prevent burns, do not touch hot surfaces with bare skin. Use the
handle when moving the appliance. Keep all flammable materials, such as furniture, pillows, bedding,
paper, clothing, and curtains at least 3 feet (90 cm) from the front and top of the appliance also avoid contact with the sides and back.
3. The appliance is not intended for use by persons (including children) with reduced physical, sensory or mental capabilities, or lack of experience and knowledge, unless they have been given supervision or instruction
concerning use of the appliance by a person responsible for their safety. Children should be supervised to
ensure that they do not play with the appliance.
4. Always disconnect the plug from the power outlet when the appliance is not in use.
5. Do not operate the appliance with a damaged cord or plug, after faulty operation, or when it
has been dropped or damaged in any way. Contact the nearest authorized service facility for
examination, electrical or mechanical adjustment, or repair.
6. Do not use the appliance outdoors.
7. This heater is not intended for use in bathrooms, laundry areas, or similar indoor locations. Never position
the appliance where it may fall into a bathtub or come in contact with water.
8. Do not run the power cord under carpeting. Do not cover cord with throw rugs, runners, or the like. Keep the
cord away from any passageways where it could be tripped over.
9. To disconnect the appliance, turn controls to off, then remove plug from outlet.
10. Do not wrap the cord around the appliance immediately after use.
11. Do not insert or allow foreign objects to get into the air intake or air outlet grille, as this may cause electric
shock or fire, or damage the appliance.
12. To prevent a possible fire, do not block air intake or air outlet grille in any way. Do not use the appliance on
soft surfaces, such as beds, where the openings may become blocked.
13. Do not cover the appliance while it is functioning in order to avoid overheating and the risk of fire.
14. The internal parts of the appliance can become very hot or produce sparks during operation. Do not use the
appliance in areas where gasoline, paints, or other flammable liquids are used or stored.
15. Use this appliance only as described in this manual. Any other use not indicated by the manufacturer may
cause fire, electric shock, or injury to persons.
16. To prevent current overload and blown fuses, make sure that no other appliance is plugged into the same
outlet or into another outlet wired into the same circuit.
17. It is normal for heater’s plug and cord to feel warm to the touch. However, an excessively hot or deformed
plug or cord is not normal and may be the result of a defective electrical outlet. Defective outlets must be
replaced before using the heater. Plugging the heater into a worn outlet may result in overheating of the
power cord or may cause the risk of fire.
18. If the supply cord is damaged, to reduce the risk of malfunction it must be replaced by the manufacturer, its
service agent, or a licensed and qualified professional.
19. Always plug the heater directly to a wall outlet. Never use with an extension cord or relocable power tap.
20. Make sure that the plug is fully inserted into the outlet. Wall outlets may deteriorate with time, so check the
plug periodically for signs of overheating or deformation. If the outlet has deteriorated, stop using it and
have it repaired.
21. Check that neither the appliance nor the power cord have been damaged during shipping.
22. Make sure that no styrofoam or other packing materials remain in the appliance.
23. The first time the appliance is used, run it at the maximum power for at least two hours. During this time,
EN
Page 4
4
Your product is equipped with a polarized alternating current line plug (a plug having one blade wider than the
other). This plug will fit into the power outlet only one
way. This is a safety feature. If you are unable to insert the
plug fully into the outlet, try reversing the plug. If the plug
should still fail to fit, contact your electrician to replace
your obsolete outlet. Do not defeat the safety purpose of
the polarized plug.
CAUTION
- Always use the heater in an upright position.
- Do not use the heater to dry your laundry. Never obstruct
the intake and outlet grilles (danger of overheating).
- The electrical cord must be replaced only by authorized
personnel.
ELECTRIC POWER CONNECTION
The fan heater must be connected to a properly polarized A/C
110/120 V household outlet in perfect working condition. Keep
loose clothing or bedding, furniture and flammable material
away from the wall outlet where the heater is plugged in.
INSTALLATION
The fan heater can be easily positioned on any horizontal support surface in an upright position.
OPERATION
Make sure the appliance is off before plugging into the mains.
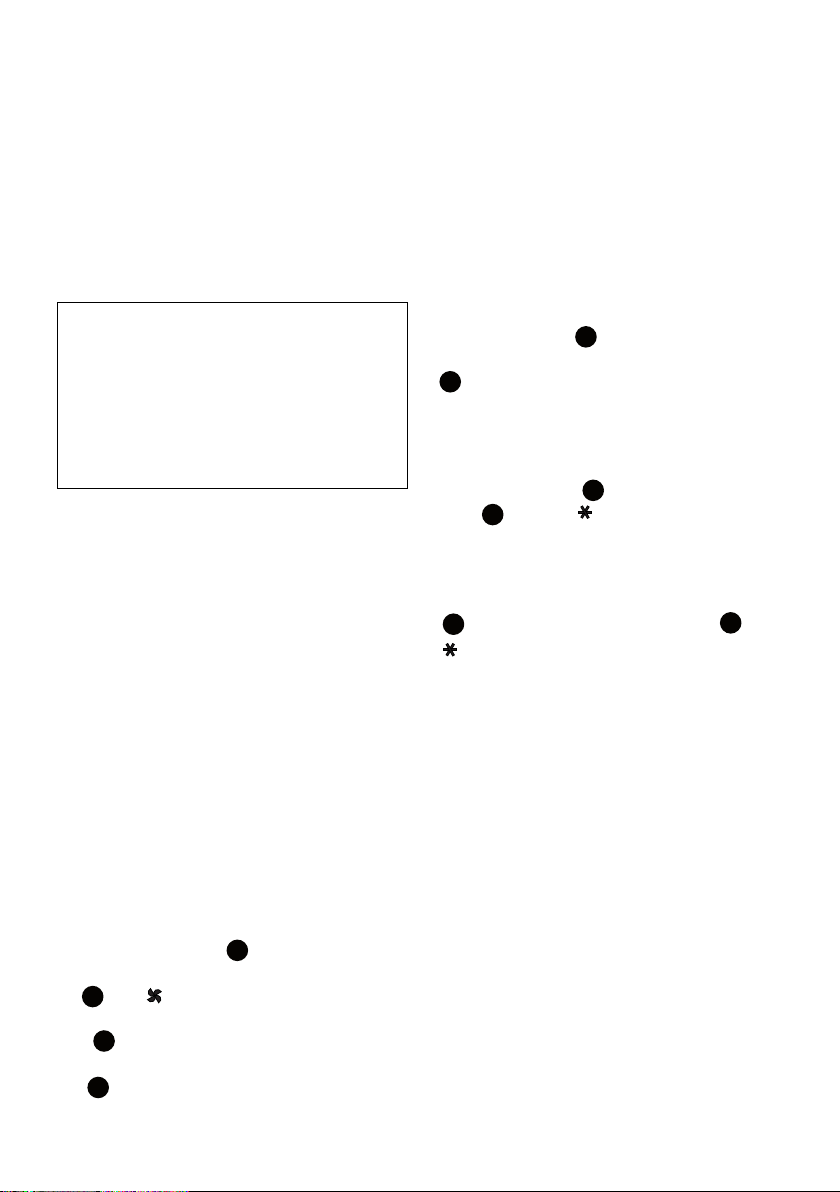
1. Plug the appliance into the mains.
2. Turn the thermostat dial to maximum.
3. Summer mode (fan only): turn the function selector
to the position (the pilot lamp will light on).
4. Low power operation: turn the function selector
to position “1” (the pilot lamp will light on).
5. High power operation: turn the function selector
to position “2” (the pilot lamp will light on).
Setting the thermostat:
Position the thermostat on maximum. When the room
has reached the required temperature, turn the thermostat dial
slowly anticlockwise until you hear a click; the fan go off
(the pilot lamp stays on). The thermostat will then keep room
temperature at the selected level automatically.
Anti-freeze function
With the function selector in position “2” and the thermostat dial in position . The appliance maintains room
temperature at about 41°F (5°C), preventing freezing with
minimal energy consumption.
Switching the appliance off: turn the function selector
to the “o” position and the thermostat dial to the
position, then remove the plug from the electrical outlet.
MAINTENANCE AND SERVICE
Always remove the plug from the power socket and allow the
heater to cool. After the heater has cooled, clean it with a soft
damp cloth, do not use detergents or abrasives. Periodically
clean the air intake and outlet grilles during the period in
which the heater is in use with a vacuum cleaner. Should the
heater not be in use over a certain length of time, wrap the
cable and store it in a dry place. This appliance has been built
to provide many years of trouble free service. In case of malfunction, do not try to repair the heater yourself: it may result
in fire hazard or electric shock. Call the nearest Service Center.
ventilate the room thoroughly to eliminate the “new” smell released by the appliance. It is completely normal for the appliance to emit “creaking” sounds the first time it is run.
24. During use check frequently to determine if the plug, outlet, or faceplate is hot.
25. CAUTION: To prevent electric shock, make sure the wide prong of the plug is inserted in the
wide slot of the outlet.
26. CAU
TION: Risk of fire. Do not open. No user serviceable parts inside.
SAVE THESE INSTRUCTIONS
For Household use only
1
222
111
1
2
2
Page 5

5
ATTENTION
A safety device switches the fan heater off if it accidentally
overheats. To reset the unit for normal operation, remove the
plug from the outlet for a few minutes, eliminate the cause of
overheating (e.g. air intake or outlet grilles obstructed) and
then plug the fan heater back in again. Contact your nearest
Service Center if the fan heater does not begin normal operation again.
TROUBLESHOOTING
PROBLEM
CAUSE
SOLUTION
The appliance doesn’t work
• Be sure it is plugged in and that the
electrical outlet is working.
• Check for any obstruction.
• The function selector is in the ”0” position.
• The thermostat may be set too low.
• Plug into the outlet.
• Remove the obstruction, unplug the heater and let the appliance cool down. If
the appliance doesn’t work please contact the nearest service center.
• Turn the function selector to the position or “1” or ”2”.
• Turn the thermostat clockwise to a
higher setting until the heater restarts.
Page 6

6
LIMITED WARRANTY
This warranty applies to all products with De’Longhi or Kenwood brand names.
What does the warranty cover?
We warrant each appliance to be free from defects in material and workmanship. Our obligation under this warranty is limited
to repair at our factory or authorized service center of any defective parts or part thereof, other than parts damaged in transit.
In the event of a products replacement or return, the unit must be returned transportation prepaid. The repaired or new model
will be returned at the company expense.
This warranty shall apply only if the appliance is used in accordance with the factory directions, which accompany it, and on an
Alternating current ( AC ) circuit.
How long does the coverage last?
This warranty runs for one year (1) from the purchase date found on your receipt and applies only to the original purchaser for
use.
What is not covered by the warranty?
The warranty does not cover defects or damage of the appliance, which result from repairs or alterations to the appliance outside our factory or authorized service centers, nor shall it apply to any appliance, which has been subject to abuse, misuse,
negligence or accidents. Also, consequential and incidental damage resulting from the use of this product or arising out of any
breach of contract or breach of this warranty are not recoverable under this warranty. Some states do not allow the exclusion
or limitation of incidental or consequential damage, so the above limitation may not apply to you.
How do you get service?
If repairs become necessary, see contact information below:
U.S. Residents: Please contact our toll free hotline at 1-800-322-3848 or log onto our website at www.delonghi.com
Residents of Mexico: Please contact our toll free number 01-800-711-8805 for assistance or log onto our website at
www.delonghi.com
The above warranty is in lieu of all other express warranties and representations. All implied warranties are limited to the
applicable warranty period set forth above. This limitation does not apply if you enter into an extended warranty with De’Longhi. Some states/countries do not allow limitations on how long an implied warranty lasts, so the above exclusions may not
apply to you. De’Longhi does not authorize any other person or company to assume for it any liability in connection with the
sale or use of its appliance.
How does country law apply?
This warranty gives you specific legal rights, and you may also have other rights, which vary from state to state/country to
country.
Page 7

7
INSTRUCCIONES IMPORTANTES
Cuando se utilizan aparatos eléctricos es oportuno adoptar siempre algunas precauciones fundamentales
para evitar el riesgo de incendios, descargas eléctricas y/o lesiones. Específicamente:
1. Lea atentamente todas las instrucciones antes de utilizar el aparato.
2. Este aparato se calienta mucho cuando está en uso. Para evitar quemaduras no toque las superficies
calientas con las manos desnudas. Para trasladar el aparato utilice el asa correspondiente. Conserve
todo objeto inflamable, tal como mobiliario, almohadas, cobertores, papel, vestidos o cortinas a una
distancia de al menos 90 cm. de las partes frontal y superior del aparato, evitando además el contacto
con los costados y la parte posterior.
3. El aparato no está diseñado para ser utilizado por personas (incluyendo niños) con capacidades físicas,
sensoriales o mentales disminuidas, o que carezcan de experiencia y conocimiento, a menos que lo
hagan bajo la supervisión o instrucción de una persona responsable de su seguridad. Los niños deben
ser supervisados para asegurarse de que no jueguen con el aparato.
4. Desconecte siempre la clavija del tomacorriente cuando no se utiliza el aparato.
5. No utilice el aparato si el cable o la clavija estuvieran dañados, después de una avería o en
caso de que se haya dejado caer o si estuviera dañado de alguna manera. Lleve el aparato
al centro de servicio autorizado más cercano para su revisión, ajuste de las partes eléctricas
o mecánicas o reparación.
6. No utilice el aparato al aire libre.
7. Este termoventilador no está diseñado para su uso en baños, áreas de lavado o sitios similares en interiores. Nunca coloque el aparato donde pudiese caer dentro de una tina de baño o entrar en contacto
con agua.
8. No pase el cable de alimentación debajo de las alfombras. No cubra el cable con tapetes, recubrimientos o similares. Extienda el cable lejos de las zonas de tránsito donde se pueda tropezar con el mismo.
9. Para apagar el aparato, sitúe los mandos en la posición OFF y desenchufe el aparato de la corriente.
10. No enrolle el cable alrededor del aparato inmediatamente después de usarlo.
11. No inserte ni permita introducir cuerpos extraños en las rejillas de toma o descarga de aire, dado que
ello puede producir descargas eléctricas, incendios o daños al aparato.
12. Para evitar el riesgo de incendios, no bloquee de ningún modo las tomas y descargas de aire. No utilice
el aparato sobre superficies suaves, tales como camas, donde las aberturas pudieran obstruirse.
13. No cubra nunca al aparato mientras esté funcionando para evitar sobrecalentamientos y riesgos de
incendios.
14. Las partes internas del aparato pueden calentarse mucho o producir chispas durante el funcionamiento.
No utilice el aparato en lugares donde se usen o almacenen gasolina, pinturas u otros líquidos inflamables.
15. Utilice este aparato sólo como se describe en este manual.
Cualquier otro uso no recomendado por el fabricante puede ser causa de incendios, descargas eléctricas
o lesiones.
16. Para impedir sobrecargas de corriente y que se fundan los fusibles, asegúrese de que ningún otro aparato esté conectado en el mismo tomacorriente o a otro tomacorriente del mismo circuito.
17. Es normal que la clavija y el cable del termoventilador se sientan calientes al tacto. Sin embargo, una
clavija o cable excesivamente calientes no es normal y puede ser resultado de un tomacorriente eléctrico defectuoso. Los tomacorrientes defectuosos deben reemplazarse antes de utilizar el termoventilador.
Conectar el termoventilador a un tomacorriente dañado puede sobrecalentar el cable de alimentación o
provocar un incendio.
18. Para reducir el riesgo de funcionamiento defectuoso, si se daña el cable de alimentación, debe ser
ES
Page 8

8
reemplazado por el fabricante, su agente de servicio, o un profesional calificado y autorizado.
19. Siempre conecte el calentador directamente a un tomacorriente de pared. Nunca utilice cables de
extensión o tomacorrientes reubicables
20. Asegúrese de que la clavija esté insertada totalmente en el tomacorriente. Los tomacorrientes de pared
pueden deteriorarse con el tiempo, así que verifique periódicamente que la clavija no presente señales
de sobrecalentamiento o deformación. Si el tomacorriente está deteriorado, deje de usarlo y mándelo
reparar.
21. Verifique que ni el aparato ni el cable de alimentación se hayan dañado durante el transporte.
22. Asegúrese de que no se haya dejado poliestireno u otros materiales de empaque entre un elemento y
otro del aparato.
23. La primera vez que utilice el aparato, hágalo funcionar a su máxima potencia durante al menos dos
horas. Durante este tiempo, ventile bien la habitación a fin de eliminar el olor “a nuevo” emitido por el
aparato. Es del todo normal que el aparato emita “crujidos” la primera vez que se usa.
24. Cuando lo opere, revíselo frecuentemente para determinar si su tomacorrientes o placa frontal está
caliente.
25. ATENCIÓN: A fin de evitar descargas eléctricas, asegúrese de que la espiga ancha de la cla-
vija se inserte en la ranura ancha del tomacorriente.
26. PRECACUIÓN: Riesgo de incendio. No lo abra. No intente reparar las partes internas.
GUARDE ESTAS INSTRUCCIONES
Únicamente para uso doméstico
Este producto está equipado con una clavija de corriente
alterna polarizada (una clavija con un polo con dimensiones mayores que las del otro). Esta clavija puede enchufarse únicamente en un modo. Es una medida de seguridad. Si no puede enchufar correctamente la clavija, pruebe
a darle la vuelta. Si tampoco así lo consigue, solicite la
intervención de un electricista para sustituir el enchufe
obsoleto. No intente modificar la clavija eliminando la función de seguridad.
ATENCIÓN
- Utilice siempre el aparato en posición vertical.
- No utilice el aparato para secar la ropa de la casa. No
obstruya nunca las rejillas de entrada ni de salida del aire
(peligro de recalentamiento).
- El cable de alimentación debe ser sustituido únicamente
por un técnico autorizado.
CONEXIÓN ELÉCTRICA
Enchufe el aparato a un enchufe idóneo de 110/120 V CA, que
funcione perfectamente.
Evite el contacto de prendas de vestir, ropa de la casa, muebles
y material inflamable con el enchufe de corriente mural al que
está enchufado el aparato.
INSTALACIÓN
Puede instalar el aparato sobre cualquier superficie horizontal
y debe mantenerlo en posición vertical.
FUNCIONAMIENTO
Compruebe que el aparato esté apagado antes de enchufarlo a
la corriente.
1. Enchufe el aparato a la corriente.
2. Gire el mando del termostato para situarlo en la posición máxima.
3. Uso veraniego (solamente ventilación): gire el selector de funciones hasta la posición (el indicador
luminoso se enciende).
4. Funcionamiento con potencia mín: gire el selector de
funciones hasta la posición “1” (el indicador luminoso
se enciende).
5. Funcionamiento con potencia máx: gire el selector de
funciones hasta la posición “2” (el indicador luminoso
se enciende).
Regulación del termostato
Ponga el termostato en la posición máxima, cuando el
ambiente haya alcanzado la temperatura elegida, gire lentamente
el mando del termostato en el sentido contrario de las agujas
del reloj hasta oír un clic (el ventilador se apaga y el indicador luminoso esta encendido). El termostato mantendrá automáticamente
la temperatura elegida regulada y constante.
1
2
1
1
2
2
Page 9

9
Función antihielo
Con el selector de funciones en la posición “2” el mando
del termostato en la posición , el aparato mantiene la
temperatura ambiente a 41°F (5°C) aproximadamente, impidiendo fenómenos de hielo y con un consumo mínimo energético.
Para apagar completamente el aparato, gire el selector
de funciones hasta la posición “o” y el mando del termostato hasta la posición y después desechufe el aparato
de la corriente.
MANTENIMIENTO Y LIMPIEZA
Desenchufe siempre el aparato de la corriente y deje que se
enfríe. A continuación, límpielo con un paño suave humedecido, no utilice detergentes o polvos abrasivos. Limpie regularmente las rejillas de entrada y de salida del aire en el período
de utilización del aparato, utilizando un aspirador.
Si no utiliza el aparato durante un largo período de tiempo,
enrolle el cable y guárdelo en un lugar seco.
Este aparato ha sido construido para durar mucho tiempo.
En caso de averías, no intente reparar el aparato usted mismo:
podría provocar incendios o descargas eléctricas. Llame al centro de asistencia más cercano.
ATENCIÓN
Un dispositivo de seguridad interrumpe el funcionamiento del
aparato en caso de recalentamiento accidental. Para restablecer el funcionamiento, desenchufe el aparato de la corriente
durante unos minutos, elimine la causa del recalentamiento
(por ejemplo, la obstrucción de las rejillas de entrada y salida
del aire). A continuación, enchufe de nuevo el aparato a la corriente. Contacte al centro de asistencia más cercano, si el
aparato no funcionase de nuevo normalmente.
SI ALGO NO FUNCIONA
PROBLEMAS
CAUSAS
SOLUCIONES
El aparato no se enciende
• El aparato no está enchufado a la corriente.
• Obstrucciónes en el aparato.
• El selector de funciones está en la posición apagado (”0”).
• El termostato está en posición más
baja.
• Enchufe el aparato a la corriente.
• Desenchufe el aparato, identificar y quitar los obstáculos. Si el aparato no se
enciende, dirigirse al Servicio PostVenta más cercano.
• Posicionár el selector de funciones en la
posición o “1” o “2”.
• Gire el termostato en sentido horario
hasta la posición máxima.
1
212
Page 10

10
Garantía limitada
Esta garantía cubre todos los productos con las marcas De'Longhi o Kenwood.
Alcance de la garantía
Cada artefacto tiene garantía por defectos de materiales y de fabricación. Bajo los términos de esta garantía limitada, nuestra
obligación se limita a la reparación de partes o componentes (a excepción de partes dañadas durante el transporte) en nuestra fábrica o en un centro autorizado de servicio. Al devolver un producto para cambio o reparación, todos los costos de envío
deben ser pagados por el propietario del mismo. El producto nuevo o reparado será devuelto con los gastos de envío pagados
por la compañía.
Esta garantía es válida únicamente si el artefacto se utiliza de acuerdo con las instrucciones del fabricante (incluidas con el
artefacto) y alimentada eléctricamente con corriente alterna (CA).
Duración de la garantía
Esta garantía es válida por un (1) año a partir de la fecha de compra que figura en el recibo o factura de venta de la unidad, y
sólo el comprador original tiene derecho a hacer uso de la garantía.
Exclusiones de la garantía
La garantía no cubre defectos ni daños que fueran consecuencia de reparaciones o modificaciones efectuadas al artefacto por
personal ajeno a nuestra fábrica o a centros autorizados de servicio, ni cubre fallas o daños causados por maltrato, uso indebido, negligencia o accidentes. Esta garantía tampoco reconocerá reclamos efectuados por perjuicios directos ni indirectos
emergentes del uso del producto, ni perjuicios o daños resultantes del uso del producto en incumplimiento de los términos y
condiciones que hacen válida la garantía. En algunos estados no se permiten exclusiones ni limitaciones de los perjuicios
reconocidos por una garantía, por lo cual las limitaciones mencionadas podrían ser no válidas en su caso particular.
Obtención de servicios de garantía
Si las reparaciones son necesarias, vea la información de contacto que aparece a continuación:
Residentes de los Estados Unidos: Por favor contactar a nuestra línea telefónica gratuita, al 1-800-322-3848 o ingrese a
nuestro sitio en el Internet www.delonghi.com
Residentes de México: Por favor contactar 01-800-711-88-05 o ingrese a nuestro sitio en el Internet www.delonghi.com
La garantía explicada anteriormente se ofrece en reemplazo de cualquier otra garantía, sea expresa u ofrecida de cualquier
otra manera, y toda garantía implícita del producto estará limitada al período de duración mencionado anteriormente. Esta
limitación queda anulada y es reemplazada por otros términos si el usuario decide obtener una garantía prolongada de
De’Longhi. En algunos estados/paises no se permiten limitaciones del período de garantía implícita, por lo cual las limitaciones mencionadas anteriormente podrían no ser válidas en su caso particular. De’Longhi no autoriza a ninguna otra persona ni
compañía a ofrecer ningún tipo de garantía ni responsabilidad con respecto al uso o a los términos de venta de sus artefactos.
Leyes del país
Esta garantía le confiere derechos establecidos por ley, pero usted también podría tener otros derechos que varían de un
estado/país a otro.
Page 11

5711410941/03.11_00
Printed in China
www.delonghi.com
 Loading...