

Dell Venue 7 3000 SERIES User Manual

Marketing model: Venue 3741
Regulatory model: T02C
Regulatory type: T02C001
Venue 7
3000 Series
User's Manual

Notes, Cautions, and Warnings
NOTE: A NOTE indicates important information that helps you make better use
of your computer.
CAUTION: A CAUTION indicates either potential damage to hardware or loss
of data and tells you how to avoid the problem.
WARNING: A WARNING indicates a potential for property damage, personal
injury, or death.
Copyright © 2014 Dell Inc. All rights reserved. This product is protected by U.S. and
international copyright and intellectual property laws. Dell™ and the Dell logo are trademarks of
Dell Inc. in the United States and/or other jurisdictions. All other marks and names mentioned
herein may be trademarks of their respective companies.
2014 – 09
Rev. A00

Contents
Features ........................................5
Charging the Battery ............................ 7
Inserting the MicroSD Card and
Micro-SIM Card (optional)........................8
Getting Started..................................9
Turning on/off the device . . . . . . . . . . . . . . . . . . . . 9
Finishing Android setup . . . . . . . . . . . . . . . . . . . . . 9
Customizing the screen . . . . . . . . . . . . . . . . . . . . 10
Locking and unlocking your device . . . . . . . . . . . . . .11
Touch tips . . . . . . . . . . . . . . . . . . . . . . . . . . . . .11
Status bar. . . . . . . . . . . . . . . . . . . . . . . . . . . . . 12
Screen orientation . . . . . . . . . . . . . . . . . . . . . . . 13
Keys and functions . . . . . . . . . . . . . . . . . . . . . . . 13
Apps and widgets . . . . . . . . . . . . . . . . . . . . . . . . 13
Using Your Device .............................14
Contacts . . . . . . . . . . . . . . . . . . . . . . . . . . . . . 14
Text entry . . . . . . . . . . . . . . . . . . . . . . . . . . . . 15
Managing your device's storage . . . . . . . . . . . . . . . 15
Calls . . . . . . . . . . . . . . . . . . . . . . . . . . . . . . . . 16
Messages . . . . . . . . . . . . . . . . . . . . . . . . . . . . . 16
Internet . . . . . . . . . . . . . . . . . . . . . . . . . . . . . . .17
Email . . . . . . . . . . . . . . . . . . . . . . . . . . . . . . . 19
Customizing Your Device . . . . . . . . . . . . . . . . . . . 20

Protecting Your Device . . . . . . . . . . . . . . . . . . . . 21
Apps . . . . . . . . . . . . . . . . . . . . . . . . . . . . . . . 24
Bluetooth. . . . . . . . . . . . . . . . . . . . . . . . . . . . . 25
Gallery . . . . . . . . . . . . . . . . . . . . . . . . . . . . . . 26
Calendar . . . . . . . . . . . . . . . . . . . . . . . . . . . . . 27
Troubleshooting ...............................28
Specifications ..................................30
Features | 5
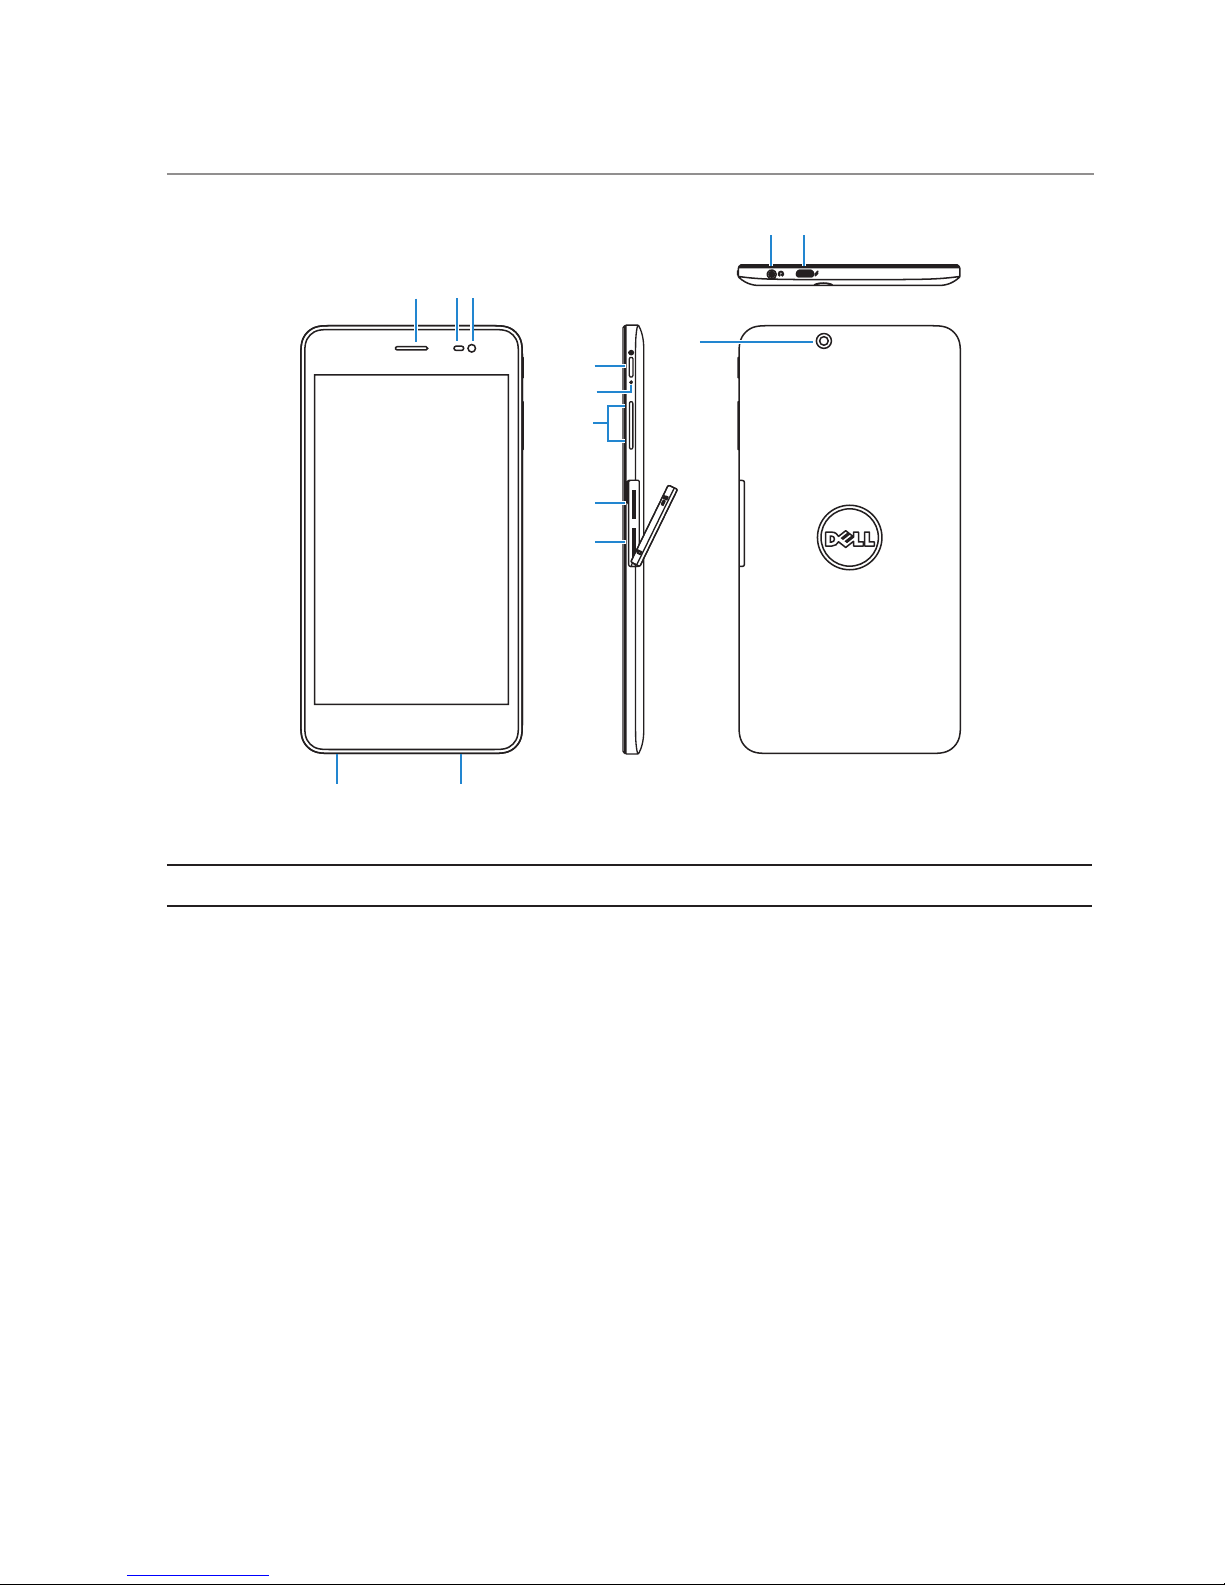
Features
6
7
11
1312
5
3
1
9
8
2
10
4
Part Functionality
1. Front camera Use to make video calls or to capture front photos and
videos.
2. Ambient-light
sensor
Detects the ambient light to allow screen-brightness to
be adjusted automatically.
3. Earpiece Used to transfer sound.
4. Microphone Use for recording sound or to input voice in other
voice-based apps.
5. Speaker Outputs sound.
6. Micro-SIM card slot Insert a micro-SIM card to access mobile broadband.
7. MicroSD-card slot Insert a microSD card to expand the storage on your
device.
8. Volume buttons • Press to increase or decrease the volume by one
level.
• Press and hold to continuously increase or decrease
the volume.

6 | Features
Part Functionality
9. Battery-charging
status light
When the device is charging, the battery-charging
status light flashes.
10. Power button • Press and hold to turn on your device.
• Press and release to lock or unlock the screen.
• While the device is turned on, press and hold to
open the options menu.
11. Rear camera Capture pictures and videos.
12. Headset port Connect headphones or headset.
13. Micro-USB port Connect a USB cable to charge your device or to
connect to your computer.
Charging the Battery | 7
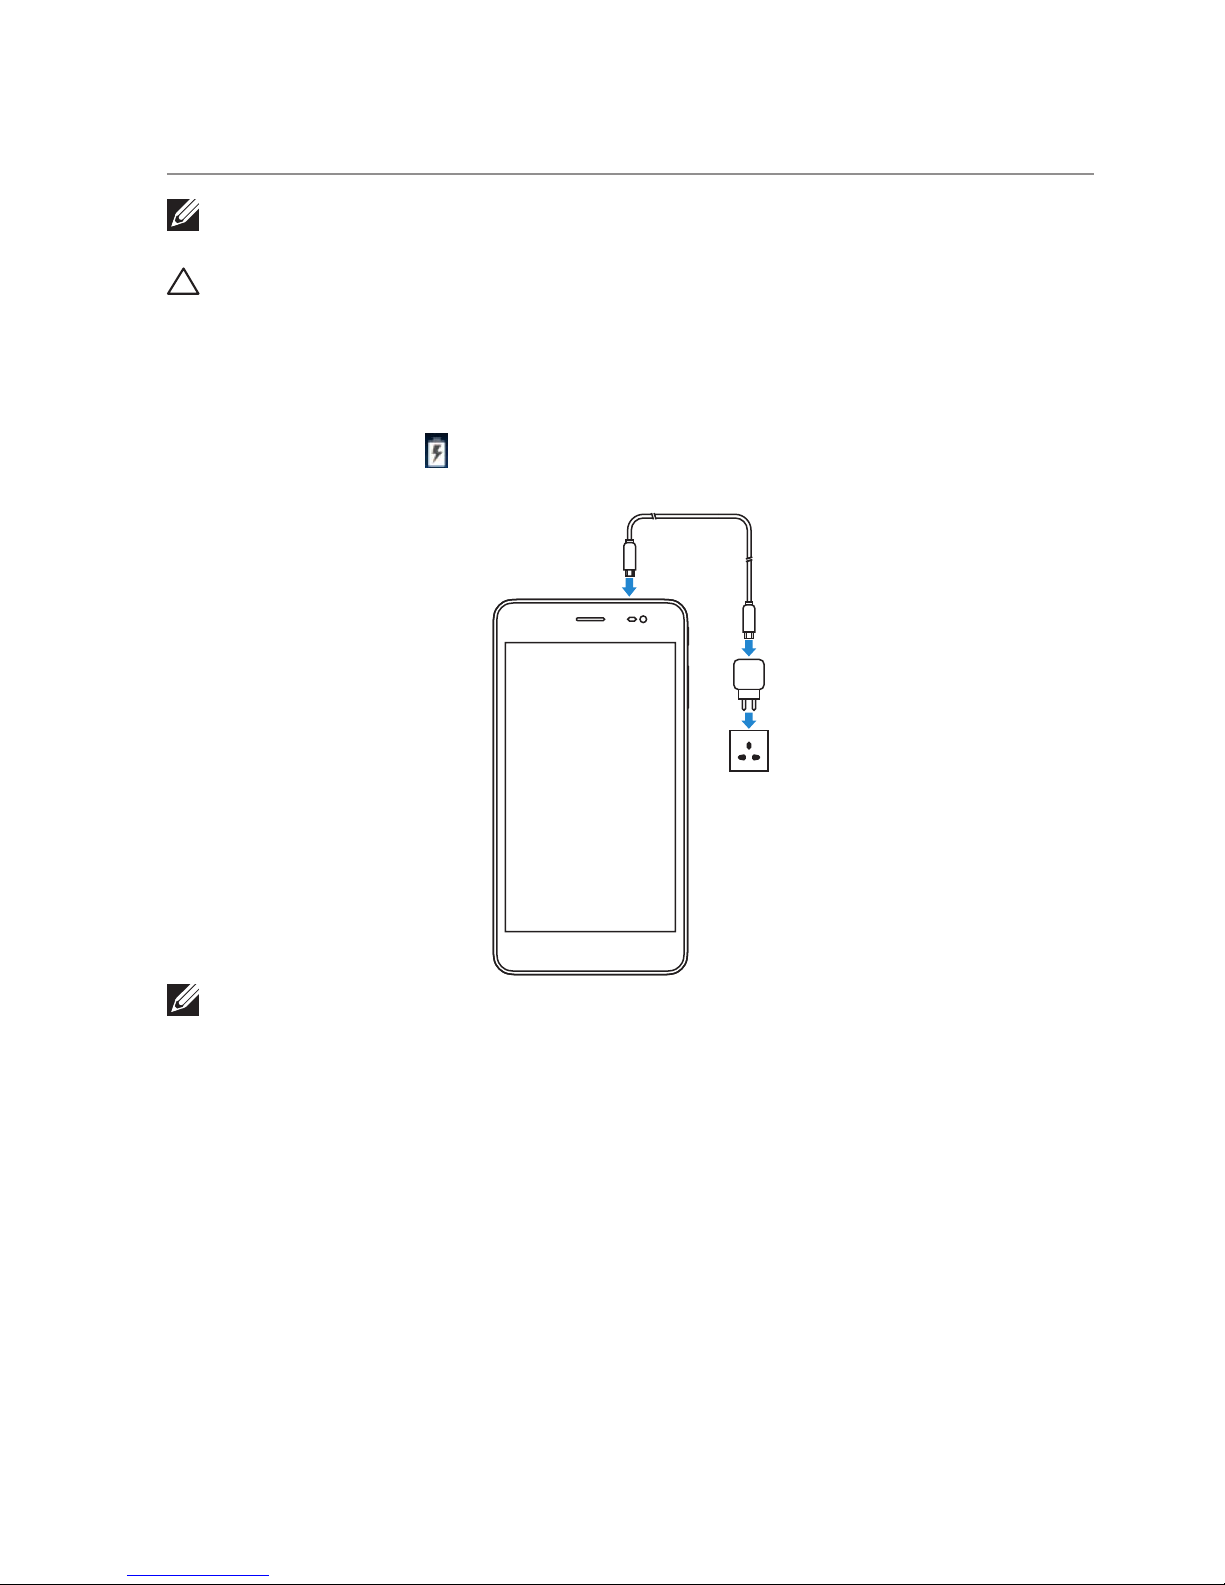
Charging the Battery
NOTE: Your device may not be fully charged when you receive it. It is
recommended to charge the device for 4 hours for the first time.
CAUTION: Use only the power adapter and/or cable that shipped with the
device.
1. Connect the micro-USB end of the USB cable to the USB port of the device.
2. Connect the other end of the USB cable to the adapter.
3. Connect the power adapter to an electrical outlet.
An animated icon appears on the screen while the battery is being charged.
When the battery is fully charged, the icon is static.
NOTE: When disconnecting the device from the adapter, disconnect the power
adapter from the power outlet and then disconnect the cable from your device.
8 | Inserting the MicroSD Card and Micro-SIM Card (optional)
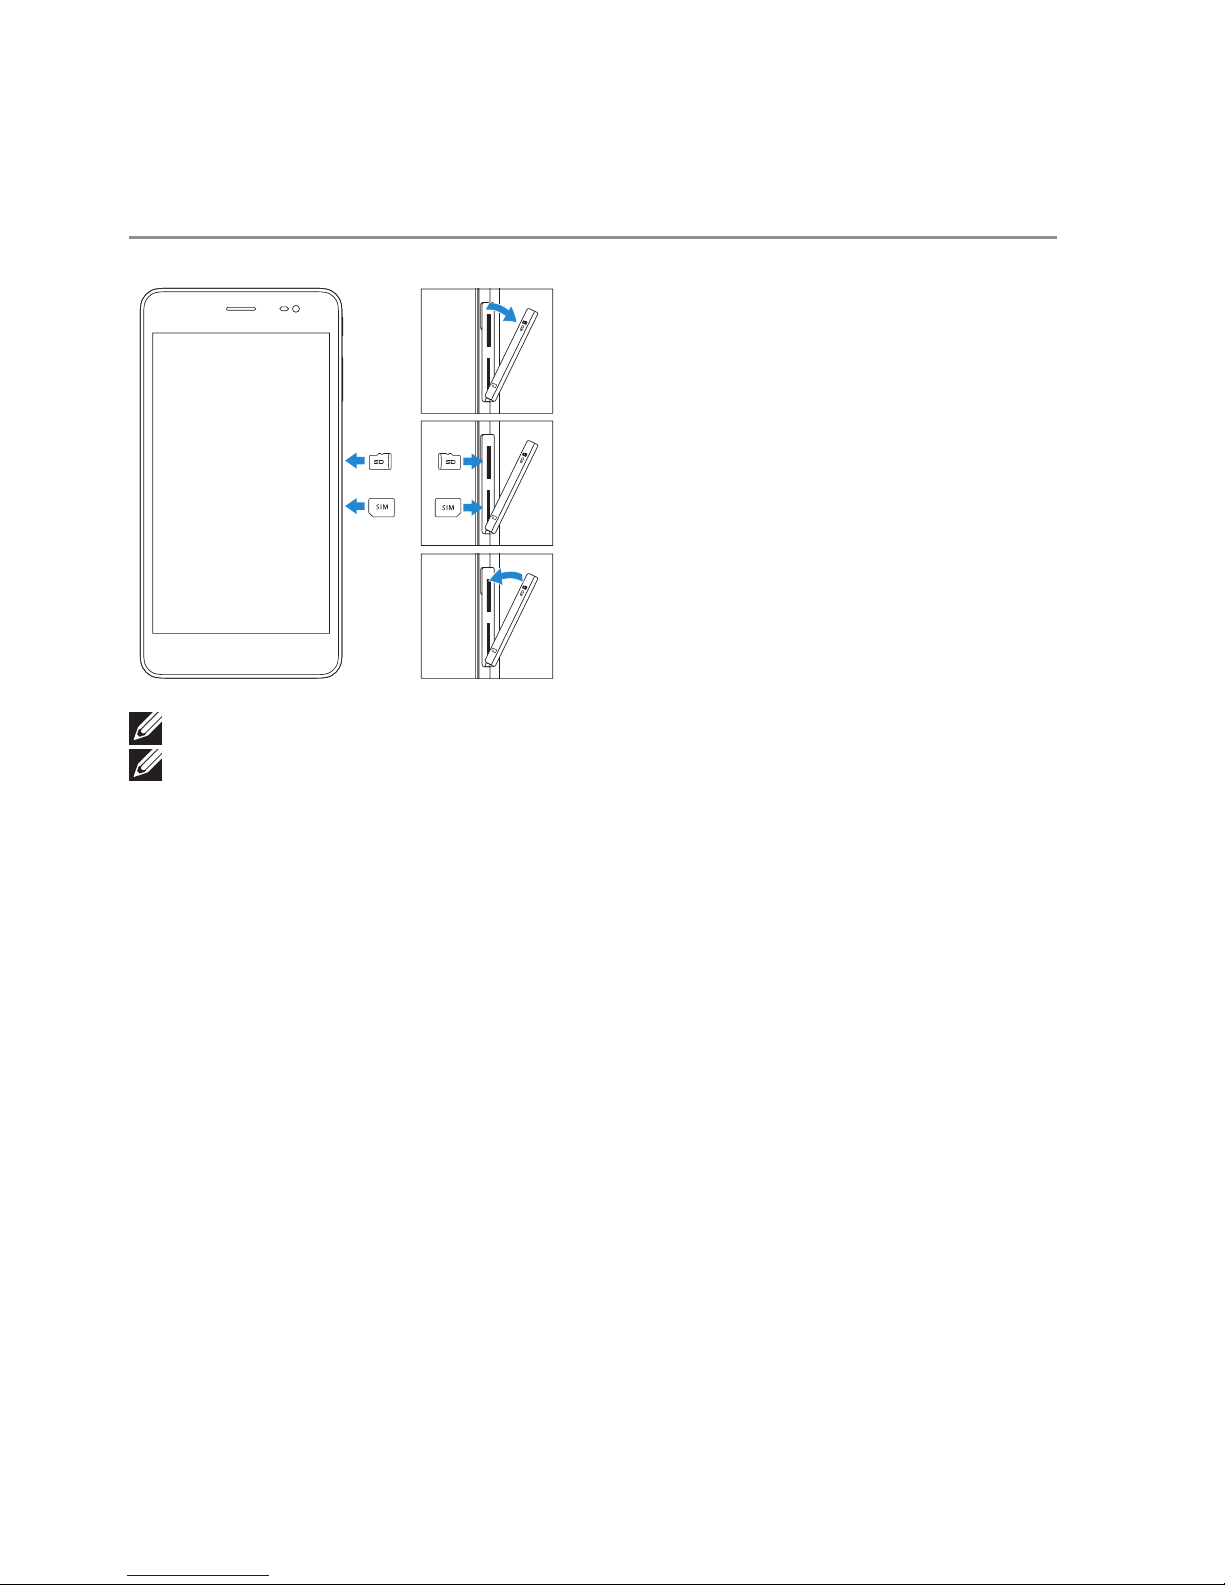
Inserting the MicroSD Card and
Micro-SIM Card (optional)
Open the card-slot door
Insert the cards into the respective slots
and push the cards in until they click in
place
Close the card-slot door
NOTE: Make sure the cards are correctly aligned and are inserted all the way.
NOTE: Turn off your device before inserting the microSD card and
micro-SIMcard.
Getting Started | 9
Getting Started
Turning on/off the device
To turn on your device, press and hold the power button for 3 seconds.
NOTE: When your device is fully discharged, it is recommended to connect
the device to the power adapter for charging for 3-5 minutes and then turn on
thedevice.
To turn off your device, press the power button to open the options menu, and then
select Power off → OK.
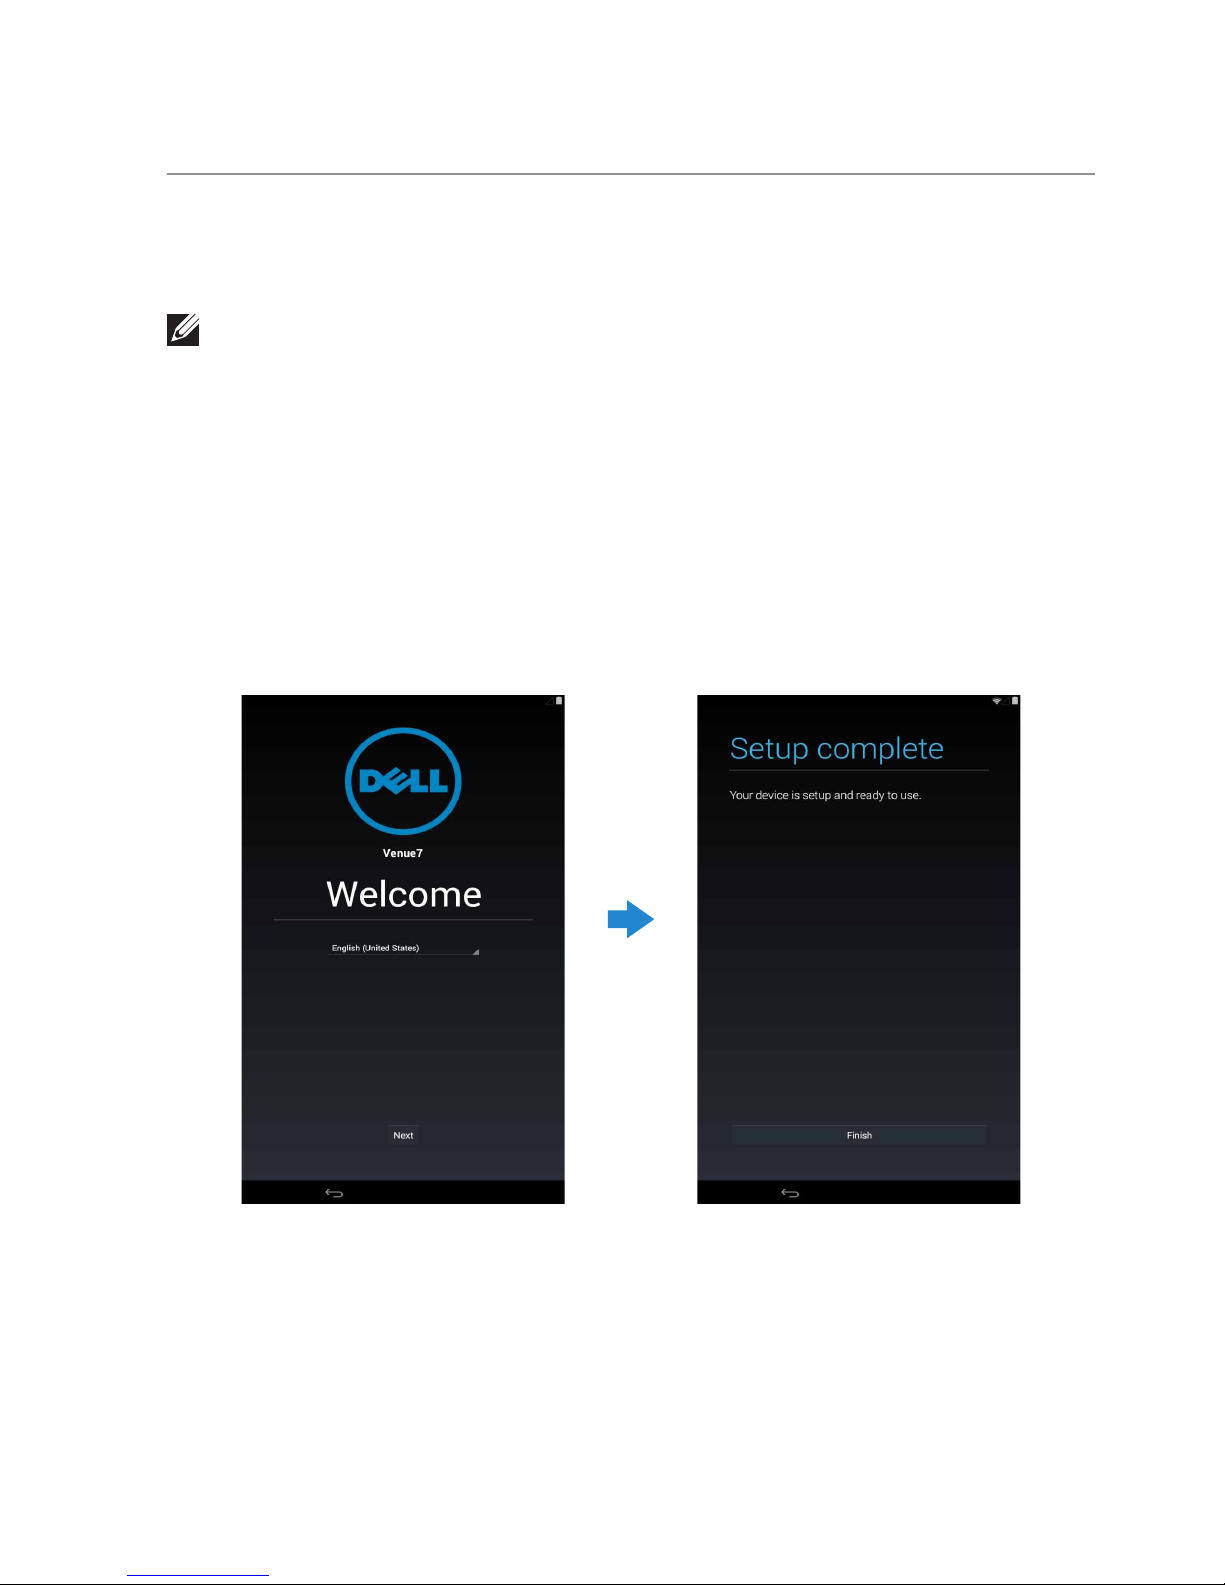
Finishing Android setup
After you turn on your device for the first time, follow the prompts on the screen to
finish Android setup.
You can configure settings such as language, Wi-Fi, date & time, sign-in to your Google
account, and so on.
 Loading...