

Dell PowerEdge 2500, PERC 3/Di Activation Manual

Dell™ Systems
ACTIVATING THE INTEGRATED RAID
CONTROLLER
www.dell.com
support.dell.com

Notes, Notices, Cautions, and
Warnings
NOTE: A NOTE indicates important information that helps you make better
use of your computer.
NOTICE: A NOTICE indicates either potential damage to hardware or loss of
data and tells you how to avoid the problem.
CAUTION: A CAUTION indicates a potentially hazardous situation
which, if not avoided, may result in minor or moderate injury.
WARNING: A WARNING indicates a potentially hazardous
situation which, if not avoided, may result in severe injury.
____________________
Information in this document is subject to change without notice.
© 2001 Dell Computer Corporation. All rights reserved.
Reproduction in any manner whatsoever without the written permission of Dell Computer
Corporation is strictly forbidden.
Trademarks used in this text:
Dell Computer Corporation;
Windows
Other trademarks and trade names may be used in this document to refer to either the entities
claiming the marks and names or their products. Dell Computer Corporation disclaims any
proprietary interest in trademarks and trade names other than its own.
February 2001 P/N 011WY Rev. A00
Dell,
the
DELL
logo, and
Intel
are registered trademarks of Microsoft Corporation.
is a registered trademark of Intel Corporation;
PowerEdge
are trademarks of
Microsoft
and

About This Guide
This document explains how to activate your Dell™ system’s integrated PowerEdge™
Expandable RAID 3/Di controller (PERC 3/Di). Your upgrade kit includes a RAID
controller memory module (Figure 1-1), RAID hardware key (Figure 1-2), RAID battery
(Figure 1-3), and RAID software.
Activating the RAID Controller
WARNING: Before you perform this procedure, you must turn off the system and
disconnect it from its power source. For more information, see “Safety First—
For You and Your System” in your system
CAUTION: See “Protecting Against Electrostatic Discharge” in the safety
instructions in your
NOTICE: To avoid possible data loss, you should back up all data on the hard-disk drives before
changing the mode of operation of the integrated SCSI controller from SCSI to RAID.
1
Turn off the system, including any attached peripherals, and disconnect the AC power
System Information
cable from its power source.
2 Open the front bezel.
Installation and Troubleshooting Guide
document.
.
See “Removing the Front Bezel” in your system Installation and Troubleshooting
Guide.
3 Remove the system cover.
4 Remove the cooling shroud and peripheral bay (see the system information label on
the inside of the system cover).
5 Open the ejectors on the RAID controller memory module socket down and outward,
as shown in Figure 1-1, which allows you to insert the memory module into the socket.
See the system information label on the inside of the system cover for the location of
the RAID controller memory module socket on the system board.
Activating the Integrated RAID Controller 1-1
www.dell.com | support.dell.com
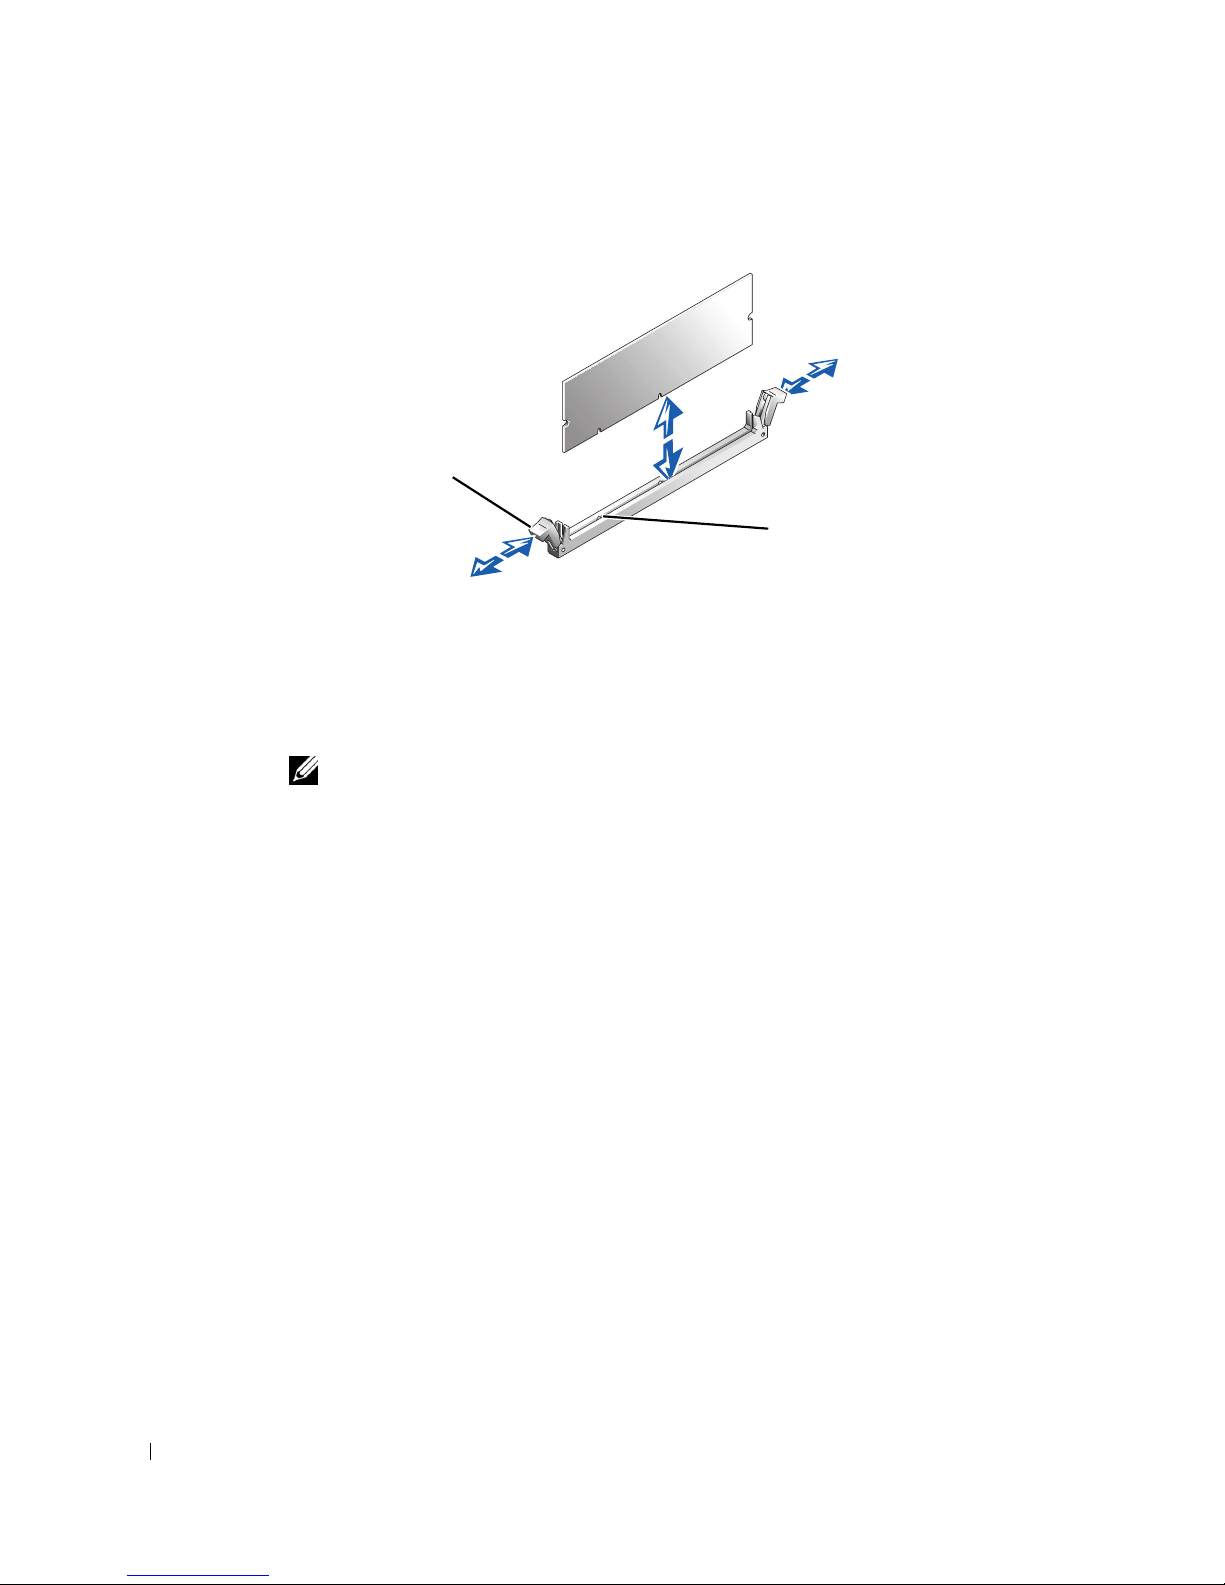
Figure 1-1. Installing the RAID Controller Memory Module
memory module
socket ejectors (2)
alignment keys (2)
6 To install the memory module provided in your upgrade kit, align the memory
module's edge connector with the memory module socket, and insert the memory
module in the socket (see Figure 1-1).
The socket has two alignment keys that allow the memory module to be installed in
the socket in only one way.
NOTE: The RAID controller memory module must be an unbuffered memory module, rated
to run at 100 MHz or faster. Do not substitute registered memory modules such as those
used for system memory.
7 Press on the memory module with your thumbs while pulling on the ejectors with your
index fingers to lock the memory module into the socket.
8 Install the RAID hardware key in its socket on the system board (see Figure 1-2).
See the system information label on the inside of the system cover for the location of
this socket. The latches on each end of the socket lock the key in place when it is fully
inserted in the socket.
1-2 Activating the Integrated RAID Controller
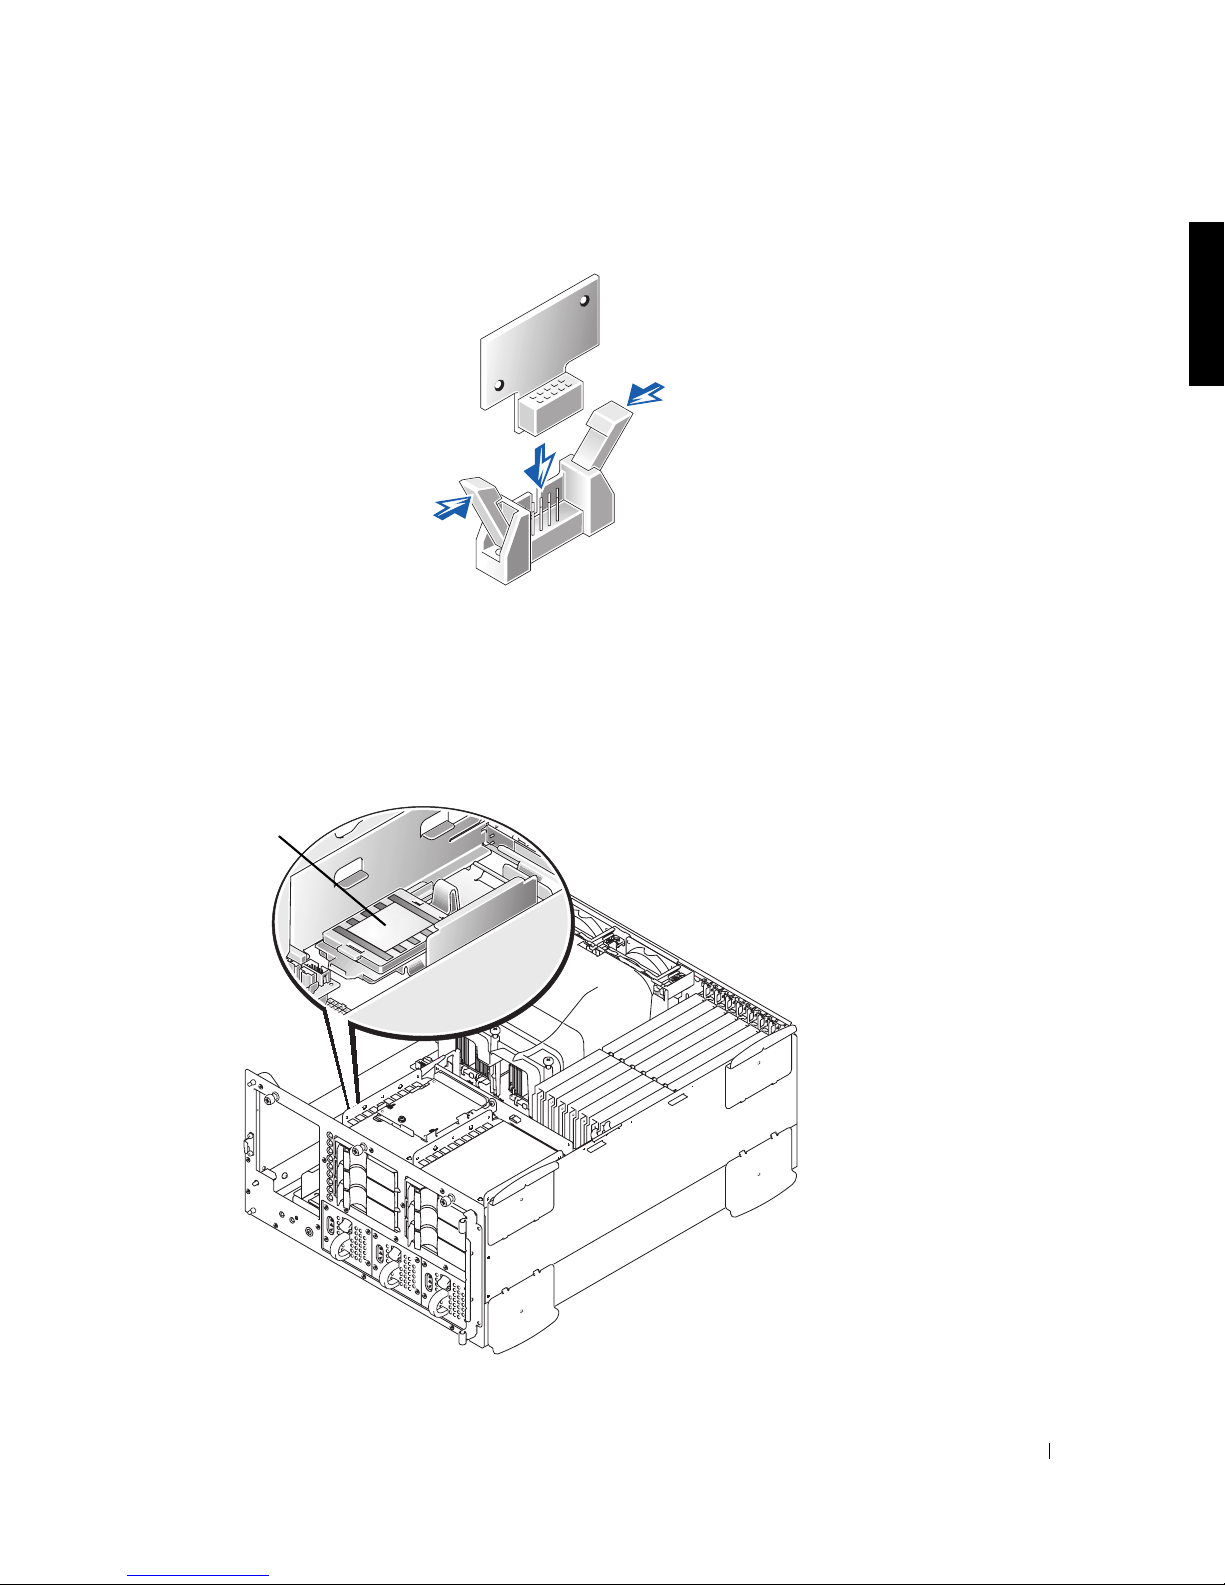
Figure 1-2. Installing the RAID Hardware Key
9
Install the RAID battery:
a Hook the front edge of the RAID battery assembly into the slot near the system
board, then snap the clip on the back edge of the battery assembly into place so
the battery lies flat (see Figure 1-3).
Figure 1-3. Installing the RAID Battery
RAID battery
Activating the Integrated RAID Controller 1-3

b Connect the battery cable to the RAID battery connector on the system board
(see the system information label on the inside of the system cover for the
location of this connector).
c Install the peripheral bay.
See “Installing the Peripheral Bay” in the system Installation and Troubleshooting
Guide.
10 Replace the cooling shroud and system cover.
11 Reconnect the system and peripherals to their power sources and turn them on.
12 Install the RAID software.
www.dell.com | support.dell.com
For more information, see the RAID controller software documentation provided in
this upgrade kit.
1-4 Activating the Integrated RAID Controller

Systèmes Dell™
ACTIVATION DU CONTRÔLEUR RAID
INTÉGRÉ
www.dell.com
support.dell.com
Remarques, avis, précautions et
avertissements
REMARQUE : Une REMARQUE indique une information importante qui
peut vous aider à mieux utiliser votre ordinateur.
AVIS : Un AVIS vous avertit d’un risque de dommage matériel ou de perte de
données et vous indique comment éviter le problème.
PRÉCAUTION : Une PRÉCAUTION vous avertit d’une situation
qui, si elle n'est pas évitée, peut entraîner des blessures plus ou
moins graves.
AVERTISSEMENT : Un AVERTISSEMENT indique une situation
éventuellement dangereuse qui, si elle n'est pas évitée, peut
provoquer des blessures graves.
____________________
Les informations contenues dans ce document sont sujettes à modification sans préavis.
© 2001 Dell Computer Corporation. Tous droits réservés.
Toute reproduction, sous quelque forme que ce soit, sans l'autorisation écrite de Dell Computer
Corporation est strictement interdite.
Marques utilisées dans ce texte :
Dell Computer Corporation ;
Windows
D'autres marques et noms commerciaux peuvent être utilisés dans ce document pour faire
référence aux entités se réclamant de ces marques et de ces noms ou à leurs produits.
Dell Computer Corporation dénie tout intérêt propriétaire vis-à-vis des marques et des noms
commerciaux autres que les siens.
Février 2001 P/N 011WY Rév. A00
Dell,
le logo
DELL
et
PowerEdge
Intel
sont des marques déposées de Microsoft Corporation.
est une marque déposée de Intel Corporation ;
sont des marques de
Microsoft
et
 Loading...