

Page 1
'HOO/DWLWXGH&3 %HIRUH <RX 7XUQ 2Q <RXU &RPSXWHU
'HOO
/DWLWXGH&3 $YDQW G·DOOXPHU YRWUH RUGLQDWHXU
'HOO
/DWLWXGH&3 9RU GHP (LQVFKDOWHQ GHV FRPSXWHUV
'HOO
/DWLWXGH&3 $QWHV GH HQFHQGHU HO RUGHQDGRU
®
ZZZGHOOFRP
0RGHO 33/
Page 2

____________________
Information in this document is subject to change without notice.
1998 Dell Computer Corporation. All rights reserved.
Trademarks used in this text: Dell, Latitude, and the DELL logo are registered trademarks of Dell Computer Corporation ; Microsoft, Windows, and
Windows NT are registered trademarks of Microsoft Corporation; 3Com is a registered tradem ark and Fast Ethe rLink is a trademark of 3Com Corporation.
Other trademarks and trade names ma y be u sed in this document t o refer to either the en tities claiming th e marks and names or their products. Dell
Computer Corporation disclaims any propriet ary interest in trademar ks and trade names other than its own .
___________________ _
Les informations de ce document sont sujettes à modification sans préavis.
1998 Dell Computer Corporation. Tous droits réservés.
Marques util is ées dans ce texte: Dell, Latitude et le logo DELL sont des marques déposées de Dell Computer Corporation; Mi crosoft, Windows et
Windows NT sont des marques déposées de Microsoft Corporation; 3Com est une marque déposée et Fast EtherLink est une marque de 3Com Corporation.
D’autres marques et no ms commerciaux peu vent être utilisés dans ce document pour faire réf érence aux entités se réc lamant de ces ma rques et de ces
noms ou à leurs produits. Dell Computer Corporation dénie tout intérêt propriétaire aux marques et aux noms commerciaux autres que les siens.
____________________
Irrtümer und technische Änderungen vorbehalten.
1998 Dell Computer Corporation. Alle Rechte vorbehalten.
Warenzeichen in dieser Dokumentat ion: Dell, Latitude und das DELL-Logo sind eingetragene Warenzeichen der Dell Computer Corporation;
Microsoft, Windows und Windows NT sind eingetragene Warenzeichen der Microsoft Corporation; 3Com Corpora tion ist ein eingetrage nes Waren-
zeichen und Fast EtherLink ist ein Warenzeichen der 3Com Corporation. Alle anderen in dieser Dokumenta ti on genannten Warenzeichen und Produktbezeichnungen sind Eigentum der entsprechenden Hersteller und Firmen. Die Dell Computer Corporation verzichtet auf alle Besitzrechte an Warenzeichen und Handel sbezeichnungen, die nicht ihr Eigentum sind.
___________________ _
La información contenida en este documento puede ser modificada sin aviso.
1998 Dell Computer Corporation. Todos los derechos reservados.
Marcas registradas en este tex t o :
Windows NT
poration. Otras marcas o nombres registrados pueden ser utiliza dos en este documento con el fin de cita r las entidades con derechos sobre las marcas,
los nombres o los productos. Dell Computer Corporation renuncia a cualquier interés sobre la propiedad de marcas o nombres comerciales que no sean
los suyos.
son marcas registradas de Microso ft Corporation;
Dell, Latitude
y el logotipo
son marcas registradas de Dell Comp uter Corporation;
DELL
es una marca registrada y
3Com
Fast EtherLink
es una marca registrada de 3Com Cor-
Microsoft, Windows
, y
February 1998 P/N 07815 Rev. A06
Page 3
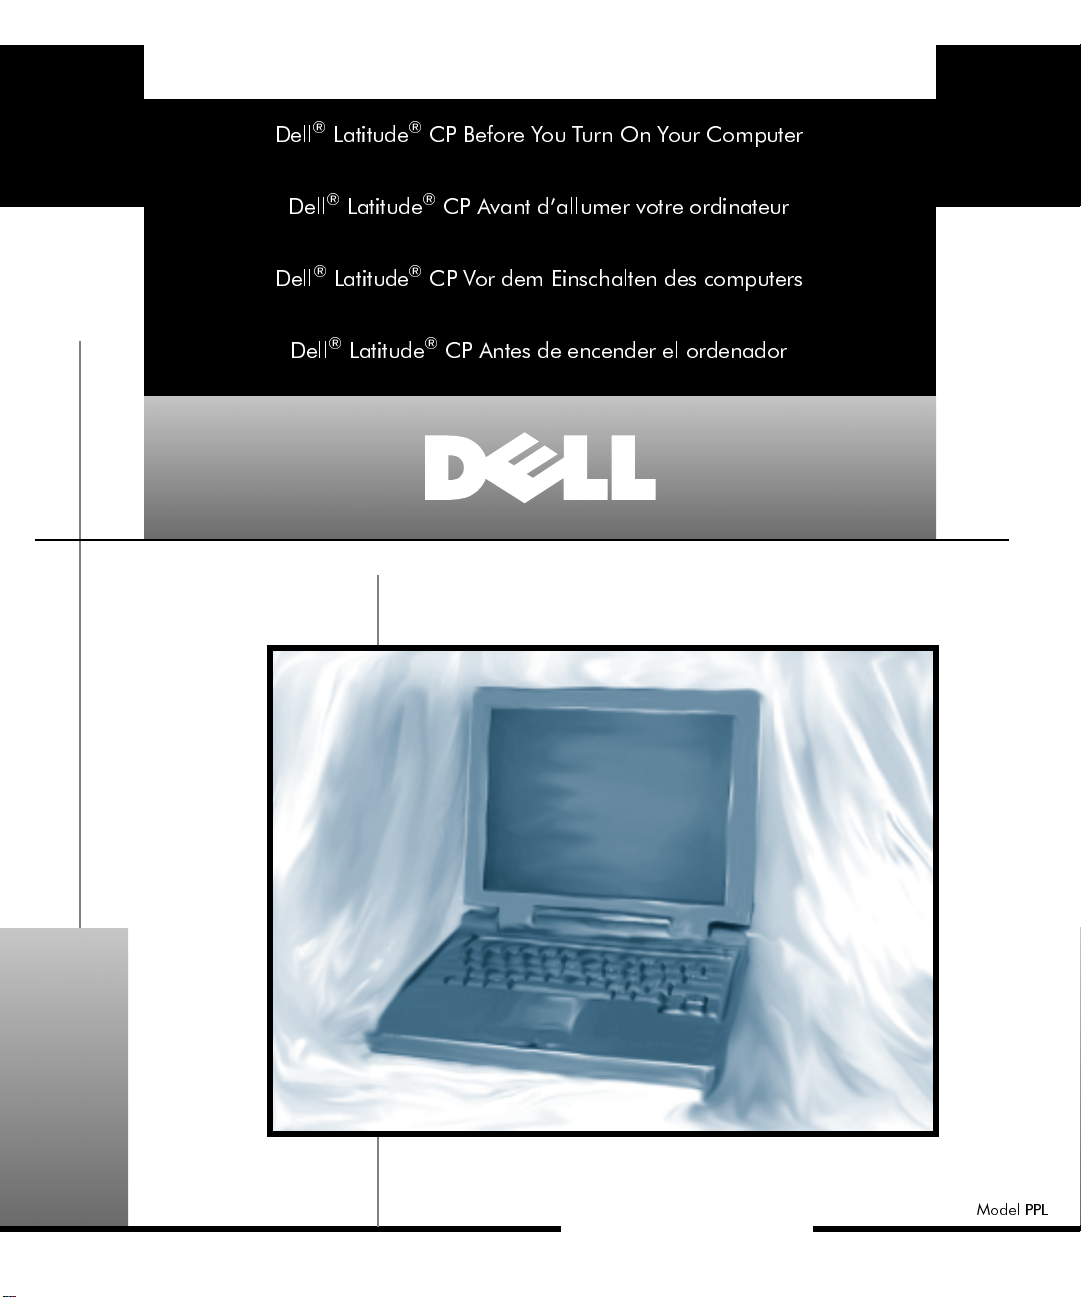
Dell® Latitude® CP
Before You Turn On Your Computer
B
efore turning on your Dell Latitude CP portable
computer for the first time, use the instructions in this
document to install or load the appropriate drivers for use
with the Dell Latitude C/Dock Expansion Station or
C/Port Advanced Port Replicator (APR).
If your computer uses the Microsoft
ating system, see the next section for instructions.
If your computer uses the Microsoft Windows NT
ating system, see the section titled “Windows NT” found
later in this document.
NOTE: If you are not planning to use a C/Dock Expansion Station or C/Port APR, you do not have to f ollow the
instructions in this document . For details on completing
the setup of the operating sys tem for use with your Dell
computer, see the Setup Guide that came with the
computer.
W
indows 95
If your computer uses Windows 95, the computer is
already configured to work with the Dell Latitude
C/Dock Expansion Station or C/Port APR . Use the following procedure the first time you turn on the computer.
®
Windows® 95 oper-
®
oper-
2. Turn on the computer undocked, and complete
the operating system setup.
For setup instructions, see the Dell-Installed
Microsoft Windows 95 Setup Guide that came with
the computer .
3. If you want to use a C/Dock Expansion Station or
C/Port APR, shut down the computer, dock it,
and turn it on again.
Follow the instructions on the display to load th e
appropriate drivers.
4. Install the appropriate drivers to use a Peripherals Component Interconnect (PCI) video or
network expansion card in the C/Dock Expansion
Station.
For instructions on installing the drivers, see the document titled “Before You Dock” that came with the
C/Dock Expansion Statio n.
W
indows NT
Complete the following procedure before you turn on
your Latitude CP computer for the first time to begin the
Windows NT set up .
CAUTION: Do not dock the computer before turning it on for the first time.
1. Remove any PC Card installed in the PC Card
slot of the computer.
PC Cards that are left in the computer during the
Windows 95 setup may cause installation difficulties. You may insert PC Cards after the operating
system setup is compl eted and y ou have re started the
computer .
CAUTION: Do not dock the computer before turning it on for the first time.
1. Remove any PC Card installed in the PC Card
slot of the computer.
PC Cards that are left in the computer during the
Windows NT setup may cause installation difficulties. You may insert PC Cards after the operating
system setup is compl eted and y ou have re started the
computer .
Dell Latitude CP Before You Turn On Your Comput er 1-1
Page 4

2. Turn on the computer undocked, and complete
the operating system setup.
For detailed information, see the Dell-Installed
Microso f t Windows NT Workstation 4.0 Se t up Guide .
3. If you plan to connect a C/Port APR to a network,
go to step 6. If you plan to use a C/Dock Expansion Station for any purpose, continue with step 4.
4. With the computer still undocked, install the
driver for the IDE controller (CMD 646U Ultra
DMA controller) that supports a CD-ROM drive
in the C/Dock media bay.
NOTE: You must install the IDE controller driver if
you want to use the C/Dock Expansio n Station with a
network.
For instructions, see the next subsecton, “IDE Controller Driver.”
5. With the computer still undocked, install the
driver for the SCSI controller (Adaptec AIC-7860
PCI SCSI controller).
For instructions, see “SCSI Controller Driver” found
later in this document.
6. Shut down the computer, dock it, and turn it on
again.
Follow the instructions on the dis play to load the
appropriate drivers.
7. If you plan to connect the C/D ock E xpansion Station or C/Port APR to a network, install the
network driver.
For instructions, see “Network Controller Driver”
found later in this document.
8. Create a hardware profile for use with the
C/Dock Expansion Station or C /Port APR.
For instructions, see “Setting Up a Hardware Profile” in the Windows NT documentation that
accompanied the computer.
IDE Controller Driver
If your computer uses Windows NT, use the following
procedure to install the driver for the IDE controller on
the C/Dock Expansion Station. The IDE controller supports a CD-ROM drive in the C/Dock media bay.
The diskettes you need in this procedure came with the
C/Dock Expansion Statio n.
NOTES: Y ou must install the IDE controller driver if you
want to use the C/Dock Expansion Station with a
network.
You must have administrator privileges to perform the
following procedure.
1. Undock the computer.
2. Click the Start button, point to Settings, and click
Control Panel.
3. Double-click the SCSI Adapters icon.
4. Click the Drivers tab and click Add.
5. In the Install Driver window, click the Have Disk
button.
6. Insert the Dell Latitude C/Dock Expansion Station
Windows NT 4.0 IDE Driver diskette into the computer’s diskette drive.
7. In the Copy the manufacturer ’s files from box,
type a:\ and click OK.
8. Highlight CMD CSA-646U Ultra DMA IDE
Adapter and click OK.
9. Type a:\ and click Continue.
10. When prompted to restart the computer, remove
the diskette and click Yes.
After the driver is installed, you may configure it for
maximum performance as follows:
1. Click the Start button and click Run.
2. Type cmdcfgnt.exe and click OK.
3. Click the General tab.
4. Select the PCI bus speed that matches that of the
computer.
T o deter mine th e PCI bu s speed of the computer, see
the section titled “Chip Set and Bus” in Appendix A
of the Reference and Troubleshooting Guide that
accompanied the Latitude CP computer. If a
documentation update came with the computer,
check whether a new PCI bus speed has been added.
5. To enable the DMA features of the controller,
click the Enable DMA box so that a check mark
appears in the box.
1-2 Dell Latitude CP Before You Turn On Your Computer
Page 5

6. Use the Boot Controller tab to tune each drive in
a specific DMA channel.
SCSI Controller Driver
If your computer uses Windows NT, use the following
procedure to install the driver for the SCSI controller on
the C/Dock Expansion Station.
The diskettes you need in this procedure came with the
C/Dock Expansion Station.
NOTE: You must have administrator privileges to perform the following procedure.
1. Undock the computer.
2. Click the Start button, point to Settings, and click
Control Panel.
3. Double-click the SCSI Adapters icon .
4. Click the Drivers tab and click Add.
5. In the Install Driver window, click the Have Disk
button.
6. Insert the Dell Latitude C/Dock Expansion Station
Windows NT 4.0 SCSI Driver diskette into the
computer’s diskette drive.
7. In the Copy the manufacturer’s files from box,
type a:\ and click OK.
8. At the Install Driver window, click OK.
9. In the Windows NT Setup window, type a:\ and
click Continue.
10. When prompted to restart the computer, remove
the diskette and click Yes.
Network Controller Driver
If your computer uses Windows NT, use the following
procedure to install the network driver if you want to
connect a C/Dock Expansion Station or C/Port APR to a
network.
NOTE: You must have administrator privileges to perform the following procedure. If necessary, see your
network administrator before beginning this procedure.
1. Shut down and dock the computer; then press the
power button and log on.
If a PCI video card is installed in the C/Dock Expansion Station, select Windows NT Workstation
Version 4.00 (VGA mode).
If there is no PCI video card installed, select Windows NT Workstation Version 4.00.
2. If a PCI video card is installed in the C/D ock
Expansion Station, conti nue with step 3. If there
is no PCI video card installed, or if you are using
a C/Port APR, go to step 9.
3. At the Invalid Display Setting s window, click OK.
4. At the Display Properties window, click Load
Drivers Now.
5. Click Display Type.
6. Click Change.
7. Click Have Disk.
8. Install the PCI video card driver.
For instructions, see “Installing a Windows NT
Driver for a PCI Video Card” in the document titled
“Before You Dock” that came with the C/Dock
Expansion Station.
9. Highlight the Network Neighborhood icon on the
desktop and right click.
10. From the menu, select Properties.
11. In the Network window, click the Adapters tab.
12. Click Add.
13. Click Have Di sk.
14. Type c:\drvlib\netcard\x86\3c90x and
click OK.
15. In the Select OEM Option window, highlight
3Com Fast EtherLink XL Adapter (3C905) and
click OK.
16. After the driver is installed, click Continue.
17. In the 3Com NIC Diagnostics window, select the
Properties tab.
18. In the Individual Settings box, click Media Type
and set the option to Autoselect.
19. In the 3NICDiag window, click OK.
20. In the 3Com NIC Diagnostics window, click OK.
21. When prompted, click No to change configuration settings and restart your computer.
22. In the Network window, click the Identification
tab.
23. Click Change.
Dell Latitude CP Before You Turn On Your Comput er 1-3
Page 6

24. Enter the computer name and workgroup name
appropriate for your network.
If the computer name and workgroup name are not
correct, the computer cannot recognize other
computers on the network. If necessary, see your network administrator for the proper identifications.
25. Click OK to close the Identification window.
26. Click Close to close the Network window.
27. When prompted, click Yes to restart the
computer.
1-4 Dell Latitude CP Before You Turn On Your Computer
Page 7

Dell® Latitude® CP
É
Avant d’allumer votre ordinateur
A
vant d’allumer votre ordinateur portable Dell Latitude CP pour la première fois, utilisez les instructions de
ce document pour installer ou charger les pilotes appropriés pour une utilisation avec la station d’extension Dell
Latitude C/Dock ou le réplicateur de port avancé C/Port
(Advanced Port Replicator [APR]).
Si votre ordinateur utilise le système d’exploitation Win-
®
dows
95 de Microsoft®, consultez la prochaine section
pour des instructions.
Si votre ordinateur utilise le système d’exploitation Windows NT
“Windows NT”, plus loin dans ce document.
REMARQUE: Si vous ne prévoyez pas d’utiliser une station d’extension C/Dock ou un APR C/Port, vous n’avez
pas à suivre les instructions de ce document. Pour des
précisions sur la configuration du système d’exploitation
pour l’utilisation avec votre o rdinateur Dell, consultez le
Guide de configuration fourni avec l’ordinateur.
W
Si votre ordinateur utilise Windows 95, l’ordinateur est
déjà configuré pour fonctionner avec la station d’extension C/Dock Dell Latitude ou l’APR C/Port. Utilisez la
procédure suivante la première fois que vous allumez
l’ordinateur.
®
de Microsoft, consultez la section intitulée
indows 95
1. Retirez toute carte PC installée dans la baie de
carte PC de l’ordinateur.
Les cartes PC laissées dans l’ordinateur au cours de
la configuration de Windows 95 peuvent créer des
difficultés d’installation. Vous pouvez insérer des
cartes PC après avoir terminé la configuration du
système d’exploitation et redéma rré l’ordinateur.
2. Allumez l’ordinateur alors qu’il est désamarré et
terminez la configuration du système
d’exploitation.
Pour des instructions de configuration, consultez le
Guide de configuration pour Windows 95 de
Microsoft installé par De ll, fourni avec l’ordinateur.
3. Si vous voulez utiliser une statio n d’extension
C/Dock ou un APR C/Port, éteignez l’ordinateur,
amarrez-le et rallumez-le.
Suivez les instructions à l’écran pour charger les
pilotes appr opriés.
4. Installez les pilotes appropriés pour utiliser une
vidéo PCI (Peripherals Component Interconnect
[interconnexion de composants périphériques])
ou une carte d’extension réseau dans la station
d’extension C/Dock.
Pour des instructions sur l’installation de pilotes,
consultez le document intitulé “Avant d’amarrer”,
fourni avec la station d’extension C/Dock.
PR
CAUTION: N’amarrez pas l’ordinateur avant
de l’allumer la première fois.
Dell Latitude CP Avant d’allumer votre ordinateur 2-1
Page 8

W
É
É
indows NT
Pour commencer la configuration de Windows NT,
suivez la procédure ci-après avant d’allumer votre ordinateur Latitude CP pour la première fois.
PR
CAUTION: N’amarrez pas l’ordinateur avant
de l’allumer la première fois.
1. Retirez toute carte PC installée dans la baie de
carte PC de l’ordinateur.
Les cartes PC laissées dans l’ordinateur au cours de
la configuration de Windows NT peuvent créer des
difficultés d’installation. Vous pouvez insérer des
cartes PC après avoir terminé la configuration du
système d’exploitation et redémarré l’ordinateur.
2. Allumez l’ordinateur alors qu’il est désamarré et
terminez la configuration du système
d’exploitation.
Pour des instructions détaillées, consultez le Guide
de configuration pour Windows NT 4.0 de Microsoft
installé par Dell.
3. Si vous prévoyez de connecter un APR C/Port à
un réseau, passez à l’étape 6. Si vous prévoyez
d’utiliser une station d’extension C/Dock pour un
usage général, continuez à l’étape 4.
4. A vec l’ordinateur toujours désamarré, installez le
pilote pour le contrôleur IDE (contrôleur DMA
CMD 646U Ultra) supportant un lecteur de
CD-ROM dans la baie de support C/Do ck.
REMARQUE: Vous devez installer le pilote de contrôleur IDE si vous voulez utiliser la station
d’extension C/Dock avec un réseau.
Pour des instructions, reporte z-vous à la procha ine
sous-section, “Pilote de contrôleur IDE”.
5. A vec l’ordinateur toujours désamarré, installez le
pilote pour le contrôleur SCSI (contrôleur SCSI
Adaptec AIC-7860 PCI).
Pour des instructions, consultez “Pilote de contrôleur
SCSI”, plus loin dans ce document.
6.
teignez l’ordinateur, amarrez-le et rallumez-le.
Suivez les instructions à l’écran pour charger les
pilotes appropriés.
7. Si vous prévoyez de connecter la station d’extension C/Dock à un réseau, installez le pilote de
réseau.
Pour des instructions, consultez “Pilote de contrôleur
de réseau”, plus loin dans ce document.
8. Créez un profil de matériel pour l’utilisation avec
la station d’extension C/Dock ou l’APR C/Port.
Pour des instr uctions, consul tez “Con figur atio n d’un
profil de matériel”, dans la documentati o n Windows
NT fournie avec l’ordinateur.
Pilote de contrôleur IDE
Si votre ordinateur utilise Windows NT, suivez la procédure ci-après pour installer le pilote pour le contrôleur
IDE sur la station d’extension C/Dock. Le contrôleur IDE
supporte un lecteur de CD-ROM dans la baie de support
C/Dock.
Les disquettes dont vous avez besoin dans cette procédure sont fournies avec la station d’extension C/Dock.
REMARQUES: Vous devez installer le pilote de contrôleur IDE si vous souhaitez utiliser la station
d’extension C/Dock avec un réseau.
Vous devez disposer des privilèges d’administrateur pour
réaliser la procédure suivante.
1. Désamarrez l’ordinateur.
2. Cliquez sur le bouton Démarrer, pointez sur
Paramètres, puis cliquez sur Panneau de
configuration.
3. Cliquez deux fois sur l’icône SCSI Adapters
(cartes SCSI).
4. Cliquez sur l’onglet Drivers (pilotes) et cliquez
sur Add (ajouter).
5. Dans la fenêtre Install Driver (installer pilote),
cliquez sur le bouton Have Disk (disquette
fournie).
6. Insérez la disquette Dell Latitude C/Dock Expan-
sion Station Windows NT 4.0 IDE Driver (Pilote
IDE Windows NT 4.0 pour la station d’exten sion
C/Dock du Dell Latitude) dans l’un it é d e disquette de l’ordinateur.
2-2 Dell Latitude CP Avant d’allumer votre ordinateur
Page 9

7. Dans la boîte Copy the manufac tu rer’s files from
É
(copiez les fichiers du fabricant depuis), tapez
a:\ et cliquez sur OK.
8. Mettez en surbrillance CMD CSA-646U Ultra
DMA IDE Adapter (adaptateur IDE DMA CMD
CSA-646U Ultra) et cliquez sur OK.
9. T apez a:\ et cliquez sur Continue (continuer).
10. Lorsque le système vous demande de redéma rrer
l’ordinateur , retir ez la disquette et cliquez sur Yes
(oui).
Une fois que le pilote est installé, vous pouvez le configurer pour une performance optimale comme suit:
1. Cliquez sur le bouton Démarrer et cliquez sur
Exécuter.
2. Tapez cmdcfgnt.exe et cliquez sur OK.
3. Cliquez sur l’onglet General (général).
4. Sélectionnez la vitesse de bus PCI correspondant
à l’ordinateur.
Pour déterminer la vitesse de bus PCI de l’ordinateur, consultez la section intitulée “Bus et ensemble
de puces”, à l’annexe A du Guide de référence et de
dépannage, fourni avec l’ordinateur Latitude CP. Si
une mise à jour de documentation est fournie avec
l’ordinateur, véri fiez si une nou velle vitesse de bus
PCI a été ajoutée.
5. Pour activer les fonctions DMA du contrôleur,
cliquez sur la boîte Enable DMA (activer DMA)
pour cocher la case.
6. Utilisez l’onglet Boot Controller (initialiser contrôleur) pour mettre chaque unité sur un canal
DMA spécifique.
Pilote de contrôleur SCSI
Si votre ordinateur utilise Windows NT, suivez la procédure ci-après pour installer le pilote pour le contrôleur
SCSI sur la station d’extension C/Dock.
Les disquettes dont vous avez besoin dans cette procédure sont fournies avec la station d’extension C/Dock.
REMARQUE: Vous devez disposer des privilèges
d’administrateur pour réaliser la procédure.
1. Désamarrez l’ordinateur.
2. Cliquez sur le bouton Démarrer, pointez sur
Paramètres, puis cliquez sur Panneau de
configuration.
3. Cliquez deux fois sur l’icône SCSI Adapters
(cartes SCSI).
4. Cliquez sur l’onglet Drivers (pilotes) et cliquez
sur Add (ajouter).
5. Dans la fenêtre Install Driver (installer pilote),
cliquez sur le bouton Have Disk (disquette
fournie).
6. Insérez la disquette Dell Latitude C/Dock Expan-
sion Station Windows NT 4.0 SCSI Driver (Pilote
SCSI Windows NT 4.0 pour la station d’extension
C/Dock du Dell Latitude) dans l’un it é d e disquette de l’ordinateur.
7. Dans la boîte Copy the manufacturer’s files from
(copiez les fichiers du fabricant depuis), tapez
a:\ et cliquez sur OK.
8. Dans la fenêtre Install Driver (installer pilote),
cliquez sur OK.
9. Dans la fenêtre Windows NT Setup (configuration de Windows NT), tapez a:\ et cliquez sur
Continue (continuer).
10. Lorsque le système vous demande de redéma rrer
l’ordinateur , retir ez la disquette et cliquez sur Y es
(oui).
Pilote de contrôleur de réseau
Si votre ordinateur utilise Windows NT, suivez la procédure ci-après pour installer le pilote de réseau si vous
souhaitez connecter une station d’extension C/Dock ou
un APR C/Port à un réseau.
REMARQUE: Vous devez disposer des privilèges
d’administrateur pour réaliser la procédure. Si nécessaire, consul tez l’adminis trateur de votr e réseau avant de
commencer cette procédure.
1.
teignez l’ordinateur et amarrez-le; appuyez
ensuite sur le bouton d’alimentation et connectezvous.
Si une carte vidéo PCI est installée dans la station
d’extension C/Dock, sélectionnez Windows NT
Workstation Version 4.00 (mode VGA).
Dell Latitude CP Avant d’allumer votre ordinateur 2-3
Page 10

S’il n’y a pas de carte vidéo PCI installée, sélectionnez Windows NT Workstation Version 4.00.
2. Si une carte vidéo PCI est installée dans la station
d’extension C/Dock, continuez avec l’étape 3. S’il
n’y a pas de carte vidéo PCI installée ou si vous
utilisez un APR C/Port, passez à l’étape 9.
3. Dans la fenêtre Invalid Display Settin gs
(paramètres d’affichage invalides), cliquez sur
OK.
4. Dans la fenêtre Display Properties (propriétés
d’affichage), cliquez sur Load Drivers Now
(charger les pilotes maintenant).
5. Cliquez sur Display Type (type d’affichage).
6. Cliquez sur Change (modifier).
7. Cliquez sur Have Disk (disquette fournie).
8. Installez le pilote de carte vidéo PCI.
Pour des instructions, consultez “Installation d’un
pilote Windows NT pour une carte vidéo PCI”, dans
le document intitulé “Avant d’amarrer”, fourni avec
la station d’extension C/Dock.
9. Mettez en surbrillance l’icône Network Neighborhood (voisinage de réseau) sur le bureau et
cliquez avec le bouton droit de la souris.
10. Dans le menu, sélectionnez Properties
(propriétés).
11. Dans la fenêtre Network (réseau), cliquez sur
l’onglet Adapters (cartes).
12. Cliquez sur Add (ajouter).
13. Cliquez sur Have Disk (disquette fournie).
14. Tapez c:\drvlib\netcard\x86\3c90x et
cliquez sur OK.
15. Dans la fenêtre Select OEM Option (sélectionner
option OEM), mettez en surbrillance 3Com Fast
EtherLink XL Adapter (3C905) (carte EtherLink
XL 3Com rapide [3C905]) et cliquez sur OK.
16. Une fois que le pilote est installé, cliquez sur Continue (continuer).
17. Dans la fenêtre 3Com NIC Diagnostics (d iagnostics NIC 3Com), sélectionnez l’onglet Properties
(propriétés).
18. Dans la boîte Individual Settin gs (paramètres
individuels), cliquez sur Media Type (type de support) et définissez l’option sur Autoselect.
19. Dans la fenêtre 3NICDiag, cliquez sur OK.
20. Dans la fenêtre 3Com NIC Diagnostics (d iagnostics NIC 3Com), cliquez sur OK.
21. Lorsque le système vous y invite, cliquez sur No
(non) pour changer les paramètres de configuration et redémarrer votre ordinateur.
22. Dans la fenêtre Network (réseau), cliquez sur
l’onglet Identification.
23. Cliquez sur Change (modifier).
24. Entrez le nom de l’ordinateur et le nom du
groupe de travail correspondant à votre réseau.
Si les noms de l’ordinateur et du group e de travail ne
sont pas corrects, l’ordinateur ne peut pas reconnaître d’autres ordinateurs sur le réseau. Si besoin,
consultez l’administrateur de votre réseau pour les
identifications correctes.
25. Cliquez sur OK pour fermer la fenêtre
Identification.
26. Cliquez sur Close (fermer) pour fermer la fenêtre
Network (réseau).
27. Lorsque le système vous y invite, cliquez sur Yes
(oui) pour redémarrer l’ordinateur.
2-4 Dell Latitude CP Avant d’allumer votre ordinateur
Page 11

Dell® Latitude® CP
Vor dem Einschalten des Computers
B
evor Sie zum ersten Mal den tragbaren Dell LatitudeCP-Computer einschalten, sollten Sie die Anweisungen
in diesem Dokument zum Installieren bzw. Laden der
entsprechenden Treiber für die Dell Latitude C/Dock
Expansion Station oder den C/Port Advanced Port Replicator (APR) ausführen.
Verwendet Ihr Computer das Betriebssystem Microsoft
Windows
dem nächsten Abschnitt.
Verwendet Ihr Computer das Betriebssystem
Microsoft Windows NT
“Windows NT” weiter unten in diesem Dokument.
HINWEIS: Wenn Sie keine C/Dock Expansion Station
oder keinen C/Port APR einsetzen, ist es nicht nötig, den
Anweisungen in diesem Dokument zu folgen. Hinweise
zum Durchführen des Setups des Betriebssystems Ihres
Dell Computers entnehmen Sie dem im Lieferumfang
Ihres Computers enthaltenen Setup-Benutzerhandbuch.
W
Läuft Ihr Computer unter Windows 95, ist der Computer
bereits konfiguriert, um mit der Dell Latitude
C/Dock Expansion Station oder dem C/Port APR zu
arbeiten. Beim erstmaligen Einschalten des Computers
sind die folgenden Verfahren auszuführen.
®
95, entnehmen Sie bitte Anweisungen hierzu
®
, lesen Sie bitte den Abschnitt
indows 95
®
1. Alle installierten PC-Karte n aus den PC-KartenSteckplätzen entfernen.
PC-Karten, die während des Windows 95-Setups im
Computer verbleiben, können zu Installationspro blemen führen. PC-Karten können nach Beendigung
des Betriebssystem-Setups und Neustart des Computers eingesetzt werden.
2. Den Computer im nichtangeschlossen en Zustand
einschalten und die Installation des Betriebssystems durchführen.
Für Anweisungen zum Setup siehe den im Lieferumfang des Computers enthaltenen Von Dell instal-
liertes Microsoft Windows 95: Setup-Leitfaden.
3. Soll eine C/Dock Expansion Station oder ein
C/Port APR verwendet werden, den Computer
herunterfahren, anschließen und wieder
einschalten.
Zum Laden der entsprechenden Treiber die
Anweisungen auf der Anzeige ausführen.
4. Die entsprechenden Treiber installieren, um eine
Peripherals Component Interconnect- (PCI)
Video- oder Netzwerkerweiterungskarte in der
C/Dock Expansion Station zu verwenden.
Für Anweisungen zur Installation der Treiber siehe
das im Lieferumfang der C/Dock Expansion Station
enthaltene Dokument “Vor dem Anschließen”.
VORSICHT: Den Computer nicht vor dem erstmaligen Einschalten anschließen.
Dell Latitude CP Vor dem Einschalten des Computers 3-1
Page 12

W
indows NT
Vor dem erstmaligen Einschalten des Latitude CPComputers si nd die folgend en Verfahren au szuführen,
um das Windows NT-Setup zu beginnen.
VORSICHT: Den Computer nicht vor dem erstmaligen Einschalten anschließen.
1. Alle installierten PC-Karten aus den PC-KartenSteckplätzen entfernen.
PC-Karten, die während des Windows NT-Setups im
Computer verbleiben, können zu Installationsproblemen führen. PC-Karten können nach Beendigung
des Betriebssystem-Setups und Neustart des Computers eingesetzt werden.
2. Den Computer im nichtangeschlossenen Zust and
einschalten und die Installa tion des Betriebssystems ausfüh ren.
Für Hinweise hierzu siehe den Von Dell installiertes
Microsoft Windows NT Workstation 4.0: SetupLeitfaden.
3. Soll ein C/Port APR an ein Netzwerk angeschlossen werden, mit Schritt 6 weitermachen. Soll eine
C/Dock Expansion Station für einen beliebigen
Zweck verwendet werden, mit Schritt 4
weitermachen.
4. Bei noch nicht angeschlossem Computer den
T reiber für den integrierten Laufwerkelektronik(IDE [integrated drive electronics]) Kontroller
(CMD 646U Ultra DMA-Kontroller) installieren,
der ein CD-ROM-Laufwerk im C/DockMedienschacht unterstützt.
HINWEIS: Soll die C/Dock Expansion Station mit
einem Netzwerk verwendet werden, muß der IDEKontroller-Treiber installiert werden.
Für Anweisungen hierzu siehe den nächsten Unterabschnitt “IDE-Kontroller-Treiber”.
5. Bei noch nicht angeschlossenem Computer den
Treiber für den Kleincomputerschnittstellen(SCSI [Small Computer System Interface]) Kontroller (Adaptec AIC-7860 PCI SCSI-Kontroller)
installieren.
Für Anweisungen hierzu siehe “SCSI-KontrollerTreiber” weiter unten in d i esem Dokument.
6. Den Computer herunterfahren, anschließen und
erneut einschalten.
Zum Laden der entsprechenden Treiber die
Anweisungen auf dem Bildschirm ausführen.
7. Soll die C/Dock Expansion Station oder der
C/Port APR an ein Netzwerk angeschlossen werden, ist der Netzwerk-Treiber zu installieren.
Für Anweisungen hierzu siehe “NetzwerkKontroller-Treiber” weiter unten in diesem
Dokument.
8. Ein Hardware-Profil für den Einsatz mit der
C/Dock Expansion Station oder dem C/Port APR
erstellen.
Für Anweisungen hierzu siehe “Hardware-Profil einrichten” in der im Lieferumfang des Computers
enthaltenen Windows NT-Dokumentation.
IDE-Kontroller-Treiber
Läuft Ihr Computer unter Windows NT, sollte das folgende Verfahren angewandt werden, um den Treiber für
den IDE-Kontroller auf der C/Dock Expansion Station
zu installieren. Der IDE-Kontroller unterstützt ein
CD-ROM-Laufwerk im C/Dock-Medienschacht.
Die für dieses Verfahren benötigten Disketten sind im
Lieferumfan g der C/Dock Expa nsion Station entha lten.
HINWEISE: Der IDE-Kontroller-Treiber muß installiert
werden, wenn die C/Dock Expansion Station mit einem
Netzwerk verwendet werden soll.
Sie müssen Verwalterprivilegien besitzen, um die folgenden Verfahren durchzuführen.
1. Den Computer von der C/Dock Expans ion Station trennen.
2. Auf die Schaltfläche “Start” klicken, auf “Einstellungen” zeigen und auf “Sy stemsteuerung”
klicken.
3. Auf das Symbol “SCSI-Adapter” doppelklicken.
4. Auf des Register “Treiber” und dann auf “Hinzufügen” klicken.
5. Im Fenster “Treiber installieren” auf die Schaltfläche “Diskette” klicken.
6. Die Diskette Dell Latitude C/Dock Expansion Sta-
tion Windows NT 4.0 IDE-Treiber in das
Diskettenlaufwerk des Computers einlegen.
3-2 Dell Latitude CP Vor dem Einschalten des Computers
Page 13

7. Im Kästchen “Die Herstellerdateien kopieren
von” a:\ eingeben und auf OK klicken.
8. “CMD CSA-646U Ultra DMA IDE-Adapter”
markieren und auf OK klicken.
9. a:\ eingeben und auf “Weiter” klicken.
10.Bei Aufforderung zum Neustart des Computers die
Diskette entfernen und auf “Ja” klicken.
Nach der Installation des Treibers kann er für optimale
Leistung wie folgt konfiguriert werden:
1. Auf die Schaltfläche “Start” und dann auf “Ausführen” klicken.
2. cmdcfgnt.exe eingeben und auf OK klicken.
3. Auf “Allgemeines Register” klicken.
4. Die Geschwindigkeit des PCI-Busses auswählen,
die der des Computers entspricht.
Zum Feststellen der Geschwindigkeit des PCIBusses siehe Abschnitt “Chipsatz und Bus” in
Anhang A des Referenz- und Fehlerbeseitigungs-
handbuchs, welches im Lieferumfang des Latitude
CP-Computers enthalten ist. Wurde eine Dokumentationsaktualisierung mit dem Computer geliefert,
sollte überprüft werden, ob die neue PCI-BusGeschwindigkeit hinzugefügt wurde.
5. Zum Aktivieren der Direktspeicherzugriff(DMA [direct memory access]) Funktion des
Kontrollers auf das Kästchen “DMA aktivieren”
klicken. Im Kästchen erscheint ein Häkchen.
6. Mit Hilfe des Registers “Start-Kontroller” jedes
Laufwerk auf einen bestimmten DMA-Kanal
abstimmen.
SCSI-Kontroller-Treiber
Läuft Ihr Computer unter Windows NT, sollte das folgende Verfahren angewandt werden, um den Treiber für
den SCSI-Kontroller auf die C/Dock Expansion Station
zu installieren.
Die für dieses Verfahren benötigten Disketten sind im
Lieferumfang der C/Dock Expansion Station enthalten.
HINWEIS: Sie müssen Verwalterprivilegien besitzen, um
die folgenden Verfahren durchzuführen.
1. Den Computer von der C/Dock Expansion Station trennen.
2. Auf die Schaltfläche “Start” klicken, auf “Einstellungen” zeigen und auf “Sy stemsteuerung”
klicken.
3. Auf das Symbol “SCSI-Adapter” doppelklicken.
4. Auf das Register “Treiber” und dann auf “Hinzufügen” klicken.
5. Im Fenster “Treiber installieren” auf die Schaltfläche “Diskette” klicken.
6. Die Diskette Dell Latitude C/Dock Expansion Sta-
tion Windows NT 4.0 SCSI-Treiber in das
Diskettenlaufwerk des Computers einlegen.
7. Im Kästchen “Die Herstellerdateien kopieren
von” a:\ eingeben und auf OK klicken.
8. Im Fenster “T r eiber installier en” auf OK klicken.
9. Im Fenster “Windows NT-Setup” a:\ eingeben
und auf “Weiter” klicken.
10. Bei Aufforderung zum Neustart des Computers
die Diskette entfernen und auf “Ja” klicken.
Netzwerk-Kontroller-Treiber
Läuft Ihr Computer unter Windows NT, sollte das
folgende Verfahren angewandt werden, um den
Netzwerk-Treiber zu installieren, wenn eine C/DockExpansion- Station oder ein C/Port APR an ein Netzwerk
ange- schlossen werden soll.
HINWEIS: Sie müssen Verwalterprivilegien besitzen, um
die folgenden Verfahren dur ch zu f ühren. Gegebenenfalls
vor Beginn dieses Verfahrens den Netzwe rkve rw al t er
kontaktieren.
1. Den Computer herunterfahren und anschließen;
dann den Netzschalter drücken und anm e lden.
Ist eine PCI-Videokarte in der C/Dock-ExpansionStation installiert, sollte die Windows NT Workstation Version 4.00 (VGA-Modus) gewählt werden.
Ist keine PCI-Videokarte installiert, die Windows
NT Workstation Version 4.00 wählen.
2. Ist eine PCI-Videokarte in der C/Dock Expansion
Station installiert, mit Schritt 3 fortfahren. Ist
keine PCI-Videokarte installiert oder wird
ein C/Port APR verwendet, mit Schritt 9
weitermachen.
Dell Latitude CP Vor dem Einschalten des Computers 3-3
Page 14

3. Im Fenster “Ungültige Anzeigenei nst ellungen”
auf OK klicken.
4. Im Fenster “Eigenschaften von Anzeige” auf
“T reiber jetzt laden” klicken.
5. Auf “Anzeigeart” klicken.
6. Auf “Ändern” klic ken.
7. Auf “Diskette ” klicken.
8. Den PCI-Videokartentreiber installieren.
Für Anweisungen hierzu siehe “Einen Windows NTTreiber für eine PCI-Videokarte installieren” im
Dokument “Vor dem Anschließen”, das im Lieferumfang Ihrer C/Dock Expansion Station enthalten ist.
9. Das Symbol “Netzwerkumgebung” auf dem
Desktop markieren und die rechte Maustaste
betätigen.
10. Im Menü “Eigenschaften” wählen.
11. Im Fenster “Netzwerk” auf das Register
“Adapter” klicken.
12. Auf “Hinzufügen” klicken.
13. Auf “Diskette” klicken.
14. c:\drvlib\netcard\x86\3c90x eingeben
und auf OK klicken.
15. Im Fenster “OEM-Option wählen” “3Com Fast
EtherLink XL Adapter (3C905)” markieren und
auf OK klicken.
16. Nach der Installation des Treibers auf “Weiter”
klicken.
17. Im Fenster “3Com NSK-Diagnose” das Register
“Eigenschaften” wählen.
18. Im Feld “Individuelle Einstellungen” auf “Medientyp” klicken und die Option auf “Autowahl”
setzen.
19. Im Fenster “3NSK-Diag” au f OK klicken.
20. Im Fenster “3Com NSK-Diagnose” auf OK
klicken.
21. Nach Aufforderung auf “Nein” klicken, um die
Konfigurationseinstellungen zu ändern und den
Computer neu zu starten.
22. Im Fenster “Netzwerk” auf das Register “Identifikation” klicken.
23. Auf “Ändern” klicken.
24. Die Computer- und Arbeitsgruppennamen eingeben, die Ihrem Netzwerk entsprechen.
Sind die Computer- und Arbeitsgrup penn amen in korrekt, kann das System andere ans Netz werk
angeschlossene Computer nicht erkennen. Gegebenenfalls den Netzwerkverwalter kontaktieren, um
die richtige Identifikation zu erhalten.
25. Zum Schließen des Fensters “Identifikation” auf
OK klicken.
26. Zum Schließen des Netzwerk-Fensters auf
“Schließen” klicken.
27. Nach Aufforderung auf “Ja” klicken und den
Computer neu starten.
3-4 Dell Latitude CP Vor dem Einschalten des Computers
Page 15

Dell® Latitude® CP
Ó
Antes de encender el ordenador
A
ntes de encender el ordenador portátil Dell Latitude
CP por primera vez siga las instrucciones en este documento para instalar o cargar los drivers apropiados para
su uso con la Est ación de expans ión Dell Latitude
C/Dock o el Replicador avanzado de puerto C/Port (APR
[Advanced Port Replicator]).
Si su ordenador utiliza el sistema operativo Microsoft
Windows
instrucciones.
Si su ordenador ut il i za el si st ema opera ti vo M icrosoft
Windo ws NT
más adelante en este documento.
NOTA: Si no plane a utilizar una Estación de expansión
C/Dock o APR C/Port, no tiene que seguir las instrucciones en este documento. Para obtener detalles para
completar la configuración del sistema operativo que va
a ser utilizado en el ordenador Dell consulte la Guía de
configuración que ha sido incluida con el ordenador.
W
Si su ordenador utiliza Windows 95, el ordenador ya se
encuentra configurado para trabajar con la Estación de
expansión C/Dock o el APR C/Port. Siga el siguiente
procedimiento la primera vez que encienda su ordenad or.
PRECAUCI
de encenderlo por primera vez.
®
95, consulte la siguiente sección para obtener
®
, consulte la sección titulada “Windows NT”
indows 95
N: No estacione el ordenador antes
®
®
1. Retire cualquier tarjeta PC instalada en la
ranura de tarjeta PC en el ordenador.
Tarjetas PC que se dejan en el ordenador durante la
configuración de Windows 95 puden causar dificultades de instalación. Puede colocar tarjetas PC
después que la configurfación del sist ema operati vo
ha concluido y que el ordenador ha sido
reinicializado.
2. Encienda el ordenador sin estacionar, y complete
la configuración del sistema operativo.
Para obtener instrucciones sobre la configuración
consulte la Guía de configuración de Microsoft
Windows 95 instalada por Dell que fue incluída con
su ordenador.
3. Si desea utilizar una estació n de expansión
C/Dock o el APR C/Port, apague el ordenador,
estaciónelo y enciéndalo otra vez.
Siga las instrucciones en la pantalla para cargar los
drivers apropiados.
4. Instale los drivers apropiados pa ra utilizar una
tarjeta de expansión de Interconexión de componentes periféricos (PCI [Peripheral Component
Interconnect]) de vídeo o de red en la Estación de
expansión C/Dock.
Para obtener instrucciones sobre la instalación de los
drivers, consulte el documento titulado “Antes de
estacionar” que ha sido incluído con la Estación de
expansión C/Dock.
Dell Latitude CP Antes de encender el ordenador 4-1
Page 16

W
Ó
indows NT
Complete el procedimiento siguiente antes de encender
su ordenador Latitude CP por primera vez para iniciar la
configuración de Windows NT.
PRECAUCI
de encenderlo por primera vez.
1. Retire cualquier tarjeta PC instalada en la
ranura de tarjeta PC en el ordenador.
Tarjetas PC que se dejan en el ordenador durante la
configuración de Windows NT pueden causar dificultades de instalación. Puede colocar tarjetas PC
después que la configuración del sistema operativo
ha concluido y que el ordenador ha sido
reinicializado.
2. Encienda el ordenador sin estacionar, y complete
la configuración del sistema operativo.
Para obtener información det allada co nsult e la Guía
de configuración de la es tación de t rabajo Microsoft
Windows NT 4.0 instalada por Dell.
3. Si planea conectar un APR C/Port a una red, diríjase al paso 6. Si planea utilizar un a Estación de
expansión C/Dock para cualquier propósito, continúe con el paso 4.
4. Con el ordenado r todavía s in estaci onar, instale el
driver para el controlador IDE (controlador
CMD 646U Ultra DMA) que da soporte a la
unidad de CD-ROM en el compartimento de
medios del C/Dock.
NOTA: Debe instalar el controlador IDE si desea
utilizar la Estación de expansión C/Dock con una
red.
Para obtener instrucciones consulte el siguiente apartado, “ Driver del controlador IDE”
5. Con el ordenado r todavía s in estaci onar, instale el
driver para el controlador SCSI (controlador
Adaptec AIC-7860 PCI SCSI).
Para obtener instrucciones consulte “Driver del controlador SCSI” más adelante en este documento.
N: No estacione el ordenador antes
6. Apague el ordenador, estaciónelo y enciéndalo
nuevamente.
Siga las instrucciones en la pantalla para cargar los
drivers apropiados.
7. Si planea conectar la Estación de expansión o el
APR C/Port a una red, instale el driver de red.
Para obtener instrucciones consulte “Driver del controlador de red” más adelante en este documento.
8. Establezca un perfil de hardware para ser utilizado con la Estación de expansión C /Dock o el
APR C/Port.
Para obtener instrucciones consulte “Establecer un
perfil de hardware en la documentación de Windows NT que se incluyó con el ordenador.
Driver del controlador IDE
Si su ordenador utiliza Windows NT, siga el procedimiento siguiente para instalar el driver del controlador
IDE en la Estación de expansión C/Dock. El controlador
IDE brinda soporte a la unidad de CD-ROM en el compartimento de medios de C/Dock.
Los disquetes que necesita para este procedimiento
fueron incluidos con la Estación de expansión C/Dock.
NOTAS: Debe instalar el controlador IDE si desea utilizar la Estación de expansión C/Dock con una red.
Debe tener privile gios de admini strador pa ra desarr olla r
el siguiente procedimiento.
1. Desestacione el ordenador.
2. Pulse sobre el botón Inicio, apunte a Configuración y pulse sobre el Panel de control.
3. Pulse dos veces sobre el icono SCSI Adapters
(Adaptadores SCSI).
4. Pulse sobre el separador Drivers y pulse Añadir.
5. En la ventan a de instalación de d rivers, pulse
sobre el botón Disco disponible.
6. Inserte el disquete Driver IDE de Windows NT
Dell Latitude C/Dock Expansion Station Windows NT 4.0 IDE en la unidad de disquete del
ordenador.
4-2 Dell Latitude CP Antes de encender el ordenador
Page 17

7. En el cuadro Copy the manufacture’s files from
(Copie archivos del fabricante desde) teclee a:\
y pulse sobre OK.
8. Resalte CMD CSA-646 UltraDMA IDE Adapter
y pulse sobre OK.
9. Teclee a:\ y pulse sobre Continuar.
10. Cuando se le pida reiniciar el ordenador, r etire el
disquete y pulse sobre Si.
Después que el driver haya sido instalado, puede configurarlo para obtener el máximo rendimiento como sigue:
1. Pulse sobre el botón Inicio y pulse Run
(Ejecutar).
2. Teclee cmdcfgnt.exe y pulse OK.
3. Pulse sobre el separador General.
4. Seleccione la velocidad de bus PCI que corresponda a la de su ordenador .
Para determinar la velocidad de bus PCI del ordenador, consulte la sección titulada “Conjunto de chips y
bus” en el apéndice A de la Guia de referencia y
solución de problemas que ha sido incl uída con el
ordenador Latitude CP. Si una actualización de la
documentación ha sido incluída con su ordenador
verifique si se ha añadido una nueva velocidad de
bus.
5. Para activar las características DMA del controlador pulse sobre el cuadro Enable DMA (Activar
DMA) de tal forma que aparezca una marca de
verificación en el cuadro.
6. Utilice el separador Boot Controller (Controlador
de inicialización) para sintoniza r cada unidad en
un canal DMA específico.
Driver del controlador SCSI
Si su ordenador utiliza Windows NT, siga el siguiente
procedimiento para instalar el driver del controlador
SCSI en la Estación de expansión C/Dock.
Los disquetes que necesita para este procedimiento han
sido incluidos con la Estación de expansión C/Dock.
NOTA: Debe tener privilegios de a dministrador pa ra
realizar el procedimiento siguiente.
1. Desestacione el ordenador.
2. Pulse sobre el botón Inicio, apunte a Configuración, y pulse sobre el Panel de control.
3. Pulse dos veces sobre el icono Adaptadores SCSI.
4. Pulse sobre el separador Drivers y pulse sobre
Añadir.
5. En la ventana Install Driver (Instalar Driver)
pulse sobre el botón Disco disponible.
6. Inserte el disquete Dell Latitude C/Dock Expan-
sion Station Windows NT 4.0 SCSI Driver (Driver
de Windows NT 4.0 de la Estación de expansión
Dell Latitude C/Dock) en la unidad de disquete del
ordenador.
7. En el cuadro Copy the manufacturer’s files from
(copie archivos del fabricante desde), teclee a:\ y
pulse sobre OK.
8. En la ventana Instalar driver, pulse sobre OK.
9. En la ventana Configura c ión de Windows NT,
teclee a:\ y pulse Continuar.
10. Cuando se le pida reiniciar el ordenador retire el
disquete y pulse sobre Si.
Driver del controlador de red
Si su ordenador utiliza Windows NT siga el siguiente
procedimiento para instalar el driver de red si desea
conectar una Estación de expansión o un APR C/Port a
una red.
NOTA: Debe tener privilegios de administrador para
realizar el procedimiento siguiente. Si es necesario consulte con el administrador de red antes de iniciar este
procedimiento.
1. Apague y estacione el ordenador y después, presione el botón de encendido e inicie una sesión.
Si se encuentra instalada una tarjeta de vídeo PCI en
la Estación de expansión C/Dock, seleccione Windows NT Workstation Version 4.00 (VGA mode).
Si no existe una tarjeta de vídeo PCI instalada, seleccione Windows NT Workstation Version 4.00.
2. Si se encuentra instalada una tarjeta de vídeo PCI
en la Estación de expansión C/Dock, continúe con
el paso 3. Si no existe instalada una tarjeta de
vídeo PCI, o si está utilizando un APR C/Port,
continúe con el paso 9.
Dell Latitude CP Antes de encender el ordenador 4-3
Page 18

3. En la ventan a Invalid Display Se ttings (Configuración de pantalla inválida), pulse sobre OK.
4. En la ventana Displa y Prop erties (Pr opiedad es de
la pantalla), pulse sobre Load Drivers Now (Cargar drivers).
5. Pulse sobre Tipo de pantalla.
6. Pulse sobre Cambiar.
7. Pulse sobre Disco disponible.
8. Instale el driver de la tarjeta de vídeo PCI.
Para obtener instrucciones consulte “Instalación de
un driver de Windows NT de una tarjeta de vídeo
PCI” en el documento titulado “Antes de estacionar”
que fue incluido con la Estación de expansión
C/Dock.
9. Resalte el icono Entorno de red en el escritorio y
pulse el botón derecho.
10. En el menú seleccione Propiedades.
11. En la ventana Red, pulse sobre el separador
Adaptadores.
12. Pulse sobre Añadir.
13. Pulse sobre Disco disponible.
14. Teclee c:\drvlib\netcard\x86\3c90x y
pulse sobre OK.
15. En la ventana Select OEM Option (Seleccionar
opción OEM), resalte 3Com Fast EtherLink XL
Adapter (3C905) y pulse sobre OK.
16. Después que el driver haya sido instalado pulse
sobre Continuar.
17. En la ventana 3Com NIC Diagnostics (Diagnósticos 3Com NIC (Network Interface Controler
[Controlador de interfase de red]), seleccione el
separador Propiedades.
18. En el cuadro Individual Settings (Configuració n
individual), pulse sobre Media Type (Tipo de
medios) y configure la opción en Autoselect.
19. En la ventana 3NICDiag pulse sobre OK.
20. En la ventana 3Com NIC Diagnostics (Diagnósticos 3Com NIC) pulse sobre OK.
21. Cuando se le pida, pulse sobre No to change configuration settings (No cambiar las selecciones de
configuración ) y reinicie el ordenador.
22. En la ventana Red, pulse sobre el separador Identification (Identificación).
23. Pulse sobre Cambiar.
24. Teclee el nombre del ordenador y el nombre del
grupo de trabajo apropiados para su red.
Si el nombre del orden ador y el nomb re de l gru po de
trabajo no son correctos, el ordenador no puede
reconocer otros ordenadores en la red. Si es necesario consulte al administrador de su red los datos de
identificación apropiados.
25. Pulse sobre OK para cerrar la ventana
Identificación.
26. Pulse sobre Cerrar para cerrar la ventana Red.
27. Cuando se le pida pulse sobre Sí para reiniciar el
ordenador.
4-4 Dell Latitude CP Antes de encender el ordenador
 Loading...