

Dell PowerVault DR4100, DR4x00 User Manual
Setting up
Dell
Through CIFS
A Dell Technical White Paper
™
DR4x00
EMC Networker
EMC Networker
Disk Backup Appliance
on the

© 2013 Dell Inc. All Rights Reserved. Dell and the Dell logo, and other Dell names and marks are trademarks of Dell
Inc. in the US and worldwide. Networker is a trademark of EMC Corporation.
2 Setting up Networker on the Dell™ DR4x00 Disk Backup Appliance

Table of contents
Executive Summary .............................................................................................................................................................................. 4
1 Install and Configure the DR4x00 ............................................................................................................................................. 5
2 Configure the Backup Server .................................................................................................................................................... 11
3 Set up Networker ......................................................................................................................................................................... 13
4 Set up the DR4X00 Cleaner ...................................................................................................................................................... 26
5 Monitoring Dedupe, Compression & Performance ............................................................................................................. 27
3 Setting up Networker on the Dell™ DR4x00 Disk Backup Appliance

Executive Summary
This paper provides information about how to set up the Dell DR4x00 as a backup to disk target for EMC
Networker™ software. This paper is a quick reference guide and does not include all DR4x00 deployment
best practices.
See the DR4x00 documentation other data management application best practices whitepapers for
additional information.
NOTE: The DR4x00/Networker build version and screen shots used for this paper may vary slightly,
depending on the version of the DR4x00/Networker software version used.
4 Setting up Networker on the Dell™ DR4x00 Disk Backup Appliance
1 Install and Configure the DR4x00
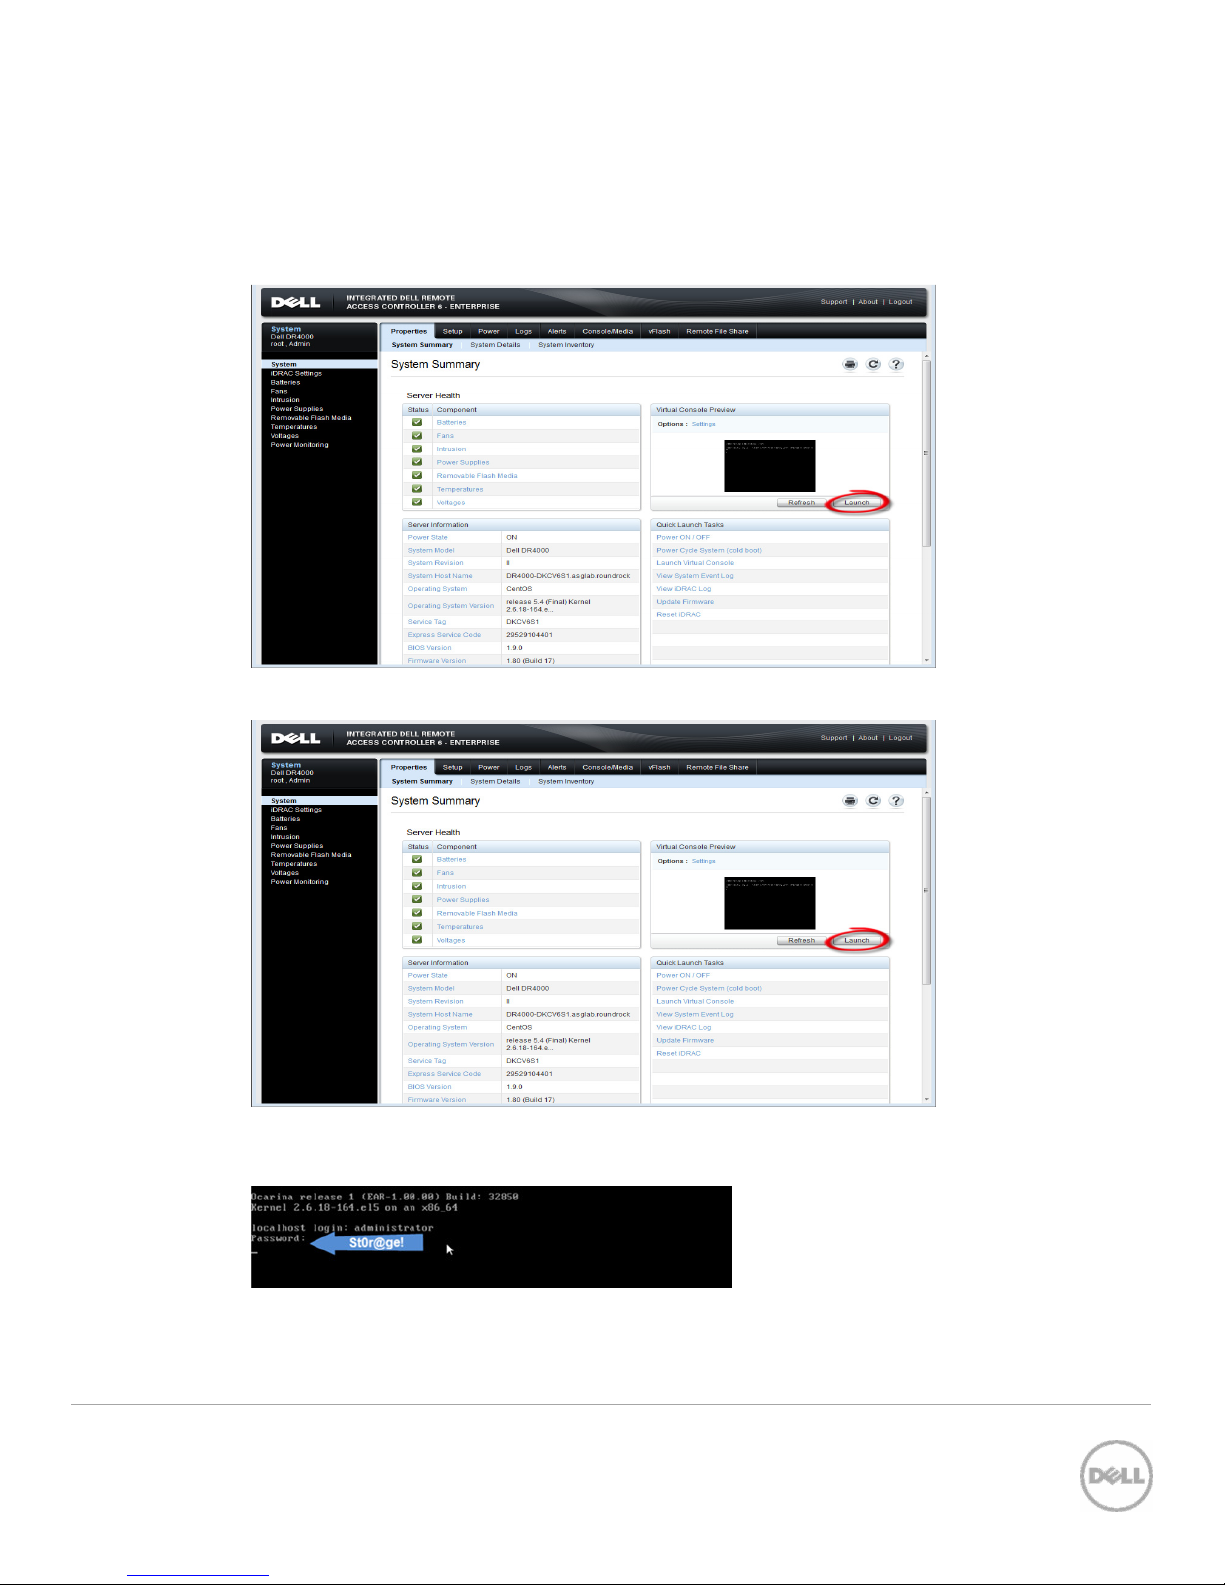
1. Rack and cable the DR4x00 appliance, and power it on.
2. Log into iDRAC using the default address 192.168.0.1, user name root, and the password calvin.
3. Launch the virtual console.
4. Once the virtual console is open, log in to the system as user administrator and the password
St0r@ge! (The “0” in the password is the numeral zero.).
5 Setting up Networker on the Dell™ DR4x00 Disk Backup Appliance
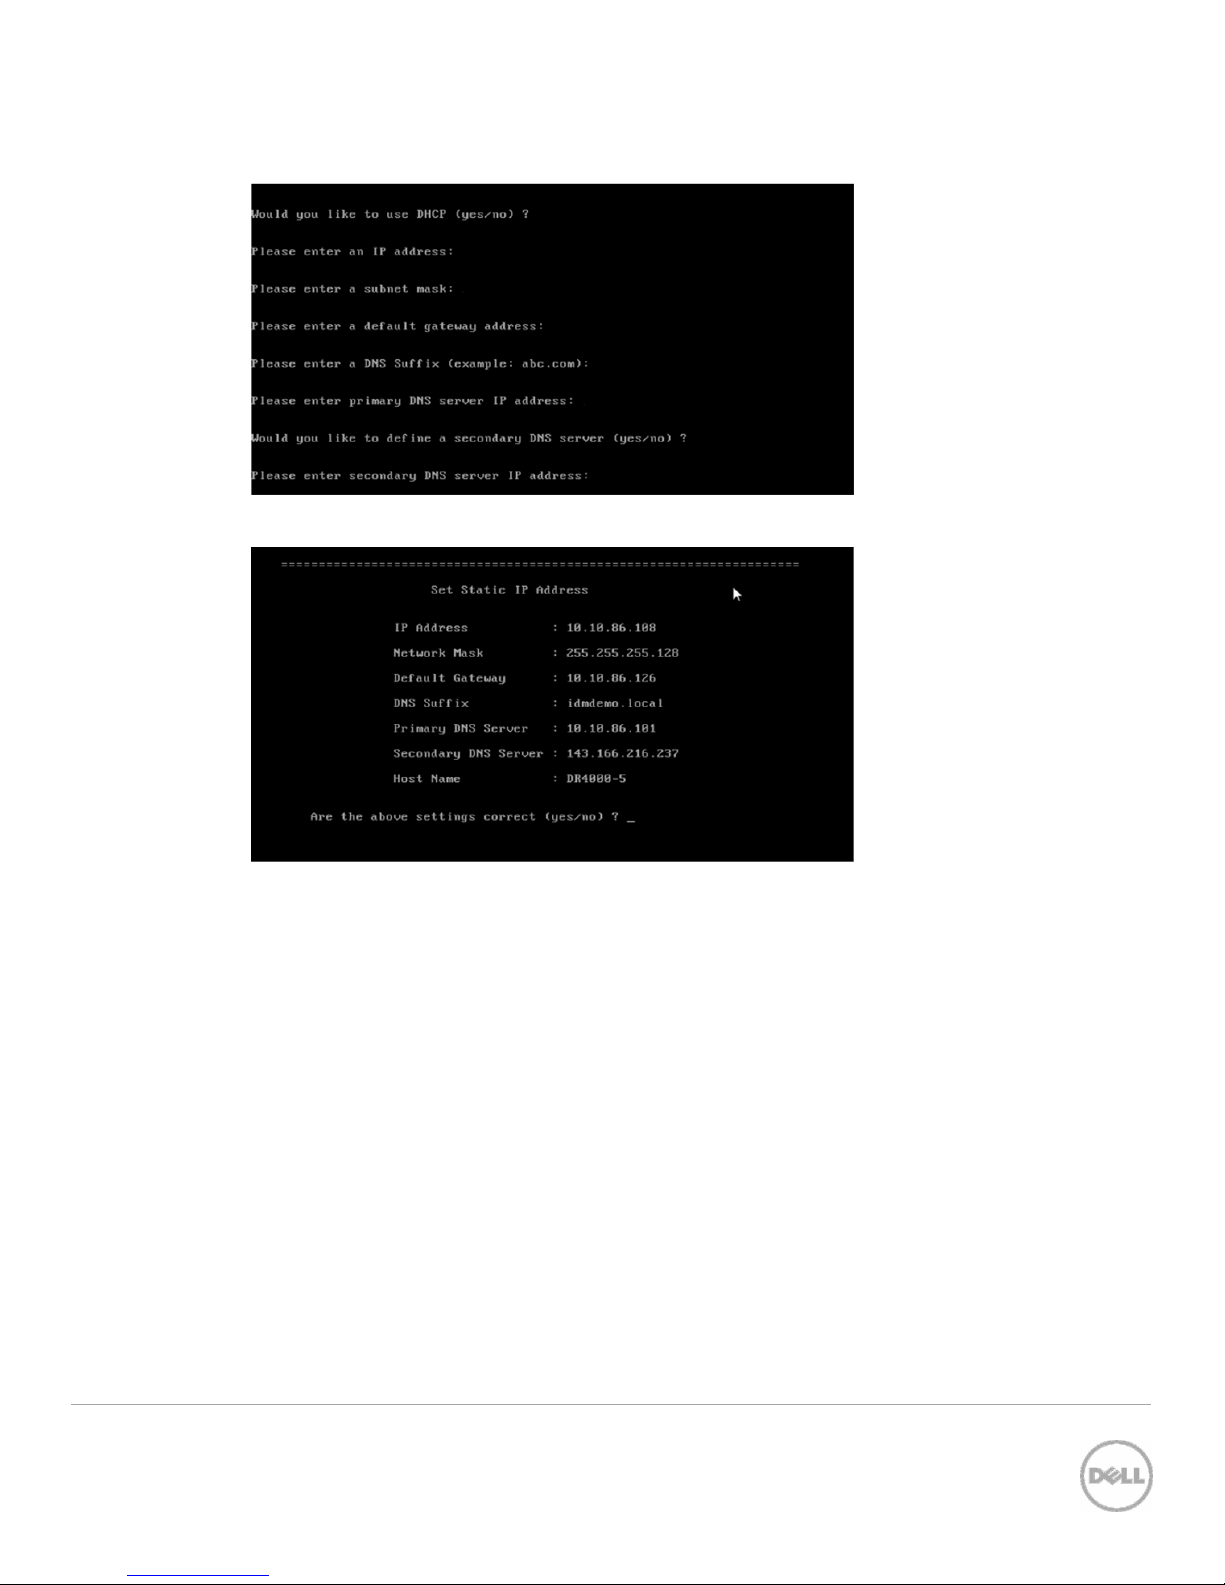
5. Set the user-defined networking preferences.
6. View the summary of preferences and confirm that it is correct.
6 Setting up Networker on the Dell™ DR4x00 Disk Backup Appliance
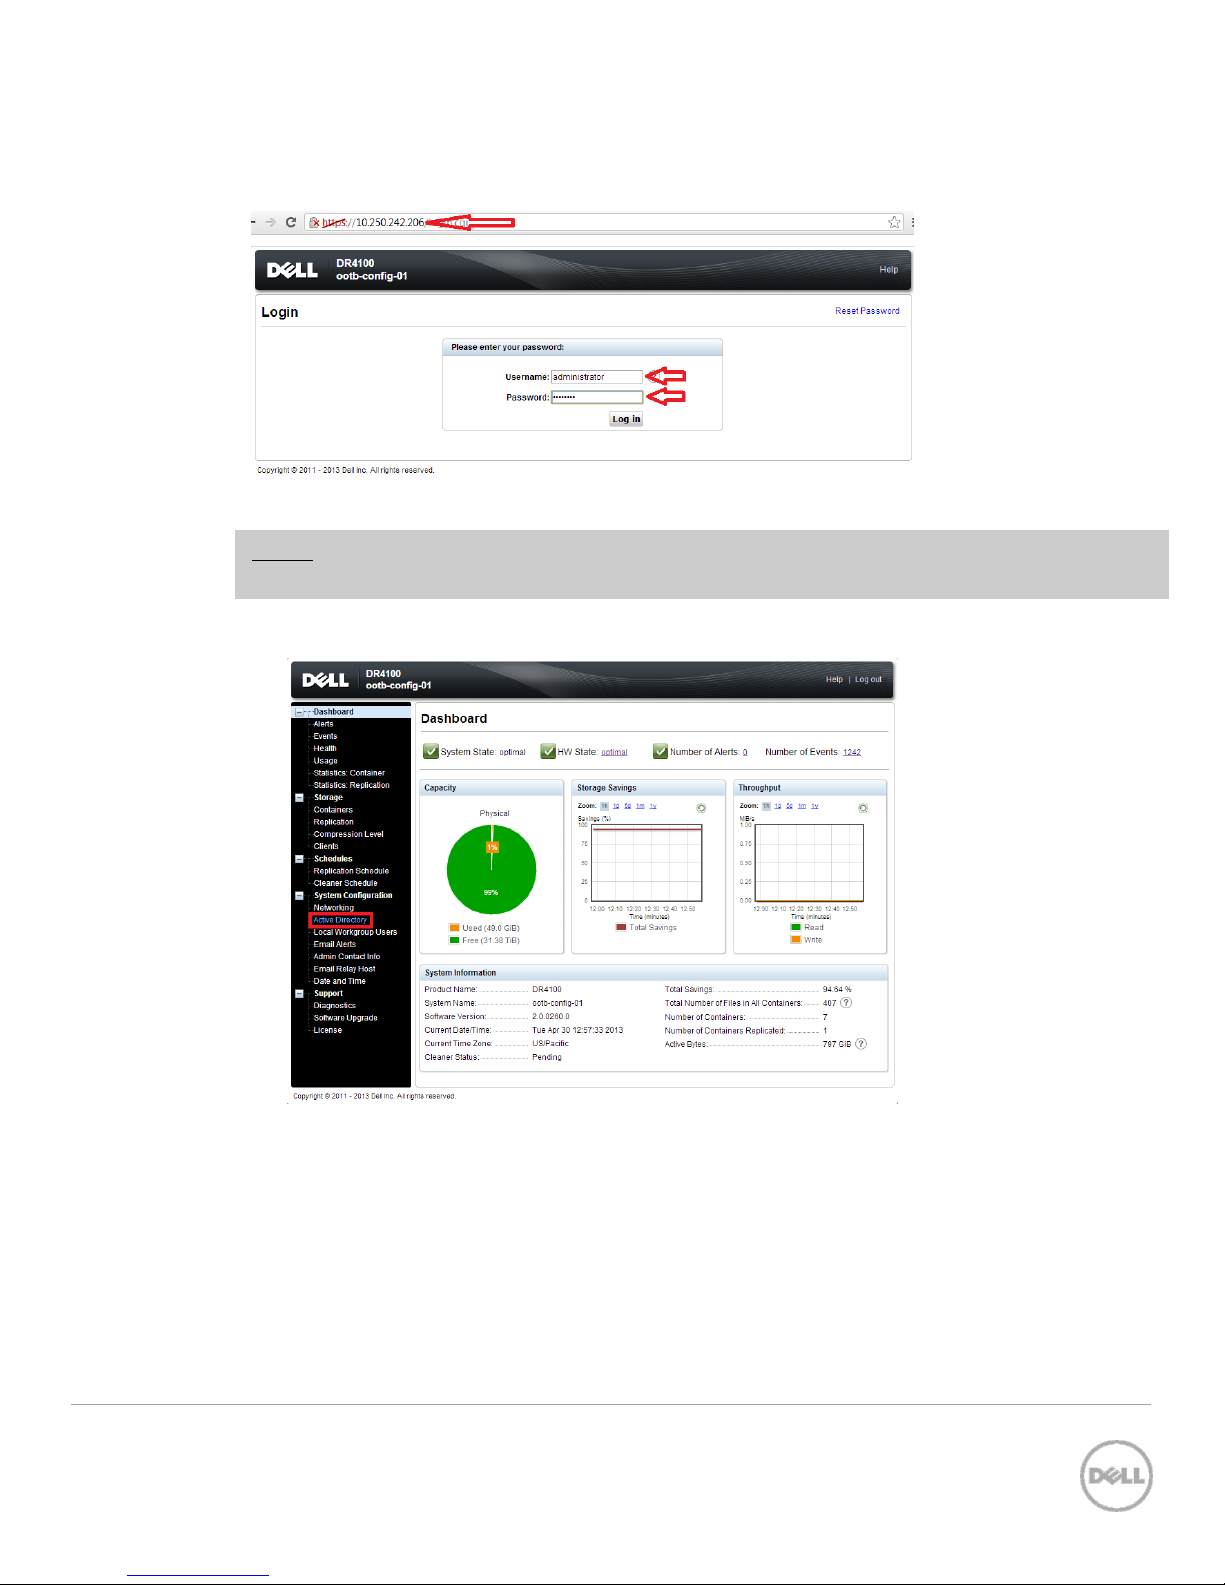
7. Log into the DR4x00 administrator console, using the IP address you just provided for the DR4x00,
user administrator and the password St0r@ge! (The “0” in the password is the numeral zero.).
8. Join the DR4x00 to Active Directory.
NOTE: if you do not want to add DR4x00 to Active Directory, see the
login instructions.
a. Select Active Directory in the tree on the left hand side of the dashboard.
Owner’s Manual
for guest
7 Setting up Networker on the Dell™ DR4x00 Disk Backup Appliance
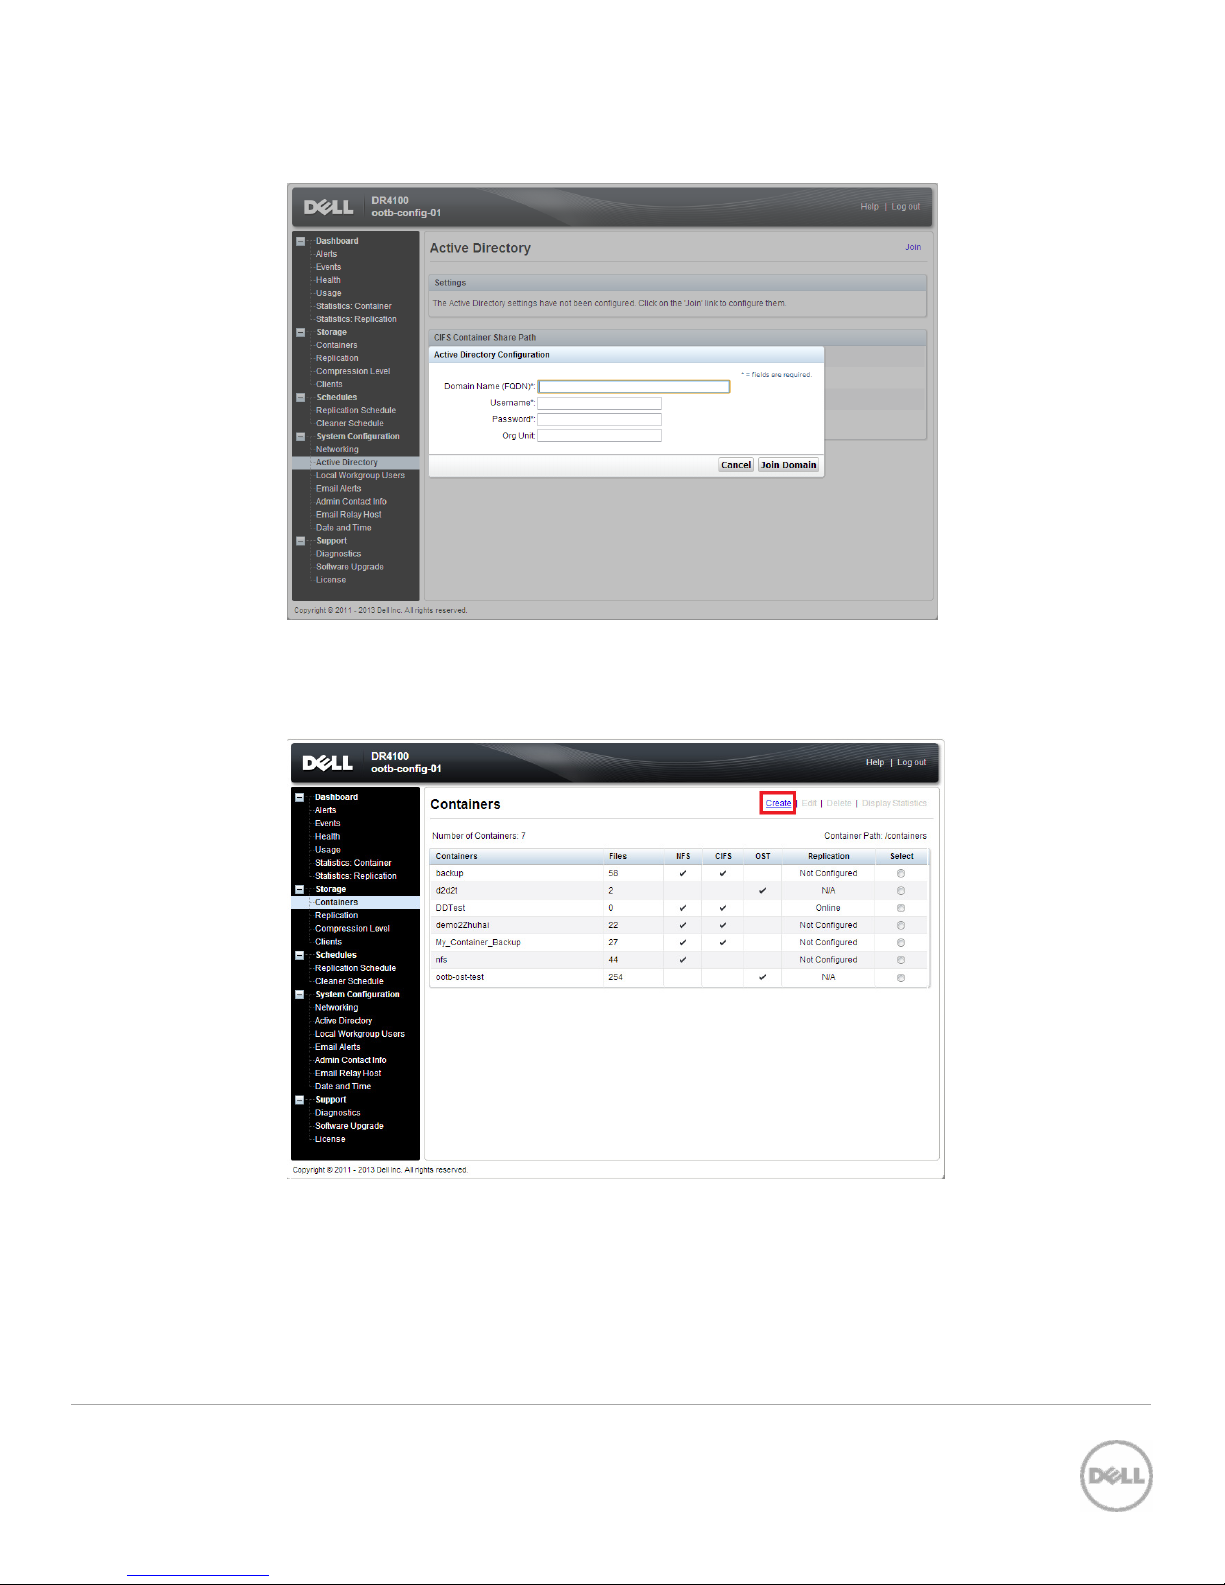
b. Enter your Active Directory credentials.
9. Create and mount the container.
a. Select Containers in the tree on the left side of the dashboard, and then click the Create link
at the top of the page.
8 Setting up Networker on the Dell™ DR4x00 Disk Backup Appliance
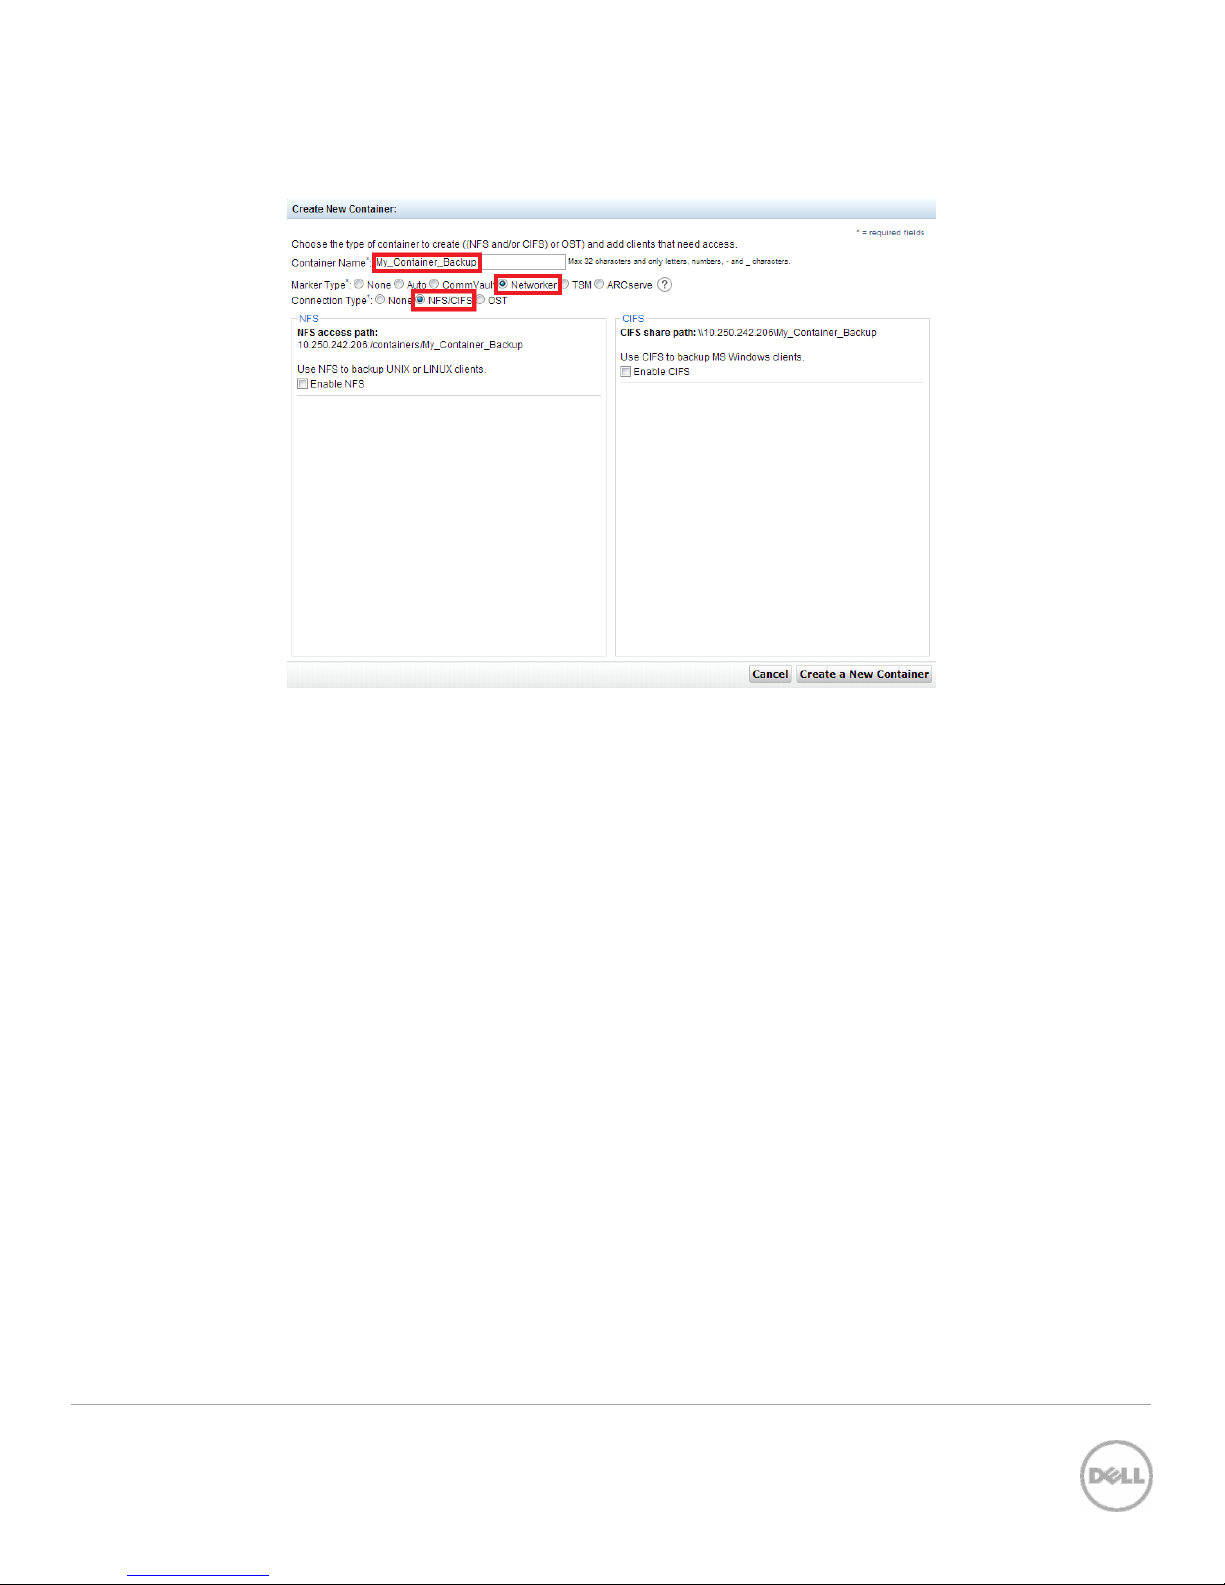
b. Enter a Container Name, select Networker as Marker Type, and select the NFS/CIFS check
box for Connection Type.
c. Under CIFS section, note down the CIFS share path (this will be used in configuring device on
Networker server), and select Enable CIFS. For Client Access section, choose either Open
Access or manually add clients into the allow list
9 Setting up Networker on the Dell™ DR4x00 Disk Backup Appliance
 Loading...