

Page 1

INSTALLATION INSTRUCTIONS
3” BULL BAR
2011-13 F-150 WITH ECOBOOST
Page 2
2011-13 F-150 WITH ECOBOOST
Qty
Description
Qty
Description
1
Bull Bar
4
12-1.75mm x 35mm Hex Bolts
1
Driver/Left Mounting Bracket
8
12mm x 32mm OD x 3mm Large Flat Washers
1
Passenger/Right Mounting Bracket
4
12mm x 24mm OD x 2.5mm Flat Washers
4
12mm x 40mm Bolt Plates
8
12mm Hex Nuts
8
12mm Lock Washers
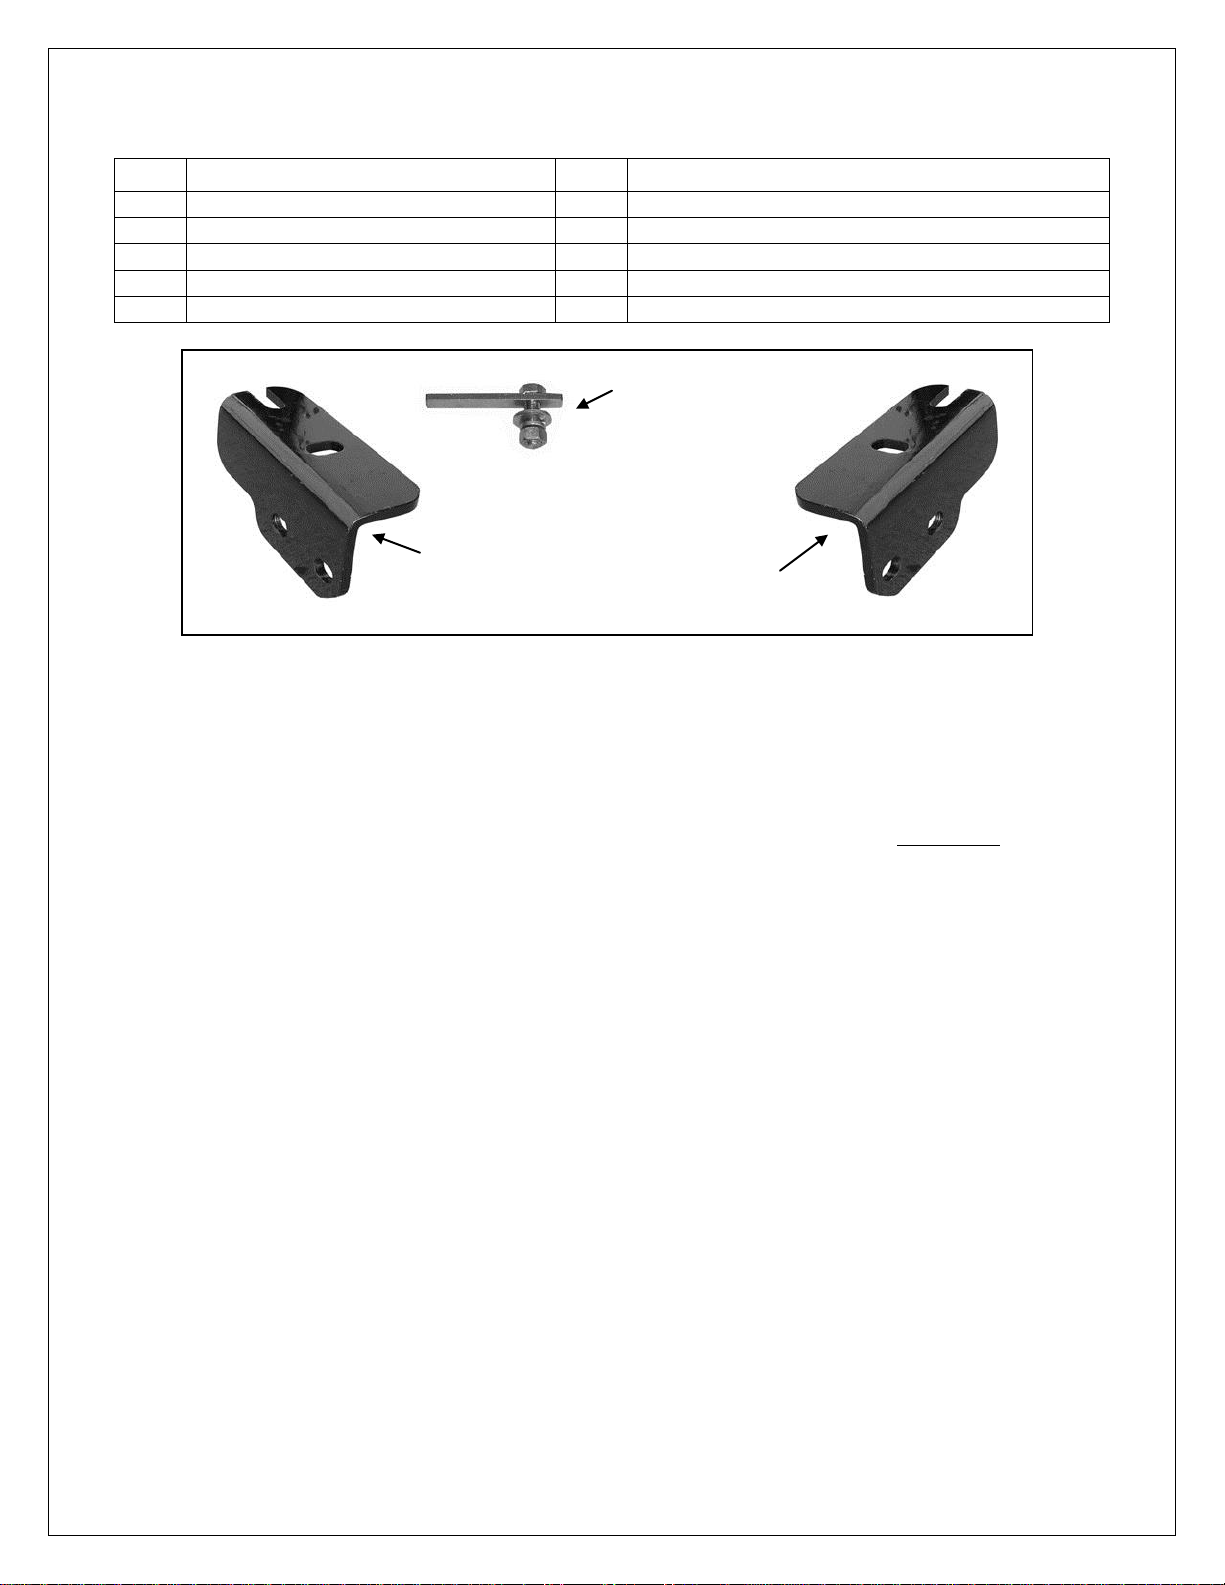
Passenger/Right
Mounting Bracket
(4) 12mm x 40mm
Bolt Plates
Driver/Left
Mounting Bracket
PARTS LIST:
PROCEDURE:
1. REMOVE CONTENTS FROM BOX. VERIFY ALL PARTS ARE PRESENT. READ
INSTRUCTIONS CAREFULLY BEFORE STARTING INSTALLATION. CUTTING MAY BE
REQUIRED.
2. Vehicles with Factory Tow Hooks
Remove the driver side tow hook by removing the front bolt and loosening the rear bolt,
(Figure 1). Slide the tow hook off. Leave the rear bolt in place to hold the double nut
plate in the frame and aligned with the holes. NOTE: This Bull Bar is not compatible
with the factory tow hooks and tow hooks will not be reinstalled.
Position the driver side Mounting Bracket up to the bottom of the frame, (Figure 2).
Slide the Bracket under the rear bolt. Bolt the Bracket in place with the factory tow hook
bolts and factory double nut plate. Repeat for passenger side Bracket installation.
Vehicles without Tow Hooks
Remove the plastic lower bumper cover, (Figure 4). Insert (2) 12mm Bolt Plates
through the opening in the open front end of the frame on the driver side and down
through the holes in the bottom of the frame, (Figure 2). Bolt the Bracket to the Bolt
Plates with (2) 12mm x 24mm STD Flat Washers, (2) 12mm Lock Washers and (2)
12mm Hex Nuts. Snug but do not tighten the hardware at this time. Repeat for
passenger side Bracket installation.
3. With assistance, position the Bull Bar onto the inside of the Mounting Brackets, (Figure 3).
Use the included (4) 12mm x 35mm Hex Bolts, (8) 12mm x 32mm Large Flat Washers, (4)
12mm Lock Washers and (4) 12mm Hex Nuts to attach the Bull Bar to the Mounting Brackets.
Do not tighten at this time.
4. Align and adjust the Bull Bar properly, and tighten all hardware.
IMPORTANT-Vehicles without Tow Hooks only
Temporarily remove the Bull Bar. Hold the plastic cover up in position and trace the outline of
the Brackets onto the inside of the cover, (Figures 4 & 5). Use a sharp knife or hacksaw blade
to carefully cut the openings for the Brackets. Make small cuts and check the fit often for best
3” BULL BAR
Page 1 of 3 7/1/13 Rev1 (DP)
Page 3

results. Once properly trimmed to clear the Brackets, reinstall the cover. Reinstall the Bull Bar
Use the factory tow hook
hardware or the included:
(2) 12mm x 40mm Bolt Plates
(2) 12mm Flat Washers
(2) 12mm Lock Washers
(2) 12mm Hex Nuts
Fig 2
Fig 1
Remove tow hooks if equipped
Insert Bolt Plates
through opening in
end of frame channel
NOTE: On vehicles without tow hooks, the
area circled above may be covered, (see
Figure 4). Remove the lower plastic bumper
cover to access the front of the frame
channel for Bracket installation
as described in Steps 3 & 4.
5. Do periodic inspections to the installation to make sure that all hardware is secure and tight.
To protect your investment, wax this product after installing. Regular waxing is recommended to add a
protective layer over the finish. Do not use any type of polish or wax that may contain abrasives that could
damage the finish.
For stainless steel: Aluminum polish may be used to polish small scratches and scuffs on the finish. Mild
soap may be used also to clean the Bull Bar.
For gloss black finishes: Mild soap may be used to clean the Bull Bar.
Page 2 of 3 7/1/13 Rev1 (DP)
3” BULL BAR
2011-13 F-150 WITH ECOBOOST
Driver Side Installation Pictured
Page 4

3” BULL BAR
(2) 12mm x 35mm Hex Bolts
(4) 12mm x 32mm Large Flat
Washers
(2) 12mm Lock Washers
(2) 12mm Hex Nuts
Fig 5
Fig 3
Fig 4
Front
Front
Front
Complete Installation
NOTE: Outline illustrated for example
only. Only remove enough plastic for
Bracket clearance. Do not cut through
the front or rear edge of the cover.
Do not cut through the
front edge of the cover
Models without tow hooks: Install and adjust
Brackets and Bull Bar. Temporarily remove the
Bull Bar. Hold plastic cover up against Brackets.
Mark outline of Brackets onto back of cover
2011-13 F-150 WITH ECOBOOST
Driver Side Installation Pictured
Page 3 of 3 7/1/13 Rev1 (DP)
 Loading...