

Page 1
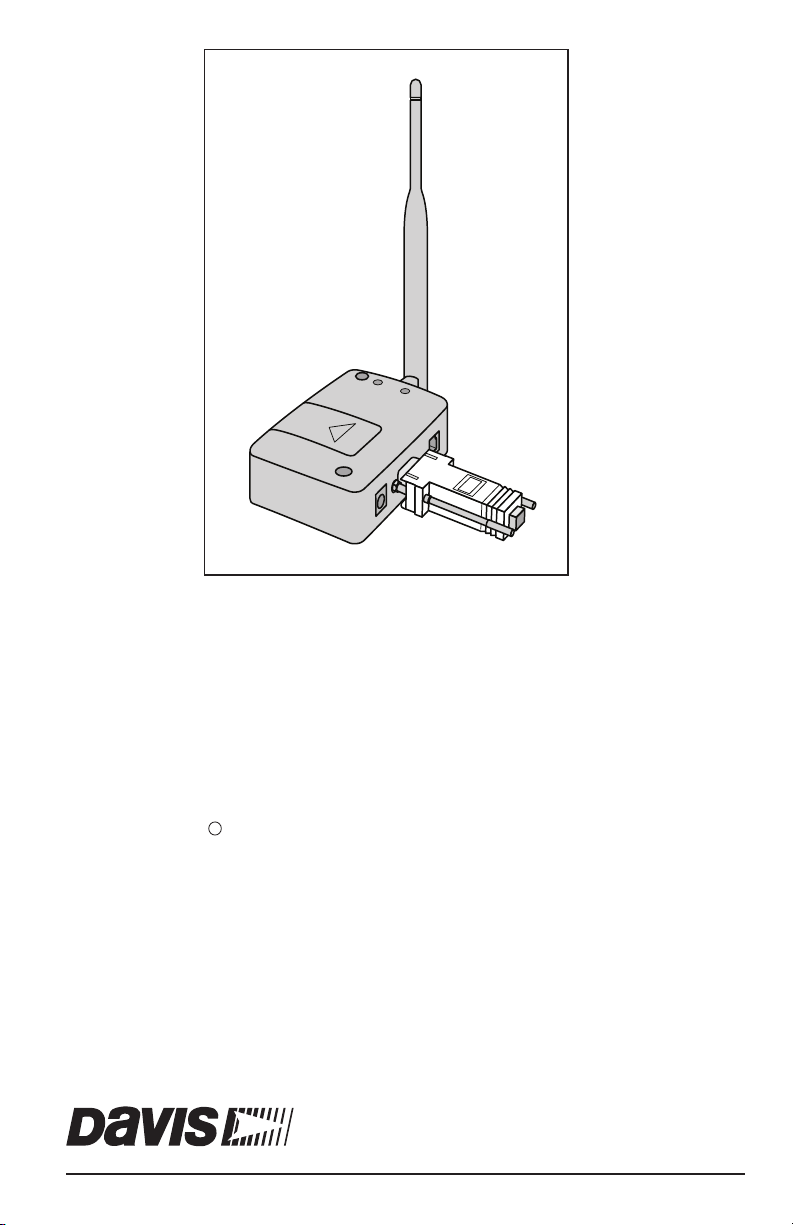
Vantage Connect
Retrofit Kit
™
For Vantage Pro2 , Vantage Pro2 Plus ,
Vantage Vue and Weather Envoy
Product number 6626
Davis Instruments, 3465 Diablo Avenue, Hayward, CA 94545-2778 U.S.A. • 510-732-9229 • www.davisnet.com
™™
R
®
™
Page 2

Vantage Connect Retrofit Kit
Product Numbers 6626, 6626EU,6626UK,
6626G, 6626S, 6626SEU 07395.322 Rev. C, June 21, 2012
For use with Vantage Pro, Vantage Pro2, and Vantage Vue Consoles and Weather Envoy.
Vantage Connect™, Vantage Pro®, Vantage Pro2™, Vantage Vue® , WeatherLink® and
Weather Envoy™are trademarks of Davis Instruments Corp., Hayward, CA.
This product complies with the essential protection requirements of the EC EMC Directive
2004/108/EC; Low Voltage Directive 2006/95/EC; and Eco-Design Directive 2005/32/
EC>0.5 watt no-load adapter.
© Davis Instruments Corp. 2012. All rights reserved.
Information in this document subject to change without notice. Davis Instruments Quality
Management System is ISO 9001 certified.
®
3465 Diablo Avenue, Hayward, CA 94545-2778 U.S.A.
510-732-9229 • Fax: 510-732-9188
E-mail: info@davisnet.com • www.davisnet.com
Page 3
Welcome to
Vantage Connect Retrofit Kit
The Vantage Connect Retrofit Kit allows you to upload data from a Davis
Vantage Pro
WeatherLink.com through the cellular network. With your own online account and a
data plan, you can receive alarm e-mails when preset weather conditions occur, view
data online or through a smart phone, or even download data into your PC with the
WeatherLink
®
, Vantage Pro2™, or Vantage Vue® console; or a Weather Envoy™ to
®
software.
(6626)
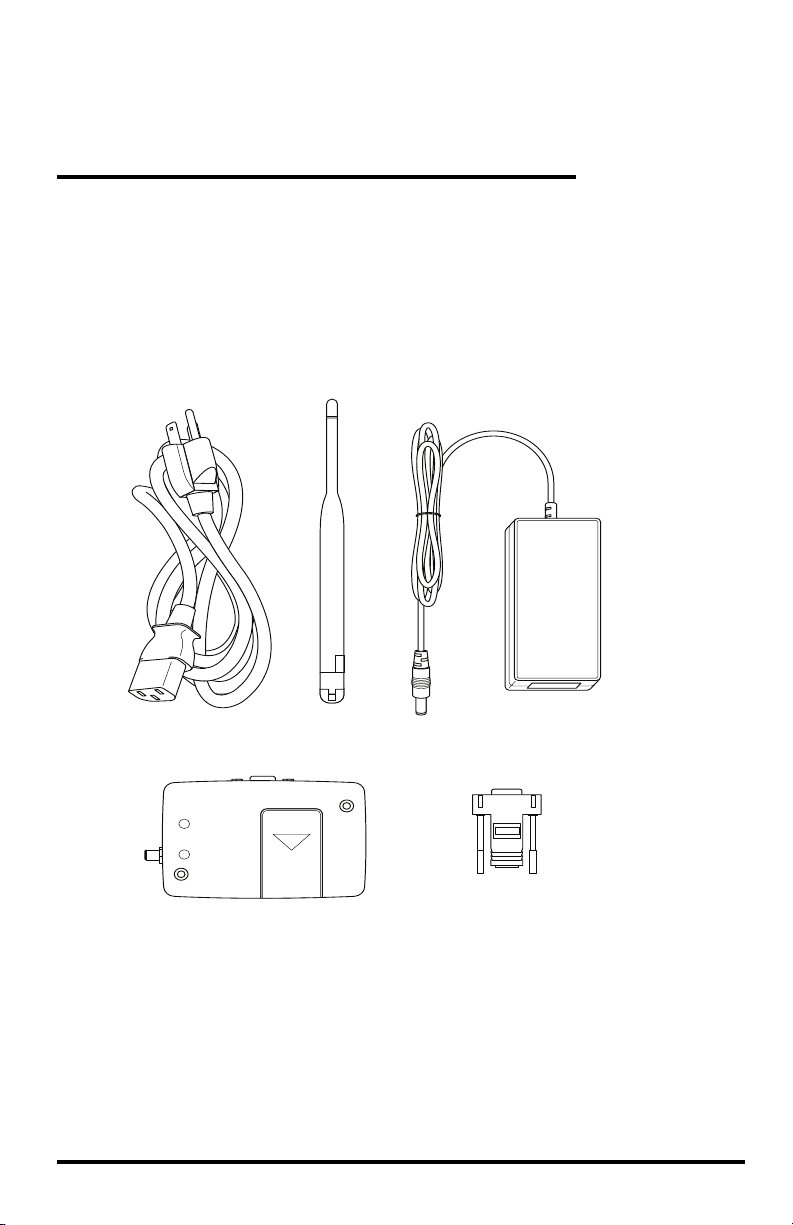
Contents of Package
Power Cord
(US Shown)
Cellular Modem
The Vantage Connect Retrofit Kit is available in six different packages: US, EU,
UK, G, S, and SEU (depending on country of use).
The package contains the following:
• Cellular Modem
• Antenna
• 12V 1.5A power supply
• Power cord with either a US, EU or UK connector
• Vantage Connect Adapter
Antenna Power Supply
Vantage Connect
Adapter
1
Page 4

Hardware Requirements
• Davis weather console, either Vantage Pro, Vantage Pro2, or Vantage Vue; or
Weather Envoy (all sold separately)
• WeatherLink software with serial data logger (product number 6510SER, not
included)
• GSM/GPRS cellular network coverage in the area
Before You Install Your Retrofit Kit
1. Backup your data.
The Vantage Connect Retrofit Kit will upload data to the Weatherlink.com
server in intervals. The update interval will be determined by the purchased
data plan. For example, if you are on a 5-minute plan, your upload interval
will be every 5 minutes. If the archive interval of your weather station is set to
a different rate than the upload interval of your data plan, the Vantage Connect
Retrofit Kit will change the archive interval to match the upload interval and
clear all the archive records. If the archive interval is the same as the upload
interval, the Vantage Connect Retrofit Kit will not clear any data in the
weather station.
Before using the Vantage Connect Retrofit Kit, check to see what archive
interval has been set in your WeatherLink software (Setup -> Set Archive
Interval). If the archive interval is not the same as the data upload interval,
you should first download the data to the WeatherLink software before connecting the weather station to the Vantage Connect Retrofit Kit to avoid losing
data.
Note: If you are exchanging a USB data logger for a serial data logger, see Appendix A:
Switching Data Loggers (page 10).
2. Check weather station time and date.
Make sure the time and date on the weather station (console or Envoy) is set
correctly before connecting the station to the Vantage Connect Retrofit Kit. If
the time is not set correctly, use the key pad (console) or WeatherLink software (Envoy or console) to set the correct time.
Tip: To change the time on a console or Envoy, see your instruction manual.
2
Page 5

3. Purchase a Vantage Connect Service Plan.
Vantage Connect Retrofit Kit requires an annual service plan. Choose #6632,
6634, or 6636 in the version appropriate for your region (US, A, B, or C). Each
plan offers a different update interval (5, 15, or 60 minutes). For more information see your Davis reseller or purchase a plan during your registration process
on WeatherLink.com.
After purchase, you will receive an e-mail with an Activation Code that you
will use to register online.
4. Register Online
Note: It is important to register your Vantage Connect Retrofit Kit online and wait 5 to 10 min-
utes BEFORE you power it up to avoid a delay in uploading data. If you already powered
up before registering, remove power from the retrofit kit, register, then repower.
When you receive the e-mail with the Activation Code, follow the instructions in the
e-mail. (Or, go to www.weatherlink.com; click on Register. Select the Vantage
Connect option.)
Enter the DID and KEY located on the sticker on the Retrofit Kit, and the Activation
Code received in the e-mail.
Product # 6626
DID: _______________
KEY: _________
FCC ID:
R17GC864
IMEI: XXXXXXXXXXXXXXXXX
SN: XXXXXXX
Made in USA with
imported
and US parts.
Create and enter a user name and password, and enter your e-mail address to create a
new user account. The first time you log in you will enter your profile information.
3
Page 6

Installation
Set Up Modem and Antenna
1. Attach the antenna
to the Vantage
Connect Retrofit
Kit by screwing it
into the threaded
receiver on the
cellular modem.
2. Adjust the antenna orientation
vertically and connect the
Vantage Connect adapter to the
cellular modem.
4
Page 7

Connect to the Weather Station
1. If you have not already set up your console or Weather Envoy, do so first. (See
the instruction manual that came with your console or Envoy.)
2. Make sure the data logger is installed in the console or Envoy. (See your
WeatherLink Getting Started Guide for more information on installing the data
logger.) Attach the 8' (2.44 m) data logger serial cable (sold with the WeatherLink Serial Data Logger) to the data logger.
3. If you wish to set alarms, do so now. You may set alarm thresholds for weather
conditions through the WeatherLink software or in the console (for Vantage
stations). When an alarm condition occurs, the current data will be sent to the
server. Up to ten alarm conditions will be sent to the server per day (from midnight to midnight). When an alarm condition occurs, the “Summary” page on
WeatherLink.com shows a snapshot of the weather condition when the alarm is
activated.
Note: See “Setting E-mail Alerts” on page 7 for information on how to receive e-mail alerts for
alarms.
4. Connect the other end of the data logger serial cable to the Vantage Connect
adapter.
5. Plug power cord into the power supply (see illustration below).
Note: Do not power up the Retrofit Kit until after you have registered online.
Vantage Pro2 Console
Data Logger
Vantage Connect
Adapter
8' (2.5 m)
Data Logger
Vantage Connect
Cellular Modem
Power Supply
Note: We recommend using the console’s AC power adapter (with battery back-up) when it is
connected to the Vantage Connect Retrofit Kit. C-batteries alone will only last 3 months.
Cable
Battery cover
Power Cord
5
Page 8

Power Up
Note: It is important to register your Vantage Connect Retrofit Kit online and wait 5 to 10 min-
utes BEFORE you power it up to avoid a delay in uploading data. If you already powered
up before registering, remove power from the retrofit kit, register, then repower.
Plug in the power supply cable to
the cellular modem (see the illustration on “Connect to the Weather
Station” on page 5) and plug the
power cord into the AC outlet to
power up the Retrofit Kit. When
power is applied to the Retrofit Kit,
the status LED should start blinking.
The LED blinks 0.5 seconds on/0.5
seconds off for about 30 seconds at
startup. When it is attempting to log
on to the cellular network, the LED
blinks 0.5 seconds on/2 seconds off.
When it has logged on to the cellular
network, the LED blinks 0.1 seconds on/5 seconds off.
The other LED should always
remain off.
If cellular coverage is poor, it may take the device much longer to register on the
network.
Status
LED
This
LED
Remains
O
Note: See “My status LED is flashing or always on,” on page 9 for more information on LED
behavior.
Upload and Access Data
Once the Retrofit Kit is registered on the network, it will upload the latest data to
the server.
• Upon first use, the Retrofit Kit will upload only the latest (current) conditions, not
all the previously stored data that may be in your data logger.
• From then on, the Retrofit Kit will upload only new data stored since the last
update.
Data is uploaded to the server along with daily, monthly and yearly highs and
lows data. The “My Weather” page shows the weather conditions uploaded at the
last upload interval.
To access your data online:
1. Go to www.weatherlink.com.
2. Click on Login in the upper right-hand corner.
Note: It takes up to 2 minutes for the data received from the Vantage Connect Retrofit Kit to be
processed to the web site. For example, if you have a 5-minute update plan, the data
received at 12:05 may not appear on the web site until 12:07.
6
Page 9

Download Data From WeatherLink Network to PC
You can download your data stored online to your PC through the WeatherLink
software. This can be done manually, or you can set up automatic downloads in
WeatherLink software. If you choose manual downloads, be aware that the server
will store four times the amount of data as your data logger alone. The amount of
data stored depends on the update interval of your service plan. Be sure to download within the time period below for your service plan.
5-minute plan 1 month
15-minute plan 3 months
60-minute plan 1 year
To set up a communication link between WeatherLink software and your
WeatherLink.com account:
1. In WeatherLink software, under the Setup menu, select Communication Port.
Select TCP/IP.
2. Click on Web Download and then enter your weatherlink.com user ID and
password.
3. Click OK to exit.
To set up automatic downloads:
1. In the WeatherLink software, under the Setup menu, select Auto Download.
2. Choose the station name, then Add.
3. Choose how often to download (from once an hour to once a day).
4. Click Save.
To manually download:
1. In the WeatherLink software, under the File menu, select Download to
download data.
See WeatherLink software’s Help for more information.
Setting E-mail Alerts
You can set up e-mail alerts for console alarm conditions. You will receive an email when the alert conditions begin and another when the alert conditions end.
You can receive up to 10 sets of start/stop e-mail alerts per day (midnight-to-midnight) when alarm conditions occur.
To set up e-mail alerts:
1. Log on to your WeatherLink.com page.
2. Click E-mail Settings.
3. In the Alarm Summary box, check the Enable box and enter your e-mail
address.
7
Page 10

Using Solar Power to Power the Vantage Connect Retrofit Kit in the Field
You can power the Vantage Connect Retrofit Kit on solar power if needed. Keep
in mind that the Vantage weather station or Envoy uses 6v DC and the Retrofit Kit
uses 12v DC. Each will need to be powered separately.
Powering a Vantage Pro2 console, Vantage Vue console or Envoy
These receiving consoles require 6v DC. Because of the near constant communication with the Retrofit Kit, the console’s backup batteries will not be sufficient to
power the console for a reasonable period. You should use either of the following
to power your console.
• Solar Power Kit for Wireless Consoles or Wireless Envoy (#6610)
Use this kit if you have a wireless console and are in a well-sunlit area with reasonable sunshine.
• Solar Power Kit for Cabled Consoles or Cabled Envoy (#7707)
Use this kit if you have a cabled console or any console in a low light or
high latitude location.
Powering the Vantage Connect Retrofit Kit
Vantage Connect Retrofit kit electrical specifications:
Voltage: . . . . . . . 12v DC
Current: . . . . . . . 5-minute plan: 27mA average/1A peak
15-minute plan: 23mA average/1A peak
60-minute plan: 21mA average/1A peak
If you plan to use your own solar power kit to power the Vantage Connect retrofit
kit in the field you will need a 12v battery with sufficient capacity (see table
below) and a solar panel that is at least 10W (20W panel in low light or high altitude conditions).
Battery
Capacity
7 Ah 11 days 13 days 14 days
15 Ah 23 days 27 days 30 days
32 Ah 49 days 58 days 63 days
5-minute plan 15-minute plan 60-minute plan
Fully Charged Battery Life
Visit www.davisnet.com/weather/empowered for more power kit solutions.
8
Page 11

Troubleshooting
My status LED is not blinking.
Make sure the power cord is connected. If power
is connected and the LED is still off, open the
Retrofit Kit and press the ON/OFF button
shown in the diagram. If the LED is still off, contact technical support.
On/O Button
My status LED is flashing or always on.
The speed at which the LED flashes or blinks indicates specific information. Use
the table below to ascertain what the condition is and what to do about it.
ON
(seconds)
2 0.1 No console detected Repower console. Check
0.1 0.1 No cell signal
0.5 0.5 Starting up Wait for next step.
0.5 1.5
0.1 5
Always Never System fault Contact Tech Support
Off
(seconds)
Indicates What to do
connectors and cables.
Move to a location with
detected
Logging on to cellular network
Logged on to cellular network, normal
function
cellular reception.
Wait for next step.
No action needed.
No data is being uploaded.
Make sure status LED is showing normal function, otherwise the device has not
registered on the network. Check the serial cable, make sure it is connected to the
weather station. Check power to the weather station.
Note: In a Weather Envoy, it will not be obvious that power has been lost.
9
Page 12

Appendix A: Switching Data Loggers
To switch out a USB data logger for a serial data logger:
1. If you are using a console, enter Setup Mode (press and hold DONE and -).
2. Power down the console or Weather Envoy (batteries and AC).
3. Unplug the USB data logger; plug in the serial data logger.
4. Repower the console or Envoy.
5. Check the time and adjust if necessary. Use the console key pad or
WeatherLink software (Envoy or console) to set the correct time.
Tip: To change the time on a console or Envoy, see your instruction manual.
Contacting Davis Technical Support
For questions about installing or operating your Vantage Connect Retrofit Kit,
please contact Davis Technical Support. We’ll be glad to help.
Online www.davisnet.com
See the Weather Support section for copies of user
manuals, product specifications, application notes, software updates, and more.
E-mail support@davisnet.com
Telephone (510) 732-7814
Monday - Friday, 7:00 a.m. - 5:30 p.m. Pacific Time.
Specifications
General:
Cellular Bands . . . . . . . . . . . . . . . . . . .850, 900, 1800, 1900 MHz
Operating Temperature. . . . . . . . . . . . .-22° to +149°F (-30° to +65°C)
Storage Temperature . . . . . . . . . . . . .-40° to +185°F (-40° to +85°C)
Current Draw . . . . . . . . . . . . . . . . . . . .25mA typical, 1A peak
GPRS class 10: 146mA typical
Transmitter Power . . . . . . . . . . . . . . . . 2W @ 850/900 MHz (Class 4)
1W @ 1800/1900 MHZ (Class 1)
AC Power Adapter . . . . . . . . . . . . . . . . 12 VDC, 1.5A peak power 2.1mm
barrel jack
Housing Material . . . . . . . . . . . . . . . . .Rugged ABS Plastic
Dimensions (width x length x height) . .2.6" x 3.75" x 1.2"
(66mm x 95.25mm x 30.84mm)
Weight . . . . . . . . . . . . . . . . . . . . . . . . . 0.28 lb (127 g)
Certifications: . . . . . . . . . . . . . . . . . . . . . .FCC PTCRB CE Carrier
 Loading...