

Page 1
Datalogic Formula™
Quick Reference Guide
Page 2

Datalogic Mobile S.r.l.
Via S. Vitalino 13
40012 - Lippo di Calderara di Reno
Bologna - Italy
Formula™ - Quick Reference Guide
Ed.: 12/2008
ALL RIGHTS RESERVED
The Datalogic name and logo are registered trademarks of Datalogic S.p.A. in many countries.
The Formula name is a trademark of Datalogic Mobile S.r.l.
All other brand and product names mentioned herein are for identification purposes only and
may be trademarks or registered trademarks of their respective owners.
Datalogic reserves the right to make modifications and improvements without prior notification.
Datalogic shall not be liable for technical or editorial errors or omissions contained herein, nor
for incidental or consequential damages resulting from the use of this material.
© 2008 Datalogic Mobile S.r.l. • All rights reserved. • Protected to the fullest extent under U.S.
and international laws. • Copying, or altering of this document is prohibited without express
written consent from Datalogic Mobile S.r.l.
Page 3

CONTENTS
1 FORMULA™ PROGRAM INSTALLATION AND SETUP ............................1
2 DATA COLLECTION WITH FORMULA™ APPLICATIONS........................2
2.1 Quick Start....................................................................................................2
2.2 Setting up the Formula™..............................................................................3
2.2.1 Getting Started..............................................................................................3
2.2.2 Setting the Time and Date ............................................................................ 4
2.2.3 Setting a Password.......................................................................................5
2.2.4 Setting Font Size........................................................................................... 5
2.2.5 Switching Backlight On/Off............................................................................5
2.3 Using PALPRO to Collect Data.....................................................................6
2.3.1 Installing PALPRO ........................................................................................6
2.3.2 Using PALPRO.............................................................................................6
2.4 Uploading Collected PALPRO File Data to a PC ........................................ 15
2.4.1 Prepare Host PC.........................................................................................15
2.4.2 Prepare Formula™ to upload Data ............................................................. 18
2.5 Prompt Customization for Chinese Version ................................................ 20
2.6 Configuring with Bar Codes.........................................................................23
2.7 Programming Parameters........................................................................... 38
3 READY TO USE APPLICATIONS.............................................................. 42
3.1 Set up the Terminal for the Connection with the PC ................................... 42
3.2 Downloading a Ready to Use Application ...................................................43
3.3 Configuring Ready tO Use Applications through SysTools™...................... 45
3.4 Transmitting a Custom Configuration File to the Formula™ ....................... 49
3.5 Uploading Collected .Dat File Data to a PC................................................53
4 EASYGEN™............................................................................................... 55
4.1 Set up the Terminal for the Connection with the PC ................................... 55
4.2 Installing an EasyGen™ Example............................................................... 55
4.3 Uploading Collected .Dat File Data to a PC................................................60
GLOSSARY OF TERMS ............................................................................62
iii
Page 4

iv
Page 5

FORMULA™ QUICK REFERENCE GUIDE
1 FORMULA™ PROGRAM INSTALLATION AND SETUP
The Formula™ terminal can accept different program options:
- custom programs developed and generated with the Formula™ Software
Development Toolkits;
- ready to use applications preloaded and distributed with Formula™ CD;
- applications created by EasyGen™ application generator.
This document describes examples of the last two options.
For details on the first option, see the SW Dev Toolkits Developer’s manual.
The following software is preloaded on the Formula™:
- PALPRO (Portable Application Library)
The following softwares must first be installed on a PC through the Formula™ CD:
Software Tool Installation Folder
EASYGEN
SYSTOOLS
STANDARD MODE M1
APPLICATION FILES
C:\”INSTALLATION FOLDER”\Formula Software
Tools\EasyGen
C:\”INSTALLATION FOLDER”\Formula Software
Tools\SysTools
C:\”INSTALLATION FOLDER”\Formula Software
Tools\Applications\Standard Mode Application
ENHANCED MODE M2
APPLICATION FILES
C:\”INSTALLATION FOLDER”\Formula Software
Tools\Applications\Enhanced Mode Application
See chapter 3.1 of Formula™ User’s manual Software Overview for further details.
∗
.
∗
A backup copy of the application is also in the Formula™ CD.
1
Page 6
DATA COLLECTION WITH FORMULA™ SOFTWARE APPLICATIONS
2 DATA COLLECTION WITH FORMULA™ APPLICATIONS
2.1 QUICK START
The Formula™ comes with an application named PALPRO loaded in memory.
PALPRO includes two useful data-collection programs for using the Formula™
without additional programming. Follow the steps below to begin using the Formula™
with PALPRO immediately. Page references show where to find more information.
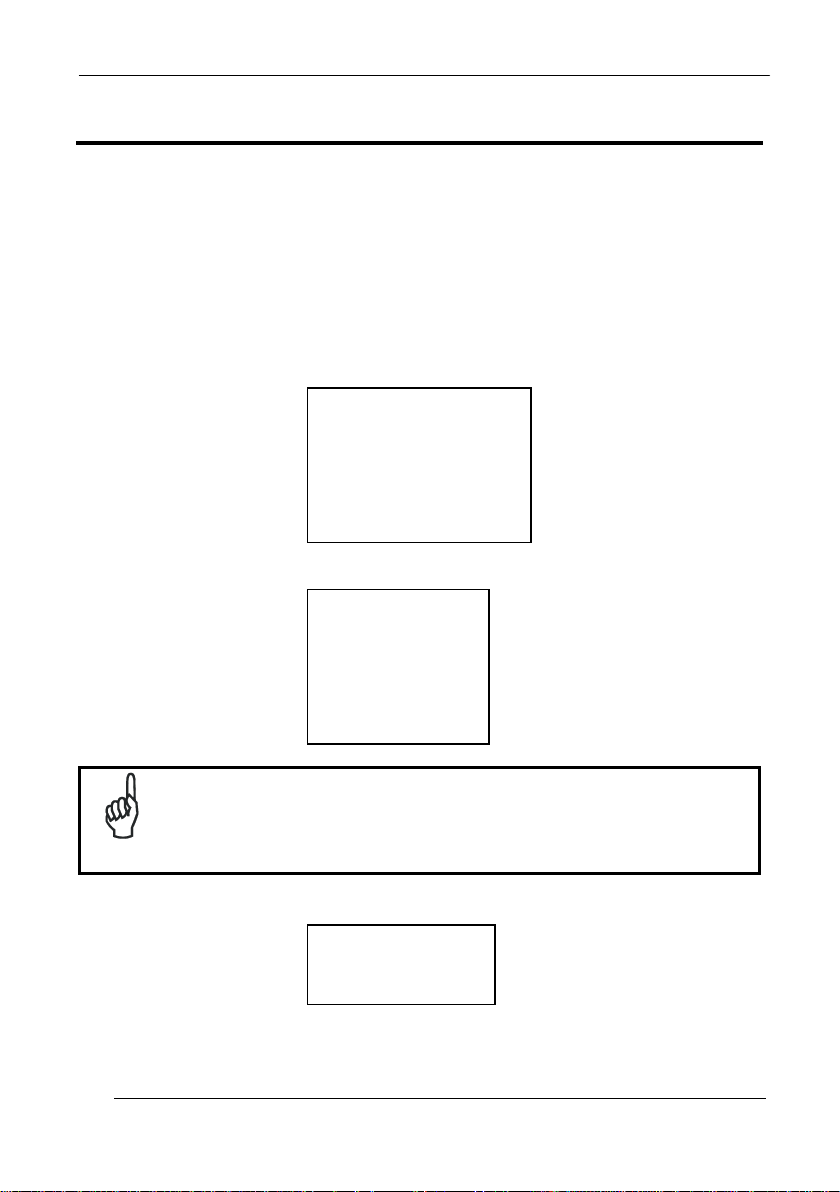
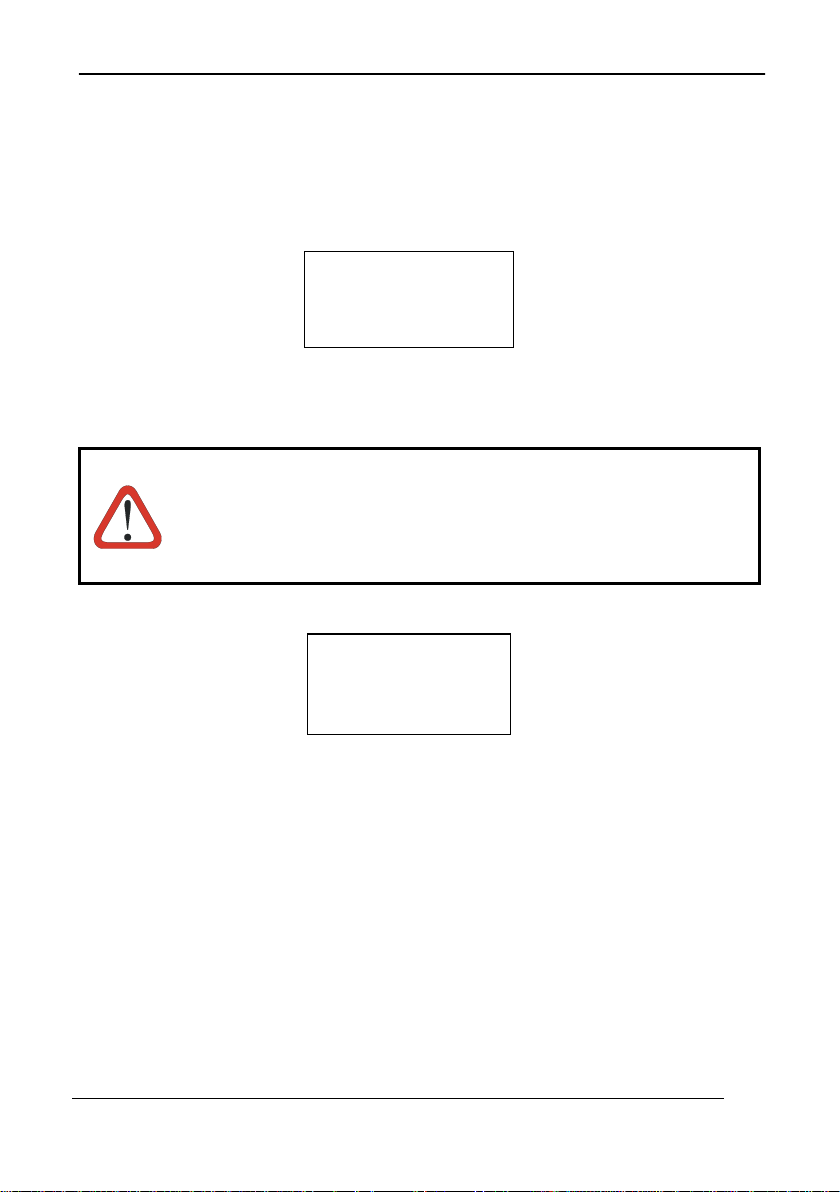
1. Turn the Formula™ on by pressing the <PWR> key. The following screen
appears:
Select
Font
F1 = Wide English
F2 = Normal English
F3 = Simplified Chinese
F4 = Traditional Chinese
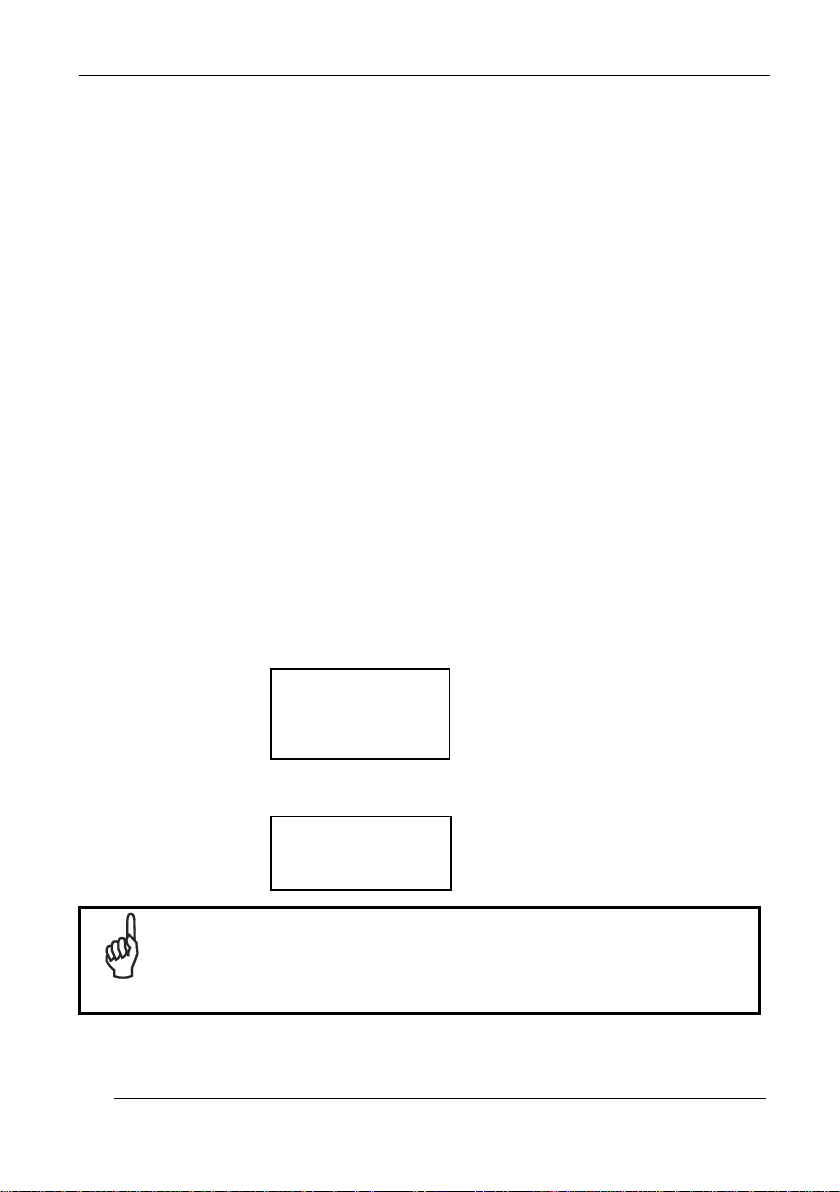
2. Select the font. The following screen appears:
FORMULA
Ver.: 1.00
System
RAM 1MB
01/01/08
00:21:48
Press F-key
If the Formula™ does not turn on when the <PWR> key is pressed,
you many need to recharge the main battery.
NOTE
3. Press any function key to move to the next screen:
APPLICATION/TEST
F1=PALPRO
F2=SIMPLEAPPL
4. Once the unit has been initialized, the display will show the APPLICATION
menu in the Figure above.
2
Page 7
FORMULA™ QUICK REFERENCE GUIDE
• Press <F1> to begin using PALPRO.
5. The application requests an update to the date and time. You can change
them here if necessary. Or, press <ENT> twice to skip either the date or the
time.
6. Enter a password (refer to par. 2.2.3).
7. Press any function key to continue on to the PALPRO Options menu.
8. Press the <F2> key to display the list of available applications. Select the
application to use. (refer to par. Switching to Another PALPRO Application).
The Formula™ is now ready to begin collecting data. For information about
sending collected data from the Formula™ to a PC, refer to par. 3.5.
2.2 SETTING UP THE FORMULA™
You can collect data records on the Formula™, and send the records later to a host
PC. The number of data records that can be collected before being uploaded are
2500 for each application.
2.2.1 Getting Started
Unless it has been customized, the Formula™ is programmed from the factory for
basic data collection using PALPRO.
This chapter describes how to use the Formula™ with its original
PSC programming (i.e. PALPRO). If the Formula™ has been
NOTE
customized, it may operate differently. Check with a systems
administrator for revised operating instructions.
If the Formula™ does not turn on when the <PWR> key is pressed,
you many need to recharge the main battery.
3
Page 8
DATA COLLECTION WITH FORMULA™ SOFTWARE APPLICATIONS
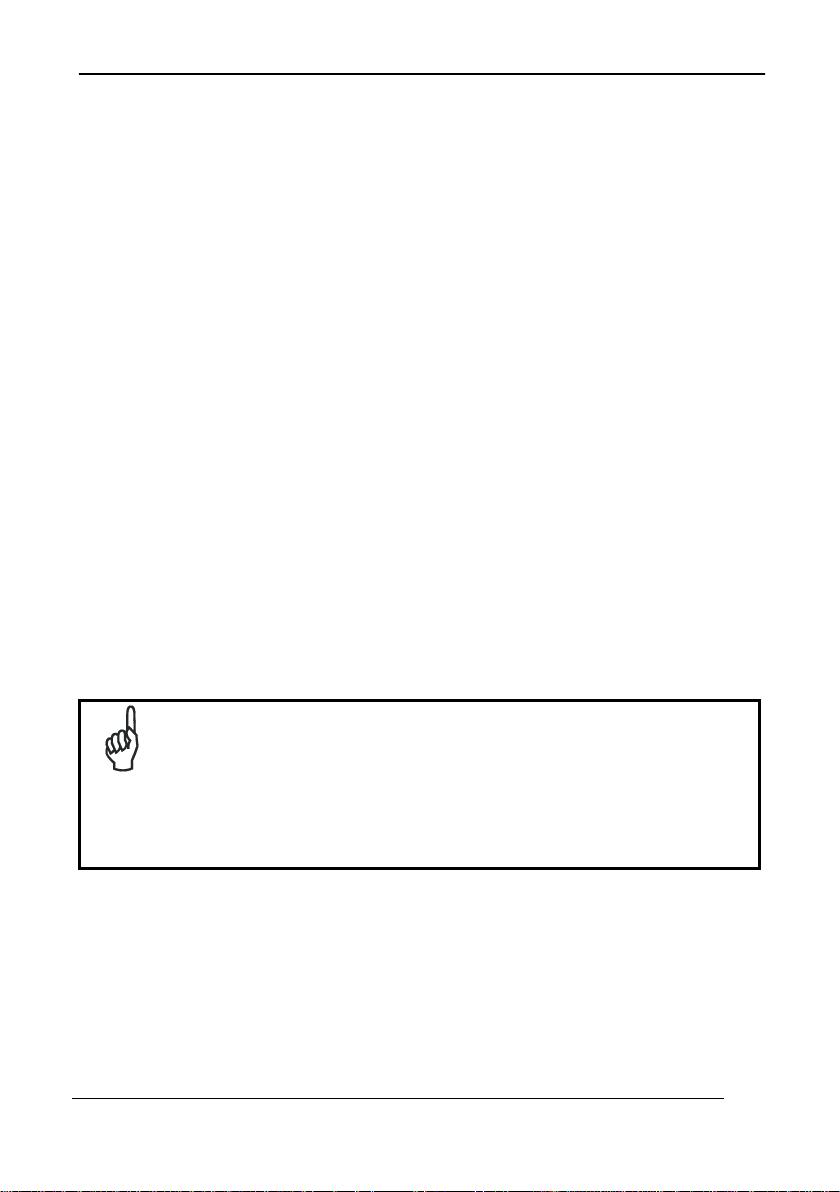
2.2.2 Setting the Time and Date
You can access the date and time prompts from other display
screens and menus (such as the password prompt in par. 2.2.3).
NOTE
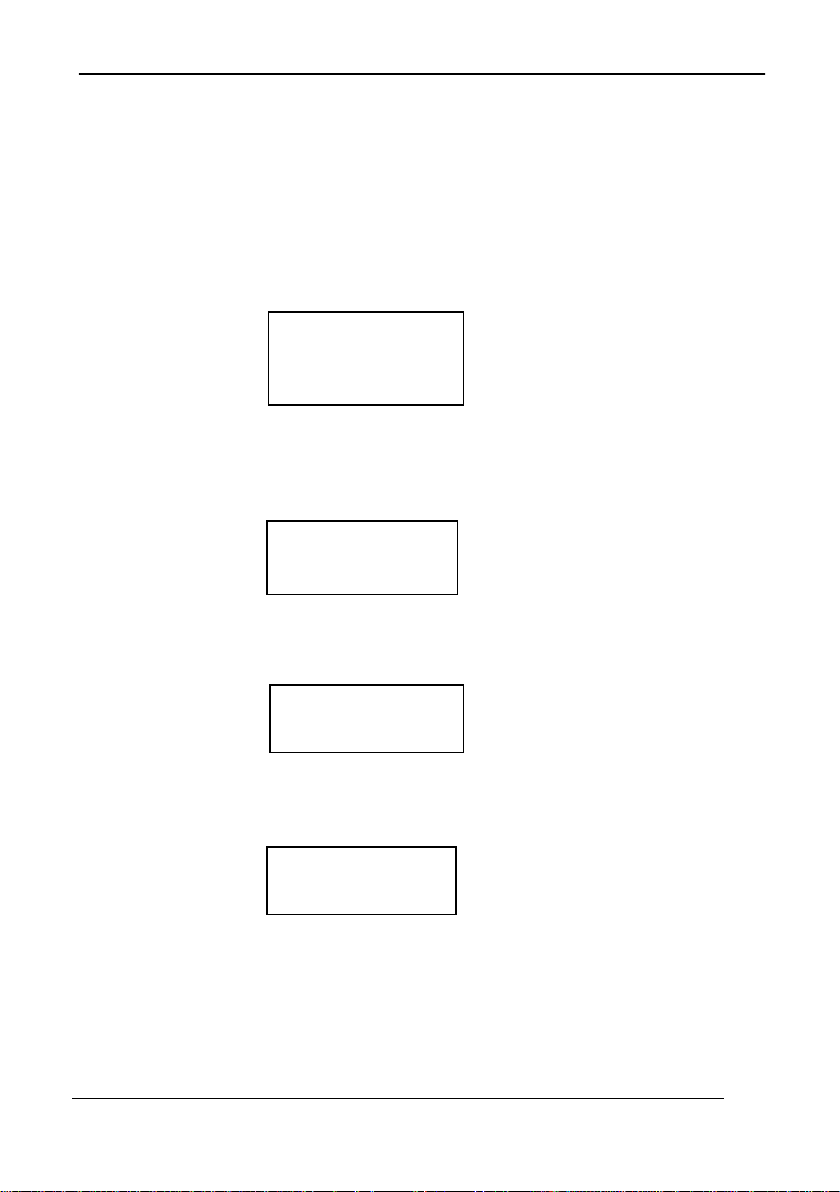
When starting the application for the first time, the display screen shows the date
currently loaded in memory. If the displayed date is correct, press the <ENT> key. If
the date is wrong, enter the correct date. Use two digits each for the month, day, and
year (e.g., 092302 for the Figure above). Press <ENT> to accept the entry.
With the F1 key you can switch from US date format (MM/DD/YY) to International
date format (DD/MM/YY).
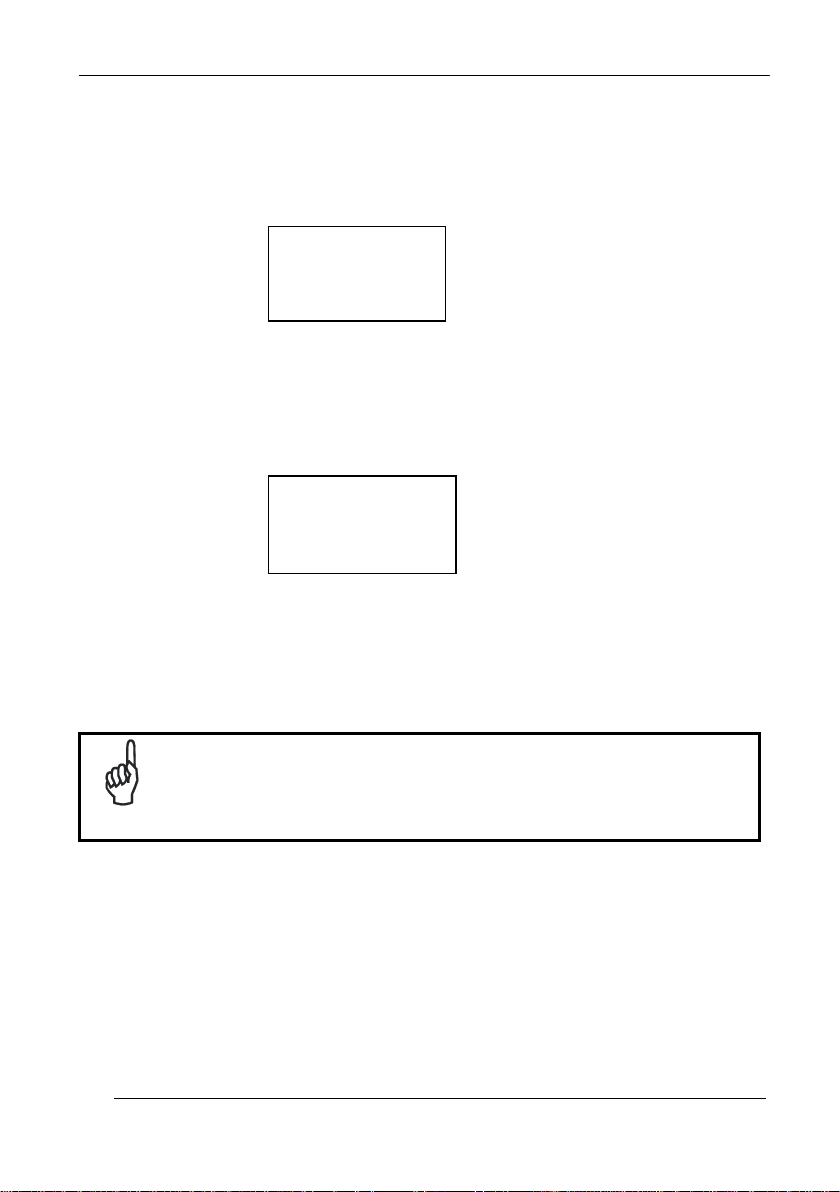
The next display screen shows the time currently loaded in the Formula™’s memory.
If the displayed time is correct, press the <ENT> key. If the time is wrong, enter the
correct time in 24-hour format. Use two digits each for the hour, minute, and seconds
(e.g., 211732 for the Figure above).
With the F1 key you can switch from 12 hour format to 24 hour format.
Current Date:
09/23/02
Enter New Date:
¤
F1=US/INT
Current Time:
21:17:32
Enter New Time:
¤
F1=12h/24h
4
Page 9
FORMULA™ QUICK REFERENCE GUIDE
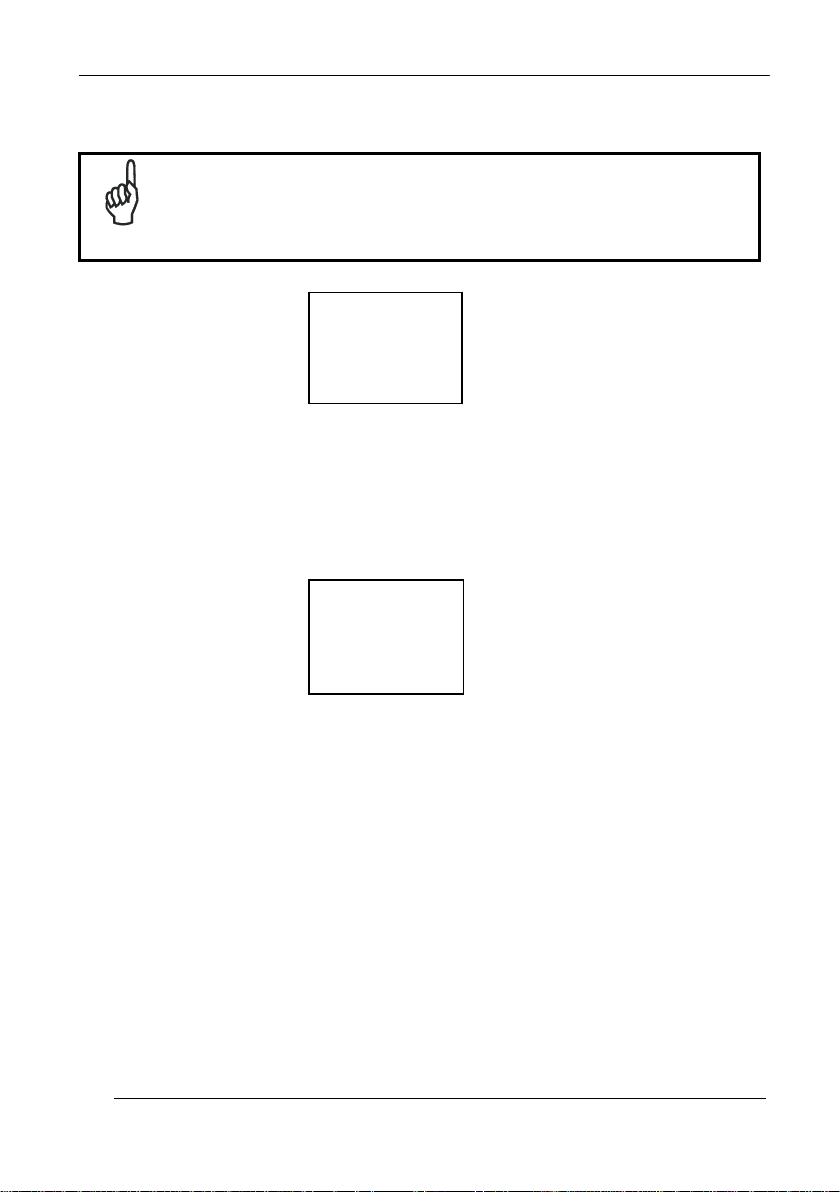
2.2.3 Setting a Password
A password is required when you install the entire suite of PALPRO applications.
Password security allows a manager or supervisor to customize the PALPRO
software and then hand it off to a worker. A password can contain up to 128
characters and can use any characters available on the Formula™.
ENTER CURRENT
OR NEW PASSWORD
¤
F-KEY=SET TIME
Without the password, the worker cannot switch applications or make changes to an
application’s title or prompts. The password prompt screen appears after entering the
date and time from the application’s initial startup.
If you lose or forget your password, you must reset the Formula™
and start over with a new password.
CAUTION
After you enter your password, the text in the following Figure 2-5 is displayed.
PSC PALPRO
08:18:04¤
10/16/02
F-KEY=CONTINUE
Press any function key to bring up the PALPRO Options menu. The Formula™ is
now ready to collect data.
2.2.4 Setting Font Size
To shift from wide font to normal font press Shift-F2. This setting only works in Wide
English and Normal English modes.
2.2.5 Switching Backlight On/Off
To switch backlight on/off press Shift-F4.
5
Page 10
DATA COLLECTION WITH FORMULA™ SOFTWARE APPLICATIONS
2.3 USING PALPRO TO COLLECT DATA
When finished setting up the Formula™ (refer to the previous section), the PALPRO
Options menu appears on the display screen. Use the menu to choose a PALPRO
application.
2.3.1 Installing PALPRO
PALPRO comes installed on your Formula™ from the factory. If you need to reinstall
PALPRO, refer to par. 3.2 of this document.
2.3.2 Using PALPRO
PALPRO combines two Portable Applications Library (PAL) applications into a single,
convenient program. With PALPRO installed on the Formula™, you can switch from
one PAL application to another without installing each application.
Selecting a PALPRO Application
Complete the following steps to select a PALPRO application:
1. With the PALPRO Options menu displayed, press the <F2> key to select a PAL
application.
PALPRO OPTIONS
F2=SELECT PROG
F4=PASSWORD
¤
2. Press <F1> to use ASSETPRO, press <F2> to use INVPRO.
F1=ASSET MGMT
F2=INV MGMT
F4=EXIT¤
NOTE
6
If you select INVPRO, the next screen asks you to select one or two
prompts (refer to par. Using INVPRO). Make a selection before going
on to the next step.
Page 11
FORMULA™ QUICK REFERENCE GUIDE
Changing Program Titles and Prompts
PALPRO allows the user to change the title that appears on the menu for each
application, or change the prompts for each application. Changing titles or prompts
can be done after selecting an application. To change the title or prompts, complete
the following steps:
1. Press the <F3> key at the prompt. To use the application’s current title and
prompts, select <F4> at the prompt in Figure below.
CHANGE PROMPTS?
F3=YES
F4=NO¤
2. Enter a name for the application (for example, FIXED ASSETS) followed by the
<ENT> key. The entered name appears at the top of the application menu for the
current application.
ENTER APPL TITLE
FIXED ASSETS¤
3. Enter the text for the first prompt (for example, BUILDING ID) followed by the
<ENT> key.
ENTER PROMPT 1
4. Enter the text for the second prompt (for example, ASSET NO.) followed by the
<ENT> key.
BUILDING ID¤
ENTER PROMPT 2
ASSET NO.¤
7
Page 12
DATA COLLECTION WITH FORMULA™ SOFTWARE APPLICATIONS
Switching to Another PALPRO Application
To switch from one PALPRO application to another, complete the following steps:
1. Select SHIFT + <F1> from the current application’s menu to exit the application.
ASSET MGMT¤
F2=COLLECT
F3=FILE OPTIONS
ShF1=PASSWORD
Enter <ShF1> on the keypad by pressing the <Shift> key and then the <F1>
key.
2. At the prompt, enter the current password, or press any function key to return to
the menu for the current application.
ENTER PASSWORD
3. When the correct password is entered, the first PALPRO screen opens.
4. Press any function key to display the PALPRO Options menu.
5. Follow the steps described in par. 2.3.2.
¤
F-KEY=EXIT
NOTE
8
If you select INVPRO, the next screen asks you to select one or two
prompts (refer to the steps described in par. Using INVPRO). Make a
selection before going on to the next step.
Page 13
FORMULA™ QUICK REFERENCE GUIDE
Using ASSETPRO
Use ASSETPRO to track assets (such as furniture, phones, computers, and
electronic equipment) at various locations (e.g., departments, rooms, floors,
buildings). With ASSETPRO, enter an identification code for a location, collect all the
asset IDs at the location, and then enter an identification code for a different location.
To use ASSETPRO, complete the following steps:
1. From the ASSETPRO application menu, select <F2>.
ASSET MGMT¤
F2=COLLECT
F3=FILE OPTIONS
F4=EXIT
2. The first prompt appears on the screen. Enter the identification code for the
location (example, WH3E).
• Scan a bar code for the location or use the keypad to enter the location ID.
LOCATION ID
¤
F3=REV F4=EXIT
The code is entered automatically when using a scanner; when using a
keypad, press the <ENT> key.
NOTE
3. T he second prompt now appears on the first line of the screen, and the location
ID appears on the third line.
• Scan the bar code identifying an asset, or use the keypad to enter the
asset’s ID number or description (for example, 004322).
ITEM ID
¤
WH3E
F3=REV F4=EXIT
9
Page 14

DATA COLLECTION WITH FORMULA™ SOFTWARE APPLICATIONS
4. The location ID and item ID appear together on the third line of the screen,
separated by a comma, and the second prompt remains on the screen.
• The Formula™ is ready to accept another ID for an asset at the current
location.
ITEM ID
¤
WH3E, 004322
F3=REV F4=EXIT
5. W hen finished collecting asset IDs for the location, press the <F4> key to return
to the first prompt.
6. Repeat steps 2 through 5, above, until IDs for each asset at every location is
collected.
7. Press the <F4> key to return to the first prompt.
8. Press the <F4> key again to return to the application menu.
Refer to par. 3.5 to upload your data.
The Formula™ stores the collected data in a single ASCII text file. When uploading
the file to the PC, the data appears as a list. Each line in the list contains two fields
separated by a comma. The first field is the location, and the second field is the
item’s identification number. The example in the Figure below is part of a data file
uploaded from a Formula™ that used ASSETPRO to collect data.
BLDG1, 000295
BLDG1, 001862
BLDG1, 000945
BLDG1, 001008
BLDG1, 000036
BLDG1, 000490
BLDG2, 000288
BLDG2, 002596
10
Page 15

FORMULA™ QUICK REFERENCE GUIDE
Using INVPRO
Use this application to track inventory. INVPRO provides a choice of one prompt or
two. For example, use one prompt to scan or enter an ID number or description for
each item. Two prompts would be used to scan or enter an item ID and the quantity
of that item.
To use INVPRO, complete the following steps:
1. At the first screen that appears, press the <F4> key to use the application with
only one prompt, or use the <F3> key for two prompts.
USE 2 PROMPTS?
F3=YES
F4=NO¤
2. Press the <F3> key to change the title or prompts that appear on the
application’s display screens.
• Refer to par. Changing Program Titles and Prompts for instructions.
• Otherwise, press the <F4> key to use the current title and prompts.
CHANGE PROMPTS?
F3=YES
F4=NO¤
3. The application menu appears next on the display screen.
4. Continue with the instructions for Using One Prompt below, or continue with
“Using Two Prompts”.
Using One Prompt
1. Select <F2> from the application menu. A prompt appears on the screen.
INV MGMT
F2 = COLLECT
F3 = FILE OPTIONS
SHF1 = EXIT
2. Scan the bar code for an inventory item, or use the keypad to enter the item’s ID
number or description.
11
Page 16
DATA COLLECTION WITH FORMULA™ SOFTWARE APPLICATIONS
Using a scanner, the code is entered automatically; with a keypad,
press the <ENT> key.
NOTE
3. The item ID number appears on the third line of the screen. The Formula™ is
ready to accept another item ID.
ITEM ID
¤
40-000-00
F3=REV F4=EXIT
4. Repeat step 2until all IDs for all items are collected.
5. Press the <F4> key to return to the application menu.
Refer to par. 3.5 to upload your data.
The Formula™ stores the collected data in a single ASCII text file. When uploading
the file to the PC, the data appears as a list. Each line in the list contains the ID for a
single item. The example shown below is part of a data file uploaded from a
Formula™ that used INVPRO with one prompt to collect data.
R44 – 2173
R44 – 2260
R44 – 2278
R44 – 2283
R44 – 2285
R44 – 2287
R44 – 2289
R44 – 2314
12
Page 17
FORMULA™ QUICK REFERENCE GUIDE
Using Two Prompts
1. Select <F2> from the application menu. The first prompt appears on the screen.
ITEM ID
¤
F3=REV F4=EXIT
2. Scan the bar code for an inventory item, or use the keypad to enter the item’s ID
number or description.
The code is entered automatically with a scanner; with a keypad, press
the <ENT> key.
NOTE
3. The second prompt now appears on the first line of the screen, and the item ID
appears on the third line.
QUANTITY
¤
40-000-00
F3=REV F4=EXIT
4. Enter the number of individual units of the item in inventory.
5. The item number and quantity appear together on the third line of the screen,
separated by a comma, and the first prompt reappears on the screen. The
Formula™ is ready to accept another item ID.
ITEM ID
¤
40-000-00, 25
F3=REV F4=EXIT
6. When finished collecting inventory data, press the <F4> key to return to the
application menu.
Refer to par. 3.5 to upload your data.
The Formula™ stores the collected data in a single ASCII text file. When uploading
the file to the PC, the data appears as a list. Each line in the list contains two fields
separated by a comma. The first field is the item ID, and the second field is the
13
Page 18

DATA COLLECTION WITH FORMULA™ SOFTWARE APPLICATIONS
number of units of that item. Figure 2-9 shows part of a data file uploaded from a
Formula™ that used INVPRO with two prompts to collect data.
R44 – 2173, 25
R44 – 2260, 12
R44 – 2278, 56
R44 – 2283, 30
R44 – 2285, 47
R44 – 2287, 16
R44 – 2289, 4
R44 – 2314, 85
14
Page 19
FORMULA™ QUICK REFERENCE GUIDE
2.4 UPLOADING COLLECTED PALPRO FILE DATA TO A PC
To upload the data (PALPRO file) to a PC, do the steps shown in the following
paragraphs.
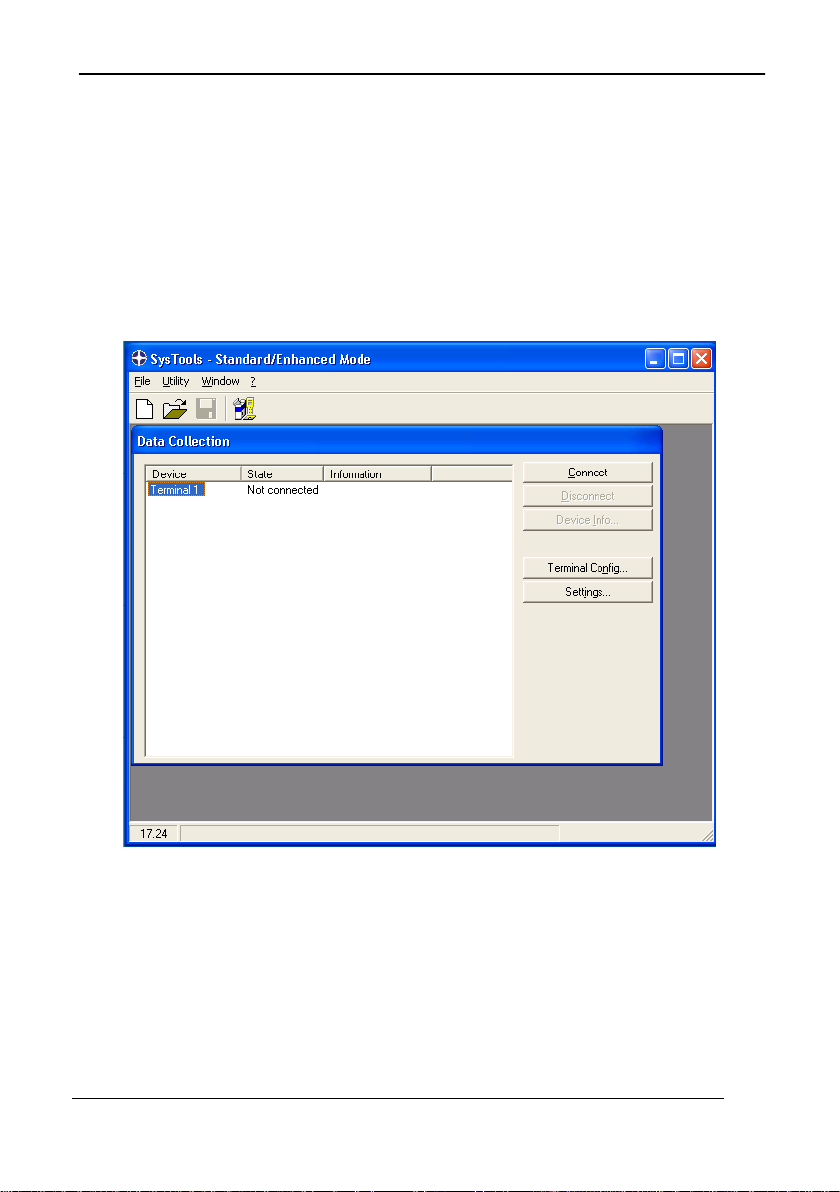
2.4.1 Prepare Host PC
Verify that USB/RS232 cable is connected and open SysTools™ (Standard/
Enhanced mode) to view the following main menu screen:
15
Page 20
DATA COLLECTION WITH FORMULA™ SOFTWARE APPLICATIONS
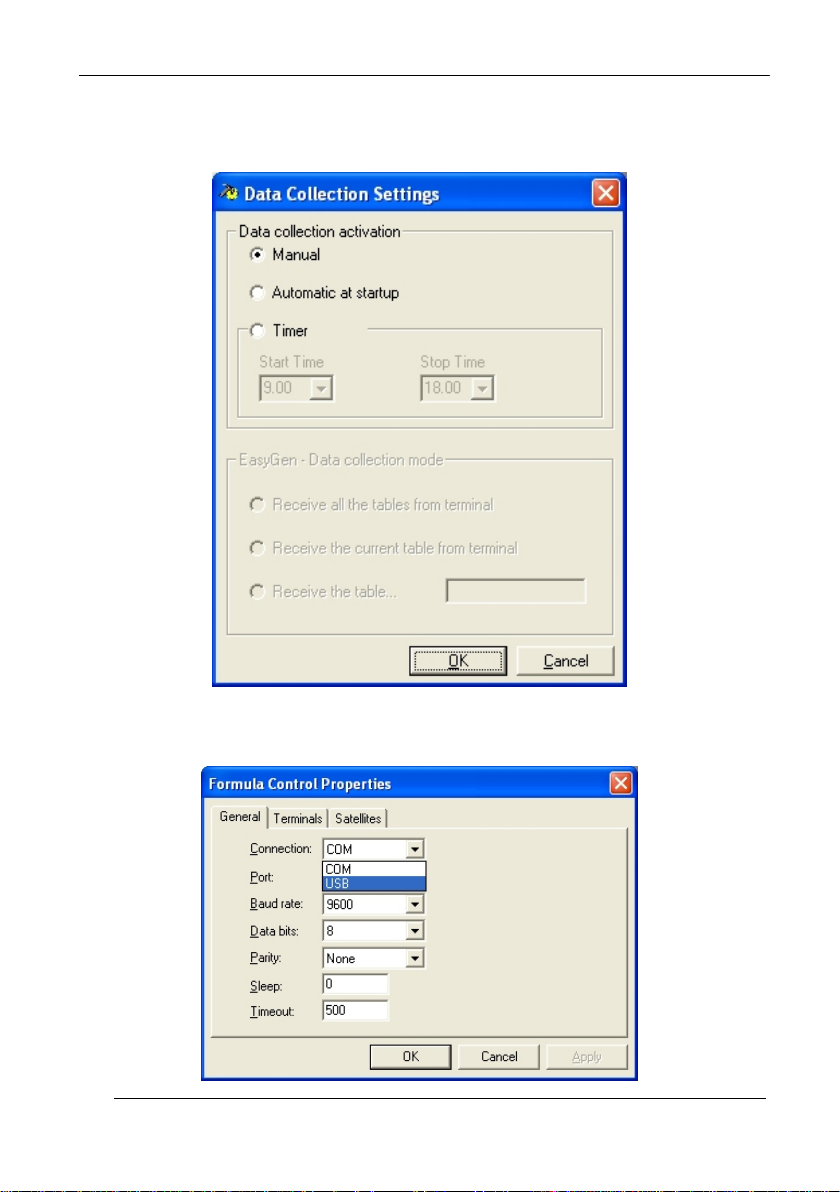
Select the SETTINGS button to view the following screen; configure the settings
according to the figure below and press OK:
Select the NETWORK SETUP button to view the following screen; insure the
Connection Type is set to USB:
16
Page 21

FORMULA™ QUICK REFERENCE GUIDE
I f you choose COM connection, select the following parameters to allow PALPRO to
run:
Baud rate: 19200
Data bits: 7
Parity: Mark
17
Page 22

DATA COLLECTION WITH FORMULA™ SOFTWARE APPLICATIONS
Select the TERMINALS tab to view the following screen. It is recommended that the
FILE NAME for collected data have a .dat extension (default name is TERM001.dat),
followed by the PATH where the data will be uploaded to on the PC.
Select OK in the Formula Control Properties to return to the main SysTools™ screen.
Select CONNECT (the Formula™ will emit a tone).
Now Systools™ is ready to receive data from the terminal.
2.4.2 Prepare Formula™ to upload Data
1. Prepare the Formula™ to upload (transmit) the collected data. From the program
menu on the Formula™; select <F3> to display the File Options menu.
INV MGMT¤
F2=COLLECT
F3=FILE OPTIONS
F4=EXIT
2. Select <F2> to display the Send File menu.
*FILE OPTIONS*
F2=SEND FILE
F3=ERASE FILE
F4=EXIT¤
18
Page 23

FORMULA™ QUICK REFERENCE GUIDE
3. Select <F2> to upload the data via the USB connection.
*SEND FILE*
F2=USB
F3=SERIAL
F4=EXIT
¤
During upload, Systools™ assumes the following statuses:
STATE: BUSY: appears while data is being uploaded.
STATE: CONNECTED: appears after the data is sent.
STATE: NOT CONNECTED: the device is not recognizable; check the cables.
NOTE 1: Click DISCONNECT or remove the terminal from the dock to end the data
transfer session.
NOTE 2: The collected .dat file data will be uploaded to the FILE NAME and PATH
settings selected earlier.
19
Page 24
DATA COLLECTION WITH FORMULA™ SOFTWARE APPLICATIONS
2.5 PROMPT CUSTOMIZATION FOR CHINESE VERSION
To customize the prompts of the Chinese Version of Formula, use the two Utility
options of Systools:
• Send Customized Label for PAL
• Label Generator for PAL
20
Page 25

FORMULA™ QUICK REFERENCE GUIDE
Select “Label Generator for PAL” to load the utility that generates the labels.
Follow these steps:
• Select the available Application option
• Customize the prompts
• Select the target file name
• Press the “Save” button to save the customized labels in the selected file.
Select F3 key on the CHANGE PROMPT menu of the device:
CHANGE PROMPT
Using
F2: Keyboard
F3: Systools
F4: No Change
21
Page 26
DATA COLLECTION WITH FORMULA™ SOFTWARE APPLICATIONS
Launch Systools application and select the Systools Utility option “Send Customized
Label for PAL”.
Select the file you generated in the “Open” dialog box.
When the file is sent the following dialog appears:
22
Page 27

FORMULA™ QUICK REFERENCE GUIDE
2.6 CONFIGURING WITH BAR CODES
This section provides bar codes for common setup parameters that can be used for
programming the Formula™. Factory default settings are underlined.
Predefined Defaults
D0*
D2*
*$+$-D0EE*
*$+$-D2EE*
Code 39
ENABLE
On
*$+$-001EE*
MINIMUM LENGTH
00
*$+$-0100EE*
10
*$+$-0110EE*
D1*
Off
40
50
*$+$-D1EE*
*$+$-000EE*
*$+$-0140EE*
*$+$-0150EE*
20
*$+$-0120EE*
30
*$+$-0130EE*
* For a description of programmable parameter settings, refer to table “General
Programming Parameters” in par. 2.7.
60
*$+$-0160EE*
23
Page 28

MAXIMUM LENGTH
DATA COLLECTION WITH FORMULA™ SOFTWARE APPLICATIONS
10
*$+$-0210EE*
20
*$+$-0220EE*
30
*$+$-0230EE*
ENABLE CHECKSUM
On
*$+$-031EE*
SEND CHECKSUM
On
*$+$-041EE*
FULL ASCII MODE
40
*$+$-0240EE*
50
*$+$-0250EE*
60
*$+$-0260EE*
Off
Off
*$+$-030EE*
*$+$-040EE*
On
*$+$-051EE*
Italian Pharmacode
ENABLE
On
*$+$-061EE*
24
Off
Off
*$+$-050EE*
*$+$-060EE*
Page 29

FORMULA™ QUICK REFERENCE GUIDE
SEND ITALIAN PHARMACODE CHECK DIGIT
On
*$+$-071EE*
SEND ITALIAN PHARMACODE PREFIX
On
*$+$-0F1EE*
Interleaved 2 of 5
ENABLE
On
*$+$-081EE*
MINIMUM LENGTH
2
*$+$-0902EE*
6
*$+$-0906EE*
Off
Off
Off
30
40
*$+$-070EE*
*$+$-0F0EE*
*$+$-080EE*
*$+$-0930EE*
*$+$-0940EE*
10
*$+$-0910EE*
20
*$+$-0920EE*
50
*$+$-0950EE*
60
*$+$-0960EE*
25
Page 30

MAXIMUM LENGTH
DATA COLLECTION WITH FORMULA™ SOFTWARE APPLICATIONS
10
*$+$-0A10EE*
20
*$+$-0A20EE*
30
*$+$-0A30EE*
REQUIRED LENGTH (no default; overrides minumum and maximum settings)
2
*$+$-09020A02EE*
4
*$+$-09040A04EE*
6
*$+$-09060A06EE*
40
*$+$-0A40EE*
50
*$+$-0A50EE*
60
*$+$-0A60EE*
8
*$+$-09080A08EE*
10
*$+$-09100A10EE*
26
Page 31

FORMULA™ QUICK REFERENCE GUIDE
12
14
16
18
20
ENABLE CHECKSUM
On
*$+$-09120A12EE*
*$+$-09140A14EE*
*$+$-09160A16EE*
*$+$-09180A18EE*
*$+$-09200A20EE*
*$+$-0B1EE*
Off
*$+$-0B0EE*
SEND CHECKSUM
On
*$+$-0C1EE*
USE LENGTHS 6 AND 14 ONLY (case code)
On
*$+$-0D1EE*
Off
Off
*$+$-0C0EE*
*$+$-0D0EE*
27
Page 32

Codabar
ENABLE
DATA COLLECTION WITH FORMULA™ SOFTWARE APPLICATIONS
On
*$+$-201EE*
MINIMUM LENGTH
04
*$+$-2104EE*
10
*$+$-2110EE*
20
*$+$-2120EE*
30
*$+$-2130EE*
MAXIMUM LENGTH
10
*$+$-2210EE*
Off
40
50
60
40
*$+$-200EE*
*$+$-2140EE*
*$+$-2150EE*
*$+$-2160EE*
*$+$-2240EE*
20
*$+$-2220EE*
30
*$+$-2230EE*
28
50
*$+$-2250EE*
60
*$+$-2260EE*
Page 33

FORMULA™ QUICK REFERENCE GUIDE
SEND STOP/START
On
*$+$-231EE*
Code 93
ENABLE
On
*$+$-2C1EE*
MINIMUM LENGTH
2
*$+$-2D02EE*
10
*$+$-2D10EE*
20
*$+$-2D20EE*
Off
Off
30
40
50
*$+$-230EE*
*$+$-2C0EE*
*$+$-2D30EE*
*$+$-2D40EE*
*$+$-2D50EE*
MAXIMUM LENGTH
2
*$+$-2E02EE*
10
*$+$-2E10EE*
30
*$+$-2E30EE*
40
*$+$-2E40EE*
29
Page 34

DATA COLLECTION WITH FORMULA™ SOFTWARE APPLICATIONS
20
*$+$-2E20EE*
UPC-A
ENABLE UPC-A
On
*$+$-301EE*
SEND SYSTEM DIGIT
On
*$+$-311EE*
SEND CHECK DIGIT
On
*$+$-321EE*
CONVERT UPC-A TO EAN-13
50
*$+$-2E50EE*
Off
Off
Off
*$+$-300EE*
*$+$-310EE*
*$+$-320EE*
On
*$+$-331EE*
30
Off
*$+$-330EE*
Page 35

FORMULA™ QUICK REFERENCE GUIDE
UPC-E
USE SYSTEM DIGIT 0
On
*$+$-341EE*
USE SYSTEM DIGIT 1
On
*$+$-351EE*
CONVERT UPC-E TO UPC-A
On
*$+$-361EE*
SEND SYSTEM DIGIT
On
*$+$-371EE*
SEND CHECK DIGIT
On
*$+$-381EE*
Off
Off
Off
Off
Off
*$+$-340EE*
*$+$-350EE*
*$+$-360EE*
*$+$-370EE*
*$+$-380EE*
31
Page 36

DATA COLLECTION WITH FORMULA™ SOFTWARE APPLICATIONS
EAN/JAN
ENABLE EAN-8/JAN-8
On
*$+$-391EE*
ENABLE EAN-13/JAN-13
On
*$+$-3A1EE*
ENABLE EAN-13 TO ISBN
On
*$+$-3B1EE*
SEND CHECK DIGIT
On
*$+$-3F1EE*
UPC/EAN/JAN Extensions
ALLOW 2-DIGIT EXTENSIONS
Off
Off
Off
Off
*$+$-390EE*
*$+$-3A0EE*
*$+$-3B0EE*
*$+$-3F0EE*
On
*$+$-3C1EE*
ALLOW 5-DIGIT EXTENSIONS
On
*$+$-3D1EE*
32
Off
Off
*$+$-3C0EE*
*$+$-3D0EE*
Page 37

FORMULA™ QUICK REFERENCE GUIDE
REQUIRE EXTENSIONS
On
*$+$-3E1EE*
Code 128
ENABLE
On
*$+$-401EE*
MINIMUM LENGTH
2
*$+$-4102EE*
10
*$+$-4110EE*
20
*$+$-4120EE*
Off
Off
40
50
60
*$+$-3E0EE*
*$+$-400EE*
*$+$-4140EE*
*$+$-4150EE*
*$+$-4160EE*
30
*$+$-4130EE*
33
Page 38

MAXIMUM LENGTH
DATA COLLECTION WITH FORMULA™ SOFTWARE APPLICATIONS
10
*$+$-4210EE*
20
*$+$-4220EE*
30
*$+$-4230EE*
ENABLE UCC128
On
*$+$-431EE*
GS1 DataBar Omnidirectional
ENABLE
On
*$+$-101EE*
40
*$+$-4240EE*
50
*$+$-4250EE*
60
*$+$-4260EE*
Off
Off
*$+$-430EE*
*$+$-100EE*
GS1 DataBar Limited
ENABLE
On
*$+$-111EE*
34
Off
*$+$-110EE*
Page 39

FORMULA™ QUICK REFERENCE GUIDE
GS1 DataBar Expanded
ENABLE
On
*$+$-121EE*
MINIMUM LENGTH
1
*$+$-1301EE*
20
*$+$-1320EE*
60
*$+$-1360EE*
MAXIMUM LENGTH
1
*$+$-1401EE*
20
*$+$-1420EE*
Off
10
40
74
10
40
*$+$-120EE*
*$+$-1310EE*
*$+$-1340EE*
*$+$-1374EE*
*$+$-1410EE*
*$+$-1440EE*
60
*$+$-1460EE*
74
*$+$-1474EE*
35
Page 40

DATA COLLECTION WITH FORMULA™ SOFTWARE APPLICATIONS
Other Controls
AUTO-OFF (in minutes)
Off
*$+$-B200EE*
5
*$+$-B205EE*
BACKLIGHT DURATION (in seconds)
On
*$+$-E200EE*
10
*$+$-E210EE*
BEEPER VOLUME
On
*$+$-BC07EE*
Clock and Calendar
2
*$+$-B202EE*
10
*$+$-B210EE*
30
*$+$-E230EE*
60
*$+$-E260EE*
Off
*$+$-BC00EE*
TIME/DATE FORMAT
Set
Tim
e
TIME FORMAT
36
*%-*
Set
Date
*%.*
Page 41

FORMULA™ QUICK REFERENCE GUIDE
12Hour
DATE FORMAT
U.S.
*$+$-D80EE*
*$+$-D90EE*
24Hour
Int.
*$+$-D81EE*
*$+$-D91EE*
37
Page 42

DATA COLLECTION WITH FORMULA™ SOFTWARE APPLICATIONS
2.7 PROGRAMMING PARAMETERS
Predefined Defaults
Three default sets can be defined:
D0 Turns every ON/OFF parameter OFF and sets all minimum and maximum
lengths to zero.
D1 Turns every ON/OFF parameter ON, sets all minimum lengths as low as
possible and sets all maximum lengths as high as possible (see the table
below).
D2
Default set installed on the terminal at the factory. This default set will work
for most applications (see the table below).
Factory default settings are underlined.
38
Page 43
FORMULA™ QUICK REFERENCE GUIDE
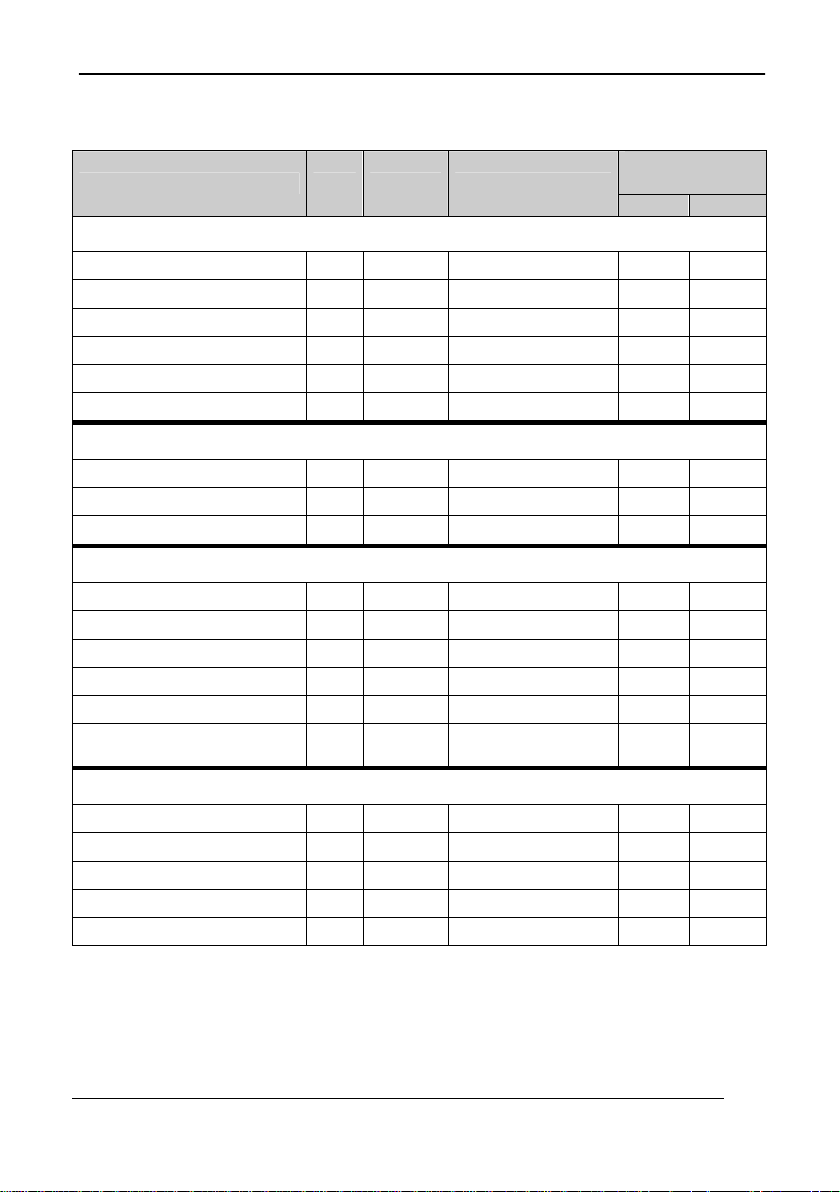
General Programming Parameters
Predefined
Defaults Code Parameter ID # Type Acceptable Input
D1 D2
Code 39
Enter 1 for On and 0 for Off.
Enable 00 On/Off On or Off On On
Minimum length 01 Value 00–60 00 00
Maximum length 02 Value 00–60 60 20
Enable checksum 03 On/Off On or Off Off Off
Send checksum 04 On/Off On or Off Off Off
Full ASCII mode 05 On/Off On or Off On On
Italian Pharmacode
Enter 1 for On and 0 for Off.
Enable 06 On/Off On or Off On Off
Send check digit 07 On/Off On or Off On On
Send prefix 0F On/Off On or Off On Off
Interleaved 2 of 5
Enter 1 for On and 0 for Off.
Enable 08 On/Off On or Off On On
Minimum length 09 Value 02–60 02 06
Maximum length 0A Value 02–60 60 10
Enable checksum 0B On/Off On or Off Off Off
Send checksum 0C On/Off On or Off Off Off
Use lengths 6 and 14 only
(case code)
Codabar
0D On/Off On or Off Off Off
Enter 1 for On and 0 for Off.
Enable 20 On/Off On or Off On On
Minimum length 21 Value 00–60 02 04
Maximum length 22 Value 00–60 60 20
Send start/stop 23 On/Off On or Off Off Off
Convert Codabar to CLSI 24 On/Off On or Off Off Off
39
Page 44

DATA COLLECTION WITH FORMULA™ SOFTWARE APPLICATIONS
Predefined
Defaults Code Parameter ID # Type Acceptable Input
D1 D2
Code 93
Enter 1 for On and 0 for Off.
Enable 2C On/Off On or Off On On
Minimum length 2D Value 00–50 01 02
Maximum length 2E Value 01–50 50 20
Universal Product Code-A (UPC-A)
Enter 1 for On and 0 for Off.
Enable 30 On/Off On or Off On On
Send system digit 31 On/Off On or Off On On
Send check digit 32 On/Off On or Off On Off
Convert UPC-A to EAN-13 33 On/Off On or Off On Off
Universal Product Code-E (UPC-E)
Enter 1 for On and 0 for Off.
Use system digit 0 34 On/Off On or Off On On
Use system digit 1 35 On/Off On or Off On On
Convert UPC-E to UPC-A 36 On/Off On or Off On Off
Send system digit 37 On/Off On or Off On Off
Send check digit 38 On/Off On or Off On Off
European Article Numbering (EAN)/
Japan Article Numbering (JAN)
Enter 1 for On and 0 for Off.
Enable EAN-8/JAN-8 39 On/Off On or Off On On
Enable EAN-13/JAN-13 3A On/Off On or Off On On
Convert EAN-13 to ISBN 3B On/Off On or Off Off Off
Send check digit 3F On/Off On or Off Off On
UPC, EAN, JAN Extensions
Enter 1 for On and 0 for Off.
Allow 2-digit extensions 3C On/Off On or Off On On
Allow 5-digit extensions 3D On/Off On or Off On On
Require extensions 3E On/Off On or Off Off Off
Press code activation E9 On/Off On or Off Off Off
If the above feature is activated, bar code data will only be used if the data format
includes the starting digits 378 or 379 AND a 2-digit or 5-digit extension is present.
40
Page 45

FORMULA™ QUICK REFERENCE GUIDE
Predefined
Defaults Code Parameter ID # Type Acceptable Input
D1 D2
Code 128
Enter 1 for On and 0 for Off.
Enable 40 On/Off On or Off On On
Minimum length 41 Value 00-60 02 02
Maximum length 42 Value 00-60 60 20
Enable UCC128 43 On/Off On or Off Off Off
Other Controls
Enter 1 for On and 0 for Off.
Enable manual reset B0 On/Off On or Off On On
Add symbology identifiers B5 On/Off On or Off On Off
Auto-Off B2 Value
BackLight Timeout E2 Value
00-99
(minutes)
00-99
(1 second units)
60 10
10 10
00 = Off
Beeper volume BC Value
01 (low) – 07 (high)
08 = One level higher
07 07
09 = One level lower
Contrast (LCD) E3 Value 01 (low) – 63 (high) 16 16
Date format D9 On/Off
On = International
Off = U.S.
Off Off
Error tone BD Value 00 (low) – 07 (high) 03 03
Good-read tone B8 Value 00 (low) – 07 (high) 05 05
Good-read number of
beeps
B9 Value 01-04 01 01
00 = 0.14 sec.
Good-read tone duration BA Value
01 = 0.07 sec.
02 = 0.45 sec.
01 01
03 = 0.22 sec.
Keyboard click DD On/Off On or Off On On
Keypad Timeout
(Intercharacter delay)
Laser delay DE Value
E4 Value
(10-millisecond units)
Time format D8 On/Off
B0 = UPC-A 10 = Code 39 D0 = EAN-8 80 = Code 128 E0 = EAN-13
30 = Interleaved 2 of 5 A0 = UPC-E 50 = Codabar 90 = Code 93
00-99
(1/4 second units)
00-99
On = 24-hour
Off = 12-hour
3 3
01 01
On On
41
Page 46

READY TO USE APPLICATIONS
3 READY TO USE APPLICATIONS
3.1 SET UP THE TERMINAL FOR THE CONNECTION WITH THE PC
Insert the battery set into the terminal, close the cover, connect the power adapter to
the terminal and let it initially charge overnight. Then insure the charging LED light
displays a GREEN status (refer to Formula™ User’s manual for further details).
The Formula™ Terminal must first be REFLASHED via the following sequence:
Press and hold the POWER button, then press the SCAN key. Press the DOWN
arrow to erase the program when prompted. Select option 1 (USB). The Formula™
will display the following information, indicating it is in receive mode via USB
communications:
BOOTSTRAPLOADER
WaitDownload USB
Connect USB cable for next step.
42
Page 47
FORMULA™ QUICK REFERENCE GUIDE
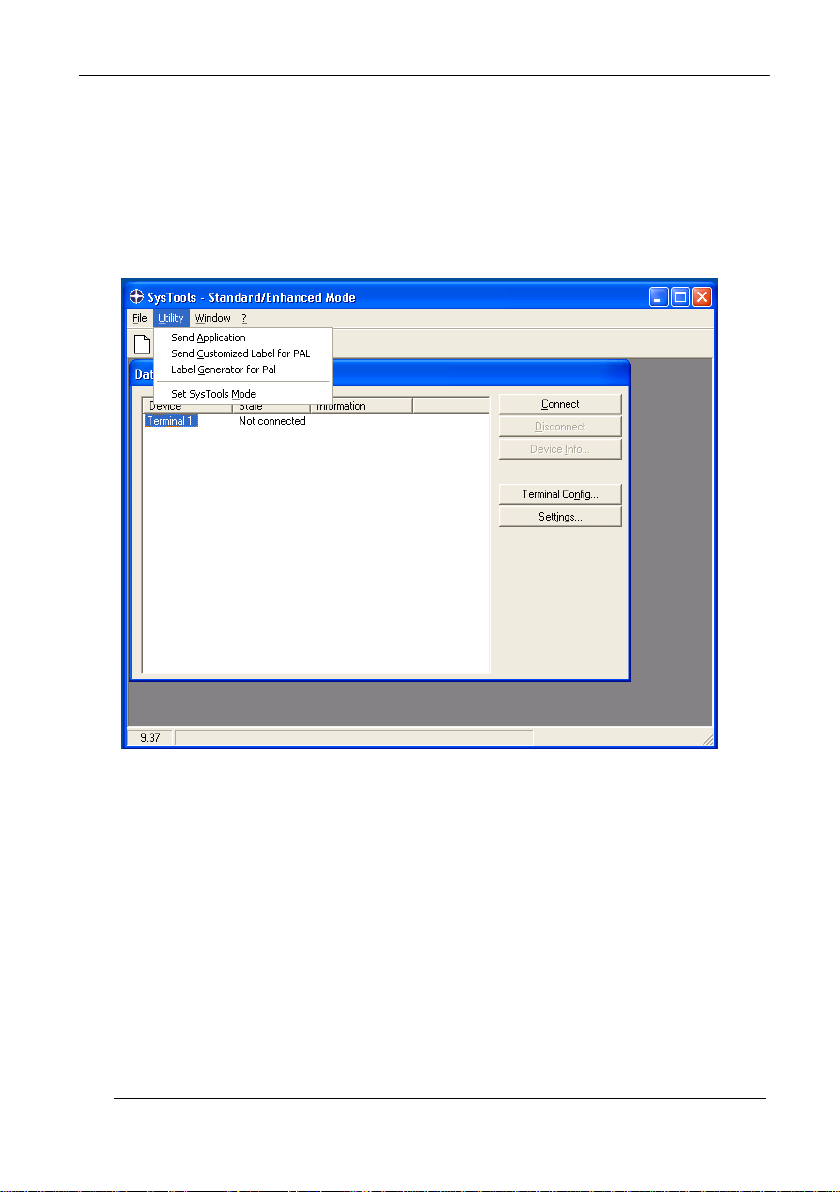
3.2 DOWNLOADING A READY TO USE APPLICATION
To correctly download a ready to use application on the Formula™ terminal, open the
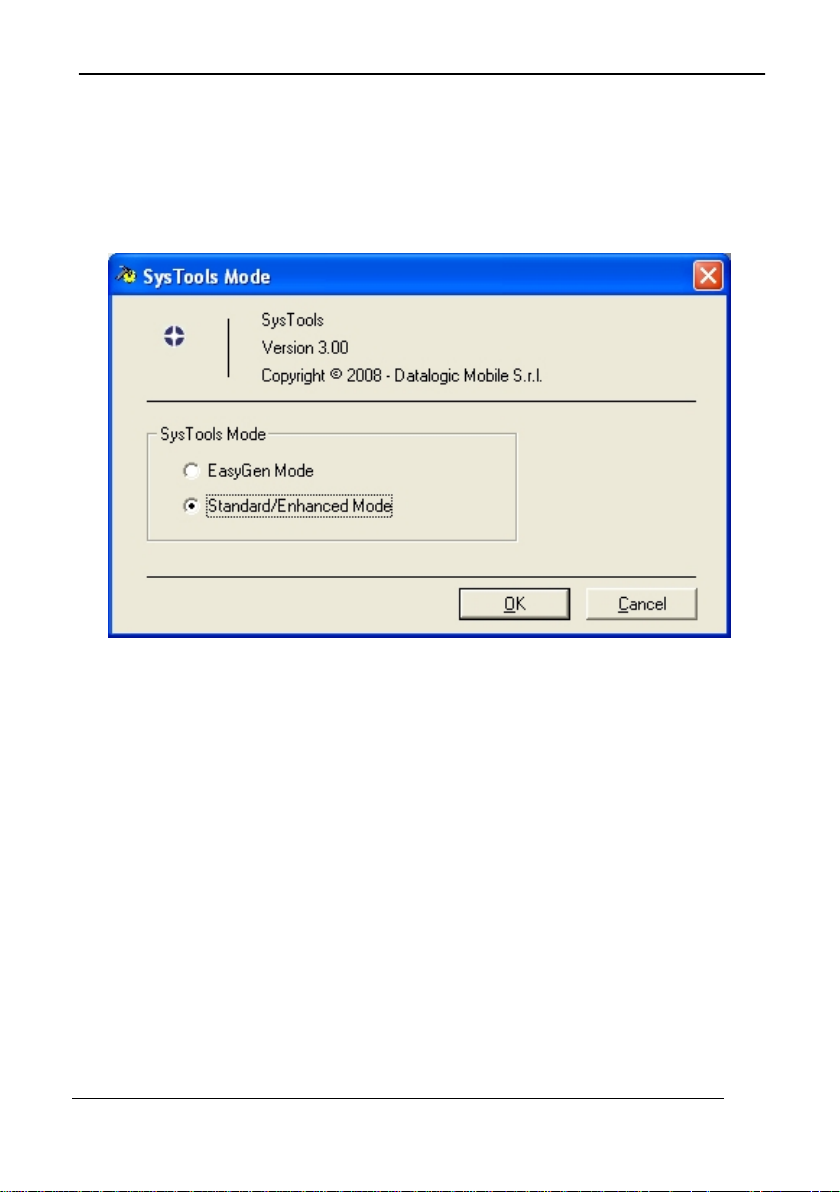
SYSTOOLS software program. There are two versions of this program: “STANDARD
and ENHANCED” mode, and “EASYGEN” mode. Insure the STANDARD and
ENHANCED” mode is enabled by selecting Utility Menu – Set SysTools Mode.
Select Utility Menu – Send Application and browse to the Enhanced Mode M2
application file, setting type file as “Multibank (*.h00):
C:\Program Files\Datalogic\Formula Software Tools\Applications\Enhanced Mode
Application\ FORMULA_M2_XXX.H00.
Alternatively you can select the Standard Mode M1 application file skipping the
custom configuration file transmission, described in par. 3.4 of this document.
Refer to Ready-to-Use Applications User’s manual for further details.
43
Page 48

READY TO USE APPLICATIONS
Select SEND to transmit the file to the Formula™. A second “multi-bank” file
(FORMULA_M2_XXX.H01) will also be sent automatically. After it is successfully
transmitted, the following message window will be displayed on the screen:
The Formula™ LCD screen should now display the following information:
Cable Plugged
Not Connected
Remove the USB cable and wait until the Formula™ LCD screen displays “LOAD
PROGRAM”.
Connect the USB cable again.
44
Page 49

FORMULA™ QUICK REFERENCE GUIDE
3.3 CONFIGURING READY TO USE APPLICATIONS THROUGH
SYSTOOLS™
Once the ready to use application has been downloaded to the terminal, both the
data collection parameters and the application parameters need to be configured.
45
Page 50

READY TO USE APPLICATIONS
Select the NETWORK SETUP button to view the following screen; insure the
Connection Type is set to USB:
I f you choose COM connection, select the following parameters to allow PALPRO to
run:
Baud rate: 19200
Data bits: 7
Parity: Mark
46
Page 51

FORMULA™ QUICK REFERENCE GUIDE
The following instructions are not required for PALPRO.
NOTE
Select the TERMINALS tab to view the following screen. The FILE NAME for
collected data must have a .dat extension (default name is TERM001.dat), followed
by the PATH where the data will be uploaded to on the PC. Default symbology setting
is Code 39. OPTION 1: Select the BARCODE TYPE button to enable other
symbology types before sending it to the terminal. OPTION 2: Use the Ready to Use
Applications Programming BarCode for programming options including symbology
settings.
See the Ready-to-Use Applications User’s manual or the Ready-to-Use Applications
Programming BarCode Document for further details.
Select SETUP, the following screen should appear:
47
Page 52

READY TO USE APPLICATIONS
Select OK in the Formula Control Properties to return to the main SysTools™ screen.
The Formula™ is now associated with the SysTools™ software program.
48
Page 53

FORMULA™ QUICK REFERENCE GUIDE
3.4 TRANSMITTING A CUSTOM CONFIGURATION FILE TO THE
FORMULA™
Once the Formula™ has been associated with the SysTools™ Software program, a
custom configuration file (.prg) can be sent. Refer to SysTools™ User's manual for
further details.
Select FILE – NEW in order to create a custom configuration for your needs. In the
example below, we will create a two prompts program where: Prompt 1 = CODE for
barcode data and Prompt 2 = QUANTITY.
Select FILE – NEW to access the following screen:
49
Page 54

READY TO USE APPLICATIONS
For our two prompts example, set the parameters to the following settings. (NOTE:
the program name can be changed). The number of maximum records are now set
to 500.
Select the FIELDS tab to view the following screen. Our program will use CODE as a
prompt 1 title (for barcode data) with a maximum length of 13 digits.
50
Page 55

FORMULA™ QUICK REFERENCE GUIDE
Click on ADD FIELD for a second prompt and set the parameters to the settings
shown below, where: NAME = QUANTITY, VERIFY CHARACTERS are only numeric
(0-9). For additional fields, simply click on ADD FIELD for a new input. NUMBER
(2/2) indicates the number of the fields created, click on the forward or the back arrow
to move between the field screens.
Once all the parameters has been entered, insure the Formula™ is connected. Select
SEND. The following screen will appear prompting for a program name:
Select YES and verify the program name. The following prompt will appear to verify
the terminal. In this case it is Terminal #1:
51
Page 56

READY TO USE APPLICATIONS
Select OK.
After the program has been installed, the following screen will display:
The Formula™ is now ready for use. Collect data using the installed CODE and
QUANTITY two prompts program!
*NOTE: For barcode programming options, refer to the program document titled
“Ready-to-Use Applications Programming BarCode Document” via the installation
CD, USER MANUALS section.
52
Page 57

FORMULA™ QUICK REFERENCE GUIDE
3.5 UPLOADING COLLECTED .DAT FILE DATA TO A PC
To upload the data (.dat file) to a PC, do the following steps:
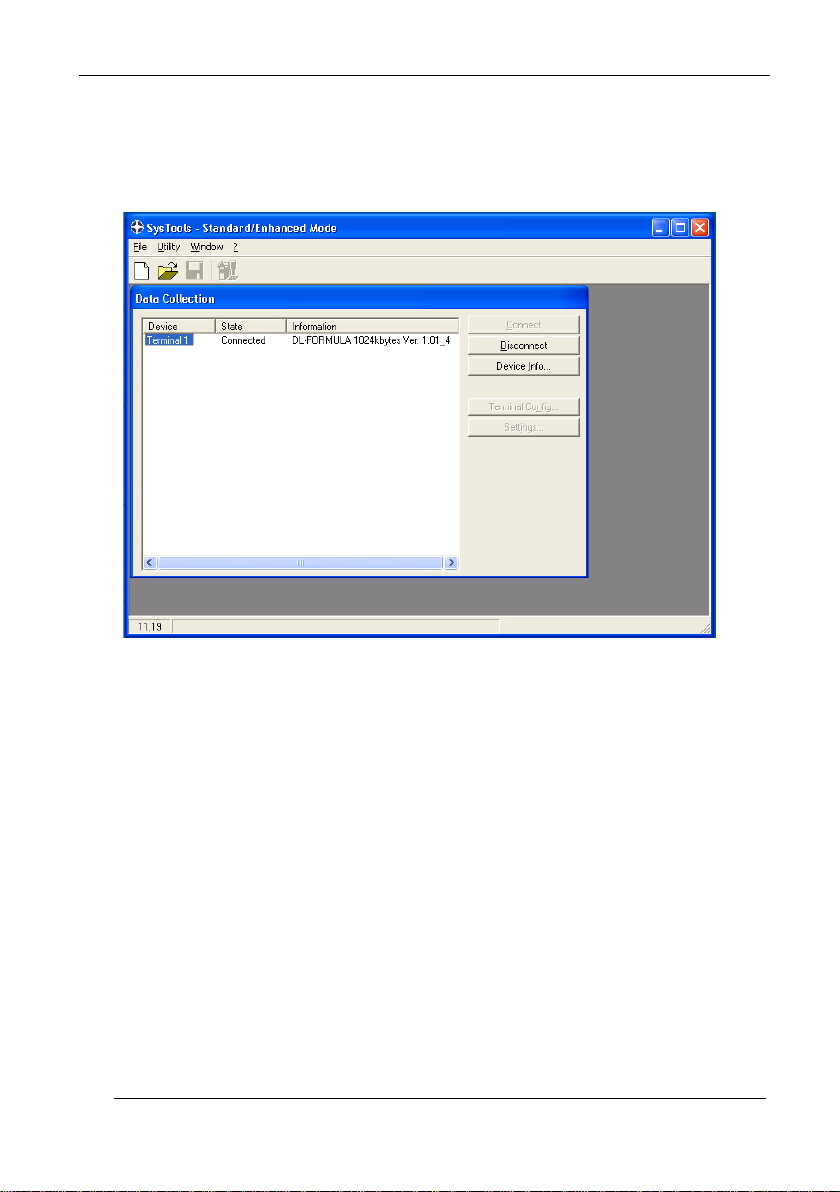
Verify that USB cable is connected and open SysTools™ (Standard / Enhanced
mode) to view the following main menu screen:
53
Page 58
READY TO USE APPLICATIONS
Select CONNECT (the Formula™ will emit a tone). STATE: BUSY appears while
data is being uploaded, STATE: CONNECTED: appears after the data is sent. NOTE
1: Click DISCONNECT P to end the data transfer session. NOTE 2: The collected
.dat file data will be uploaded to the FILE NAME and PATH settings selected earlier.
54
Page 59

FORMULA™ QUICK REFERENCE GUIDE
4 EASYGEN™
4.1 SET UP THE TERMINAL FOR THE CONNECTION WITH THE PC
Insert the battery set into the terminal, close the cover, connect the power adapter to
the terminal and let it initially charge overnight. Then insure the charging LED light
displays a GREEN status (refer to Formula™ User’s manual for further details).
The Formula™ Terminal must first be REFLASHED via the following sequence:
Press and hold the POWER button, then press SCAN key. Press the DOWN arrow to
erase the program when prompted. Select option 3 (Serial). The Formula™ will
display the following information, indicating it is in receive mode via serial
communications:
BOOTSTRAPLOADER
WaitDownload Ser
Insert the terminal into the cradle and connect it to any standard 9-pin serial nullmodem cable (see Formula™ User’s manual for connection details).
4.2 INSTALLING AN EASYGEN™ EXAMPLE
To correctly download an EasyGen™ application open the SYSTOOLS software
program. There are two versions of this program: “STANDARD and ENHANCED”
mode and “EASYGEN” mode. Insure that EASYGEN mode is enabled by selected
Utility Menu – Set SysTools Mode.
Select Utility Menu – Send EasyGen Intepreter, browse and select the interpreter file
(EIFOR_XXX.H00).
Default path:
C:\Program Files\Datalogic\Formula Software Tools\EasyGen\Interpreters).
55
Page 60
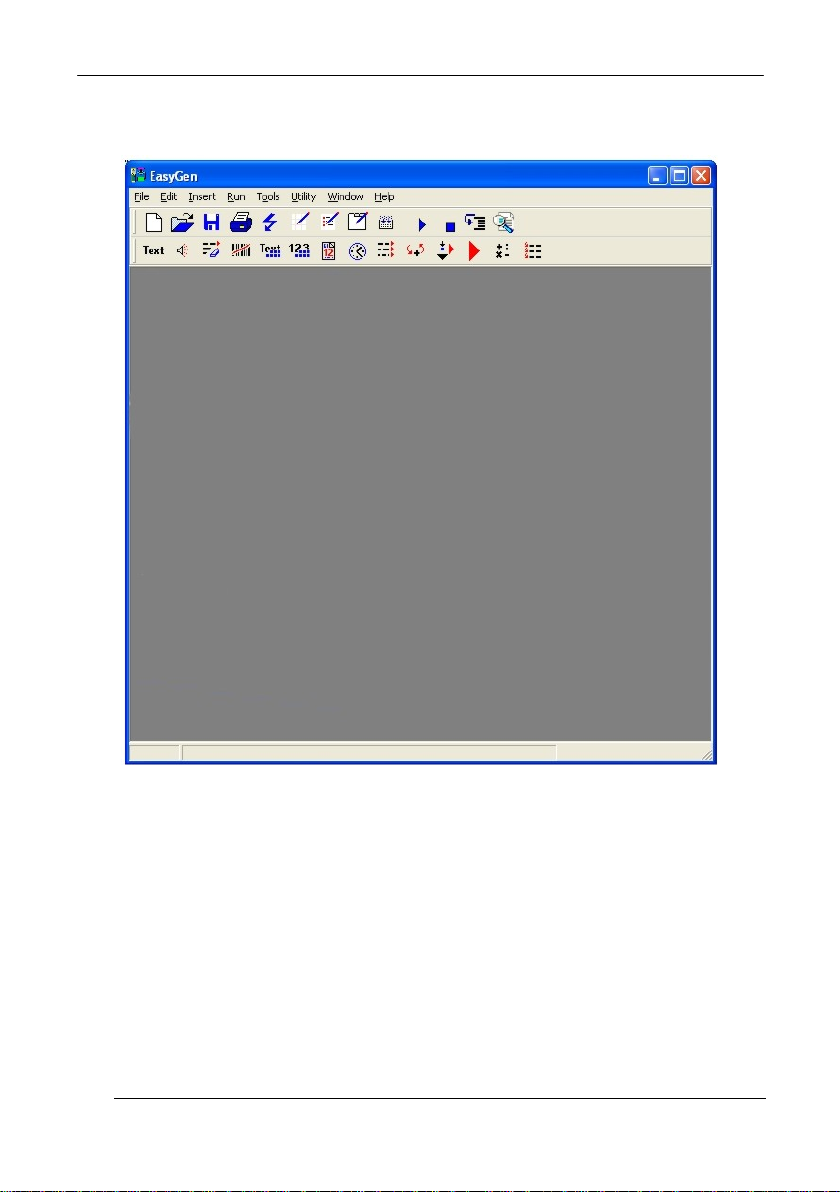
Open the EASYGEN software program:
EASYGEN™
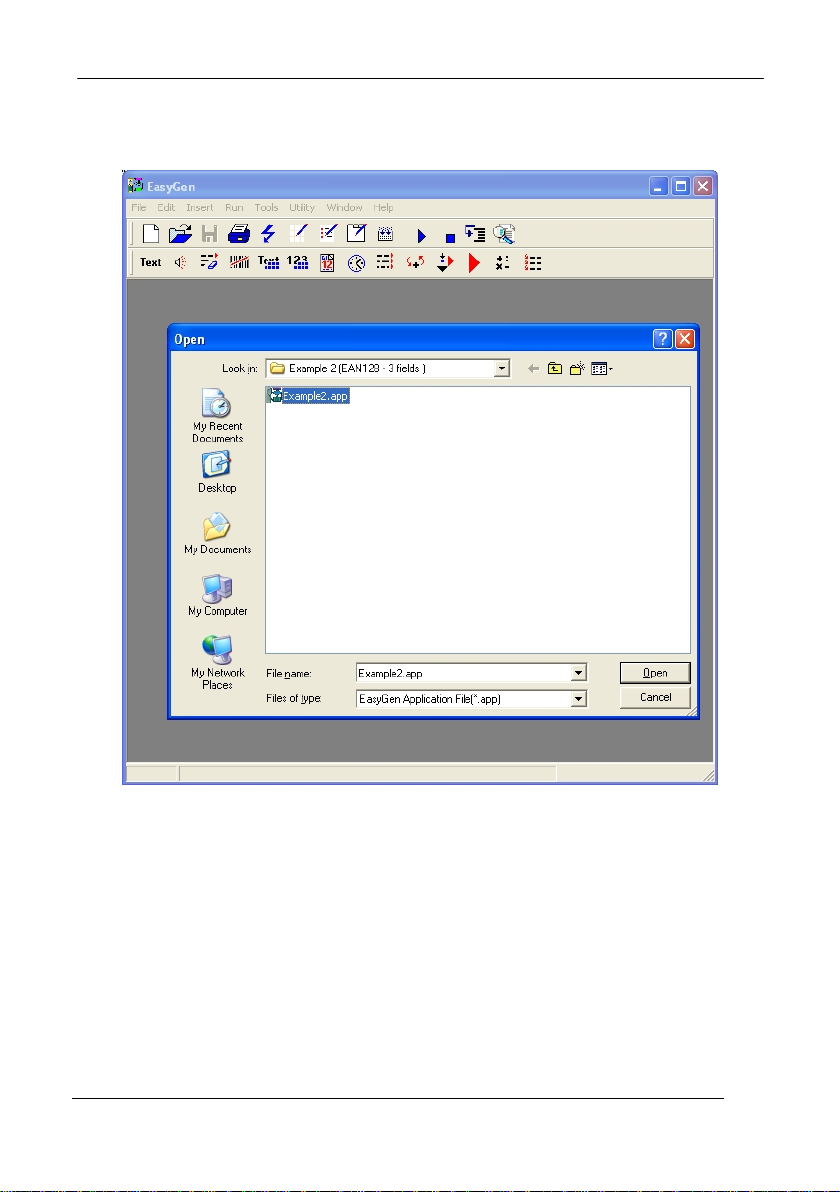
Select FILE – OPEN. Browse to the folder where the default Example applications
are installed:
C:\”INSTALLATION FOLDER”\Datalogic\Formula Software
Tools\EasyGen\Examples\English
Example Default Programs are:
EXAMPLE 1 (CODE + QUANTITY)
EXAMPLE 2 ( EAN128 – 3 FIELDS)
EXAMPLE 3 (ASSISTED SALES)
EXAMPLE 4 (LISTED PICKING)
EXAMPLE 5 ( INVENTORY)
56
Page 61
FORMULA™ QUICK REFERENCE GUIDE
For this example we will install the EXAMPLE 2 (EAN128 – 3 FIELDS) application
(.app) file:
57
Page 62
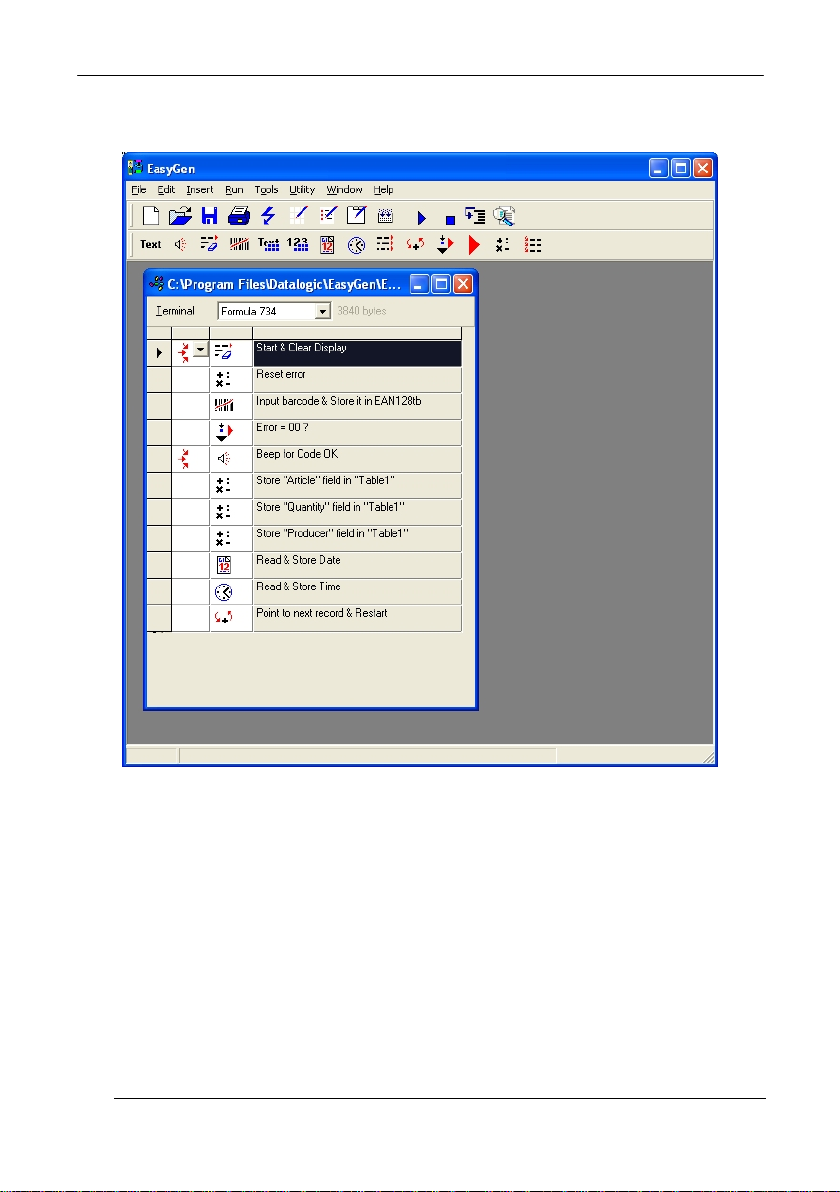
Select OPEN to view the following screen:
EASYGEN™
Insure that Formula is the selected terminal type. The program steps are also
displayed.
Remove the Formula™ from the cradle, it will display Interpreter for EASYGEN Rel
2.1. Press ENTER on the Formula™ (it will display READ ERROR). Place it back in
the cradle.
58
Page 63
FORMULA™ QUICK REFERENCE GUIDE
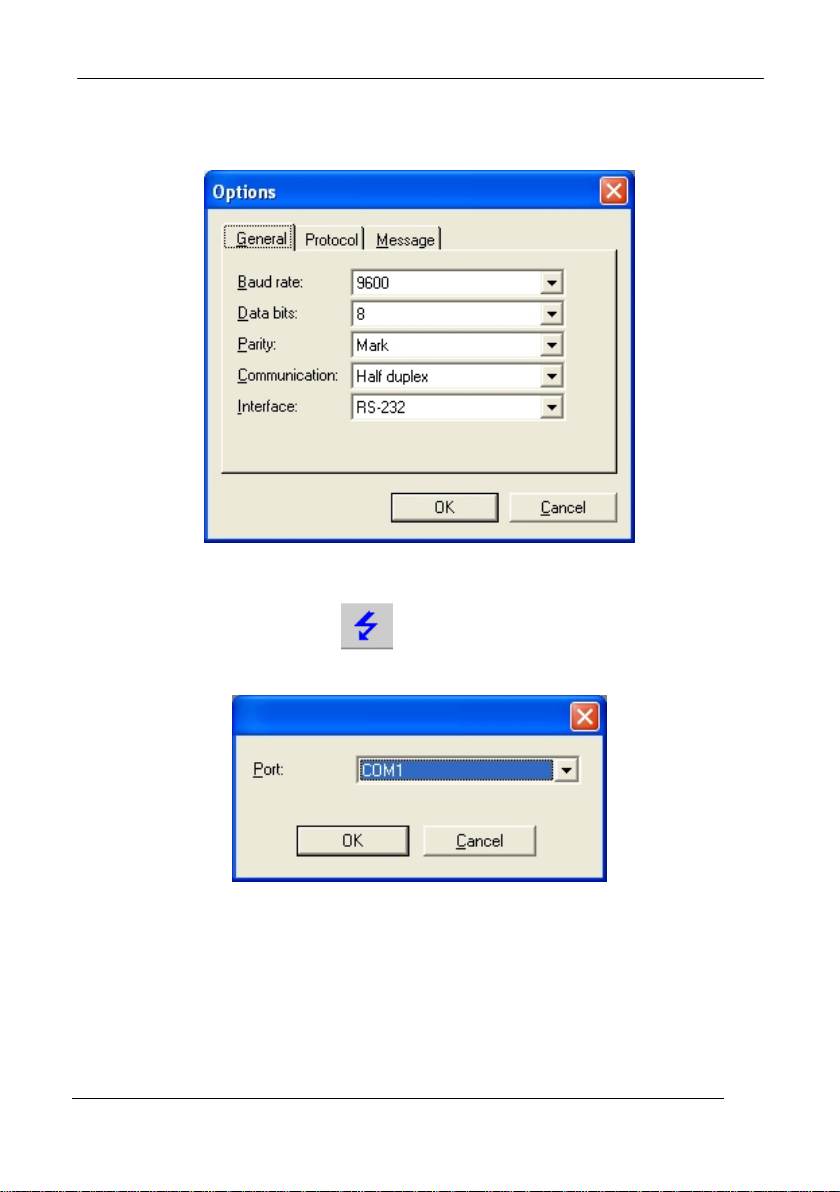
In EASYGEN, Select TOOLS – OPTIONS (GENERAL TAB) to view the following
protocol settings box. Insure the settings are set to the following parameters:
Select OK.
To send the program, select the
button or the File – Send menu to display the
following screen:
Select OK (insure the comport of choice is selected). An UPLOADING PLEASE
WAIT screen will appear and then disappear when the application is transmitted.
Remove the Formula™ from the dock and press ENTER.
The program prompt will then be displayed.
59
Page 64

EASYGEN™
4.3 UPLOADING COLLECTED .DAT FILE DATA TO A PC
To upload the data (.dat file) to a PC, do the following steps:
Open SysTools™ and set EasyGen™ mode to view the following main menu screen:
Select the NETWORK SETUP button and insure the Connection Type is set to COM.
60
Page 65

FORMULA™ QUICK REFERENCE GUIDE
Select CONNECT (the Formula™ will emit a tone). STATE: BUSY appears while
data is being uploaded, STATE: CONNECTED: appears after the data is sent. NOTE
1: Click DISCONNECT to end the data transfer session.
NOTE 2: The collected .dat file data will be uploaded to the FILE NAME and PATH
settings selected earlier.
61
Page 66

GLOSSARY OF TERMS
APPLICATION DEVELOPMENT:
1. EASYGEN: a Rapid Application Generator to generate easy and quick
applications to operate on a Formula™ device. It requires an interpreter file to be
installed before installing an application. A set of ready to use EasyGen™
application example programs are also provided.
EXAMPLE 1 (CODE + QUANTITY)
EXAMPLE 2 ( EAN128 – 3 FIELDS)
EXAMPLE 3 (ASSISTED SALES)
EXAMPLE 4 (LISTED PICKING)
EXAMPLE 5 ( INVENTORY)
2. SW Developer’s Toolkit (DS FOR FORMULA): a software development toolkit to
develop applications with the 8051 compiler. A set of work demo examples are
available on the CD for each main communication feature.(See Sw Dev Toolkits
Developer’s Manual).
READY TO USE APPLICATIONS:
STANDARD MODE M1: ready to use application that can be installed to
automatically install a basic inventory program ready for use.
STANDARD MODE M2: ready to use application that can be installed to work with
custom program creation via SysTools™.
COMMUNICATION:
SYSTOOLS: PC based communication software to download applications and
exchange data between a PC and Formula™ terminal through serial interface. It also
provides an option to create a quick custom program for installation.
62
Page 67

www.mobile.datalogic.com
World wide Sales Network
available from: www.mobile.datalogic.com/contacts
Datalogic Mobile S.r.l.
Via S. Vitalino, 13
40012 Lippo di Calderara di Reno
Bologna - Italy
Telephone: (+39) 051-3147011
Fax: (+39) 051-3147561
©2008 Datalogic Mobile S.r.l.
12/08
 Loading...