

Installation Danfoss Valve Insert for Dunham-Bush
VIFOB102
Instructions SWRF-B ¾” Radiator Valve, 013G8074
WARNING: Prior to working on the valve, the
supply of steam to the system should be turned off.
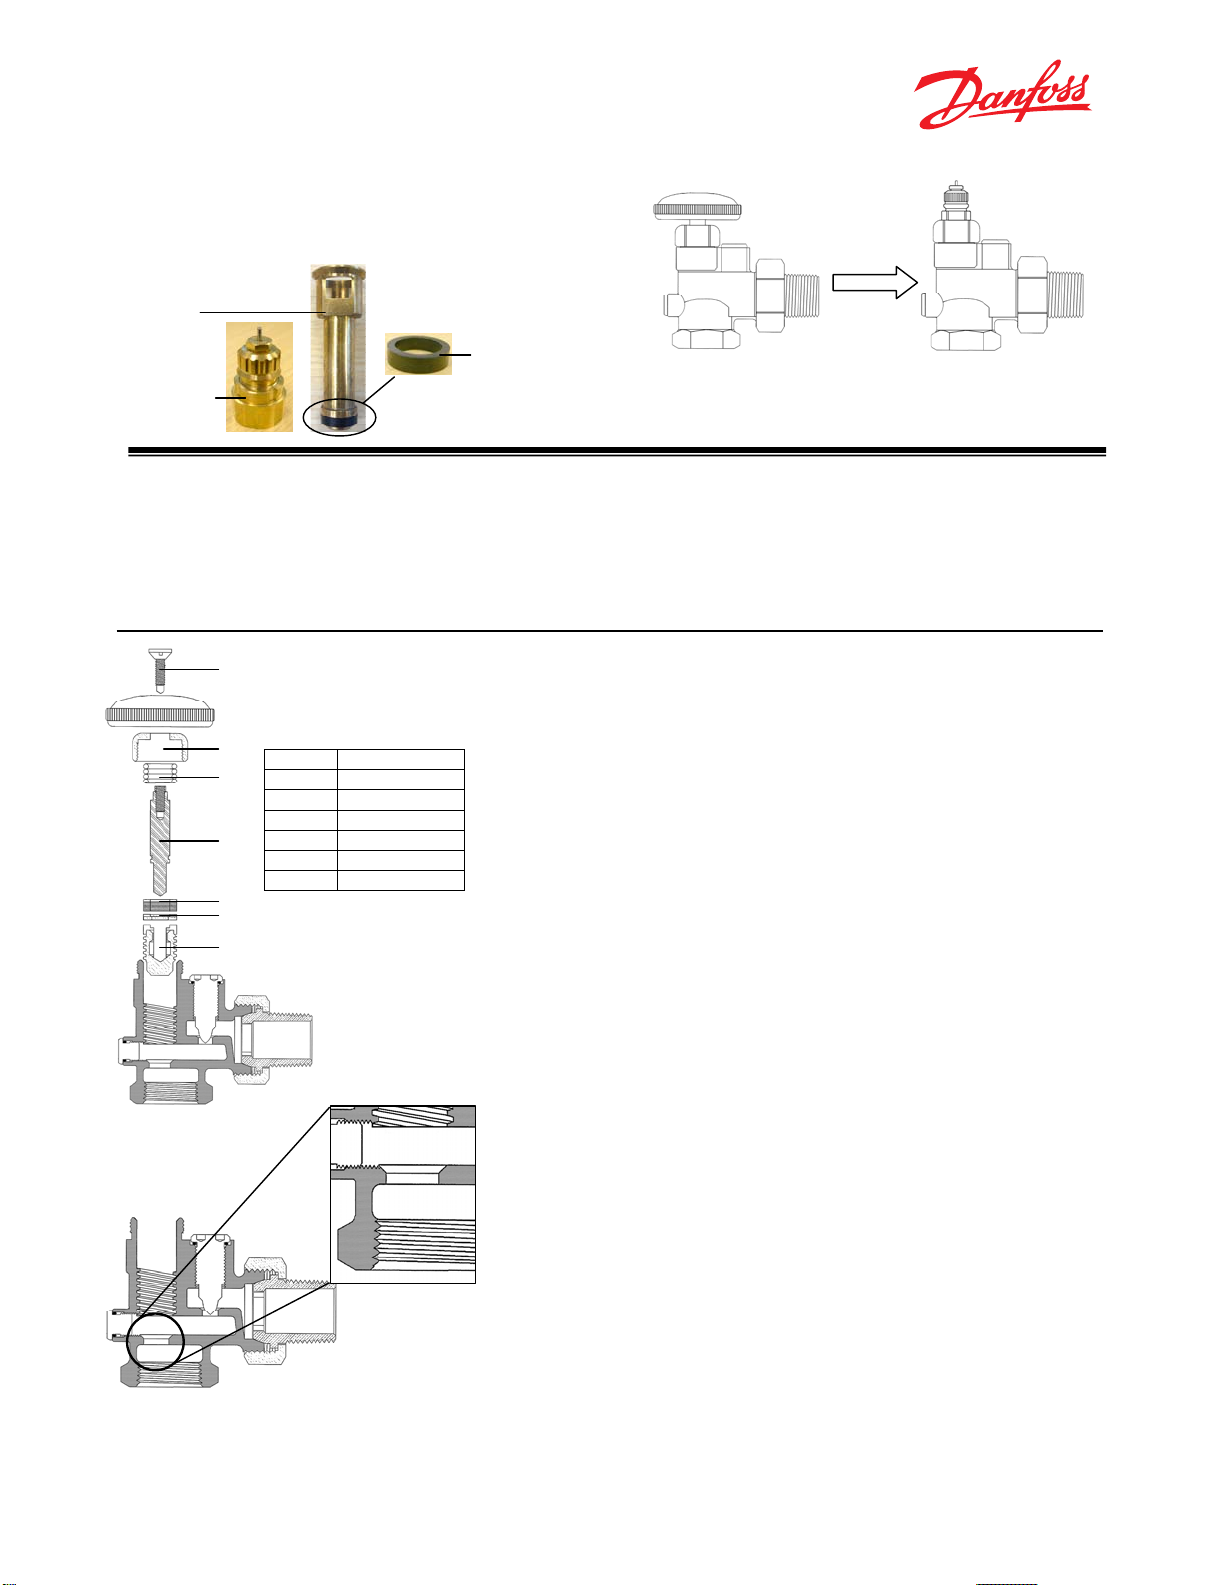
Within the following package contains the Danfoss
valve insert:
Internal
Insert
Bonnet
Assembly
Insert Gasket
Dunham-Bush Installed Danfoss insert
SWRF-B valve in SWRF-B valve
The internal replacement of the SWRF B
with the Danfoss insert provides the ability
of individual control to the radiator via a
non-electric thermostatic operator, thus
reducing over heating within the room.
1
Table 1
2
Item # Description
3
4
1 Handle screw
2 Packing nut
3 Spring
4 Insert
5 Stem washers
6 Shut-off valve
STEP 1: Removal of SWRF-B Internals
• Carefully remove the convector cover. (if applicable)
• Loosen the packing nut (2) from the valve and fully turn the
• Remove the internals of the valve (3 thru 6). Refer to Table 1.
5
6
STEP 2: Evaluation and Valve Preparation
• With a wire brush or resurfacing tool (contact local Danfoss
Prior to installing the Danfoss insert, the installer
should read through the installation instructions and
be familiar with the process involved in replacing the
internals of the valve body.
knob of the SWRF-B counter-clockwise, opening the valve.
Troubleshooting: In the event the shut-off valve (6) has a
difficulty of being removed, a screwdriver and a pair of needle
nose pliers will aid in removing this part from the valve.
distributor for details on resurfacing tool), clean the valve seat
by running it in the taper and valve stem opening to provide a
clean base to accept the Danfoss insert.
04.2011, Patent Pending
• Clean or vacuum the seat opening of debris.
• Perform a visual inspection of the valve seat. If the valve seat is
damaged the valve body should be replaced before installing an
insert.
1
Installation Danfoss Valve Insert for Dunham-Bush
VIFOB102
Instructions SWRF-B ¾” Radiator Valve, 013G8074
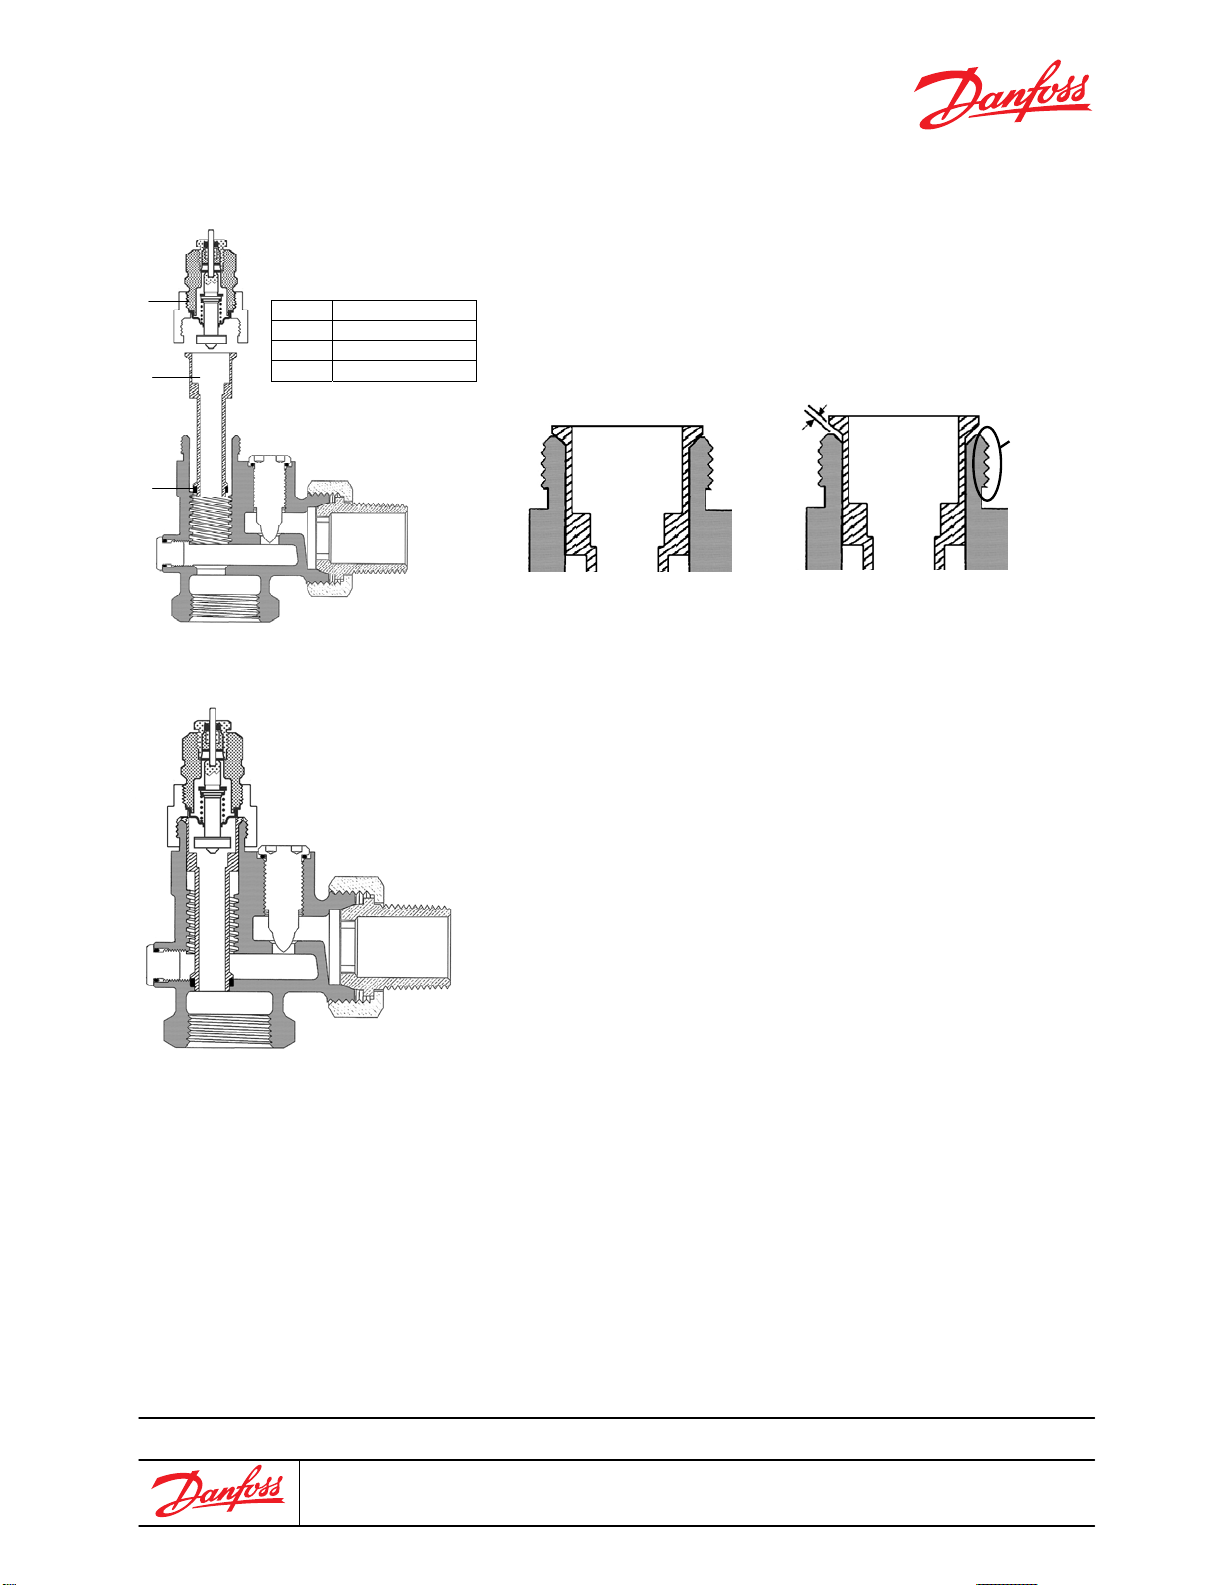
STEP 3: Danfoss Internals Installation
• Align the internal insert replacement (2) within the valve body.
• Twist the insert as it is being installed within the valve stem
1
2
Table 2
Item# Description
1 Bonnet assembly
2 Internal insert
3 Insert gasket
opening to ensure the lower insert gasket (3) seats properly.
• The upper lip of the internal insert should not sit on the shoulder
of the valve body. A gap should be visible between the lip and
shoulder on the valve as seen in the figures below.
3
Gap
Apply thread
locker to
these threads.
Incorrect seating of internal insert Proper seating of internal insert
If contact occurs between the upper lip and the shoulder of the
valve body, replace the valve.
• Evenly apply thread locker, Loctite Red 271, to the male
threads of the valve body’s bonnet base.
• Screw the bonnet assembly (1) to the body of the valve.
When the bonnet assembly can no longer be turned easily by
hand, tighten the bonnet with a torque wrench and a 1” 6point deep socket to a minimum 25 ft/lbs.
Failure to apply thread locker and properly tighten the valve
bonnet can result in the leakage of steam from the valve
bonnet.
STEP 4: Installation of Danfoss Thermostatic Operator
Follow the standard mounting procedures for the Danfoss RA2000
operator that has been selected.
04.2011, Patent Pending
Danfoss can accept no responsibility for possible errors in printed materials and reserves the right to alter its products without notice.
All trademarks in this material are property of the respective companies. Danfoss and Danfoss logotype are trademarks of Danfoss A/S. All rights reserved.
Danfoss LLC
Baltimore, MD, USA, 21220
Tel: 800.375.4822 Fax: 443.512.0270
2
 Loading...