

Page 1
Installation Guide
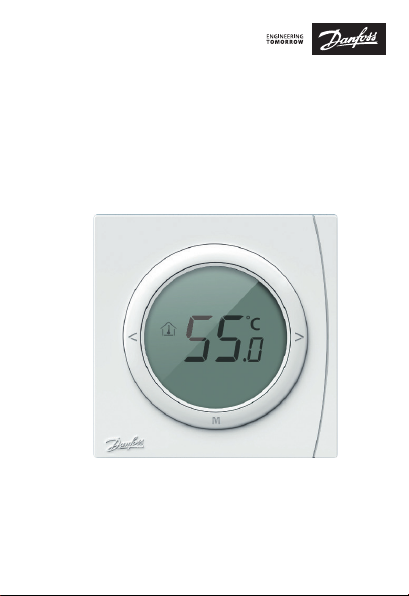
ECtemp Next Plus HW
Thermostat for temperature maintenance
© Danfoss | Produced by FEC | 2020.10
Page 2

Page 3
ECtemp Next Plus HW
Contents
1. Installation Guide .....................................4
ECtemp Next Plus HW
Thermostat for temperature maintenance
2. Installationsanleitung ............................... 16
ECtemp Next Plus HW
Thermostat für Temperaturerhaltung
3. 安装指南 ............................................ 28
ECtemp Next Plus HW
温度保持用温控器
4. Instrukcja montażu .................................. 40
ECtemp Next Plus HW
Termostat do podtrzymania temperatury
© Danfoss | Produced by FEC | 2020.10 AN347136888492-010101 | 3
EN
DE
CN
PL
Page 4

ECtemp Next Plus HW
1 Introduction
ECtemp Next Plus HW is an electronic programmable timer
thermostat used for controlling domestic hot water temperature.
The thermostat is designed for fixed installation only and can be
used for both temperature maintenance and legionella mitigation
(above 55 °C), using timer and external sensor features.
• Correct wiring is essential. Use instrument to confirm L
and N before wiring is recommended.
• Don’t remove too much of the insulation cover from
the wire to avoid short circuit, caused by the naked wire
touching the metal 86 mm. sized mounting wall box.
• Don’t let the screw press or touch the wire when using
screw to fix room thermostat in wall box. A short-circuit
risk exists if the wire insulation cover is damaged by the
screw, and if the naked wire connects with the screw.
• If walls must be painted, mount the room thermostat
after painting, to avoid dust or paint material penetrating
the room thermostat and thus damaging the PCB.
• The max load of relay is <16 A (resistive) or <6 A (inductive).
The relay will be damaged if the load exceeds the limit.
• Don’t cover the thermostat, for instance by
hanging towels directly in front of it.
4 | © Danfoss | Produced by FEC | 2020.10 AN347136888492-010101
Page 5
ECtemp Next Plus HW
2 Technical Specifications
Feature Description
Approval CE Marking, EN60730
Ambient temperature 0 to 45 °C
IP Class 30
Max. load, inductive <6 A
Max. load, resistive <16 A
Floor sensor NTC 15 kOhm at 25 °C
Power consumption <2 W
Power supply 85-250 V AC, 50/60 Hz
Size 86 x 86 x 13 mm, WxHxD,
External temp. sensor range 35 to 65 °C
Housing ABS + PVC
Hysteresis ±1 °C
Cable specification max. 1x4 mm²
Frost protection temperature (in °C) 5 °C
Ball pressure test temperature (in °C)
Pollution degree 2
Controller type 1C
Software class A
© Danfoss | Produced by FEC | 2020.10 AN347136888492-010101 | 5
in-wall 24,5 mm
75 °C
EN
Page 6
ECtemp Next Plus HW
Feature Description
Storage temperature (in °C) -10 to +60 °C
Protection class Class II
Weight 143 g
Electrical safety and Electro-Magnetic Compatibility for this
product is covered by the compliance with the EN/IEC Standard
“Automatic electrical controls for household and similar use”:
• EN/IEC 60730-1 (general)
• EN/IEC 60730-2-9 (thermostat)
6 | © Danfoss | Produced by FEC | 2020.10 AN347136888492-010101
Page 7
ECtemp Next Plus HW
85-250 Vac, 50/60 Hz
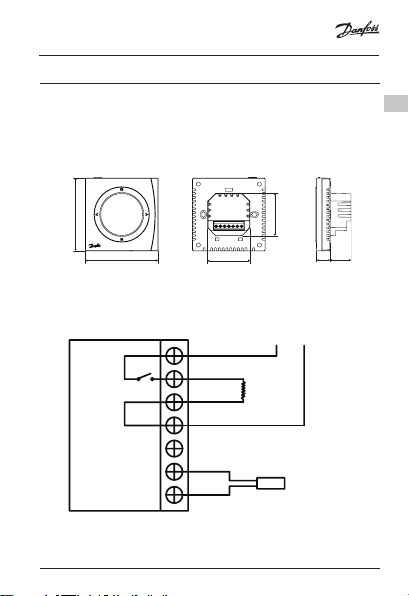
3 Wiring
• Dimensions, see fig. 4
• Wiring diagram, see fig. 5 (S1, S2: floor sensor terminals).
• Complete the wiring, see fig 5.
EN
86.0
86.0
50.0
50.0
24.513.0
Fig. 4
L
L(Load )
N(Load )
N
L N
Max. Load
16 A
S1
S2
Fig. 5
© Danfoss | Produced by FEC | 2020.10 AN347136888492-010101 | 7
Page 8
ECtemp Next Plus HW
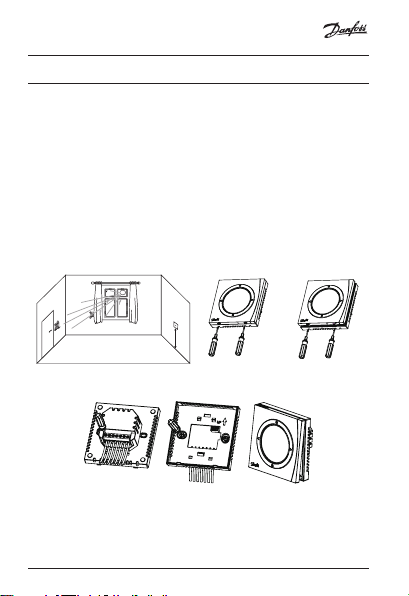
4 Installation Steps
User Guide can be downloaded from: heating.danfoss.com.
• Installation must be done by an authorised electrician.
• The room thermostat should be installed at approx. 1,5 m
above floor and where the effects of sunlight, draught or
other heat sources (eg. TV’s) are avoided, see fig. 1.
• First of all, carefully remove the cover, see fig. 2.
• Connect the wire before mounting the back plate to the
wall box using the enclosed screws. Then mount the
cover to the back plate, see fig 3.
1.5 m
Fig. 1
Fig. 2
Fig. 3
8 | © Danfoss | Produced by FEC | 2020.10 AN347136888492-010101
Page 9
ECtemp Next Plus HW
5 Basic features
• Floor temperature setting and measurement.
• Auto recovery, Defrost (low temperature protection).
• Clock, Timer and 6 period programming.
• Working mode selection.
• Keypads Lock.
6 Status display
• Thermostat output display.
• Floor temperature display.
• Floor temperature setting display.
• Clock display.
• Low temperature protection display.
• Working mode selection display.
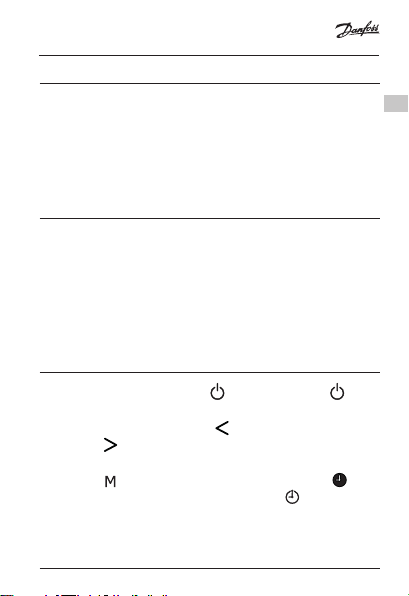
7 Operation
• On/Off thermostat: Press “ ” to turn on, press “ ”
again to turn off thermostat and its output.
• Setting temperature: press “ ” to reduce temperature,
press “ ” to raise temperature (0.5 °C changed each press).
• Working Mode Selection: When thermostat turns on,
press “ ” to select different working mode, icon
means thermostat at Timer mode, icon “ “ means at
Programming mode, without these two icons means at
manual mode.
© Danfoss | Produced by FEC | 2020.10 AN347136888492-010101 | 9
EN
Page 10
ECtemp Next Plus HW
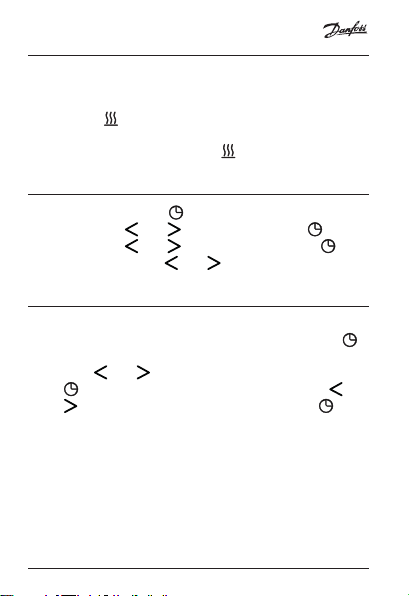
• Heating Equipment Control: The thermostat will switch
on the heating equipment when the water temperature
2 degree lower than the setting temperature, the LCD will
display “ ”; When the water temperature is equal with
setting temperature, the thermostat will switch off the
heating equipment. The icon “ ”will disappear.
8 Clock setting
• Clock setting: Press “ ” till to display “hh:mm” and “hh”
flash, press “ ” or “ ” to adjust hour, press “ ”, “mm”
flash, press “ ” or “ ” to adjust minute; Press “ ”,
“week” flash, press “ ” or “ ” to adjust Mon to Sun.
9 Timer programming
• Weekdays Setting: When thermostat at Programming mode,
setting in the first period: press and hold for 5 seconds “ ”
till to display “Mo Tu We Th Fr” and “hh:mm” and “hh” flash,
press “ ” or “ ” to adjust hour in the first period; press
“ ” till to display “hh:mm” and “mm” flash, press “ ” or
“ ” to adjust minutes in the first period; press “ ”, the
temperature flash and the figure is the setting temperature
of first period. When setting temperature is lower than
35 °C, it will display “OFF”. Using the above method to set
the hour and minute in other periods. Once the setting
time is over 16:00 at each period, it will switch to
weekend setting.
• Weekend Setting: “Sa Su” showing is weekend setting, the
setting method is same with above.
10 | © Danfoss | Produced by FEC | 2020.10 AN347136888492-010101
Page 11
ECtemp Next Plus HW
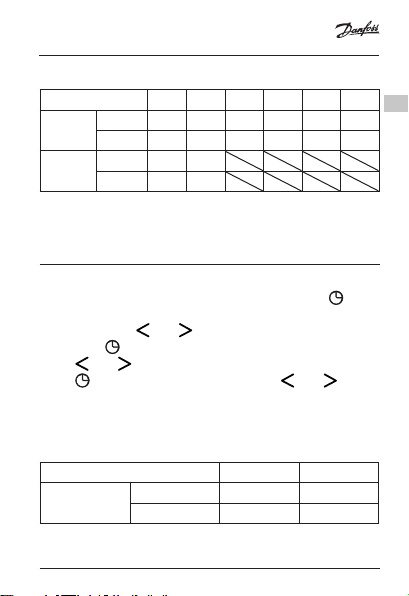
Default setting value at each event is as below.
Weekday / Weekend Per. 1 Per. 2 Per. 3 Per. 4 Per. 5 Per. 6
Weekday
Staring T 23:30 05:00 09:00 11:00 13:00 16:00
(Mo-Fr)
temp. °C OFF 50 °C OFF OFF OFF 50 °C
Weekend
Staring T 23:30 05:00
(Sa-Su)
temp. °C OFF 50 °C
Working day: Mon Tue Wed Thu Fri;
Off day: Sat Sun
10 Timer setting
• Period setting: When thermostat at Timer mode, setting
in the first period: press and hold for 5 seconds “ ” till to
display “Mo Tu We Th Fr Sa Su” and “hh:mm” and “hh”
flash, press “ ” or “ ” to adjust hour in the first period;
press “ ” till to display “hh:mm” and “mm” flash, press
“ ” or “ ” to adjust minutes in the first period; press
“ ”, the temperature flash and press “ ” or “ ” to
switch between ON and OFF. Using the above method to
set the hour and minute in other periods.
Default setting value at each event is as below.
Everyday Period 1 Period 2
Everyday
© Danfoss | Produced by FEC | 2020.10 AN347136888492-010101 | 11
Staring T 23:30 05:00
Status OFF ON
EN
Page 12
ECtemp Next Plus HW
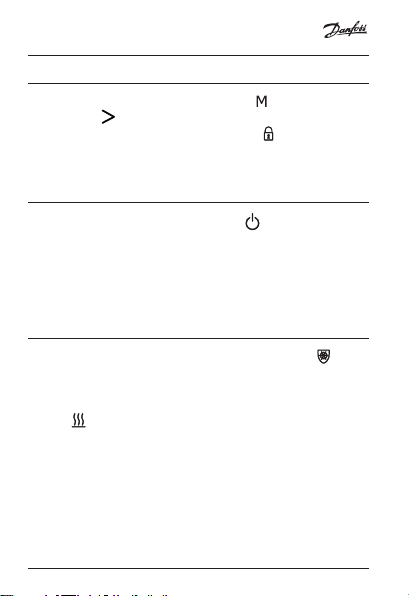
11 Keypad lock
• When thermostat power on, press “ ” button then
press “ ” simultaneously, keypads are locked for fear
anyone operated. Display will show “ ”, repeat the
operation, the function will be disable.
12 Resetting
• When thermostat turns off, press “ ” for 10 seconds to
reset the value. Display shows all icons, after resetting,
thermostat will turn on automatically. Resetting
operation includes programming default value and timer
default value.
13 Frost protection temperature
• When the thermostat turns off, display shows “ ”, it
means the function of low temperature protection is
able. When the water temperature is lower than 5 °C, it
will be turned on automatically in heating mode with
“ ” showing and will connect with heating
equipment; the thermostat will turn off output when
water temperature is higher than 7 °C.
12 | © Danfoss | Produced by FEC | 2020.10 AN347136888492-010101
Page 13
ECtemp Next Plus HW
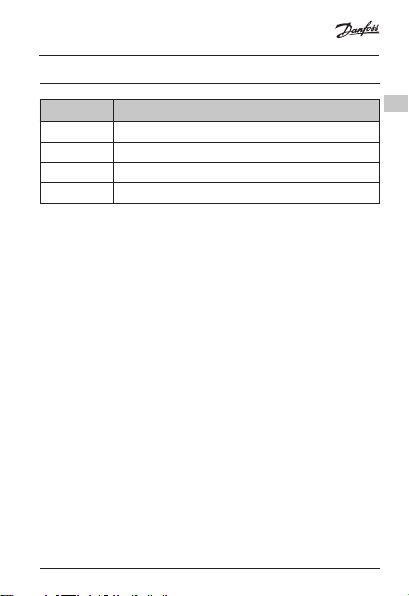
14 Error codes
Display Description
E1 Short circuit external sensor
E2 Open circuit external sensor
E3 Detected temperature above 70 °C
E4 Detected temperature below 0 °C
© Danfoss | Produced by FEC | 2020.10 AN347136888492-010101 | 13
EN
Page 14
ECtemp Next Plus HW
15 The 5 Year Danfoss Warranty:
You have purchased a Danfoss heating
system which we are sure will serve to
improve the comfort and economy of
your application.
Danfoss provides superior electrical
heating solutions for total climate
control in and around homes and
buildings. Danfoss offers a complete
product program with ECflex heating
cables or ECmat heating mats, ECtemp
thermostats, ECdry and ECdry heating
systems, ECfast fixing strips and
Danfoss Self-limiting heating cables
combined with additional products
completing the product program.
This 5 year warranty applies to ECdry
heating mats and Danfoss Self-limiting
heating cables, connection units and
Danfoss crimp set for self-limiting
heating cables.
Should you, against all expectations,
experience a problem with your
Danfoss product, you will find that
Danfoss offers a 5 year warranty from
the date of purchase on the following
conditions:
During the warranty period Danfoss
shall offer a new comparable product
or repair the product in case the
product is found to be faulty by reason
of defective design, materials or
workmanship. Repair or replacement
shall be carried out solely at Danfoss’s
discretion. Danfoss shall not be liable
for any consequential or incidental
damages including, but not limited to,
14 | © Danfoss | Produced by FEC | 2020.10 AN347136888492-010101
damages to property or extra utility
expenses.
The warranty shall be valid only if the
WARRANTY CERTIFICATE is completed
correctly and in accordance with the
instructions, and provided the fault is
submitted to the installer or the seller
without undue delay and proof of
purchase is provided. Please note that
the WARRANTY CERTIFICATE must be
completed in English or local language.
An extension of the warranty period
following repairs undertaken under
warranty cannot be granted.
The Danfoss Warranty shall not
cover any damage caused by incorrect
conditions of use, incorrect installation
or if installation has been carried out
by non-authorised electricians. All
work will be invoiced in full if Danfoss
is required to inspect or repair faults
that have arisen as a result of any of
the above.
The Danfoss Warranty shall not extend
to equipment which has not been
paid in full.
Danfoss will, at all times, provide a
rapid and effective response to all
complaints and inquiries from our
customers.
The warranty explicitly excludes all
claims exceeding the above conditions.
Page 15
ECtemp Next Plus HW
© Danfoss | Produced by FEC | 2020.10 AN347136888492-010101 | 15
EN
Page 16
ECtemp Next Plus HW
1 Einführung
Der ECtemp Next Plus HW ist ein elektronischer, programmierbarer
Timer-Thermostat zur Regelung der Trink warmwassertemperatur.
Der Thermostat ist ausschließlich für eine feste Installation
ausgelegt und kann sowohl für die Temperaturerhaltung als auch
für die Legionellenreduzierung (über 55 °C) verwendet werden,
wobei Timer und externe Fühlerfunktionen verwendet werden.
• Eine ordnungsgemäße Verdrahtung ist unerlässlich. Es emp-
fiehlt sich, L und N vor der Verdrahtung mit einem Messgerät
zu überprüfen.
• Nicht zu viel von der Isolierung des Drahts entfernen, da der Kon-
takt zwischen dem nicht isolierten Draht und dem metallischen
Wandkästchen (Größe 86 mm) zu einem Kurzschluss führen kann.
• Bei der Verwendung von Schrauben zur Befestigung des
Raumthermostats im Wandkästchen darf die Schraube den
Draht nicht berühren oder auf den Draht drücken. Wird die
Isolierung des Drahts durch die Schraube beschädigt, kann
bei Kontakt zwischen nicht isoliertem Draht und Schraube ein
Kurzschluss ausgelöst werden.
• Muss die Wand gestrichen werden, ist der Raumthermostat erst
nach dem Streichen einzubauen, da sonst Staubpartikel oder
Farbmaterial den Raumthermostat durchdringen und so die
Leiterplatte beschädigen können.
• Die maximale Last für die Relaisausgänge beträgt <16 A (ohmsch)
bzw. <6 A (induktiv). Bei einer Überschreitung dieser Grenze wird
das Relais beschädigt.
• Den Thermostat nicht abdecken, z. B. durch Handtücher, die
direkt vor dem Thermostat aufgehängt werden.
16 | © Danfoss | Produced by FEC | 2020.10 AN347136888492-010101
Page 17

ECtemp Next Plus HW
2 Technische Spezifikationen
Funktion Beschreibung
Zulassung CE-Kennzeichnung, EN60730
Umgebungstemperatur 0 bis 45 °C
IP-Schutzart 30
Max. induktive Belastung <6 A
Max. Last, ohmsch <16 A
Bodenfühler NTC 15 kOhm bei 25 °C
Leistungsaufnahme <2 W
Spannungsversorgung 85–250 V AC, 50/60 Hz
Größe 86 x 86 x 13 mm (B x H x T)
Externer Temp.fühlerbereich 35 bis 65 °C
Gehäuse ABS + PVC
Hysterese ±1 °C
Max. Kabelspezifikation 1 x 4 mm²
Frostschutztemperatur (°C) 5 °C
Kugeldruckprüfungstemperatur (°C)
Verschmutzungsgrad 2
Reglertyp 1C
Softwareklasse A
© Danfoss | Produced by FEC | 2020.10 AN347136888492-010101 | 17
Unterputz 24,5 mm
75 °C
DE
Page 18

ECtemp Next Plus HW
Funktion Beschreibung
Lagertemperatur (°C) -10 bis +60 °C
Schutzklasse Schutzklasse II
Gewicht 143 g
Die elektrische Sicherheit und elektromagnetische Verträglichkeit
dieses Produkts entsprechen den EN/IEC-Normen für „Automatische
elektrische Regel- und Steuergeräte für den Hausgebrauch und
ähnliche Anwendungen“:
• EN/IEC 60730-1 (allgemein)
• EN/IEC 60730-2-9 (Thermostat)
18 | © Danfoss | Produced by FEC | 2020.10 AN347136888492-010101
Page 19

ECtemp Next Plus HW
3 Verdrahtung
• Abmessungen, siehe Abb. 4.
• Schaltplan, siehe Abb. 5 (S1, S2: Bodenfühlerklemmen).
• Schließen Sie die Verdrahtung ab, siehe Abb. 5.
DE
86.0
86.0
50.0
50.0
24.513.0
Abb. 4
85-250 Vac, 50/60 Hz
L
L(Load )
L N
Max. Load
16 A
N(Load )
N
S1
S2
Abb. 5
© Danfoss | Produced by FEC | 2020.10 AN347136888492-010101 | 19
Page 20

ECtemp Next Plus HW
4 Installation
Die Bedienungsanleitung kann unter folgender Adresse heruntergeladen werden: www.danfoss.com/de-de/
• Der Einbau muss durch einen autorisierten Elektriker erfolgen.
• Der Raumthermostat muss in ca. 1,5 m Höhe und geschützt vor
Sonneneinstrahlung, Zugluft oder anderen Wärmequellen (z. B.
Fernsehgeräten) eingebaut werden, siehe Abb. 1.
• Entfernen Sie zunächst vorsichtig die Abdeckung, siehe Abb. 2.
• Schließen Sie die Leitungen an, bevor Sie die Gehäuserück-
seite mit den beigefügten Schrauben an die Unterputzdose
montieren. Befestigen Sie anschließend die Abdeckung an der
Gehäuserückseite, siehe Abb. 3.
1.5 m
Abb. 1
Abb. 3
20 | © Danfoss | Produced by FEC | 2020.10 AN347136888492-010101
Abb. 2
Page 21

ECtemp Next Plus HW
5 Wesentliche Merkmale
• Einstellung und Messung der Bodentemperatur.
• Automatische Wiederherstellung, Enteisungsmodus (Niedrigtemperaturschutz).
• Uhr, Timer und 6-Perioden-Programmierung.
• Betriebsmodusauswahl.
• Tastatursperre.
6 Statusanzeige
• Thermostatausgangsanzeige.
• Bodentemperaturanzeige.
• Anzeige Bodentemperatureinstellung.
• Uhranzeige.
• Anzeige Niedrigtemperaturschutz.
• Anzeige Betriebsmodusauswahl.
7 Betrieb
• Ein-/Aus-Thermostat: Drücken Sie zum Einschalten „ “ und
zum Ausschalten des Thermostats und seines Ausgangs
erneut „ “.
• Einstellen der Temperatur: Drücken Sie „ “, um die
Temperatur zu senken, und „ “, um die Temperatur zu
erhöhen (Änderung um 0,5 °C bei jedem Drücken).
• Betriebsmodusauswahl: Wenn sich der Thermostat einschaltet,
drücken Sie „ “, um einen anderen Betriebsmodus
auszuwählen. Das Symbol „ “ bedeutet, dass sich der
Thermostat im Timermodus befindet, das Symbol „ “ zeigt
© Danfoss | Produced by FEC | 2020.10 AN347136888492-010101 | 21
DE
Page 22

ECtemp Next Plus HW
den Programmiermodus an. Wird keines dieser beiden Symbole
angezeigt, befindet sich das Gerät im manuellen Modus.
• Heizungsanlagenregelung: Der Thermostat schaltet die
Heizungsanlage ein, wenn die Wassertemperatur um 2 Grad
unter der eingestellten Temperatur liegt; das LCD-Display zeigt
„ “ an. Wenn die Wassertemperatur der eingestellten
Temperatur entspricht, schaltet der Thermostat die
Heizungsanlage ab. Das Symbol „ “ wird ausgeblendet.
8 Uhreinstellung
• Einstellen der Uhr: Drücken Sie „ “, bis „hh:mm“ angezeigt wird
und „hh“ blinkt. Drücken Sie „ “ oder „ “, um die Stunde
einzustellen. Drücken Sie „ “, bis „mm“ blinkt. Drücken Sie
auf „ “ oder „ “, um die Minuten einzustellen. Drücken Sie
auf „ “, bis „Woche“ blinkt. Drücken Sie „ “ oder „ “, um
Mo bis So einzustellen.
22 | © Danfoss | Produced by FEC | 2020.10 AN347136888492-010101
Page 23

ECtemp Next Plus HW
9 Timerprogrammierung
• Einstellen der Wochentage: Wenn sich der Thermostat im
Programmiermodus befindet, stellen Sie die erste Periode ein:
Halten Sie „ “ fünf Sekunden lang gedrückt, bis „Mo Di Mi
Do Fr“ und „hh:mm“ und „hh“ blinken. Drücken Sie „ “ oder „
“, um die Stunde in der ersten Periode einzustellen. Drücken
Sie „ “, bis „hh:mm“ und „mm“ blinken. Drücken Sie „ “
oder „ “, um die Minute in der ersten Periode einzustellen.
Drücken Sie „ “. Die Temperatur blinkt und die Einstellung
der Temperatur der ersten Periode wird angezeigt. Wenn die
eingestellte Temperatur unter 35 °C liegt, wird „AU S“
angezeigt. Verwenden Sie die oben beschriebene Methode,
um Stunden und Minuten in weiteren Perioden einzustellen.
Sobald die Einstellzeit in jeder Periode 16:00 Uhr
überschreitet, wird auf Wochenendeinstellung umgeschaltet.
• Wochenendeinstellung: Die angezeigte Einstellung „Sa So“ ist
die Wochenendeinstellung. Die Einstellungsmethode ist mit
der oben beschriebenen identisch.
Die Werkseinstellung ist bei jedem Ereignis wie folgt.
Wochentag/Wochenende
Wochentage
(Mo-Fr)
Wochenende (Sa/So)
Werktag: Mo Di Mi Do Fr;
Freie Tage: Sa So
© Danfoss | Produced by FEC | 2020.10 AN347136888492-010101 | 23
Per. 1 Per. 2 Per. 3 Per. 4 Per. 5 Per. 6
Ab T 23:30 05:00 09:00 11:00 13:00 16:00
Temp.- °C OFF 50 °C OFF OFF OFF 50 °C
Ab T 23:30 05:00
Temp.- °C OFF 50 °C
DE
Page 24

ECtemp Next Plus HW
10 Timereinstellung
• Periodeneinstellung: Wenn sich der Thermostat im
Timermodus befindet, stellen Sie die erste Periode ein:: Halten
Sie „ “ fünf Sekunden lang gedrückt, bis „Mo Di Mi Do Fr Sa
So“ und „hh:mm“ und „hh“ blinken. Drücken Sie „ “ oder
„ “, um die Stunde in der ersten Periode einzustellen.
Drücken Sie „ “, bis „hh:mm“ und „mm“ blinken. Drücken Sie
„ “ oder „ “, um die Minute in der ersten Periode
einzustellen. Drücken Sie „ “, bis die Temperatur blinkt, und
drücken Sie „ “ oder „ “, um zwischen EIN und AUS zu
wechseln. Verwenden Sie die oben beschriebene Methode,
um Stunden und Minuten in weiteren Perioden einzustellen.
Die Werkseinstellung ist bei jedem Ereignis wie folgt.
Jeden Tag Periode 1 Periode 2
Jeden Tag
24 | © Danfoss | Produced by FEC | 2020.10 AN347136888492-010101
Ab T 23:30 05:00
Status OFF EIN
Page 25

ECtemp Next Plus HW
11 Tastatursperre
• Wenn der Thermostat eingeschaltet ist, drücken Sie „ “ und
„ “ gleichzeitig. Die Tastatur wird gesperrt und kann nicht
bedient werden. Das Display zeigt „ “ an. Wiederholen Sie
den Vorgang, bis die Funktion deaktiviert wird.
12 Reset
• Wenn sich der Thermostat ausschaltet, drücken Sie zehn
Sekunden lang „ “, um den Wert zurückzusetzen. Auf dem
Display werden alle Symbole angezeigt. Nach dem
Zurücksetzen schaltet sich der Thermostat automatisch ein.
Der Rücksetzvorgang umfasst die Programmierung von
Standardwert und Timer-Standardwert.
13 Frostschutztemperatur
• Wenn sich der Thermostat ausschaltet, zeigt das Display „ “
an, was bedeutet, dass die Funktion des Niedrigtemperaturschutzes aktiviert ist. Wenn die Wassertemperatur unter 5 °C
liegt, wird er automatisch im Heizungsmodus eingeschaltet,
und „ “ wird angezeigt. Es wird eine Verbindung zur
Heizungsanlage hergestellt. Der Thermostat schaltet den
Ausgang ab, wenn die Wassertemperatur 7 °C übersteigt.
© Danfoss | Produced by FEC | 2020.10 AN347136888492-010101 | 25
DE
Page 26

ECtemp Next Plus HW
14 Fehlercodes
Display Beschreibung
E1 Kurzschluss externer Fühler
E2 Offener Schaltkreis externer Fühler
E3 Temperatur über 70 °C erkannt
E4 Temperatur unter 0 °C erkannt
26 | © Danfoss | Produced by FEC | 2020.10 AN347136888492-010101
Page 27

ECtemp Next Plus HW
15 Die 5-Jahres-Garantie von Danfoss:
Sie haben ein Danfoss-Heizungssystem,
bei dem wir sicher sind, dass es den
Komfort und die Wirtschaftlichkeit Ihrer
Anwendung erhöhen wird.
Danfoss bietet hochwertige elektrische
Heizungslösungen für eine vollständige
Klimatisierungsregelung in und um
Eigenheime und Gebäude. Danfoss liefert
ein komplettes Produktprogramm mit
ECflex-Heizbändern oder ECmat-Heizmatten, ECtemp-Thermostaten, ECdry und
ECdry-Heizungssystemen, ECfast-Befestigungsstreifen und selbstbegrenzenden
Danfoss-Heizleitungen in Kombination mit
zusätzlichen Produkten, die das Produktprogramm vervollständigen.
Diese 5-Jahres-Garantie gilt für ECdryHeizmatten und selbstbegrenzende
Danfoss-Heizbändern, Anschlusseinheiten und den Danfoss-Crimpsatz für
selbstbegrenzende Heizleitungen.
Sollten Sie entgegen allen Erwartungen
bei Ihrem Danfoss-Produkt auf Probleme stoßen, gewährt Ihnen Danfoss ab
dem Kaufdatum eine 5-Jahres-Garantie
zu folgenden Bedingungen:
Während des Garantiezeitraums liefert
Danfoss ein neues vergleichbares
Produkt oder repariert das vorhandene
Produkt, sofern festgestellt wird, dass
dieses aufgrund der Ausführung, der
Materialien oder der Herstellung fehlerhaft ist. Reparatur oder Austausch erfolgen ausschließlich nach dem Ermessen
von Danfoss. Danfoss haftet nicht für
Folge- oder Nebenschäden einschließ-
© Danfoss | Produced by FEC | 2020.10 AN347136888492-010101 | 27
lich Schäden am Eigentum des Kunden
oder zusätzlichen Betriebskosten.
Die Garantie gilt nur dann, wenn das
GARANTIEZERTIFIKAT vollständig und
korrekt ausgefüllt wurde, der Defekt dem
entsprechenden Installateur oder Verkäufer unverzüglich gemeldet wurde und
ein Kaufnachweis vorliegt. Bitte beachten
Sie, dass das GARANTIEZERTIFIKAT auf
Englisch bzw. in der entsprechenden
Landessprache ausgefüllt werden muss.
Eine Verlängerung des Garantiezeitraums nach Reparaturen kann nicht
gewährt werden.
Die Danfoss-Garantie deckt keine Schäden ab, die aufgrund unzulässiger Betriebsbedingungen, falscher Installation
oder einer Installation durch einen nicht
autorisierten Elektriker verursacht werden. Alle Arbeiten werden vollständig
in Rechnung gestellt, falls festgestellt
wird, dass für Danfoss eine Prüfung oder
Reparatur von Defekten nötig wird,
die durch einen der oben genannten
Umstände verursacht wurden.
Die Danfoss-Garantie gilt nicht für Produkte, die nicht vollständig bezahlt wurden.
Danfoss wird jederzeit für eine schnelle
und effiziente Beantwortung aller
kundenseitigen Beanstandungen und
Anfragen sorgen.
Alle Beanstandungen, deren Ursache
eine der oben genannten Bedingungen
darstellt, sind ausdrücklich von dieser
Garantie ausgeschlossen.
DE
Page 28

ECtemp Next Plus HW
1 介绍
ECtemp Next Plus HW 是一款带有定时器的电子可编
程温控器,适用于控制生活热水温度。 此温控器只能
采用固定式安装,并且通过定时器和外部传感器功能,
可用于温度保持和军团菌缓解(55 °C 以上)。
• 正确接线至关重要。 接线之前,建议使用万用表
确定 L 与 N 线。
• 电线剥皮不易过长,以免裸露部分相接触或触及金
属 86 安装壁箱造成短路。
• 注意将房间温控器固定到壁箱的螺栓不要挤压或接
触电线, 以免电线破裂与螺栓造成短路。
• 宜在墙面装修后再安装房间温控器,以避免装修
粉尘或涂料从温控器顶部缝隙中进入温控器,损
坏 PCB。
• 继电器的最大负载为 <16 A(电阻性)或 <6 A(
感性)。 如果负载超过限值,则继电器将会受损。
• 请勿覆盖温控器,例如:将毛巾直接挂在温控器
上。
28 | © Danfoss | Produced by FEC | 2020.10 AN347136888492-010101
Page 29

ECtemp Next Plus HW
2 技术规格
特点 描述
认证 CE 标志,EN 60730
环境温度 0 至 45 °C
IP 防护等级 30
最大负载(感性) <6 A
最大负载(纯阻性) <16 A
地面温度传感器 在 25°C 时 NTC 电阻为
功耗 <2 W
电源 85-250 V AC,50/60 Hz
管道尺寸 86 × 86 × 13 mm,宽 ×
外部温度传感器范围 35 至 65 °C
外壳 ABS + PVC
控制精度 ±1 °C
最大电缆规格 1×4 mm²
防冻温度(单位为 °C) 5 °C
球压试验温度(单位为 °C) 75 °C
污染等级 2
© Danfoss | Produced by FEC | 2020.10 AN347136888492-010101 | 29
15 kOhm
高 × 深
墙体嵌入式 24.5 mm
CN
Page 30

ECtemp Next Plus HW
特点 描述
控制器类型 1C
软件等级 A
存储温度(单位为 °C) -10 至 +60 °C
防护等级 等级 II
重量 143 g
本产品符合以下“家用或类似用途的自动电控制器规范”
EN/IEC 标准,具有电气安全性和电磁兼容性:
• EN/IEC 60730-1(通用)
• EN/IEC 60730-2-9(温控器)
30 | © Danfoss | Produced by FEC | 2020.10 AN347136888492-010101
Page 31

ECtemp Next Plus HW
3 接线
• 外形尺寸,请见图 4
• 接线图,请见图 5(S1、S2: 地面传感器端子)。
• 完成接线,请见图 5。
86.0
86.0
50.0
50.0
24.513.0
图 4
85-250 Vac, 50/60 Hz
L
L(Load )
L N
Max. Load
16 A
N(Load )
N
S1
S2
图 5
© Danfoss | Produced by FEC | 2020.10 AN347136888492-010101 | 31
CN
Page 32

ECtemp Next Plus HW
4 安装步骤
可通过以下网址下载《用户指南》: heating.danfoss.com。
• 安装必须由专业的电工进行操作。
• 房间温控器安装高度应距地面约 1.5 米,并且应避
免受到日照、气流或者其他热源(如: 电视机)的
影响,请见图 1。
• 首先,小心拆下前盖,请见图 2。
• 先接线,然后固定后背板。 然后,将盖板安装到
背板上,请见图 3。
1.5 m
图1 图2
图 3
32 | © Danfoss | Produced by FEC | 2020.10 AN347136888492-010101
Page 33

ECtemp Next Plus HW
5 基本功能
• 地面温度设置和测量。
• 自动恢复、除霜(低温保护)。
• 时钟、定时器和 6 时间段编程。
• 工作模式选择。
• 键盘锁。
6 状态显示
• 温控器输出显示。
• 地面温度显示。
• 地面温度设置显示。
• 时钟显示。
• 低温保护显示。
• 工作模式选择显示。
7 工作
• 打开/关闭温控器: 按“ ”可打开,再次按“ ”可关
闭温控器及其输出。
• 设置温度: 按“ ”可降低温度,按“ ”可升高温度(
每按一次温度变化 0.5°C)。
• 工作模式选择: 当温控器打开时,按“ ”可选择不
同的工作模式,图标“ ”表示恒温器处于定时器模
式,图标“ ”表示编程模式,若未显示这两个图
标,表示处于手动模式。
© Danfoss | Produced by FEC | 2020.10 AN347136888492-010101 | 33
CN
Page 34

ECtemp Next Plus HW
• 加热设备控制: 当水温低于设定温度 2 度时,温
控器将打开加热设备,液晶显示屏将显示“ ”; 当
水温等于设定温度时,温控器将关闭加热设备。
图标“ ”将消失。
8 时钟设置
• 时钟设置: 按“ ”直到显示“hh:mm”和“hh”闪烁,
按“ ”或“ ”可调整小时,按“ ”,“mm”闪烁,按“
”或“ ”可调整分钟; 按“ ”,“周”闪烁,按“ ”
或“ ”可在周一至周日之间调整。
9 定时器编程
• 工作日设置: 当温控器处于“编程”模式时,第一个
时间段的设置: 按住“ ”5 秒,直到显示“周一 周
二 周三 周四 周五”且“hh:mm”和“hh”闪烁,按“ ”
或“ ”可调整第一时间段的小时; 按“ ”直到显
示“hh:mm”和“mm”闪烁,按“ ”或“ ”可调整第一
时间段的分钟; 按“ ”后,温度闪烁,数字为第一
时间段的设定温度 。 当设定温度低于 35°C 时,将
显示“关闭”。 使用上述方法,可在其他时间段设置
小时和分钟。 一旦每个时间段的设置时间超过
16:00,将切换到周末设置。
• 周末设置: “周六 周日”显示为周末设置,设置方
法与上述相同。
34 | © Danfoss | Produced by FEC | 2020.10 AN347136888492-010101
Page 35

ECtemp Next Plus HW
每个事件的默认设置值如下。
工作日/周末 时间
工作日(
开始时间 23:30 05:00 09:00 11:00 13:00 16:00
周一至周
温度 °C
五)
周末(
开始时间 23:30 05:00
周六-周
温度 °C
日)
段 1时间段 2时间段 3时间段 4时间段 5时间段 6
OFF 50 °C OFF OFF OFF 50 °C
OFF 50 °C
工作日: 周一 周二 周三 周四 周五;
休息日: 周六 周日
10 定时器设置
• 时间段设置: 当温控器处于“定时器”模式时,第一
个时间段的设置: 按住“ ”5 秒,直到显示“周一
周二 周三 周四 周五”且“hh:mm”和“hh”闪烁,按“
”或“ ”可调整第一时间段的小时; 按“ ”直到显
示“hh:mm”和“mm”闪烁,按“ ”或“ ”可调整第一
时间段的分钟; 按“ ”,温度闪烁,按“ ”或“ ”
可在打开和关闭之间切换。 使用上述方法,可在
其他时间段设置小时和分钟。
每个事件的默认设置值如下。
每天 时间段 1 时间段 2
每天
© Danfoss | Produced by FEC | 2020.10 AN347136888492-010101 | 35
开始时间 23:30 05:00
状态 OFF 开
CN
Page 36

ECtemp Next Plus HW
11 键盘锁
• 当温控器电源打开后,按“ ”按钮,然后同时按“
”,键盘将被锁定,以防有人操作。 显示屏将显
示“ ”,重复操作,该功能将被禁用。
12 重设
• 当温控器关闭后,按“ ”10 秒,以重置该值。 显
示屏显示所有图标,重设后,温控器将自动打
开。 重设操作包括编程默认值和定时器默认值。
13 防冻温度
• 当温控器关闭时,显示屏将显示“ ”,表示已启用
低温保护功能。 当水温低于 5°C 时,温控器将在
供暖模式下自动打开,同时“ ”显示并将与加热
设备连接; 当水温高于 7°C 时,温控器将关闭输
出。
36 | © Danfoss | Produced by FEC | 2020.10 AN347136888492-010101
Page 37

ECtemp Next Plus HW
14 错误代码
显示 描述
E1 短路外部传感器
E2 开路外部传感器
E3 检测到温度高于 70 °C
E4 检测到温度低于 0 °C
© Danfoss | Produced by FEC | 2020.10 AN347136888492-010101 | 37
CN
Page 38

ECtemp Next Plus HW
15 丹佛斯 5 年质保:
感谢您购买丹佛斯采暖系统。该系统
不仅为您带来更舒适的感受,而且还
经济实用。
丹佛斯为住宅和楼宇提供卓越的电采
暖解决方案,使您完全摆脱气候的
影响。 丹佛斯提供了一整套产品,
包括:ECflex 采暖电缆或 ECmat 加
热垫、ECtemp 温控器、ECdry 和
ECdry 采暖系统、ECfast 固定带、
丹佛斯自限式采暖电缆以及其他配
套产品。
5 年质保服务适用于 ECdry 加热垫、
丹佛斯自限温加热电缆、连接装置
以及用于自限温加热电缆的丹佛斯
固定装置。
如果您遇到丹佛斯产品问题,您可以
享受丹佛斯提供的自购买之日开始的
5 年质保服务:
如果产品在质保期内因设计、材料或
工艺缺陷而出现故障,丹佛斯将提供
新的对等产品或负责将产品修复。 是
修复还是更换,将由丹佛斯单方决
定。 丹佛斯不对任何附属损害或意外
损害负责,包括(但不限于)财产损
害或额外的公用事业费用。
必须符合以下条件,才能享受质保服
务:正确填写质保凭证;符合说明要
求;及时向安装厂商或销售商报告故
障;提供购买凭证。 请注意,质保凭
证须用英语或当地语言填写。
在根据质保协议执行修理之后,质保
期不予延长。
因不当使用、不当安装而导致的损
坏,或由未经授权电工执行的安装,
将不在丹佛斯的质保范围之列。 如
38 | © Danfoss | Produced by FEC | 2020.10 AN347136888492-010101
果请丹佛斯检查或修理源于上述任
何因素的故障,所有相关作业都将
全额收费。
尚未付清全款的设备不在丹佛斯质保
范围之列。
丹佛斯会随时对任何客户投诉和垂询
作出迅速有效的回应。
本质保服务不受理任何超出上述范
畴的要求。
Page 39

ECtemp Next Plus HW
© Danfoss | Produced by FEC | 2020.10 AN347136888492-010101 | 39
CN
Page 40

ECtemp Next Plus HW
1 Wprowadzenie
ECtemp Next Plus HW jest elektronicznym programowalnym
termostatem z zegarem służącym do regulacji temperatury ciepłej
wody użytkowej. Termostat przeznaczony jest wyłącznie do montażu
podtynkowego i może być używany zarówno do podtrzymywania
temperatury, jak i łagodzenia bakterii Legionella (powyżej 55 °C), dzięki
zastosowaniu wyłącznika czasowego i funkcji czujnika zewnętrznego.
• Prawidłowe wykonanie połączeń elektrycznych jest bardzo ważne.
Przed podłączeniem zalecane jest sprawdzenie przewodu fazowego i
zerowego za pomocą miernika elektrycznego.
• Nie wolno usuwać zbyt dużo izolacji z przewodu, gdyż może
dojść do zwarcia spowodowanego przez przewód dotykający
do obudowy metalowej o wielkości 86.
• Zabronione jest, aby śruba mocująca termostat do ściany
dociskała lub dotykała przewodu. Istnieje ryzyko zwarcia, jeśli
osłona izolacyjna zostanie uszkodzona przez wkręt i odsłonięty przewód zetknie się z wkrętem.
• Jeżeli ściany będą malowane, termostat pokojowy należy za-
montować po malowaniu tak, aby zanieczyszczenia lub farba
nie dostały się do jego wnętrza oraz nie uszkodziły obwodu
drukowanego.
• Maks. obciążenie przekaźnika to < 16 A (rezystancyjne) lub < 6 A
(indukcyjne). Jeżeli ograniczenie zostanie przekroczone przekaźnik ulegnie uszkodzeniu.
• Nie wolno zakrywać termostatu, na przyk ład przez powiesze-
nie na nim ręcznika.
40 | © Danfoss | Produced by FEC | 2020.10 AN347136888492-010101
Page 41

ECtemp Next Plus HW
2 Dane techniczne
Cecha Opis
Klasa metrologiczna Znak CE, EN60730
Temperatura otoczenia od 0 do 45 °C
Klasa IP 30
Maks. obciążenie indukcyjne < 6 A
Maks. obciążenie rezystancyjne < 16 A
Czujnik podłogowy NTC 15 kOhm w temp. 25 °C
Pobór mocy < 2 W
Zasilanie 85-250 V AC, 50/60 Hz
Wymiary 86 x 86 x 13 mm, S x W x G,
Zakres czujnika temp. zewnętrznej od 35 do 65 °C
Obudowa ABS + PVC
Histereza ±1 °C
Przewód zasilający (maks.) 1 x 4 mm²
Temperatura ochrony przeciwzamrożeniowej (w °C)
Wytrzymałość termoplastyczna (w °C)
Stopień zanieczyszczenia 2
Regulacja 1C
© Danfoss | Produced by FEC | 2020.10 AN347136888492-010101 | 41
podtynkowy 24,5 mm
5 °C
75 °C
PL
Page 42

ECtemp Next Plus HW
Cecha Opis
Klasa oprogramowania A
Temperatura przechowywania (w °C)
Stopień ochrony Klasa II
Masa 143 g
Bezpieczeństwo elektryczne i kompatybilność elektromagnetyczna
produktu są zgodne z normą EN/IEC „Automatyczne regulatory
elektryczne do użytku domowego i podobnego”:
• EN/IEC 60730-1 (Wymagania ogólne)
• EN/IEC 60730-2-9 (Termostaty)
42 | © Danfoss | Produced by FEC | 2020.10 AN347136888492-010101
od -10 do +60 °C
Page 43

ECtemp Next Plus HW
85-250 Vac, 50/60 Hz
3 Okablowanie
• Wymiary, patrz rys. 4
• Schemat połączeń elektrycznych, patrz rys. 5 (S1, S2: zaciski
czujnika podłogowego).
• Wykonać połączenia elektryczne, patrz rys. 5.
86.0
86.0
50.0
50.0
24.513.0
Rys. 4
L
L(Load )
N(Load )
L N
Max. Load
16 A
N
S1
S2
Rys. 5
© Danfoss | Produced by FEC | 2020.10 AN347136888492-010101 | 43
PL
Page 44

ECtemp Next Plus HW
4 Kroki instalacji
Instrukcję użytkownika można pobrać ze strony internetowej: www.
ogrzewanie.danfoss.pl
• Instalacja musi być wykonana przez licencjonowanego elektryka.
• Termostat z pomiarem temperatury powietrza powinien być
zainstalowany około 1,5 metra nad podłogą, w miejscu gdzie
nie padają promienie słoneczne, nie ma przeciągu lub innych
źródeł ciepła (np. telewizor), patrz rys. 1.
• W pierwszej kolejności, należy ostrożnie zdjąć frontową część
obudowy termostatu, patrz rys. 2.
• Podłączyć przewody a następnie zamocować czarną płytkę do
puszki podtynkowej używając dostarczonych śrub. Zamontować
frontową część obudowy termostatu na tylnej płytce, patrz rys. 3.
1.5 m
Rys. 1 Rys. 2
Rys. 3
44 | © Danfoss | Produced by FEC | 2020.10 AN347136888492-010101
Page 45

ECtemp Next Plus HW
5 Funkcje podstawowe
• Regulacja i pomiar temperatury podłogi.
• Autom. regeneracja, rozmrażanie (zabezpieczenie przed niską
temperaturą).
• Programowanie zegara, wyłącznika czasowego oraz 6 okresów.
• Wybór trybu pracy.
• Blokada klawiatury.
6 Wyświetlacz stanu
• Wyświetlacz wyjścia termostatu
• Wyświetlacz temperatury podłogi.
• Wyświetlacz ustawienia temperatury podłogi.
• Wyświetlacz zegara.
• Wyświetlacz ochrony przed niską temperaturą.
• Wyświetlacz wyboru trybu pracy.
© Danfoss | Produced by FEC | 2020.10 AN347136888492-010101 | 45
PL
Page 46

ECtemp Next Plus HW
7 Praca
• Termostat wł./wył.: Nacisnąć przycisk „ ”, aby włączyć,
następnie ponownie nacisnąć „ ”, aby wyłączyć termostat
oraz jego wyjście.
• Ustawianie temperatury: nacisnąć przycisk „ ”, aby zmniejszyć
temperaturę oraz „ ”, aby ją zwiększyć (każde naciśnięcie o
0,5 °C).
• Wybór trybu pracy: Po włączeniu termostatu należy nacisnąć
przycisk „ ”, aby wybrać inny tryb pracy. Ikona oznacza, że
termostat znajduje się w trybie sterowania czasowego, ikona „
” oznacza programowanie, brak tych dwóch ikon oznacza
tryb ręczny.
• Sterowanie sprzętem grzewczym: Termostat włączy urządzenie
grzewcze, kiedy temperatura wody jest o 2 stopnie niższa od
ustawionej, na wyświetlaczu LCD pojawi się komunikat „ ”.
Jeśli temperatura wody będzie równa nastawie, termostat
wyłącza urządzenie grzewcze. Ikona „ ” zniknie.
8 Ustawianie zegara
• Ustawianie zegara: Naciskaj przycisk „ ”, aż zacznie migać
„hh:mm” oraz „hh”, aby ustawić godzinę, naciskaj przycisk „
”/„ ”. Naciśnij „ ” — zacznie migać „mm”, aby ustawić
minuty naciskaj „ ” lub „ ”. Naciśnij prz ycisk „ ”
— zacznie migać „week” (tydzień), naciskaj „ ” lub „ ”, aby
ustawić dzień tygodnia.
46 | © Danfoss | Produced by FEC | 2020.10 AN347136888492-010101
Page 47

ECtemp Next Plus HW
9 Programowanie zegara
• Ustawienie dla dni roboczych: Po ustawieniu termostatu w tryb
programowania, pierwszy okres: nacisnąć i przytrzymać „ ”
przez 5 sekund, aż na wyświetlaczu pojawią się symbole „Mo Tu We
Th Fr;” oraz migają „hh:mm” oraz „hh”; nacisnąć „ ” lub „ ”, aby
ustawić godzinę w pierwszym okresie; naciskać „ ” do momentu
wyświetlenia „hh:mm” oraz „mm”, następnie nacisnąć „ ” lub „
”, aby ustawić minuty w pier wszym okresie; nacisnąć przycisk „ ”,
zacznie migać temperatura, a cyfra oznacza ustawioną
temperaturę pierwszego okresu. Jeśli ustawiona temperatura jest
niższa niż 35 °C, zostanie wyświetlony komunikat „OFF” (WYŁ.). Za
pomocą powyższej metody można ustawić godziny oraz minuty w
innych okresach. Po godzinie 16:00 w każdym okresie następuje
przełączenie do ustawienia weekendu.
• Ustawienie weekendu: „Sa Su” oznacza ustawienie weekendowe, a metoda ustawień jest taka sama.
Domyślna wartość ustawienia przy każdym zdarzeniu jest następująca.
Dzień powszedni/weekend Okr. 1 Okr. 2 Okr. 3 Okr. 4 Okr. 5 Okr. 6
Dzień
powszedni
(Mo-Fr)
Weekend
(Sa-Su)
Dzień roboczy: Mon Tue Wed Thu Fri (Pon Wt Śr Czw Pt);
Dzień wolny: Sat Sun (Sob Niedz)
© Danfoss | Produced by FEC | 2020.10 AN347136888492-010101 | 47
Początek 23:30 05:00 09:00 11:00 13:00 16:00
temp. °C
Początek 23:30 05:00
temp. °C WYŁ. 50°C
WYŁ. 50°C WYŁ. WYŁ. WYŁ. 50°C
PL
Page 48

ECtemp Next Plus HW
10 Ustawianie timera
• Ustawienie okresu: Po ustawieniu termostatu w tryb timera,
pierwszy okres: nacisnąć i przytrz ymać „ ” przez 5 sekund,
aż na wyświetlaczu pojawią się symbole „Mo Tu We Th Fr Sa
Su” oraz migają „hh:mm” oraz „hh”; nacisnąć „ ” lub „ ”, aby
ustawić godzinę w pierwszym okresie; naciskać „ ” do
momentu wyświetlenia „hh:mm” oraz „mm”, następnie
nacisnąć „ ” lub „ ”, aby ustawić minuty w pierwszym
okresie; nacisnąć przycisk „ ”, zacznie migać temperatura, a
następnie pr zycisk „ ” lub „ ”, aby przełączyć pomiędzy
ON (WŁ.) oraz OFF (WYŁ.). Za pomocą powyższej metody
można ustawić godziny oraz minuty w innych okresach.
Domyślna wartość ustawienia przy każdym zdarzeniu jest
następująca.
Każdego dnia Okres 1 Okres 2
Każdego
dnia
48 | © Danfoss | Produced by FEC | 2020.10 AN347136888492-010101
Początek 23:30 05:00
Status WYŁ. WŁ.
Page 49

ECtemp Next Plus HW
11 Blokada klawiatury
• Gdy termostat jest włączony, aby zablokować klawiaturę
nacisnąć jednocześnie przycisk „ ” oraz „ ”. Na
wyświetlaczu pojawi się „ ”, powtórzyć operację, a funkcja
zostanie wyłączona.
12 Resetowanie
• Po wyłączeniu termostatu nacisnąć przycisk „ ” i
przytrzymać go przez 10 sekund. Na wyświetlaczu pojawiają
się wszystkie ikony, po zresetowaniu termostat włączy się
automatycznie. Resetowanie obejmuje programowane
wartości domyślne oraz wartości domyślne timera.
13 Temperatura ochrony przeciwzamrożeniowej
• Kiedy termostat jest wyłączony, na wyświetlaczu pojawia się
komunikat „ ”, oznacza to, że funkcja zabezpieczenia przed
niską temperaturą jest włączona. Jeśli temperatura wody będzie
niższa niż 5 °C, automatycznie włączy się tryb ogrzewania z
oznaczeniem „ ” oraz termostat połączy się z urządzeniami
grzejnymi; termostat wyłączy wyjście, gdy temperatura wody
przekroczy 7 °C.
© Danfoss | Produced by FEC | 2020.10 AN347136888492-010101 | 49
PL
Page 50

ECtemp Next Plus HW
14 Kody błędów
Wyświetlacz Opis
E1 Zwarcie czujnika zewnętrznego
E2 Otwarty obwód czujnika zewnętrznego
E3 Wykryta temperatura powyżej 70 °C
E4 Wykryta temperatura poniżej 0 °C
50 | © Danfoss | Produced by FEC | 2020.10 AN347136888492-010101
Page 51

ECtemp Next Plus HW
15 5-letnia gwarancja firmy Danfoss:
Zakupiliście Państwo układ grzejny
Danfoss. Jesteśmy pewni, że za jego
pomocą poprawi się komfort i ekonomiczność Państwa aplikacji.
Danfoss zapewnia doskonałe elektryczne rozwiązania grzewcze do całkowitej
kontroli temperatury wewnątrz i na
zewnątrz budynków oraz domów.
Danfoss oferuje kompleksowy program
produktów, obejmujący kable grzejne
ECflex i maty grzejne ECmat, termostaty
ECtemp, ECdry i układy grzejne ECdry,
opaski mocujące ECfast oraz samoograniczające kable grzejne Danfoss, które w
połączeniu z dodatkowymi produktami
tworzą kompletną ofertę.
Niniejsza 5-letnia gwarancja obejmuje
maty grzejne ECdry oraz samoograniczające kable grzejne Danfoss, zespoły przyłączeniowe i zestaw zaciskarki Danfoss do
samoograniczających kabli grzejnych.
Jeżeli pomimo wszelkich oczekiwań,
będą Państwo mieli problem z zakupionym produktem Danfoss, oferujemy
5-letnią gwarancję, rozpoczynającą się
z dniem zakupu. Gwarancja regulowana jest poniższymi warunkami:
Danfoss dostarczy nowy produkt o
porównywalnych parametrach, lub naprawi produkt reklamowany w okresie
obowiązywania gwarancji, jeżeli stwierdzi się jego wady wynikające z błędów
konstrukcyjnych, materiałowych lub
wykonania. Naprawa lub wymiana jest
przeprowadzana wyłącznie według
uznania Danfoss. Danfoss nie ponosi
© Danfoss | Produced by FEC | 2020.10 AN347136888492-010101 | 51
żadnej odpowiedzialności za szkody
wtórne bądź uboczne, obejmujące
m.in. szkody na mieniu, lub wyższe
koszty mediów użytkowych.
Gwarancję uznaje się za ważną
wyłącznie wówczas, gdy CERTYFIKAT
GWARANCYJNY został wypełniony
prawidłowo i zgodnie z instrukcją, a także
wówczas, gdy usterka zostanie zgłoszona
instalatorowi lub sprzedawcy w trybie
natychmiastowym wraz z dowodem
zakupu. Należy pamiętać, aby wypełnić
GWARANCJĘ w języku angielskim lub w
języku urzędowym w Państwa kraju.
Gwarancja nie ulega przedłużeniu w
razie naprawy produktu.
Gwarancja Danfoss nie obejmuje
szkód spowodowanych niewłaściwymi
warunkami użytkowania, niewłaściwą
instalacją, lub instalacją wykonaną przez
elektryków nieposiadających uprawnień.
Sprawdzenie lub usunięcie przez
Danfoss usterek wynikłych z powyższych
przyczyn jest w pełni odpłatne.
Gwarancja Danfoss nie jest udzielana
na sprzęt, za który nie uiszczono pełnej
zapłaty.
Danfoss zapewnia szybką i skuteczną
reakcję na wszelkie reklamacje i pytania
ze strony klientów.
Gwarancja nie uwzględnia wszelkich
roszczeń i reklamacji poza wymienionymi w powyższych warunkach.
PL
Page 52

ECtemp Next Plus HW
Danfoss A/S
Nordborgvej 81
6430 Nordborg, Syddanmark
Denmark
AN347136888492-010101
© Danfoss | Produced by FEC | 2020.10
 Loading...