

Page 1
DakStats Webcast Setup Guide 1 of 2
201 Daktronics Drive PO Box 5128, Brookings, SD 57006-5128
Tel: 1-800-DAKTRONICS (1-800-325-8766) Fax: 605-697-4746
Web: www.daktronics.com/support
ED-17019 Rev 3
24 May 2013
This section is intended for
Website Administrators
This document will assist in setting up the DakStats Webcast. The first
section is to help computing services or network admin individuals setup
your website for the DakStats Webcast. The second section will assist with
Webcasting during a game.
C.
DakStats Webcasting – Server Setup
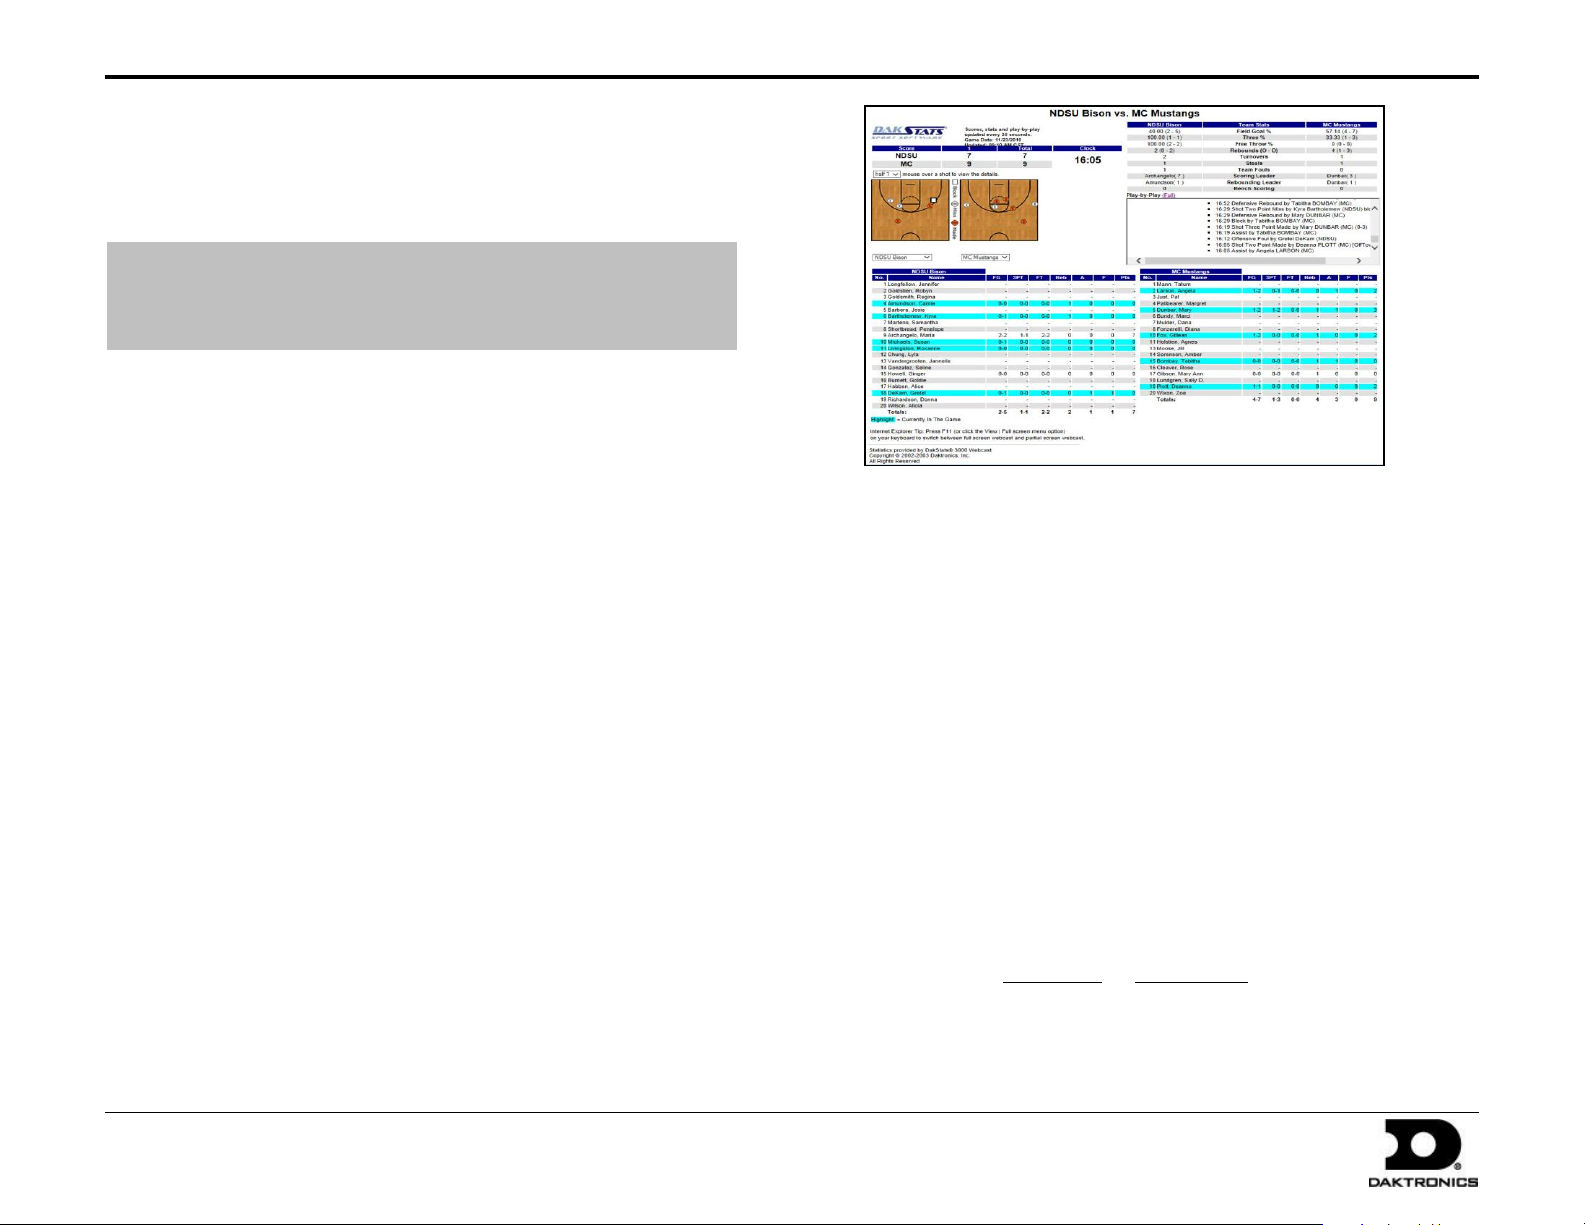
When the DakStats Webcast is started, it will first upload some small
graphics and then the HTML files that contain the statistical information.
The HTML files will be updated with the latest data every 30 seconds.
In order to use the Webcast, you must allow files to be uploaded using FTP
or HTTP PUTs. If available, the HTTP PUT method is recommended.
Using FTP:
The user will require a URL for uploading files, a username, and a password.
URL is the absolute path to the FTP directory; avoid using virtual
directories in the URL.
Example: If you want to FTP files to the server directory
“C:\Inetpub\wwwroot\www\athletics\Webcast\” with a virtual
directory, ftp://ftp.myschoolname.com/webcast, the absolute path
would be: ftp://ftp.myschoolname.com/www/athletics/webcast
The user will also require a URL to view the information
Example: http://www.myschoolname.com/athletics/webcast
Using HTTP PUT in IIS
The setup is different if you are running Apache or other servers.
Refer to your server documentation for any special information on
the HTTP PUT command. The following instructions are for servers
running Internet Information Server (IIS).
The user will require a URL, a username, and a password.
The URL is the directory where you will be uploading the
files. The directory referred to in the URL must have WRITE
permission set. (For IIS 4.0, this is configurable via Directory
Properties in MMC).
Example: http://www.myschoolname.com/athletics/webcast
Webcasting to a local or network directory
It is also possible to Webcast to a local or network directory.
When entering the URL in DakStats, use the following:
file:\\”Drive Letter”|“directory path”
Example: “file:\\c|\webcast\Basketball”
Note: You must use a | in the file path instead of a colon.
Page 2
DakStats Webcast Setup Guide 2 of 2
201 Daktronics Drive PO Box 5128, Brookings, SD 57006-5128
Tel: 1-800-DAKTRONICS (1-800-325-8766) Fax: 605-697-4746
Web: www.daktronics.com/support
ED-17019 Rev 3
24 May 2013
Steps 5 and 6 mentioned an index page. The index makes it easier to link
to your webcasts. To view a Webcast index, open your browser and enter
the URL provided by your network administrator to view the Webcast.
At the end of the URL, enter the filename of the index as follows:
http://”www.daktronics.com/webcast/””your season name”.htm
Where “www.daktronics.com/webcast/” is your URL and ”your season name”
is the exact name of your season in DakStats, including spaces.
Ex: http://www.daktronics.com/webcast/2012SDSUMen.htm
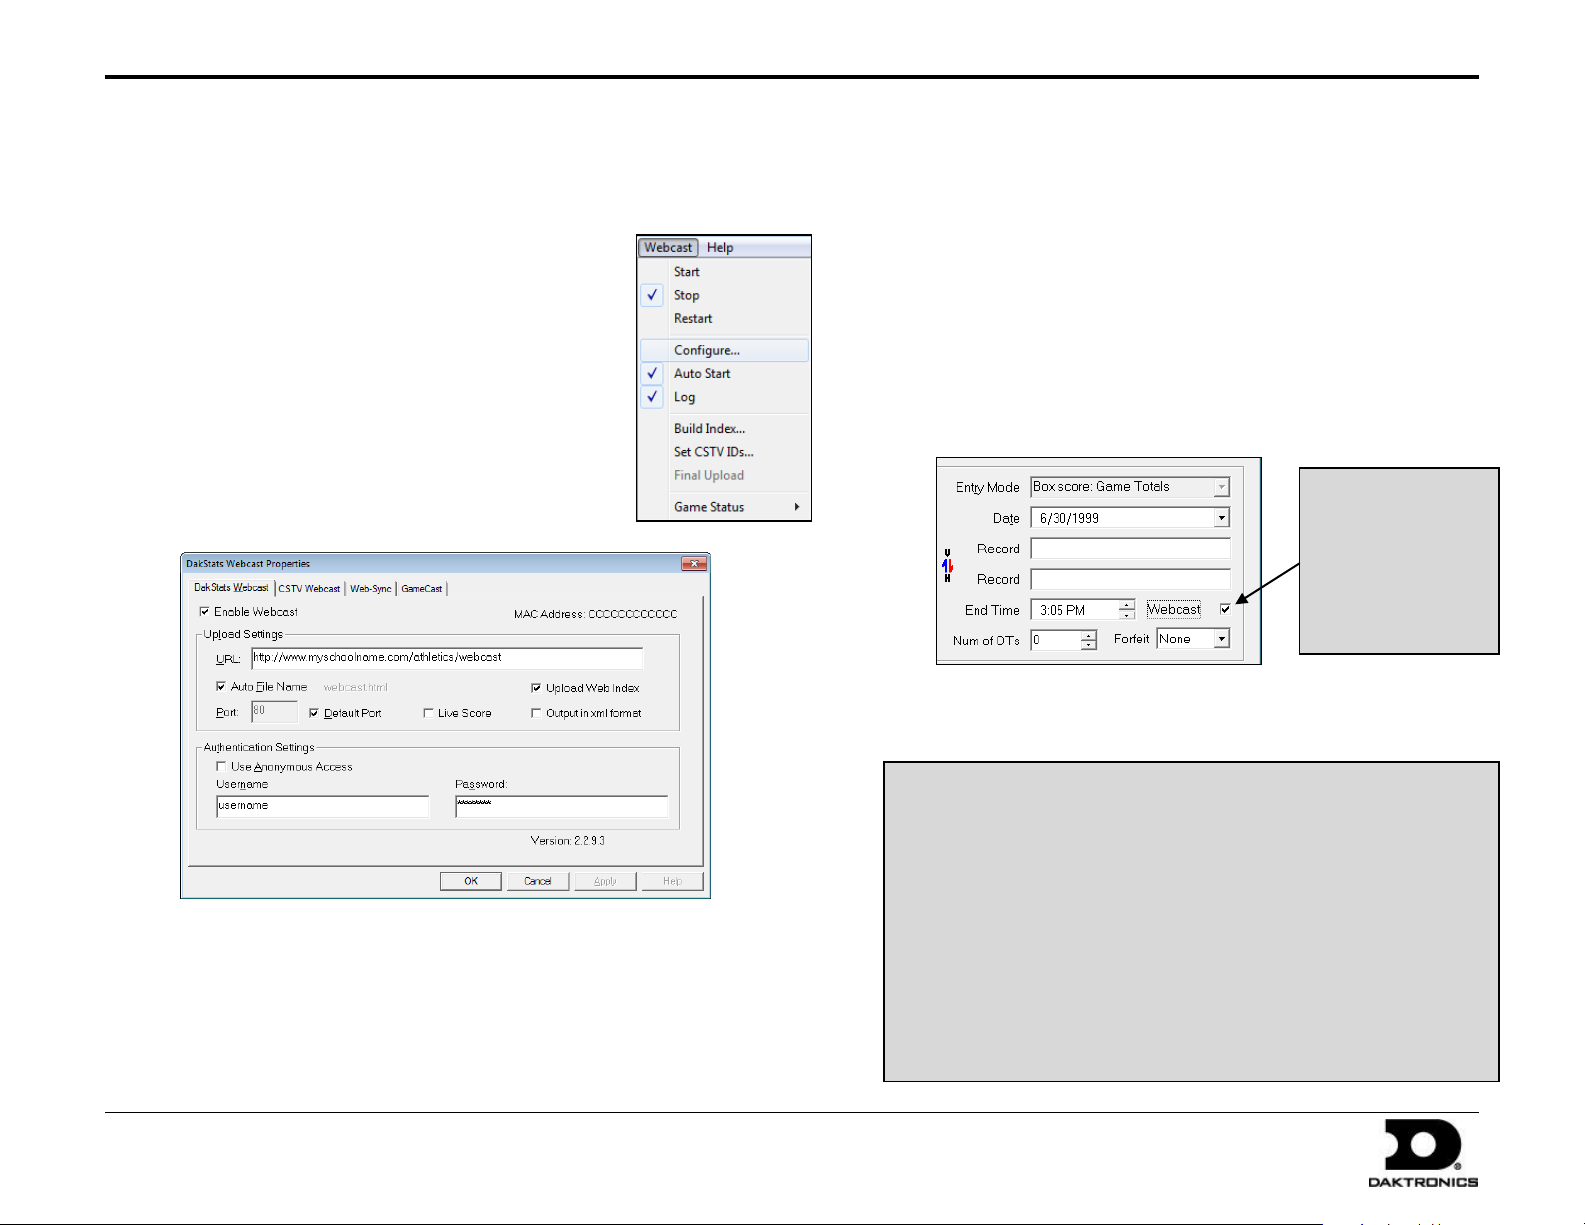
Note: When creating
new games, check
Webcast. DakStats
will then include this
game in your
Webcast index.
DakStats Setup and Game Operation
This section will assist you in setting up DakStats to Webcast your games.
Setup will only need to be done once. Once setup is completed, you will
simply be able to start new games and begin webcasting.
First Time Installation Steps
1. Install DakStats software (refer to software
manual for more information about the
installation procedure).
2. Request a URL, username, and password for
your Webcast from your Internet service
provider or network administrator.
3. Open DakStats and go to Webcast > Auto Start.
4. Go to Webcast > Configure.
5. Click Enable Webcast and enter the appropriate
Webcast settings:
Upload Web Index: (recommended) DakStats will create
an index of all your webcasts and update it every time
you start the Webcast.
Default Port: (recommended) Allows you to change the
port being used. Leave this box checked unless told
differently by your network administrator.
Live Score: (optional) When checked, DakStats will post
a game summary XML file along with your game files.
Output in xml format: (not recommended) When checked
your webcasts will be posted in XML instead of HTML.
6. Create and open a new play-by-play game. Click Yes when
prompted to start webcasting.
URL: (required) The upload URL provided by your network
administrator or service provider
Auto File Name: (recommended) Check the box if you want
DakStats to name the files for you. If you do not check this box,
you must add a filename at the end of the URL.
Example: http://www.myschoolname.com/athletics/webcast.html
7. Start entering statistics in the DakStats software as usual.
** Repeat steps 6 & 7 during normal game operation.
 Loading...