

Page 1

DakStats Basketball Software
Installation & Operation Manual
ED-18169 Rev 6 – 12 December 2012
201 Daktronics Drive PO Box 5128 Brookings, SD 57006-5128
Tel: 1-800-DAKTRONICS (1-800-325-8766) Fax: 605-697-4746
www.daktronics.com/support
Page 2

ED-18169
Product 1149
Rev 6 – 12 December 2012
DAKTRONICS, INC.
Copyright 2009-2012
All rights reserved. While every precaution has been taken in the preparation of this manual, the publisher
assumes no responsibility for errors or omissions. No part of this book covered by the copyrights hereon may be
reproduced or copied in any form or by any means – graphic, electronic or mechanical, including photocopying,
taping or information storage and retrieval systems – without written permission of the publisher.
All Sport®, DakStats®, Venus®, and Web-Sync® are trademarks of Daktronics, Inc. All other trademarks used in this manual are
property of their respective owners.
Page 3

Table of Contents
Table of Contents .................................................................................................................................. i
Section 1: Introduction ................................................................................................................. 1
1.1 System Requirements ............................................................................................................. 1
1.2 Levels of Play ........................................................................................................................... 1
1.3 Software Conventions ............................................................................................................ 2
Section 2: Installation ................................................................................................................... 3
2.1 Installation ............................................................................................................................... 3
Downloading from the Internet ..................................................................................... 3
Installing from the Installation CD ................................................................................ 3
2.2 Season Update ......................................................................................................................... 3
Section 3: Initial Setup ................................................................................................................. 5
3.1 Splash Screen ........................................................................................................................... 5
Season ................................................................................................................................ 5
Team .................................................................................................................................. 5
Roster ................................................................................................................................. 6
Schedule ............................................................................................................................ 6
Web-Sync .......................................................................................................................... 6
Common Tasks ................................................................................................................. 6
3.2 Creating a Season .................................................................................................................... 6
3.3 Configure Teams ..................................................................................................................... 8
Adding a Team ................................................................................................................. 8
To Manually Add a New Team .............................................................................. 8
To Add a New Team Via List .................................................................................. 9
To Import a Team ..................................................................................................... 9
Editing a Team ................................................................................................................. 9
3.4 Adding or Editing Rosters ................................................................................................... 10
Adding Players to a Roster ........................................................................................... 10
Deleting and Editing Players ........................................................................................ 10
3.5 Creating New Games ........................................................................................................... 11
To Create a New Game ................................................................................................. 11
Section 4: Pregame Setup ......................................................................................................... 13
4.1 Before Game Time ................................................................................................................. 13
Be Familiar with the Program ...................................................................................... 13
Have a Good Spotter ..................................................................................................... 13
4.2 Beginning the Game ............................................................................................................. 13
Section 5: In Game Operations ................................................................................................. 15
5.1 Main Toolbar ......................................................................................................................... 15
5.2 Play by Play Mode ................................................................................................................ 16
Game in Progress Scoreboard ...................................................................................... 17
Entering Starters ............................................................................................................. 17
Entering Shots ................................................................................................................ 18
Entering Shots on the Court .................................................................................. 18
Made Shots ................................................................................................ 18
Missed Shots.............................................................................................. 18
Entering Shots with Player Information .............................................................. 18
Table of Contents i
Page 4

Entering Rebounds ........................................................................................................ 19
Entering Fouls ................................................................................................................ 19
Foul on a Made Shot ............................................................................................... 19
Foul During Game Play ......................................................................................... 20
Entering Steals ................................................................................................................ 20
Entering Free Throws .................................................................................................... 21
Entering a Jump Ball ...................................................................................................... 22
Entering Substitutions ................................................................................................... 22
Right-Click the Roster ............................................................................................ 22
Right-Click the Player Number ............................................................................ 23
Select the Substitution Tab or Sub Button ........................................................... 23
Mass Substitutions ......................................................................................................... 24
Right-Clicking the Team Name ............................................................................ 24
Clicking the Mass Substitution Button ................................................................ 24
5.3 Edit Menu ............................................................................................................................... 24
Manually Adding and Inserting Plays ........................................................................ 24
Deleting Plays ................................................................................................................. 25
Inserting Periods ............................................................................................................ 25
Deleting Periods ............................................................................................................. 25
Add or Edit Play Commentary .................................................................................... 25
Rebuild Stats ................................................................................................................... 25
Check for Errors ............................................................................................................. 25
5.4 Game Control Menu ............................................................................................................. 26
Start Next Period ............................................................................................................ 26
Game Finished ................................................................................................................ 26
Update Team Win/Loss Records and Duration ................................................. 26
Substitutions ................................................................................................................... 26
Mass Substitutions ......................................................................................................... 26
Balance Stats ................................................................................................................... 27
Swap Teams .................................................................................................................... 27
Timeouts .......................................................................................................................... 27
Toggle Active Team ....................................................................................................... 27
Toggle Rebound Team .................................................................................................. 27
Export Game as XML File ............................................................................................. 27
Export Package ............................................................................................................... 27
Analyze Game ................................................................................................................ 27
5.5 View Menu ............................................................................................................................. 28
Toolbars ........................................................................................................................... 28
Entry Modes.................................................................................................................... 28
GIP Data & Shot Chart .................................................................................................. 28
Rosters & Statistics ......................................................................................................... 28
5.6 Two-Click Mode .................................................................................................................... 29
Entering Starters/Subs .................................................................................................. 29
Suggested Plays .............................................................................................................. 30
Entering Shots................................................................................................................. 30
Entering Blocks ............................................................................................................... 30
Entering Turnovers ........................................................................................................ 31
Entering Steals ................................................................................................................ 31
Entering Fouls ................................................................................................................ 31
Entering Free Throws .................................................................................................... 31
Onscreen Scoreboard ..................................................................................................... 32
Game Clock .............................................................................................................. 32
Team Scores ............................................................................................................. 32
ii Table of Contents
Page 5

Timeouts .................................................................................................................. 32
Roster List ....................................................................................................................... 32
Play-by-Play Script ........................................................................................................ 33
Editing Plays ............................................................................................................ 33
Inserting Plays ......................................................................................................... 33
Deleting Plays.......................................................................................................... 33
Moving Plays ........................................................................................................... 33
Insert Period ............................................................................................................ 34
Add/Edit Play Commentary ................................................................................ 34
Two-Click Edit Menu .................................................................................................... 34
Rebuild Stats ............................................................................................................ 34
Delete Last Play ....................................................................................................... 34
Team Button Colors ................................................................................................ 34
Two-Click Game Control Menu................................................................................... 35
Start Next Period ..................................................................................................... 35
Game Finished ........................................................................................................ 35
Timeout .................................................................................................................... 35
Balance ..................................................................................................................... 35
Swap Teams ............................................................................................................. 35
Shot Chart Refresh .................................................................................................. 35
Prompt Block Last ................................................................................................... 35
Two-Click View Menu .................................................................................................. 36
Keystroke Entry ............................................................................................................. 36
5.7 Box Mode ............................................................................................................................... 37
Entering Scores & Statistics .......................................................................................... 37
Entering Technicals ....................................................................................................... 38
Section 6: Creating Reports ...................................................................................................... 39
6.1 In-Game Reports ................................................................................................................... 39
6.2 Shot Chart Printouts ............................................................................................................. 39
6.3 Season Reports ...................................................................................................................... 40
Printing Conference Season Reports ........................................................................... 42
Creating Collections ...................................................................................................... 42
6.4 Print Career Reports ............................................................................................................. 43
6.5 Lineup Analysis Reports ...................................................................................................... 44
Analyzing Games ........................................................................................................... 44
Creating a Lineup Analysis Report ............................................................................. 44
Types of Lineup Analysis Reports (Groups) .............................................................. 45
Overall Efficiency.................................................................................................... 46
Best Lineup .............................................................................................................. 46
Most Productive Offense ....................................................................................... 46
Most Used Lineup .................................................................................................. 46
Best Free Throw Shooting ...................................................................................... 46
Best 3pt Shooting .................................................................................................... 47
Most Productive Rebounding ............................................................................... 47
Most Efficient Rebounding .................................................................................... 47
Best Offensive/Defensive Rebounding ............................................................... 47
2nd Chance Scoring ................................................................................................ 47
Points in Paint ......................................................................................................... 48
Defense - Best Lineup ............................................................................................. 48
Defense - Most Efficient Lineup ........................................................................... 48
Defense - Most Used Lineup ................................................................................. 48
Defense - Best Against 3pt % ................................................................................. 48
Table of Contents iii
Page 6

Defense - Most Efficient to Force TO .................................................................... 49
Defense - Best Against Pts in Paint ....................................................................... 49
Customize ....................................................................................................................... 49
Using a Lineup Analysis Report .................................................................................. 49
Player Comparisons ............................................................................................... 49
Situational Comparisons ........................................................................................ 50
6.6 Roster Printouts ..................................................................................................................... 51
Section 7: Importing & Exporting .............................................................................................. 53
7.1 Importing Games .................................................................................................................. 53
7.2 Exporting Games ................................................................................................................... 54
7.3 Exporting Season Statistics .................................................................................................. 55
7.4 Importing Teams ................................................................................................................... 56
7.5 Exporting Teams ................................................................................................................... 56
7.6 Exporting Games as XML Files ........................................................................................... 56
Section 8: Additional Features & Settings ................................................................................ 57
8.1 Season and System Preferences ........................................................................................... 57
Seasons ............................................................................................................................ 57
Tournaments ................................................................................................................... 57
To Add a Tournament ............................................................................................ 57
To Delete a Tournament ........................................................................................ 57
Utilities ............................................................................................................................ 58
8.2 Rules ........................................................................................................................................ 58
8.3 Configuring DakStats Basketball ........................................................................................ 59
Modifying Games .......................................................................................................... 59
Configuring Conferences .............................................................................................. 60
To Create a New Conference ................................................................................. 60
To Configure a Conference .................................................................................... 60
To Delete a Conference .......................................................................................... 60
Configurations ................................................................................................................ 61
8.4 Play Entry Button Colors ..................................................................................................... 61
8.5 Team Button Colors .............................................................................................................. 62
8.6 Auto Start Options ................................................................................................................ 62
8.7 Messaging .............................................................................................................................. 63
8.8 Quick Display ........................................................................................................................ 63
8.9 Enhanced Stats ....................................................................................................................... 64
8.10 Webcast ................................................................................................................................... 64
8.11 GameCast ............................................................................................................................... 64
8.12 Web-Sync ................................................................................................................................ 65
8.13 Twitter .................................................................................................................................... 65
Configuration ................................................................................................................. 66
Template................................................................................................................... 66
Credentials ............................................................................................................... 67
Section 9: Using the Keyboard & Hotkeys ............................................................................... 69
Section 10: Contact Information .................................................................................................. 71
Index . ................................................................................................................................... 73
Appendix A: DakStats Basketball Stat Sheet ............................................................................... 77
Appendix B: Supplemental Guides & Manuals ............................................................................ 79
iv Table of Contents
Page 7

Section 1: Introduction
The purpose of this manual is to assist users with the installation and operation of the DakStats®
Basketball application. The manual includes the following main sections:
Introduction covers the basic information about the program and this manual. Take time to
read the introduction as it defines terms and explains concepts used throughout the manual.
Installation describes the software installation procedures.
Initial Setup, Pregame Setup, In Game Operations, Creating Reports, Importing &
Exporting, Additional Features & Settings, and Using the Keyboard & Hotkeys explain
how to control and configure the application.
Contact Information offers details about who to contact for help.
Index presents an alphabetical listing of important terms and processes.
Appendix contains supplemental information about or for the application.
Daktronics identifies manuals by an ED or DD number located on the cover page of each manual.
Any manuals referenced in this document will be identified by its ED/DD number. For example, this
manual would be referred to as ED18169.
1.1 System Requirements
The DakStats Basketball application has the following recommended requirements:
Windows
CPU: 1.0 GHz or faster
Video: 1024 x 768 resolution
Internet Explorer
Memory: 512 MB or more of RAM
®
XP or higher
®
6.0 or higher
1.2 Levels of Play
DakStats Basketball can be used at any level of competition including games, tournaments,
and season statistics for club, high school, college or professional teams. The software is
available with four main entry modes:
Box supports the box statistics entry mode (post game stats entry).
Box Plus includes conferencing features and Web-Sync with the standard Box version.
Play-by-Play has all the features of the previous two plus the ability to enter stats
live during competitions.
Two-Click is a simplified play-by-play mode targeted toward the high school level
that allows operators to click a stat and then click a player.
Introduction 1
Page 8

Bold
Indicates an item that requires direct action, such as clicking, pressing,
selecting or formatting.
Italics
Indicates onscreen text or labels that are not clickable.
Bold Italics
Used to reference items within the manual, such as figures or sections, as
well as other documents and important notes.
[X]
Represents a keyboard key that needs to be pressed.
“Quotes”
Text or commands that may be typed. Quotes also indicate folder names.
Click
Press and release the left mouse button.
Double-click
Press and release the left mouse button twice.
Right-click
Press and release the right mouse button.
Select
Highlight or mark, such as by placing a check mark in a nearby box;
clicking will not necessarily perform an action.
>
Followed by (ex. File > Open).
1.3 Software Conventions
This manual contains the following software conventions and terminology:
2 Introduction
Page 9

Section 2: Installation
Figure 1: Desktop Icon
2.1 Installation
The DakStats Basketball application can be downloaded from the Internet or installed from
an installation CD.
Downloading from the Internet
1. Download the DakStats Basketball program.
a. Open an Internet browser.
b. Type www.dakstats.com/download.html in the address bar.
c. Find the Basketball row on the web page.
d. Click on Click Here under the Download column.
e. In the window that appears, click Run. If an additional window opens, click
Run once more.
2. Follow the onscreen instructions.
3. Click Finish when done.
4. Double-click the desktop icon (Figure 1) to open the program.
Installing from the Installation CD
1. Insert the installation CD.
2. Choose the DakStats Basketball program to install.
3. Follow the onscreen instructions.
4. Click Finish when done.
5. Double-click the desktop icon (Figure 1) to open the program.
2.2 Season Update
If previous seasons are saved to the computer, go to Configure > Season & System
Preferences. Select each existing season, and then click Update. This ensures older season
databases are compatible with the latest software version.
Installation 3
Page 10

Page 11

Section 3: Initial Setup
Figure 2: Splash Screen
The season, teams, rosters, and other game information must first be set up before users can use the
DakStats Basketball application for scores and statistics. Users can set up the entire season and all of
the teams before the first game of the season even begins. It is recommended that games are set up at
least one hour before the game start time.
3.1 Splash Screen
When the DakStats Basketball program is first opened, users are greeted by the splash screen
(Figure 2). Here users may select seasons, games, and rosters to configure as well as
open/import/export games, print detailed reports, and begin Web-Syncing.
Initial Setup 5
Note: This section gives only a brief explanation of the buttons on this screen.
Each function is also available in the File and/or Configure menus at the top of the
screen, and they are described in the sections or documents denoted in parentheses.
Season
Use the drop-down list to select a previously created season (Section 3.2). Click Configure to
edit the season settings (Section 8.1).Click Set as Default Season to keep the same season
selected each time the program is opened.
Team
After selecting a season, select previously created team. Click Configure to edit the team
settings (Section 3.3). Click Set as Default Team to keep the same season and team selected
each time the program is opened.
Note: The default team may also be assigned in the season configuration (Section 8.1).
Page 12

Figure 3: System Preferences
Roster
After selecting the appropriate season and team, the roster will appear in this area if one has
already been created (Section 3.4).
Double-click a player in the roster, or click Configure to edit the roster settings.
Click Download Roster to get a team’s latest roster for those using DakStats Web-
Sync. Refer to the DakStats Web-Sync Guide (ED-14571) for instructions on setting
up the Web-Sync service.
Schedule
This area lists all scheduled games for a selected season.
Select a game on the list and click Open, or double-click the game to begin entering
scores and stats for that game.
Select a game and click Configure to edit the game settings.
Click Add New to create a new game for the season (Section 3.5).
Web-Sync
Select a user Profile, type in the Password, and click Sync to begin the Web-Sync. Refer to the
DakStats Web-Sync Guide (ED-14571) for instructions on setting up the Web-Sync service.
Common Tasks
This area includes additional frequently used commands.
Print Season Reports: Click to generate a wide variety of printouts (Section 6.3).
Lineup Reports: Click to generate lineup analysis reports (Section 6.5).
Import Game: Click to import a game file (Section 7.1).
Export Game: Click to export a game file (Section 7.2).
3.2 Creating a Season
The first step to set up the DakStats Basketball program is creating the season in which the
games will be played. By default a “Demo” season exists in the “Seasons” file, but users
should create their own seasons for all future games.
To create a season:
1. Go to Configure > Season and System Preferences (Figure 3).
6 Initial Setup
Page 13

2. In the System Preferences window, click Add.
Figure 4: Creating a New Season
3. In the New Season window (Figure 4), type in the Season Title.
4. Select the Default Play Entry Mode:
Box Score: Game Totals: All game total statistics are entered after the game
is completed.
Box Score: Period by Period: Game statistics are entered for each period
after the game is completed.
Play by Play: Simple mode: Statistics are entered as the game is played,
down to each individual play.
Two-Click mode: Statistics are entered as the game is played, first by
clicking a stat, and then the player to give the stat.
5. Select the Rules File:
Rules HS: Rules set for high schools
Rules NBA: Rules set for NBA teams
Rules NCAA: Rules set for NCAA teams
Rules WNCAA: Rules set for NCAA women’s teams
Note: Refer to Section 8.2 for more information about rules configuration.
6. Select the Default Gender, either Male or Female.
Note: Default Team is only selectable when editing the season. Refer to Section 8.1.
7. Click OK.
Initial Setup 7
Page 14

Figure 5: Configure Teams Window
League
Division
Coach
Conference
3.3 Configure Teams
The next step to set up the DakStats Basketball program is to configure the teams. For the
program to work correctly, both home and guest teams must be configured.
Adding a Team
Choose one of the following ways to add a team:
To Manually Add a New Team
Users are required to enter the team location, nickname, print name, and abbreviation for
teams to be added correctly. All other information is optional.
1. Go to Configure > Teams.
2. In the Configure Teams window (Figure 6), select the Season.
3. Click Add New.
4. Type in the Team Location. (a high school’s or university’s name, for example)
5. Type in the Stadium, City, and State if desired. When a new game is created, these
6. Type in the team’s Nickname. (The team’s mascot may also be entered here).
7. Type in the team’s official name in the Print Name text box. This name appears on
8. Enter the team’s Abbreviation. The abbreviation is used to identify games.
9. Enter the following optional information as desired:
10. Click Save to keep the changes, or click Cancel to discard the changes.
11. Click Close when finished.
Note: Check Female as needed. Users should only check the Disable Team checkbox
when they do not want the selected team to show up in the teams list. Checking Show
Disabled Teams will allow the user to view all teams, whether they were disabled or not.
8 Initial Setup
fields will populate based on the selected home team (Section 3.5).
most reports and printouts.
Page 15

To Add a New Team Via List
Figure 6: Look Up League ID Window
Teams that use the DakStats Web-Sync service are able to add other teams and information
using the Via List option rather than having to enter other teams’ information by hand.
1. Click Via List.
2. In the Look Up League ID window (Figure 6), select the team’s League.
3. Highlight a team, and then click Select.
Note: If no leagues appear in the League dropdown menu, click Update Leagues.
If no teams appear after selecting a league, click Update Teams.
To Import a Team
1. Click Import.
2. Select a team to import.
Note: The importing option is typically used to quickly get information from another
team that also uses DakStats Basketball, rather than typing in all of the information
manually and risking errors. See Section 7 for more information about importing and
exporting teams.
Editing a Team
1. Go to Configure > Teams.
2. In the Configure Teams window (Figure 5), select the Season.
3. Select the team to edit.
4. Enter changes to the team’s information using the text and check boxes.
5. Click Save to keep the changes, or click Cancel to discard the changes.
6. Click Close when finished.
Initial Setup 9
Page 16

Figure 7: Configure Rosters Window
3.4 Adding or Editing Rosters
On the Configure Rosters window, users are able to add, retrieve, or edit rosters. Users must
enter a roster for their team. If using Play-by-Play mode, opponent rosters are also required.
When using Box Mode or Two-Click, opponent rosters are not necessary.
Adding Players to a Roster
If the team roster has no players or missing players, users may add players to the roster.
1. Go to Configure > Rosters.
2. In the Configure Rosters window (Figure 7), select the correct Season.
3. Select the correct Team.
4. Click Add New.
5. The new player will be displayed at the top of the roster as Add New Player.
6. Fill in the fields with the player’s information. At a minimum, users need to enter the
player’s number, first name, and last name.
7. Click Save to keep the changes, or click Cancel to discard the changes.
8. Click Close when finished.
Note: Users should only check the Disable Player checkbox when they do not want
the selected player to show up in the roster. Checking Show Disabled Players will
allow the user to view all players, whether they were disabled or not.
Deleting and Editing Players
To edit a player: Select the player, and change the player information fields.
To delete a player: Select the player, and then click Delete.
Note: Players with statistics associated with them cannot be deleted. To delete the player
the statistics associated with the player need to be removed or set to zero.
10 Initial Setup
Page 17

3.5 Creating New Games
Figure 8: Game Information Window
The Game Information window allows users to fill in several fields of detailed game information.
The following steps must be completed for a game to be created properly.
To Create a New Game
1. Go to File > New Game and the Game Information window will appear (Figure 8).
2. Select the correct Season.
3. Select the Visiting Team.
4. Select the Home Team.
5. Select the Game Type.
6. Enter the correct Start Time.
7. Select the desired Entry Mode.
8. Enter the correct Date.
9. Click Save Game to keep the changes, or click Cancel Game to discard the changes.
10. Click Done when finished. If the game has not been saved, the user will be prompted
to do so at this point.
Note: The remaining fields are optional and do not need to be filled in when creating a
new game. Return to the Game Information window at any time to adjust this information
(Section 8.3). Remember that the Stadium, City, and State fields will populate if they were
entered during creation of the selected home team (Section 3.3).
Initial Setup 11
Page 18

Page 19
Section 4: Pregame Setup
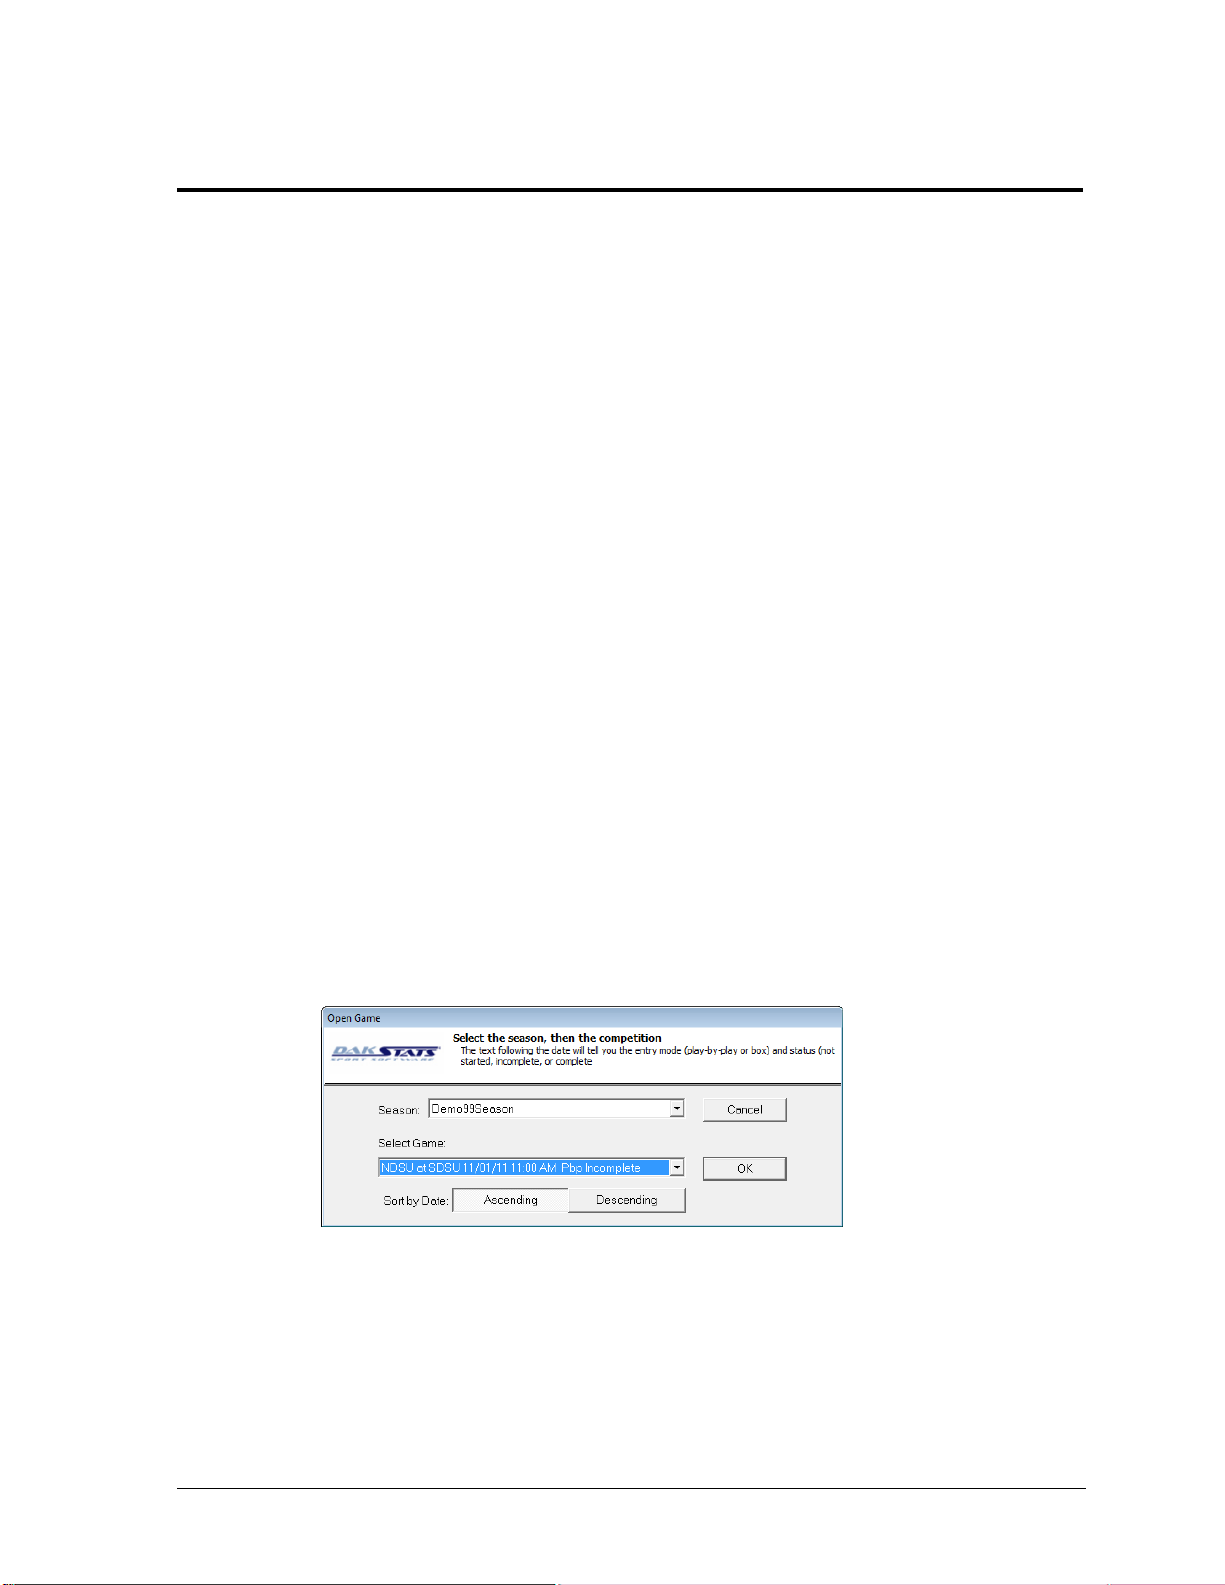
Figure 9: Open Game Window
4.1 Before Game Time
Before using the DakStats Basketball software for the first time, Daktronics suggests a few
simple steps to help make in-game use easy and efficient.
Be Familiar with the Program
There is a one or two game learning curve. It is highly recommended that users take the time
to read this manual and familiarize themselves with the program before game time. Some
other helpful hints include:
Practice taking stats while watching game film.
Identify the location of buttons associated with the most common plays.
Print out a Play-by-Play report from a Demo game, and then re-enter it to learn what
buttons/steps were used to follow the Play-by-play action.
Have a Good Spotter
The spotter is a person who watches the game and tells the operator the plays as they happen
so the software operator can concentrate on entering stats rather than looking back and forth
between the game and a computer screen. Having a spotter who pays close attention to the
game and has a good understanding of the game will help the user more quickly enter data
into the DakStats Basketball program.
Note: It is also helpful to have pens and paper handy in case the operator gets behind
entering stats or there are any technical difficulties.
4.2 Beginning the Game
Pregame Setup 13
1. Go to File > Open Game.
2. In the Open Game window (Figure 9), select the correct Season, and Game. Use Sort by
Date to list the games from oldest (Ascending) to newest first (Descending).
3. Click OK.
Note: If a certain game does not appear in the list, return to the Configure Games
window to make sure the game was created in the correct season; create a new game
in the proper season if necessary.
Page 20

Page 21

Section 5: In Game Operations
1) 2) 3) 4) 5) 6) 7) 8) 9) 10) 11) 12) 13) 14) 15) 16)
Figure 10: DakStats Basketball Main Toolbar
Once a game is opened, users are able to begin entering statistics into the DakStats Basketball
program. Depending on the Default Play Entry Mode (Section 3.5), the screen will appear with a
different layout and certain buttons available on the main toolbar.
5.1 Main Toolbar
Users can click the buttons on the main toolbar (Figure 10) to quickly execute common tasks
during games instead of going through the menus. Use the toolbar buttons to:
1) Create a new game
2) Open a game
3) Print the current game
4) Print the current game shot chart (Play-by-play Mode only)
5) View only the home team’s statistics
6) View only the visiting team’s statistics
7) View both home and visiting team statistics
8) Switch team court sides (Play-by-play Mode only)
9) Display or hide the court (Play-by-play Mode only)
10) Redraw the shot chart (Play-by-play Mode only)
11) View game in progress scoreboard (Play-by-play Mode only)
12) Make single substitutions (Play-by-play Mode only)
13) Make mass substitutions (Play-by-play Mode only)
14) Insert a time out (Play-by-play Mode only)
15) Balance the stats ((Play-by-play and Two-Click mode)
16) View program and system information
Most of the buttons listed above have corresponding keyboard shortcuts.
Refer to Section 9 for more information.
Note: It is possible to click and drag the toolbar anywhere else on the screen, dock it to the
bottom or either side, or remove it completely (go to View > Toolbar to turn it off and on).
In Game Operations 15
Page 22

Figure 11: DakStats Basketball Play by Play Screen
5.2 Play by Play Mode
The DakStats Basketball program allows users to enter plays as they happen. Operators are
able to input stats by selecting game commands and then entering specific information when
prompted; prompts will default to the most common choice. The Play-by-play screen is
available to users throughout the game, and remains available when the game is finished.
Figure 11 shows the main application screen in Play-by-play mode, with each section of the
screen labeled by function:
Game In Progress: Shows the current game time, quarter, team fouls, bonus, and
possession. This also shows if the Webcast is currently running.
Line Score: Tracks the score for both teams in each period
Data Entry: This is where the action of a play is recorded.
Rosters & Statistics: Shows each player of both teams and their statistics for the
game. It is not possible to edit the stats in this area.
Play by Play & Editing: As stats are entered, a detailed commentary of each play will
appear here. It is possible to modify any previous play as needed, and the rest of the
game data will update accordingly.
Above the Data Entry section is an illustration of a basketball court. This is where the
position of each shot is recorded, including assists and blocks when needed.
16 In Game Operations
Page 23

Game in Progress Scoreboard
Figure 12: Game in Progress Scoreboard
Figure 13: Entering Starters
Beneath the main toolbar is the game in progress scoreboard (Figure 12). This is for users to
keep track of and update:
Time: displays the game clock and time remaining in the game
Use the [Space Bar] to start and stop the game time.
Half/Quarter: displays the current half or quarter of the game
Team Fouls: displays the number of fouls each team has for that half
Bonus: displays if the team is in bonus fouls
Possession: keeps track of ball possession status
Webcast: turns green if the game is currently being webcast or remains red when
webcasting is disabled
Entering Starters
Before the game will allow plays to be entered, the players/positions for each team must be
assigned.
1. Press [F2] or click the Substitution button from the main toolbar.
2. Under the team name there is a box with five spaces next to a position number in
green (Figure 13). This area displays the players in the game/starters.
3. Select the five starters either by typing in their jersey numbers and clicking Enter or
by simply clicking their names from the roster. The small basketball icons indicate
the in-game players.
Note: When entering starters, one of the teams will be automatically selected to enter
players. Click the other team button (or press [X]) to enter their rosters.
In Game Operations 17
Page 24

Figure 14: Entering Shots on the Court
Successful field goal
Missed field goal
Blocked field goal
Successful three point shot
Missed three point shot
Blocked three point shot
Entering Shots
There are two different ways to enter shots taken. Both methods involve clicking the
onscreen buttons or pressing the keyboard key that corresponds to the underlined letter on
the button command.
Entering Shots on the Court
Entering shots on the court creates a detailed view of
where and how many shots were taken (Figure 14).
Select the team in possession of the ball (if not already
done by DakStats Basketball) by clicking on the team
abbreviation above the starters/players window.
Made Shots
Right-click the spot on the court where the made shot
was taken. Continue entering the play as follows:
1. Click Fouled and/or Fastbreak as needed.
2. Select the player who made the shot.
3. Select the player who fouled and/or the
player who made an Assist if necessary.
Missed Shots
Left-click the spot on the court where the shot was
attempted. Continue entering the play as follows:
1. Click Blocked as needed.
2. Select the player who missed the shot.
3. Select the player who made the rebound. Click Offensive if needed.
4. If the shot was Blocked, select the player who made the block.
Note: Whether a shot was made or missed, be sure to select any play options before
clicking on the player names.
Shot Icons
Note: Three point shots are automatically detected when the shot is placed on or behind
the three point arc, as are 2nd chance points and points off turnover.
Entering Shots with Player Information
In the Data Entry section, select the shooter by clicking on the player’s number from the
active player window (Figure 15). Then do one of the following:
If the shot was good, select FG Made, or 3Pnt Made.
If the shot was missed, select FG Attempt or 3Pnt Attempt.
If the shot was blocked, select FG Blocked or B3P.
18 In Game Operations
Page 25

Entering Rebounds
Figure 15: Entering Shots with Player Information
Figure 16: Entering Rebounds
After selecting FG Attempt, 3Pnt Attempt, FG Blocked, 3Pnt Blocked or Free Throw-No Good,
DakStats Basketball asks for the player who rebounded the missed/blocked shot.
Select what type of rebound occurred (Figure 16):
Player Rebound: an individual player rebounded the ball (this is the default
selection). Enter the jersey of the player who rebounded.
Note: Make sure the correct team is on the button behind the player name/number.
Offense Team Rebound: the offensive team got the rebound.
Defense Team Rebound: the defensive team got the rebound.
Offense Deadball: the rebound turned into a deadball and the ball goes to the offense.
Defense Deadball: the rebound turned into a deadball and the ball goes to the defense.
Entering Fouls
When a foul occurs during the game, users may enter this information in two different ways:
as a foul, or as a foul on a made shot.
Foul on a Made Shot
After a shot is made, DakStats will give the option to select if a foul occurred on the made
shot (Figure 17).
If no foul occurred, select No Foul (this is the default selection).
Select either Personal Foul, Intentional Foul, or Flagrant Foul, and then enter the
player who fouled.
Select what occurred after the made shot (multiple options may be selected):
o Fast Break
o Offensive Turnover
o Paint
In Game Operations 19
o 2nd Chance
Page 26

Figure 17: Entering Fouls on a Made Shot
Figure 18: Entering Fouls During Game Play
Foul During Game Play
1. Click Foul (Figure 18).
2. Enter the number of the player who committed the foul (or click on the player’s
number in the player roster window).
3. Select the type of foul committed.
Personal Foul
Intentional Foul
Flagrant Foul
Player Technical
Coach Technical
Bench Technical
Player Tech Non-Personal
Bench Tech Non-Personal
4. Click Enter.
Entering Steals
When the ball is turned over or stolen, users can select the Steal or Turnover options to
document the ball possession has transferred.
1. Click Steal (Figure 19).
Note: When selecting Steal, Turnover is automatically selected. Likewise, when
Turnover is selected, Steal is also selected.
2. Enter the number of the player who committed the turnover.
3. Enter the number of the player who stole the ball, and then select Team Turnover, or
select No Steal.
20 In Game Operations
Page 27

Entering Free Throws
Figure 19: Entering Steal/Turnovers
Figure 20: Entering Free Throws
When a free throw is taken, select the Free Throw option and enter the game information
that would normally follow a free throw (Figure 20).
Click Free Throw.
Enter the type of free throw being shot
Bonus
Double Bonus
One Shot
Two Shots
Three Shots
Enter if the shot was:
Good
No Good
Offense Violation
If the shot was good, select what occurred after the made shot (multiple options may
be selected):
Fast Break
Click Enter.
Offensive Turnover
Paint
2nd Chance
In Game Operations 21
Page 28

Figure 21: Entering a Jump Ball
Figure 22: Substitutions by right-clicking the roster
Entering a Jump Ball
1. Click Jump Ball (Figure 21).
2. Enter the players from both teams involved with the jump ball.
3. Click the button with the team name to indicate which team possessed the ball.
4. Click Enter.
Entering Substitutions
DakStats Basketball provides several different methods for entering substitutions.
Right-Click the Roster
One of the easiest ways to substitute players in and out is to right-click the player’s name or
number in the roster.
1. Right-click the player’s name or
number in the team roster that is
going in the game (Figure 22). A
graphic of a player with an arrow
on the left side (pointing toward
the court) will appear next to the
number. ( )
2. Right-click the player’s name or
number in the team roster that is
coming out of the game. A
graphic of a player with a
basketball and an arrow on the
right side (pointing toward the
roster) will appear next to the
number. ( )
3. Click Sub at the bottom of the roster to confirm the substitutions.
22 In Game Operations
Page 29

Right-Click the Player Number
Figure 23: Active
Player Window
Substitutions
Figure 24: Substitutions Window
Another way to substitute a player is to simply right-click the jersey
number from the current players list, and then select the sub going
in for that player (Figure 23).
1. Right-click the number of the player coming out from the
list of active players.
2. Select the player going in to the game from the list that
appears.
Select the Substitution Tab or Sub Button
Yet another way to enter subs into the game is by selecting the Substitutions tab from the
Data Entry section or clicking the Substitutions button .
1. Click the Substitutions button, press [F2], or go to Game Control > Substitution and
the Substitutions window will appear (Figure 24).
In Game Operations 23
2. Select the 5 players who are or will be playing on both teams.
Click Clear to deselect all players for a team if needed.
Click Reset to reset the players to the menu if needed.
3. Click OK to save the changes or Cancel to discard them.
Page 30

Figure 25: Mass
Substitutions
Figure 26: Selecting Players for Mass Substitutions
Mass Substitutions
In the event that five new players are substituting in to the
game, operators can substitute many players at once without
having to deselect the current active players.
Right-Clicking the Team Name
When all new players are substituting in the game, it may be
easiest to right-click the team name, and enter the new players.
1. Right click the team name in the Data Entry section.
2. Select Mass Subs (Figure 25).
3. Select the substitutes going in the game from the roster.
Clicking the Mass Substitution Button
1. Click the Mass Substitution button
2. Click the arrow buttons (
3. Select the substitutes going in the game from the roster (Figure 26).
4. Click Enter to save the changes or Cancel to discard them.
5.3 Edit Menu
The Edit menu allows users to manually edit stats or the play commentary, rebuild stats,
check for errors, and find a play. Play by play can be edited simply by clicking on a previous
play and making the appropriate changes.
Note: None of the Edit menu commands are available for Box scoring modes, and Two-
Click mode uses a separate Edit menu of its own.
.
- or ->) to select which team is making the mass substitution.
<
Manually Adding and Inserting Plays
In case a play was not inserted or added in the correct place, users can insert missing plays.
1. Locate the place where the play should have taken place in the Play-by-play script.
2. Go to Edit > Insert Play to put a new Dummy Play before the selected play or click
Add Play to put a Dummy Play after the selected play.
3. Select the Dummy Play and enter in the play as it should have happened.
24 In Game Operations
Page 31
Deleting Plays
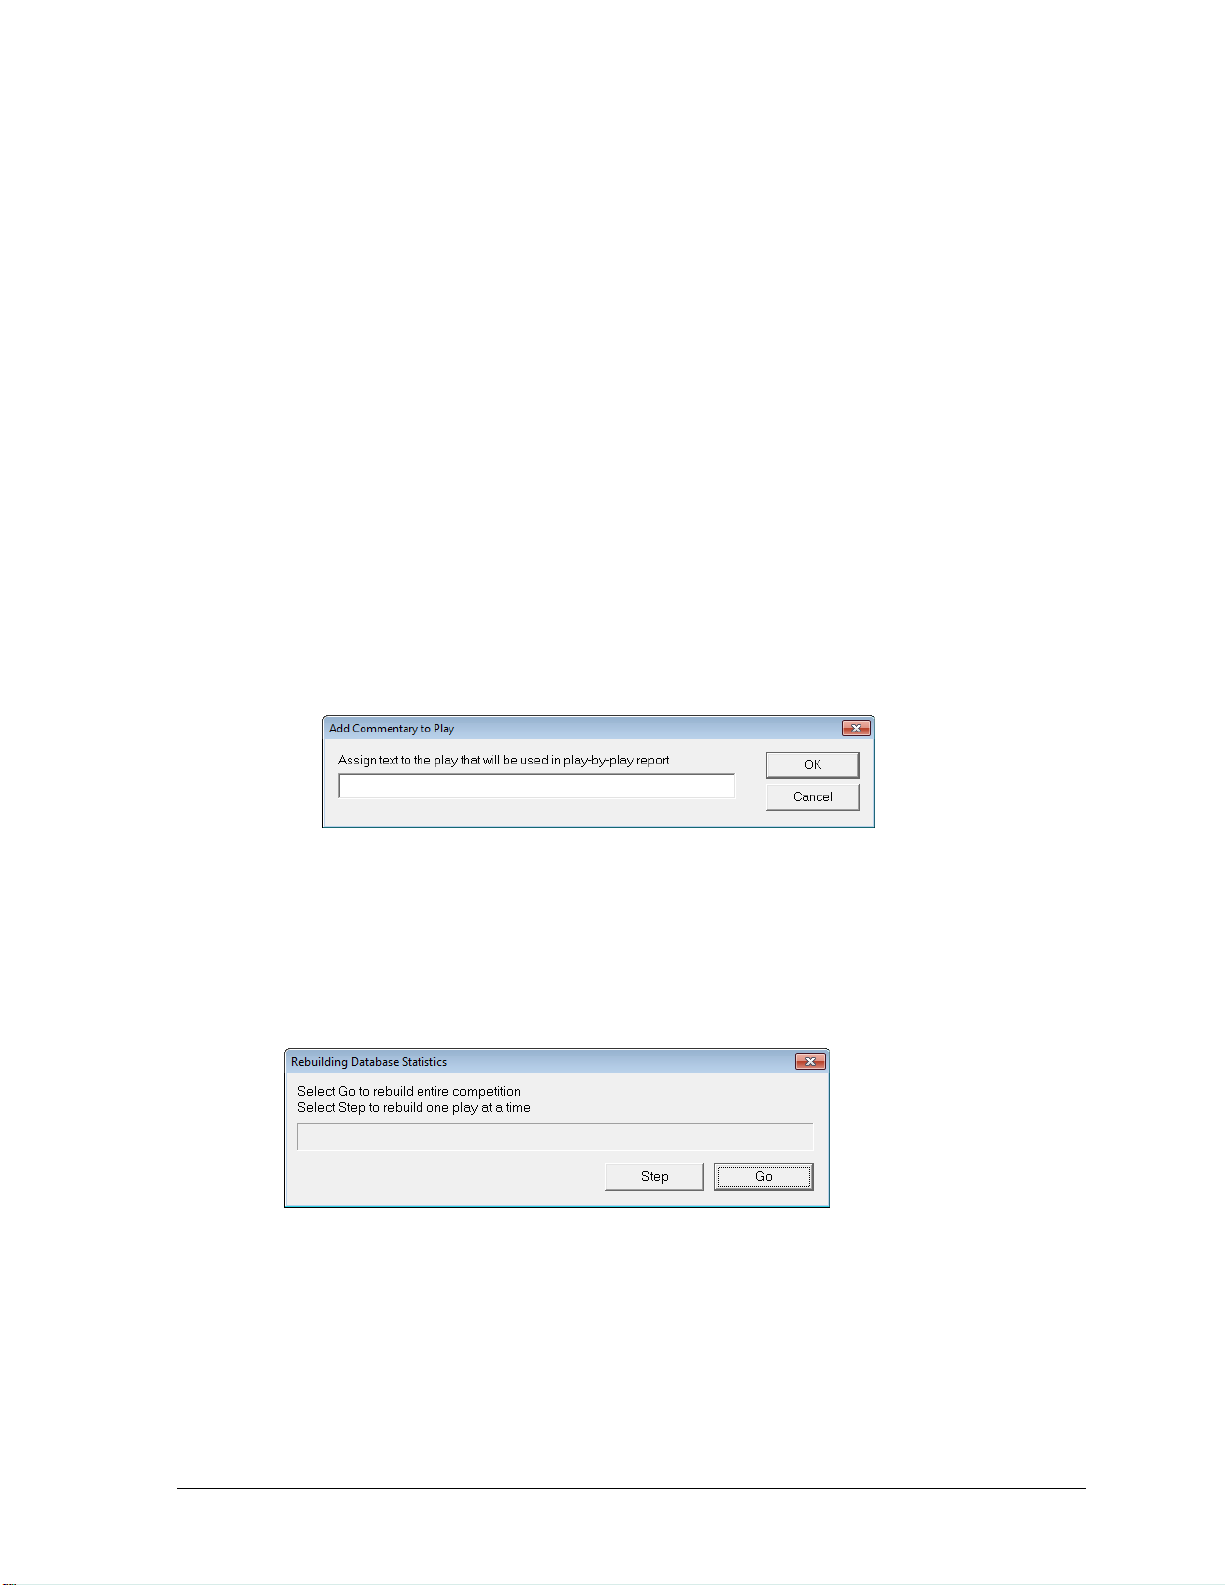
Figure 27: Add Commentary to the Play
Figure 28: Rebuilding Database Statistics
In the event that a play needs to be deleted from the play commentary or statistics, users are
able to delete any play.
1. Locate and select the play to be deleted in the Play-by-play script.
2. Go to Edit > Delete Play.
Inserting Periods
1. Select the last play of the old period.
2. Go to Edit > Insert Period.
Deleting Periods
1. Select the period (half) to delete in the Play-by-play script.
2. Go to Edit > Delete Period.
Add or Edit Play Commentary
1. Select the play to add to or edit.
2. Go to Edit >Add/Edit Play Commentary.
3. In the Add Commentary to Play window (Figure 27), type in the text desired to be used
in the play-by-play report.
Rebuild Stats
Users are able to rebuild stats either by rebuilding one play at a time or by rebuilding an
entire game. Be sure to rebuild the stats after editing previous plays.
Go to Edit > Rebuild Stats (Figure 28).
Click Step to rebuild one play at a time. The Step button will have to be clicked every
time to move on to the next play.
Click the Go button to begin rebuilding the entire game.
Check for Errors
Check a game for statistical errors by going to Edit > Error Check. Plays with suspected
errors will appear bolded in the Play-by-play commentary.
In Game Operations 25
Page 32

5.4 Game Control Menu
The Game Control menu allows users to start the next period, end a game, enter
substitutions, balance statistics, swap team sides, enter a timeout, toggle team rosters, and
export XML files.
Note: Only Game Finished, Balance, and Export game as XML file are available for Box
Score modes, and Two-Click mode uses a separate Game Control menu.
Start Next Period
At the end of a period, go to Game Control > Start Next Period.
Note: Starters will automatically clear out at the beginning of a new period. Users must
enter the starters for each period.
Game Finished
1. At the end of a game, go to Game Control > Game Finished.
2. Click Yes if the game is over, or click No if plays still need to be entered.
Note: After ending a play-by-play game, the DakStats Basketball program will ask if
the user wants to analyze the game for lineup analysis reports. Click Yes to perform
the analysis, or click No to continue.
Update Team Win/Loss Records and Duration
After ending a game, the DakStats Basketball program will ask if the user wants to update
the Team Win/Loss Records or Game Duration. Click No to skip the screen or click Yes to
update the information. If Yes is clicked, the Game Information window will appear. The user
can then update any game information shown.
Substitutions
Note: Starters must already be entered through the Substitutions button on the main data
entry screen to use this function.
1. To enter player substitutions, go to Game Control > Substitutions. The Substitutions
window will appear (Figure 24).
2. Select the 5 players who are or will be playing on both teams.
Click Clear to deselect all players for a team if needed.
Click Reset to reset the players to the menu if needed.
3. Click OK to save the changes or Cancel to discard them.
Mass Substitutions
Note: Starters must already be entered through the Substitutions button on the main data
entry screen to use this function.
1. To enter mass substitutions for either team, go to Game Control > Mass Subs.
2. Click the arrow buttons (
substitution.
3. Select the substitutes going in the game from the roster. (Figure 26).
- or ->) to select which team is making the mass
<
26 In Game Operations
Page 33

Balance Stats
Figure 29: Balancing Game Stats
Go to Game Control > Balance or click the balance button to have the program check to
ensure all statistics are properly balanced. A green check mark means stats are correctly
balanced, while a red X indicates an issue to be resolved (Figure 29).
Swap Teams
To change the teams’ sides of the court, go to Game Control > Swap Teams.
Timeouts
1. To indicate a timeout during a game, go to Game Control > Timeouts.
2. Click the appropriate team button to indicate which team called the timeout.
Toggle Active Team
To switch ball possession, go to Game Control > Toggle Active Team, or press [X]. Active
teams are indicated by the depressed button next to the appropriate in-game roster and a red
box in the Line Score section.
Toggle Rebound Team
To switch the rebound team, go to Game Control > Toggle Rebound Team, or press [O].
Export Game as XML File
In some instances, teams may need to export games as XML files to send to various media
outlets. Refer to Section 7.6 for more information.
Export Package
Use this feature to export multiple combined reports and/or game files at once that can be
shared with other coaches, the media, etc.
Analyze Game
Click to prepare the current game for use with Lineup Analysis reports (see Section 6.5).
In Game Operations 27
Page 34

5.5 View Menu
Use the View menu to configure the in-game layout of the application screen.
Toolbars
Go to View > Toolbar to enable/disable the main toolbar (refer to Section 5.1).
Go to View > Quick Display Toolbar to enable/disable the Quick Display buttons
(refer to Section 8.8).
Go to View > Twitter to enable/disable the Twitter function (refer to Section 8.13).
Entry Modes
Users may switch from Play by Play mode to both Box Mode Score by Period and Box Mode
Score by Game, as well as switch between both Box Modes. Click View and then select
which mode to switch to: Box Score by Period or Box Score by Game.
Note: Once a game is switched to Box mode, any changes made to statistics will cause the
game to remain in Box mode. Games in Box mode cannot be changed back to Play by
Play. A warning message will appear to confirm the permanent change in scoring mode.
GIP Data & Shot Chart
Go to View > Shot Chart (or press [F6]) to enable/disable the basketball graphic at
the top of the screen.
Note: Go to View > Shot Chart Refresh or click the button to redraw the shots
on the basketball court. This removes any shots that may have been accidentally
placed and were never attributed to a specific player or shots that were deleted from
the Play-by-play script.
Go to View > Game In Progress (or press [F7]) to enable/disable the game in
progress (GIP) information at the top of the screen.
Rosters & Statistics
Click View and select which rosters and statistics to view on the right side of the screen:
Home Team Only ([F10]), Visiting Team Only ([F11]), or Both Teams ([F12]).
28 In Game Operations
Page 35

5.6 Two-Click Mode
Figure 30: DakStats Basketball Two-Click Window
Figure 31: Entering Starters
Two-Click mode is a simplified entry mode where users first select a stat, and then select a
player who performed the action. Similar to Play-by-play mode, Two-Click lets users enter
the action as it happens. Unlike Play-by-play mode, Two-Click is not as structured. Users do
not need to record the stats for both teams or even in a logical fashion; instead they may
focus only on their team’s stats if they choose, adding any stat to any player at any time.
Figure 30 shows Two-Click mode, which opens in a separate window from the DakStats
Basketball main application screen.
Entering Starters/Subs
To select the starters for a team, right-click their jersey numbers
directly below the appropriate side of the basketball court. After
selecting five numbers, they will all appear as larger buttons to
the side of the court (Figure 31).
To make substitutions, right-click the new player(s)
coming in, and then right-click the player(s) going out.
To make a mass substitution, left-click the MASS button,
and then right-click five players or click Cancel to keep
the current players selected.
Note: Any jersey number button on the screen may be
left-clicked in order to record a shot or a stat. TEAM may
also be clicked to assign stats to an entire team.
In Game Operations 29
Page 36

Figure 32: Suggested Plays – Rebound
Figure 33: Entering
Missed Shots
Figure 34: Entering
Made Shots
Successful field goal
Missed field goal
Successful three point shot
Missed three point shot
Suggested Plays
To minimize the number of clicks needed to record a play, Two-Click mode selects certain
stat buttons for users to enter more information (Figure 32).
Entering assists, offensive/defensive rebounds, and turnovers after steals are completely
optional. Users may simply ignore the highlighted buttons and enter another shot or select a
different stat to continue. Steps below that include suggested plays, or the chance to enter
more play details, are marked with an asterisk (*).
Entering Shots
Every shot besides a free throw is entered using the basketball court.
To enter missed shots:
1. Left-click on the court at the approximate location the shot was taken.
*Click BLOCKED if the shot was blocked (Figure 33).
Note: Go to Game Control > Prompt Block Last to toggle if the
blocker will be selected after selecting the offensive/defensive
rebounder (enabled) or after the shooter (disabled).
2. Click the number of the player who took the shot.
* Select whether there was a REBOUND-OFF or REBOUND-DEF and click the
player/team that made the rebound. If the play resulted in a deadball,
click TM DEADBALL next to either the offensive or defensive team.
To enter made shots:
1. Right-click on the court at the approximate location the shot was taken.
* Click FAST BREAK, 2ND CHANCE, PAINT, and/or TURNOVER if
not already selected (Figure 34).
2. Click the number of the player who took the shot.
* Click the player who made an ASSIST.
Shot Icons
Note: Three point shots are automatically detected when the shot is placed behind the three
point arc. Paint, 2nd Chance, and Turnover shots are automatically selected as well.
Entering Blocks
The BLOCKED option appears after a missed shot is entered. To enter a block at any time:
1. Click BLOCK.
2. Click the number of the player who made the block.
30 In Game Operations
Page 37

Entering Turnovers
Figure 35: Entering Fouls
Figure 36: Entering Free Throws
To enter a turnover:
1. Click TURNOVER.
2. Click the number of the player who made the turnover.
* Click the number of the player who made the STEAL on the opposing team.
Entering Steals
To enter a steal:
1. Click STEAL.
2. Click the number of the player who made the steal.
* Click the number of the player who made the TURNOVER on the opposing team.
Note: Remind the spotter to say who made the steal before who made the turnover to
take advantage of this suggested play.
Entering Fouls
To enter fouls:
1. Click either FOUL-DEF or FOUL-OFF.
* Click on a more specific foul type (Figure 35):
BENCH TECH NON-PERSONAL
PLAYER TECH NON-PERSONAL
FLAGRANT
INTENTIONAL
PLAYER TECH
COACH TECH
BENCH TECH
2. Click the number of the player or the team who
performed the foul, or click CANCEL to bring back the
other stat buttons.
Entering Free Throws
To enter free throws:
In Game Operations 31
1. Click FREE THROW.
2. Click the player who will perform the free throw.
3. Select a free throw TYPE (Figure 36):
One Shot
Two Shots
Three Shots
Bonus
Double Bonus
4. Select what occurred for each shot:
Made
Missed
Violation
* Click FAST BREAK, 2ND CHANCE, PAINT, and/or TURNOVER as needed.
5. Click DONE when finished, or click CANCEL before assigning free throws to enter
another play.
Page 38

Figure 37: Onscreen Scoreboard
Figure 38: Taking Time Outs
Figure 39: Roster List
Onscreen Scoreboard
Two-Click mode contains an interactive onscreen scoreboard that can be used to view and
record the current game action (Figure 37).
Game Clock
To change the game time, click the clock, type in the new value, and then press [Enter]. The
colon and any extra zeros will appear automatically; for example, typing “6” will appear as
“0:06”. Values may not be higher than the default period length.
Click START CLOCK to begin counting down the time, and click STOP CLOCK to stop again.
Press the [Space Bar] to quickly toggle the clock on and off.
Team Scores
Click the +3, +2, +1, or -1 buttons underneath the appropriate team to manually increase or
decrease the score by the selected amount.
Note: If the software is controlling a scoreboard or display but only the stats for one team
are being recorded, use these buttons to keep both team scores up-to-date without
tracking the details of how the points were made.
Timeouts
To take timeouts, click the number next to FULL or
PARTIAL (Figure 38). In the message box that appears,
click Yes to confirm taking the timeout. Alternately, go
to Game Control > Timeout and select Full or Partial
for the appropriate team.
Roster List
The roster lists show all available players on a team with
their current number of fouls, points, rebounds, and assists
immediately visible. Team totals are always visible at the
bottom of the list
By placing the cursor over a player, additional information
will appear, including field goal, three-pointer, and free
throw percentages as well as other game stats (Figure 39).
Note: It is not possible to record stats or enter starters by
clicking on players in these lists.
32 In Game Operations
Page 39

Play-by-Play Script
Figure 40: Play-by-Play Script
Figure 41: Editing the Play-by-Play Script
Figure 42: Play-by-Play Right-Click Menu
Figure 43: Deleting a Period
The Play-by-play script (Figure 40) contains a list of every action performed by each player or
team. This running game script shows the Period, the Clock time, the Team, the Player who
performed an action, the Action itself, and the Result of the action.
Editing Plays
Most items in the Play-by-play script can be
edited by double-clicking them and selecting
or typing in the new choice or value (Figure
41). The play being edited is highlighted in
yellow. Click off the play to save the change.
The Play-by-play script has a right-click menu with additional options (Figure 42).
Inserting Plays
To insert a new play, right-click the play immediately
after where the new play should take place, and then
click Insert. Double-click each column of the Please Edit
Play row to fill in the play details.
Deleting Plays
To delete a play, right-click it, and then click Delete.
Click Yes to confirm the deletion, or click No to cancel.
When deleting a period that has plays in it, a different
window will appear (Figure 43). Select whether to
Delete the plays or Move them to the previous/next
period. Click OK when finished to delete the period
and move/delete the plays, or click Cancel to keep the
period and its plays.
Moving Plays
To make a play occur earlier or later in the game,
right-click it, and then click Move Up or Move Down,
respectively.
In Game Operations 33
Page 40

Figure 44: Add/Edit Play Commentary
Figure 45: Play with Commentary
Figure 46: Rebuild Stats
Figure 47: Configure Team Button Colors
Note: Always rebuild the stats after modifying the Play-by-play script (go to Edit >
Rebuild Stats). If any shot plays were deleted, be sure to also refresh the shot chart
(Game Control > Shot Chart Refresh).
Insert Period
Right-click a play and then click Insert Period to create a new period before the selected play.
The starters will automatically clear out at the beginning of a new period.
Add/Edit Play Commentary
Right-click a play and select Add/Edit
Play Commentary to open a window to
type in a note of up to 50 characters
about the play (Figure 44). Click OK to
save the commentary or Cancel to exit.
Plays that have commentary will
appear in bold in the Play-by-play
script (Figure 45).
Two-Click Edit Menu
Rebuild Stats
Users are able to rebuild game stats either by one
play at a time or by the entire game. Always rebuild
the stats after modifying the Play-by-play script.
Go to Edit > Rebuild Stats or click the button
(Figure 46).
Click Step to rebuild one play at a time.
Click the Go button to begin rebuilding the entire game.
Delete Last Play
Go to Edit > Delete Last Play or click the button to quickly delete the last play from the
Play-by-play script.
Team Button Colors
Go to Edit > Team Button Colors to adjust the
TEAM button appearance (Figure 47). Select both
a Text and Background color for both Home and
Visitor teams. Click OK to save the changes or
Cancel to keep the default button colors.
34 In Game Operations
Page 41

Two-Click Game Control Menu
Figure 48: Timeout Menu
Figure 49: Balance Stats
Several of the Game Control menu actions are also available as buttons on the main
application screen.
Start Next Period
1. At the end of a period, go to Game Control > Start Next Period.
2. Click Yes to begin the new period, or click No if plays still need to be entered.
Note: At the beginning of a new period, go to Game Control > Use Previous
Period’s Starters to quickly add starters used in the last period.
Game Finished
1. At the end of a game, go to Game Control > Game Finished.
2. Click Yes if the game is over, or click No if plays still need to be entered.
Note: To undo ending the game, delete the last play.
Timeout
1. Go to Game Control > Timeout.
2. Select Full or Partial for the appropriate
team, or Media (Figure 48).
3. In the message box that appears, click Yes
to confirm taking the timeout.
Balance
Go to Game Control > Balance or click the button to
have the program to ensure statistics are properly
balanced. A green check mark means stats are correctly
balanced, while a red X indicates an issue to be resolved
(Figure 49).
Swap Teams
To switch the sides of the court that the teams are
playing, go to Game Control > Swap Teams or click the
button.
Shot Chart Refresh
Go to Game Control > Shot Chart Refresh or click the
button to redraw the shots on the basketball court.
This removes any shots that may have been accidentally
placed and were never attributed to a specific player or
shots that were deleted from the Play-by-play script.
Prompt Block Last
Go to Game Control > Prompt Block Last to set when blockers are selected in play entry:
When enabled, the blocker is selected after clicking on the off/def rebounder.
When disabled, the blocker is selected after clicking on the shooter.
In Game Operations 35
Page 42

Key
Action
Optional Action
G or Q
Good shot (two & three point)
Assist By
F
Good shot on a fast break
Assist By
Y
Good three point shot
Assist By
R
Missed shot (rebound)
P
Good shot in the paint
Assist By
X
Missed three point shot (rebound)
Z
Good shot in the paint on a fast break
Assist By
K
Blocked shot
E
Made free throw
Figure 50: Keystroke Entry
Non-Field Goal Keys
Key
Action
E
Free Throw
R
Rebound
A
Assist
F
Foul
T
Turnover
S
Steal
K
Block
O
Timeout
Field Goal Keys
Key
Action
J
Jumper
D
Dunk
L
Layup
P
Tip-In
Y
Three Point Shot
Key
Action / Where Used
B
Deadball (Rebound)
Bench (Foul)
D
Defensive (Rebound)
M
Team (Rebound, Turnover)
Full (Timeout)
T
Technical (Foul)
Media (Timeout)
2 or 3
Partial (Timeout)
Key
Action
H
Select Home Team
V
Select Visiting Team
F10
Clear the play
Space
Start/Stop Clock
Two-Click View Menu
Go to View > Twitter to show or hide the Twitter toolbar. Refer to Section 8.13 for more
information about the Twitter feature.
Keystroke Entry
Two-Click Mode offers an even more simplified way of entering
plays using just the keyboard. Above the Play-by-Play Script is a
text box and two basketball icons (Figure 50). The visiting team is
on the left and the home team is on the right. The orange
basketball represents the active team.
Use the keystroke commands below to enter plays. The selected key appears in the text box
along with a description below it. Additional play entry information will also appear on the
selected team’s side of the court.
Note: When entering single-digit player numbers, be sure to type a “0” first.
Alternately, type the first digit followed by a hyphen (“-“) to skip the second digit.
Result Keys
Other Keys
36 In Game Operations
Page 43

5.7 Box Mode
Figure 51: Box Mode Score by Period
Users entering statistics in box mode have two options: they can enter stats in Box Score by
Period (Figure 51), or Box Score by Game. The difference between the two is that box mode
score by period separates game statistical totals into periods (5 rebounds in the 3rd period)
whereas in box mode score by game, the statistical totals are one lump sum (15 rebounds
during the whole game).
Note: Most of the column headings in Box Mode contain abbreviations. To see what these
abbreviations stand for, place the cursor over each heading for a moment.
Entering Scores & Statistics
1. Use the Select Period dropdown box to switch between periods of the game if working
2. To increase the score or a statistic one point at a time, double-click it, or click the
3. To decrease the score or a statistic one point at a time, double-right-click it, or click
4. To modify the score or a statistic by more than one point at a time, click the statistic,
Note: When entering three point shots in Box Mode, be sure to also increment the total
FGM and FGA (in addition to 3P and 3PA).
In Game Operations 37
in Box Score by Period.
green plus button in the upper right hand corner of the screen.
the red minus button in the upper right hand corner of the screen.
type in the new value, and press [Enter].
Page 44

Figure 52: Technical Fouls Window
Entering Technicals
Click the Technicals button in the upper right hand corner to enter technical fouls.
1. In the Technical Fouls window (Figure 52), click Add Technical.
2. Select the Period Number in which the foul occurred.
3. Enter the Clock Time of the foul.
4. Choose a Team, a Foul Type, and a specific Player if necessary.
5. Click Save Technical to record the foul, or Delete Technical to remove the foul.
6. Click Add Technical to record more fouls or select an existing foul to make changes
(be sure to Save after changing).
7. Click Close when finished.
38 In Game Operations
Page 45

Section 6: Creating Reports
Figure 53: Selecting Reports
Figure 54: Print Shot Chart Window
DakStats Basketball allows users to view and print a wide variety of reports to help assess player and
team statistics. The reports are produced as HTML files for easy transfer, email, and posting online.
6.1 In-Game Reports
Users are able to print game reports when a
game is finished or while it is still open.
Note: By “print” it is meant that the reports
are generated as HTML files that can be
opened in an Internet browser and then sent
to a printer.
To print in-game reports:
1. Go to File > Print In Game.
2. In the Select Report(s) window (Figure
53), click on one or more of the desired
report types.
3. Selecting Output as combined file will show all reports on a single page. Combined
reports will also have links back to the top of the page under each section. Enable
Force Page Breaks to ensure each report appears on its own sheet of paper when
printed out.
4. Click Print to open the report(s) in the default Internet browser, or click Cancel to
avoid creating the report(s).
5. Typically, going to File > Print within the Internet browser will create a hardcopy
printout of the report.
6.2 Shot Chart Printouts
Users are able to print the shot charts from each
period or the entire game (Play-by-play mode only).
To print a shot chart:
1. Go to File > Print Shot Chart.
2. In the Print Shot Chart window (Figure 54),
3. Select Team or Individual reports. Select
4. Enter descriptive Report Titles.
5. Click View to open a shot chart in the default Internet browser.
6. Typically, going to File > Print within the Internet browser will create a hardcopy
7. Click Done when finished.
Creating Reports 39
select the periods to print.
Note: Check the All Periods checkbox to
select every period.
specific player(s) as needed.
printout of the report.
Page 46

Figure 55: Printing Season Reports
6.3 Season Reports
Users are able to print cumulative season statistics reports.
To print season reports:
1. Go to File > Print Season and the Printouts window will appear (Figure 55).
2. On the Competitions tab, select the Team Reports sub-tab.
3. Select the Season.
4. Select the Team.
5. Select the type of game:
All
Home
Away
Neutral
Conference
Non-Conference
Other - allows users to select specific games
6. Select the Team Reports tab (Figure 56), and then select the desired reports to print.
40 Creating Reports
Page 47

7. Click the Other tab to view
Figure 56: Team Reports
Figure 57: List of Reports
Figure 58: Statistic Printout
additional report options, such as
the directory where they are
saved and their titles.
8. Click GO and a list of reports will
appear in the default Internet
browser (Figure 57).
Note: If any report is selected that
asks for individual results (i.e.
Individual Game by Game) a
screen with the team roster will
appear, asking for an individual
player to be selected. Select a player
and click Select to continue generating
the report(s).
9. Click a link, and a stat printout will
appear (Figure 58).
10. Typically, going to File > Print within
the Internet browser will create a
hardcopy printout of the report.
11. Click the browser’s Back button to
return to other report links, if
necessary.
Creating Reports 41
Page 48

Figure 59: Printing Conference Reports
Figure 60: Creating Collections
Printing Conference Season Reports
1. Go to File > Print
Season and the
Printouts window will
appear (Figure 55).
2. On the Competitions
tab, select the Conf
Reports sub-tab.
3. Select the Season.
4. Select the Conference.
5. Select the Games:
All
Home
Away
Neutral
Conference
Non-
Conference
Other – allows
users to select
specific games
6. Click the Conf Reports tab (Figure 59).
7. Select the Conference Reports.
8. Click the Other tab to view additional report options, such as the directory where
they are saved and their titles.
9. Click GO and a list of reports will appear in the default Internet browser.
10. Click a link, and a stat printout will appear.
11. Typically, going to File > Print within the Internet browser will create a hardcopy
printout of the report.
12. Click the browser’s Back button to return to other report links, if necessary.
Creating Collections
Collections are used to save lists of the most commonly used reports.
1. Click the button next to the word Collections on
the right side of the screen (Figure 60).
2. In the window that appears, type in a
descriptive name for the collection of reports.
3. Select the desired reports as described above.
4. Click the save button to assign the reports to the collection. The types of reports
within a collection can be changed at any time; just be sure to save the changes.
5. Click the red X to completely delete the collection.
6. Right-click a collection to Rename, Save, Save As, Delete, or Add New.
42 Creating Reports
Page 49

6.4 Print Career Reports
Figure 61: Career Reports
Figure 62: Example Team Career by Season Report
1. Go to File > Print Career Reports to view the Career Reports window (Figure 61).
2. Click Set Up Seasons to Include.
a. Assign each season a short Print Name.
b. Number the seasons in the order they should be displayed, using “0” for any
season not wanted to be shown.
c. Click Close.
3. Select a Season and a Team.
4. Click Automatic to automatically update the season totals, or click Manual to update
each statistic using a stat chart.
5. Click View Career Reports.
6. The DakStats Career Reports Internet browser window will appear.
To view a specific player’s career reports select the player from the list and click
View Single Player by Season.
Select either Player Career by Season, Player Career Totals, or Team Career by
Season (Figure 62) to view each report.
Creating Reports 43
Page 50

Figure 63: Lineup Analysis
6.5 Lineup Analysis Reports
Lineup analysis reports give users an in-depth look into the way groups of five-players have
performed throughout the season in various game situations. Be sure to check out the final
section on pages 47-49 for helpful hints to get the most out of this powerful tool.
Note: Lineup analysis reports are configured to omit groups of players with limited
playing time to avoid statistical anomalies. Contact Daktronics to make the lineup reports
more inclusive if necessary.
Analyzing Games
Before users can create a lineup report, the games that are to be included must be analyzed.
After ending a Play-by-Play game, the user will be automatically asked to analyze the game.
For Two-Click games or other games that have not been analyzed, follow the steps below.
1. Open the desired Play-by-Play or Two-Click game (Box mode is not supported).
2. Go to Game Control > Analyze Game, and then click OK.
3. Repeat steps 1-2 for every game that should appear in the lineup report.
4. Go to File > Print Lineup Analysis once more and locate the game.
Note: If any of the stats of a finished game are edited, the game must be analyzed again
to maintain the accuracy of lineup reports.
Creating a Lineup Analysis Report
1. Go to File > Print Lineup Analysis (Figure 63).
2. In the Lineup Analysis window, select a Season and a Team and the available games
should appear in the lower-left corner. If the desired game does not appear, make
sure the game has been analyzed (see Analyzing Games).
3. By default all of the games in a season are selected. Uncheck All, and then check
Other to manually select the games, or check Home, Away, Neutral, Conf, NonConf, Post, Win, or Loss to display only those types of games.
44 Creating Reports
Page 51

4. Narrow the report results further with the following restrictions:
Enter point values in the Leading By, Trailing By and Within +/- fields.
Select the separate period(s) or overtime.
Enter a specific Start and End time to view only a certain portion of the game(s).
5. Select one or more reports in the right corner (see Types of Lineup Analysis Reports).
6. Click GO to generate the selected reports with the specified options. Click Print to
make a hardcopy printout of the selected report(s), or click Open to view the HTML
report file in a new window.
Note: Create Collections to save frequently used lineup reports (see Section 6.3).
Types of Lineup Analysis Reports (Groups)
Refer to the legend for a description each stat category of every report listed in this section.
Report Legend
Players: The group(s) of in-game players, sorted alphabetically by first name
Time: Total time the players were on the court together
Pts+/-: The number of points the players scored after subtracting the number of
points the opposing team scored
Pts/Min: Average number of points scored per minute of play time
Pts/Poss: Average number of points scored per possession
Pts/Reb: Average number of points scored per rebound
Pts/Min+/-: The number of points the players scored per minute after subtracting the
number of points the opposing team scored
Reb/Min: Average number of rebounds made per minute of play time
Reb/Min+/-: The number of rebounds the players made per minute after subtracting
the number of rebounds made by the opposing team
Reb+/-: The number of rebounds the players made after subtracting the number of
rebounds made by the opposing team
OReb: Total number of offensive rebounds
DReb: Total number of defensive rebounds
Reb: Total offensive/defensive rebounds
Misses: Total offensive/defensive rebound opportunities
FTM: Total free throws made
FTA: Total free throws attempted
3PM: Total three-point shots made
3PA: Total three-point shots attempted
%: Depending on the type of report, this percentage is free throws divided by free
throws missed, three-point shots made divided by three-point shots missed, or
rebounds divided by rebound opportunities
Poss: Total number of offensive/defensive possessions
TO: Total number of turnovers by the opposing team
Paint: Total number of points made in the paint
2nd Pts: Total number of second chance points made
Stops: Total number of stops made against the opposing team
Stop %: The number of stops divided by the number of possessions
Rating: A value created by adding points for positive actions and subtracting points
for negative actions; adapted from the efficiency rating of professional basketball
Note: For each report, the columns in bold indicate how the information is sorted.
Creating Reports 45
Page 52

Figure 64: Overall Efficiency Rating
Figure 65: Best Lineup Sorted by Scoring Margin
Figure 66: Most Productive Offense Sorted by Points Per Possession
Figure 67: Most Used Lineup Sorted by Playing Time
Figure 68: Best Free Throw Shooting Sorted by %
Overall Efficiency
The Overall Efficiency report (Figure 64) shows the group of players with more ‘positive’
actions (made shots, rebounds, steals, etc.) than ‘negative’ (missed shots, turnovers, etc.).
Best Lineup
The Best Lineup report (Figure 65) shows the group of players who made more points
themselves than let the other team make.
Most Productive Offense
The Most Productive Offense report (Figure 66) shows the group with the most points
scored per possession.
Most Used Lineup
The Most Used Lineup report (Figure 67) shows the group with the most time on the court.
Best Free Throw Shooting
The Best Free Throw Shooting report (Figure 68) shows the group of players with the
highest free throw shot percentage.
46 Creating Reports
Page 53

Best 3pt Shooting
Figure 69: Best 3pt Shooting Sorted by %
Figure 70: Best Rebounding Sorted by Rebounding Margin
Figure 71: Most Efficient Rebounding Sorted by %
Figure 72: 2nd Chance Scoring Sorted by Points
The Best 3pt Shooting report (Figure 69) shows the group of players with the highest threepoint shot percentage.
Most Productive Rebounding
The Most Productive Rebounding report (Figure 70) shows the group of players who made
more rebounds themselves than let the other team make.
Most Efficient Rebounding
The Most Efficient Rebounding report (Figure 71) shows the group of players who best took
advantage of every offensive and defensive rebounding opportunity.
Best Offensive/Defensive Rebounding
The Best Offensive Rebounding and Best Defensive Rebounding reports separate the total
number of rebounding opportunities into offensive and defensive (see Most Efficient
Rebounding).
2nd Chance Scoring
The 2nd Chance Scoring report (Figure 72) shows the group of players who scored the most
points after making offensive rebounds.
Creating Reports 47
Page 54

Figure 73: Points in Paint Sorted by Points
Figure 74: Defense - Best Defense Combination Sorted by Opponent Points Per Possession
Figure 75: Defense - Most Efficient Lineup Sorted by Stop %
Figure 76: Defense - Most Used Lineup Sorted by Opp Possesion
Figure 77: Defense - Best 3pt% Defense Sorted by %
Points in Paint
The Points in Paint report (Figure 73) shows who scored the most points in the paint.
Defense - Best Lineup
The Defense - Best Lineup report (Figure 74) shows the group of players who allowed the
other team to score the fewest points per possession.
Defense - Most Efficient Lineup
The Defense - Most Efficient Lineup report (Figure 75) shows the group of players with the
highest percentage of stopping the other team.
Defense - Most Used Lineup
The Defense - Most Used Lineup report (Figure 76) shows the group of players who faced
the most number of opponent possessions.
Defense - Best Against 3pt %
The Defense - Best Against 3pt % report (Figure 77) shows the group of players with the
highest percentage of keeping the other team from scoring three point shots.
48 Creating Reports
Page 55

Defense - Most Efficient to Force TO
Figure 78: Defense - Most Efficient Lineup Sorted by Stop %
Figure 79: Defense - Best Points in the Paint Defense Sorted by Points
Figure 80: Best Lineup with a Significant Substitution
The Defense - Most Efficient to Force TO report (Figure 78) shows the group of players with
the highest percentage of forcing the other team to make turnovers.
Defense - Best Against Pts in Paint
The Defense - Best Against Pts in Paint report (Figure 79) shows the group of players who
are the best combination of players to keep the other team from scoring points in the paint.
Customize
Click customize to select color schemes for the top 5 groups of players to make them stand
out in the reports. Each group may have its own row and text color
Using a Lineup Analysis Report
After creating a lineup analysis report, the amount of information may be overwhelming
without some direction. This section details some more advanced uses of the lineup reports.
Player Comparisons
Use lineup reports to find statistical variations with different players on the court.
In Figure 80, the best lineup is composed of Alyssa, Dayna, Katie, Megan, and Tricia.
Together this group scored 9 points after subtracting the points scored by the opposing team.
Looking down the list, simply by substituting Tricia for Kaitlyn, the team lost 11 points.
Creating Reports 49
Page 56

Figure 81: Most Used Lineup & Leading
Figure 82: Most Used Lineup & Trailing
With Kaitlyn on the court, either the group was not able to score as frequently or the
opposing team was allowed to score more often. This could be a result of poor performance
by Kaitlyn, superior performance by Tricia, or another factor that should be looked into.
Situational Comparisons
In addition to examining individual performance, lineup reports are a great way to find
variations within the same group of players across unique game situations.
The example shown in Figure 81 was taken from a Most Used Lineup report of a team that
was Leading By 5 or fewer points. The top group of players had a net gain of 7 points,
increasing the lead. Notice this is the same group of players from Figure 80 that had one of
the worst overall scoring margins, yet they seem to perform better when the team is ahead.
Now watch what happens in Figure 82 with the same lineup report and the team Trailing By 5
points. The same group actually had a net loss of 22 points, pulling the team further behind.
Such a trend may indicate that this particular group does not perform as well under pressure,
or that the players lack morale or cooperation when the team is behind.
Additional Suggestions:
Use comparisons when looking at the best or most used players in different periods
or times during the game, at home or away games, or against certain teams.
Mix and match the options to find strengths or weaknesses in specific areas, and then
use the reports as a guide for setting goals and charting the team’s progress.
Print out a list of the statistically best players for making substitutions when
particular game situations arise (late in the game and trailing, late in the game and
ahead, etc.).
Create custom printouts of the best lineups to use against rival teams.
50 Creating Reports
Page 57

6.6 Roster Printouts
Figure 83: Printing Rosters
1. Go to Configure > Rosters.
2. On the Configure Rosters window (Figure 83), select the Season and Team.
3. Click Print Roster and the roster will appear in the default Internet browser.
4. Typically, going to File > Print within the Internet browser will create a hardcopy
printout of the roster.
Creating Reports 51
Page 58

Page 59

Section 7: Importing & Exporting
Figure 84: Start Time & Score
Figure 85: Import Competition Window
Information can be exchanged electronically from any team or conference that uses DakStats
Basketball by importing and exporting game files. This will eliminate the need to enter rosters or
statistics that have already been entered. It is also possible to import information to and from other
third-party software applications.
Note: When importing or exporting, right-click a game to
see the score and start time for that game (Figure 84). This
makes games easier to identify when importing and for
conference offices.
7.1 Importing Games
1. Go to File > Import Game, and the Import Competition window will appear
(Figure 85).
2. Select the Season in which to save the file.
3. Click Change Import Directory to select the folder from which to import the file.
4. Select the File Type to look for in the selected folder:
Importing & Exporting 53
DakStats (*.txt) – Text files generated from the DakStats program
SC XML (*.xkg) – XKG files exported from Stat Crew
SC XML (*.xml) – XML files exported from Stat Crew
SC BPK (*.bpk) – BPK files exported from Stat Crew
®
programs
®
programs
®
programs
DakStats Pbp (*.pbx) – Files generated from the DakStats program that
include the entire play-by-play commentary
SCBB1 (*.zzz) – ZZZ files exported from Stat Crew
®
programs
Note: After importing a PBX file, open the imported game and go to Edit >
Rebuild Stats.
Page 60

Figure 86: Import Into Window
Figure 87: Export Competition Window
5. Select the game to be imported from the Select File to Import column, and then click
Import File.
6. If a possible duplicate game is
detected, the Import Into window will
appear (Figure 86) with 2 choices:
Click Import New
Competition to import the
game as is.
Select the existing game from
the list, and then click
Import Into Existing to
replace the game with the
imported game.
Note: Import Into Existing commands cannot be undone.
7.2 Exporting Games
1. Go to File > Export Game,
and the Export Competition
window will appear
(Figure 87).
2. Select the Season, Team, and
Competition to be exported.
Note: The current directory
is shown at the bottom of
the window. To change
this location, click
Directory and select the
desired destination for the
exported file.
3. Click the drop-down arrow
to select the type of file to
export:
DakStats (*.txt) –
Text files for use with DakStats program
DakStats Pbp (*.pbx) – Files for use with DakStats programs that include the
entire play-by-play commentary
MaxPreps (*.txt) – Text files for users of MaxPreps.com
SC BPK (*.bpk) – BPK files for use with Stat Crew
SC XML (*.xkg) – XKG files for use with Stat Crew
SC XML (*.xml) – XML files for use with Stat Crew
SCBB1 (*.zzz) – ZZZ files for use with Stat Crew
4. Click Export.
5. With the game exported, it can now be emailed or burned to a disk for users of
DakStats Basketball and other programs to import into their season.
®
programs
®
programs
®
programs
®
programs
54 Importing & Exporting
Page 61

7.3 Exporting Season Statistics
Figure 88: Export Season Statistics Window
DakStats Basketball allows users to export files containing season-to-date statistics to send to
conference or league headquarters.
1. Go to File > Export Season to Date, and the Export Season Statistics window will
appear (Figure 88).
2. Select the Season statistics to export.
3. Select the File Output Format.
DakStats Text: The user should choose this format if sending the file to be
imported into DakStats.
NCAA XML: Only NCAA users will choose this format to send their
statistics.
4. Select the type of Season To Date:
Select School Season to Date if the user is a school exporting the season to
the conference.
Select Conference Season to Date if the user is a conference exporting
statistics for all teams in the conference.
Note: The current directory is shown at the bottom of the window. Click Directory,
and then select the desired destination for the exported file.
5. Click Export.
6. With the season statistics exported, they can now be emailed or burned to a disk and
given to the appropriate conferences.
Importing & Exporting 55
Page 62
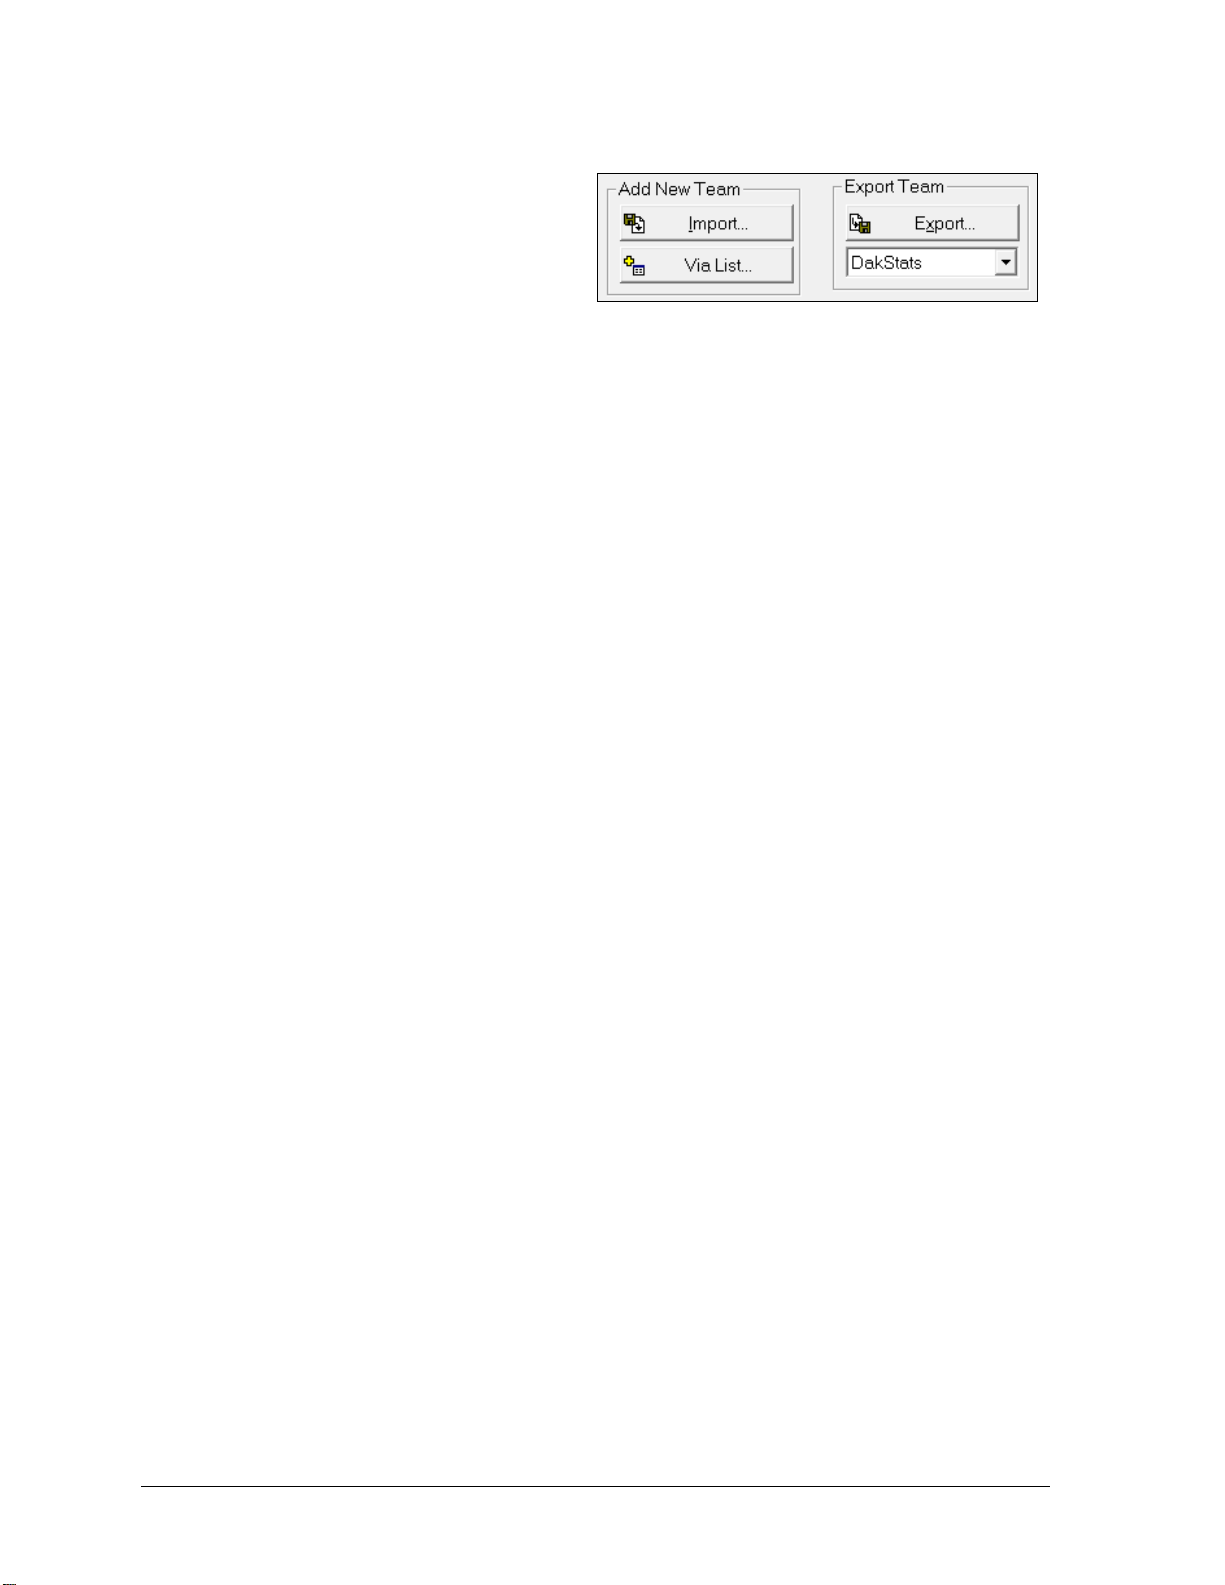
Figure 89: Importing & Exporting Teams
7.4 Importing Teams
Importing a team is a simple way to get
another team’s roster and data rather
than having to manually type in all the
information.
1. Go to Configure > Teams.
2. Select the Season.
3. Click Import in the bottom-right corner of the Configure Teams window (Figure 89).
4. Browse to the location of the file.
5. Select the team’s file, and click OK.
7.5 Exporting Teams
Exporting teams only works for DakStats Basketball users.
1. Go to Configure > Teams.
2. Select the Season.
3. Select the team to be exported.
4. Click Export in the bottom-right corner of the Configure Teams window (Figure 89).
5. Save the file with the team information to an easily accessible location, such as
“My Documents” or the “Desktop”.
6. With the team exported, it can now be emailed or burned to a disk for other DakStats
Baseball users to import into their season.
7.6 Exporting Games as XML Files
It is possible to export a game as an XML file so that the file can be sent to other users who
require game data in XML format.
Note: There must be a game open to export a game as an XML file.
1. Go to Game Control > Export Game as XML File.
2. Navigate to an easily accessible location, such as “My Documents” or the “Desktop”.
3. Enter a descriptive File name.
4. Click Save.
5. With the file exported, it can now be emailed or burned to a disk.
56 Importing & Exporting
Page 63

Section 8: Additional Features & Settings
Figure 90: System Preferences – Seasons
Figure 91: System Preferences – Tournaments
This section details the rest of the features and settings of the DakStats Basketball application.
8.1 Season and System Preferences
The System Preferences window allows users to add, edit, delete, and update seasons, as well
as repair, make and restore backups, and perform several other system management tasks.
Go to Configure > Seasons and System Preferences, and the System Preferences window will
appear (Figure 90).
Seasons
Use the Seasons tab on the System Preferences
window to add and edit seasons. The
following actions are available:
To add a season, refer to Section 3.2.
To edit a season, select a season, and
then click Edit.
To delete a season, select the season,
and then click Delete.
To make sure the season is up-to-date,
select a season, and then click Update.
Note: The Update option is used to update any
changes made in DakStats Basketball such as
database field updates and modifications. If
the database is not working properly, use the
Repair/Compact command (see Utilities).
Tournaments
The Tournaments tab on the System Preferences
window (Figure 91) allows users to add, delete,
or edit tournaments.
To Add a Tournament
1. Select a Season.
2. Click Add.
3. Type in a descriptive Tournament Name.
4. Click OK.
Note: Click Edit to change the name of a
selected tournament.
To Delete a Tournament
1. Select a Season.
2. Select a tournament to delete.
3. Click Delete.
Additional Features & Settings 57
Page 64

Figure 92: System Preferences – Utilities
Figure 93: DSBB Rules Configuration
Utilities
The Utilities tab on the System Preferences
window (Figure 92) allows users to manage the
seasons with copies, repairs, and backup files.
1. Click the Utilities tab.
2. Select a Season.
3. The following actions are available:
To repair or compact the season
database, click
Repair/Compact.
To make a backup copy of an
entire season, click Backup.
To overwrite the current
database with a previously
backed up database, click
Restore Backup.
Note: Restore Backup commands cannot be undone.
To delete the backup copy of the season, click Delete Backup.
Users may also enable Backup Externally? and select a different location to
save the season backup. Use this feature in case of hard drive crashes or
other unexpected computer problems.
If there are problems with a season, it is possible to submit the season to Daktronics so that a
DakStats representative may examine the problem.
Click Submit Season to upload a season to Daktronics.
Be sure to write an email to Daktronics explaining the problem as clearly as possible.
Click Retrieve Season to download a season that has been submitted to Daktronics.
8.2 Rules
Game rules can be changed by opening the
Rules Configuration window.
1. Go to Configure > Rules
Configuration.
2. On the DSBB Rules Configuration
window (Figure 93), select an available
Rules File.
3. Type in the applicable values for
Timeouts, Game, Period, and Foul
Information. Set the Reset Team Fouls,
Overtime Team Fouls, CBA Settings, and
Three Point Line.
4. Click Save to update the changes, or
click Reset to restore the default rules.
5. Click Close when finished.
58 Additional Features & Settings
Page 65

8.3 Configuring DakStats Basketball
Figure 94: Modifying or Updating a Game
Users are able to modify or update game and conference information at any time.
Modifying Games
Section 3.3 explains how to add a new game. To quickly modify an existing game:
1. Go to Configure > Games.
2. In the Game Information window (Figure 94), select the Season and Game ID, then add
any information that was left blank when a game was first created, or update the rest
of the information as needed.
3. Click Save Game to preserve the changes.
Note: The Update Game Notes button is only active when modifying an existing
game. Use this function to enter any additional game info not covered in the fields.
Additional Features & Settings 59
Page 66

Figure 95: Configure Conferences Window
Configuring Conferences
Configuring conferences allows users to group teams together for reporting purposes.
Conferences are unique to each season, but one team can belong to multiple conferences.
Go to Configure > Conferences, to access the Configure Conferences window (Figure 95).
To Create a New Conference
1. Select the Season for the conference.
2. Click Add New.
3. Type the conference name under Conference Identifier.
4. Type the conference short name under Conference Print Name. This name is for reports.
5. If desired, click Set As Default Import Conf for conference offices importing season-
to-date files.
6. Click Save.
To Configure a Conference
1. Select the Season for the conference.
2. Select the Conference.
3. Select which teams to include in the conference in the Conference Teams Selected box.
4. Click Save.
To Delete a Conference
1. Select the Season of the conference.
2. Select a Conference.
3. Click Delete.
60 Additional Features & Settings
Page 67

Configurations
Figure 96: Configurations Window
Figure 97: Set Play Entry Button Colors Window
The Configurations window allows users to adjust settings that affect how DakStats Basketball
operates. Go to Configure > Configurations to access the Configurations window (Figure 96).
Note: The Configurations menu is only available in Play-by-play mode.
Under Stats Shown in Roster Lists,
select to display stats by Period
Totals or Game Totals.
Under Shot Chart Entry, choose
to display a popup menu to
prompt for player number entry
when using the shot chart by
selecting Yes. To enter players
using the keyboard, click No.
If Yes to the previous question:
o Select Automatic to enter the
play automatically upon
completing the popup
menus.
o Select Manual to make it
necessary to press Enter to
record each play.
8.4 Play Entry Button Colors
The Set Play Entry Button Colors window (Figure 97) allows the user to change the text and
background colors for buttons, as well as to choose between a normal or flat button appearance.
1. Go to Configure > Play
Entry Button Colors.
2. Choose the color of the text
or background for Normal
Play Entry Buttons selected
and not selected, or choose
the color of the text or
background for Special Play
Entry Buttons selected and
not selected.
3. Uncheck Flat Button Style to
give the buttons a 3D look.
4. Click Restore Defaults to
return the buttons to their
original settings, or click OK
to save the changes.
Additional Features & Settings 61
Page 68

Figure 98: Team Button Colors Window
Figure 99: Auto Start Options
8.5 Team Button Colors
Use the Team Button Colors window
(Figure 98) to further customize the
appearance of the DakStats Basketball
user interface.
1. Go to Configure > Team Button
Colors.
2. Choose Text and Background
colors for the Selected(Depressed)
and Not Selected Guest Team
Button and Home Team Button.
3. Click Restore Defaults to return
the buttons to their original
settings, or click OK to save the
changes.
Note: Try changing the button colors to match the team or school colors for easier visual
recognition.
8.6 Auto Start Options
The Auto Timing, Auto Start Chart RTD, and Auto Start Interface options are found on the
Configure menu (Figure 99).
Auto Timing: Should only be checked if the computer is
connected to an All Sport® controller. DakStats Basketball
will automatically start and stop time the game time and
shot clocks in sync with the All Sport control console.
Auto Start Interface: Should only be checked when using
the Daktronics Scoring-Timing Interface (DSTI) to interface with a display.
Auto Start Shot Chart RTD: Should only be checked when using interfaces for
generating shot charts.
Output Season Xml: Check this option if instructed by a league office. This keeps an
up-to-date XML file that certain leagues need to update their websites (refer to
Appendix B).
62 Additional Features & Settings
Page 69

8.7 Messaging
Figure 100: DakStats/DSTI Messaging
Figure 101: Quick Display
The messaging settings help determine
how DakStats Basketball communicates
with other Daktronics software.
The default setting is that the DakStats
Basketball program is on the same
computer as the DSTI program. If these
programs are on separate computers:
1. Go to Configure > Messaging.
2. In the DakStats/DSTI Messaging
window (Figure 100), select
Different Machine.
3. Click OK.
8.8 Quick Display
The Quick Display option allows users
who interface with Venus® 7000 display
controllers to run sequences from
DakStats Basketball. These settings do
not need to be modified if the DakStats
Basketball program is not interfacing
with a display controller. For more
information about creating sequences,
refer to the Venus 7000 Operator’s
Manual (ED-14551).
1. Make sure to have DakStats
Basketball, DSTI, and Venus
7000 running.
2. In DakStats Basketball, go to
Configure > Quick Display, and the Quick Display window will appear (Figure 101).
3. If the Empty Interface Configuration File! message appears at the bottom of the
window, click Request Config.
4. Right-click an empty cell, and then click Add Item; to modify an existing cell, right-
click the cell, and click Edit Item:
a. In the Configure Quick Display Item window (Figure 102), check the box next to
Show on toolbar.
b. Type in a descriptive Item Name.
c. Check Show on toolbar.
d. Fill in the Enhanced RTD Parameters to specify the desired sequence to play.
e. Fill in the Request Parameters to specify what type of data to output.
Note: Items with the %Select Nickname are not compatible with quick display
buttons.
f. Click OK to save the changes to the quick display button.
Additional Features & Settings 63
Page 70

Figure 102: Configure Quick Display Item
Figure 103: Enhanced Scoring Options Window
5. Repeat Step 4 to assign up to 20
other commands on the toolbar.
6. To delete an existing cell, right-click
the cell, and click Delete Item.
7. Click Close when finished creating
the quick display buttons.
8. Go to View > Quick Display
Toolbar to make the Quick Display
Toolbar appear above the standard
toolbar.
9. The QD Toolbar can be undocked
and moved, and it also will dock on
either side or the bottom of the
screen.
8.9 Enhanced Stats
DakStats Basketball offers the choice of including enhanced statistics when printing reports.
1. Go to File > Setup
Enhanced Stats.
2. In the Enhanced Scoring
Options window (Figure
103), click Yes or No to
the posed question.
3. Click Done after making
the selection.
8.10 Webcast
DakStats Webcast allows the user to easily broadcast a live play-by-play Webcast of games to
the Internet for fans and media to view.
For information on Webcasting to the Web-Sync server, refer to the DakStats Web-
Sync Setup Guide (ED-14571)
For information on Webcasting to a school server, refer to the DakStats Webcast
Setup Quick Start Guide (ED-17019).
8.11 GameCast
The GameCast feature outputs game and season data for use with the DakStats GameCast
Basketball program. This program is installed on a separate computer and is used by press
personnel including newspaper reporters, radio announcers, and other on-air personalities to
navigate through statistics and find exactly what is newsworthy. For more information, refer
to the DakStats Basketball GameCast Installation and Operation Manual (ED-15732).
64 Additional Features & Settings
Page 71

8.12 Web-Sync
1) 2) 3) 4) 5) 6)
Figure 104: Twitter Toolbar – Not Signed In
The Web-Sync service greatly reduces the effort needed to collect league statistics. Any group
of teams using DakStats, such as conferences or state associations, can easily compile league
leaders and game-by-game statistics. Refer to the DakStats Web-Sync Setup Guide
(ED-14571) or the DakStats Web-Sync Operation Manual (DD1670479) for instructions on
setting up the Web-Sync service.
8.13 Twitter
Internet access is required to use the Twitter function.
DakStats has the ability to send “tweets” through a validated Twitter account from within
the software, providing followers with instant game updates. DakStats can automatically
suggest tweets after specific actions occur – such as when a team scores, at the end of a
period/game, etc. – and users may manually edit and send these suggested tweets. Users are
also free to type in and send their own tweets at any time.
When a Play-by-Play game is first opened, the Twitter toolbar should be visible at the top of
the screen (Figure 104). If not, go to View > Twitter to enable it. The toolbar can be dragged
elsewhere on the screen as desired.
The following is a summary of each feature of the Twitter toolbar:
1) The user can type in tweets (or edit automatic tweets) in this textbox.
2) Click this button to toggle between automatic and custom tweet mode:
indicates that the text may be overwritten by an automatic tweet.
indicates that automatic tweets will not overwrite any custom text entered.
When in custom mode, the textbox is outlined in orange.
3) This shows a count of the remaining characters in the tweet. A single tweet has a
maximum of 140 characters, including spaces and punctuation.
4) This button shows Sign In when the user is not currently signed in to Twitter.
After signing in, it will show Tweet; click this button to send custom and auto tweets.
5) Click this button to modify tweet settings. Refer to the Configuration section below.
6) This box shows “Not signed in” when the user is not currently signed in to Twitter.
After signing in, this shows the current Twitter account that DakStats is connected to.
Additional Features & Settings 65
Page 72

Game Open
On Score
On Score Tied
End of Period
End of Period Tied
Game Over
Game Over Tied
Figure 105: Configure Twitter
Configuration
Click the configure button to open the Configure Twitter window (Figure 105). After
making any changes to the configuration, click OK to save them, or Cancel to discard them.
Template
Templates tell the software how and when to generate tweets for certain game actions.
By default, 7 templates for automatic tweets are provided:
When one of these game actions occurs, the textbox in the Twitter toolbar will automatically
populate with the information defined in its template. Note that automatic tweets are only
generated when a Twitter user is signed in, and they are not sent until the user clicks the
Tweet button.
Select one of the available templates from the drop-down box to view the information it
contains. The On End of Period template is shown as an example:
End of <<CurQtrText>> <<QtrHalfText>>, <<AbbrWinning>> leads <<ScoreWinning>> <<ScoreLosing>>.
To edit the template, simply type in the textbox.
To return the template to its default text, click .
To turn off a particular type of automatic tweet, uncheck Enabled.
The information in <<double carets>> is known as a “markup”. Markups are
placeholders that will be swapped with real-time game data in the actual tweet.
For example, <<AbbrWinning>> is replaced by the leading team’s abbreviated name.
Click the [>>] button to view a complete list of available markups, and click on a
markup to insert it into the textbox at the location of the cursor.
66 Additional Features & Settings
Page 73

Credentials
Figure 106: Authorize DakStats
Figure 107: Authorization Page
Figure 108: Confirmation Window
1. Under Username, type in the Twitter account name
that the tweets will be posted to.
2. Click Validate Connection.
3. In the Authorize DakStats window (Figure 106), click
Authorize.
4. A Twitter webpage will open in the default Internet
browser (Figure 107). Enter the Username or email and
Password for the Twitter account (if not already signed
in), and then click Authorize app.
5. The next page will provide a unique PIN number.
Copy and Paste this number into the Pin text box,
then click OK.
6. Click OK again on the confirmation window
(Figure 108).
The text shown on the Configure Twitter window should change as follows:
DakStats now has access to send tweets on behalf of this Twitter account.
Under Profile, users may select a Web-Sync profile associated with the season. The following
template markups require a Web-Sync profile in order to be used:
League
League Sport Gender
Team Schedule Link (this appears as a shortened bitly™ link to a Web-Sync page)
Note: The Web-Sync profile needs to have been successfully synced at least once. If the
profile was just created without being synced, or if no profile is selected, the software
will ignore these markups.
Additional Features & Settings 67
Page 74
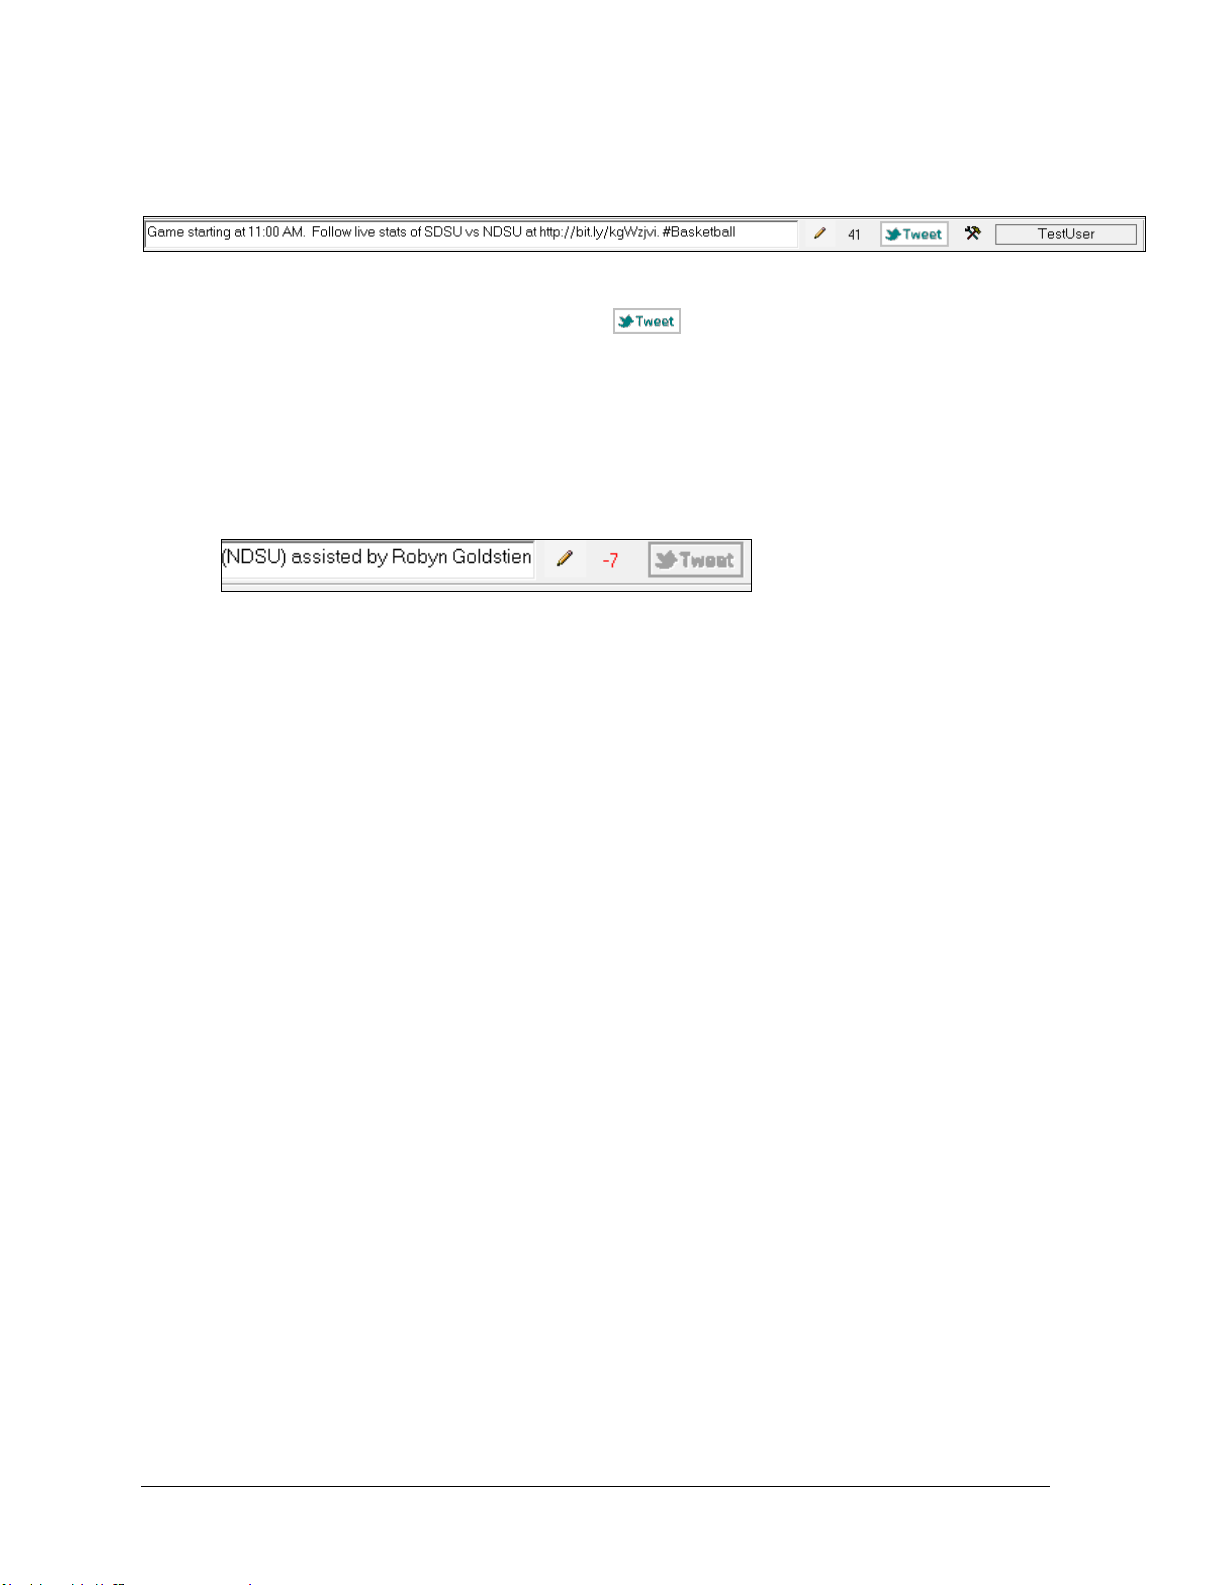
Figure 109: Twitter Toolbar – Signed In
Figure 110: Twitter Toolbar – Message Too Long
After validating a Twitter account, the Twitter toolbar is updated. Figure 109 shows the
updated Twitter toolbar with an automatically generated tweet upon opening the game:
Users must manually click the Tweet button to send custom and automatic tweets.
For a few moments after sending a tweet, the textbox is outlined in green. Users may open
their Twitter page to verify the tweet has been sent successfully. Any undesired tweets may
be removed from this page as well.
If a template was created that contains too many or too lengthy markups (such as “Play by
Play Text”), the character count may show a red negative value (Figure 110). In this instance,
the Tweet button will be unavailable until the message is shortened.
68 Additional Features & Settings
Page 75

Section 9: Using the Keyboard & Hotkeys
Hotkey
Command
Button
[F1]
Help (view manual)
[F2]
Substitution tab (PbP Mode)
[F3]
Mass Substitution
[F4]
opens Balance window
[F5]
Swap Teams to the other side of the court
[F6]
opens Timeout window
[F7]
toggle Game in Progress on/off
[F10]
view Home roster/stats
[F11]
view Visitor roster/stats
[F12]
view both Visitor and Home roster/stats
[Ctrl] + [n]
opens Game Information window (new game)
[Ctrl] + [o]
opens Open Game window
[Ctrl] + [i]
opens Select Report(s) window (in-game)
[Ctrl] + [s]
opens Print Shot Chart window
[Ctrl] + [p]
opens Printouts window (season)
[Ctrl] + [q]
opens Quick Display window
[Space Bar]
toggle Game Clock start/stop
Many of the commands in DakStats Basketball can be accessed with the keyboard as well as the
mouse. Most buttons in the main menu and Play-by-play entry mode have labels with an underlined
letter. Pressing the key on the keyboard that correlates with the underlined letter will activate that
particular button. To activate secondary buttons, which are usually colored differently, press the
underlined key while holding the [Shift] key.
For additional Two-Click keystroke entry shortcuts, refer to the last page of Section 5.6.
Using the Keyboard & Hotkeys 69
Page 76

Page 77

Section 10: Contact Information
Mail: Daktronics, Inc., Customer Service
201 Daktronics Drive
PO Box 5128
Brookings, SD 57006
Phone: DakStats Help Desk: 1-888-325-7828
Fax: 1-605-697-4000 Attn: DakStats
Email: dakstats@daktronics.com
If there are any questions about installing or operating the DakStats Basketball program or Web-Sync
service that are not covered in this manual, please contact DakStats Customer Service:
Contact Information 71
Page 78

Page 79

Index .
2
2nd chance points ................................. 19, 21, 31
A
All Sport controller
assists
in play-by-play mode ................................... 18
in Two-Click mode ....................................... 30
balance stats ................................................. 15, 27
in Two-Click mode ....................................... 35
ball on ................................................................. 16
blocks
in Two-Click mode ....................................... 30
bonus ............................................................ 21, 31
box mode ........................................................... 37
entering scores and statistics ....................... 37
score by game ................................................ 37
score by period .............................................. 37
check for errors ................................................. 25
conferences
creating ........................................................... 60
deleting .......................................................... 60
Configure menu ........................ 6, 8, 9, 10, 51, 57
contact information .......................................... 71
deadballs ...................................................... 19, 30
DSTI
messaging options ........................................ 63
Edit menu .......................................................... 24
enhanced statistics ............................................ 64
entering shots
in Two-Click mode ....................................... 30
using player information ............................. 18
using the court .............................................. 18
....................................................... 62
B
C
D
E
entry modes
descriptions of ................................................. 7
exporting
games .............................................................. 54
games in XML .......................................... 27, 56
season stats ..................................................... 55
teams ............................................................... 56
F
fast breaks ............................................... 19, 21, 31
File menu .................................... 11, 13, 39, 44, 53
fouls
during game play .......................................... 20
in play-by-play mode ................................... 19
in Two-Click mode ........................................ 31
on made shots ................................................ 19
settings ............................................................ 58
free throws
in play-by-play mode ................................... 21
in Two-Click mode ........................................ 31
G
game clock .......................................................... 17
in Two-Click mode ........................................ 32
Game Control menu ................................... 44, 56
in play-by-by mode ....................................... 26
in Two-Click mode ........................................ 35
game duration ................................................... 26
game time ........................................................... 16
games
analyzing for lineup reports ........................ 44
analyzing for Lineup reports ....................... 27
creating ........................................................... 11
ending ....................................................... 26, 35
exporting ........................................................ 54
exporting in XML .......................................... 56
importing ........................................................ 53
modifying ....................................................... 59
opening ........................................................... 13
settings ............................................................ 58
H
helpful hints ....................................................... 13
Index 73
Page 80

I
importing
duplicate games ............................................ 54
games .............................................................. 53
teams ............................................................... 56
installing the software ........................................ 3
downloading from the internet..................... 3
using installation CD ...................................... 3
J
jump balls ........................................................... 22
K
keyboard shortcuts ........................................... 69
L
lineup analysis reports
analyzing games for ............................... 27, 44
getting the most out of ................................. 49
M
mass substitutions ............................................ 24
in Game Control menu................................. 26
in Two-Click mode ....................................... 29
P
periods
deleting ........................................................... 25
inserting ......................................................... 25
settings ........................................................... 58
starting new ............................................. 26, 35
play commentary
editing............................................................. 25
viewing ........................................................... 16
viewing in Two-Click mode ........................ 33
play-by-play mode ........................................... 16
appearance ..................................................... 61
hotkeys ........................................................... 69
plays
adding and inserting .................................... 24
adding and inserting in Two-Click mode . 33
deleting ........................................................... 25
deleting in Two-Click mode ........................ 33
deleting last play ........................................... 34
editing in Two-Click mode .......................... 33
suggested ........................................................30
points in paint ........................................ 19, 21, 31
printouts .............................................................39
Q
quick display ......................................................63
R
rebounds
in play-by-play mode ....................................19
in Two-Click mode ........................................30
rebuilding stats ..................................................25
in Two-Click mode ........................................34
reports .................................................................39
2nd chance scoring ........................................47
best 3pt shooting............................................47
best defense against 3pt % ...........................48
best defense against points in paint ............49
best defensive lineup ....................................48
best free throw shooting ...............................46
best lineup ......................................................46
best offensive/defensive rebounding .........47
career ...............................................................43
conference .......................................................42
in-game ...........................................................39
legend ..............................................................45
lineup analysis ...............................................44
most efficient defense to force TO ...............49
most efficient defensive lineup ....................48
most efficient rebounding ............................47
most productive offense ...............................46
most productive rebounding .......................47
most used defensive lineup .........................48
most used lineup ...........................................46
overall efficiency ............................................46
points in paint ................................................48
rosters ..............................................................51
season ..............................................................40
shot charts ......................................................39
using collections ...................................... 42, 45
rosters
adding players ...............................................10
deleting players .............................................10
editing players ...............................................10
on splash screen .............................................. 6
stats shown in ................................................61
viewing in play-by-play mode ...................16
viewing in Two-Click mode ........................32
RTD
74 Index
Page 81

auto start settings .......................................... 62
quick display settings ................................... 63
rules
changing ......................................................... 58
setting to seasons ............................................ 7
S
seasons
backing up ..................................................... 58
creating ............................................................. 6
deleting .......................................................... 57
edting.............................................................. 57
exporting ........................................................ 55
updating ......................................................... 57
uploading to Daktronics .............................. 58
viewing on splash screen ............................... 5
shot chart
hide and show ............................................... 15
icons Two-Click ............................................ 30
shot charts
icons ................................................................ 18
options ............................................................ 61
refreshing ........................................... 15, 28, 35
reports ............................................................ 39
splash screen ....................................................... 5
common tasks .................................................. 6
schedule ........................................................... 6
spotters ............................................................... 13
starters
in play-by-play mode ................................... 17
in Two-Click mode ....................................... 29
steals
in play-by-play mode ................................... 20
in Two-Click mode ....................................... 31
substitutions ................................................ 17, 22
in Game Control menu ................................ 26
in Two-Click mode ....................................... 29
right-clicking the player number ................ 23
right-clicking the roster ................................ 22
system requirements ........................................... 1
T
T.O.P ................................................................... 16
teams
adding manually ............................................. 8
adding via list .................................................. 9
changing courtsides ................................ 27, 35
changing possession ..................................... 27
editing ............................................................... 9
exporting ........................................................ 56
importing ........................................................ 56
on splash screen ............................................... 5
timeouts .............................................................. 26
in Two-Click mode .................................. 32, 35
toolbars
main ................................................................ 15
tournaments
creating ........................................................... 57
deleting ........................................................... 57
turnovers ............................................................ 20
in Two-Click mode ........................................ 31
Twitter ................................................................ 65
Configuration................................................. 66
Tweeting ......................................................... 68
Two-Click mode ................................................ 29
V
Venus 7000 ......................................................... 63
View menu ............................................. 15, 28, 64
W
Webcast ................................................... 16, 17, 64
Web-Sync .............................................. 6, 9, 65, 68
Index 75
Page 82

Page 83

Appendix A: DakStats Basketball Stat Sheet
Appendix A: DakStats Basketball Stat Sheet 77
Page 84

Page 85

Team (Record) 1 2
K
( )
( )
Date:
Start Time:
Conference _____ Non-Conference _____
End Time:
Basketball Stats Sheet
Home _____ Away _____ Neutral _____
Player Name GP GS FG FGA 3P 3PA FT FTA OFF DEF TOT PF TP A TO BL
Site:_________________________
(Arena/City/State)
S MIN TF
Team Rebounds:
Page 86

Page 87

Appendix B: Supplemental Guides & Manuals
Document Title Document Number
DakStats Output Season XML Quick Start Guide ................................................................. DD2119764
Appendix B: Supplemental Guides & Manuals 79
Page 88

Page 89

DakStats Output Season XML Quick Start Guide 1 of 1
201 Daktronics Drive PO Box 5128, Brookings, SD 57006-5128
Tel: 1-800-DAKTRONICS (1-800-325-8766) Fax: 605-697-4700
Web: www.daktronics.com
DD2119764 Rev 0
23 September 2011
This guide will assist you with a feature of the DakStats software that allows you to output an XML file of the current season. This is useful when posting
up-to-date statistics to a website with your own style sheet applied. DakStats Baseball, Basketball, Football, Soccer, and Volleyball support this feature.
Enabling Season XML Output
1. Open the DakStats program.
2. Go to Configure > Output Season Xml. A checkmark appears
next to the menu item to indicate it is enabled.
Setting the Default Team
In order to create the season XML file, there must be a default team for the
current open season. The current season is shown on the top of the screen
when the program is opened.
To set a default team, simply select the team from the drop-down
list and click Set as Default Team. Alternately, a default team may
be selected when creating a new season. To set a different default
team, you must go to Configure > System and Season Preferences,
select the season, and click Edit.
With Output Season XML enabled and a default team set, a Season
XML file will be created in the following location:
“C:\Daktronics\DakStats [Sport]\season.xml”
Note: For Baseball and Basketball, a “gamebygame.xml” file is
also created in the same folder.
The XML files are created and updated ONLY after performing one
of the following actions:
Closing a game (File > Close)
Closing the Configure Teams window (Configure > Teams)
Closing the Configure Rosters window (Configure > Rosters)
The “season” file is the NCAA/Stat Crew specification. The
“gamebygame” file provides a record of each game of the season.
The names of the XML files are always the same. They can be
parsed by a CSS or XLST file to display the stats on a website
however you want, with your own style and branding.
 Loading...