

DAIKIN FTXS09HVJU, FTXS12HVJU Operation Manual
DAIKIN ROOM AIR CONDITIONER
OPERATION MANUAL
MODELS
FTXS09HVJU
FTXS12HVJU
CONTENTS
READ BEFORE OPERATION
Safety Precautions ....................................................................2
Name of Parts ...........................................................................4
Preparation before Operation ...................................................8
OPERATION
AUTO · DRY · COOL · HEAT · FAN Operation .......................10
Adjusting the Airfl ow Direction ................................................12
INTELLIGENT EYE Operation ................................................13
POWERFUL Operation ...........................................................15
OUTDOOR UNIT QUIET Operation .......................................16
HOME LEAVE Operation ........................................................17
TIMER Operation ....................................................................19
CARE
Care and Cleaning ..................................................................21
TROUBLE SHOOTING
Trouble Shooting .....................................................................25
1
2
Safety Precautions
Keep this manual where the operator can easily fi nd it.•
Read this manual carefully before starting the unit.•
For safety reason, the operator must read the following cautions carefully.•
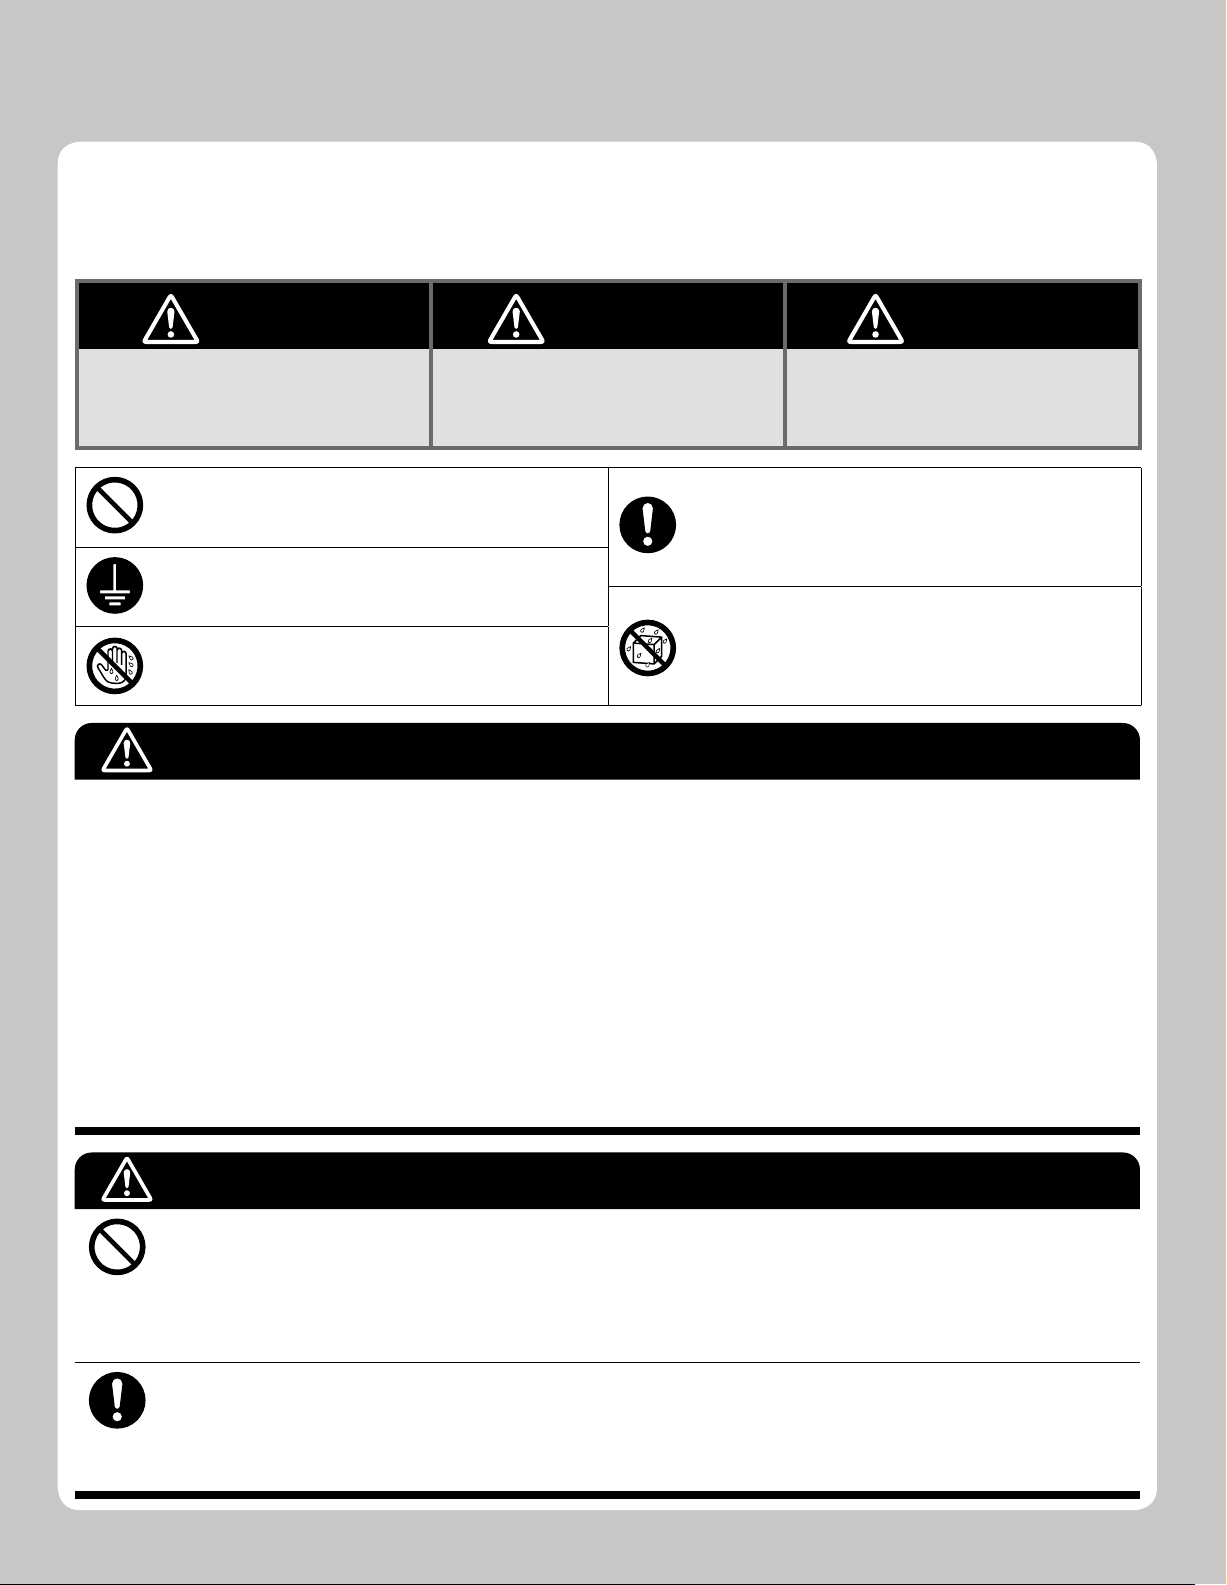
This manual classifi es precautions into DANGER, WARNING and CAUTION. Be sure to follow all precautions below: they are all •
important for ensuring safety.
DANGER WARNING CAUTION
Indicates an imminently hazardous
situation which, if not avoided, will result
in death or serious injury.
Never do.
Be sure to ground the air conditioner.
Never touch the air conditioner (including the remote
controller) with a wet hand.
DANGER
For refrigerant leakage, consult your dealer.•
Refrigerant gas is heavier than air and replaces oxygen. A massive leak could lead to oxygen depletion, especially in
basements, and an asphyxiation hazard could occur leading to serious injury or death.
Refrigerant gas may produce a toxic gas if it comes in contact with fi re such as from a fan heater, stove or cooking •
device. Exposure to this gas could cause severe injury or death.
Any abnormalities in the operation of the air conditioner such as smoke or fi re could result in severe injury or death. •
Turn off the power and contact your dealer immediately for instructions.
Do not install the unit in an area where fl ammable materials are present due to risk of explosion resulting in serious injury or death.
•
If equipment utilizing a burner is used in the same room as the air conditioner, there is the danger of oxygen defi ciency •
which could lead to an asphyxiation hazard resulting in serious injury or death.
Be sure to ventilate the room suffi ciently to avoid this hazard.
Safely dispose of the packing materials.•
Packing materials, such as nails and other metal or wooden parts, may cause stabs or other injuries. Tear apart and
throw away plastic packaging bags so that children will not play with them. Children playing with plastic bags face the
danger of death by suffocation.
If you do not follow these instructions
exactly, the unit may cause property
damage, personal injury or loss of life.
Be sure to follow the instructions.
Never cause the air conditioner (including the remote
controller) to get wet.
If you do not follow these instructions exactly,
the unit may cause minor or moderate
property damage or personal injury.
WARNING
It is not good for health to expose your body to the air fl ow for a long time.•
Do not put your fi nger, a rod or other objects into the air outlet or inlet. As the fan is rotating at a high speed and could, •
cause injury. Always keep small children away from the unit during operation.
Do not attempt to repair, relocate, modify or reinstall the air conditioner by yourself. Incorrect work or modifi cations could •
cause electric shocks, fi re or other damage.
For repairs and reinstallation, consult your Daikin dealer for advice and information.
If the air conditioner is not cooling (heating) properly, the refrigerant may be leaking, contact your authorized dealer or
•
qualifi ed service repairman.
When making repairs which requires adding refrigerant, consult with your authorized dealer or qualifi ed service repairman.
Do not attempt to install the air conditioner by yourself. Improper installation could result in water leakage, electric shocks •
or fi re. For installation, consult your authorized dealer or a qualifi ed technician.
3
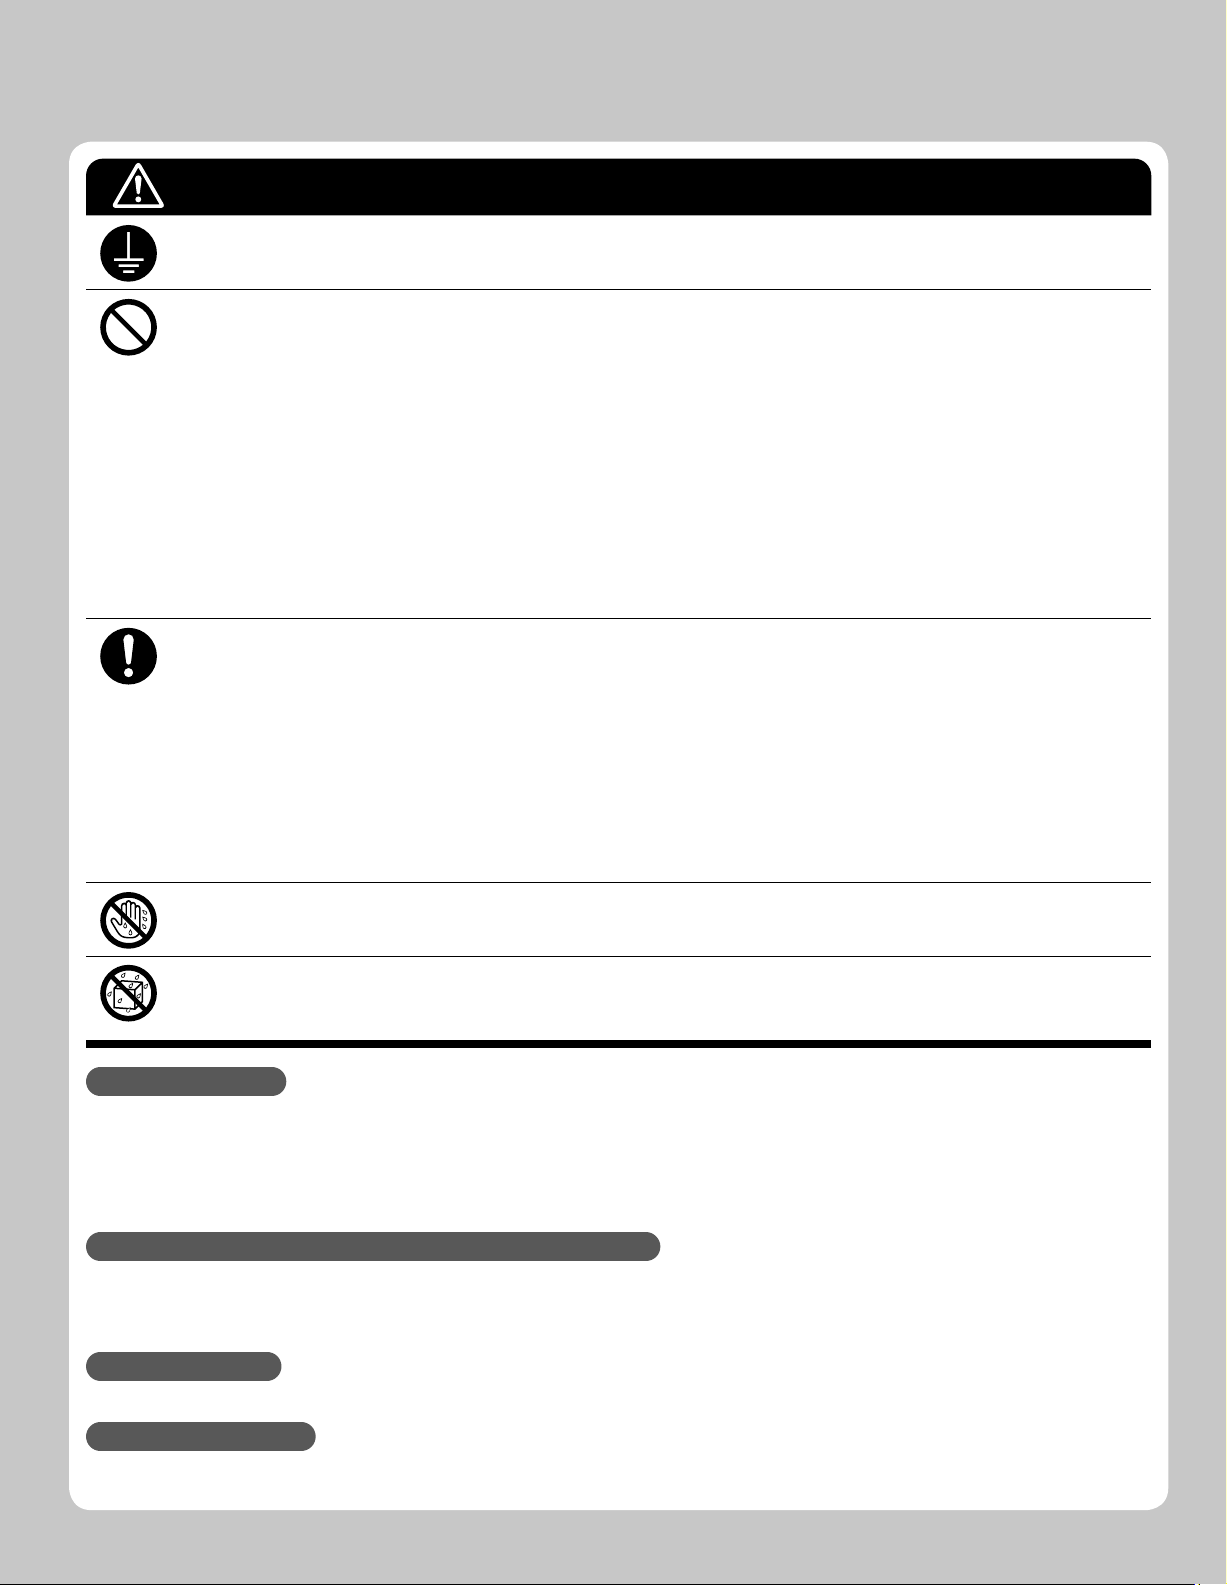
CAUTION
The air conditioner must be grounded to the earth. Improper grounding may result in electric shocks. Do not connect the earth
•
grounding wire to a gas pipe, water pipe, lightning rod, or a telephone ground line. Follow all local and state electrical codes.
Do not use this unit for cooling precision instruments, food, plants, animals or works of art.•
Never expose little children, plants or animals directly to the air fl ow.•
Do not block air inlets nor outlets. Impaired air fl ow may result in poor performance or equipment problems.•
Do not stand, sit, or place objects on the outdoor unit. To avoid injury, do not remove the fan guard.•
Do not place anything under the indoor or outdoor unit that must be kept away from moisture , such as electrical or •
electronic equipment. In certain conditions, moisture in the air may condense and drip.
Check the unit stand and fi ttings for damage annually.•
Do not touch the air inlet and aluminum fi ns of outdoor unit. It may cause injury and/or damage the heat transfer surface.•
This appliance is NOT intended for use by young children or impaired persons without proper supervision.•
Young children should be supervised to ensure that they DO NOT play with or near the air fl ow of this appliance.•
Do not pull at the conduit or hang anything on it. Otherwise it will cause fi re or electric shock.•
Do not touch the heat exchanger fi ns. Improper handling may result in injury.•
Do not turn off the power immediately after stopping operation. Always wait at least fi ve minutes before turning off the •
power. Otherwise, water leakage and trouble may occur.
To avoid personal injury or equipment damage be sure to stop the operation, turn the breaker off or pull out the supply •
cord before cleaning or servicing the unit. NOTE: More than one disconnect may be required to shut off all power.
Do not connect the air conditioner to a power supply different from the one specifi ed. It may cause improper operation or fi re.
•
Depending on the environment, state and local electrical codes, a ground fault circuit interrupter may be required. •
Improper grounding or lack of a ground fault circuit interrupter may result in electrical shock, injuries, or death.
Arrange the drain hose to ensure smooth drainage. Improper drainage may cause water damage to the building, or it’s furnishing.
•
Depending on the usage environment, water may leak from the air conditioner. If this happens, contact your Daikin Dealer.
•
The remote controller should be installed in such away that children cannot play with it.•
Do not place objects in direct proximity of the outdoor unit and do not let leaves and other debris accumulate around the unit.
•
Leaves are a hotbed for small animals which can enter the unit. Once in the unit, such animals can cause malfunctions,
smoke or fi re when making contact with electrical parts.
Do not operate the air conditioner with wet hands.•
Do not wash the indoor unit with excessive water, only use a slightly wet cloth.•
Do not place things such as vessels containing water or anything else on top of the unit. Water may penetrate into the •
unit and degrade electrical insulations, resulting in an electric shock.
Installation site.
To install the air conditioner in the following types of environments, consult the dealer.
Places with an oily ambient or where steam or soot occurs.•
Salty environment such as coastal areas.•
Places where sulfi de gas occurs such as hot springs.•
Places where snow may block the outdoor unit.The drain from the outdoor unit must be discharged to a place of good drainage.•
Consider nuisance to your neighbours from noises.
For installation, choose a place as described below.
A place solid enough to bear the weight of the unit which does not amplify the operation noise or vibration.•
A place from where the air discharged from the outdoor unit or the operation noise will not annoy your neighbours.•
Electrical work.
For power supply, be sure to use a separate power circuit dedicated to the air conditioner.•
System relocation.
Relocating the air conditioner requires specialized knowledge and skills. Please consult the dealer if relocation is necessary for •
moving or remodeling.
4
Name of Parts
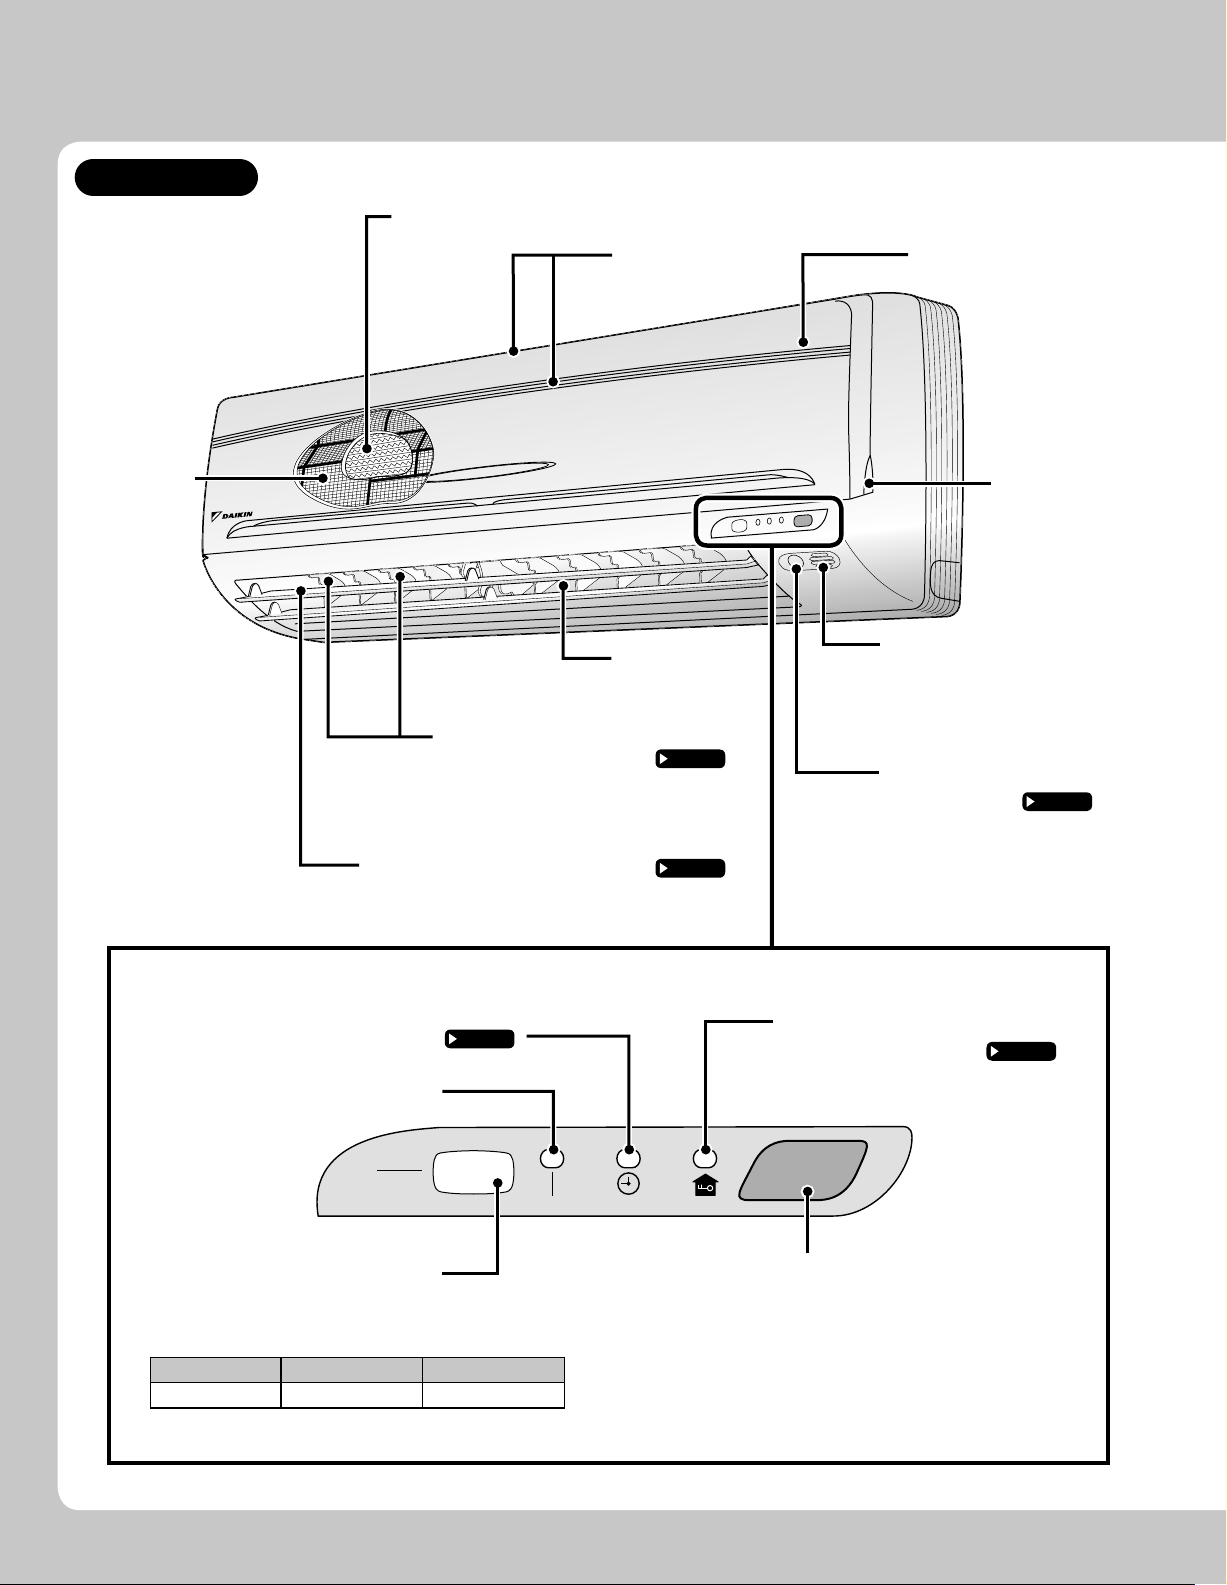
Indoor Unit
Air-purifying fi lter with photocatalytic deodorizing function
Air inlet Front panel
Air fi lter
Operation lamp (green)
Flaps (horizontal blades)
TIMER lamp (yellow)
Air outlet
Louvers (vertical blades)
The louvers are inside of the air •
outlet.
Page 12
Page 12
Control panel
Page 19
Panel tab
Room temperature
sensor
It senses the air temperature •
around the unit.
INTELLIGENT EYE
sensor
It detects the movements of •
people and automatically
switches between normal
operation and energy saving
operation.
Page 13
HOME LEAVE lamp (red)
Lights up when you use HOME •
LEAVE Operation.
Page 17
ON
OFF
Indoor unit ON/OFF switch
Push this switch once to start operation.•
Push once again to stop it.
The operation mode refer to the following table.•
Mode
AUTO 77°F(25°C) AUTO
This switch is useful when the remote controller is missing.•
Temperature setting
Airfl ow rate
Signal receiver
It receives signals from the remote •
controller.
When the unit receives a signal, •
you will hear a short beep.
Operation start• ......... beep-beep
Settings changed• ..... beep
Operation stop• ......... beeeeep
5
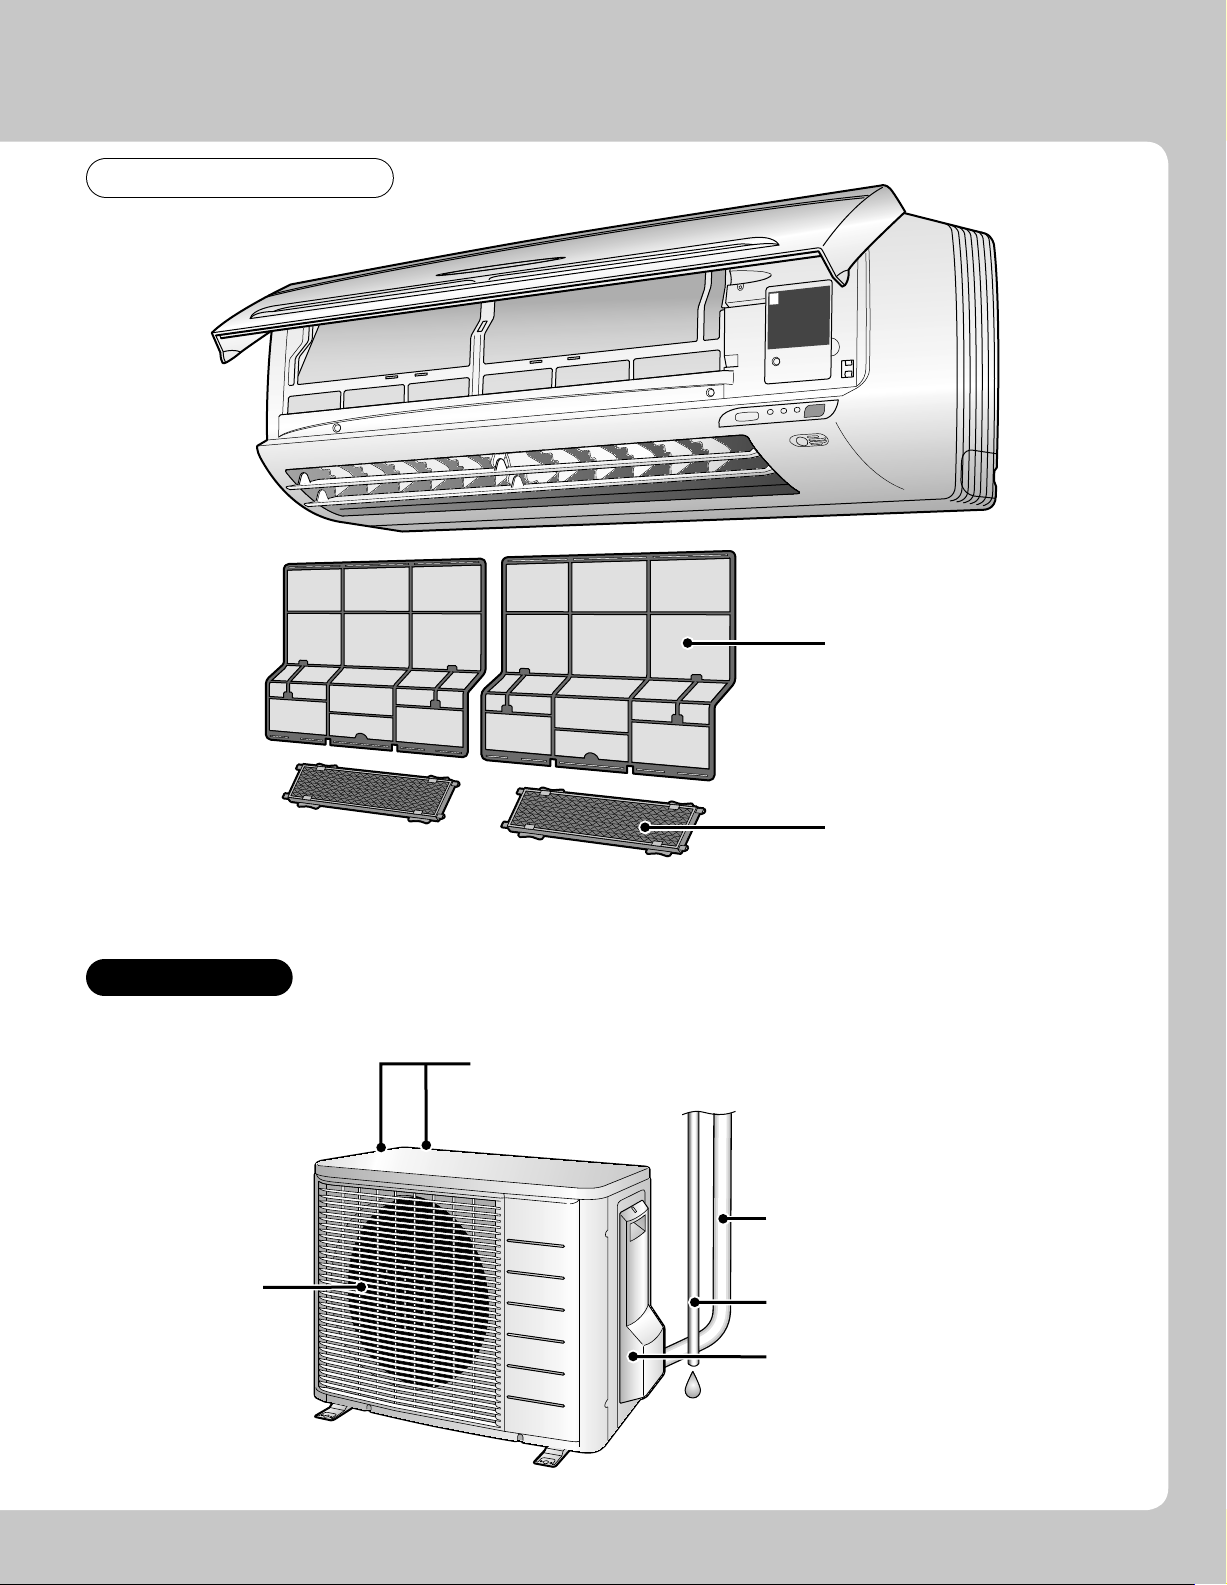
Open the front panel
Air fi lter
Outdoor Unit
Appearance of the outdoor unit may differ from some models.•
Air outlet
Air-purifying fi lter
with photocatalytic
deodorizing function
Air inlet: (Back and side)
Refrigerant piping and
inter-unit cable
Drain hose
Earth terminal
It is inside of this cover.•
6
Name of Parts
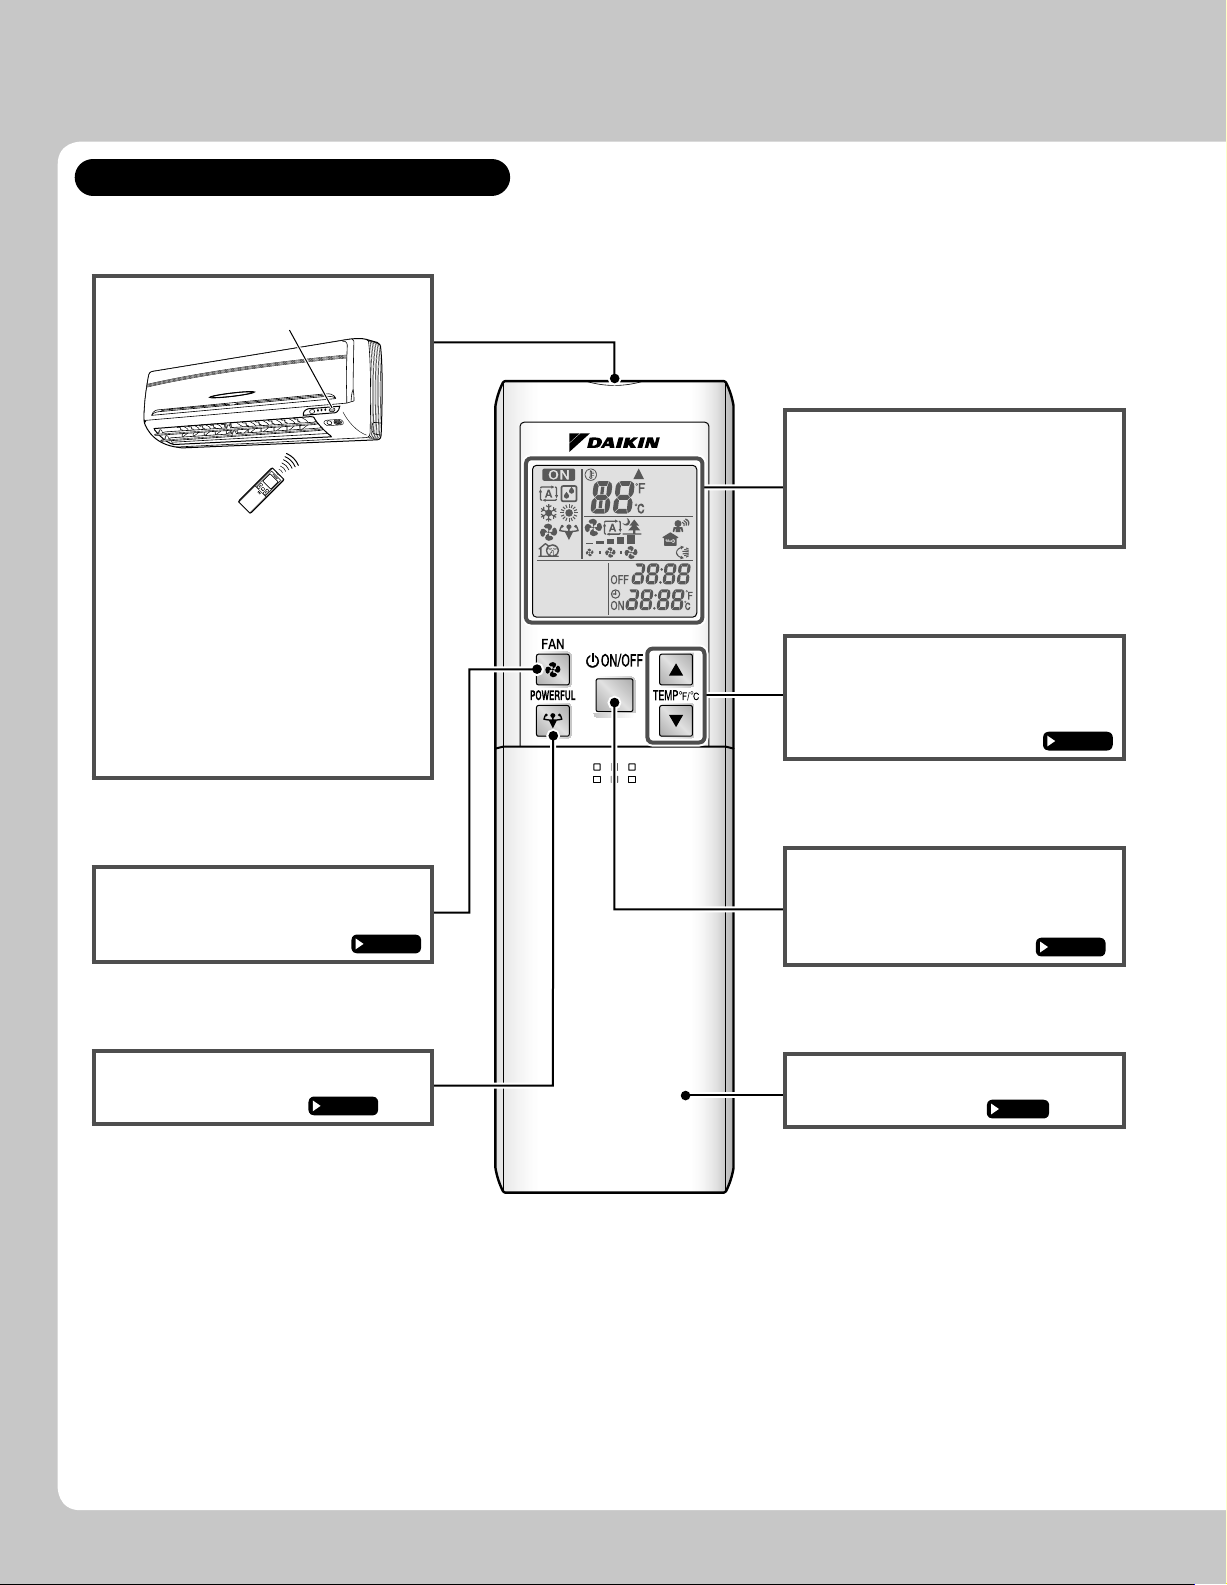
Remote Controller: ARC452A7
Signal transmitter
Receiver
To use the remote controller, aim the •
transmitter at the indoor unit. If there
is anything to block signals between
the unit and the remote controller,
such as a curtain, the unit will not
operate.
Do not drop the remote controller. Do •
not get it wet.
The maximum distance for •
communication is approximately
23 ft (7m).
Display (LCD)
It displays the current settings.•
(In this illustration, each section is
shown with its displays ON for the
purpose of explanation.)
TEMPERATURE
adjustment buttons
It changes the temperature setting.•
Page 10
FAN setting button
It selects the airfl ow rate setting.•
POWERFUL button
POWERFUL operation •
Page 15
Page 11
ON/OFF button
Press this button once to start •
operation.
Press once again to stop it.
Front cover
Open the front cover. •
Page 10
Page 7
7
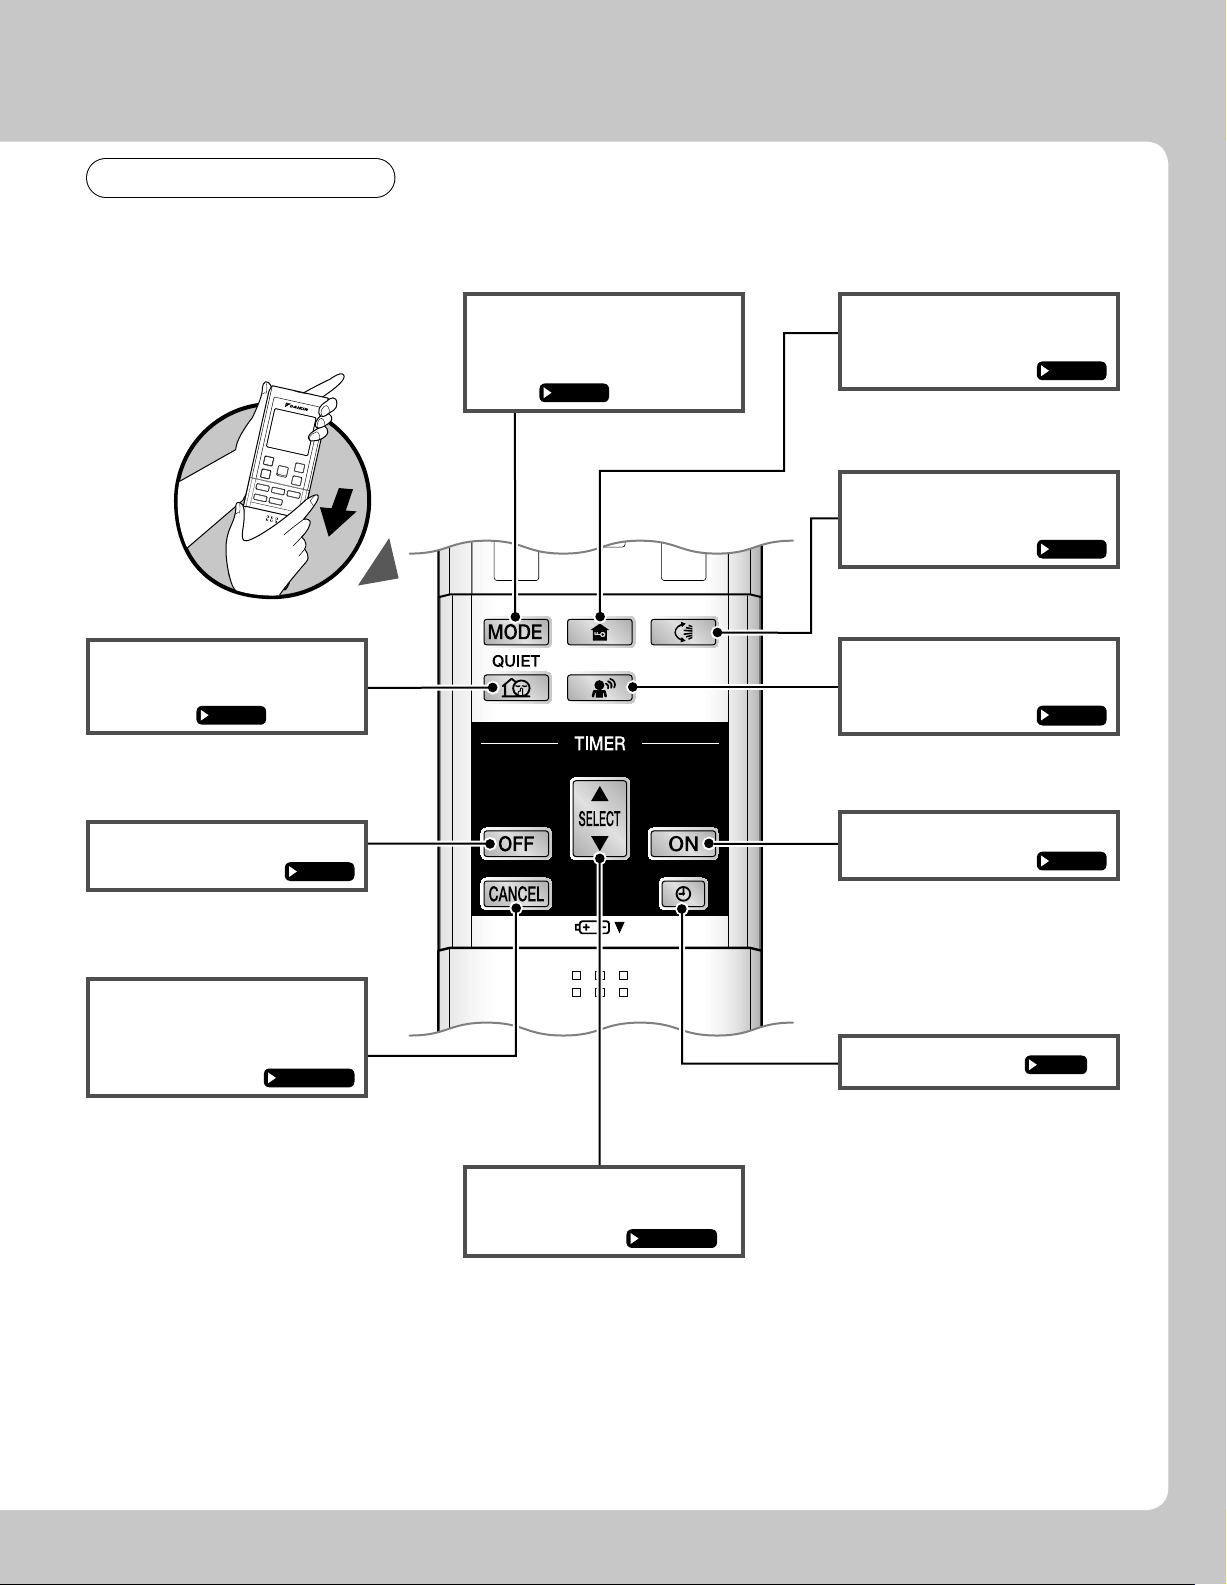
Open the front cover
QUIET button
OUTDOOR UNIT QUIET •
operation
Page 16
OFF TIMER button
Page 19
MODE selector button
It selects the operation mode. •
(AUTO/DRY/COOL/HEAT/
Page 10
FAN)
HOME LEAVE button
HOME LEAVE operation •
Page 17
SWING button
Adjusting the Airfl ow Direction•
Page 12
SENSOR button
INTELLIGENT EYE operetion •
Page 13
ON TIMER button
Page 20
TIMER CANCEL
button
It cancels the timer setting.•
Page 19,20
SELECT button
It changes the ON/OFF •
TIMER settings.
Page 19,20
CLOCK button
Page 9
8
Preparation before Operation
2
3
1
Position and
correctly!
+
–
Remote controller
Set. Pull.
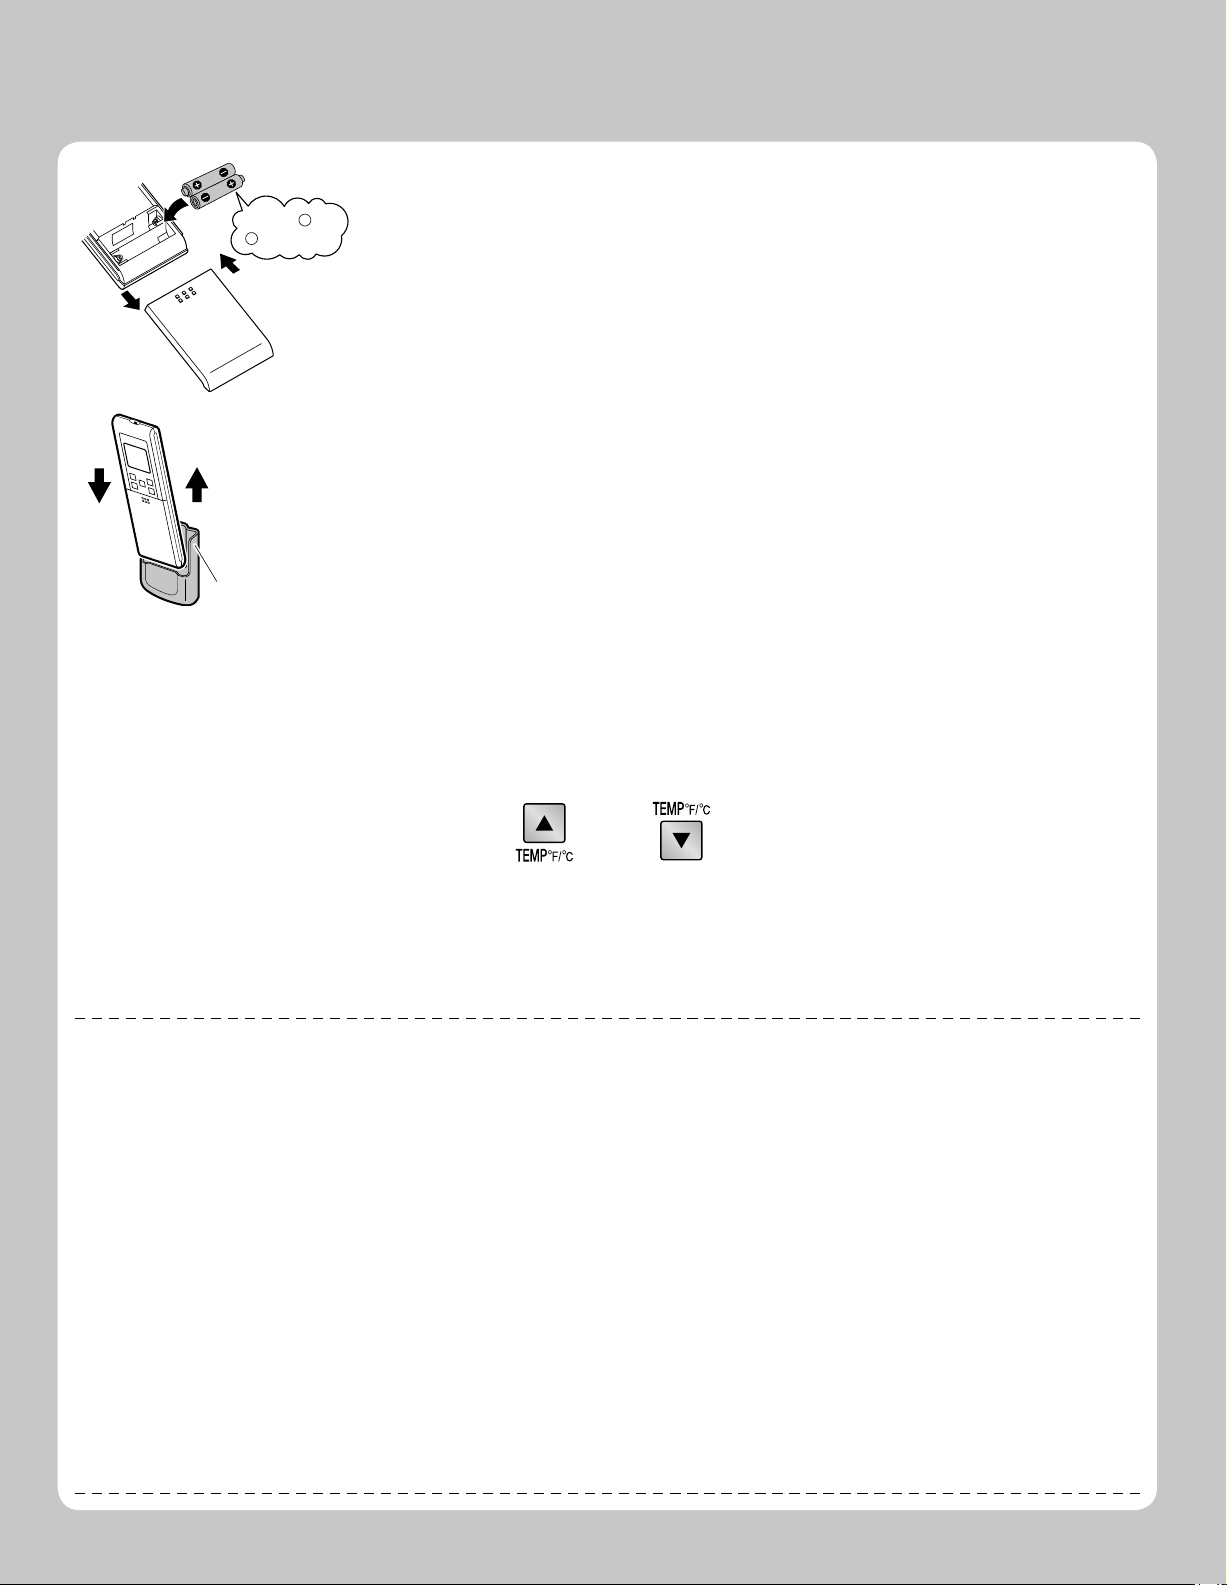
To set the batteries
Slide the front cover to take it off.1.
Set 2 dry batteries AAA.LR03 (alkaline).2.
Set the front cover as before.3.
To fi x the remote controller holder on the wall
Choose a place from where the signals reach 1.
the unit.
2.
Fix the holder to a wall, a pillar, etc. with the
screws supplied with the holder.
3.
Place the remote controller in the remote
controller holder.
ATTENTION
About batteries
When replacing the batteries, use batteries of the same type, and replace the 2 old batteries together.•
When the system is not used for a long time, take the batteries out.•
The batteries will last for approximately 1 year. If the remote controller display begins to fade and the degradation of reception performance occurs •
within a year, however, replace both 2 batteries with new, size AAA.LR03 (alkaline).
The attached batteries are provided for the initial use of the system.
•
The usable period of the batteries may be short depending on the manufactured date of the air conditioner.
About remote controller
Never expose the remote controller to direct sunlight.•
Dust on the signal transmitter or receiver will reduce the sensitivity. Wipe off dust with soft cloth.•
Signal communication may be disabled if an electronic-starter-type fl uorescent lamp (such as inverter-type lamps) is in the room. Consult the shop •
if that is the case.
If the remote controller signals happen to operate another appliance, move that appliance to somewhere else, or consult the service shop.
•
Celsius/Fahrenheit display change function of remote controller
The set temperature may increase when the display is changed to Celsius from Fahrenheit, because a fraction of 0.5°C is rounded up.•
Example: A set temperature of 64°F (equivalent to 18.5°C) will be converted into 19°C.•
A reception sound will go off for the transmission of set temperature to the indoor unit at the time of setting the Celsius/Fahrenheit display change function.
•
Celsius/Fahrenheit display switch
The Celsius or Fahrenheit display is selectable with the following buttons.•
Press and buttons simultaneously
for 5 seconds.
The temperature will be displayed in Fahrenheit if it is presently displayed in Celsius, and •
vice versa.
When the display is changed to Fahrenheit again, the set temperature will be converted into 66°F (equivalent to 19°C) instead of the
original set temperature (64°F) but a set temperature of 66°F (equivalent to 19°C) will be converted into 19°C with no temperature change.
 Loading...