

Daewoo SR234B50A User Manual
%
#
$
^
6
2
1
4
5
3
!
@
*
(
)
&
1
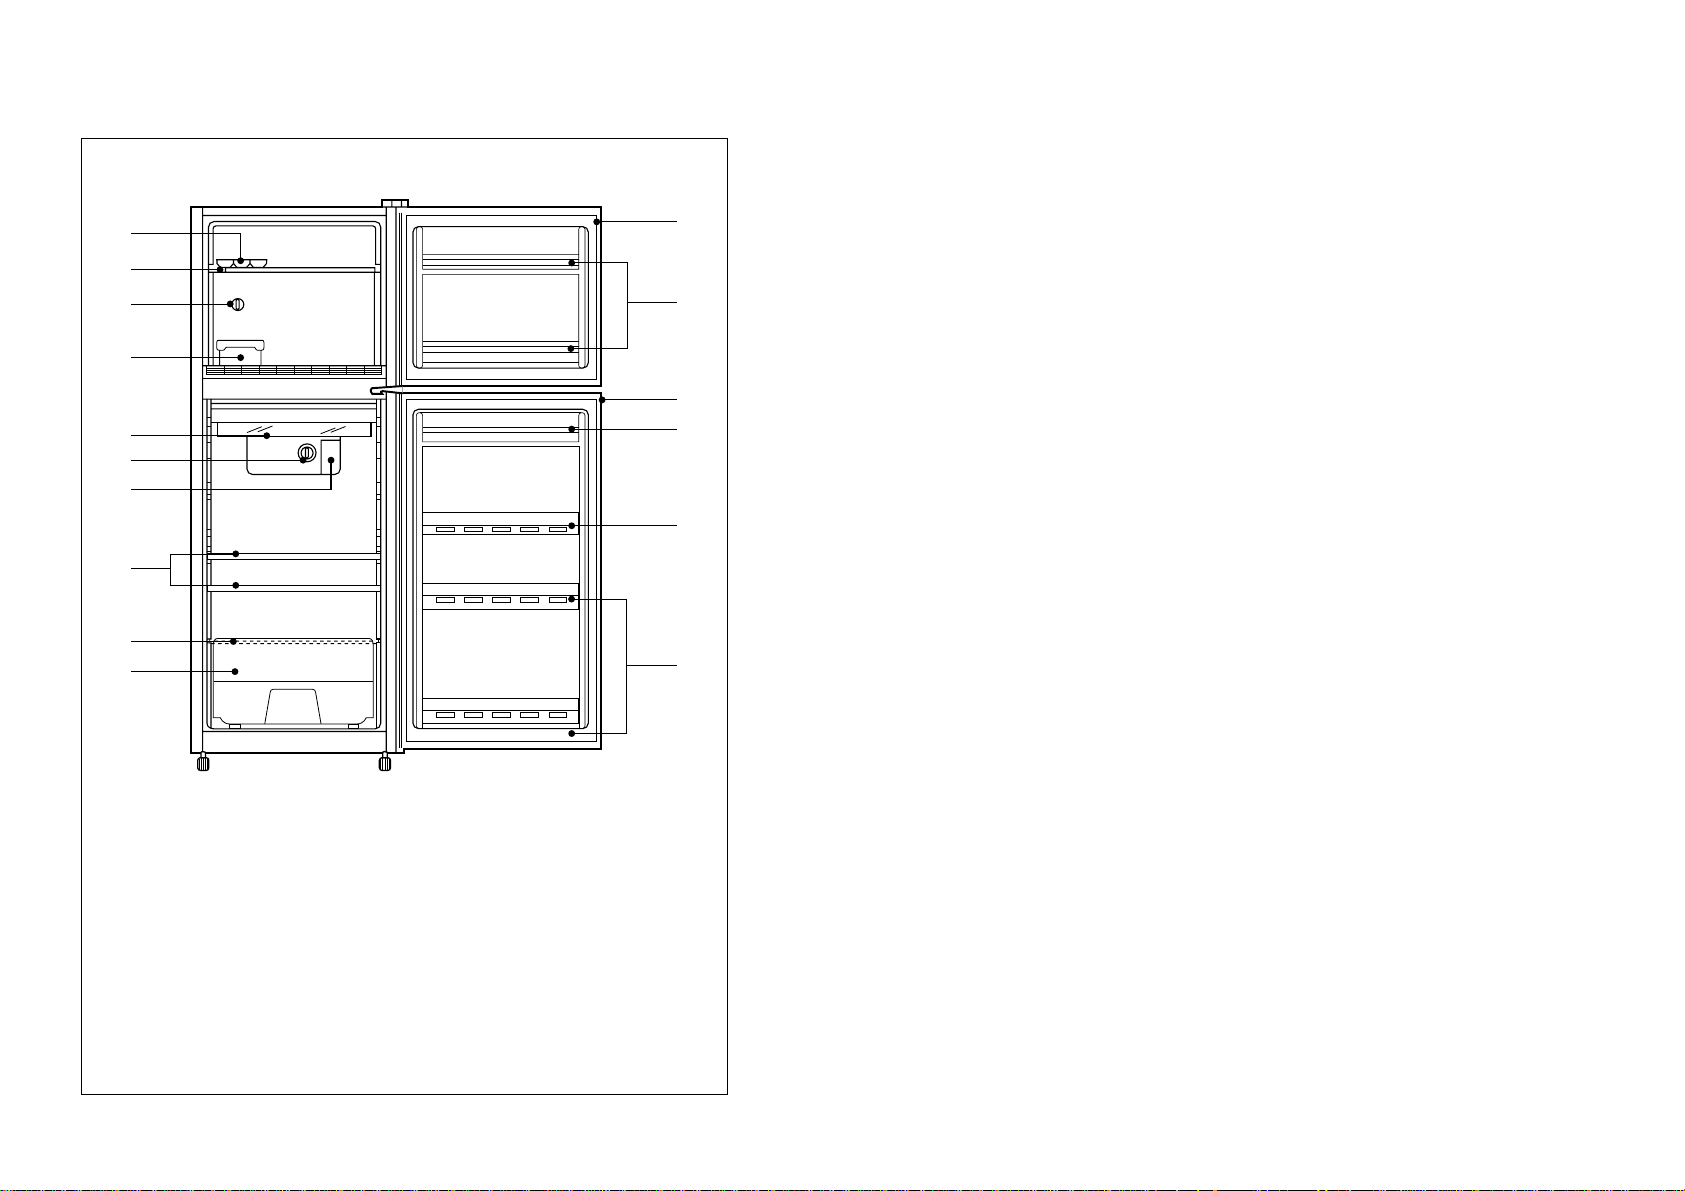
FEATURE CHART
! FREEZER DOOR GASKET
@ FREEZER POCKET
# FREEZER REMOVABLE SHELF
$ FREEZER TEMPERATURE
CONTROL KNOB
% ICE TRAY
^ ICE BOX
& REFRIGERATING-ROOM DOOR
GASKET
* EGG POCKET
( REFRIGERATING-ROOM
POCKET (SMALL)
) REFRIGERATING-ROOM
POCKET (LARGE)
1 LAMP COVER
2 REFRIGERATOR TEMPERATURE
CONTROL KNOB
3 REMOVABLE SHELF (LARGE)
4 GLASS SHELF
5 VEGETABLE BOX
6 CHILLED TRAY

32
Here are the features of your new refrigerator.
Take a moment to know all the features and convenience it was designed to
provide. Numbers match those in the illustration on page 1.
§
Ice tray
Fill tray 3/4 full to allow expansion of water during freezing. Place the tray
in freezer chest. To release cubes, twist lid slightly.
§
Removable Shelf
Shelves can be removed by pulling forward. The shelf can be placed at
your desirable position.
§
Freezer Shelf
To remove the freezer shelf!
1.Remove the screw on the left of inside freezer shelf with screw driver.
2.Push the shelf hooks to the back slightly and remove it by lifting off the
slots of bottom side.
3.Reverse procedure to install.
§
Defrost Drain Vessel
To remove defrost drain vessel.
1.Lift the defrost drain vessel slightly, then rotate bottom out and pull it down.
2.Reverse procedure to install.
CAUTION: 1. Check your voltage before inserting the power supply cord
into the socket.
2. Contact the earthing conductor to this unit with an
attachment earthing screw.
3. DonÕt make it spill to this unit.
4. DonÕt work with flammable spray, such as painting, near this
unit.
5. DonÕt put ignitable materials, such as, benzine, LP, Gas,
alcohol, etc., into this unit.
6. Precaution to the leakage of any gas equipment near this
unit
7. Precaution not to hold on to the door of this unit by children.
8. Precaution not to reinsert the power supply cord within 5
minutes after release it from socket. If not, a trouble may be
occured to compressor.
§§
ö
Lamp cover
To remove lamp cover
1. Push up the bottom ends of lamp
cover gently, then pull out.
2. Reverse procedure to install.
§§
ö
Vegetable Crisper
May be used for fruit and vegetable
storage. Both the crisper and its cover
shelf are removable for easy cleaning.
Simply slide forward to remove.
§§
ö
Egg Pocket
Egg supporter in this pocket can be
turned upside down.
May be used of small size goods.
!
Lamp Cover
@
!
@
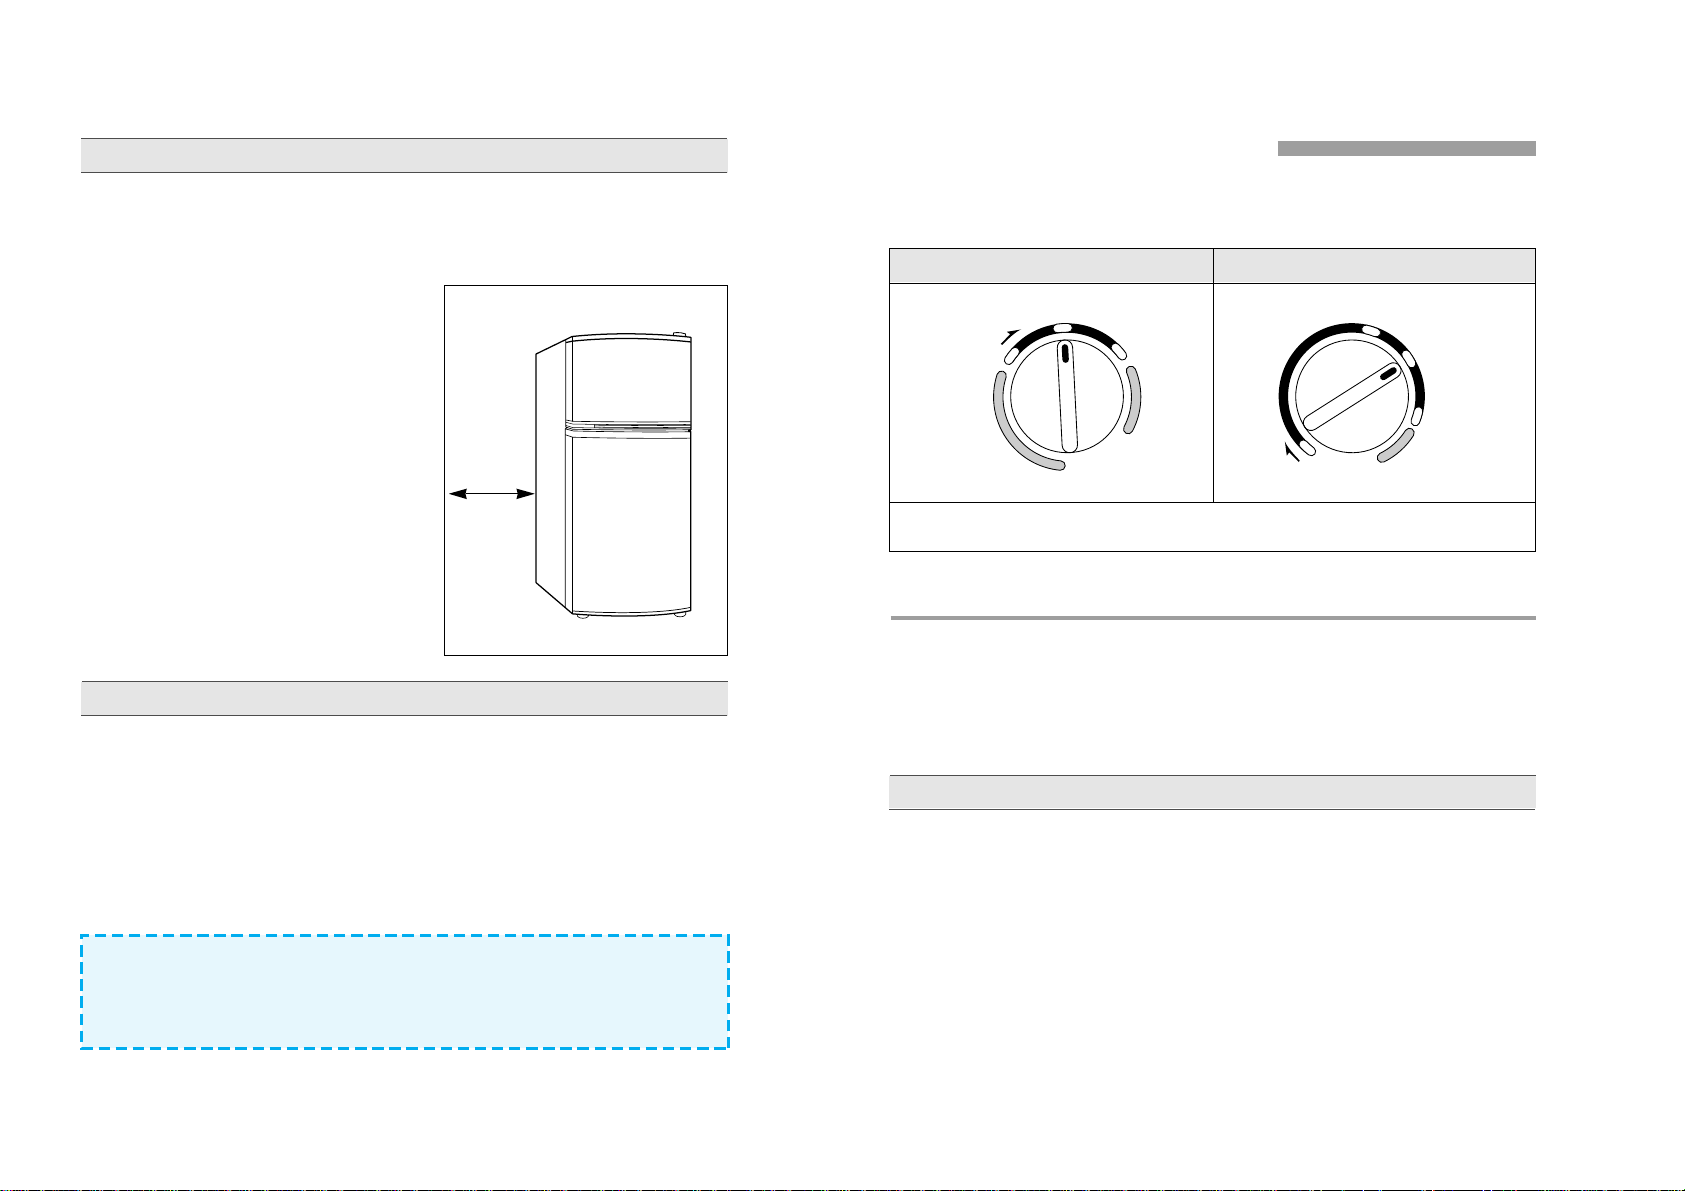
Freezer temperature control Refrigerator temperature control
Location
To change temperature
54
HOW TO INSTALL
Leveling
Install refrigerator in a convenient location away from extreme heat and cold.
Allow sufficient clearance between the refrigerator and side wall so the door
will open for a fully usable interior. Refrigerator is not designed for recessed
installation.
Level refrigerator so it rests solidly on the floor without rocking. There are two
leveling glides, one at each front corner. Turn to the left to raise a corner, to
the right to lower it. Use shims under rear corners, if necessary.
§ If you want, the refrigerator door to close when not held open, adjust glides
so that the front of the refrigerator is raised. However, front corners must
be level with each other, and rear corners with each other.
§ If you want, the refrigerator door to remain motionless when open, adjust
the leveling glides so that all four corners are level with each other.
NOTE : Make sure all packing material is removed. If the shipping tape has
left a residue on the door, touch the residue lightly with the
adhesive side of tape or with isopropyl alcohol (most rubbing
alcohol is this type).
HOW TO OPERATE
1. TEMPERATURE CONTROL
Temperature is controlled automatically. The TEMPERATURE CONTROL at
the in side of the refrigerator and freezer section control the degree of cooling
of each compartment.
Many factors influence the internal temperature of the refrigerator section
and freezer section.
§ The temperature and humidity of the home.
§ The frequency of door openings and the amount of warm food placed in
the refrigerator.
§ The combination of foods and containers stored in the refrigerator
For these reasons, you may want to adjust the control to suit the season
and your needs. When adjusting the temperature:
§ Select a place with strong level floor.
§ Allow 6cm of space between the
refrigeratorÕs side and the wall.
Starting your new refrigerator
1. Clean the refrigerator thoroughly. Wipe the outside with a soft dry cloth, the
inside with a damp cloth.
2. Set TEMPERATURE CONTROL at MED.
3.Connect the power supply cord.
The control has three settings from MIN to MAX.
MAX.
MED.
MIN.
MAX.
MED.
MIN.
OFF
6 cm
 Loading...