


CT6600øµπÆmenual 89.6.16 11:12 AM ∆‰¿Ã¡ˆ1
USER°ØS GUIDE

°ØS GUIDE CONTENTS
CT6600øµπÆmenual 89.6.16 11:12 AM ∆‰¿Ã¡ˆ2
CT6600
CONTENTS
DAEWOO CT6600 USER

CT6600øµπÆmenual 89.6.16 11:12 AM ∆‰¿Ã¡ˆ3
CONTENTS
Contents
Starting
How to use this manual / Check Items / System Setting
1. System Configuration
front Cpnfiguration / Rear Cpnfiguration
2. Srart to Install
Plugging keyboard and mouse / Plugging the Monitor
Plugging the power cord / Plugging the RJ11 Phon line
3.
System disassemble & upgrading
Disassembling Drawing /Upgrading Memory and
installing the PCI option card
4. Mother board
Specification / Layout / Jumper Setting
5. BIOS Setup
MAIN Setup Menu / Advanded Serup Menu / Security
Setup Menu /Power Setup Menu / Boot Setup Menu /
Exit Setup Menu
4
7
8
10
15
19
6. Driver Insrallation
Inf Update / Installation the VGA Driver /Insralling
theAV’97 Audio Driver
35

¡ÜFor your safety, remember to turn off the system and to disconnect
all the cords and cables before opening the system chassis.
¡ÜTo avoid electric shock, do not open the power supply
4
DAEWOO CT6600
CT6600øµπÆmenual 89.6.16 11:12 AM ∆‰¿Ã¡ˆ4
CT6600
USER°ØS GUIDE
Starting
This manual is for anyone who wants to setup and configure the PC.
It will help you to use CT6600 computer easily.
Please read this guide carefully before you install the system

CT6600øµπÆmenual 89.6.16 11:12 AM ∆‰¿Ã¡ˆ5
Your packing box includes CT6600, keyboard, mouse and power cord.
Check all the items form your box
Starting
Starting
S y s t e m
M a n u a l
Power Cord
K e y b o a r d
M o u s e
CD-ROM Title
DAEWOO CT6600
5

CT6600øµπÆmenual 89.6.16 11:12 AM ∆‰¿Ã¡ˆ6
CT6600
USER°ØS GUIDE
Operate the PC on a sturdy level surface such as desk or table
Please do not overload the
power socket
Please do not place magnetic
objects close to the system
Keep the computer away from
high temperature and direct
s u n l i g h t
Keep distance between the
system and the wall
DAEWOO CT6600
6
Keep the computer away from
excessive moisture and dust
Place the system away from
radio or any electronic receivers

CT6600øµπÆmenual 89.6.16 11:12 AM ∆‰¿Ã¡ˆ7
1. System Configuration
System Configuration
MIDI/GAME port
Headphone
MIC in
Digital LCD Monitor out(option)
Power LED
HDD LED
Power Button
Floppy Disk Drive
FDD Eject button
CD-Rom Drive LED
CD-Rom Drive eject button
CD-Rom Drive
USB Port
Keyboard
Mouse
Parallel port
Serial port
Monitor out
Speakerout
Line in
Mic in
Tel Line(to the wall)
Phone
Voltage selection switch
AC Power
DAEWOO CT6600
7

CT6600øµπÆmenual 89.6.16 11:12 AM ∆‰¿Ã¡ˆ8
CT6600
USER°ØS GUIDE
2. Start to Install
PS/2 Mouse
PS/2 Keyboard
Keyboard and mouse connector is on the rear panel
Connect the keyboard cable to the keyboard connector colored blue
Connect the mouse cable to the mouse connector colored gre e n
Option
Option
Digital LCD Monitor(option)
Analog CRT Monitor
DAEWOO CT6600
8

¡ÜDo not connect power cable to the power outlet until you finish all
the preceding steps
Start to Install
9
DAEWOO CT6600
Tel line(to the wall)
CT6600øµπÆmenual 89.6.16 11:13 AM ∆‰¿Ã¡ˆ9
Connect the CRT monitor to the MONITOR OUT connector colored ro y a l
b l u e .
If you want to use digital LCD monitor with DFP I/F, connect the digital LCD
monitor to the DIGITAL MONITOR OUT connector colored white.
Voltage Selection Switch
Power Cord
CT6600 Computer System applies both 110/220Vpower range with voltage
selecting switch.
B e f o re plug the power cord to your PC and connect the cord into the
g rounded outlet, you should select voltage 100 or 220 first.
P h o n e

CT6600øµπÆmenual 89.6.16 11:13 AM ∆‰¿Ã¡ˆ10
CT6600
USER°ØS GUIDE
With telephone line connectivity, you can network PCs located anywhere in
the same building where you have access to jacks from a single telephone
l i n e .
Using this system, you can share the internet, printers, files, devices, etc.
Connect phone jack and telephone line of the PCs you want to network with
RJ11 telephone line
3. System disassemble & upgrading
CT6600 provides many convenient options that gives you more system
flexibility. This chapter describes how to install optional part inside the
computer and remove and replace the computer cover and expansion-card
c a g e .
For easier work with inside your computer, please check out you have
p roper lighting and a clean work space. If you temporarily disconnect cables
or remove expansion cards, make sure you note the position of the
connectors and slots so that you can reassemble the system corre c t l y .
1.Remove all the AC power source from your computer and all peripherals.
DAEWOO CT6600
10
2 .Connection any telephone or telecommunication lines from the computer
may cause personal injury or electric shock.
3 .Please wait 5 second after turning off the computer before disconnecting
the peripheral or removing the component when you are disconnecting a
peripheral frome the computer or removing a component from the system

CT6600øµπÆmenual 89.6.16 11:13 AM ∆‰¿Ã¡ˆ11
board, to avoid possible damage to the system board.
4. Touch an unpainted metal surface on the computer chassis, such as the
power supply, before touching anything inside your computer.
To avoid static electricity that might harm internal component, please touch
an unpainted metal surface on the computer chassis periodically.
Touching components or contacts on a card or pins on a chip might cause
damage of components.
System disassemble & upgrading
This section describes how to disassemble PC for adding RAMs, installing MR
card and installing PCI option card etc.
Opening the Computer
1
LOOSE THESE SCREWS
2
DISCONNECT POWER
CONNECTOR
LOOSE THESE SCREWS
3
DAEWOO CT6600
11

CT6600øµπÆmenual 89.6.16 11:13 AM ∆‰¿Ã¡ˆ12
CT6600
USER°ØS GUIDE
This section is to describe that upgrading memory and Installing the PCI
option card.
Upgrading Memory
This model has 64 Mbytes memory as a default and you can upgrade max
256 Mbytes when you need.
How to install
1 .Locate the two clips that hold the memory module in place. One clip holds
the left edge of the module and the other clip holds the right edge.
2 . Push both clips away from the socket.
3 . Position the DIMM over the socket so that the notch at the bottom of the
module lines up over the divider in the socket. As shown in the next
p i c t u re, match the wide part of the module to the wide part of the opening
in the socket
DIMM
To insert DIMM module :
Position botton notches
over socket dividers
shown
Memory module
DAEWOO CT6600
12
notches
DIMM Socket
4 . Push the module straight into the socket.

CT6600øµπÆmenual 89.6.16 11:13 AM ∆‰¿Ã¡ˆ13
How to remove
1 . Locate the two clips that hold the memory module in place. One clip holds
the left edge of the module and the other clip holds the right edge.
2. Push one clip away from the module. Then, while holding the module
with one hand, push the other clip away from the module.
System disassemble & upgrading
DIMM
Memory module
DIMM Socket
3. Lift the module out of the socket
1. Unscrew and remove an empty slot guide
2. Put an Add-On Card in the empty PCI slot carefully.(be careful to the
d i rection of the card)
3. If there are cables that should be connected to the Add-On card, please
connect to it.
4. Screw the guide of the Add-On card.
DAEWOO CT6600
13

°‹The Add-On Cards should be properly inserted in the slot. If the card
is not properly inserted,then it could cause the system failure
CT6600øµπÆmenual 89.6.16 11:13 AM ∆‰¿Ã¡ˆ14
CT6600
USER°ØS GUIDE
PCI Slot
Option PCI CARD
Phone
Tel Line(to the wall)
.
DAEWOO CT6600
14

CT6600øµπÆmenual 89.6.16 11:13 AM ∆‰¿Ã¡ˆ15
4. Mother board
Item Specification
Model Name CB660F-WH
CPU Single Celeron Processor 400/433/466/500/533 MHz
(370-pin PGA connector)
Front Side Bus 66/100 MHz
Main Memory -Supports a maximum memory size of 512MB
-Supports two 168-pin DIMM Socket
-Supports PC 100/66 SDRAM
VGA Controller -GMCH0 /Graphic & Memory Controller Hub
-2X AGP
-DVMT / Dynamic Video Memory Technology
USB 2 USB ports
IDE -40-pin Boxed-Header for IDEs(Primary IDE)
-50-pin Boxed-Header(2mm pitch)for CDROM (Secondary IDE)
I/O Controller -1 Serial port
-1 Parallel port with ECD and EPP support
-Interface for one 1.2MB, 1.44MB, and 2.88MB Diskette Drive
-PS/2 type mouse and keyboard interfaces
Audio -SigmaTel AC°Ø97 codec
-Support AC°Ø97 compliant 2.1
-Line-out,Line-in,Mic-in port
-Telephony/Aux-In/Front(Line-Out ,MIC-In) Connector
BIOS -Phoenix PnP BIOS
-4MB Firmware Hub
MR (Modem Riser card) -56Kbps down load/ 33.6Kbps up load
-Support V.90
-Support Class1 Fax, T.30 protocol
-SupportITU-TV.34,V.32/V.32bis, V.23,V.22/V.22bis,V.21,Bell
103/2121
Expansion Slot -One PCI slot for Add-on card.
Mother board
DAEWOO CT6600
15

CT6600øµπÆmenual 89.6.16 11:13 AM ∆‰¿Ã¡ˆ16
CT6600
USER°ØS GUIDE
J34
J29
J16
J12
JP3
JP6
J17
J21
JP4
J20
DM1
DM2
ICH
J23 J27 J26
J4
J28
J33
J8
J24
J22
JP10
JP1
J5 J6 J7
J31
J32 J14 J13
J35
J30
J25
GMCH
J9
JP11
JP7
JP8
J3
JP5
J10
JP9
J19
DAEWOO CT6600
16

°a1 - 2°b, °a2 - 3°bf o r
connect pins 1&2, connect pins 2&3 respectively, or °aO N ( S h o r t )°b,
°aO F F ( O p e n )°b
JP3 : CMOS Clear
The CMOS RAM is powerd by the onboard coin-cell battery or power supply.
To clear the AC cord from the system. Short pins 2&3 for 5~10 seconds and
place jumper back to pins 1&2 position. If not the system may malfunctions.
JP4 : FWH Setting
JP5 : Keyboard Password Power-On Setting
Mother board
17
DAEWOO CT6600
JP5 KBD PWR-ON DESCRIPTION
1-2 NORMAL Nomal Operation without keyboard power-on
Setting when use keyboard power-on
(password, hotkey power-on, etc.)
2-3 KBD Power-On
JP4 FWH Setting DESCRIPTION
ON UNLOCK When upgrading BIOS
Protection from virus, etc
(can not upgrading BIOS)
OFF LOCK
JP3 CMOS CLEAR DESCRIPTION
1-2 NORMAL Setting when Normal Operation
2-3 CLEAR Setting BIOS default value by clearing CMOS
CT6600øµπÆmenual 89.6.16 11:13 AM ∆‰¿Ã¡ˆ17
Several hardware settings are made through the of jumper caps to connect
jumper pins(JP) on the motherboard. Refer to motherboard layout on
following page.
The jumper settings will be described numerically such as

CT6600øµπÆmenual 89.6.16 11:13 AM ∆‰¿Ã¡ˆ18
CT6600
USER°ØS GUIDE
JP7, JP8: Support ACPI S3 mode(STR)-option
JP7 JP8 REMARK
STR All OPEN 1-2, 3-4, 5-6, 7-8 Entering up to S3
Non-STR 1-2, 3-4, 5-6 All OPEN Entering up to S1
JP10: AUDIO Setting
JP10 AUDIO DESCRIPTION
1-2 ENABLE Setting when use AUDIO on motherboard.
2-3 DISABLE Setting when AMR or PCI Audio.
Internal VGA Setting
This is not a jumper but, user can setting Enable/Disable on BIOS Setup.
DAEWOO CT6600
18

§™Main
§™Advanced
§™Security
§™Power
§™Boot
§™Exit
3. To select an option entry, press arrow key(UP or Down). As the cursor
moves through the menu, the current option is hightlighted.
4. <+>,<-> and the space bar will scroll the current field°Øs value.
5. To change a value of configuraion, repeat the pro c e d u re 2through 4.
6. If you press<ESC>, the Exit menu will be displayed.
Save or discard your changes to CMOS and exit system Setup.
BIOS Setup
19
DAEWOO CT6600
5. BIOS Setup
CT6600øµπÆmenual 89.6.16 11:13 AM ∆‰¿Ã¡ˆ19
The SETUP program is a built-in program that allows configuration of
functions and devices of the system.
This chapter provides information on how the setup program allows you to
c o n f i g u re the function and device of your computer and how to configure
each items on the setup menus.
1. SETUP can be invoked when the power is turned on or software rest is
initiated. During the initial boot sequence, press <F2> will display the
setup main scre e n .
2. F rom the initial SETUP menu, use arrow key(Right or) to display the next
or previous menu.
T h e re are six SETUP menus and they are :

° ∞E x i t°±m e n u .
3. On the ° ∞Load Setup Deafaults°±option, Press <Enter> and select <Ye s > .
4. Select the ° ∞Exit Saving Changes°±to save the default values and exit SETUP.
To start Phoenix BIOS Setup utility :
1. Tu rn on or reboot your system. Phoenix BIOS displays this message:
P ress <F2> to enter SETUP or <CTRL-F1> to load VBU(if enabled)
2. P ressing <F2> displays the Main, which looks like this
<Figure1> Main Screen
20
DAEWOO CT6600
CT6600øµπÆmenual 89.6.16 11:13 AM ∆‰¿Ã¡ˆ20
CT6600
USER°ØS GUIDE
1. During boot-up sequence, press<F2> to display the SETUP menu.
2. Press <ESC> to go to the
Main Advanced Security Power Boot Exit
System Time: °a12:50:13°b
System Date: °a01:01:1998°b
Legacy Diskette A: °a1.44/1.25MB 3®ˆ”°b
Legacy Diskette B: °aDisabled°b
¢∫Primary Master °a1755MB°b
¢∫Primary Slave °aNone°b
¢∫Secondary Maste °aCD-ROM°b
¢∫Secondary Slave °aNone°b
¢∫Keyboard Features
Phoenix BIOS Setup Utility
Item Specfic Help
<Tab>,<Shift Tab>, or
<Enter> selects field.
System Memory : 640KB
Extended Memory : 30720KB
F1 Help ®y®zSelect Item -/+ Change Values F9 Setup Defaults
ESC Exit ®w®xSelect Menu Enter Select ¢∫Sub-Menu F10 Save and Exit

¡áSystem Time
This option displays the current system time.
Use <+> and <->keys to change the values.
P ress <Enter> to move from the Hour to the Minute, to the second field.
¡áSystem Date
This option displays the current system time.
Use <+> and <-> keys to change the values.
P ress <Enter> to move from the Month to the Date, to the Year field.
¡áLegacy Diskette A:Legacy Diskette B:
Specity the capacity and format of the floppy drives installed in your system.
Primary Master/Sl a v e ,Secondary Master/Slave
The Master and Slave settings on the Main Menu control the types of devices:
§™Hard-disk drives
§™Removable-disk drives
§™CD-ROM drives
The setting is defined to °ÆA u t o°Øto automatically select the hard disk
parameters and the protocol at the time of boot-up. The user can define its
own parameter by selecting the °ÆU s e r°Øv a l u e .
If you press <Enter>, the datas for each device would display.
¡áKeyboard Features
Specify Keyboard Features as Following:
§™Numlock: On or Off turns NumLock on off at bootup. Auto turns NumLock
on if it finds a numeric key pad.
§™Key Click: Tu rns audible key click on.
BIOS Setup
21
DAEWOO CT6600
CT6600øµπÆmenual 89.6.16 11:13 AM ∆‰¿Ã¡ˆ21
Use this menu for basic system configuration.
You can make the following selections on the Main Menu itself.

§™Keyboard auto-repeat rate : Sets the number of times a second to repeat a
k e y s t roke when you hold the key down.
§™Keyboard auto-repeat delay : Set the delay time after the key is held down
b e f o re it begins to repeat the keystro k e .
§™Legacy USB Support : Enable/Disable for Legacy Universal Serial Bus.
¡áSystem Memory
Displays the amount of conventional system memory detected during
b o o t u p .
¡áExtended Memory
Display the amount of extended system memory detected during bootup.
22
DAEWOO CT6600
CT6600øµπÆmenual 89.6.16 11:13 AM ∆‰¿Ã¡ˆ22
CT6600
USER°ØS GUIDE

° ∞A d v a n c e d°±f rom the Menu Bar displays the Advanced
Menu, Which looks like this :
<Figure2> Advanded Screen
BIOS Setup
23
DAEWOO CT6600
Phoenix BIOS Setup Utility
Main Advanced Security Power Boot Exit
Settup Warning
Setting items on this menu to incorrect values
may cause your system to malfunction.
Processor Serial Number : °aEnabled°b
Installed O/S : °aWin 98 /Win 2000°b
Primary Video Adapter : °aAGP°b
Reset Configuration Data : °aNo°b
PS/2Mouse °aAuto Detect°b
Secured Setup Configurations °aNo°b
Large Disk Acsess Mode: °aDOS°b
Local Bus IDE adapter: °aBoth°b
Spread Spectrum °aEnabled°b
¢∫I/O Device Configuration
¢∫Advanced Chipset Control
F1 Help ®y®zSelect Item -/+ Change Values F9 Setup Defaults
ESC Exit ®w®xSelect Menu Enter Select ¢∫Sub-Menu F10 Save and Exit
Item Specfic Help
Select the operating
system installed on your
system which you will use
most commonly.
Note: An incorrect setting
can cause some operating
systems to display
unexpected behavior.
CT6600øµπÆmenual 89.6.16 11:13 AM ∆‰¿Ã¡ˆ23
Use this menu to set the Advanced Features available on your system’s
chipset. Selecting

¡áProcessor Serial Number
C o n t rols detection of processor Serial Number.
(Note:this option woul show only if there is Pentium ¥²processor in your system.)
¡áInstalled O/S
Selected the operating system installed on your system which you will use
most commonly
(N o t e : An incorrecting setting can cause some operating systems to display
unexpected behavior.)
¡áPrimary Video Adqpter
This item allows you to select which video card display first when AGP and
PCI Video card are installed at the same time.
To reset PnP data. set the value to¡¯Ye s¡¯.¡¯Ye s¡¯erase all configuration data in
ESCD, which stores the configuration settings for non-PnP plug-in devices.
Select ¡®Ye s¡¯when requied to re s t o re the manufacture¡¯s defaults.
¡áPS/2Mouse
This is to °ÆE n a b l e d°Øor to °ÆD i s a b l e°ØPS/2Mouse functions.
°ÆAuto Detect°Øwill enable the PS/2mouse only if pre s e n t .
¡áSecured Setup Configurations
‘ Yes’ prevents the Operaing System from overriding selections you have
made in setup.
¡áLarge Disk Access Mode
Select ‘DOS’ if you have DOS.
Select ‘Other’ if you have another operating system such as UNIX.
A large disk is one that has more than 1024 cylinders, more than 16 heads, or
m o re than 63 tracks per sector.
24
DAEWOO CT6600
CT6600øµπÆmenual 89.6.16 11:13 AM ∆‰¿Ã¡ˆ24
CT6600
USER°ØS GUIDE

¡áLocal Bus IDE adqpter
Enable or Disable the integrated local bus IDE adapter.
Specifies an option from below.
§™Disabled : Disabled the Local Bus IDE adapter.
§™Primary:Use only the primary Local Bus IDE.
§™Secondary:Use only the Secondary Local Bus IDE.
§™Both :Use both Local Bus IDE adapters.
¡áSpread Spectum
When This item is enabled, are ENI noise can be extrimely minimized.
¡áI/O Device Configuration.
this items allos youto configure I/O device as following.
§™Serial port:Assign a port address to the parallel port.
§™Parallel Port:Assign a port address to the parallel port.
§™Floopy disk Controller:Enable/Disable the Floppy disk controller.
§™MIDI Port: Configure MIDI Port.
§™Game PortL:Configure Gme Port.
¡áAdvanced Chipset Control
§™Video boot type
D e t e rmines whether the onboard video controller will be used as aboot
display device or not.
If you want to disable onboard video contro l l e r, Swlsct ° ∞Disable Onboard
Vi d e o°±.Then no system memory will be allocated for video.
§™Video BIOS Update
With this option, seletable between ° ∞E n a b l e d°±and ° ∞Disabled you can
c o n t rol if the video BIOS update proess can be invoked or not pre s s i n g
the hot-key sequence. It doesn°Øt mean that ff e a t u re is disabled, because
you can still use a Video BIOS updqte patch if one is already loaded. Yo u
jut can°Øt updqte it again/ if you select ° ∞E n a b l e d°±, the hot-key detection
will be fully functional.
BIOS Setup
25
DAEWOO CT6600
CT6600øµπÆmenual 89.6.16 11:13 AM ∆‰¿Ã¡ˆ25

§™Video BIOS
This option is selectable between ° ∞Degault VB°±and ° ∞Updated VB°±. Once
it has both video BIOS in the system,you can select which video BIOS
will be used by the internal graphic device. This option is automatically
BIOS will be used by the internal graphic device. This opton is
automatically switched to ° ∞Updqted VB°±upon the end of a successfully
updqte pro c e s s .
Note
The video BIOS update process is invoked by pressing a hot-key combination
during the POST process, but prior ro turn on the system an invoke the process, you
need to get the video BIOS updqte files from intel, prepare a floppy and place it into
the driver. Those simple steps are described bellow. The update process takes only
10 to 15 seconds.
a. Getting update files
The updqte pack is composed by a set of 2 files that will make available in its
web site or given in any other kind of media. The files must be named
WVBIOS. VID and WVBIOS. SIG The °ÆV I D°Øfile is the actual video BIOS and
°ÆS I G°Øfile is a signature file used by the validation process to confirm the
video BIOS authenticity.
b. Preparing a floppy
Specific actions are necessary on preparing a floppy for the update pro c e s s ,
once the ° ∞file reading capabilities°±and ° ∞copy the WVBIOS.VID and
WWBIOS. SIG files to it without do any other write operation,°±
c. Updating the system
To update the video BIOS, it is only necessary to place the floppy on the
d r i v e r, turn the system on and press the hot<CTRL-F1> during the boot
p rocess. The time to issue the hot key is announced by a message(same time
to press F2 to go into setup) and if you°Øre using the quiet boot, just pre s s
ESC kiy to go to log screen, You can also press the hot key when you see
quiet boot logo.
26
DAEWOO CT6600
CT6600øµπÆmenual 89.6.16 11:13 AM ∆‰¿Ã¡ˆ26
CT6600
USER°ØS GUIDE

°Øs possible
during the POST, to skip the updated patch and load the defaul one instead.
This is accomplished by pressing the hot key<CTRL-O>(in the same time to
p ress F2for setup). The system then do are-boot and load the default video
BIOS.Keep in mind that system then do are-boot and load the defult video
BIOS. Keep in mind that in the next boot. if you want to select perm a n e i t l y
the default video BIOS, you need to go to setup applicaton and select
° ∞Default VB°±for ° ∞Video BIOS°Øo p t i o n .
§™Enable memory Hole; If enabled, turn system RAM off to free
address space for use with an option card.
Either a 16KB conventional CD hole, starting at 880KB(DC000h), or a
1MBextended memory gap, starting at 15MB, will be created in
system RAM.
§™Frequetly Ratio: Selet the internal frequency multiplier of the CPU.
BIOS Setup
27
DAEWOO CT6600
CT6600øµπÆmenual 89.6.16 11:13 AM ∆‰¿Ã¡ˆ27
d. Skip loading the video BIOS patch
Once the system has a video BIOS patch loaded and enabled, it

° ∞S e c u r i t y°±f rom the Menu Bar displays the Security menu, which
looks like this:
<Figure 3>Security Screen
¡áSupervisor Password Is:/User Password Is:
These items show the states of the Supervisor and User Password.
¡áSet Supervisor Password
Set Supervisor Password.
28
DAEWOO CT6600
CT6600øµπÆmenual 89.6.16 11:13 AM ∆‰¿Ã¡ˆ28
CT6600
USER°ØS GUIDE
Use this menu to set User and Supervisor Password and Backup and Vi r u s
check re m i n d e r.
Selecting
Main Advanced Security Power Boot Exit
Supervisor Password Is: Clear
User Password Is: Clear
Set Supervisor Password °aEnter°b
Set User Password °aEnter°b
Password on boot: °aDisabled°b
Diskette access: °aDisabled°b
Fixed disk boot sector: °aDisabled°b
Virus check reminder: °aDisabled°b
System backup reminder: °aDisabled°b
¢∫Power Supply Control
F1 Help ®y®zSelect Item -/+ Change Values F9 Setup Defaults
ESC Exit ®w®xSelect Menu Enter Select ¢∫Sub-Menu F10 Save and Exit
Phoenix BIOS Setup Utility
Item Specfic Help
Supervisor Password
Controls access to the
setup utility.

¡áPassword on boot
D e t e rmines whether the password will be asked for in every boot(Enabled),
or when entering in to the SETUP pro g r a m ( D i s a l d e d ) .
Refer to the item named SET SUPERVISOR PSSWORD for the password
s e t t i n g .
¡áDiskette access
This item allow you to control access to diskette drives.
Set to ‘Supervisor’, access to the FDD is allowed only to the supervisor.
¡áFixed disk boot sector
If ‘Write protect’ is set forthis option , the boot sector of the hard disk is writep rotected to against viruses.
(Note: This must be set to ‘Normal’ to transmit system files of the hard disk or to
format the hard disk.)
¡áVirus check reminder
If ‘ Daily’, ‘Weekely’, or ‘Monthly’ is selected, the system prompts the user
with remi nder for virus check at respective intervals.
¡áSystem backup reminder
If ‘Daily’, ‘Weekely’, or ‘Monthly’ is selected, the system prompts the user with
reminder for system backup at boot-up.
¡áPower Supply Control
This item allows you to select a method to power on by keyboard.
(Note: USB keyboards can’t be used to power on.)
§™Disabled: Disable the keyboard power on.
§™PC 98-KBD. It allows you to power on thr system by the PC98
keyboard’s Power Button.
BIOS Setup
29
DAEWOO CT6600
CT6600øµπÆmenual 89.6.16 11:13 AM ∆‰¿Ã¡ˆ29
To clear the current password, just hit <Enter> on New Password and
c o n f i rm Password.(Maximum 5 characters can be used for a password.)

§™Hot-Key: It allows you to power on the system by the Hot-key.
(Ctrl+F1/Ctrl+f2/Ctrl+f3/Ctrl+F4)
§™Password: It allows you to power on the system by the password
that you entered.
Use this menu to configure Power-Management feature s .
Selecting “power” from the Menu Bar displays the Power menu which looks
like this:
<Figure 4> Power Screen
¡áPowerButton Override
Specify power button option as Following:
§™Enabled: Use Power Button as the Suspend/ Resume Button and
30
DAEWOO CT6600
CT6600øµπÆmenual 89.6.16 11:13 AM ∆‰¿Ã¡ˆ30
CT6600
USER°ØS GUIDE
Main Advanced Security Power Boot Exit
PowerButton Override: °aEnabled°b
Power Savings: °aDisabled°b
Standby Timeout: °aOff°b
Auto Suspend Timeout: °aOff°b
Resume On Time: °aOff°b
Resume Time: °a00:00:00°b
Resume On Modem Ring: °aOff°b
F1 Help ®y®zSelect Item -/+ Change Values F9 Setup Defaults
ESC Exit ®w®xSelect Menu Enter Select ¢∫Sub-Menu F10 Save and Exit
Phoenix BIOS Setup Utility
Item Specific Help
<Enabled>
: Use PowerButton as
the Suspend/Resume
Button and support
4sec Power Override.
<Disabled>
: Use PowerButton as
the SoftOff Button.

§™Disabled: Use Power Button as Soft-off Button.
¡áPower Savings
Specify Power Savings option as following:
§™Maximum Power Saving:Conserves the greatest amount of system
power
(Auto Suspend Timeout 5 Minutes)
§™Maximum Performance: Conserves power but allows greatest system
performance.
(Stanby Timeout:16 Minutes, Auto Suspend Timeout:60Minutes)
§™Disabled: Turn off Power Management.
§™Customized: Can define the ‘Stanby Timeout’ and ‘Auto Suspend
Timeout’.
¡áStanby Timeout
Define the ‘Stanby Ti m e o u t ’ .
¡áAuto Suspend Timeout
Define the ‘Auto Suspend Ti m e o u t ’ .
¡áResume On Time
According to the pre-set, the system recoves from the Suspend mode, or
wakes up from power- o ff state at a specific time.
¡áResume Time
Define the ‘Resume Time’ when ‘Resume On Time’ is set to ‘On’
¡áResume On Modem Ring
If set to ‘on’, the system wakes up from the suspend mode, or power- o ff state
when an incoming call is detected on your modem.
BIOS Setup
31
DAEWOO CT6600
CT6600øµπÆmenual 89.6.16 11:13 AM ∆‰¿Ã¡ˆ31
Support 4sec Power override.

¡á1/2/3/4
You can arrange the Boot Order List at the top of this menu to specify the
order of the devices from which the BIOS will attempt to seareh the
Operating System. To move a device, first select it with up-or-down arro w
keys, and move it up or down sding the <+> and <-> keys.
Note: If you have more than one hard drive, or more than one re m o v a b l e
devices, use the HARD DRIVE item to specify which one to use on the boot
order list, as descibed in the following.
32
DAEWOO CT6600
CT6600øµπÆmenual 89.6.16 11:14 AM ∆‰¿Ã¡ˆ32
CT6600
USER°ØS GUIDE
Use this menu to specify any drive as a boot drive.
Selecting “Boot” from the Menu Bar displays the Boot menu, which looks
like this:
Phoenix BIOS Setup Utility
Main Advanced Security Power Boot Exit
1. °aRemovable Devices°b
2. °aHard Drive°b
3. °aATAPI CD-ROM Drive°b
4. °aNetwork Boot°b
Item specific Help
Use<®C>or<®D>to
select a device, then
press <+> to move it up
the list, or <-> to
move it down the list.
Press <Esc> to exit
this menu.
¢∫Hard Drive
¢∫Removable Devices
QuickBoot Mode: °aEnabled°b
Summary screen: °aEnabled°b
F1 Help ®y®zSelect Item -/+ Change Values F9 Setup Defaults
ESC Exit ®w®xSelect Menu Enter Select ¢∫Sub-Menu F10 Save and Exit
<Figure 5> Boot Screen

¡áHard Drive
If you have more than one hard drive, select “Hard Drive” from the
B o o t M e n u .
Select the hard drive to use for booting by using the up-and-down arro w s .
Then move it to the toop of this list using the <+> key.
¡áRemovable Devicses
If you have more than one removable device, select “Removable Devices”
f rom the Boot Menu. Select the removable device to use for booting by using
the up-and-down arro w s .
Then move it to the top of this list using the <+> key.
¡áQuickBoot Mode
By skipping a few tests for booting, Quick Boot mode reduces system
booting time.
¡áSummary screen
Display system configuration on boot.
BIOS Setup
33
DAEWOO CT6600
CT6600øµπÆmenual 89.6.16 11:14 AM ∆‰¿Ã¡ˆ33

¡áExit Saving Changes
Save current values and exit the SETUP pro g r a m .
¡áExit Discarding Changes
I g n o re the changes and exit SETUP pro g r a m .
¡áLoad Setup Defaults
Assign defaults values to configuration fields.
¡áDiscard Changes
I g n o re the changes.
¡áSave Changes
Save current values to CMOS.
34
DAEWOO CT6600
CT6600øµπÆmenual 89.6.16 11:14 AM ∆‰¿Ã¡ˆ34
CT6600
USER°ØS GUIDE
Exits the current menu.
Selecting “Exit” from the Menu Bar displays the Exit menu, which looks like
t h i s :
Phoenix BIOS Setup Utility
Main Advanced Security Power Boot Exit
Exit Saving Changes
Exit Discaeding Changes
Load Setup Defaults
Discard Changes
Save Changes
F1 Help ®y®zSelect Item -/+ Change Values F9 Setup Defaults
ESC Exit ®w®xSelect Menu Enter Select ¢∫Sub-Menu F10 Save and Exit
<Figure 6> Exit Screen
Item specific Help
Exit System Setup and
save your changes to
CMOS.

§™Core PCI and ISAPnP services
§™AGP support
§™IDE/UDMA-33/UDMA-66 support
§™USB support
§™Identification of Intel chipset components in device manager
Files for Windows98 and files for Windows95 are included in this software
p a c k a g e .
( Windows98 SE support Intel 810 chipset devices, so No Inf files needed in
Windows98 SE)
1) Installing the INF file
¡áRun ° ∞S e t u p . e x e°±file in °ÆI n f°Ød i r e c t o r y. (That is d:\inf\setup.exe)
¡áClick the °Æn e x t°Øbutton, then you will be prompted to agree to the
license agre e m e n t .
Driver Installation
35
DAEWOO CT6600
6. Driver Installation
CT6600øµπÆmenual 89.6.16 11:14 AM ∆‰¿Ã¡ˆ35
The Inf files for Intel(R) 810 chipests contain Windows device installation
files(*.inf) that outline to the operating system how the chipset components
shall be configure d
for proper functioality of the following feature ;
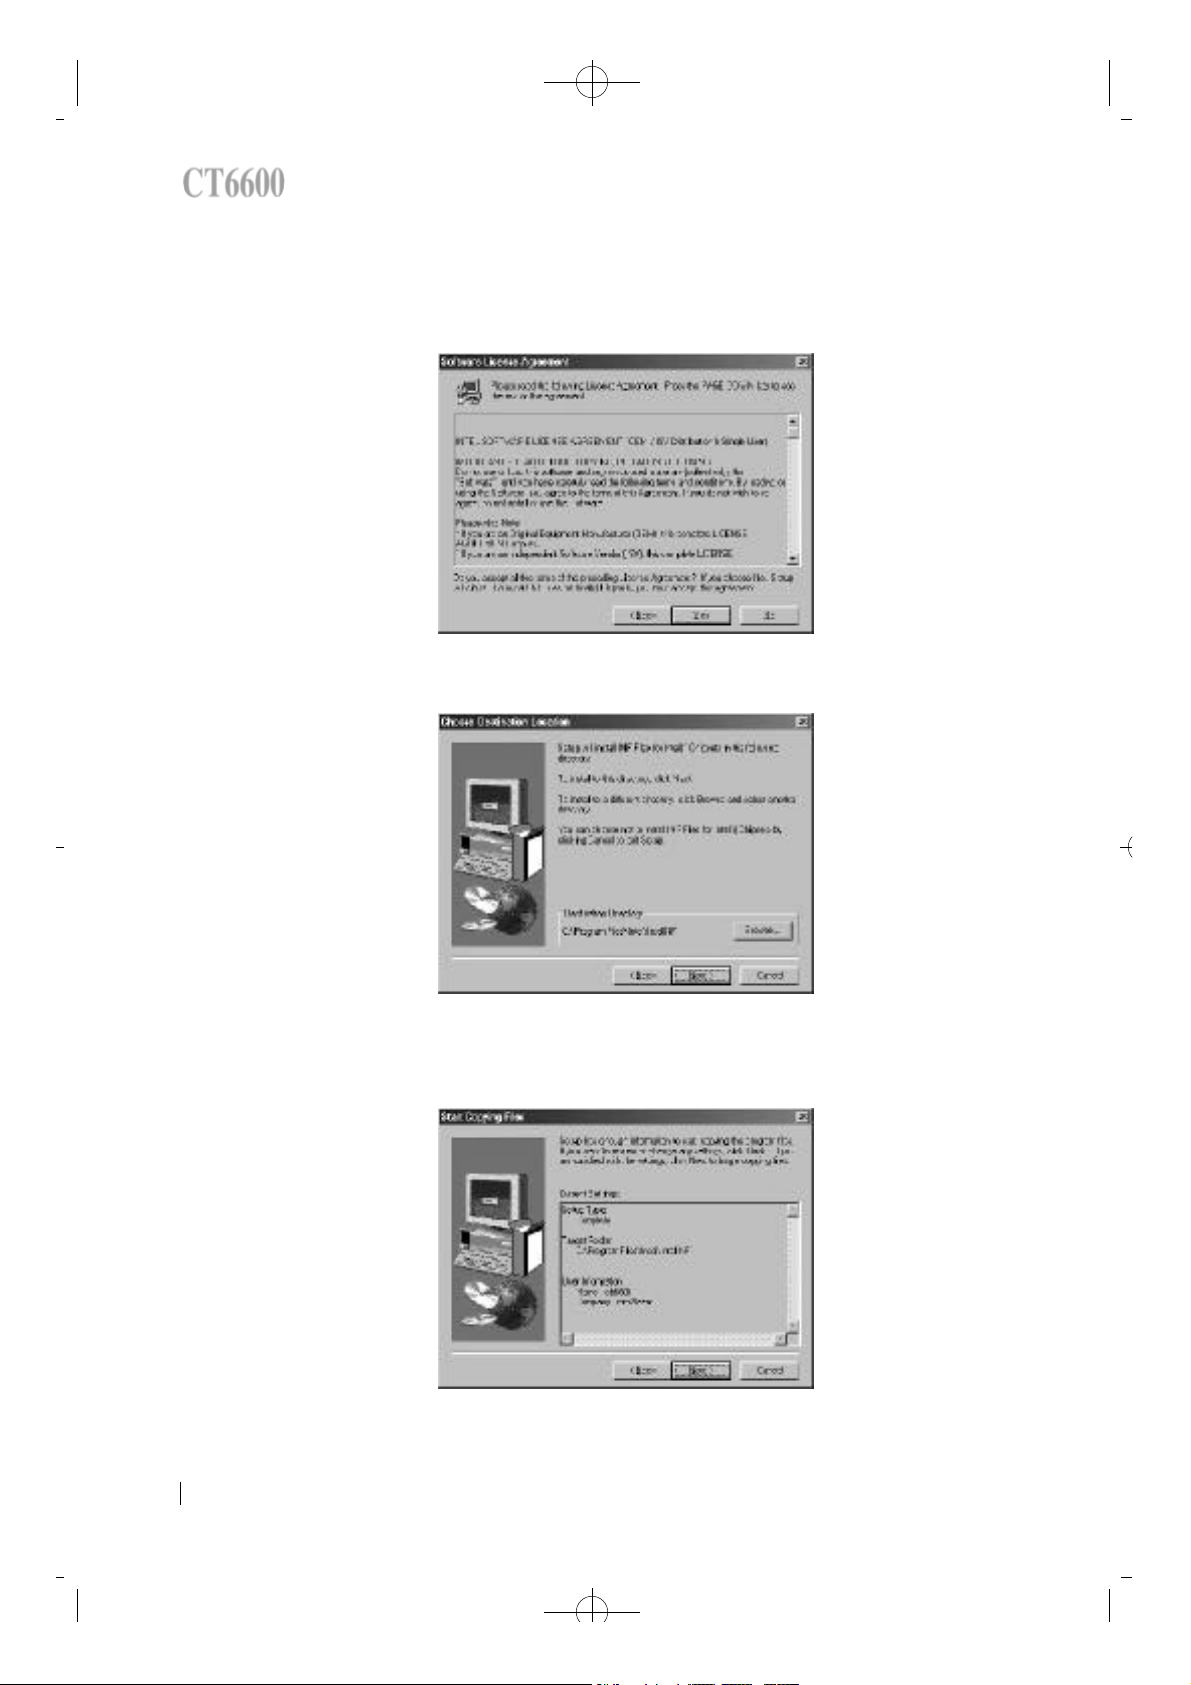
¡áClick the °Æy e s°Øb u t t o n .
¡áClick the °Æn e x t°Øb u t t o n .
¡áClick the °Æn e x t°Øbutton, then Inf files will be copied to c:\pro g r a m
files\intel\intelInf dire c t o r y .
36
DAEWOO CT6600
CT6600øµπÆmenual 89.6.16 11:14 AM ∆‰¿Ã¡ˆ36
CT6600
USER°ØS GUIDE

¡áRun ° ∞Setup. exe°±file in °ÆI n f i n s t°Ød i rectory. (That is d:\infinst\setup.exe)
¡áClick °Æn e x t°Øbutton, then you will be prompted to agree to the license
a g re e m e n t .
¡áClick °Æy e s°Øb u t t o n .
¡áClick °Ænext button
CT6600øµπÆmenual 89.6.16 11:14 AM ∆‰¿Ã¡ˆ37
2) Installing the Inf Update utility
Driver Installation
DAEWOO CT6600
37
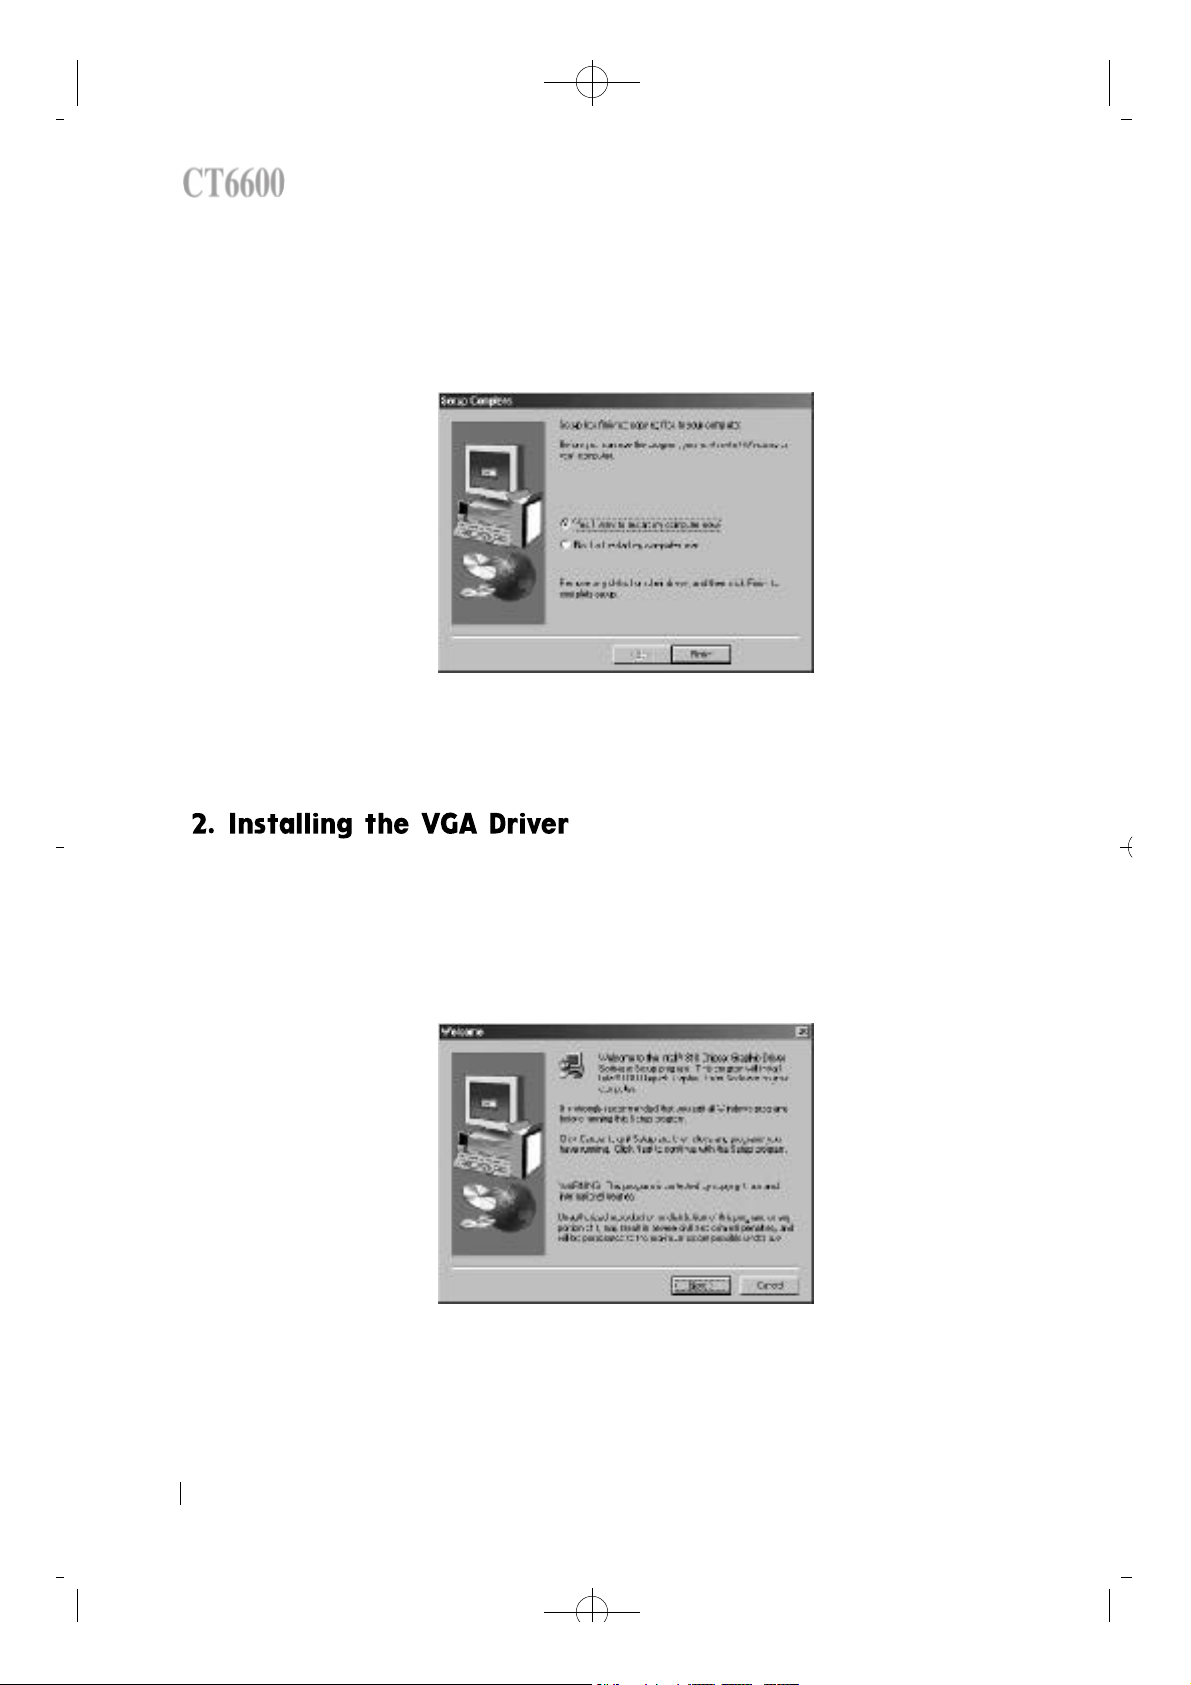
¡áClick °Æf i n i s h°Øbutton then system will re s t a r t .
¡áRun the ¡°S e t u p . e x e¡±file in ¡®w i n 9 x¡¯d i re c t o r y .
( d : \ v g a \ w i n 9 x \ G r a p h i c s \ s e t u p . e x e )
¡áClick ¡®n e x t¡¯button, then you will be prompted to agree to the license
a g re e m e n t .
38
DAEWOO CT6600
CT6600øµπÆmenual 89.6.16 11:14 AM ∆‰¿Ã¡ˆ38
CT6600
USER°ØS GUIDE

¡áClick ¡®y e s¡¯b u t t o n .
¡áClick next butto, then the vga drivers will copied will copied c:\pro g r a m
files\intel\GfxDrvEUD dire t o r y .
¡áClick ¡®f i n i s h¡¯button, then system will re s t a r t .
CT6600øµπÆmenual 89.6.16 11:14 AM ∆‰¿Ã¡ˆ39
Driver Installation
DAEWOO CT6600
39

°Ø
¡áClick °Æs t a r t°Øbutton, select settings, and select control panel.
¡áDouble click °ÆS y s t e m°Øicon, and select the Driver Manager tab. Then
you can see the following figure .
¡áSelect the ° ∞PCI Multimedia Audio Device°±, and click °ÆR e m o v e°Øb u t t o n .
¡áClick °ÆR e f re s h°Øb u t t o n .
¡áClick °Æn e x t°Øb u t t o n .
40
DAEWOO CT6600
CT6600øµπÆmenual 89.6.16 11:14 AM ∆‰¿Ã¡ˆ40
CT6600
USER°ØS GUIDE

¡áClick °Æn e x t°Øb u t t o n .
¡áCheck the °ÆSpecify a location°Øbox, and type the location.
(If you use Win98SE or Win2000, type d:\audio\win98se_2k.
If you use Win95 or Win98 Gold version, type d:\audio\win95_98)
¡áThen click °Æn e x t°Øb u t t o n
CT6600øµπÆmenual 89.6.16 11:14 AM ∆‰¿Ã¡ˆ41
Driver Installation
DAEWOO CT6600
41

¡áClick °Æn e x t°Øbutton. Then System will copy driver files.
¡áClick °Æf i n i s h°Øb u t t o n .
¡áThen the Device Manager tab will change like following figure .
42
DAEWOO CT6600
CT6600øµπÆmenual 89.6.16 11:14 AM ∆‰¿Ã¡ˆ42
CT6600
USER°ØS GUIDE
 Loading...