

Dacor DOP36M96GL Installation Instructions Manual

Modernist Prorange
DOP36M96GL*
Installation Instructions
Install_NX9900R_PRORANGE_DOP36M96_DA_DG68-01106C-00_EN+MES+CFR.indb 1 2019-02-15 5:46:13

Contents
Contents
Before you begin 4
Important 4
About this manual 5
Important note to the installer 5
Important note to the consumer 5
Important note to the servicer 5
Customer service information 6
Important safety instructions 7
Read all instructions before using this appliance 8
Symbols used in this manual 8
Product specifications 21
What's in the box 21
Installation requirements 23
Pre-installation checklist 23
General requirements 23
Location requirements 27
Gas requirements 29
Special gas requirements (gas models sold in Massachusetts) 30
Electrical requirements 31
Installation instructions 32
Preparing for installation 32
Installing the knobs for surface burners 43
Cooktop assembly 44
Verifying proper operation 47
Removal and Re-installation 48
Installation checklist 49
English2
Install_NX9900R_PRORANGE_DOP36M96_DA_DG68-01106C-00_EN+MES+CFR.indb 2 2019-02-15 5:46:13
WARNING: Failure to follow the instructions in this manual exactly
may cause a fire or explosion, and, consequently, property damage,
personal injury, or death.
• DO NOT keep or use gasoline or other flammable products near
this appliance.
• IF YOU SMELL GAS:
- DO NOT light any appliances.
- DO NOT touch any electrical switches.
- DO NOT use any phone in your building.
- Immediately call your gas supplier from a neighbor's phone,
and follow the supplier's instructions. (If you cannot reach
your gas supplier, call the fire department.)
• Installation and service must be performed by a qualified
installer, service agency, or the gas supplier.
English 3
Install_NX9900R_PRORANGE_DOP36M96_DA_DG68-01106C-00_EN+MES+CFR.indb 3 2019-02-15 5:46:13
Contents
Before you begin
Important
Installer
• To promote safety and minimize
problems, read this manual thoroughly
before starting the installation. Leave
this manual with the user.
• Write the appliance’s model/serial
numbers in this manual for service/
maintenance reference.
User
• Keep this manual for personal and
professional reference.
• The overall design and/or accessories may
differ with the model.
English4
Install_NX9900R_PRORANGE_DOP36M96_DA_DG68-01106C-00_EN+MES+CFR.indb 4 2019-02-15 5:46:13

About this manual
READ THESE INSTRUCTIONS COMPLETELY AND CAREFULLY.
Important note to the installer
• Read all instructions contained in these installation instructions before installing the
range.
• Remove all packing materials from the cooktop compartments before connecting the
electric and gas supply to the range.
• Observe all governing codes and ordinances.
• Be sure to leave these instructions with the consumer.
• Installation of this appliance requires basic mechanical skills.
• Proper installation is the responsibility of the installer.
• Product failure due to improper installation is not covered under the Warranty.
Important note to the consumer
Keep these instructions with your user manual for future reference.
• As when using any appliance generating heat, there are certain safety precautions you
should follow.
• Be sure your range is installed and grounded properly by a qualified installer or
service technician.
• Make sure the wall coverings around the range can withstand the heat generated by
the range.
• Cabinet storage space above the cooktop burners should be a minimum of 30 in
(76.2 cm).
Before you begin
Important note to the servicer
The electrical diagram is in an envelope attached to the back of the range.
English 5
Install_NX9900R_PRORANGE_DOP36M96_DA_DG68-01106C-00_EN+MES+CFR.indb 5 2019-02-15 5:46:13
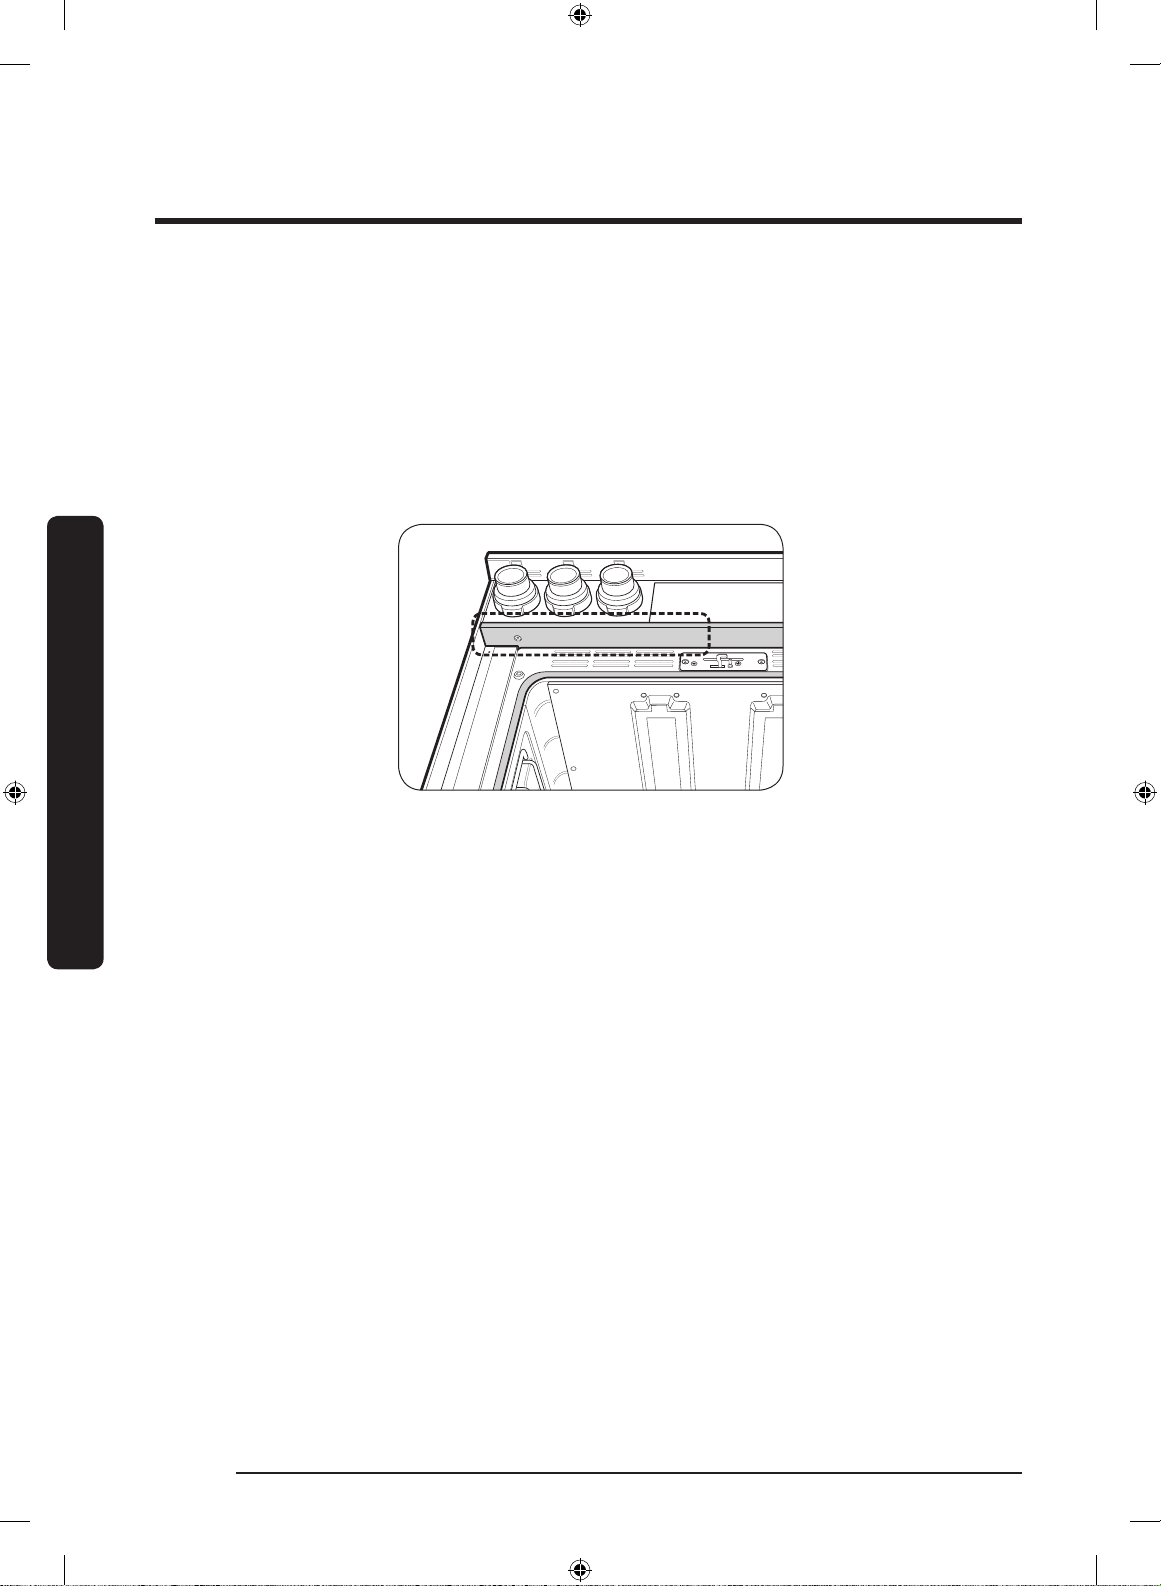
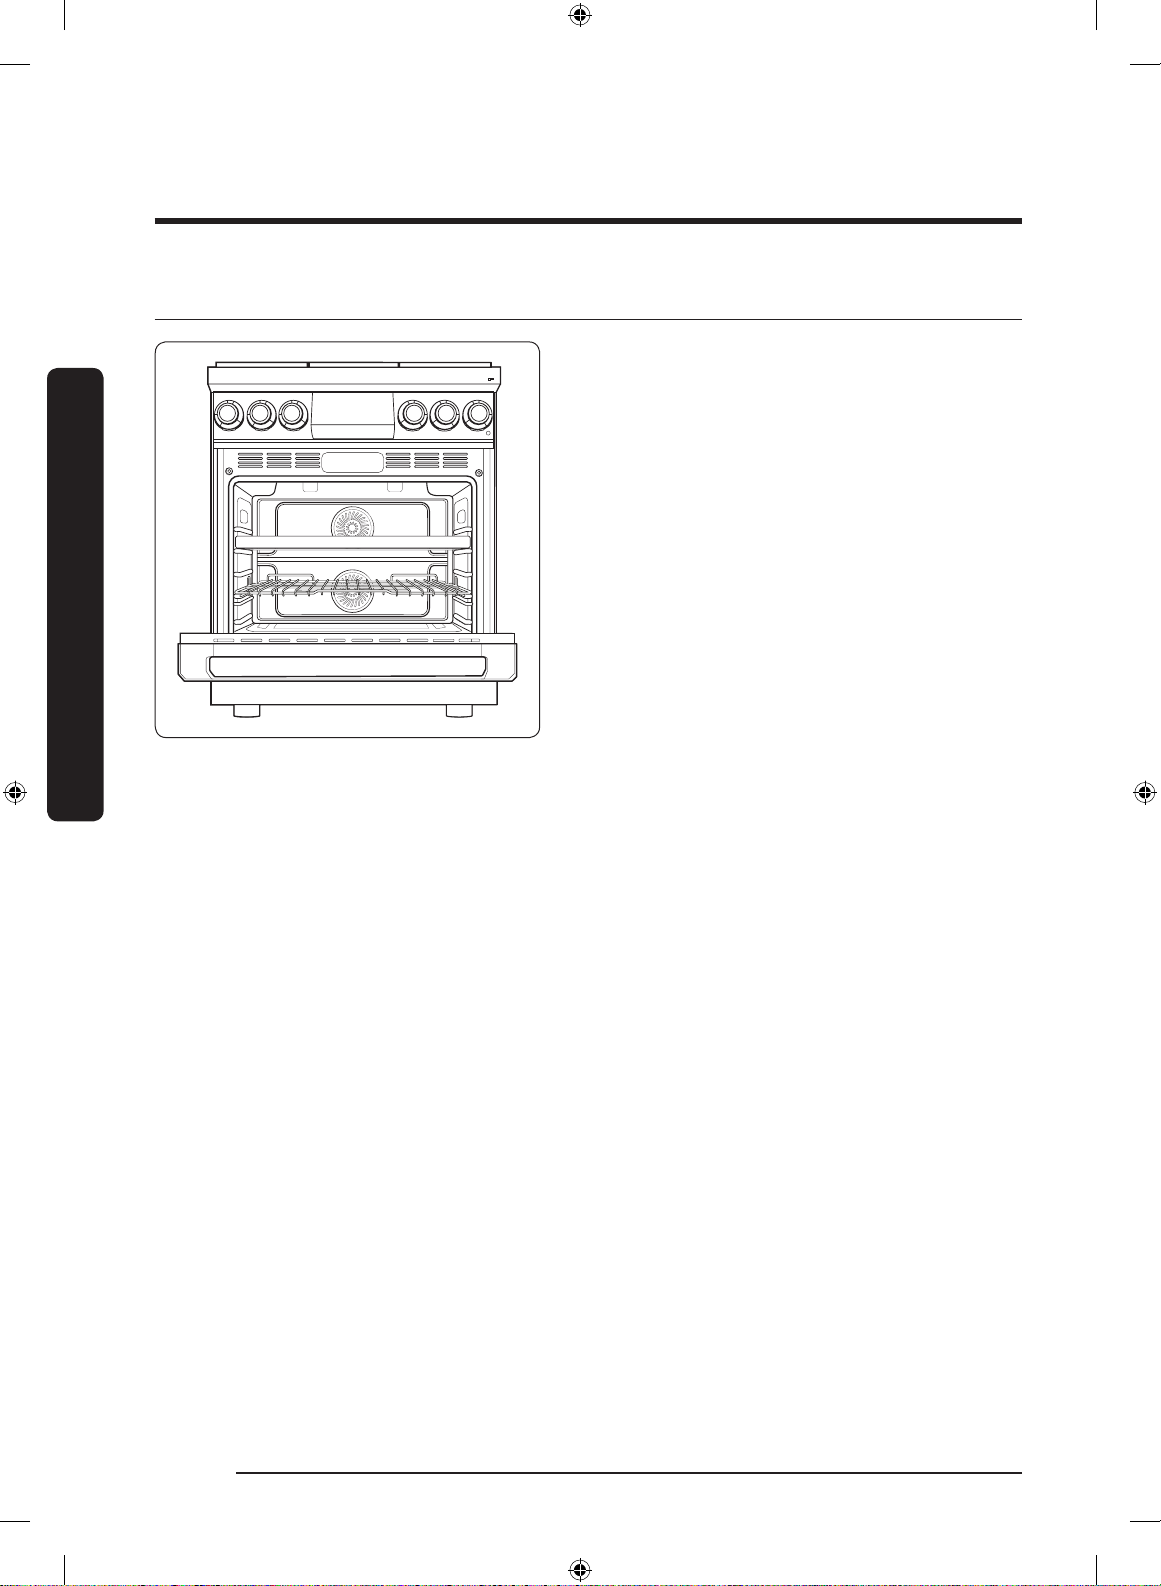
Customer service information
This section should appears as follows:
For installation issues, contact your Dacor dealer or Dacor Customer Assurance. Have
available the appliance's model and serial numbers. (See the graphic below for location.)
Dacor Customer Assurance
Phone: 833-35-ELITE (833-353-5483) USA, Canada
Mon – Fri, 5:00 a.m. to 5;00 p.m. Pacific Time
Customer service information
Model and Serial Number Location
English6
Install_NX9900R_PRORANGE_DOP36M96_DA_DG68-01106C-00_EN+MES+CFR.indb 6 2019-02-15 5:46:13
Important safety instructions
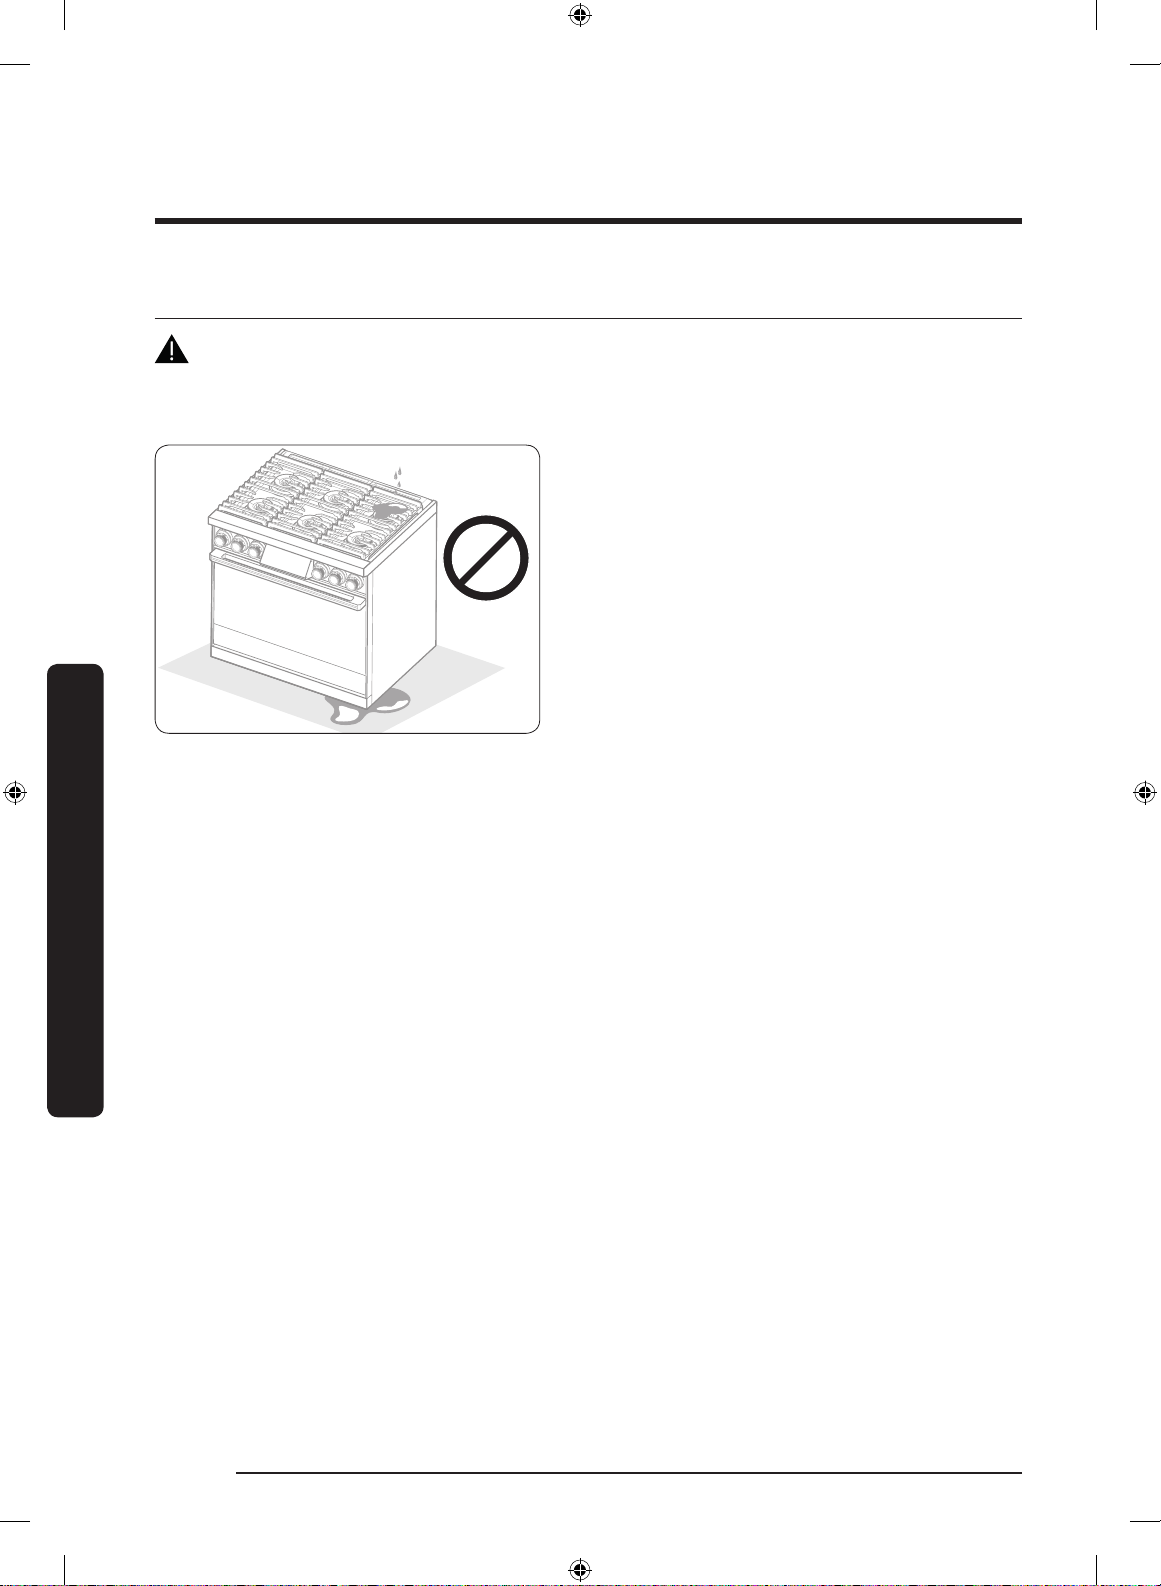
ANTI-TIP DEVICE
WARNING
ALL RANGES CAN TIP, RESULTING IN PERSONAL INJURY.
TIPPING RANGES CAN CAUSE BURNS FROM SPILLS,
PERSONAL INJURY, AND/OR DEATH.
INSTALL AND CHECK THE ANTI-TIP BRACKET FOLLOWING
THE INSTRUCTIONS AND TEMPLATE SUPPLIED WITH THE
BRACKET.
• To prevent accidental tipping of the range, attach an approved
anti-tip device to the floor. (See Installing the Anti-Tip Device
in the Installation Instructions.) Check for proper installation by
carefully tipping the range forward. The anti-tip device should
engage and prevent the range from tipping over.
• If the range is pulled out away from the wall for any reason, make
sure the anti-tip device is reengaged after the range has been
pushed back into place.
• Follow the installation instructions found in the Installation
Manual. Failure to follow these instructions can result in death,
serious personal injury, and / or property damage.
• DO NOT step / sit / lean on the door or drawer to prevent
accidental tipping of the range.
Important safety instructions
English 7
Install_NX9900R_PRORANGE_DOP36M96_DA_DG68-01106C-00_EN+MES+CFR.indb 7 2019-02-15 5:46:14

Important safety instructions
READ ALL INSTRUCTIONS BEFORE USING THIS APPLIANCE
• Electrical and gas equipment with moving parts can be dangerous. The important
safety instructions in this manual are intended to minimize the risk of property
damage, personal injury, and death. Be sure to read them.
• Keep this manual in a handy place so you can refer to it as needed.
Symbols used in this manual
WARNING
Hazards or unsafe practices that may result in severe personal injury or death.
CAUTION
Hazards or unsafe practices that may result in electric shock, personal injury, or property
damage.
Important safety instructions
NOTE
Useful tips and instructions.
These warning icons and symbols are intended to prevent property damage and personal
injury. Follow them explicitly.
English8
Install_NX9900R_PRORANGE_DOP36M96_DA_DG68-01106C-00_EN+MES+CFR.indb 8 2019-02-15 5:46:14
California Proposition 65 Warning
WARNING
Cancer and Reproductive Harm - www.P65Warnings.ca.gov.
Commonwealth of Massachusetts
This product must be installed by a licensed plumber or gas fitter qualified or licensed by
the State of Massachusetts. When using ball-type gas shut-off valves, you must use the
T-handle type. Multiple flexible gas lines must not be connected in series.
General safety
WARNING
To reduce the risk of fire, electric shock, personal injury, or death, observe these
precautions:
• Do not touch any surface, component,
or mechanism of the product during or
immediately after cooking.
• Learn where and how to open/close the
range's gas valve.
Important safety instructions
• Make sure the anti-tip device is properly installed. (See the Installation Instructions for
details.)
• Do not let children sit/stand on the product or play with any of its parts. Do not leave
children unattended in the kitchen when the product is in use.
• Remove all packaging before operating the product to keep this material from catching
fire. Keep all packaging away from children. Properly dispose of packaging as soon as
the product is unpacked.
• Do not keep objects of interest to children on or around the product.
• Do not operate the product if it is damaged in any way, if it malfunctions, or is missing
parts.
• Do not use the product as a space heater. This product is to be used for cooking
purposes only.
• Do not use oven cleaners or oven liners in or around any part of the oven.
English 9
Install_NX9900R_PRORANGE_DOP36M96_DA_DG68-01106C-00_EN+MES+CFR.indb 9 2019-02-15 5:46:14
Important safety instructions
• Use only dry pot holders.
• Do not use the product to heat unopened food containers.
• Do not strike the oven glass.
• When disposing of the range, cut off the power cord and remove the door.
• Unplug the product before service/maintenance.
• Make sure all meat and poultry is cooked thoroughly. Meat should always be cooked
to an internal temperature of 160 °F (71 °C). Poultry should always be cooked to an
internal temperature of 180 °F (82 °C).
• An air curtain or other overhead range hood, which operates by blowing a downward
airflow onto a range, shall not be used in conjunction with a gas range unless the
hood and range have been designed and tested in accordance with the Standard
for Domestic Gas Ranges, ANSI Z21.1 • CSA1.1, and listed by an independent testing
laboratory for combination use.
Important safety instructions
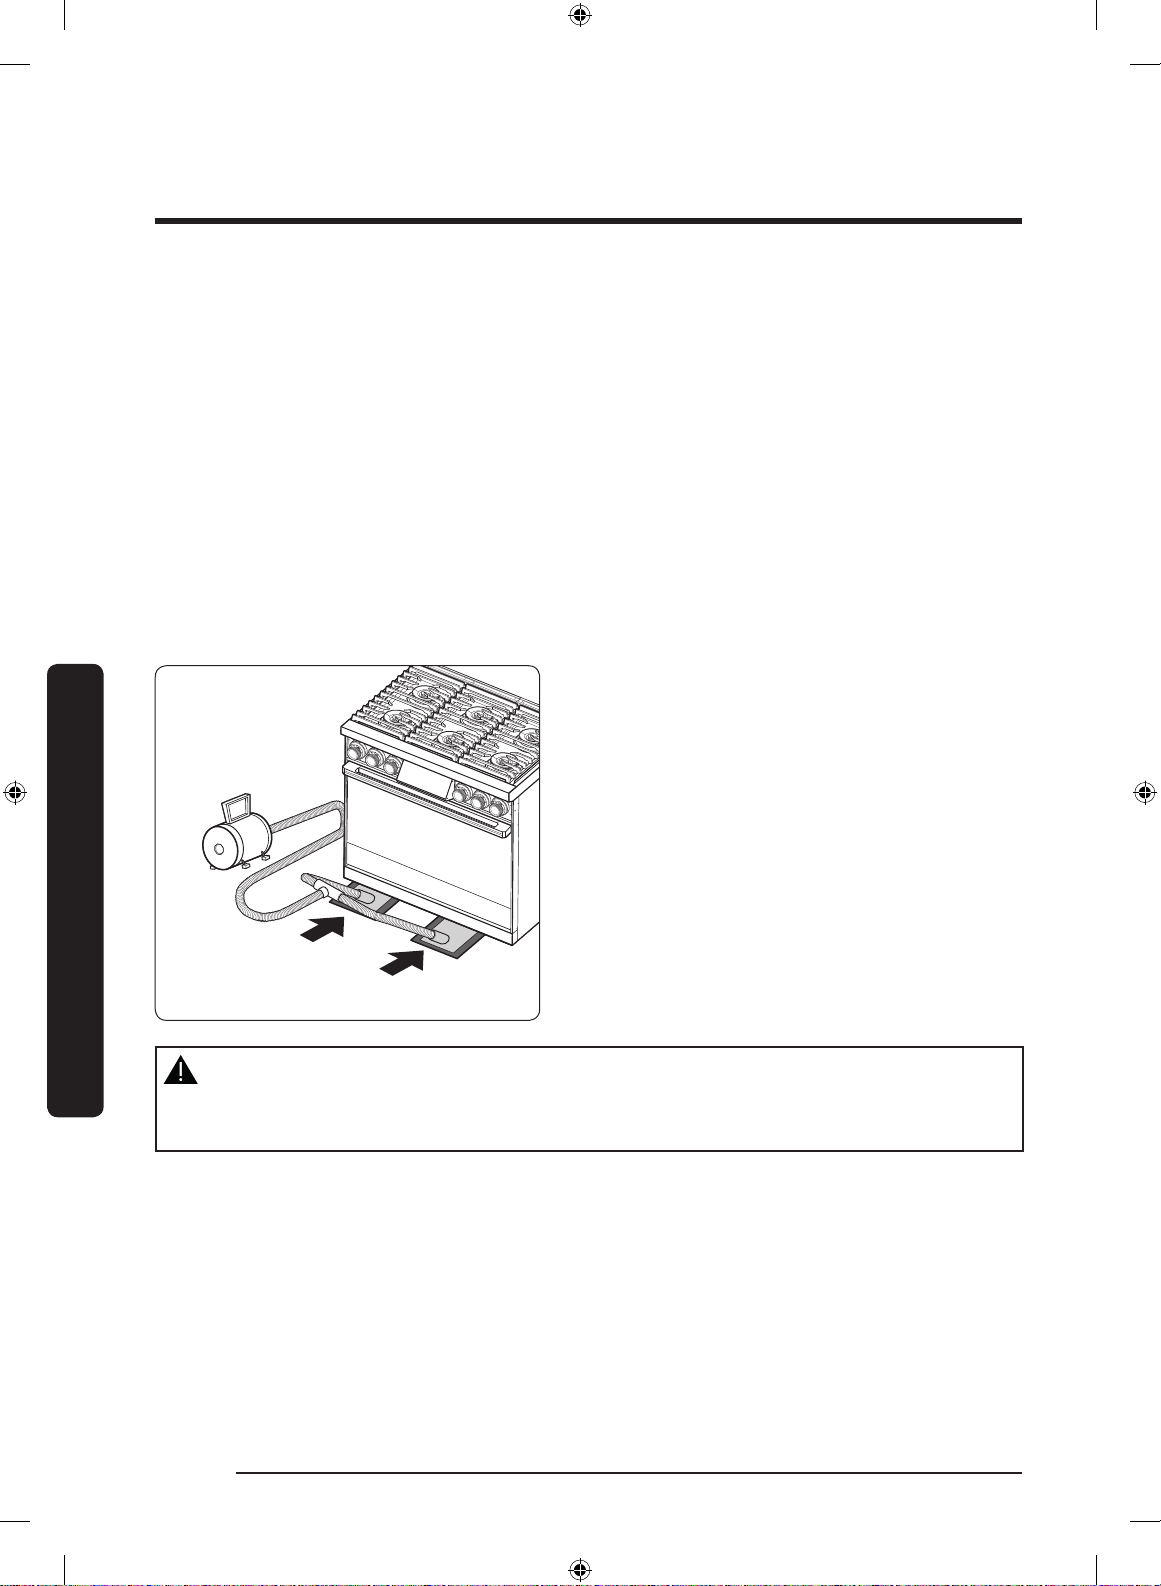
• Due to the weight, heavy equipment
movers such as Air Sled should be used
to move this unit. The weight must be
supported uniformly across the bottom.
After transporting the range by Air
Sled where you want, the range can
be leveled by adjusting the legs with a
wrench while Air Sled is supported.
Air Sled Insert
WARNING
NEVER use this appliance as a space heater to heat or warm the room. Doing so may
result in carbon monoxide poisoning and overheating of the oven.
English10
Install_NX9900R_PRORANGE_DOP36M96_DA_DG68-01106C-00_EN+MES+CFR.indb 10 2019-02-15 5:46:15

To remove safely from the pallet
1. Remove the screws from the bottom
bracket on either side of the unit.
2. Press the bracket on either side to pull
out.
Important safety instructions
3. Have two persons hold both bottom
sides of the unit and lift up to remove
from the pallet. Use caution not to hold
the door handle.
English 11
Install_NX9900R_PRORANGE_DOP36M96_DA_DG68-01106C-00_EN+MES+CFR.indb 11 2019-02-15 5:46:15
Important safety instructions
Fire safety
WARNING
To reduce the risk of fire, electric shock, personal injury, or death, observe these
precautions:
• To avoid grease buildup, regularly clean the vents.
• Do not let pot holders or other flammable material touch a heating element. Do not use
Important safety instructions
a towel or other bulky cloth item as a pot holder.
• Do not douse a grease fire with water. Instead, turn off the heat source, and smother
the fire with a tight-fitting lid, or use a multi-purpose, dry-chemical or foam
extinguisher.
• If a grease fire should occur in the oven, turn off the oven by pressing the OFF button.
Keep the oven door closed until the fire goes out. If necessary, use a multipurpose dry
chemical or foam-type fire extinguisher.
• Do not heat unopened food containers - buildup of pressure may cause container to
burst and result in injury.
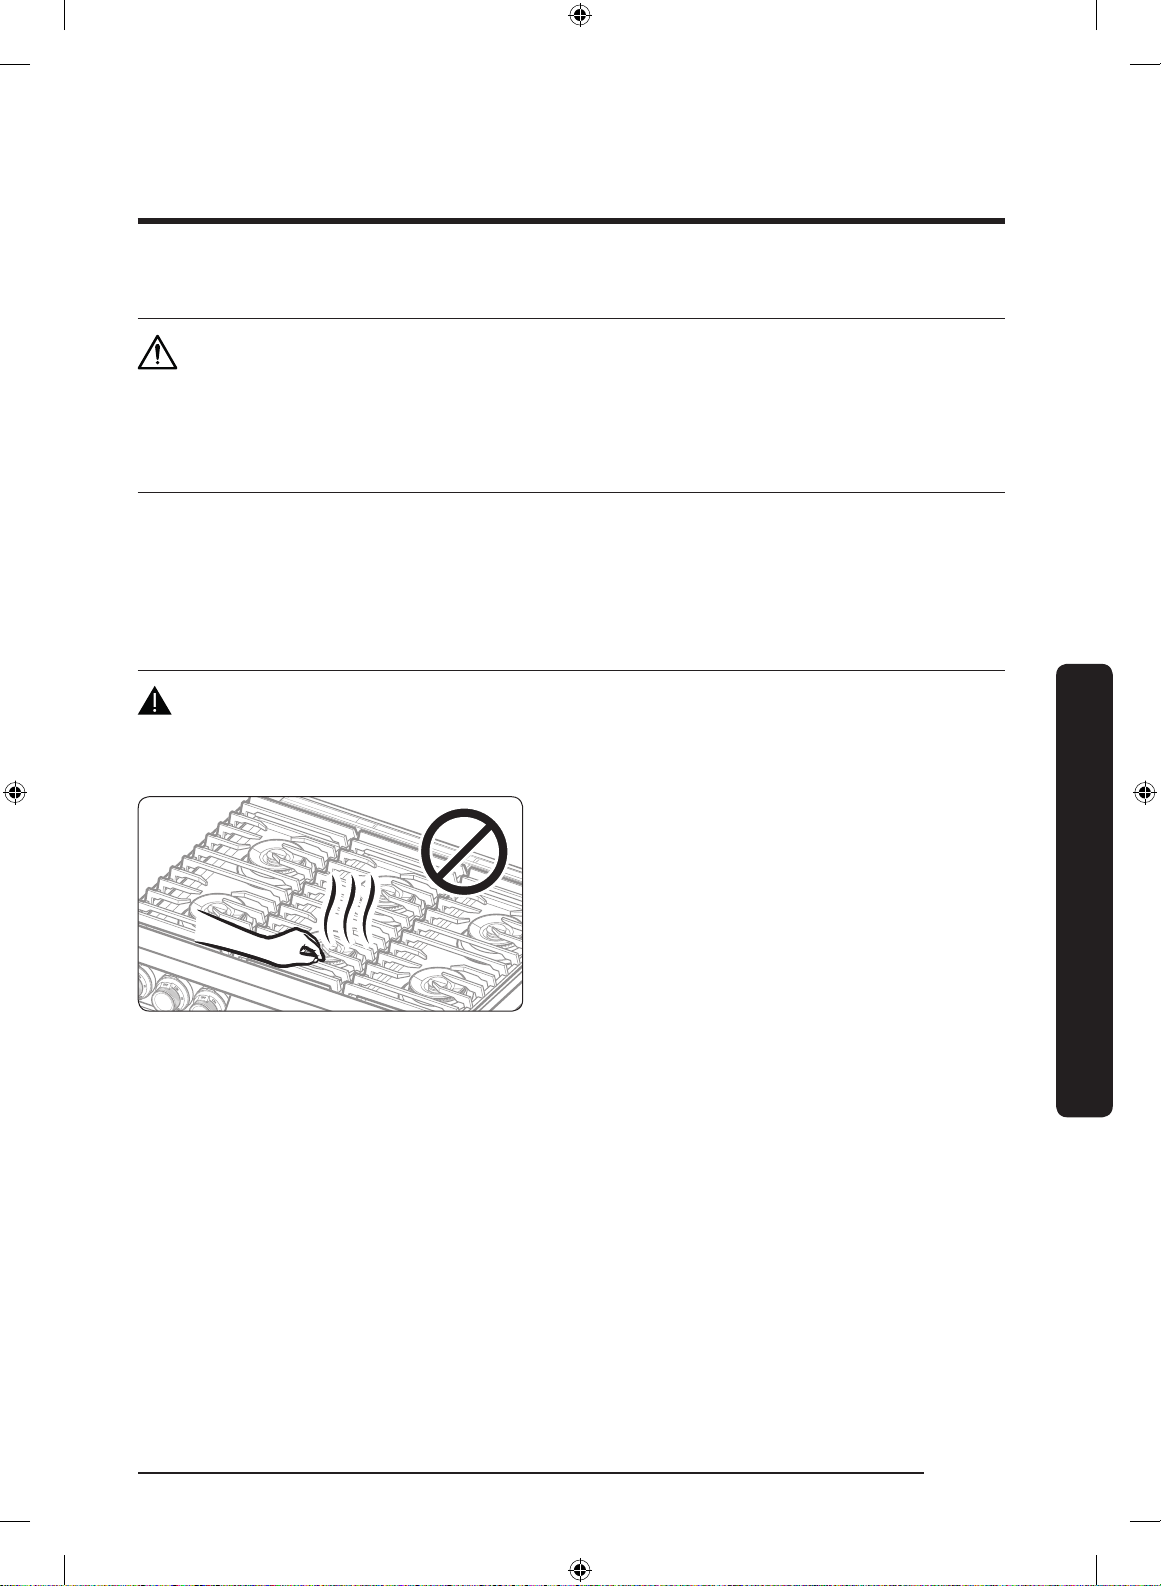
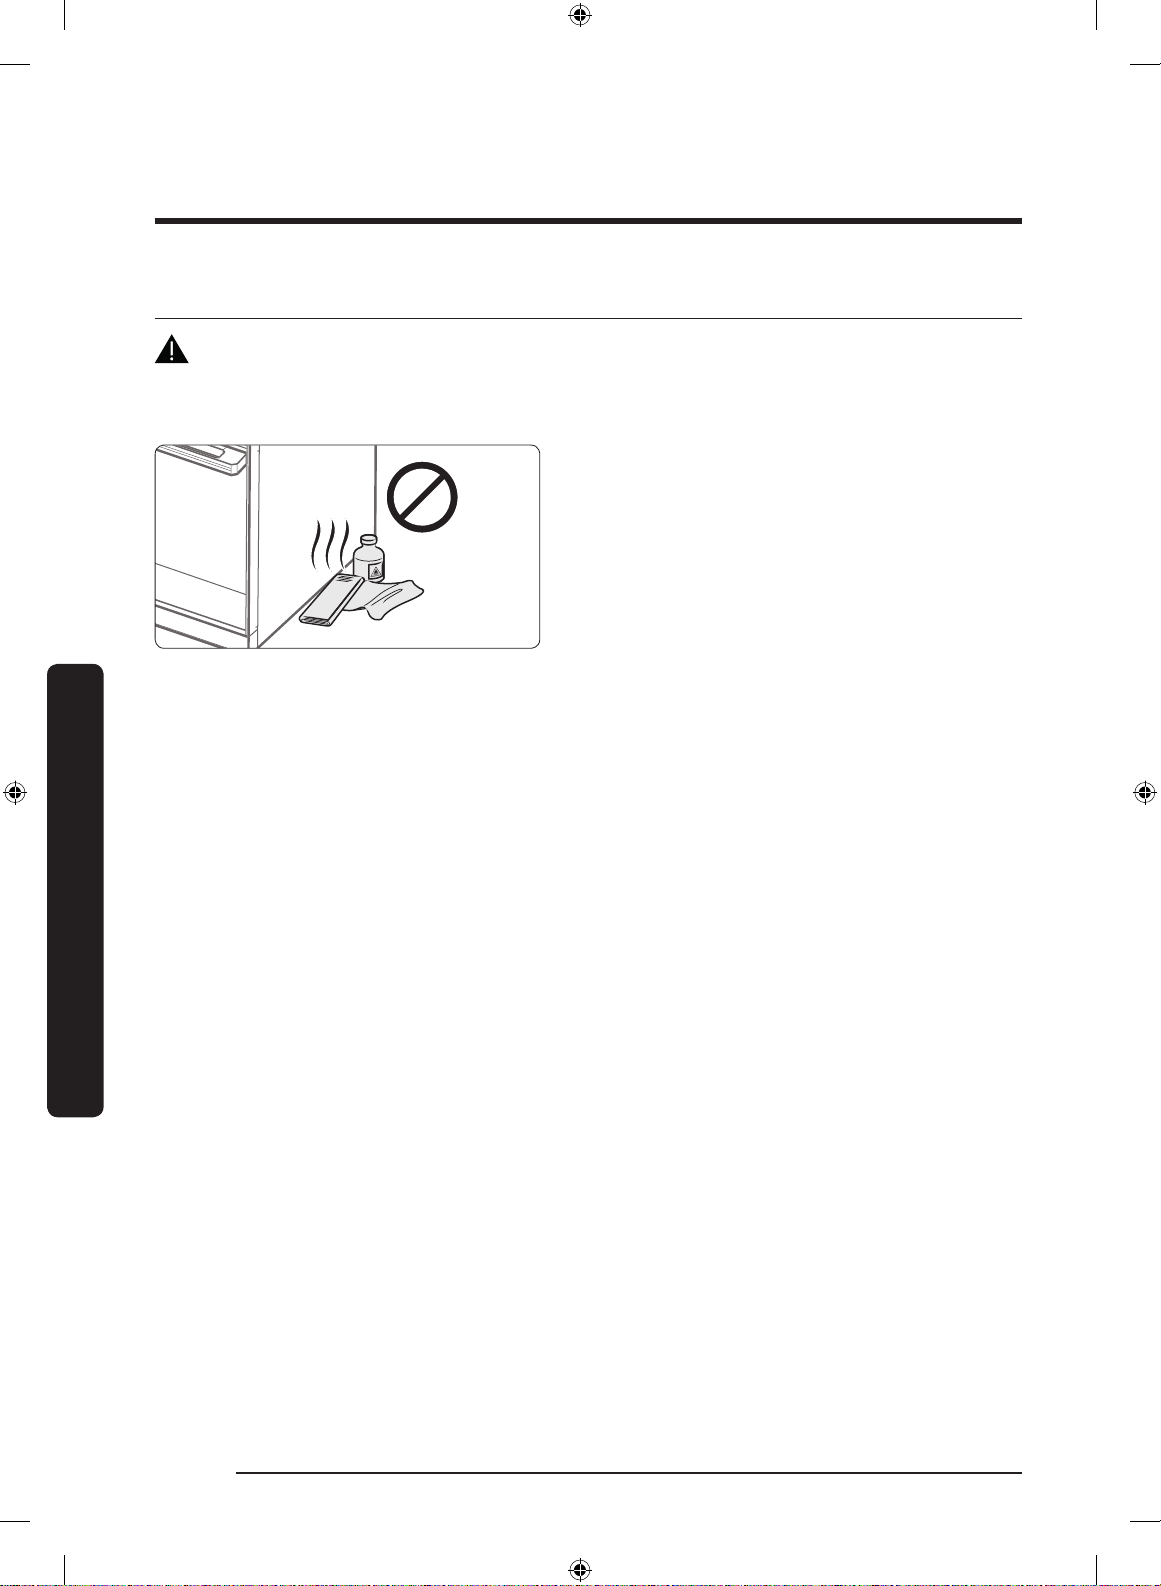
• Do not store/place/use combustible
materials (e.g., paper, plastic, pot
holders, linens, gasoline, alcohol) near
the product.
• Do not wear loose fitting or hanging
garments while using the product.
English12
Install_NX9900R_PRORANGE_DOP36M96_DA_DG68-01106C-00_EN+MES+CFR.indb 12 2019-02-15 5:46:15

Gas safety
WARNING
To reduce the risk of fire, electric shock, personal injury, or death, observe these
precautions:
If you smell gas:
• Close the valve and do not use the product.
• Do not light a match, candle, or cigarette.
• Do not turn on any gas or electric appliances.
• Do not touch any electrical switch or plug in a power cord.
• Do not use any phone in your building.
• Evacuate everyone from the building.
• Immediately call your gas supplier from a neighbor’s phone. Follow the gas supplier’s
instructions.
• If you cannot reach your gas supplier, call the fire department.
Checking for gas leaks
Leak-testing the appliance must be done according to the manufacturer’s instructions. Do
not use a flame to check for gas leaks. Use a brush to spread a soap-and-water solution
around the area you are checking. If there is a gas leak, small bubbles will appear in the
solution. When not sure, call for professional help.
Important safety instructions
English 13
Install_NX9900R_PRORANGE_DOP36M96_DA_DG68-01106C-00_EN+MES+CFR.indb 13 2019-02-15 5:46:15
Important safety instructions
Electrical and grounding safety
WARNING
To reduce the risk of fire, electric shock, personal injury, or death, observe these
precautions:
Important safety instructions
• Do not put a fuse in a neutral or ground circuit.
• Use a dedicated 120-volt, 60-Hz, 20-amp, AC, fused electrical circuit for this range.
A time-delay fuse or circuit breaker is recommended. Do not plug more than one
appliance into this circuit.
• Do not connect the ground wire to plastic plumbing lines, gas lines, or hot water pipes.
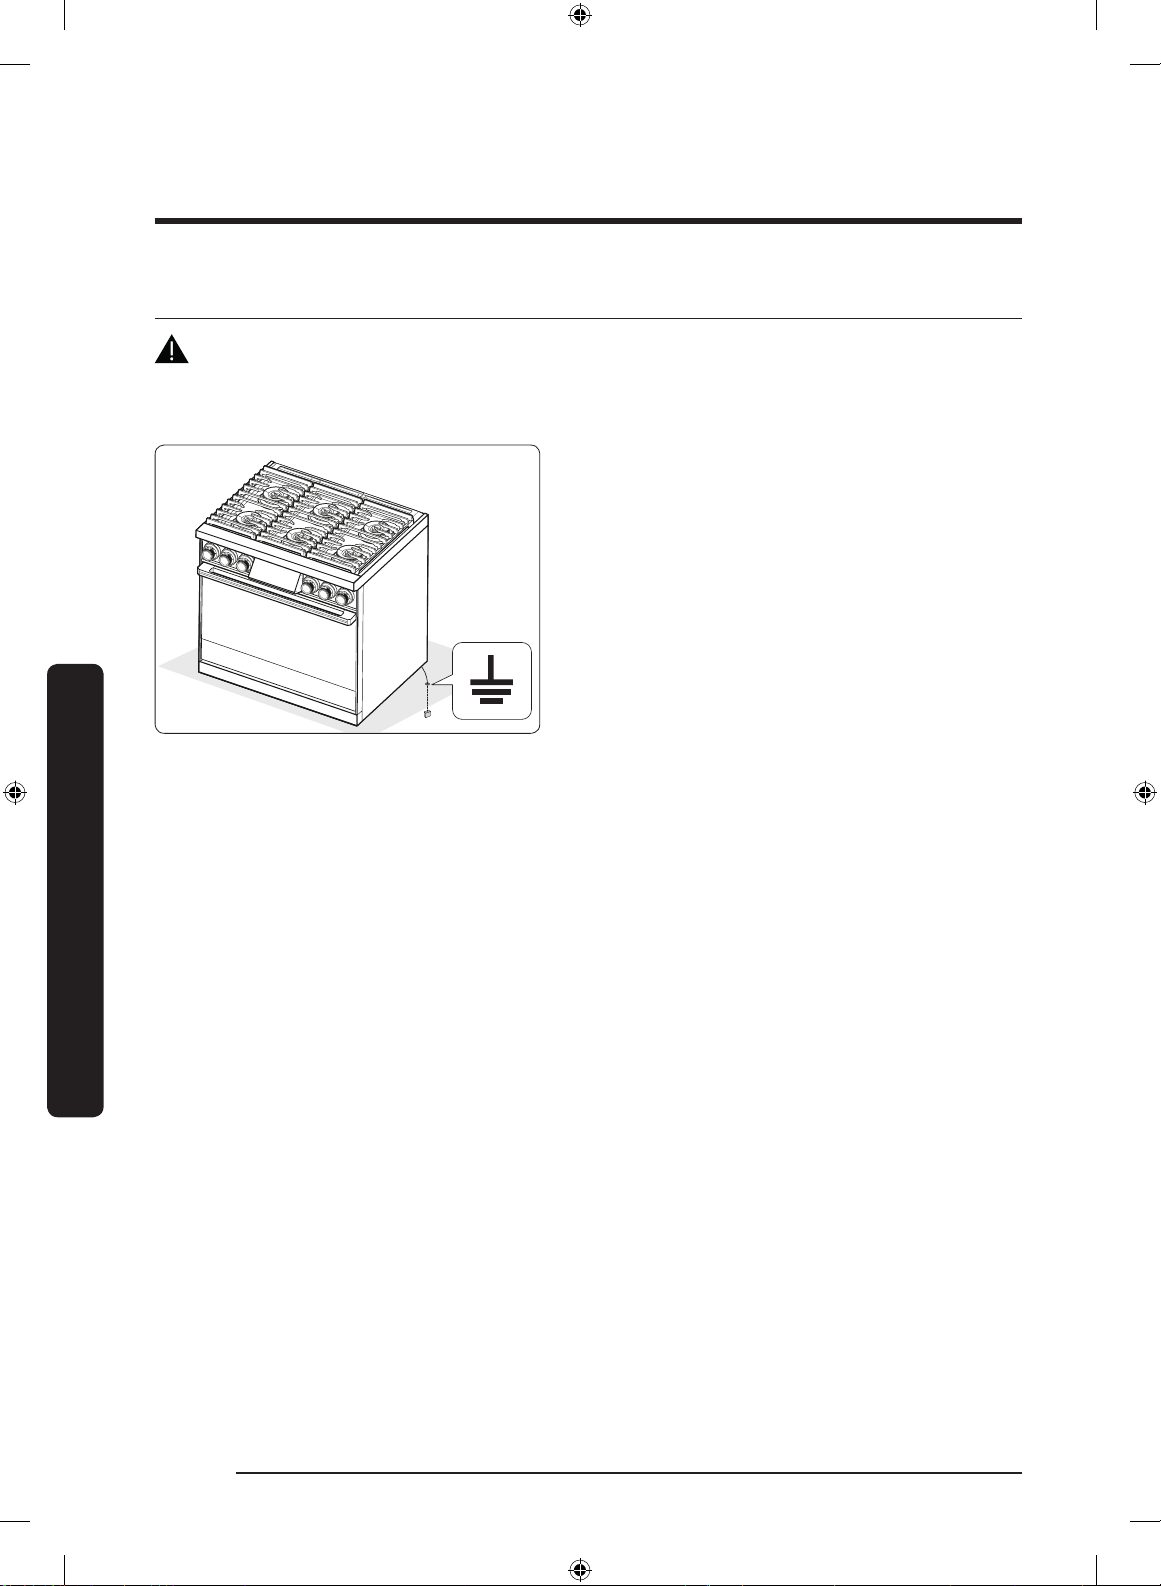
• This product must be grounded. If the range malfunctions grounding reduces the risk
of electric shock by providing a safe path for the current. This range's power cord has
a grounding plug, which must be firmly plugged into an outlet that is properly installed
and grounded according to local regulations. If you are not sure your electrical outlet is
properly grounded, have it checked by a licensed electrician.
• The range is supplied with a 3-pronged grounded plug. This cord must be plugged into
a mating, grounded 3-prong outlet that meets all local codes and ordinances. If codes
permit the use of a separate ground wire, we recommend that a qualified electrician
determine the proper path for this ground wire.
• Electrical service to the range must conform to local codes, or in the absence of local
codes, to the National Electrical code/NFPA No. 70 – Latest Revision (for the U.S.) or the
Canadian Electrical Code CSA C22.1 or Latest Revisions.
• The product owner shall ensure that the proper electrical service is provided for the
product.
• Plug into a grounded 3-prong outlet.
• Do not remove the ground prong.
• Do not use an adapter or an extension
cord.
• Do not use a damaged power plug,
power cord, or loose power outlet.
• Do not modify the power plug, cord, or
outlet.
English14
Install_NX9900R_PRORANGE_DOP36M96_DA_DG68-01106C-00_EN+MES+CFR.indb 14 2019-02-15 5:46:15

Installation safety
WARNING
To reduce the risk of fire, electric shock, personal injury, or death, observe these
precautions:
• This product should be installed and
properly grounded by a qualified
installer, as specified in the Installation
Instructions. Adjustments and service
should be performed only by qualified
gas range installer or service technician.
• Do not try to service/modify/replace the product or any part of it unless specifically
recommended in this manual. All other service should be performed by a qualified
technician.
• Use only new, flexible connectors when installing the product.
• Make sure the anti-tip device is properly installed. (See the Installation Instructions for
details.)
• Due to the size and weight of the range, have two or more people move the range.
• Remove all tape and packaging materials.
• After unpacking the product, remove all accessories from inside and around it.
(Cautiously handle the heavy grates.)
• Make sure no parts came loose during shipping.
• Make sure the product is correctly installed/adjusted by a qualified service technician
or installer for the type of gas (natural or LP) you will use. For the range to use LP gas,
the installer must replace every surface burner orifices with the provided LP orifice
set, and reverse the GPR adapter. These adjustments must be made by a qualified
technician according to manufacturer instructions and local regulations. The qualified
agency performing this work shall be responsible for the gas conversion.
• Installation of this range must conform with local codes or, in the absence of local
codes, with the National Fuel Gas Code, ANSI Z223.1/NFPA.54, latest edition. In Canada,
installation must conform with the current Natural Gas and Propane Installation Code,
CAN/CGA-B149.1, or the current Propane Installation Code, CAN/CGA-B149.2, and with
local codes where applicable. This range has been design-certified by UL according to
ANSI Z21.1/CSA 1.1, latest edition.
Important safety instructions
English 15
Install_NX9900R_PRORANGE_DOP36M96_DA_DG68-01106C-00_EN+MES+CFR.indb 15 2019-02-15 5:46:16
Important safety instructions
Location safety
WARNING
To reduce the risk of fire, electric shock, personal injury, or death, observe these
precautions:
Important safety instructions
• Select a level, well-constructed floor that can support the range’s weight. Synthetic
flooring, such as linoleum, must withstand 180 °F (82 °C) temperatures without
shrinking, warping, or discoloring. Do not install the range directly over interior kitchen
carpeting unless a sheet of ¼ inch plywood or a similar insulator is placed between the
range and carpeting.
• The range must be installed within easy reach of a grounded, 3-prong outlet.
• Do not hang paper blinds on a window near the range; do not hand long curtains that
could be blown over/onto the range.
• For proper ventilation, the range needs sufficient space below and all around the
chassis. Vents in the chassis exhaust heat and fumes so the range can operate properly.
• Make sure the wall coverings around the range can withstand heat up to 194 °F (90 °C)
generated by the range.
• Cabinet storage above the surface of the range should be avoided. If cabinet storage
above the range is necessary: allow a minimum clearance of 30 inches (76.2 cm)
between the cooking surface and the bottom of cabinets; or install a range hood that
projects horizontally a minimum of 5 inches (12.7 cm) beyond the bottom of the
cabinets.
• This range is for indoor household use
only. Do not install the range outdoors
or anywhere that it will be exposed to
weather/water or wind/ strong drafts.
English16
Install_NX9900R_PRORANGE_DOP36M96_DA_DG68-01106C-00_EN+MES+CFR.indb 16 2019-02-15 5:46:16
 Loading...