

12V/5A
LiFe60
MANUAL
CONGRATULATIONS
To the purchase of your new professional switch mode battery charger. This charger is
included in a series of professional chargers from CTEK SWEDEN AB and represents the
latest technology in bat tery charging. The LITHIUM XS charger model is designed for
Lithium-ion batteries using LiFePO
turer for details. Do not use the LITHIUM XS charger for any other battery technology.
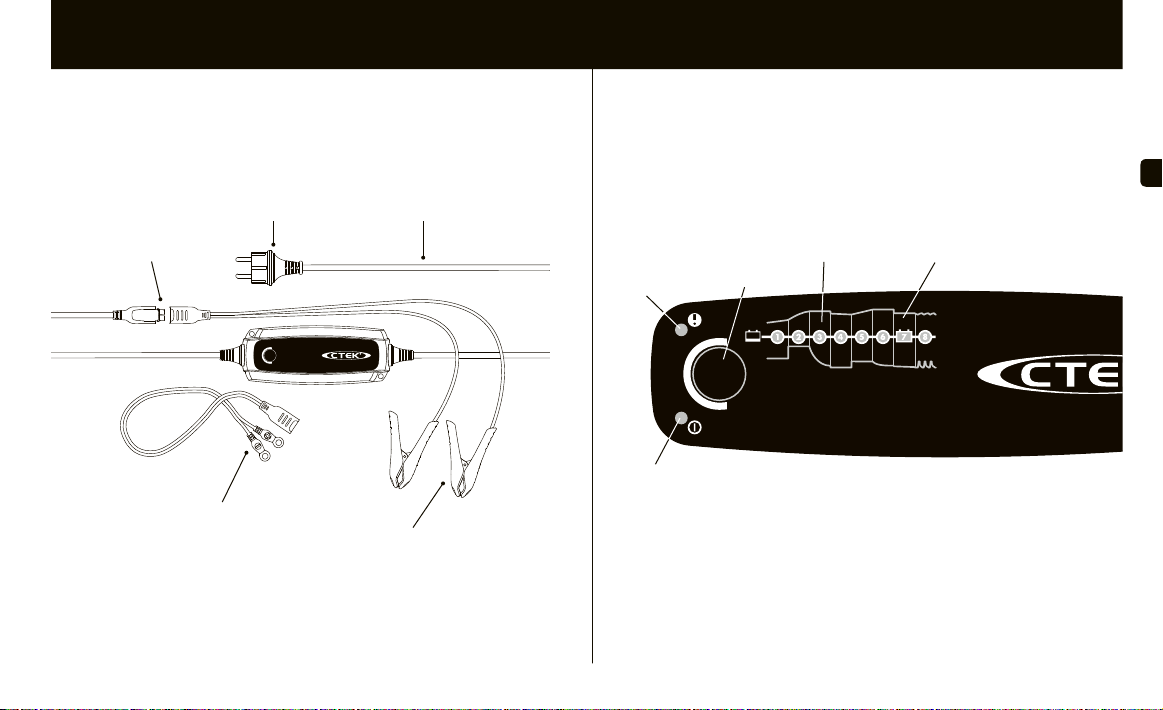
CTEK COMFORT CONNECT
CHARGE CABLE
CTEK COMFORT CONNECT – eyelet M6
technology only. Please check with the battery manufac-
4
SUPPLY PLUG*
CTEK COMFORT CONNECT – clamp
MAINS CABLE
* Supply plugs may diffe r to sui t your wall socket.
HOW TO CHARGE
1. Connect the charger to the battery.
2. Connect the charger to the wall socket.
3. Follow the 8 -step display through the charging process.
The battery is ready to start the engine when STEP 3 is lit.
The battery is fully charged when STEP 7 is lit.
4. Stop charging at any time by disconnecting the mains cable from the wall socket.
FULLY CHARGEDREADY TO USE
ERROR LAMP
POWER LAMP
BATTERIES WITH "UNDER VOLTAGE PROTECTION"
Some Lithium- ion batteries have an on -board UVP (under voltage protection) that
disconnects the battery to avoid it becoming too deeply discharged. This prohibits the
CTEK charger from detecting that there’s a battery connected. To bypass this, the battery charger needs to open the UVP. By pressing the RESET-button for 10 seconds, the
charger opens the UVP. During this process, the charging STEP 7 is lit. Once the UVP has
been opened and the battery is ready to be charged, the charger automatically starts the
charging cycle.
RESET-BUTTON
RESET
EN
EN • 3
ERROR LAMP
If the error lamp is lit, check the following:
1. Is the chargers positive lead connected to the bat tery´s
positive pole?
2. Is the charger connec ted to a 12V LiFePO
3. Has charging been interrupted in STEP 1 or 4?
Restart the charger by pressing the RESET-button. If charging is still
being interrupted, the battery...
STE P 1: ...can not accept charge.
...may be too large for the charger to wake up. Press
RESET-button up to 5 times.
...a paralell load may be connected to the batter y. Disconnect
the bat tery and try again.
STEP 4: ...can not keep charge and may need to be replaced.
POWER LAMP
If the power lamp is lit with a:
1. STEADY LIGHT
The mains cable is connected to the wall socket.
2. FLASHING LIGHT:
The charger has entered the energy save mode. This happens if the
charger isn´t connected to the battery within 2 minutes or the battery on
board UVP (under voltage protection) is activated.
1.
4 • EN
READY TO USE
The table shows the estimated time for an empty battery to reach 90%
state of charge (SOC). Please note that charging t imes are
longer in low ambient temperatures.
BATTERY SIZE (Ah)
8Ah
20Ah
60Ah
battery?
4
TIME TO 90% CHARGED
2h
5h
16h
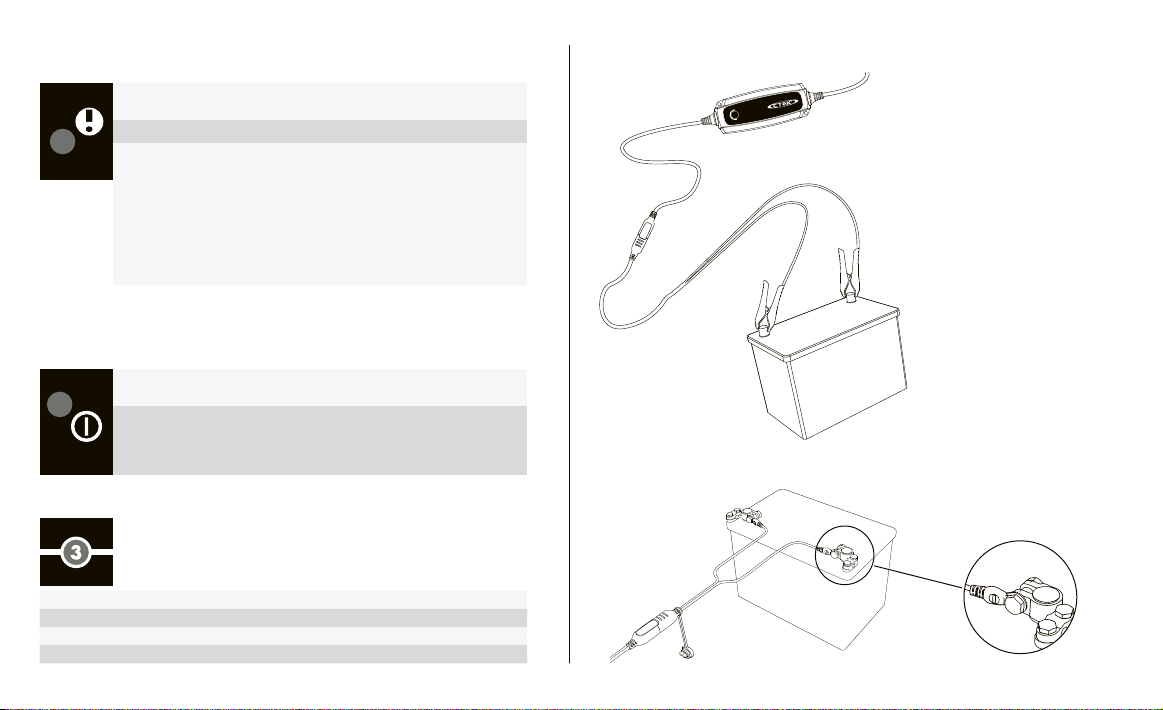
CONNECT AND DISCONNECT THE CHARGER TO A BATTERY
INFO
If the battery clamps are incorrectly
connected, the reverse polarity protection will ensure that the battery
and charger are not damaged.
For batter ies mou nted i nside a
vehicle
1. Conne ct the red clamp t o the battery's positive pole.
Comfort
Connect
Comfort
Connect
–
+
+
2. Connect the black clamp to the
vehicl e chass is remot e from th e fuel
pipe and the bat tery.
3. Connect t he charg er to the w all
socket.
4. Disconnect the charger from the
wall soc ket bef ore disc onnec ting the
bat tery.
5. Disconnect the black clamp before
–
the red clamp.
Some vehicle s may have posi tively earthed batteries.
1. Connect the black clamp to the battery's negative pole.
2. Con nect the red cla mp to the vehicle
chass is remot e from the fuel pip e and
the b atter y.
3. Connect t he charg er to the w all
socket.
4. Disconnect the charger from the
wall soc ket bef ore disc onnec ting the
bat tery.
5. Di sconnect the red clamp before t he
black clamp.
 Loading...