CTEK MXS 5.0 TEST AND CHARGE User Manual

MANUAL
CONGRATULATIONS
on the purchase of your new professional switch mode battery charger and tester. This charger and tester is included in a series of professional chargers from CTEK Sweden AB and represents the latest technology in battery charging and testing
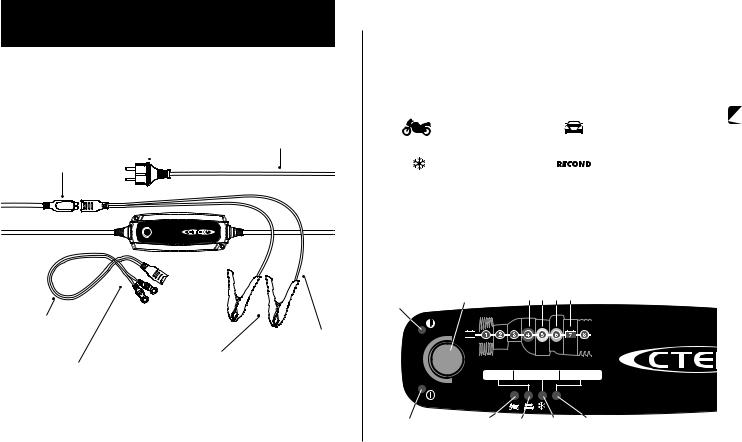
SUPPLY PLUG* |
MAINS CABLE |
|
H05RN-F Rubber |
||
|
|
|
CTEK COMFORT CONNECT
CHARGE CABLE
H05RN–F Rubber
HPN Rubber Cable
HPN Rubber Cable
CTEK COMFORT CONNECT – clamp
CTEK COMFORT CONNECT – eyelet M6
* Supply plugs may differ to suit your wall socket.
HOW TO CHARGE
1. Connect the charger to the battery. Lamp 4, 5 and 6 now start flickering indicating
|
VOLTAGE TEST PROGRAM. Ignore this and continue with the next step. |
|
|
2. |
Connect the charger to the wall socket. The power lamp will indicate that the mains |
|
|
|
cable is connected to the wall socket. The error lamp will indicate if the battery clamps |
|
|
|
are incorrectly connected. The reverse polarity protection will ensure that the battery |
|
|
|
or charger will not be damaged. |
|
|
3. |
Press the MODE-button (3) to select charging program. |
EN |
|
|
|
|
|
|
Small battery program |
NORMAL battery program |
|
Continue to press the MODE-button to combine charging program with charging options.
COLD WEATHER OPTION |
RECOND OPTION |
Press the MODE-button several times until the desired combination of charging program and options are lit.
4.Follow the 8-step display through the charging process. The battery is ready to start the engine when STEP 4 is lit. The battery is fully charged when STEP 7 is lit.
5.Stop charging at any time by disconnecting the mains cable from the wall socket.
Note: If the charger indicates START POWER lamp (10) and BAD lamp (4) press MODE-button for 2 sec to exit VOLTAGE TEST PROGRAM.
2 |
3 |
|
4 |
5 |
6 |
7 |
|
|
|
|
|
|
|
|
|
|
|
|
|
MXS 5.0 TES |
|
MODE |
|
VOLTAGE TEST PROGRAM |
|||
|
|
|
||||
|
|
BATTERY START POWER ALTERNATOR |
||||
|
|
|
|
|
RECOND |
|
|
1 |
8 |
9 |
|
10 |
11 |
EN • 3

HOW TO TEST
TESTING PROGRAMS AVAILABLE
•BATTERY – Reveals a battery’s current charge level.
•START POWER – Monitors a battery’s output during the strain of engine cranking, to evaluate overall condition.
•ALTERNATOR – Establishes whether a vehicle’s charging system is correctly charging the battery or not.
BEFORE TESTING
1.Read the SAFETY section in the manual to make sure you connect/disconnect the unit to the battery/safely.
2.Before doing the START POWER or ALTERNATOR tests, make sure the battery is
fully charged. If it isn’t, false results may occur. Before doing a BATTERY test, ensure ambient temperature is at least 5°C and that the battery has not been charged – by a mains charger or the vehicle – for at least an hour before testing.
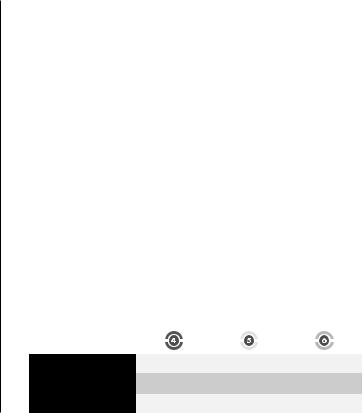
3.Lamp 4, 5, and 6, show the results. 4 (red) indicates BAD, 5 (orange) FAIR, 6 (green) OK.
TESTING
(MAINS POWER NOT REQUIRED)
1.Connect the charger to the battery. Lamp 4, 5, and 6 illuminate in sequence to show the charger is in Testing Mode and ready.
2.Press the MODE-button (3) to move between the test programs: BATTERY (9),
START POWER (10), ALTERNATOR (11).
BATTERY
1.Select BATTERY (9) using MODE-button (3).
2.After a few seconds the unit will show the results.
BAD (4) recharge the battery as soon as possible.
FAIR (5) charging is recommended for maximum battery life. OK (6) the battery is at a high state of charge.
START POWER
1.Select START POWER (10) using MODE-button (3).
2.Crank the engine over as soon as possible. Continue cranking for a few seconds, or until the engine starts.
BAD (4) recharge the battery as soon as possible.
FAIR (5) charging is recommended for maximum battery life. OK (6) the battery is at a high state of charge.
4 • EN
ALTERNATOR
1.Select ALTERNATOR (11) using MODE-button (3)
2.Start the engine, hold it at 2000 RPM, and monitor the results.
BAD (4) Charging System fault. FAIR (5) Charging system fault.
OK (6) Vehicle Charging system working OK.
TIPS
1.If the error lamp (2) immediately illuminates, the battery is incorrectly connected. Unplug the charger, correct the connections to the battery, and return to step 1.
2.If the lamp don’t illuminate, this may be because the battery is so discharged it cannot support the unit. If so, fully charge the battery.
3.If mains mains voltage is detected, the MXS 5.0 TEST&CHARGE automatically enters
Charging Mode. Press the MODE-button (3) for two seconds to switch back to Testing
Mode, as signified by an illumination sequence in lamp 4–6.
4.Start Power Test
OK (6) will illuminate at the start of the test, but may drop down to BAD (4). Before discarding a battery, it’s worth charging it using the charger’s Recond Mode and trying
the START POWER test again. Batteries failing this test in warm weather will almost certainly fail completely when temperatures drop.
CHECK THE RESULT LAMPS |
|
|
|
|
|
|
|
|
|||
|
|
BAD |
|
FAIR |
|
|
OK |
||||
If the result lamp is lit: |
|
|
|
|
|
|
|
|
|
|
|
|
|
|
|
|
|
|
|
|
|
|
|
BATTERY |
|
|
|
|
|
|
|
|
|
|
|
below 12.4V |
|
12.4–12.6V |
|
above 12.6V |
|||||||
|
|
||||||||||
START POWER |
below 9.6V |
|
9.6–10.5V |
|
above 10.5V |
||||||
ALTERNATOR |
below 13.3V |
|
13.3–14.0V |
|
above 14.0V |
||||||
|
|
|
|
|
|
|
|
|
|
|
|

CHARGING programs and options
Press the MODE-button to select between the charging programs and to add charging options. The lamps will indicate which programs and options that are selected. The selected program will be memorised and restarted next time the charger is connected.
Charging Programs
Program |
Battery |
|
Explanation |
|
Temp range |
|
Size (Ah) |
|
|
|
|||
|
|
|
|
|
|
|
|
|
|
|
|
|
|
|
|
|
Small battery |
|
-20°C–+50°C |
|
|
1.2–14Ah |
|
program, 0.8A |
|
(-4ºF–122ºF) |
|
|
|
|
Use for smaller batteries. |
|
|
|
|
|
|
|
|
|
|
|
|
|
Normal battery |
|
-20°C–+50°C |
|
|
14–160Ah |
|
program, 5A |
|
(-4ºF–122ºF) |
|
|
|
|
|
|||
|
|
|
Use for normal sized batteries. |
|
|
|
Charging Options
Option Battery
Size (Ah)
1.2–160Ah
Explanation |
Temp range |
Cold weather option |
-20°C–+5°C |
Use for charging at low tempera- |
(-4ºF–41ºF) |
tures and for power AGM batteries |
|
like Optima® and Odyssey®. Cold |
|
weather option increases charging |
|
voltage |
|
Recond option |
-20°C–+50°C |
Use to return energy to empty bat- |
(-4ºF–122ºF) |
teries. Recond your battery once per |
|
RECOND 1.2–160Ah year and after deep discharge to |
|
maximise lifetime and capacity. The |
|
Recond option adds STEP 6 to the |
|
selected charging program. |
|
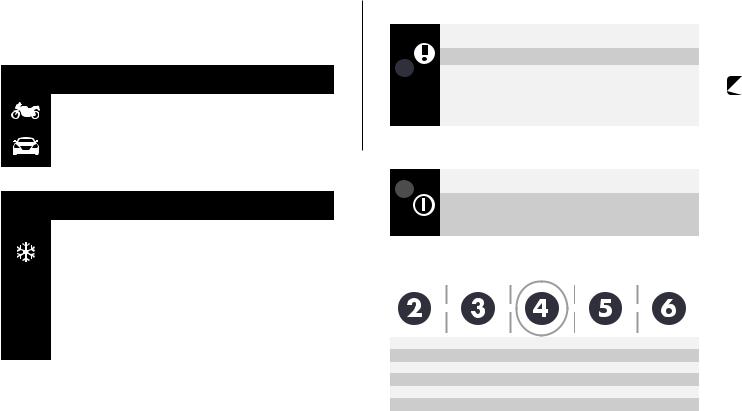
ERROR LAMP
If the error lamp is lit, check the following:
1.Is the chargers positive lead connected to the battery's positive pole?
2.Is the charger connected to a 12V battery?
3.Has charging been interrupted in STEP 1, 2 or 5?
Restart the charger by pressing the MODE-button. If charging is
still being interrupted, the battery...
step 1: ...is seriously sulphated and may need to be replaced. step 2: ...cannot accept charge and may need to be replaced. step 5: ...cannot keep charge and may need to be replaced.
POWER LAMP
If the power lamp is lit with a:
1.STEADY LIGHT
The mains cable is connected to the wall socket.
2.FLASHING LIGHT
The charger has entered the energy save mode. This happens if the charger isn't connected to a battery in 2 minutes.
READY TO USE
The table shows the estimated time for an empty battery to reach 80% charge level
BATTERY SIZE (Ah) |
TIME TO 80% CHARGED |
2Ah |
2h |
8Ah |
8h |
20Ah |
4h |
60Ah |
12h |
110Ah |
26h |
EN
EN • 5
 Loading...