

Page 1
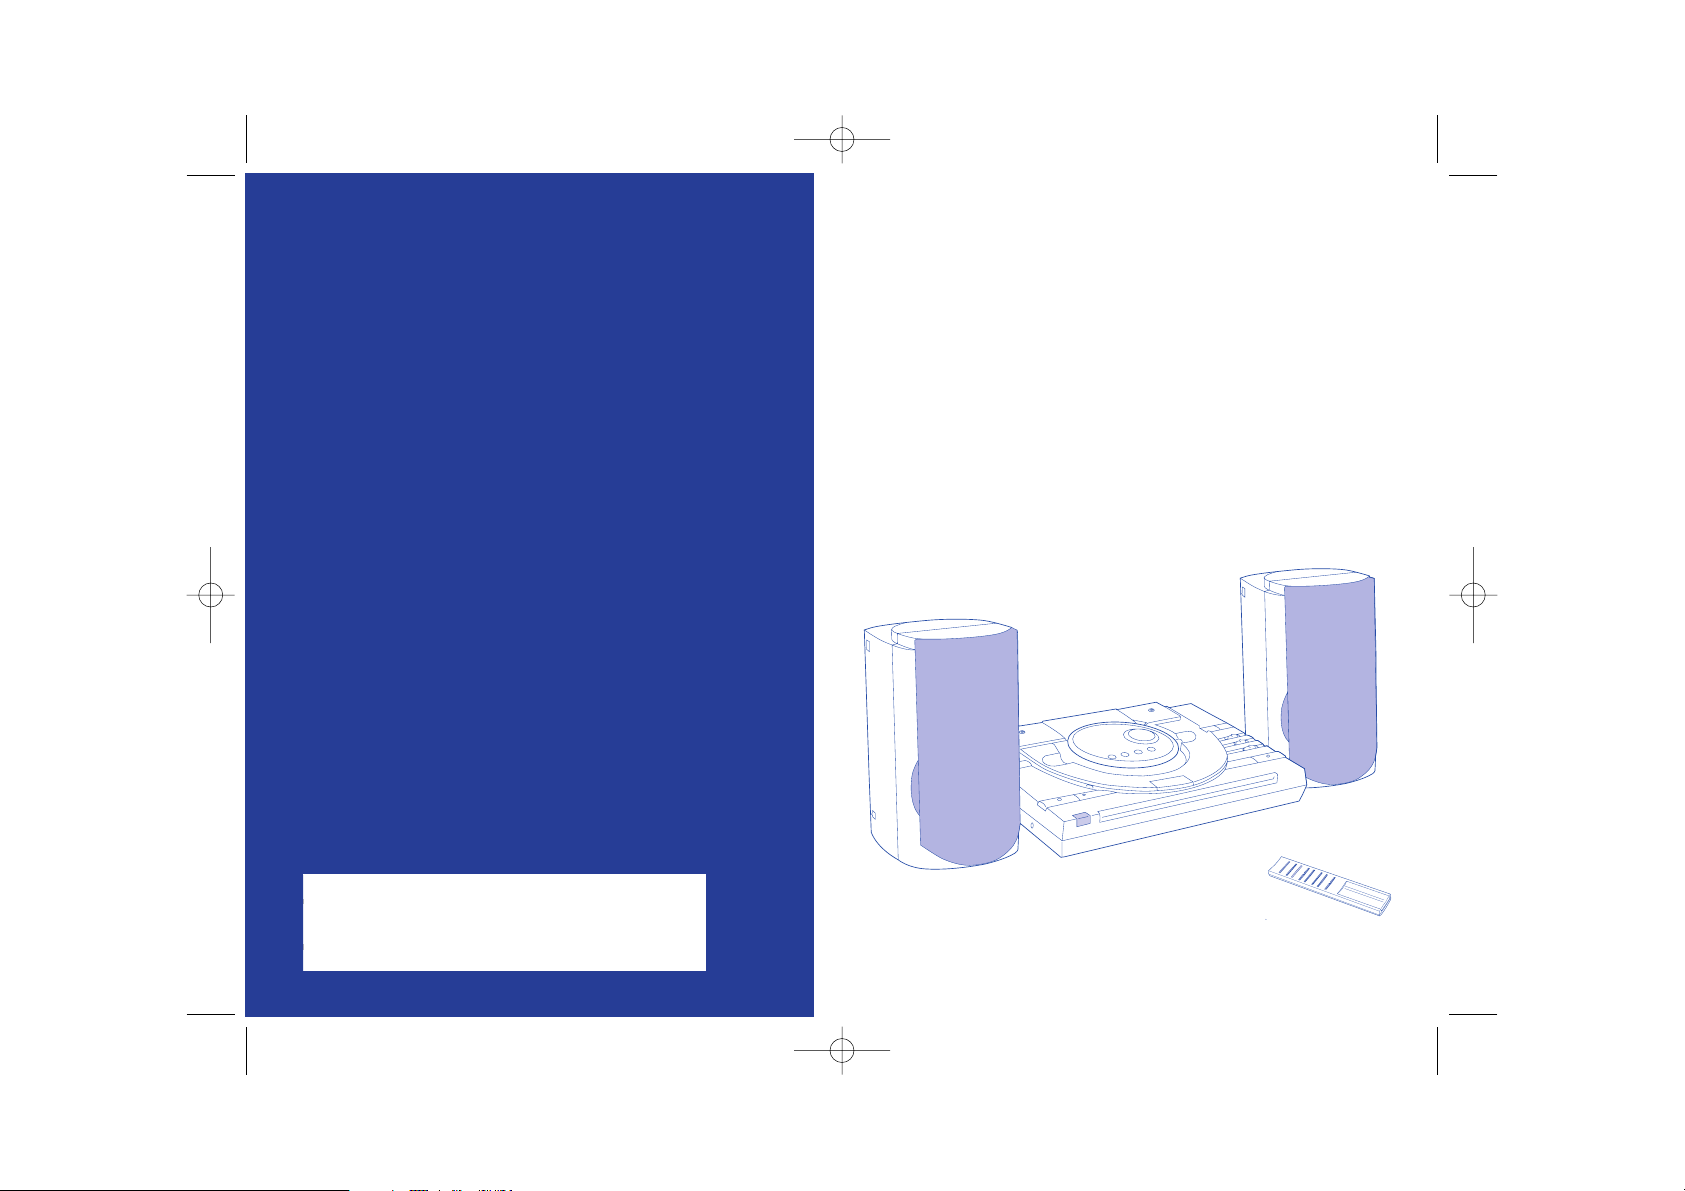
AM/FM and Single CD Micro Hi FI
System
Model CRN-285
guidelines for use
Micro System CRN-285 d4.qxd 7/22/04 2:09 PM Page 2
Page 2

2
Micro System CRN-285 d4.qxd 7/22/04 2:09 PM Page 3
120 people every day lose their sight. Almost one person in sixty
in Britain is blind or partially sighted.
Coronation Street’s
‘Please help’
‘Please help’
Liz Dawn
MBE
Every year hundreds of babies are
found to have serious eye disease
Reg. Charity Nº: 294087
Please help, by using the donation form at the back of this booklet.
The battle against blindness
depends on scientific research
Page 3
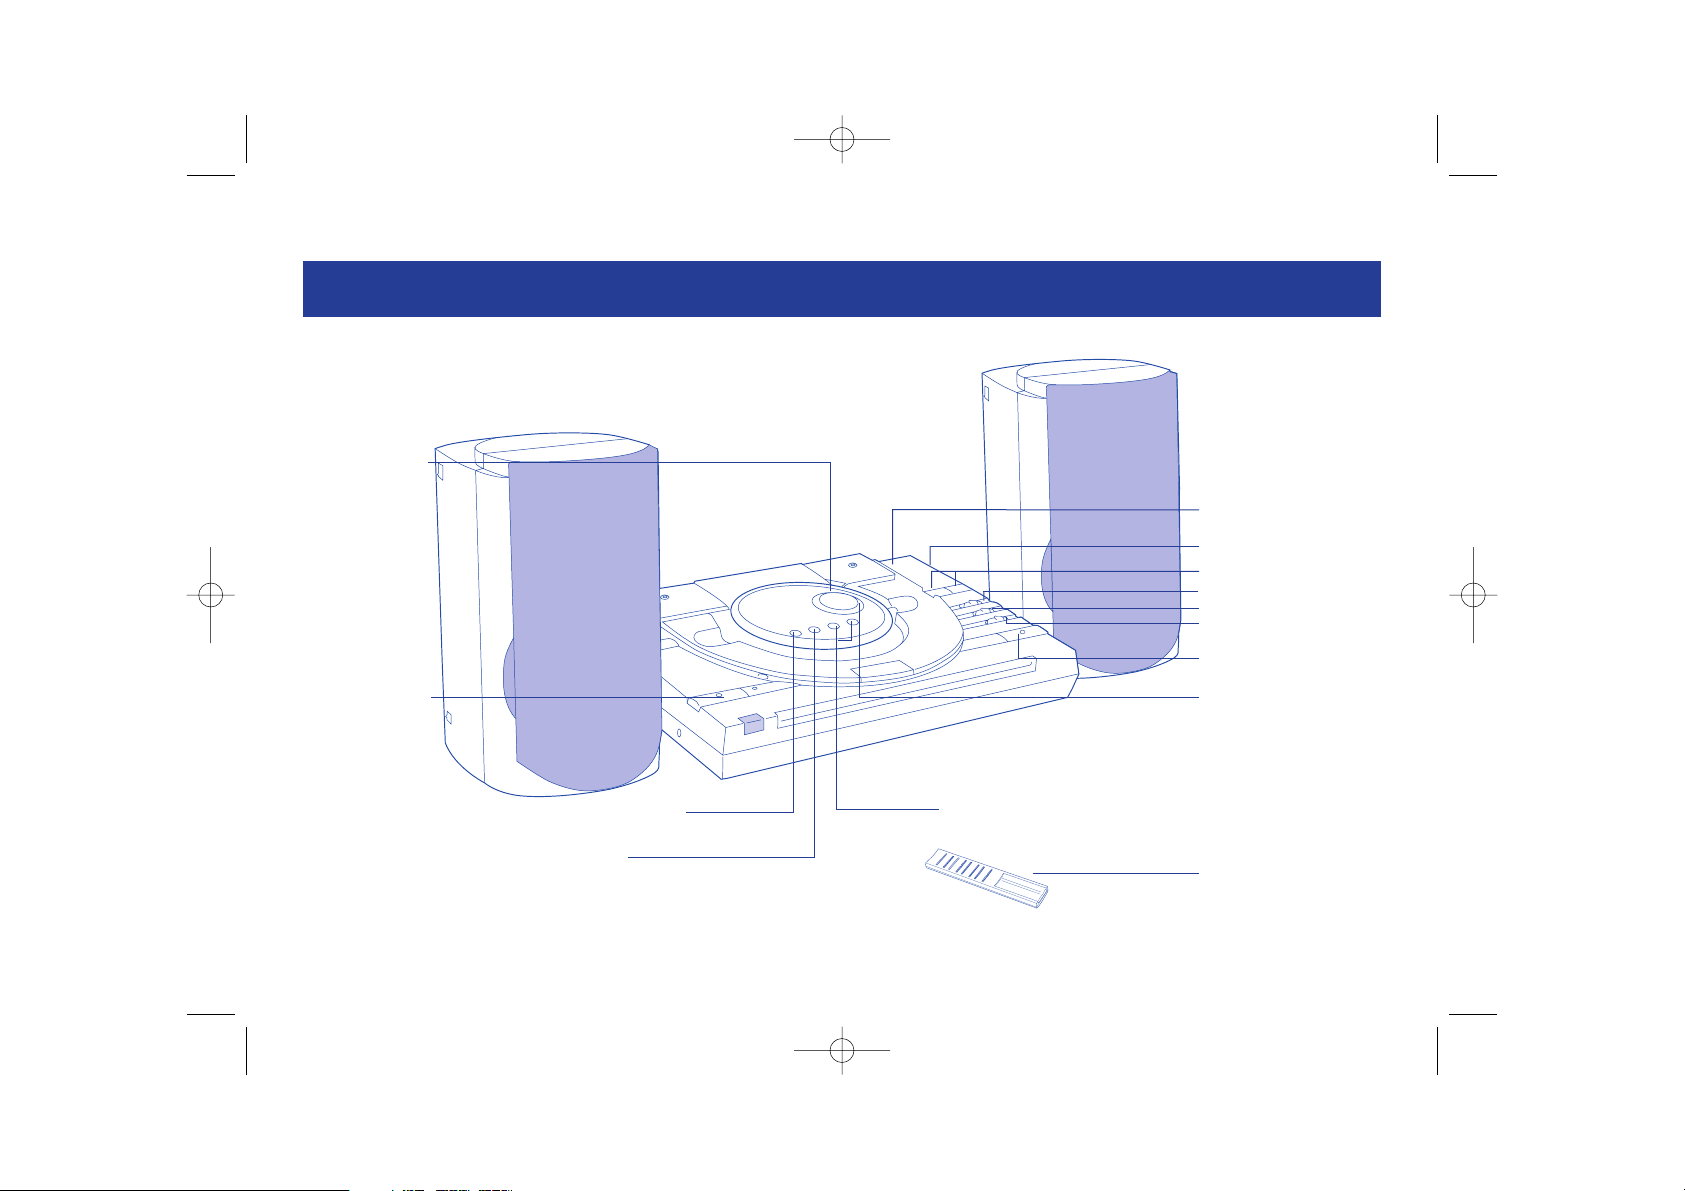
GETTING TO KNOW YOUR MICRO SYSTEM
3
CD LID
TUNING DIAL
BASE SWITCH
AM/FM/FM STEREO SELECTOR
CD LID BUTTON
press to open to CD lid
FUNCTION SWITCH
VOLUME BUTTONS
PLAY / PAUSE BUTTON
STOP BUTTON
POWER/
STANDBY BUTTON
REMOTE CONTROL
PROGRAM
REPEAT
SKIP/ SEARCH
FORWARD/ BACK
Micro System CRN-285 d4.qxd 7/22/04 2:09 PM Page 4
Page 4
USING YOUR MICRO SYSTEM
Mains connection
1 Check that the speakers are correctly connected.
2 Check that the voltage indicated on the back of
your Micro System corresponds to the voltage of
your mains electricity supply (230Volts AC).
3 Plug the
mains lead
into a wall
socket. The
system is
now in
Standby
mode and
the Standby
button on
the front
panel will
glow red.
4 Press the POWER/STANDBY button on the front
of the Micro System.
5 To switch off your Micro System completely,
press the POWER/STANDBY button and remove
the mains plug from the wall.
Before Use
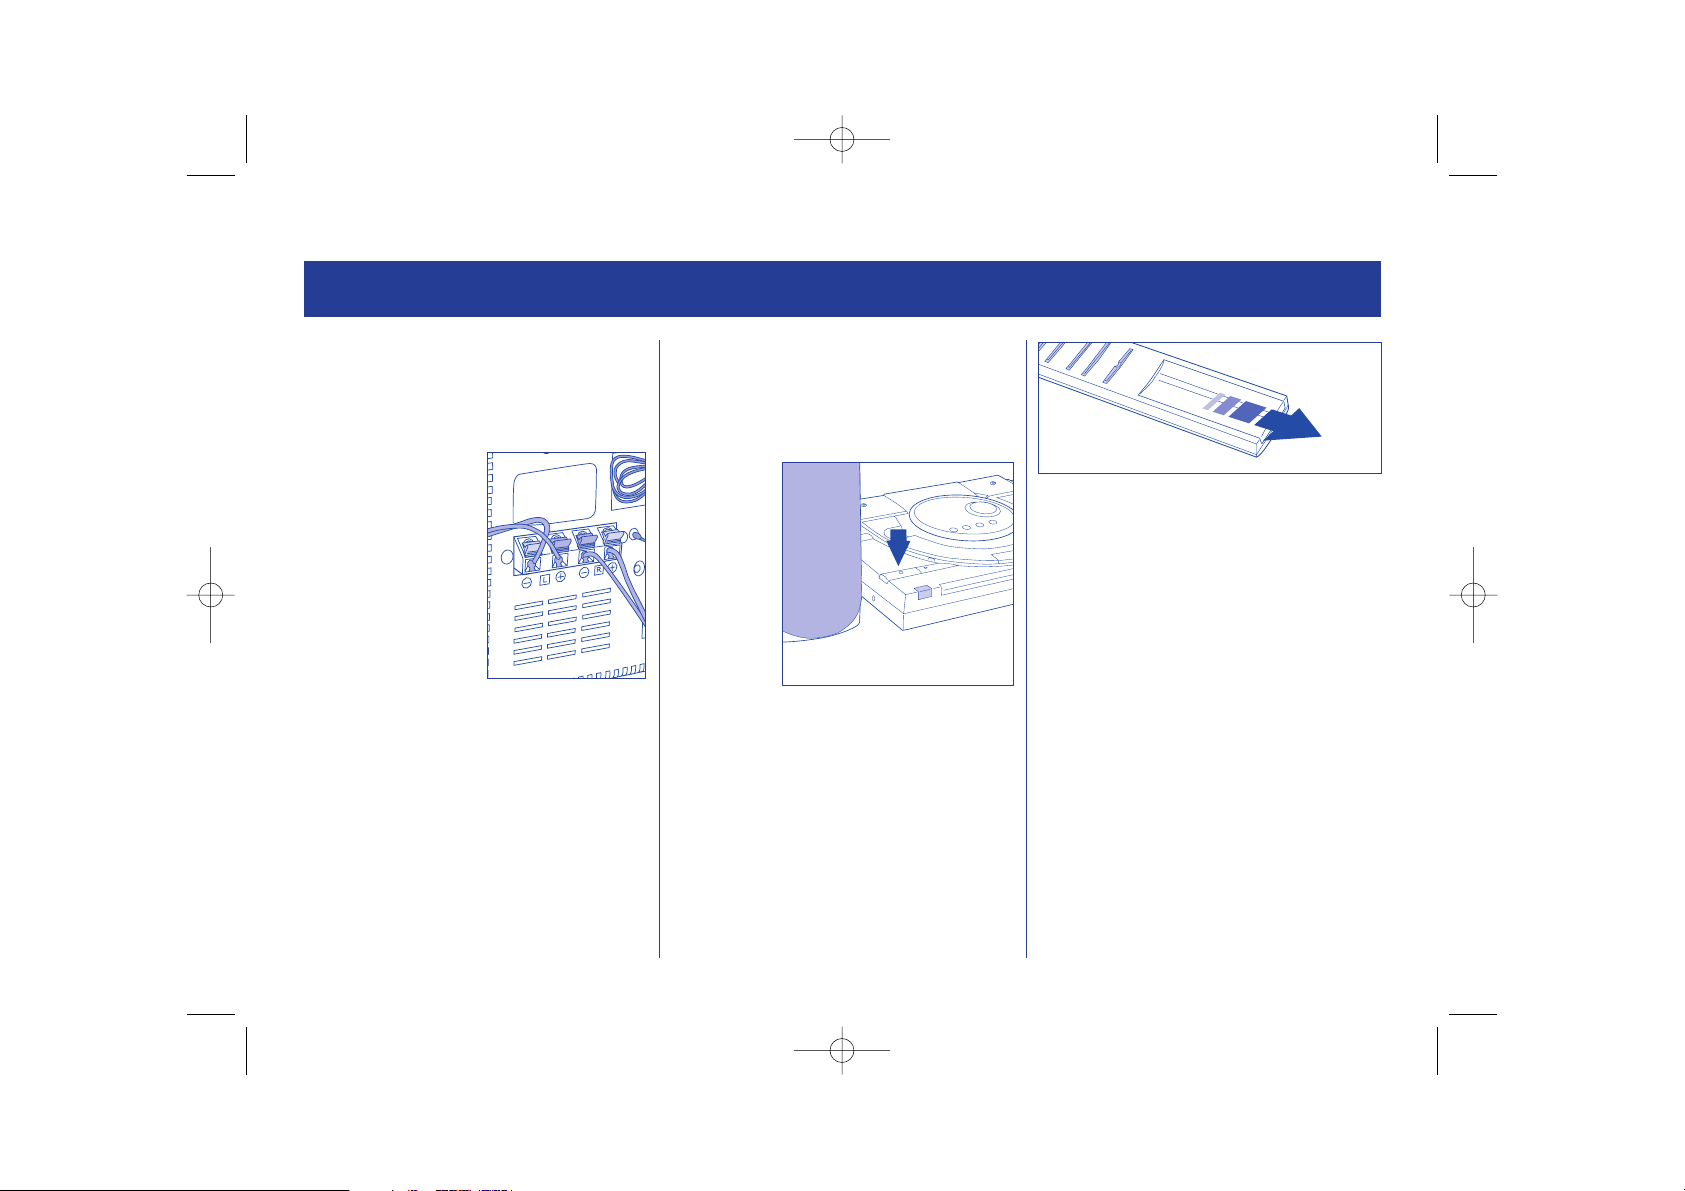
Speaker Connection
1 Connect one of your speakers to the terminal
marked L on the back of your Micro System,
this will become the left speaker. To connect the
wire into the
designated outlet
simply push down the
gripper clip until an
opening is exposed.
Push the end of the
speaker wire (the bare
wire and not the
plastic covering) into
the opening and
release the gripper clip
to secure the wire firmly in its place.
2 Insert the end of the black and grey speaker
wire into the red outlet marked ‘+’ and the end
of the black speaker wire into the black outlet
marked ‘-’. This speaker is now the left hand
speaker.
3 Connect the other speaker in the same way to
the terminal marked R. This will now be your
right hand speaker.
4
Fit the batteries into the
Remote Control
1 Remove the battery cover by sliding it away
from the body of the remote control.
2 Insert two size AA batteries so that the ‘+’ and
‘-’ marks on the batteries match the ‘+’ and ‘-’
marks inside the unit.
3 Replace the battery cover.
Note: Batteries are not included.
Micro System CRN-285 d4.qxd 7/22/04 2:09 PM Page 5
Page 5

Radio operation
1 Slide the Function switch on the top of the
Micro System to Radio.
2 Select the required radio band by sliding
the BAND switch to AM, FM or FM ST.
3 Tune into your desired radio station by
turning the Tuning control on the side of
your Micro System until the display shows
the frequency you want.
Note: The FM indicator will appear when you have a strong signal if
you are in the FM Stereo mode (FM ST.). See the ‘FM Mono and FM
Stereo switch’ section.
4 Adjust the volume by using the Volume Control buttons on top of the
Micro System.
FM Mono and FM Stereo switch
The FM Mode button is located on the top of your Micro System.
Slide the button to switch to FM- the programme will be played in mono, this is
particularly useful if the signal is weak or there is noise interference in the FM
Stereo mode.
Slide the button to FM ST. for FM Stereo mode and the programme will be
played in stereo.
REMOTE CONTROL USING THE RADIO
The other buttons on the Remote Control are explained elsewhere in this guide.
5
POWER BUTTON
to switch the unit on and off
VOLUME BUTTON
to increase or decrease the
sound
RANDOM
plays the tracks on your CD
randomly until all tracks have
been played
PLAY / PAUSE
play (or pause if playing) the
CD in your Micro System
You can use the controls on the front of the Micro System or the Remote
Control - whichever you find easier.
Micro System CRN-285 d4.qxd 7/22/04 2:09 PM Page 6
Page 6

CD Player operation.
Before use.
• Place only one disc at a time in the CD compartment.
• Always place the compact disc in the CD compartment with the label
facing upwards.
• Fingerprints and dust should be carefully wiped off the disc’s reflective
surface with a soft cloth.
Loading the disc
1 Slide the Function switch on the top of the
Micro System to CD. The display will show
00.
2 To open the CD lid press the DOOR OPEN
button on the top of the Micro System, the
lid will open automatically.
3 Place a disc carefully over the central
spindle in the CD compartment, with the
label facing upwards.
3 To close the door GENTLY push the door back to its closed position and it
will click into place.
4 The Display Screen will show the total number of tracks on the CD (with a
maximum of 39).
Playing the disc
1 Press the PLAY/PAUSE button.
2 Disc play will begin from track No.1. The Display Screen will show the track
number.
3 Press the STOP button to stop play at any time.
4 When the last track has been played, the CD Player will stop and the Screen
Display will show the last track number on the disc.
5 To start play from a designated track, press either or until the
desired track number is indicated on the Screen Display.
6 Press the PLAY/PAUSE button. Play will start from the selected track.
To Pause play
1 Press the PLAY/PAUSE button during play.
2 Disc play will stop temporarily and PLAY will flash in the Screen Display.
3 Press the PLAY/PAUSE button again to resume play.
Track/Passage search
1 Press and hold down either or during disc play to quickly
advance or return to any position within the current track.
2 Release or to continue disc play.
3 To advance or return to a particular track number, press either
or one press at a time until the track number is shown.
4 The search function is only possible in play mode.
Repeat mode
This function allows all the tracks on the disc or a particular track to be played
repeatedly.
To repeat the same track:
• Press the REPEAT button once during play, on the track you wish to hear
repeatedly. REPEAT will flash in the Display Screen.
To repeat the whole disc:
• Press the REPEAT button twice during play (on any track). REPEAT will be
shown in the Display Screen.
To release the Repeat mode:
USING THE CD PLAYER
6
Micro System CRN-285 d4.qxd 7/22/04 2:09 PM Page 7
Page 7

USING THE CD PLAYER ADDITIONAL FEATURES
7
• Press the REPEAT button until the REPEAT is no longer shown in the
Display Screen
Random mode
This function will play all the tracks on the disc in a random order.
1 Press the RANDOM button on the Remote Control, RANDOM will be shown in
the Display Screen.
2 Press Play to start playing tracks in a random order.
Program mode
This allows you to program selected tracks on a disc to be played in your chosen
order. Up to 20 tracks can be programmed for playback.
1 Press the PROGRAM button on the front of the Micro System.
2 The Display Screen will show the program number 01 and PROGRAM which
will flash.
3 Press either or to display the desired track number.
4 Press the PROGRAM button again to select the track. The Display Screen
will then show 02.
5 Repeat steps 2, 3 and 4, until all your selected tracks are programmed.
6 Press the PLAY/PAUSE button to start the memory playback.
7 To cancel at any time press the STOP button twice. If you open the CD Door
any programmed tracks will be cleared from the memory.
NOTE: Memory mode can only be programmed when the Player is in the stop
mode.
Headphone Socket
(Headphones are not included)
• Insert the jack plug of your headphones into the socket on the front of the
Micro System. Note: if your headphone jack does not fit the Headphone
socket you may need an adaptor.
• Turn the volume on the Micro System to low before using the headphones,
then adjust the volume to suit.
CAUTION: You should not expose yourself to continuous play at loud volume
levels while using your headphones. You may damage your hearing. If you
experience ringing in your ears, reduce the volume or stop using your Micro
System.
If symptoms persist, see your doctor.
Mute Button
To temporarily silence the Micro System, for example to answer the phone, press
the Mute button on the Remote Control.
To resume play press the Mute button again.
Bass Button
Slide to ON to increase the bass level.
Micro System CRN-285 d4.qxd 7/22/04 2:09 PM Page 8
Page 8

This product was designed and manufactured to
meet strict quality and safety standards. There are,
however, some operation precautions that you
should be aware of:
Laser beam caution. If your CD player is operated
whilst the outer casing is removed, invisible laser
radiation could cause damage to the eye.
Check that the voltage as indicated on the back of
your Micro System corresponds to the voltage of
your mains electrical supply.
The Micro System should never be used with an
extension lead.
To prevent a fire or shock hazard, do not expose the
Micro System to rain, moisture or any form of
naked flame, such as a lit candle.
To avoid electric shock - never immerse in water or
allow water to drip or be splashed onto the Micro
System. Do not use the Micro System in a bathroom
or shower cabinet.
Do not try to open the Micro System itself. Always
refer servicing to a qualified service centre.
9
MAINTENANCE
Compact Discs
• If the CD skips or will not play, the disc may
need cleaning. Wipe the disc from the centre
out with a cleaning cloth (either with or
without CD cleaner fluid).
• Compact discs should be returned to their
cases after use.
• Do not expose a disc to direct sunlight, high
humidity or high temperature.
• Do not stick paper or write anything with a
ball point pen on a compact disc.
• Do not use cleansers or antistatic sprays on
compact discs.
Your Micro System
Do not use abrasive cleansers or chemical solvents.
Clean by lightly wiping with a soft cloth.
CD Player Lens
The CD Lens is located within the CD compartment.
It should never be
touched with
fingers as this can
affect performance.
Clean your CD lens
occasionally using a
CD lens cleaner and
by following the
instructions on the
cleaner packaging.
CLASS I
LASER PRODUCT
WARNING
IT IS HAZARDOUS FOR ANYONE OTHER THAN
AUTHORISED SERVICE PERSONNEL TO CARRY
OUT SERVICING OR REPAIRS WHICH INVOLVE
THE REMOVAL OF COVERS.
TO AVOID THE RISK OF AN ELECTRIC
SHOCK DO NOT REMOVE THE COVER
OF THE DVD PLAYER.
LASER BEAM CAUTION
LASER RADIATION CAN CAUSE EYE DAMAGE
DO NOT EXPOSE THE LENS
Micro System CRN-285 d4.qxd 7/22/04 2:09 PM Page 9
Page 9

10
SAFETY cont TECHNICAL SPECIFICATIONS
Should any solid object or liquid fall on/into the
Micro System unplug it and have it checked by a
qualified service centre only.
A small amount of current continues to flow to the
Micro System when not in use. Press the On/Off
switch to OFF and unplug it from the mains if it is
not to be used for an extended period of time. To
disconnect the mains lead, pull out by the plug itself
- never disconnect by pulling the cord.
The mains lead must be replaced by a qualified
service centre only.
Do not place anything on top or around the Micro
System that will impede ventilation.
During use place the Micro System in a location
with adequate ventilation to prevent heat build up.
The Micro System should have a clearance of at
least 10cm from either side and at the rear with
30cm at the top.
The Micro System is designed for use in moderate
climates. If the Micro System is brought directly
from a cold location to a warm location, or is
placed in a very damp room, moisture may
condense on the lens inside the CD player. Should
this occur, the CD player will not operate. Remove
the CD and leave the Micro System turned on for
about an hour until the moisture evaporates.
General
Power output 2 x 2W (RMS)
Power consumption 38 W
Speaker 2 x 92mm Ø 4Ohm
Power source AC 230V ~ 50Hz
Dimensions of Unit 200 x 291x 77 mm approx.
Dimensions of Speaker 162 x 110 x 205 mm approx.
(W/D/H)
Weight 2.95 Kg approx.
Radio Section
FM 87.5-108 MHz
MW 530-1600 KHz
Antenna Built-in antenna
CD Section
S/N Radio : 60db
Wow & Flutter Undetectable
Pick up laser 3 Beam semi-conductor laser
Pick up laser wavelength 760 - 810 nm
Frequency Response 100Hz - 16 KHz
Micro System CRN-285 d4.qxd 7/22/04 2:09 PM Page 10
Page 10

ELECTRICAL CONNECTIONS
14
This appliance is fitted with a fused three pin plug
to BS 1363 which will be suitable for use in all
houses fitted with sockets to current specifications.
If the fitted plug is not suitable for your sockets
outlets, it should be cut off and carefully disposed
of. To avoid a possible shock hazard, do not insert
the discarded plug into a socket.
Fitting a new plug
If for any reason you need to fit a new plug, the
flexible mains lead must be connected as follows.
The wires in the mains lead fitted to this appliance
are coloured in accordance with the following code.
If the colours of the wires in the mains lead of this
appliance do not correspond with coloured
markings identifying the terminals in your plug,
proceed as follows.
The wire which is coloured Blue MUST be
connected to the terminal which is marked with
the letter N or coloured Black. The wire which is
coloured Brown MUST be connected to the
terminal which is marked with the letter L or
coloured Red.
Before refitting the plug cover, check that there are
no cut or stray strands of wire inside the plug.
Use a 13 Amp BS1362 fuse, only BSI or ASTA
approved fuses should be used. If you are in any
way unsure which plug or fuse to use, always refer
to a qualified electrician.
Note: After replacing or changing a fuse on a
moulded plug which has a fuse cover, the fuse
cover must be refitted to the plug, the appliance
must not be used without a fuse cover. If lost
replacement fuse covers can be obtained from an
electrical shop.
CONNECT
BLUE TO
NEUTRAL (N)
MAKE SURE THE OUTER
SHEATH OF THE MAINS
LEAD IS SECURELY HELD
BY THE CLAMP
This appliance complies with the following E.E.C
Directives.
72/23 EEC (Low Voltage Directive)
89/336 EEC (EMC Directive)
13 AMP FUSE
This appliance is double insulated,
no connection must be made to
the earth terminal of the plug.
CONNECT
BROWN TO
LIVE (L)
Micro System CRN-285 d4.qxd 7/22/04 2:09 PM Page 11
Page 11

15
Micro System CRN-285 d4.qxd 7/22/04 2:09 PM Page 12
Page 12

CROWN CORPORATION (UK) LIMITED
Express Way, Whitwood,
Wakefield, WF
10 5QJ
Tel: 01977 604111 Fax: 01977 603159
For further information please
contact the Crown Technical Helpline
on: 01422 203676 .
Micro System CRN-285 d4.qxd 7/22/04 2:09 PM Page 1
 Loading...