

Page 1
Page 2

This machi ne has been engine ered to our own rigid safety and performance standards. It
has been de signed to comply wi th sanitation and health guideli nes recommended by the
Automatic Merchandising Health-Industry Council (AMHIC) and it conforms with all
other NAMA safety recommendations.
This machi n e has been manufactured in accor dance with the s afety standards of both
Underwriter’s Labo ratories and the Canadian Standards Association. To maintain this
degree of safety and to continue to achieve the level of performance built in to this
machine, it is important that installation and maintenance be performed so as to not al ter
the original construction or wiring and that replac ement parts are as specified in the
Manual. Your investm ent in this equip me n t will be protect ed by using this Setup and
Operato r’s Guide, the Programming Gui de, and the Parts Manual in your operation, ser
vice and mai ntenance work. By following prescribed procedures, machine performance
and safe ty w ill be preserved.
Parts
Crane Merchandising Systems Parts and Support
Phone Numbers:
Parts: 1-800-621-7278
Service: 1-800-628-8363
-
Page 3

Hot Drink Center II Programming Guide
Table of Contents
Title Page
Introd uction ... ....... .... ...... .... ...... .... ...... .... ...... .... ...... .... ...... .... ...... ... 1
Getting Around ..........................................................................................1
The Displays ..............................................................................................2
The Function Keys .....................................................................................2
Other Keys .................................................................................................2
Some Conventions: ....................................................................................3
Control Panel Switch Functions Explained ...............................................4
SureVend™ ...............................................................................................5
The Supervisor Mode ................................................................................6
Programmi n g Procedures ..................... .................. ..... 7
Basic Setup .....................................................................................7
Gain A cc es s To The Super v isor Mode........ ......... ... .......... ......... ... ......... ... 7
Enter A New Supervisor Code .................................................................. 7
Ente r A F re ev e nd C od e .. .. .......... ......... ... .......... ......... ... ......... .......... ... ....... 7
Ente r a New D at a R ecall Code ........ .. .. .......... ... ......... .......... .. .......... .......... 8
Lock Or Unlock Mode or Payout Keys ..................................................... 9
Set Prin t e r or D EX O p ti o ns ................. ... .......... ......... ... ......... .......... ........ 10
Select Printer Baud Rate.......................................................................... 10
Set DEX Options (DEX Mode Only)..................................................... 11
Set Talker Mode ...................................................................................... 12
Select Display La nguage ............. ........................................... ................. 12
Select Coin Mechanism........................................................................... 12
Monetary Setup ...........................................................................12
Select Bill Validator ................................................................................ 13
Initial Setup of a Non-Standard Bill Validator........................................ 14
Select Card Reader .................................................................................. 15
Select Monetary Options ......................................................................... 15
Set Up Win n er M od e .......... .......... ... ......... .......... .. .......... .......... .. .......... ... 18
Set Up Mug Discount .............................................................................. 19
Cup Configuration ......................................................................19
Set the Machine Type and Configuration Code ...................................... 20
Disa ble S e lection s in th e M er c ha n di s e r.............. .. .......... .......... .. .......... ... 22
Set Up Cup Sizes ..................................................................................... 23
Assign Cup Sizes to Selections................................................................ 24
Set Up A Ho t D ri n k ... .. .......... .......... .. .......... ......... ... .......... ......... .......... .. . 25
6730018 i July, 2003
Page 4

Hot Drink Center II Programming Guide
Table of Contents
Title Page
Set up a Hot Drink ......................................................................25
Collecting Dry Product Gram Throws..................................................... 28
Collecting Hot Water Throws.................................................................. 31
Cappuccino ..............................................................................................33
Caffé Latte ...............................................................................................34
European Cappuccino ..............................................................................36
Blended Selections ...................................................................................37
View or Set the Hot Water Tank Temperature........................................ 38
Set up Low Tempera tur e D i s p en si ng .......... ......... .......... ... ......... ... ......... . 38
Set up Low P o w er Set ti n g s........... ... ......... .......... .. .......... ... ......... .......... .. . 39
Set the Automatic Brewer Rinse Time .................................................... 40
Set the Bowl Rinse Time ......................................................................... 41
Turn Su re V end™ On o r Of f.. .......... ......... ... ......... ... .......... ......... ... ......... . 42
SureVend Confi g u r a t io n ...... ........ ........ ................ ........ ..............42
Optio n al or M an d atory Sur eV e nd ™ ... ... .......... .. .......... .. .......... .......... .. ... 42
Set Up the SureVend™ Anti-Jackpot Timer....... .................................... 43
View So f tw a r e V er si o n .......... .. .......... .......... .. .......... .. .......... .......... .. ........ 43
Set the T im e of D ay........ ......... ... ......... .......... ... ......... .......... .. .......... ........ 44
Setup Time ...................................................................................44
Set Mo n th , D at e, an d Y ea r . ... .......... ......... ... ......... .......... ... ......... .......... .. . 44
Set Daylight Savings Option ................................................................... 44
Set Time-of-Day Inhibit Vendin g............. ... ......... .......... ... ......... .......... .. . 45
Set Time-of-Day Free Vending ............................................................... 45
Set Time-of-Day Discount Vending........................................................ 45
Time Interval Ed it i ng.......... .......... ... ......... ... ......... .......... ... ......... ... ......... . 46
Select a Standby Message...................................................................... .. 48
Messages ......................................................................................48
Select an Out-of-Service Message........................................................... 48
Select a Freevend Message...................................................................... 48
Edit Custom Message .............................................................................. 49
View Water Tank Temperature ............................................................... 51
Check th e S e tu p .............. ................ ........ ................ ................ ....51
View Machine type/Configuration Setting.............................................. 51
View Cup Sizes Assigned to Selections .................................................. 52
Payout Coins............................................................................................ 52
Set Prices .............. .. .......... .......... .. .......... .......... .. .......... ......... ... .......... ..... 53
View Nonresettable Sales and Vend Data ............................................... 53
July, 20 03 ii 6730018
Page 5

Hot Drink Center II Programming Guide
Table of Contents
Title Page
View Machine Data .....................................................................53
View Data Four Different Ways.............................................................. 54
View To t al Pa id Sal es............ .. .......... .......... .. .......... .. .......... .......... .. ........ 54
View To t al Sa le s by D r in k Size....... .. .......... ......... ... .......... .. .......... ......... . 54
View Total Sales by Selection (both Cup Sizes) ..................................... 55
View To t al Sa le s by In d i vid u a l Selection .......... .. .......... ... ......... .......... .. . 55
View Total Paid Sales by Price Line ....................................................... 55
View To t al Pa id Ve n d s................. ... ......... .......... .. .......... ... ......... .......... .. . 56
View To t al Pa id Ven d s by P r ic e Li ne .... .......... ......... ... ......... ... .......... .. ... 56
Clea r Al l Re s et t ab l e Da t a . .. ... .......... .. .......... ......... ... .......... ......... ... ......... . 56
Clea r Pa id Sa l es D at a On ly ......... ......... ... .......... ......... .......... .. .......... ........ 57
View Amount in Coin Box ...................................................................... 57
View Amount in Validator...................................................................... 58
View Fr ee v e n d Sales by Time In te r va l .. .. .......... .......... .. .......... .. .......... ... 58
View Discount Sales by Tim e Interval............................. ....................... 59
View Free Vends ..................................................................................... 59
View Winners .. .. ... .......... ......... ... ......... ... .......... ......... ... ......... ... .......... ..... 59
View Time Data....................................................................................... 60
View Total Unpaid Sales......................................................................... 61
View Total Unpaid Vends ....................................................................... 61
View Nu m b er o f Te st Ve nd s ........ .......... .. .......... .......... .. .......... .. .......... ... 62
View N u mb er o f Mu g Ve nd s .......... .. .......... ......... ... .......... .. .......... ......... . 62
View N u mb er o f Al t V en d s........ .. .......... .. .......... .......... .. .......... .......... .. ... 62
View Machine ID Number ...................................................................... 62
View C up Ri n g Cy cl es R elated to Su reVend™) .. ... .......... .. .......... ......... .. 6 3
View Ti mes No Cup W as De tected Aft er a Cu p Ri n g Cyc led...... ......... . 63
View Home Switch Usage Related to SureVend™ ................................ 63
Test Vend Selections and Verify Credit Added ...................................... 64
6730018 iii July, 2003
Page 6

Hot Drink Center II Programming Guide
Table of Contents
Title Page
Test the Ma c h i ne .. ........ ........ ........ ........ .............. ........ ........ ........ .64
Test Drop a Cup....................................................................................... 64
Test the Automatic Delivery Door .......................................................... 64
Test the Whipper(S)................................................................................. 64
Test the Grinder(S) .................................................................................. 65
Test the Air .............................................................................................. 65
Test the Brewer........................................................................................ 65
Rins e th e M ixing Bow ls ... .......... .. .......... .......... .. .......... ......... ... .......... ..... 65
Rins e th e B re wer..... ... .. .......... .......... .. .......... ......... ... .......... .. .......... ......... . 66
Test Switches or Sensors ......................................................................... 66
View Su r eV e n d™ Last Record ed Calibr at i on V al u e ..... ... .. .......... ......... . 66
View SureVend™ Average Calibration Value........................................ 67
Clear Ta n k Er r or s an d Fi ll th e Tan k .... .......... ... ......... ... ......... ... .......... ..... 67
Test the Display....................................................................................... 67
View D i ag n os ti c M es s ag es. .......... .......... .. .......... .......... .. .......... .. .......... ... 68
Download Data to a PDCD...................................................................... 70
Set Freevend Options............................................................................... 71
July, 20 03 iv 6730018
Page 7
Introduction HDC II Programming Guide
Intro duct ion
Getting around the Hot Drink Center software is pretty easy once you know the
features that ar e availabl e to you, and how to use th em. The three main part s you
will use are the SERVICE KEYPAD, the SELECTION SWITCH PANEL, and
the DISPLAY.
The Se rvice K e ypad
GETTING AROUND
For most of your programming jobs,
you will be using the service keypad,
conveniently located on the monetary
panel. The service keypad has 16
keys. The three columns on the le ft
are the MODE keys. The right hand
column contains the MOVEMENT
keys.
The Selection Switch Panel
The selection switch panel is also
located on the m oneta ry pane l. Unlike
the service keypad, it is accessible
when the cabinet door is closed.
These ar e the keys the customer will
use to make selections. You can also
use these keys during programming
procedures.
6730018 1 July, 2003
Page 8
HDC II Programming Guide Introduction
T
Y
E
P
E
-
Y
E
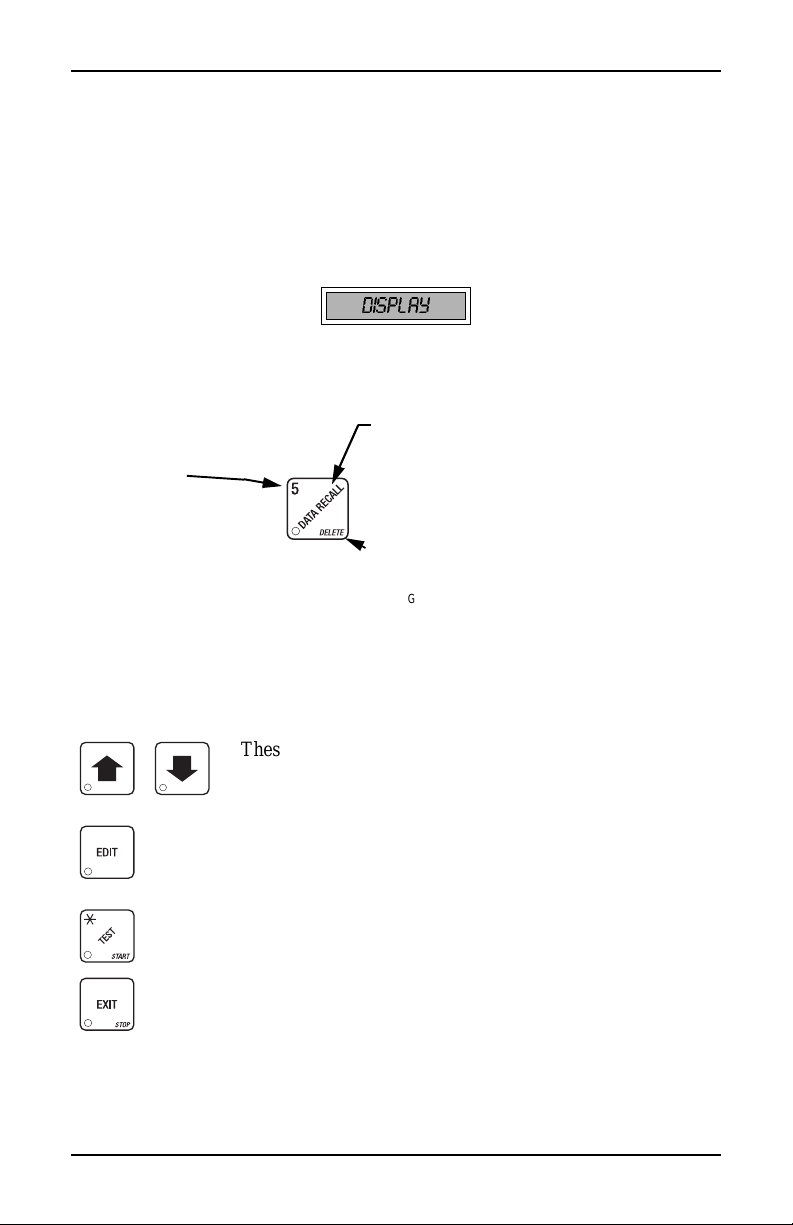
THE DISPLAYS
The 10-character display performs two functions, and is refe rred to in this book
as "the display":
• It shows the customer's selectio n and how much credit is in the machine,
as well as the ready, service, and time of day messages.
• It provides information and feedback to the service person during maintenance.
DISPLAY
THE FUNCTION KEYS
The keys on the control pane l ca n be us ed for up to three things:
THE PRIMARY PURPOSE
HE NUMBER
OU MIGHT BE ASKED TO
NTER A NUMERICAL VALUE
RESSING THIS KEY WILL
NTER A
"5".
THIS IS THE MAIN JOB OF THE KEY
MESSAGE, IT WILL ALLOW YOU TO ENTER A PROGRAM
MING MODE
.
SALES DATA
THE SECONDARY PURPOSE
THIS IS THE KEY'S "SECOND JOB
CAN BE USED TO DELETE A CHARACTER WHEN YOU AR
EDITING CUSTOM MESSAGES
. IN
THIS EXAMPLE, YOU CAN VIEW STORED
.
.
FROM THE STANDBY
".
FOR EXAMPLE, THIS KE
.
OTHER KEYS
The MOVEMENT keys on the control pane l let you move inside a mode, and
back and forth between modes.
These keys are your "legs", which let you move up and
down the list of tasks. They let you continue from one step
to the next in programming procedures.
This is your "act ivate " or "cho ose" ke y. It "opens a do or" to
additional information and lets you begin a programming
task once you a re i nside of a mode. Somet imes, it is us ed as
a toggle switch to show you your choices during a program
ming task.
-
This key can be used before running a function, or to
choose “ALL” in a multip l e selection .
This is your "end" key. Pressing it one or more times will
move you back to the start of the mode, or all the way back
to the standby mess age .
July, 20 03 2 6730018
Page 9
Introduction HDC II Programming Guide
SOME CONVENTIONS:
All programming procedures assume that you are starting with the standby mes-
sage showing in the display. If not, just press until you get there.
Each programming procedure is highlighted by a pointing hand: so it
will stand out.
Definitions and helpful information will appear in shadow boxes:
HELPFUL HINT
When you see the word CONTINUE at the end of a function, it means to press
until you return to the standby message.
6730018 3 July, 2003
Page 10

HDC II Programming Guide Introduction
CONTROL PANEL SWITCH FUNCTIONS EXPLAINED
Press this button to put your machine into the Price Setting mode.
You can see maximum and minimum machine prices, and chang e
prices for entire machine, product, or individual selection.
Press this button to set up how the Free Vend mode will operate.
Press this button to view the water tank temperature, software version number, machine and access ory configuration, and active selection st at us.
Press this b utton to:
• Select display language
• Select coin mechanism and options
• Select bill validato r and options
Press this b utton to:
• View total sales and vends by whole
machine, selection, or drink size
Press this b utton to:
• Download data into your portable data coll ection device (PDCD ), OR
• Set printer baud rate, depending upon wh ich device you are using
Press this b utton to:
• Set machine configuration
• Set wh ich selec tio n s are activ e
• Set up water tank low power
Press this b utton to:
•Set time of day
• Set day, month, year
• Set up time of day inte rv a ls for
inhibit, freevend, and discount
vending
• Select card reader and options
• Select monetary options
• Set winner feature
• Set mug disco unt option
• Clea r re settable da ta
• View or set machine ID
• Set up blended selections
• Set up cup sizes
• Select SureVend™ options
• Select di splay messages
•Edit messages
• Set message scrolling speed
Press this button to pay one or more coins from the coi n mechanism.
Press this button to see any fault or condition that may place the
machine out of service
Press this b utton to:
• Perfo rm T ES T V EN DS
• Test machine functions
• Test displays
• Fill th e w at er tank
Press this b utton to:
• Enter the SUPERVISOR mode
• Change the SUPERVISOR access
code
July, 20 03 4 6730018
• Lock and unlo ck access to functions
• Set free ve nd code
Page 11
Introduction HDC II Programming Guide
SUREVEND™
SureVend™ ensures that a cup is always available in the cup station before any
money is collected or product delivered. The sens ing system is a beam of infra
red light across the cup station which is broken by the cup when it f alls into position.
The SureVend™ software monitors th e cup s tatio n sens or during t he time the cup
ring is cycled and for th ree se conds afterward. If a cup is not detected, the soft
ware will first determine if a second cup ring with the same size cups exists and
will then try to drop a cup from the second ring. If the second ring also fails to
drop a cup or is not usable, the software will repe at the attempt from the first cup
ring to attempt to clear any j ams in the cu p d elivery area. Each r i n g w ill be tried
up to two times. If a cup is still not detected by the infrared sensor then several
things happe n:
• Any ring th at failed twice in a row is placed temp orarily out-of- se r vice for
a length of time that is determined by the user,
• The customer's credi t is either restored for another vend at tempt or is
returned automatically,
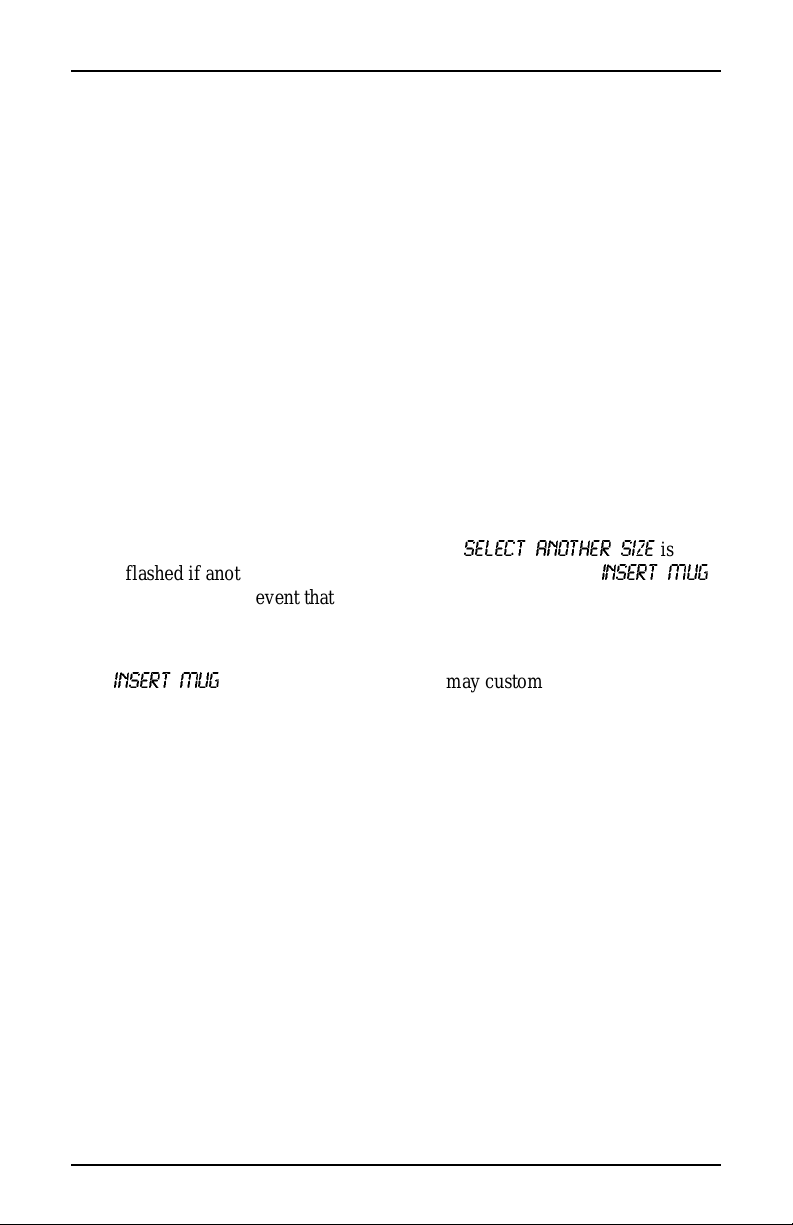
• Three beeps are sounded and the message
flashed if another size cup ring is available, or the message
is flas h ed in the ev ent that n o other cu p s are available. T h e customer may
always get his money back by pressing the coin return button.
SELECT ANOTHER SIZE
INSERT MUG
-
is
-
NOTE
INSER T MUG
(see
Special rules exist to protect both the cus tom er and the operator from loss. First
and foremost, the customer is protected because no drink is spoiled nor money
lost because a cup fa ils to fall to the cup station. The customer is given every
chance to get his original choice of cup size by trying at least twice per ring to
eject a cup . If two ri ng s ar e ava il able with th e same cup size , th e sy st em will
alternately try to vend a cup from each ring until the cup is delivered or both
rings are placed out-of-service.
6730018 5 July, 2003
is the default message . You may customize this message
if desired
"Edit Custom Message", PA G E 4 9 for more information).
Page 12

HDC II Programming Guide Introduction
The operator is prot ected by the anti-jackpo t program of the system. It is conceivable that a custom er could prevent c ups from reachi ng the sens ing are a of the
cup station in order to steal the cups and then get his or her money back for the
vend. Under the Su reVend™ Anti-Jackpot sy stem, the operato r can los e no more
than two cups in a row per ring. Then that ring is temporarily placed out-of-ser
vice both to protect the customer and to discourage theft. The amount of time
that the cup ring is out -of-service is programmable fr om 0 to 99 minutes. After
the time has elapsed, the cup ring will return to service but the count of the two
failures is kep t. If the previous problem was theft, then the next vend attempt
from that ring will be su cc es s f ul and the count of the two previous fail ures will
be erased . If th e pro b le m is an actual sy ste m fa i lu re, then the th i rd f ai lu r e w il l
permanently place that cup ring out of service until a service technician visits the
machine.
Alternate cup vends and mug vends still work as before. If a cup ring is out of
service due to SureVend™ the alternate vend will only be from a selected large
cup to a smal l cup at the small cup price. An induced SureVend™ failure cannot
cause an alternat e v end from a selected small cup to a larg e cu p at the small cup
price. Thi s protects the opera tor from customers trying to get large cup drinks at
a small cup price. (SureVend™ will not automatically switch to a different cup
size in mid-vend because it cannot be ensured that correct change will be
returned for the new price.)
-
SureVend™ can be turned off if desired (see "Turn SureVend™ On or Off",
PAGE 42).
THE SUPERVISOR MODE
The supervis or is allowed to do things that a normal user c annot, like contro lling
access to certain m odes . The supervisor can lock out any of the programming
modes to anyone who does not h ave the rig ht "ke y". On ce a supe rvisor enters t he
proper code, he or she wil l be able to:
• Change the supervisor ac cess code
• Lock out any or all of the service key pad modes
• Set whether data is cleared wit h or after being downloaded into a
portable data collection device
• Grant or deny access to data item s duri ng DATA RECALL
• Modify the machine configuration
July, 20 03 6 6730018
Page 13
Basic Setup HDC II Programming Guide
Basic S etup
PROGRAMMING PROCEDURES
GAIN ACCESS TO THE SUPERVISOR MODE
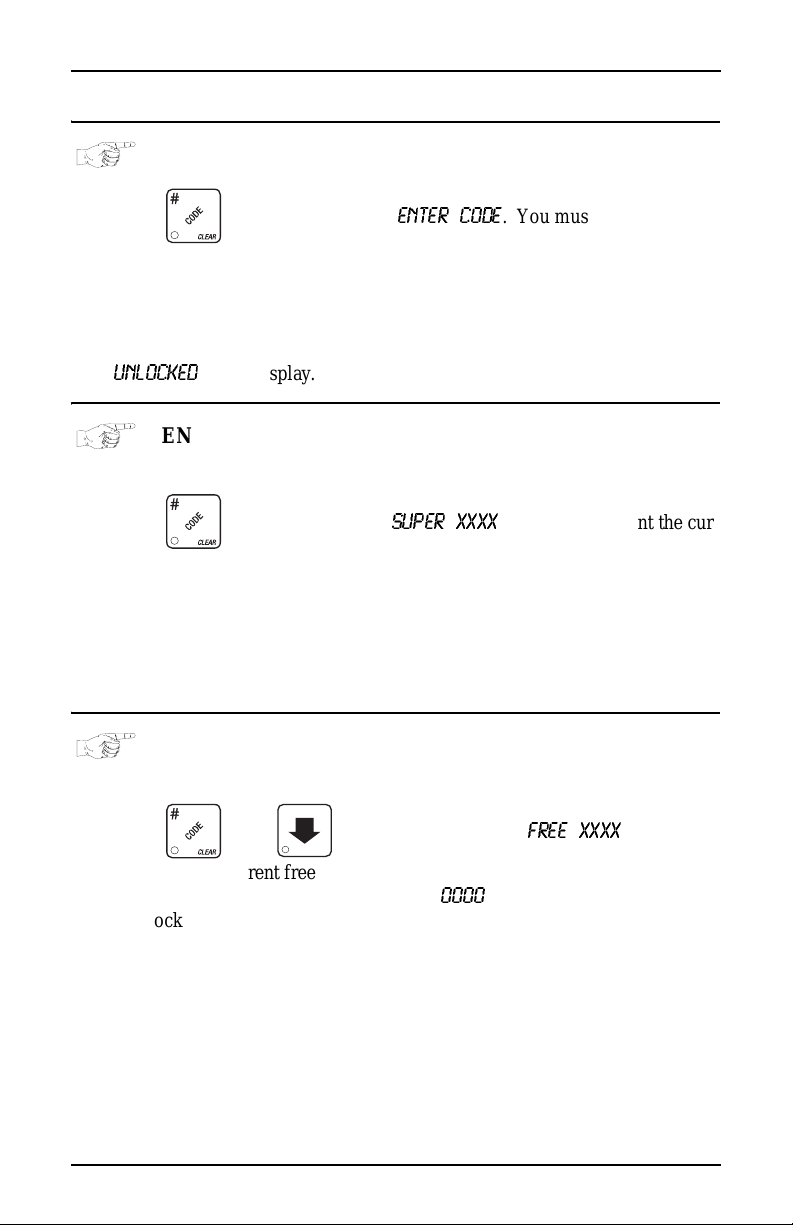
1. Press . The display shows:
digit supervisor code within 6 seconds to gain access.
A new machine has a factory-set supervisor code of 0000.
When you have entered the right code, you will hear two beeps and see
UNLOCKED
in the display.
ENTER CODE
NOTE
. You must enter the four -
ENTER A NEW SUPERVISOR CODE
1. Follow the steps in "Gain Access To The Supervisor Mode", PAGE 7.
2. Press . The display shows
rent supervisor code. Use the number keys to enter a new code.
If you enter a new code, be sure to kee p a written record of it.
There is no other way to access the SUPERVISOR mode.
3. CONTINUE.
SUPER XXXX
IMPORTANT
. The X's represent the cur-
ENTER A FREEVEND CODE
1. Follow the steps in "Gain Access To The Supervisor Mode", PAGE 7.
2. Press , then until the display shows
represent the current freevend code. Use the number keys to enter a new
code. If t he code is anything other than "
0000
key lock is turned in orde r to ena ble free vends.
3. CONTINUE.
6730018 7 July, 2003
FREE XXXX
. The X's
", it must be entered after the
Page 14

HDC II Programming Guide Basic Setup
ENTER A NEW DATA RECALL CODE
If the proper non-zer o code is entered, sales and non-res ettable sales data can be
viewed without opening the machine’s door.
1. Follow the steps in "Gain Access To The Supervisor Mode", PAGE 7.
2. Press , then until the display shows
resent the cur rently e ntere d code. Use the num ber keys t o ent er a new code ,
if desired.
NOTE
A code of
With the machine in ready mode, enter the 4-digit code. When
the corr ect code is entered, the non-res ettable sales total is dis
played. This display will remain active for 9 seconds, or until
3. CONTINUE.
0000
disables this feature.
USAGE
another key is presse d.
NR XXXX
. The X's rep-
-
July, 20 03 8 6730018
Page 15
Basic Setup HDC II Programming Guide
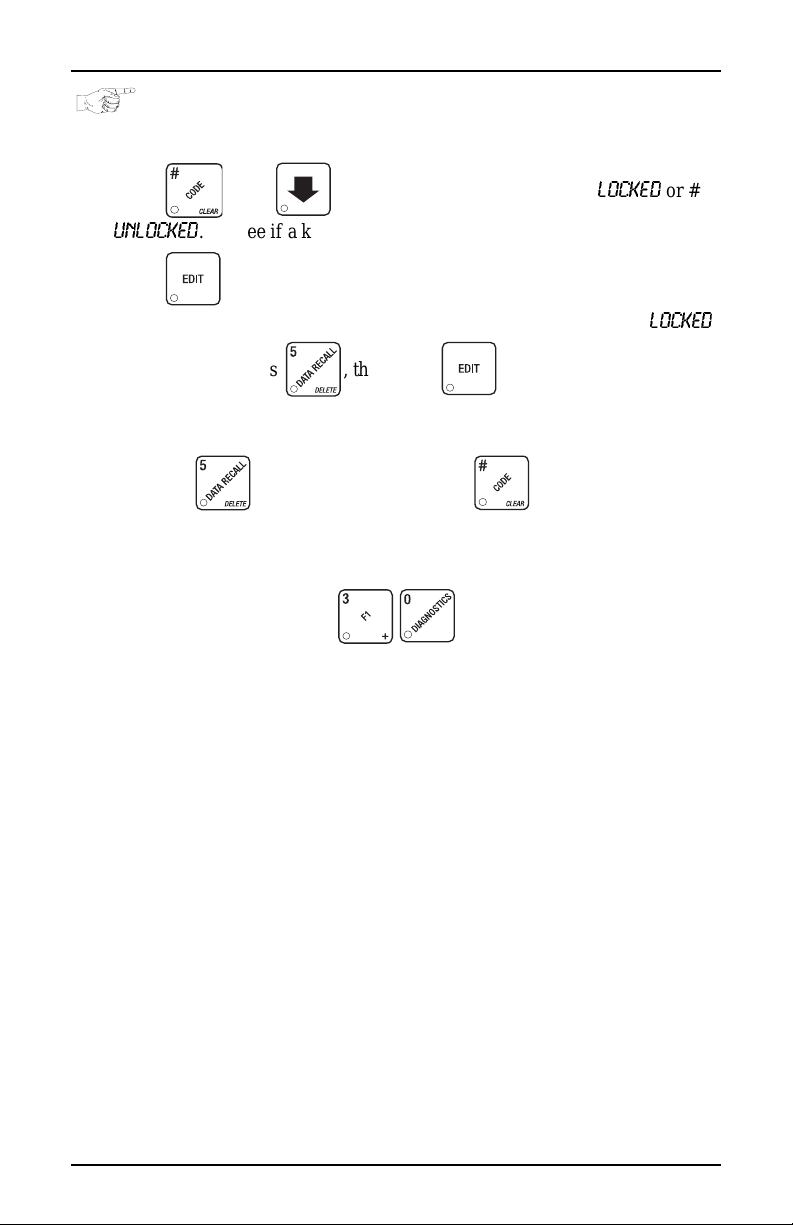
LOCK OR UNLOCK MODE OR PAYOUT KEYS
1. Follow the steps in "Gain Access To The Supervisor Mode", PAGE 7
2. Press , then until the display shows either #
UNLOCKED
3. Press to change between locked and unlocke d. When anyone other
than the supervisor tries to enter a locked mode, the display shows
EXAMPLES: Press , then press to lock the func tio n. Now ,
non-supervisory users can NOT view any sales data.
If you want non-supervi sory users to vie w data but not be able to cl ear data,
leave the
4. CONTINUE.
. To see if a key is locked or unlocked, press that key.
key unlocked, but do lock .
NOTE
The following mode keys cann ot be locked out:
LOCKED
or #
LOCKED
.
6730018 9 July, 2003
Page 16
HDC II Programming Guide Basic Setup
SET PRINTER OR DEX OPTIONS
1. Follow the steps in "Gain Access To The Supervisor Mode", PAGE 7.
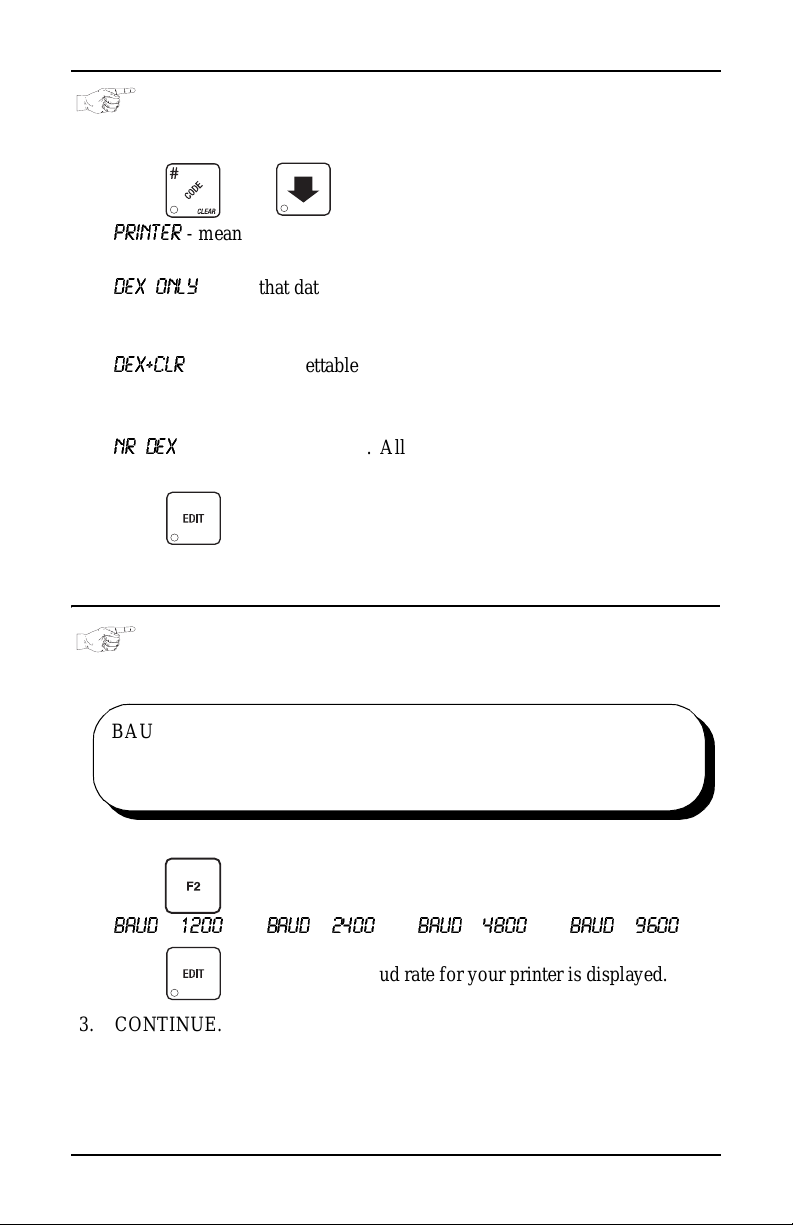
2. Press , then until the display shows:
PRINTER
DEX ONLY
portable data collection device (PDCD),
DEX+CLR
PDCD.
NR DEX
Consult your DEX supplier before choosing this option.
3. Press to change between the three choices.
4. CONTINUE.
- means that data will be sent directly to a printer,
- OR -
means that data remains in memory after it is downloaded into a
- OR -
means that resettable data is cleared after it is downloaded into a
- OR -
- a speci al DEX option . Al l sal es da ta will be come n on-re set table .
SELECT PRINTER BAUD RATE
(PRINTER MODE ONLY)
BAUD
RATE
The speed of data transfer, expressed in bits per second.
Your printer can receive data at a certain rate, and you must
tell the machine what that rate is.
1. Press . One of the following is displayed:
BAUD 1200 BAUD 2400 BAUD 4800 BAUD 9600
2. Press until the correct baud rate for your printer is displayed.
3. CONTINUE.
July, 20 03 10 67300 18
Page 17
Basic Setup HDC II Programming Guide
SET DEX OPTIONS (DEX MODE ONLY)
1. Follow the steps in "Gain Access To The Supervisor Mode", PAGE 7.
2. Press , then until the display shows one of two resettable
bill validator totals transmitted to the DEX device:
CA 304 = N.C.
cash format. F or example: 200 for two dollars. (This is the default setting.)
CA 304 = N. O.
lar count format. For example: 2 for two dollars.
3. Press to switch between the two choices. Consult your DEX ha ndheld supplier for the proper settings for your machine.
If your bill count is incorrect, the CA304 setting may be
4. Press until the display shows one of the following two date/time
options:
LAST.VND.ON
vend for each selecti on.
LAST.VND.OFF
last vend for each selec tion. (This is the default setting)
5. Press to switch between the two choices.
- the value of bills in the stac ker will be transmitted in a
- the value of bills in the sta cker will be transmitted in a dol -
NOTE
wrong. Try us ing the other setting.
- the DEX devic e will transmit the date and time of the last
- OR -
- the DEX device will NOT trans mit the date and time of the
6. CONTINUE.
6730018 11 July, 2003
Page 18
HDC II Programming Guide Monetary Setup
SET TALKER MODE
1. Follow the steps in "Gain Access To The Supervisor Mode", PAGE 7.
2. Press , then until the display shows
TALK ON or TALK OFF.
3. Press to tu r n th e talker opt ion ON or OF F.
NOTE
Tal ker hardware must be installed for this to work.
4. CONTINUE.
SELECT DISPLAY LANGUAGE
1. Press . The cu rr en t LANGUAGE displays. Press to
choose the desired language. Your choices are:
ENGLISH, DEUTSCH, FRANCAIS, ESPANOL, PORTUGUES, SWEDISH,
NEDERLANDS
, or
FINNISH
.
2. CONTINUE.
SELECT COIN MECHANISM
Monetary Setup
1. Press , then press until the c urre nt COIN MECHANISM is
shown in the display. Press to choose the desired coin mechanism.
Your choices are:
DUMB MECH, MDB MECH, EXEC MECH, OR NO MECH
2. Proceed to SELECT MONETARY OPTIONS, page 15, to customize
your coin m e ch an i s m ch o ic e.
NOTE
Depending upon your choice of coin mechanisms, some
choi c e s m ay not dis p lay.
3. CONTINUE.
July, 20 03 12 6730018
Page 19
Monetary Setup HDC II Programming Guide
SELECT BI LL VALIDATOR
1. Press , then press until one of the following is displayed:
NO DBV
mripb=a_s
SER.1.2.5.10.20
MDB.1.2.5.10.20
MDB.
<*>
2. Press to choose the desired option.
3. Proceed to "Sel ect Monetary Options", PAG E 15, to customiz e your bill
validator cho ice.
-
No bills will be accepted or there is no bill validator
installed (you can exit the function).
- The pulse bill validator will accept $1 bi lls.
-
The serial bill validator is selected and will accept $1, $2,
$5, $10, and $20 bills. Use BILL SELECTION METHOD
below to change the bills that will be accepted.
-
A standard MDB bill validator is selected. It will accept
$1, $2, $5, $10 and $20 bills. Use BILL SELECTION
METHOD below to change the bills that will be accepted.
BILL SELECTION METHOD:
The standard $1, $2, $5, $10 an d $20 bills are enabled by
pressing the 1, 2, 5, 6, or 7 key(s), respectively, to display
which bill(s) will be accepted.
-
An MDB bill validator tha t accepts coupons or non-standard bills (normally used for non-U.S. currency) is con-
nected and operating. Press to enter list of bills.
See BILL LIST OPERATION. See INITIAL SETUP OF
NON-STANDARD BILL V AL IDATOR.
NOTE
Depending upon your choice of bill validator, some choices
may not display.
4. CONTINUE.
6730018 13 July, 2003
Page 20

HDC II Programming Guide Monetary Setup
INITIAL SETUP OF A NON-STANDARD BILL VALIDATOR
1. Connect the bill validator , and follow the steps in "Select Bill Validator" ,
PAGE 13 to select
MDB
K==
<*> will not be an option yet. Exi t the bill validator set up by pres s -
ing . Bill information is now collected from the validator.
MDB.1.2.5.10.20
in the bill validator selection scre ens .
2. Press , then press until
3. Press .
validator channel 1, the
the validator will accept $1.00 bills.
4. Press to toggle the bill acceptance ON or
5. Press and to scroll through the list of other denominations
and to set them to ON or
6. Press to m o v e up to the to p le vel scre en .
If a denom ination does not display in the scroll list of av ailable
denominations, check the binary switc h se ttings for the valida
tor. If the binary switch for a given denomination is set to
1. 1.00 ON
“off”, it will not display in the list of denominations.
will display. The first number (1.) indicates bill
1.00
is the bill denominat ion, and ON indicates that
OFF
.
NOTE
MDB
K==
<*> displays.
OFF
.
-
July, 20 03 14 6730018
Page 21
Monetary Setup HDC II Programming Guide
SELECT CARD READER
1. Press , then press until the current card re ader is shown in
the display. Press to choose the desired card reader.
2. Your choices are:
3. Proceed to SELECT MONETARY OPTIONS, page 15, to customize
your card reader choice.
Depending upon your choice of card reader, some displays
4. CONTINUE.
NO CARD, DUMB CARD
NOTE
may not appear.
, or
MDB CARD
.
SELECT MONETARY OPTIONS
Certain options can be selected, depending upon which monetary devices you
have selected.
This functi on lets you:
• Set change returning criteria
• Set declining balance
• Set currency acceptance on low
change
1. Press , then press until the display shows
X.XX
represents the largest denomination coin or bill that will be changed
without a purch ase. Any non-ze ro value her e will retur n all escrowe d coins.
(Each coin denomination for which the coin mech has a tube is called an
ESCROWED coin because it can be returned.) When the coin return button
is press ed , all coins ins er t ed wi l l be re tu r n ed pro v id ed there is a co in mech
tube for each of those coins, EXCEPT in the forced vend mode.
Some ex amples:
CHANGE 0.00
CHANGE .25
CHANGE 1.00
- Forced vend; NO change returned without a purchase .
- Returns change without purchase if all accepted coins are
less than .25 denomination or have a payout tube. Accep
tance of a do ll ar co i n wil l no t ca use a Force Vend if the
coin mechani sm h as a dol la r coin p ayo ut tube . Ot herwise,
accepting a dollar coin or accepting and stack ing of a dol
lar bill will ca u se a Force Vend.
- Bills and non-escrowed coins less than or equal to $1.00
will be changed without purchase. All escrowed coins
are returned.
• Set overbuy options
• Set last bill stacking options
• Set card reader revalue options
CHANGE X.XX
.
-
-
6730018 15 July, 2003
Page 22
HDC II Programming Guide Monetary Setup
2. Press until one of the following is displayed:
3.
ACC
=
<
$$ X.XX
able change. Hold the last bill which meets or exceeds maximum price in
escrow. (This setting is normally used.)
4.
ACC.STK X.XX
able change. Immediately stack the last bill.
Example: If setting is
setting will immediately stack the second $1.00 bill inserted.
5. Press to display the desired choice.
-Accept any bill of value $X.XX or less, regardles s of avail-
- OR -
-Accept any bill of value $X.XX or less, regardless of avail-
ACC.STK 1.00
and maximum price is $1.50. This
6. The value of "
a. The valu e of "
even though there is not enough change in the coin mech to cover all
possible paybacks.
For example, enter 1.00. Therefore, the machine will take a dollar bill
or coin even though there is less than $1.00's worth of change . Entering
5.00 tells the machine to take a five even though there is less than
$5.00's worth of change, and so forth.
This could cause a customer to be short-changed.
Entering 0.00 means that bills or coins not held in escrow or in a tube
will only be accepted if there is enough change to cover them.
b. The value of "
to overbuy a product. The cust om er will be short-changed when an
overbuy occurs. Example:
For a value of $0.25: if there is no change in the machine and the customer inserts a $1.00 bill. The customer can purchase a product for
$0.75 even though the change cannot be paid back. The cust omer will
be short-changed. Normally a purchase will not be approved unless all
change can be paid.
Entering 0.00 means that the vend will only be approved when the correct change can be returned (overbuy disabled).
X.XX
" has two purposes:
X.XX
" tells the machine how big a bill or co in to accept
X.XX
" tell s t he m a chi ne how m uch the cu st om er i s al low ed
NOTE
July, 20 03 16 6730018
Page 23
Monetary Setup HDC II Programming Guide
7. Press until the display shows:
show
USE E XACT C HANGE
when the amount of availa ble ch ange in t he coin
mechanism falls below the value of "
keys. For example, if
CHANGE
message is d isplaye d when les s than a d oll ar's worth of c hang e is in
LOW.M S G 1. 00
LOW.MSG X.XX
X.XX
". Enter a value with the number
is displayed, the
. The display will
USE EXA CT
the coin mechanis m.
DECLINING
BALANCE:
Once credit is established, multiple
vends may occur until the coin return is
pressed.
8. Press until one of the following is displayed:
DECLINE.ON
DECLINE.OFF
- More than one vend is allowed , with a declining balance.
- OR -
- A declining balance is not allowed.
9. Press to display the desired choice.
10. Press until one of the following is displayed (only for machines
with Card opti on) :
REVALUE.ON
REVALUE.OFF
- Allows cred it to be tran sf e r re d on to th e ca rd
==-==
Credi t ca nn o t be tr a n s fer r ed to th e ca rd
11. Press to display the desired choice.
6730018 17 July, 2003
Page 24
HDC II Programming Guide Monetary Setup
SET UP WINNER MODE
WINNER At preselected intervals, a customer may receive a
1. Press , then press until one of the following is displayed:
WINNER OFF
WIN XXX
Press to display the desired choice.
If you sele ct ed
2. The display shows
must occur per each winner vend. For example, an interval number of 50
means that a winner can happen any one time during the next 50 vends.
Using the number keys, enter an interval number between 10 and 9999.
3. Press . The display s hows
represent which selections are allowed winners. Press the appropriate letter
key to enable a selection, press the key again to disable it. For example,
pressing A, C, and E will cause the display to look like this:
A
- C - E - - - - - meaning that all A, C, and E products can have a winn er.
refund for a selection. You can select the inter val and
qualifying selections.
- Winner function is disabled.
- OR -
- Winners are allowed at certain interv als, represented by "
WINNER OFF
WIN XXX
, you can exit the function.
. XXX represents the number of vends that
==
=
- - - - - - - - -=. The dashes in the displ ay
*
XXX
".
ADVANCED OPTIONS:
• Press to enable all selections.
• Press to deactivate all selections.
• Press 0 or 1 to set winner selections by cup size.
July, 20 03 18 6730018
Page 25

Cup Configuration HDC II Programming Guide
NOTE
If displaying WINNER by selection, press once to
redisplay wildcard (
=
,
ABC
*
....) sel ec ti o n s.
AN EXAMPLE . . .
You want to enable winners on all select ions except E and F. Do the following:
a. Press . The letters
A
through J appear in the display instead of
the da shes.
b. Press "E" and "F". The letters
E
and
F
in the display are replaced by
dashes.
NOTE
This is a two-p art scr een. P ress to display selections
X_ _ 2 _ _ _ _
.
4. CONTINUE.
SET UP MUG DISCOUNT
Cup Configuration
You can establish a discount for customers who use their own mug.
1. Press , then press until the display shows
MUG DSC .00
.
This example shows the existing discount amount is zero.
2. Enter a discount amount. This will be in cents, for example press
or 5 to enter a disco unt amount of 5 cents.
3. CONTINUE.
6730018 19 July, 2003
Page 26
HDC II Programming Guide Cup Configuration
SET THE MACHINE TYPE AND CONFIGURATION CODE (SUPERVISOR MODE ONLY)
1. Press , then until the display shows
2. Press or 1 to enter
3. Press until the display shows
delivery door status. A plus sign (+) means the door is on; a dash (-) means
the door is off. Toggle this setting by pressing
setting. Toggle a plus sign (+) or a dash (-) with the J key. See "Whipper
Options", PAGE 26 for more information. "WXYZ" is the machine config-
uration code. W represent s the machine type, X is the 6th product confi guration, Y is the brewer configuration, and Z is canis ter mapping. The
following tables give the possible values for each of the four numbers.
Enter the appropriate configuration code for your machine.
Table D1 Machine Type Configuration
Enter for (W) Definition
1 Hot Drink Center model 675
5 Hot Drink Center models 673 and 677
MACH.TYPE 1
D+J+ WXYZ
.
MACH.TYPE 0
. “D” is the automatic
. “J” is the w hip per
or
1.
Table D2 6th Product (Selection C) Conf igu ration
Enter for (X) Definition
1 No 6th product
2 6th product prese nt, but receives no condime nts
3 6th product prese n t, may receive condiments
4 Water only
July, 20 03 20 6730018
Page 27

Cup Configuration HDC II Programming Guide
SINGLE BREW A machine with only one bre wed s election
(the second selection is freeze dried). Uses a
single barrel brewer.
DUAL BREW A machine with two brewed selec tions.
DUAL CONDIMENT A machine with two separate sets of condi-
ments (lightener/sugar) to avoid cross-flavor-
ing.
Table D3 Brewer Configuration
Enter for (Y) Coffee Mix
Number of
Brewers
Condiment Sets
1 Single Brew One Single
2 Dual Brew One Single
6 Freeze Dry None Single
Table D4 Canister Mapping (See figure below)
Menu Selection Letters for Canister Numbers
Enter for (Z)
3 (Single condiment only) 2 1
1 F B A
2 F A B
3 B F A
4 B A F
SIXTH PRODUCT
(C)
WHIPPER 2
TEA/COFFEE
(F)
WHIPPER 1
DECAF
(B)
653p0007
COFFEE
(A)
SUGAR SUBSTITUTE/
SEVENTH PRODUCT
(X)
SOUP/
FIFTH PRODUCT
(H)
CHOCOLATE
(G)
WHIPPER 5
WHIPPER 4
SUGAR
LIGHTENER
765 43 2 1
WHIPPER 3
6730018 21 July, 2003
Page 28

HDC II Programming Guide Cup Configuration
Canister Mapping
DISABLE SELECTIONS IN THE MERCHANDISER
1. Press , then press until the display shows something like
this:
LK. ABCDEFGH
This display means that all regular size selections (A - H) are not available
for vending. An availabl e selec tion has it s lett er repla ced by a bla nk space.
Press
2. Press the appropriate letter to tog gle the display on or off.
Press to lock all selections; press to unlock all
3. CONTINUE.
July, 20 03 22 6730018
to display the second screen for X, Y, and Z selections.
NOTE
selections.
Page 29

Cup Configuration HDC II Programming Guide
SET UP CUP SIZES
Make sure the cup sizes you select agree with the cups you have actually loaded
during setup.
1. Press the display shows
drink size for the cups in turret 2 (normally lar ge cups), "Y" is the currently
selected drink size for the cups in turrets 1A and 1B (normally regular
cups).
2. Press to toggle through the #1 cup ring sizes; press to
toggle the #2 cup ring size.
3. Any changes made to the cup sizes must be "locked in". There are two
ways to do this:
a. If you are keeping some cup sizes the same, or putting the cups in dif fer -
ent cup rings, press and hold . The display momentarily shows
CLEARING
old throw times to the new cup ring, if possible.
b. If you are loading all different size cups, or want to load all new default
times, press and hold
CLEARING
factory default times for all cup sizes, clearing any custom throw times
you have established. (See t he tables on the following pages for the fac
tory default times.)
, two beeps sou nd, the n shows
, two beeps sound, th en s hows
X OZ Y
. The display momenta r ily shows
. "X" is the cur r e n tl y selected
FINISHED
FINISHED
. This will reassign the
. This will reload the
-
4. CONTINUE.
6730018 23 July, 2003
Page 30

HDC II Programming Guide Cup Configuration
ASSIG N CUP SI ZE S TO SELEC TIONS
(SUPERVISOR MODE ONLY)
You can load up to two different siz es of cups in your machine (see "Set Up Cup
Sizes", PAGE 23). You may not always want a cert ain selection to use all of the
cup sizes in your machine. For example, espresso is normally s erve d in regular
cups, so you probabl y will not want it to be available in large or jumbo cups.
1. Press , then press until the display shows something like
this:
0. ABCDEFGH
is available for all selections (A - H).
Press to display all selections; press to clear all selections.
. This display means that the smaller of the two cup sizes (0)
NOTE
2. Press to display remaining selections (
play , the “X” repre sent s the 7t h product, and the “ 2” repre sents th e cup only
selection.
NOTE
If you have only one cup size i n your machin e, you will not see
the next display.
3. Press . The display shows something like this:
1. ABCDE F G H
available for all selections (A - H).
4. Press the appr opriate letter to toggle the display on or off. A select ion that
doesn't vend the displayed size cup has its letter replaced by a dash (-).
Press to display all selections; press to clear all selections.
5. Press to display remaining selections (
play , the “X” repre sent s the 7t h product, and the “ 2” repre sents th e cup only
selection.
To vend a cup only, press 1, 2, 3 (large size) or 2, 3 (regular size).
6. CONTINUE.
. This display means that the larger of the two cup sizes (1) is
NOTE
0 X_2_ _ _ _
1 X_2_ _ _ _
). In this dis-
). In this dis-
July, 20 03 24 6730018
Page 31

Set up a Hot Drink HDC II Programming Guide
SET UP A HOT DRINK
Set up a Hot Drink
Be sure that the cup sizes you set in "Set Up Cup Sizes", PAGE 23, agree with
the cup sizes actually in your machine. All procedures for setting up the hot
drinks are simi lar, so this example will demon strat e how to s et up t he A se lect ion,
regular size fresh brew coffee.
1. Press , then press until the display shows
SETUP
- *. The
star (*) represents the selection (A, B, etc.). The dash (-) represents the
size of the selection.
2. Press A. (If you were setting up the A selection for the large size drink , you
would press 1 first, then A.) The display shows
WAT. A 8.25
. This means
that the currentl y se t wate r throw time for the A selection is 8.25 seconds.
Enter a new time if desired.
3. Press . The displ ay shows
DRY. A .60
. This means that the cu r -
rently set dry product t hrow time for the A selection is .60 seconds. Enter a
new time if desired.
4. Pressing after each display will cause the following scre ens to
display:
DRY. A+
SUG. A
SUG. A+
LIT. A
LIT. A+
SUB. A
SUB. A+
STP. A
STP. A+
AIR. A
DLY. A
Vi ew and c hange the settings for an extra strong drink
View and change the settings for the sugar thr ow tim e
Vi ew and c hange the settings for extra suga r throw time
View and change the settings for the lightener throw time
Vi ew and c hange the settings for extra lightener throw time
View and change the settings for the sugar sub throw time
Vi ew and c hange the settings for extra suga r sub throw time
View and change the steep t i me
Vi ew and c hange the steep time for an extra strong drink
Vi ew and change the air compressor/pump running time
Vi ew and c hange the amount of time after the vend to open
the auto vend door
6730018 25 July, 2003
Page 32

HDC II Programming Guide Set up a Hot Drink
Whipper Options
WHP. A XXX
ON
ON+
OFF
OPT
• If J+ is sele ct ed (s ee "Set the Ma ch ine Type and Configuration Code
(Supervisor Mode Only)", PAGE 20):
OPT- The last 3 seconds of the drink is whipped only when the J
OPT+ The whole drink is whipped only when the J key is pressed
• If J- is selected (see "Set the Machine Type and Configuration Code
(Supervisor Mode Only)", PAGE 20):
OPT- The las t 3 seconds of the drin k is whippe d unless the J key is
OPT+ The whole drink is whipped unless the J key is pressed
Some selectio ns will not show all of these it ems. The E selec tion will ha ve some
additional selections:
WA.2 E
DR.2 E
PCT. E
Press to view and change the whipper settings:
- The last 3 seconds of the drink is always whipped
The whole drink is always whipped
The drink is never whipped
See below
key is pressed
pressed
DIFFERENCES:
Vi ew and set the wat er throw ti me for t he cappuc cino s econd
product (chocolate)
View and set the chocolat e throw time for cappuccin o
To automatically compute new times for cappuccino, enter a
percentage, then press
the amount of chocolate product in cappuccino, versus that
in a normal choc olate dri nk. T his t ime and the nor mal cof fee
settings will compute the new cappuccino ti me.
July, 20 03 26 6730018
. This per ce n tage repr es e n ts
Page 33

Set up a Hot Drink HDC II Programming Guide
OPTIONS:
a. At any of the preceding displays, you can press to test thro w
that it em .
b. At any of the preceding displays, you can press * or # (on the selection
switch panel) to s tep through a list of that item's throw tim es for other
selections where that item is active. For example, pressing # at the
WAT. A
way to move from one selection to another without going to the
screen first.
If you try t o se t up a sele ction tha t is not configu red, the
5. CONTINUE.
display will show the throw time for
NOTE
screen will remain in the display.
WAT. B
. This is a handy
SETUP
SETUP
6730018 27 July, 2003
Page 34

HDC II Programming Guide Set up a Hot Drink
S
S
COLLECTING DRY PRODUCT GRAM THROWS
Measuring the gram throw allows you to get the right amount of dry product or
condiment in to your hot drink . To do this, you need a container to catch the prod
uct throw and an accurate gram scale to measure its weight.
1. Make a measuring conta iner by cutting down a paper cup until it fits under
the canister spout as shown.
2. Weigh the measur in g cup and zero th e gram scal e accordingly.
3. Make 5 test throws as instructed in the programming steps.
4. W eigh ea ch test thro w, then add all 5 weights t oge ther an d div ide by 5 t o get
an aver age weight.
5. If necessa ry, adjust the throw time and re pea t steps 3 and 4 until you ge t the
correct product or condiment weight.
Tables D1 and D2 show the factory default settings for the various dry products
sold by the merchandis er. They are good starting points to use in setting up your
machine. In the end, the amount of dry product or condiments you us e in your
drinks depen ds upon t aste an d manufact urers ’ recommenda tio ns. Recomm ended
weights and times a re for guidance only, and you do not have to adhere to them.
-
LIGHTENER
UGAR
UBSTITUTE
CHUTE
MIXING
COVER
COLLECTING
CONDIMENT
BOWL
SUGAR
CUP POSITION
FOR TEST
THROW
FRESH BREW
COFFEE
CANISTER
THROWS
CHUTE
CUP POSITION
FOR TEST THROW
July, 20 03 28 6730018
Page 35

Set up a Hot Drink HDC II Programming Guide
Table D1 Dry Product Weight and Throw Time Factory Default Settings
Weight (in grams) per size cup (in ounces)
Selection
A Fresh brew coffee
A Freeze dry cof fee
Strong freeze dry cof-
A
fee
B Fresh brew decaf
B Freeze dry decaf
Strong freeze dry
B
decaf
C Soluble product
Fresh brew coffee
D
ESPRESSO
Freeze dry cof fee
D
ESPRESSO
Strong freeze dry cof-
D
fee ESPRESSO
Fresh brew coffee
E
CAPPUCCINO
Freeze dry cof fee
E
CAPPUCCINO
Strong freeze dry cof-
E
fee CAPPUCCINO
F Instant tea
F Strong inst a nt tea
G Chocolate
H Soup
H Soluble pr oduct
X Soluble pr oduct
Sugar used in
D
espresso
Extra sugar used in
D
espresso
Throw times (in seconds) per size cup
5 7 8 9 10 12 14 16 18 20
5.70
8.00
9.00
10.00
11.00
13.00
15.30
17.50
1.60
0.90
0.35
1.10
0.65
5.70
1.60
0.90
0.35
1.10
0.65
10.8
2.45
5.70
1.60
0.90
0.35
1.05
0.65
5.70
1.60
0.90
0.35
1.05
0.65
0.90
0.70
1.10
0.90
17.00
2.80
4.30
0.70
10.80
2.45
10.80
2.45
2.20
0.35
3.20
0.50
2.20
1.20
0.50
1.50
0.90
8.00
2.20
1.20
0.50
1.50
0.90
15.0
3.35
8.00
2.20
1.20
0.50
1.50
0.90
8.00
2.20
1.20
0.50
1.50
0.90
1.20
1.00
1.50
1.25
24.00
4.00
6.00
1.00
15.00
3.35
15.00
3.35
2.85
0.45
4.15
0.65
2.50
1.50
0.60
1.80
1.10
9.00
2.50
1.50
0.60
1.80
1.10
17.8
4.00
9.00
2.50
1.50
0.60
1.80
1.10
9.00
2.50
1.50
0.60
1.80
1.10
1.50
1.25
1.80
1.60
28.00
4.65
7.00
1.15
17.80
4.00
17.80
4.00
3.50
0.55
4.80
0.75
2.80
1.60
0.65
2.00
1.20
10.00
2.80
1.60
0.65
2.00
1.20
19.4
4.35
10.00
2.80
1.60
0.65
2.00
1.20
10.00
2.80
1.60
0.65
2.00
1.20
1.60
1.30
2.00
1.75
31.00
5.15
7.60
1.25
19.40
4.35
19.40
4.35
3.80
0.60
5.10
0.80
3.10
1.80
0.70
2.20
1.35
11.00
3.10
1.80
0.70
2.20
1.35
21.6
4.85
11.00
3.10
1.80
0.70
2.20
1.35
11.00
3.10
1.80
0.70
2.20
1.35
1.80
1.60
2.20
1.85
34.00
5.65
8.50
1.35
21.60
4.85
21.60
4.85
4.15
0.65
5.76
0.90
3.65
2.20
0.90
2.60
1.60
13.00
3.65
2.20
0.90
2.60
1.60
25.9
5.80
13.00
3.65
2.20
0.90
2.60
1.60
13.00
3.65
2.20
0.90
2.60
1.60
2.20
1.85
2.60
2.10
41.00
6.80
10.20
1.65
25.90
5.80
25.90
5.80
5.10
0.80
6.70
1.05
4.25
2.55
1.00
3.05
6.85
15.30
4.25
2.55
1.00
3.05
6.85
30.20
6.80
15.30
4.25
2.55
1.00
3.05
6.85
15.30
4.25
2.55
1.00
3.05
6.85
2.55
2.10
3.05
6.85
47.50
7.90
11.90
1.95
30.20
6.80
30.20
6.80
6.05
0.95
8.00
1.25
4.85
2.90
1.15
3.50
2.15
17.50
4.85
2.90
1.15
3.50
2.15
34.50
7.75
17.50
4.85
2.90
1.15
3.50
2.15
17.50
4.85
2.90
1.15
3.50
2.15
2.90
2.40
3.50
2.15
54.50
9.00
13.60
2.25
34.50
7.75
34.50
7.75
6.70
1.05
9.30
1.45
19.60
5.45
3.25
1.30
3.95
2.40
19.60
5.45
3.25
1.30
3.95
2.40
38.85
8.75
19.60
5.45
3.25
1.30
3.95
2.40
19.60
5.45
3.25
1.30
3.95
2.40
3.30
2.20
3.95
2.40
61.00
11.80
15.30
2.50
38.85
8.75
38.85
8.75
7.65
1.20
10.55
1.65
21.80
6.05
3.65
1.45
4.35
2.70
21.80
6.05
3.65
1.45
4.35
2.70
43.15
9.70
21.80
6.05
3.65
1.45
4.35
2.70
21.80
6.05
3.65
1.45
4.35
2.70
3.65
2.05
4.35
2.70
68.00
12.25
17.00
2.80
43.15
9.70
43.15
9.70
8.50
1.35
11.50
1.80
6730018 29 July, 2003
Page 36

HDC II Programming Guide Set up a Hot Drink
Table D1 Dry Product Weight and Throw Time Factory Default Settings
Weight (in grams) per size cup (in ounces)
Selection
Throw times (in seconds) per size cup
5 7 8 9 10 12 14 16 18 20
Sugar used in cappuc-
E
cino
Extra sugar used in
E
cappuccino
F Sugar used in tea
Extra sugar used in
F
tea
F Lightener used in tea
Extra lightener used
F
in tea
Sugar substitute used
F
in tea
Extra sugar substitute
F
used in tea
*
Sugar
*
*
Extra sugar
*
*
Lightener
*
*
Extra lightener
*
*
Sugar substitute
*
*
Extra sugar substitute
*
D = Espresso I = Chocolate times for cappuccino
E = Cappuccino
* The actual gram weight of a product or condiment throw will vary
depending upon the type of product or condiment used. The
weights given are approximate bas ed on factory testing.
**Separate sugar, lighte ner, and sugar substitute timers are available
for selecti ons A /B/C/D, E, and F.
3.60
0.45
4.60
0.60
4.20
0.55
5.45
0.70
1.20
0.70
1.55
0.90
0.60
0.75
0.80
1.00
4.25
0.55
5.45
0.70
1.20
0.70
1.55
0.90
0.60
0.75
0.80
1.00
5.20
0.65
6.95
0.90
6.00
0.75
7.75
1.00
1.50
0.85
2.15
1.25
0.85
1.05
1.10
1.35
5.05
0.75
7.75
1.00
1.50
0.85
2.15
1.25
0.85
1.05
1.10
1.35
6.00
0.75
7.75
1.00
7.00
0.90
8.95
1.15
2.00
1.15
2.50
1.45
1.00
1.25
1.30
1.60
7.00
0.90
8.95
1.15
2.00
1.15
2.50
1.45
1.00
1.25
1.30
1.60
6.55
0.80
8.50
1.10
7.75
1.00
9.70
1.25
2.20
1.25
2.75
1.60
1.10
1.35
1.40
1.75
7.75
1.00
9.70
1.25
2.20
1.25
2.75
1.60
1.10
1.35
1.40
1.75
7.30
0.90
9.25
1.20
8.55
1.10
10.90
1.40
2.45
1.40
3.00
1.75
1.30
1.60
1.60
2.00
8.95
1.15
10.90
1.40
2.45
1.40
3.00
1.75
1.30
1.60
1.60
2.00
8.70
1.10
11.15
1.45
10.10
1.30
12.85
1.65
2.95
1.70
3.60
2.10
1.50
1.90
1.90
2.40
10.90
1.40
12.85
1.65
2.95
1.70
3.60
2.10
1.50
1.90
1.90
2.40
10.20
1.25
13.10
1.70
12.05
1.55
13.60
1.75
3.40
1.95
4.20
2.45
1.70
2.10
2.15
2.70
12.05
1.55
13.60
1.75
3.40
1.95
4.20
2.45
1.70
2.10
2.15
2.70
11.60
1.45
15.00
1.95
13.60
1.75
17.50
2.25
3.90
2.25
4.80
2.80
1.90
2.40
2.50
3.10
13.60
1.75
17.50
2.25
3.90
2.25
4.80
2.80
1.90
2.40
2.50
3.10
13.10
1.65
16.95
2.20
15.15
1.95
19.45
2.50
4.35
2.50
5.45
3.15
2.20
2.75
2.80
3.50
15.15
1.95
19.45
2.50
4.35
2.50
5.45
3.15
2.20
2.75
2.80
3.50
14.55
1.80
18.50
2.40
17.10
2.20
21.75
2.80
4.85
2.80
6.05
3.50
2.40
3.00
3.10
3.90
17.10
2.20
21.75
2.80
4.85
2.80
6.05
3.50
2.40
3.00
3.10
3.90
July, 20 03 30 6730018
Page 37

Set up a Hot Drink HDC II Programming Guide
COLLECTING HOT WATER THROWS
National Vendors recommends the factory defa ult times be used for hot water
throws to ensure prop er mixing. Ta ble W1 gives the factory default water throw
times for the various size cups and product selections.
WARNING
This water is HOT! Be careful .
For a non-brewed selection, collect the water throws as follows:
1. Place a cup in the c u p d elivery station.
2. Ensure the merchandiser is using the factory defaults for the cup sizes (see
SET UP CUP SIZES, page 23).
3. Initiate the water throw for a selection.
4. Remove the cup and pour the water into a graduated cylin der.
5. Refer to table W1 for the correct volume of water.
6. Adjust the throw time for that selection (see "Set Up A Hot Drink", PAGE
25) and repeat st eps 3 through 5 unt il the correct volume of water is thrown.
7. If you are unable to get the desired amount of water, reset the throw time to
the factory default, then adjust the water valves. You may then readjust the
throw times to fine-tune your water throws.
For a brewed selection, collect the water throws as follows:
1. Remove water supply hos e from the brewer as shown on the next page.
2. Place the end of the hose in a graduated cylinder.
3. Initiate the water throw for a selection.
4. Remove the cup and pour the water into a graduated cylin der.
5. Refer to table W1 for the correct volume of water.
6. Adjust the throw time for that selection (see "Set Up A Hot Drink", PAGE
25) and repeat st eps 3 through 5 unt il the correct volume of water is thrown.
7. If you are unable to get the desired amount of water, reset the throw time to
the factory default, then adjust the water valves. You may then readjust the
throw times to fine-tune your water throws.
8. Replace the water supply hose on the brewer.
6730018 31 July, 2003
Page 38

HDC II Programming Guide Set up a Hot Drink
CUP FOR
TAKING
WATER
THROWS
CUP
DELIVERY
STATION
653p0011
Table W1 Water Throw Default Times and Volumes
Time (in seconds) per size cup
Selection
A Fresh brew coffee
B Fresh brew decaf
A Freeze dry coffee
B Freeze dry decaf
C 6th Product
D Espresso (FB)
D Espresso (FD)
F Tea
G Chocolate
H Soup
H Soluble Product
X Soluble Product
5 oz 7 oz 8 oz 9 oz 10 oz 12 oz 14 oz 16 oz 18 oz 20 oz
5.00
7.00
135
190
5.00
7.00
135
190
5.00
7.00
125
175
5.00
7.00
125
175
5.00
7.00
110
155
2.25
3.50
62.5
87.5
2.50
3.50
62.5
87.5
5.00
7.00
125
175
5.00
7.00
105
145
5.00
7.00
115
165
5.00
7.00
110
155
5.00
7.00
110
155
Volume (in ml) per size cup
8.25
9.00
240
9.00
240
9.00
225
9.00
225
9.00
200
4.50
120
4.50
112.5
9.00
225
9.00
185
9.00
210
9.00
200
9.00
200
10.00
265
10.00
265
10.00
255
10.00
255
10.00
225
5.00
133
5.00
127.5
10.00
255
10.00
205
10.00
235
10.00
225
10.00
225
220
8.25
220
8.25
210
8.25
210
8.25
185
4.15
110
4.15
105
8.25
210
8.25
170
8.25
195
8.25
185
8.25
185
12.00
320
12.00
320
12.00
305
12.00
305
12.00
270
6.00
160
6.00
153
12.00
305
12.00
245
12.00
285
12.00
270
12.00
270
14.00
375
14.00
375
14.00
355
14.00
355
14.00
315
7.00
185
7.00
175
14.00
355
14.00
290
14.00
330
14.00
315
14.00
315
16.00
425
16.00
425
16.00
405
16.00
405
16.00
360
8.00
210
8.00
205
16.00
405
16.00
330
16.00
380
16.00
360
16.00
360
18.00
480
18.00
480
18.00
455
18.00
455
18.00
405
9.00
225
9.00
225
18.00
370
18.00
370
18.00
425
18.00
405
18.00
405
20.00
535
20.00
535
20.00
505
20.00
505
20.00
450
10.00
265
10.00
255
20.00
505
20.00
410
20.00
475
20.00
450
20.00
450
July, 20 03 32 6730018
Page 39

Set up a Hot Drink HDC II Programming Guide
RECIPES
CAPPUCCINO
Cappuccino is m ade with va riou s rat ios of choc ola te t o cof fee , ac cordin g t o t aste.
Lightener (E timer) is al so used for cappuccino. For an example, the default
chocolate- to-coffee ratio of 15/85 in a 8.25 oz. cup consists of the following:
• A chocolate throw (DR.2) lasting .65 seconds, providing 15% of the normal chocolate throw (approximately 5.4 grams*).
• A water throw for the chocolate (WA.2) lasting 2.65 seco nds (chocolate
product throw plus 2 seconds to ensure the mixing bowl is fully rinsed).
The volume is about 59 ml, depending upon how the flow rate is adjusted.
• A throw for cappuccino coffee (product E) equa l to a normal coffee (prod uct A ) th row.
• A water throw for the freeze dry coffee selection (water E) lasting for 5.55
seconds (132 ml).
- OR -
• A water throw for the fre sh bre w coff ee sel ection (wa ter E ) lastin g for 5.55
seconds (153 ml). In either case the wat er volume is enough to fill the
remainder of the cup.
The actual mixing sequence is as follows:
1. The coffee portion of cappuccino is made using the same canister/val ve
combination as the normal (A) coffee.
2. After t he c of f ee is com pl etely in the cup , t he ch oco lat e po rti on is mad e wi th
the selecti on G canister/valve combina tion. This gives the drink its tradi
tional "layering".
Chocolate weights will vary with different produ cts
HINTS:
T o “fi ne tune ” your Cappuccino d rink t o your exac t t aste, se t a rati o clos e to what
you like (between 5% and 50%). Adjust the individual timers using
until you are sati sfied. You may find it neces sary to cut down on the
amount of sweetener available to a cappuccino drink with a high ratio of chocolate, as the chocol ate contains sweetener of it s own.
6730018 33 July, 2003
-
and
Page 40

HDC II Programming Guide Set up a Hot Drink
CAFFÉ LATTE
Caffé Latte has a rich, ro bust coffee flavor. It is a full-bodied hot beverage with
extra creamer, whipped to frothy perfection, with sugar optional. Try this recipe
to expand your gourme t product selections and increase prem ium pr icing oppor
tunities.
ENTER THE SUPERVISOR CODE:
-
1. Press . The displ ay shows:
digit supervisor code within 6 seconds to gain access.
A new machine has a factory-set supervisor code of 0000.
When you have entered the right code, you will hear two beeps and see
UNLOCKED
SET THE MACHINE TO VEND A LARGE "D" SELECTION:
1. Press the foll owing keys: , then until the display shows
1. ABCDEFGH
selection switch panel to display the "
2. Press twice to return to the standby message.
in the display.
Ensure that your machine has be en config ured for two s eparate
cup sizes , and that th e larger size is 12 oz. See
SIZES, page 23.
. Make sure the "D" is displayed. If not, press "D" on the
ENTER CODE
NOTE
NOTE
D
. You must enter the four -
SET UP CUP
".
July, 20 03 34 6730018
Page 41

Set up a Hot Drink HDC II Programming Guide
SET UP YOUR SELECTION:
1 D 6 or 7 Drink Sel ection Setup
Large Cup Size
12 OZ 14 OZ 16 OZ 18 OZ 20 OZ
TIME
WATER
COFFEE
SUGAR
EX
SUGAR
LIGHT-
ENER
EX
LIGHT
-
ENER
STEEP
TIME
STEEP +
TIME
WHIP
FB / FDTIME
SEC.
12 cup 320/305 ml14 cup 375/355 ml16 cup 425/405 ml18 cup 480/455 ml20 cup 535/505
3.65 13.0/2.2 gm4.25 15.3/
0.35 2.7 gm 0.40 3.1 gm 0.45 3.5 gm 0.55 4.25 gm 0.60 4.65 gm
0.35 2.7 gm 0.40 3.1 gm 0.45 3.5 gm 0.55 4.25 gm 0.60 4.65 gm
2.90 5 gm 3.35 5.85 gm 3.85 6.7 gm 4.35 7.55 gm 4.85 8.45 gm
2.90 5 gm 3.35 5.85 gm 3.85 6.7 gm 4.35 7.55 gm 4.85 8.45 gm
12.5 12.5 12.5 12.5 12.5
12.5 12.5 12.5 12.5 12.5
ON + ON + ON + ON + ON +
SEC.
FB / FDTIME
4.85 17.5/2.9 gm5.45 19.6/
2.55 gm
FB / FDTIME
SEC.
SEC.
FB / FDTIME
SEC.
6.05 21.8/
3.25 gm
FB /
FD
ml
3.65 gm
To get th ese measu r e m en t s, s e e "Collecting Dry Product Gram Throws", PAGE
28, and perform test throws of the dry ingredients. See "Coll ec ting Hot Water
Throws", PAGE 31, and perform test water throws.
6730018 35 July, 2003
Page 42

HDC II Programming Guide Set up a Hot Drink
EUROPEAN CAPPUCCINO
Introducing a grea t new blended drink called EUROPEAN CAPPUCCINO:
First, a portion of cappuccino topping mix (or lightener) is dispensed, then lay
ered on top is a small serving of strong coffee.
1. Replace product in the soup (or internationa l coffee) caniste r with the lightener or cappuccino topping mix.
-
2. Press . The displ ay shows:
ENTER CODE
. You must enter the four -
digit supervisor code within 6 seconds to gain access.
NOTE
A new machine has a factory-set supervisor code of 0000.
When you have entered the right code, you will hear two beeps and see
UNLOCKED
in the display. Press .
3. Recon f igure the machine:
a. Press , then press until the display shows Db.
WXYZ
is the curr ent con fi gura ti on cod e, wh ere W = the m ac hin e typ e, X
= 6th product configuration, Y = brewer configuration, and Z = caniste r
mapping.
See “Set the Machine Type and Configuration Code (Superv isor Mode Only)” on page 20. You will be changing the number represented by X. The only way to do that is to change all four numbers, so
at this time write down your c onfigura tio n code s o you will know whe re
to star t if yo u m ak e a mistak e .
c. Replace "X" as follows:
If your current value of X is: Change it to:
1 5
2 6
3 7
4 8
J+ WXYZ
.
For example: If your current configuration code is
numbers
W 6 Y Z
. Your new drink wil l be selected with the H key. Valid selec-
W 2 Y Z
, you will enter the
tions are H3 (black) and H4 (with sugar). After the reconfiguration, timers for
the topping mix or lightener are under the H selec tion as
DR.2
, and the timers for
the coffee serving are under the H selection. Now, you need to alter the water
throw times for the two selections. Consult
T abl e W1 on page 32 for sugge stio ns
for a starting point for your new drink.
July, 20 03 36 6730018
Page 43

Set up a Hot Drink HDC II Programming Guide
BLENDED SELECTIONS
Two new blended selections are offered with the Y and Z keys. Any two base
products, a primary and secondary, can be blended from 15% to 85% in 5%
increments. The primary product is dispensed first followed by the secondary
creating a 'laye r.' To reverse the orde r dispensed to the cup, invert the primary
and secondary products. The blended drink will s upport condiments if condi
ments are valid for either of the base products.
-
Blended selections are configured in the
CONFIG list. T h e Y and Z keys select the blended selections from the
list. O nc e the Y or Z key is pressed, you can select the blend selections and the
percentage. T he arrow keys toggle between the selection and percentage list
items and the 1 and 2 keys edit the primary and secon dary products, respectively.
For exam p le to set up the Y blended selection:
1. Press then pr ess until the screen displays
2. Press Y; the screen now displays
ondary products currently selected.
3. Repeatedl y press 1 until your selected pri ma ry product appears next to Y1.
(NOTE: the selec ted s econdary prod uct will not be i nclude d in the avail able
primary products list.)
4. Repeatedl y press 2 until y our s elec ted s econd ary pr oduct a ppears next to Y2
(NOTE: the selecte d primary product will not be in cluded in the available
secondary products list.)
5. Press . T h e screen display s
percentage of the primary and secondary products selected.
6. Press 1 to incre as e the primary product percentage, or press 2 to incre as e
the secondary product percentage. (NOTE: the alterna te product percent
age value is automatically changed to total 100%).
BLEND
list item of the PRODUCT
Y1.# Y2.
Y1 ** Y2
BLEND
BLEND
# . # represents the primary /sec-
. ** represents the
**
- *.
-
6730018 37 July, 2003
Page 44

HDC II Programming Guide Set up a Hot Drink
VI EW OR SET THE HOT WATER TANK TEMPERATURE
1. Press then until the display shows
example, 202° is th e water ta nk temp eratur e set point i n de grees F ahrenhe it.
If a decimal point appears next to the "F", the heater is on.
2. If desired, ente r a new setpoint in the accepted ra nge of 149° - 205° F (65°
- 96° C).
NOTE
The lower limit for vending is 20° below setpoint, up to a max-
imum of 180° F (82° C).
3. To change display units (replace the "F" with a "C" for Celsius), press
.
4. CONTINUE.
pbq=OMO=°c=
. In this
SET UP LOW TEMPERATURE DISPE NSING
1. Press then pr ess until the screen displays either
a.
LTDIS OFF
Hot Drink Center. For example, with a setpoint temperature of 202º F
the machine will inhibit vendin g wh en the water tank temperature falls
below 182º F.
b.
LTDIS ON
. This ca uses t he mac hin e to oper ate th e s ame a s the prev ious
- OR -
. Allows vending to a water tank temperature of 140º F.
2. Press to change between ON and
3. CONTINUE.
July, 20 03 38 6730018
OFF
.
Page 45

Set up a Hot Drink HDC II Programming Guide
SET UP LOW POWER SETTINGS
Low power setti ngs allow fo r the water tank to be se t to a l ower te mperat ure at up
to 4 different dates and times.
For example, you want to lower the tank temperature to 160º F overnight on
Mondays through Fr idays. The machine tank temp erature setpoint will be
changed to 16 0º F at 6:00 pm and mai ntain ed at t hat temp erature until 5:00 am on
the following morning when the setpoint is returned to 202º F. Please keep in
mind that at 5:00, the machin e will just begin to inc re ase to the 20 2 º F se tp o i nt
temperature. It is up to you to determine how long that will take and to allow
enough time for the tank to be at its prope r te mperature when the machine will be
used. Typically, one hour is adequate to return to the normal ope rating tempera
ture. NOTE: The mach i n e
interval will be determined by how you have set the
OUT OF SERVICE
condition during the low power
LTDIS
configuration.
-
1. Press then press until the scree n displ ays
Press the number of the tim e interval you want to edit, or to ed it
time interval 1 (we will use interval 1 for th is example).
2. The display shows
whether your time interval (represented by 1) is on or off. Press
change the condition of the time interval.
3. If you turn an interval ON, it must be edi ted. You can edit a time interval
now, then turn it OFF until another time.
4. Press . The displ ay shows
start time. Enter a new start tim e (24-hour format) for this interval. To
enter the time for 6:0 0 pm, ente r 1800.
5. Press . The displ ay shows
stop time. En ter a new st op time (2 4-hour format) for thi s int erval. To enter
the time for 5:00 am, ente r 0500.
6. Press . The display shows 1.@ - - - - - - - . The dashes represent the
LOW.PW ON
or
LOW.PW OFF
1.STRT X.XX.==
1.STOP X.XX.
. This display te lls you
X.XX is the current l y set
=====
X.XX is the currently set
LOW.PWR.
- - - - .
to
days that this ti me interval is active. Pressing number keys 1 through 7
switches the days on/of f. 1= sunday, 2=monday, et c. For exa mple, press "2",
“3”, "4", “5”, and "6". The display now shows
1.
@ -
M T W T F
6730018 39 July, 2003
-. This interval is ac tive on Monday through Friday.
Page 46

HDC II Programming Guide Set up a Hot Drink
7. Press . The displ ay shows
means there is no custom message selected, and "X" represen ts the custom
message number set for this interval. Press the number key of the message
(1 through 8) you want displayed. To edit this message, press
follow the procedu r e given in EDIT CUSTOM MESSAGE (page 49).
Press 0 to turn the message OFF for this time interval.
8. Press . The displ ay shows
9. Press 1, 6, and 0. The screen di splays
10. CONTINUE.
1. MESG OFF
L.PWR 202
L.PWR 160
.
=
or
1. MESG X.
.
"OFF"
and
SET THE AU TOMATIC BREWER RINSE TIME
(BREWER EQUIPPED MACHINES ONLY)
The brewer will be aut omati call y rinsed by one of two methods : You can specify
a set time of day when the brewe r is rinsed, or you can specify th at rinsing takes
place a s et time after the last br ew ed select io n is vended.
1. Press then until the display shows one of the following:
SAN.TIM 4.5
rinses t he brew er. In this ex ample , bre w er r ins e tak es p lac e ea ch day at 4: 30
am. Range: 0.0 - 23.9 in .1 hour (6 minute) increments.
SAN.HRS 2 .5
last vend. Range: 2.0 - 12.5 hours, in .1 hour (6 minute) increments.
If 24 hours passes withou t a vend, no rinsing will take plac e.
This eliminates unnecessary rinsing over a wee kend or holiday.
2. Whichever one of the two choices is displayed is the method by which the
brewer will be rinsed. Press
Enter a new ti me , if desired.
3. CONTINUE.
July, 20 03 40 6730018
The time of day (in hours and tenths of hours ) the mac hine
- OR -
. In this example, brewer rinse takes p lace 2.5 hours af ter the
NOTE
to switch between these two displays.
Page 47

Set up a Hot Drink HDC II Programming Guide
SET THE BOW L RINSE TI ME
Mixing bowl(s) can be automatically rinsed by one of two methods: You can
specify a set time of day when the bowl is rinsed, or you can specify that rinsing
takes pl ace a set time after the last selection is vended.
1. Press then until the display shows one of the following:
RIN.HRS 2.5
In this exampl e, bowl ri nse take s plac e 2.5 hou rs afte r the la st ve nd. Range:
2.0 - 12.5 hours, in .1 hour (6 minute) increments.
RIN.T IM 4.5
rinses the bowls. In this example, bowl rinse takes place at 4:30 am.
Range: 0.0 - 23.9 in .1 hour (6 minut e) increments.
If 24 hours passes withou t a vend, no rinsing will take plac e.
This eliminates unnecessary rinsing over a wee kend or holiday.
RINSE OFF
2. Press to switch b et ween the se o ptions , and the number keys to ente r
new values.
3. CONTINUE.
- This is how soon the machine rinses the bowls after a ve nd.
- OR -
- The time of day (in hours and tenths of hours) the machine
NOTE
- OR -
- No bowl rinse takes place.
6730018 41 July, 2003
Page 48

HDC II Programming Guide SureVend Configuration
TURN SUREVEND™ ON OR OFF
SureVend Configur ation
1. Press then until the display shows one of the following:
SURE.V OFF
: None of the SureVend™ functions are available. Use this if
the SureVend™ system is not installed, or there is some reason you do not
want to use it (for example in a high cup theft situat ion).
SURE.V ON
. The SureVend™ system is oper ative. Al l o f the SureVend™
functions are available.
2. Press to switch between the two choices.
3. CONTINUE.
OPTIONAL OR MANDATORY SUREVEND™
1. Press then until the display shows one of the following:
OPT’N SURE.V
motors if the SureVend™ system cannot operate normally because of an
obstruction in the cup station or for any other reason.
MUST S URE. V
system is determined to be working. Otherwise, the machine will go tem
porarily out of service until the blockage or other er ror is corrected.
2. Press to switch between the two choices.
: The machine reverts to home switch opera tion of the ring
: The vendi ng machine is op erati onal only if the Sure Vend™
-
3. CONTINUE.
July, 20 03 42 6730018
Page 49

SureVend Configuration HDC II Programming Guide
SET UP THE SUREVEND™ ANTI-JACKPOT TIMER
1. Press then until the display shows
represents how many minutes Su reVend™ will be disabled for either cup
ring. The same value applies to the two timers (one on each ring).
2. Enter a number using eit her keypad.
If any cup ring motor fai ls to deliver a cup on two consecutive attempts , the
cup ring goes out of service. After the time set in step 2 has elapsed, the
cup ring goes bac k in service and i s giv en one mor e cha nce to de liver a cup.
If cup delivery is aga in uns uccessful, the ring goes out of s ervice until the
machine is serviced. A successful delivery on any c up ring will reset the
failed attemp ts for that particular cup ring. If both cup rings perform three
consecutive failed attempts (and the SureVend™ sensor is determine d to be
working), the entire machine goes in the "mug only" m ode until the
machine is serviced. If either cup ring performs thre e consecutive failed
attempts with the other cup ring in anti-ja ckpot timer mode, the entire
machine will be in "mug only" mode (assuming SureVend is worki ng) until
the pre set time elapses (one more attempt will be made to deliv er a cup) or
the mach i n e is s er v i ce d by a ro ut e o p era t o r.
NOTE
A setting of 00 will disable this feature. A setting of 99 will
disable th e ring until the next service call.
CONDITIONS:
If the cup sizes are the same, the machine alternates ring motor cycles until
either a cup is de tected or both rings reach two consecutiv e failed attempts.
If the cup sizes are d ifferent, the selected ring is cycled up to two times
befor e re tu r n i ng cr ed i t. If the c us to m e r selects a larg e size drink and th at
ring is out of service, the customer gets a small drin k (if in s ervice) and
receives change.
AJP.TMR XXM
. XX
VIEW SOFTWARE VERSION
1. Press , and press until the display shows
"XXXXXX" represents the current software ver si on num ber.
2. CONTINUE.
6730018 43 July, 2003
VER XXXXXX
.
Page 50

HDC II Programming Guide Setup Time
SET THE T IME OF DAY
Setup Time
1. Press . The display shows
TIME HH.MM
. "HH.MM" is the time of
day in 24-hour format.
2. Enter the current time using the number keys.
NOTE
9:00 am is entered with a lea ding zero, like this: 0900; 9:00
pm is entered as 2100.
3. CONTINUE.
SET MONTH, DATE, AND YEAR
1. Press , and press until the display shows
"MM" is the month, "DD" is the da te, YY is the year, X is the day of the
week (1=sunday, 2=monday, etc.)
2. Enter the current month, date, and year using the numbe r keys .
For example, press the following keys to enter February 15, 2002:
0, 2, 1, 5, 0, 2
Once a date is entered, the day of the week will automatic ally adjust to the
correct day.
3. Press to switch between MM/DD and DD/MM formats
MM/DD/YY X
.
4. CONTINUE.
SET DAYLIGHT SAVINGS OPTION
1. Press , then press until the display shows something like:
DST N.AMER
2. Press to se le ct th e ap p r op r i at e o pt i on for yo u r machine. T he
options are:
DST N.AMER
3. CONTINUE.
July, 20 03 44 6730018
(North America),
DST UK/ EUR
.,
DST AUSLIA, DST OFF
.
Page 51

Setup Time HDC II Programming Guide
SET TIME-OF-DAY INHIBIT VENDING
Vending can be inhibited up to four time s a day.
1. Press , then press until the display shows
2. See "Tim e I n terval Editi ng", PAGE 46 for an example of how to set up
time-of-day inhibited vending.
INHIB
- - - -.
SET TIME-OF-DAY FREE VENDING
1. Press , then press until the display shows
2. See "Tim e I n terval Editi ng", PAGE 46 for an example of how to set up
time-of-day free vending.
FREEV
- - - -.
SET TIME-OF-DAY DISCOUNT VENDING
1. Press , then press until the display shows
2. See "Tim e I n terval Editi ng", PAGE 46 for an example of how to set up
time-of-day discount vending.
DISCT
- - - -.
6730018 45 July, 2003
Page 52

HDC II Programming Guide Setup Time
TIME INTERVAL EDITING
You can select up to four times of day for each special vending period.
NOTE
If two or more of these time periods overlap, the interval with the
highest priority will overrule the other(s). This order of preced enc e is:
1. INHIBIT
2. FREEVEND
3. DISCOUNT
For example, if a DISCOUNT time period is scheduled for a certa in
area before the end of an INHIBIT time period, DISCOUNT does not
begin until the INHIBIT interval has ended for that area.
The time interval editing proced ur e is almost the same for the INHIBIT, FREEVEND, and DISCOUNT intervals. There is one difference (Step 3 below) for the
DISCOUNT time interval, so we will use it in our example. Assume you just fin
ished the "Set Time-of-Da y Discount Vending", PAGE 45 procedure. Step 1
picks up where you left off . . .
-
1. The display s hows
want to edit, or
example).
2. The display shows
whether your time interval (represented by 1) is on or off. Press
change the condition of the time interval.
If you tu rn an interval ON, it must b e ed ited. You can edit a
time interval now, then turn it OFF until another time.
3. Press . The displ ay shows
percentage for this period. Enter a discount percen tage of 25 with the num-
ber keys. (Discount percentages of from 0 to 99 are permitted.) The
machine will app ly a 25% disco unt t o each pri ce, roun ding up to the near est
nickel (or whatever is the smallest coin accepted by the coin mechanism).
4. Press . The display shows
start time. Enter a new start tim e (24-hour format) for this interval. To
enter the time for 3:3 0 pm, ente r 1530.
DISCT
- - - - . Press the number of the time inte rval you
to edit time interval 1 (we'll use interval 1 for this
1.DISCT ON
or
1.DISCT OFF
NOTE
1.DSCT X
1.STRT X.XX
This display tells you
. "X" represents the discount
K ==
X.XX is the currently set
to
July, 20 03 46 6730018
Page 53
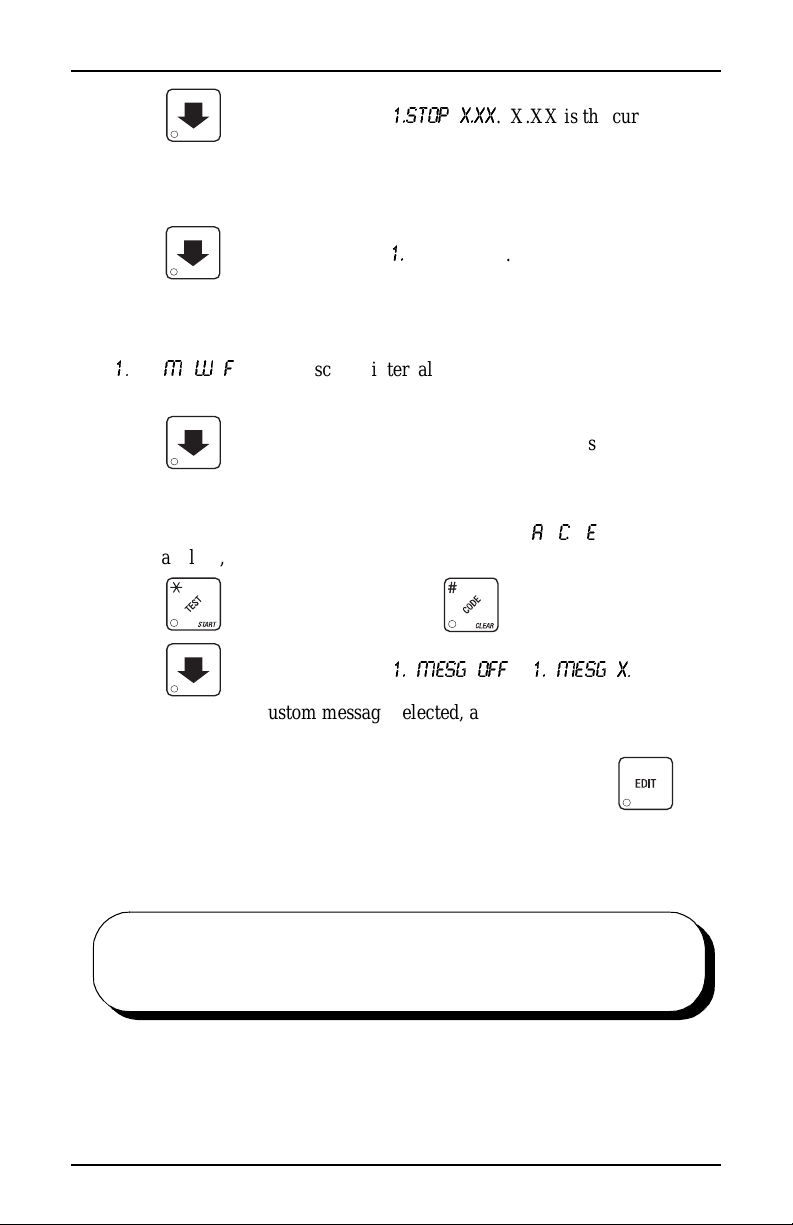
Setup Time HDC II Programming Guide
5. Press . The displ ay shows
stop time. En ter a new st op time (2 4-hour format) for thi s int erval. To enter
the time for 6: 00 pm, enter 1800. You have now esta bl ished a 25% di scount
that starts at 3:30 pm and ends at 6:00 pm.
6. Press . The display shows 1.@ - - - - - - - . The dashes represent the
days that this ti me interval is active. Pressing number keys 1 through 7
switches the days on/off. For e xample, press "2", "4", a nd " 6". The display
now shows
1
K
@ -
day, and Friday.
7. Press . The displ ay shows
the products affected by this time interval. Press the appropriate letter key
to enable a product, press the key again to disable it . For example, pressing
A, C, and E will cause the display to look like this:
ing that al l A, C, and E selections are affected by this interv al.
Press to turn on all levels; press to turn all levels off.
8. Press . The displ ay shows
M
=-=W=-=F=
-. This discount in terval is only active on Monda y, Wednes-
1.STOP X.XX
=
- - - - - - - - - . The dashes represent
*
1. MESG OFF
.
====
X.XX is the currently set
A
- C - E - - - -_, mean-
=
or
1. MESG X
K
"OFF"
means there is no custom message selected, and "X" represen ts the custom
message number set for this interval. Press the number key of the message
(1 through 8) you want displayed. To edit this message, press
follow the procedu r e given in EDIT CUSTOM MESSAGE, page 49.
Press 0 to turn the message OFF for this time interval.
9. CONTINUE.
STANDBY
MESSAGE
6730018 47 July, 2003
The message that is displayed during normal vending periods when there a re no out-of-service faults
on the machine.
and
Page 54

HDC II Programming Guide Messages
SELECT A STANDBY MESSAGE
Messages
1. Press , then press until the display shows
STANDBY XX
.
"XX" represents the current message number selected for the standby message. Two dashes mean that the factory-set message is selected.
2. To select a mess age, just press the corresponding num ber (1 through 8). To
display the fact ory-set message, press 0.
3. The selected m essage (ex cept th e facto ry-set messa ge) ca n be edit ed. To do
this, press and follow the procedure given in
EDIT CUSTOM MES-
SAGE, page 49.
4. CONTINUE.
SELECT AN OUT-OF-SERVICE MESSAGE
1. Press , then press until the display shows
"XX" represents the current message number selected to display when the
machin e is out-of-service. Two dashes mean t h at the f actory-s et messag e is
selected.
2. To select a mess age, just press the corresponding num ber (1 through 8). To
display the fact ory-set message, press 0.
3. The selected m essage (ex cept th e facto ry-set messa ge) ca n be edit ed. To do
this, press and follow the procedure given in
EDIT CUSTOM MES-
SAGE, page 49.
4. CONTINUE.
SERVICE XX
.
SELECT A FREEVEND MESSAGE
1. Press , then press until the display shows
represents th e current message number selected for the message that displays when the machine is in the freevend mode. Two dashes mean that the
factory-set message is selected.
2. To select a mess age, just press the corresponding num ber (1 through 8). To
display the fact ory-set message, press 0.
3. The selected m essage (ex cept th e facto ry-set messa ge) ca n be edit ed. To do
this, press and follow the procedure given in
EDIT CUSTOM MES-
SAGE, page 49
4. CONTINUE.
July, 20 03 48 6730018
FREE XX
. "XX"
Page 55

Messages HDC II Programming Guide
T
t
c
c
k
EDIT CUSTOM MESSAGE
1. Press , then pres s until the displ ay shows
the number of the message you want to edit.
represents the mes sage number you pressed).
NOTE
Custom message 8 represents the
2. Press . The message text is displayed with the first character
flashing.
3. To view the message, press . The message scrolls across the
display. To stop the scrol ling, press .
4. When the character you want to change is flashing, either enter it directly,
or use
character is di splayed. Use the arrow keys to highlight different charac-
ters. See the section on the next pa ge for an explanat ion of speci al keys and
the ch ar acter set.
Instead of stepping through the whole character set to enter a letter
that is not on your keypad, enter one close to the one you want, then
and to step through the chara cter set unt il the desir ed
SHORTCUT
=jbpp^db=u
INSERT MUG
bafq=jpd'p
is displayed (X
message.
. Press
step to it. Example: If you want to enter an L, first press ,
then press six times. Your L should now be displayed.
THE END OF MESSAGE CHARACTER
his is the most import ant character in your message , because it
ells the machine when the message is ended. If you don't use this
haracter, your messa ge will be followed by a bunch of zeros. This
haracter can be selected either from the character set or b y a direct
ey entry (see "ENTERING YOUR MESSAGE", PAGE 50).
6730018 49 July, 2003
Page 56

HDC II Programming Guide Messages
ENTERING YOUR MESSAGE
Most of the keys on the con trol panel have a special purpose to help you create
and edit your messages :
Inserts an R at the flashin g
character.
Inserts an S at the flashing
character.
Inserts a T at the flashing
character.
Inser t s a space at t h e flashing
character.
Deletes the current character
and closes up the space.
Deletes the current character
and leav es the spac e.
Enters the special "end of
Repeats the letter to the left of
the flashing character.
messa g e" ch ar a ct er, whi ch
denotes the end of the mes
sage.
"Pages" through the message, ten characters (one screen) at a time.
Steps forward and backwa rd through the message, one character at a time.
Steps forward and backwa rd through the character lis t, one
character at a time.
-
0 A J U (
1 B L V )
2 C M W
3 D N X P
4 E O Y +
5 F P Z >
6 G Q
7 H R _ .
8 I S $ < O
9 J T =
July, 20 03 50 6730018
(SPACE)
/ ?
Page 57
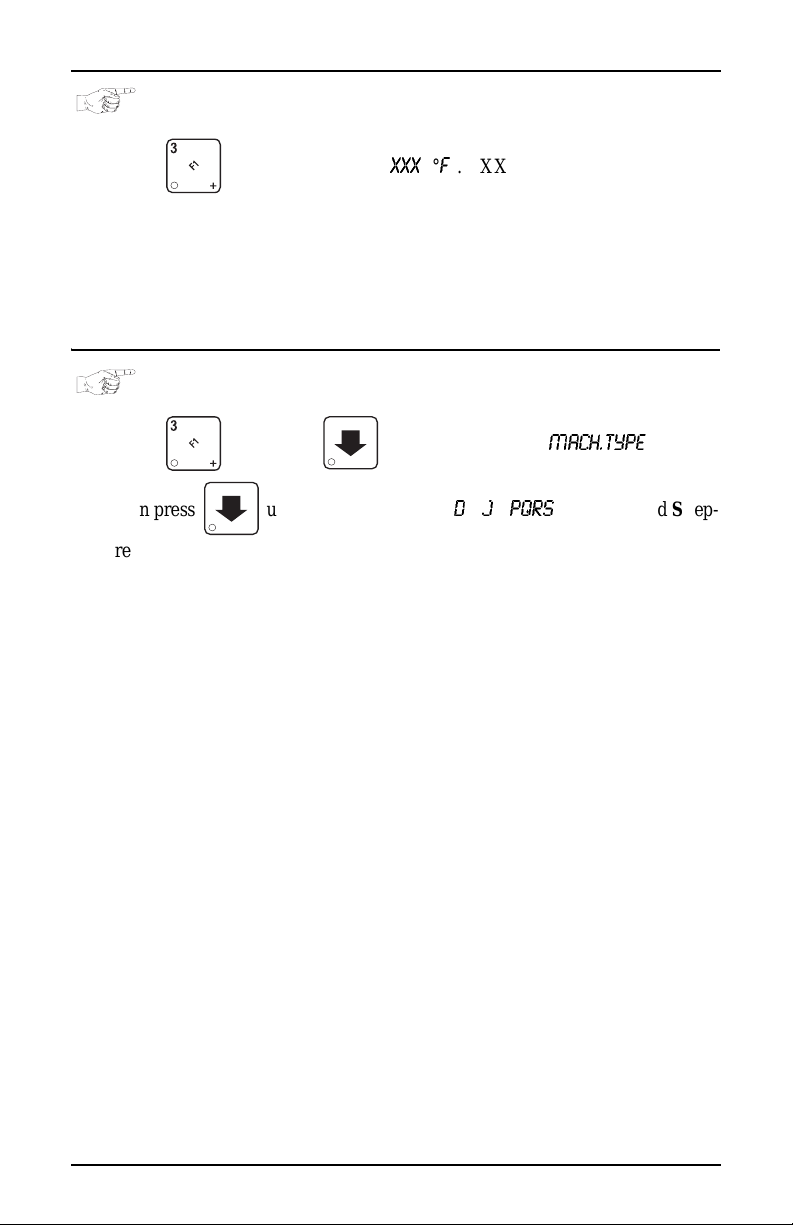
Check the Setup HDC II Programming Guide
VIEW WATER TANK T EMPERATURE
Check the Setup
1. Press . The display shows
XXX °F
. "XXX" is the current water
tank temperature. "° F" means that the temperature is displayed in degrees
Fahrenheit (may be s ho wn in degre es Cels ius , depe nding u pon y our choice .
See
"Vi ew or Set the Hot Water Tank Temperature" , PAG E 38 ). A decimal
point shown in the display indicates that the tank heater is operating.
2. CONTINUE.
VIEW MACHINE TYPE/CONFIGURATION SETTING
1. Press , then press until display shows
then p r ess until the display shows D- Jresent set tings specific to your machine . See "SET THE MACHINE TYPE
AND CONFIGURATION CODE (SUPERVISOR MODE ONLY)",
PAGE 20 for an explanation of this display.
2. CONTINUE.
MACH.TYPE
PQRS
. P, Q, R, and S rep-
6730018 51 July, 2003
Page 58

HDC II Programming Guide Check the Setup
VI EW CUP SIZES ASSIGNED TO S ELECTIONS
1. Press , then press until the display shows
This example shows that regular size cups are assigned to selections C & G.
NOTE
Press to display the remaining selections:
NOTE
If you have only one cup size i n your machin e, you will not see
the next display.
2. Press . The display s hows
large size cups are assigned to selections A thru C and F thru H.
Press to display the remaining selections:
3. CONTINUE.
1. ABC
NOTE
- -
FGH
. This example shows that
0.
0 X
- - - 2 - - - -
0 X
- - - 2 - - - -
- - C - - - G -.
PAYOUT COINS
1. Press . If a dumb mech was sel ected, t he dis play s hows
an MDB mech was selected the display shows
2. Press . A dumb mech pays out one Nickel; an MDB mech pays a
coin fro m tube 1. Press . A dumb mech pays out one Dime; an
MDB mech pays a coin from tube 2. Press . A dumb mech pays out
one Quarter; an MDB mech p ays a coin from tube 3.
3. To continuously pay out coins, hold down the appropria te key.
4. CONTINUE.
July, 20 03 52 6730018
PAY 123
.
NDQ=123
; if
Page 59

View Machine Data HDC II Programming Guide
SET PRIC ES
1. Press . The display shows something like **
2.50 .25
play shows the maximum and minimum prices set in the machine. In this
example, the maxi mum price is $2.50 and the minimum is $0.25.
2. Enter prices using one of the following methods:
SET EN T I R E MAC HINE TO ON E P R ICE . . .
a. Press . The display shows **
X.XX
. Enter a price using the
number keys. All selections in the machine are now set to this price.
SET THE PRICE OF AN INDIVIDUAL SELECTION:
a. Press the number and letter of the selection to be priced.
(for example: 1A) The display shows
1A X.XX
. Enter a price using the
number keys. The price for 1A (product A, lar ge cup) is set.
b. Press . The display shows
1B X.XX .
Enter a price for 1B
(product B, large cup) using the number keys.
c. Press to toggle through and s et prices for each selection in turn .
You can also enter the number and letter for a specifi c selection (this
avoids scrolling through the entire se lection list).
4. CONTINUE.
. This dis-
VIEW NONRESETTABLE SALES AND VEND DATA
View Machine Data
1. Press . The displ ay shows
cents figure sho wing the total of all sales in the ma chine. This is a running
total, and is not r esettable.
2. Press . The displ ay shows
made by the machine. This is a running total, and is not resettable.
3. CONTINUE.
6730018 53 July, 2003
NR$ XX.XX
NR X
. "XX.XX" is a dollar and
. "X" is the total nu mber of vends
Page 60

HDC II Programming Guide View Machine Data
VIEW DATA FOUR DIFFERENT WAYS
Paid sales and vends can be viewed four different ways:
1.
2.
3.
4.
$ XX.XX
**
$ XX.X X
1
*
$ XX.XX
A
*
$ XX.XX
1A
See next four sections for details.
- Total Paid Sales for the machine
- Total Sales by Drink Size
- Total Sales by Selection (both sizes)
- Total Sales by Individual Selection.
VI EW TOTAL PAI D SALES
1. Press , then press until the display shows
"XX.XX" is a dollar and cents fi gure showing the total of all PAID sales in
the machine (as opposed to unpaid sales like winner and free vends). This
is the total since the last time it was cleared.
2. CONTINUE.
$ XX.XX.
**
VI EW TOTAL SA LES BY DRINK SIZE
1. Press , then press until the display shows
2. Press 0. The display will read 0*
small cup size.
XX.XX
. XX.XX is the total sales for the
$ XX.XX.
**
3. Press to s ee th e to tal sales of th e la rg er cu p size.
4. CONTINUE.
July, 2003 54 6730018
Page 61

View Machine Data HDC II Programming Guide
VI EW TOTAL SA LES BY SELEC TION (BOTH CUP SIZES)
1. Press , then press until the display shows
2. Press A. The display will read *
for both the large cup and small cup for selection A,
3. Press to cycle through all available selections.
4. CONTINUE.
A XX.X X
. XX.XX will be the total sales,
$ XX.XX.
**
VIEW TOTAL SALES BY INDIVIDUAL SELECTION
1. Press , then press until the display shows
2. Press 0 and A. The display will read
sales, for selection A, smal l cup.
3. Press . The display will sh ow
to cycle through the total sales of each small cup selection. Continue press-
ing to view the total sales of each large cup se lection.
4. CONTINUE.
0A XX.XX
0B XX.XX.
. XX.XX will be the total
Press repeatedly
$ XX.XX.
**
VI EW TOTAL PAI D SALES BY P RICE LINE
1. Press , then press until the display shows
2. Press . The displ ay shows
price line for items priced at $0.30. The amount foll owing the apostrophe
(‘), is the total dollar amount of the sales for this amount. In this example,
there was total sales of $3,430.50 for the $0.30 item.
3. Press rep eatedly to vi ew all pric e li n es.
4. CONTINUE.
6730018 55 July, 2003
.30’3430.50
. This is an ex ample of a
$ XX.XX.
**
Page 62

HDC II Programming Guide View Machine Data
VI EW TOTAL PAI D VENDS
1. Press , then press until the display shows
the total number of paid vends for the entire machine.
2. If desired, view this data by individual selection or drink size.
3. CONTINUE.
**
XX.
VI EW TOTAL PAI D VENDS BY PRICE LINE
1. Press , then press until the display shows
2. Press . The display s hows
line for items priced at $0.30. The amount following the apo st r ophe (‘), is
the total number of sales f or this amount. In this exampl e, there wa s a total
of 11,435 sales of the $0.30 item.
3. Press rep eatedly to vi ew all pric e li n es.
4. CONTINUE.
.30’11435
. This is an example of a price
**
XX.
CLEAR ALL RESETTABLE DATA
"XX" is
1. Press . The displ ay shows
is not resettable.
2. Press and hold . Two beeps sound and the display shows
momentarily, and then changes to
3. CONTINUE.
July, 20 03 56 6730018
NR$ XX.XX
FINISHED
. This is a running tot al, and
CLEARING
. All data is cleared.
Page 63

View Machine Data HDC II Programming Guide
CLEAR PAID SALES DATA ONLY
1. Press , then press until the display shows
"XX.XX" is a dollar and cents fi gure showing the total of all PAID sales in
the machine (as opposed to unpaid sales like winner and free vends). This
is the total since the last time it was cleared.
2. Press and hold . Two beeps sound and the display shows
momentarily, and then changes to
other data is not cleared.
3. CONTINUE.
FINISHED
. All paid sales data is cleared;
**
$ XX.XX
CLEARING
K
VIEW AMOUNT IN COIN BOX
(NOT SHOWN IF ZERO)
1. Press , then press until the display shows
"XX.XX" is the dollar and cents amount in the coin box.
2. To clear the amount in the coin box, Press and hold . Two beeps
sound and the display shows
FINISHED
.
CLEARING
momentarily, and then changes to
CBX XX.XX
.
WARNING
To ensure the coin box total is accurate, make sure to clear the
coin box total eve r y time you empty it and do not clear this
total unless you also empty the coin box.
3. CONTINUE.
6730018 57 July, 2003
Page 64

HDC II Programming Guide View Machine Data
VIEW AMOUNT IN VALIDATOR
(NOT SHOWN IF ZERO)
1. Press , then press until the display shows
"XX.XX" is the dollar amount in the bill stacker.
2. Press to show the qua nti ties of bi ll s in t he st acker. For example, the
display show s
stacker. Press
$5s, $10s, or $20s.
3. CONTINUE.
$0120
, meaning that there ar e 20 dollar bills in the bill
again to show the quantiti es of other bills, such as
DBV XX.XX
.
VIEW FREEVEND SALES BY TIME INTERVAL
(NOT SHOWN IF ZERO)
1. Press , then press until the display shows -
2. Press , then press until the di spla y shows
the total sales for freevend interval 1, shown even if zer o .
0$ XX.XX
1.FRV .0 0
.
. This is
3. Press to view intervals 2 through 4.
4. CONTINUE.
July, 20 03 58 6730018
Page 65
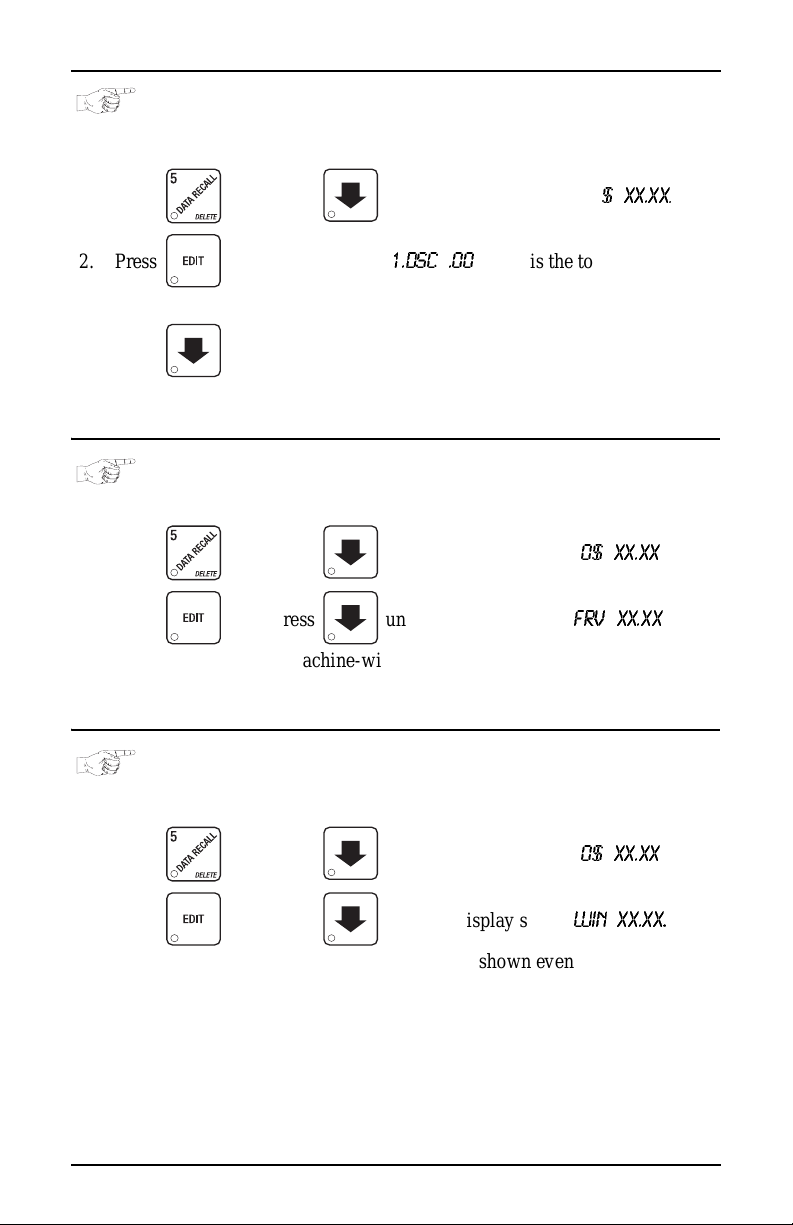
View Machine Data HDC II Programming Guide
VIEW DISCOUNT SALES BY TIME INTERVAL
(NOT SHOWN IF ZERO)
1. Press , then press until the display shows
2. Press . The display shows
count interval 1.
3. Press to view intervals 2 through 4.
4. CONTINUE.
1.DSC .00
. This is the total sales f or dis-
VI EW FREE VENDS
(NOT SHOWN IF ZERO)
1. Press , then press until the display shows -
2. Press , then press until the display shows
"XX.XX" is the total machine-wide freevends, shown even if zero.
3. CONTINUE.
VIEW WINNERS
$ XX.XX
**
0$ XX.XX
FRV XX. X X
K
.
.
(NOT SHOWN IF ZERO)
1. Press , then press until the display shows -
2. Press , then press until the display shows
"XX.XX" is the total machin e-wide winners, shown even if zero.
3. CONTINUE.
6730018 59 July, 2003
0$ XX.XX
WIN XX.XX
.
.
Page 66

HDC II Programming Guide View Machine Data
VIEW TIME DATA
1. Press , then press until the display shows
2. Press . Somethi ng similar to the fo llow ing mess age scro lls acr oss
the display:
MAIN.1 237M 01/30 10.13
This example shows the latest time interval the main (mac hine) door was
open (
1
). It was open for 237 minutes, and was opened on January 30 (
) at 10:13 am (
30
appear for inter vals 2, 3, and 4. Otherwise, go to the next step.
3. Press . The following message scrolls across the display:
This example shows that the last time the machine lost po wer was on January 30 (
(
4. Press . The following message scrolls across the display:
This example shows that the longest time the machine was without power
was on January 30 (
47 minutes (
01/30
00. 0.23
) at 1:51pm (
).
00. 2.47
10.13
). Press . If applicable, simi lar displays will
LAST POWER 01/30 13.51 FOR 00. 0.23
13.51
) for zero days, zero hou rs, a nd 23 minutes
LONGS.T POWER 01/30 10.58 FOR 00. 2.47
01/30
) at 10:58am (
).
10.58
) for zero days, 2 hours and
TIME DATA
.
01/
5. Press . The following message scrolls across the display:
FULL CLEAR 01 / 3 0 8.5 8
This example shows that the last time resettable sales was fully cleared was
on Ja nu ary 30 (
6. Press . The following message scrolls across the display:
This example shows that the last time the time or date was set was on January 30 (
July, 20 03 60 6730018
01/30
01/30
) at 8:58am (
TIME SET 01/30 9.15
) at 9:15 am (
9.15
).
8.58
).
Page 67

View Machine Data HDC II Programming Guide
7. Press . The following message scrolls across the display:
PRICE SET 01/30 9.42
This example shows that the last time prices were set was on January 30
(
01/30
) at 9:42 am (
8. Press . The following message scrolls across the display:
This example shows that th e last v end for selec tion 0A wa s on Jan uary 23 at
4:51 am.
Press to scro l l th r o u gh the last ve nd times fo r each sele ct io n .
9. CONTINUE.
VIEW TOTAL UNPAID SALES
(NOT SHOWN IF ZERO)
9.42
).
LAST.VND 0A 01/29 4.51
1. Press , then press until the display shows
"XX.XX" is the total unpaid sales (free vends, winner vends, 100% dis-
counts, zero price vends) for the entire machine.
2. If desired, view this data by tray and individual selection.
3. CONTINUE.
_0$ XX.XX
.
VIEW TOTAL UNPAID VENDS
(NOT SHOWN IF ZERO)
1. Press , then press until the display shows
the total number of unpaid vends for the entire machine.
2. If desired, view this data by tray and individual selection.
3. CONTINUE.
6730018 61 July, 2003
_0 XX
K
"XX" is
Page 68

HDC II Programming Guide View Machine Data
VIEW NUMBER OF TEST VENDS
(NOT SHOWN IF ZERO)
1. Press , then press until the display shows
number of test vends.
2. If desired, view this data by product and indivi dual selection.
3. CONTINUE.
TST X
. "X" is the
VIEW NUMBER OF MUG VENDS
(NOT SHOWN IF ZERO)
1. Press , then press until the display shows
the number of mug vends.
2. If desired, view this data by tray and individual selection.
3. CONTINUE.
MUG X
. "X" is
VIEW NUMBER OF ALT VENDS
(NOT SHOWN IF ZERO)
An ALT VEND occurs when a smaller cup size is unavailable and the machine
vends the smal le r selec tio n by usi ng a la r ger cup. The c ustome r wil l get t he l arge r
cup, but receive the smaller volume of product (at the small cup price). To view
the number of ALT VENDS,
1. Press , then press or until the display shows
ALT X
selections.
2. CONTINUE.
. The “X” is the number of larger cups us ed to fill smaller
VI EW MACHINE ID N UMBER
1. Press , then press or until the display shows
I.D. XXXXXX
2. You can edit the machine I D n umb er if the supervisor access code has be en
previously e ntered (see
3. CONTINUE.
July, 20 03 62 6730018
. The X's represent the 6-digit machine ID number.
"Gain Access To The Supervisor Mode " , PAGE 7).
Page 69

View Machine Data HDC II Programming Guide
VIEW CUP RING CYCLES RELATED TO SUREVEND™
(NOT SHOWN IF ZERO)
1. Press , then press until the display shows
represents the number of vends during which more than one ring cycle was
required to successfully dispense a cup.
2. Press to cl ear the coun t .
3. CONTINUE.
SV.TOT XX
VIEW TIMES NO CUP W AS DETECTED AFTER A CUP RING CYCLED
(NOT SHOWN IF ZERO)
1. Press , then press until the display shows
represents th e number of times a cup was not detected after ring 1 cyc led.
Check the cup r ing adjustment (see the Operator’s Guide), or the cup s tack
for damage if the count is excessive.
2. Press to cl ear the coun t .
3. Press until the display shows
ber of times a cup was not detected after ring 2 cycled. Check the cup ring
adjustment (see the Operator’s Guide), or the cup stack for damage if the
count is excessive.
4. CONTINUE.
SV.FL2 XX
. XX represents the num-
SV.FL1 X X
. XX
. XX
VIEW HOME SWITCH USAGE RELATED TO SUREVEND™
(NOT SHOWN IF ZERO)
1. Press , then press until the display shows
represents the number of times home switches were used due to
OPT’N SURE.V
2. CONTINUE.
6730018 63 July, 2003
selected but not working.
WO.SV XX
. XX
Page 70

HDC II Programming Guide Test the Machine
TEST VEND SELECTIONS AND VERIFY CREDIT ADDED
Test the Machine
1. Press . The display shows
TEST .0 0
. You may now test vend selec-
tions. If you insert money into the machine, the zeros in the display will be
replaced with the a mount of the credit. After the item vends , your money
will be retu r ned.
NOTES
SureVend™ is not operational during a test vend. You may make one
more test vend if you close the door while still in TEST VEND mode.
2. CONTINUE.
TEST DROP A CUP
1. Press , then press until the display shows
2. Press to drop a cup.
3. CONTINUE.
CUP TEST
TEST THE AUTOMATIC DELIVERY DOOR
1. Press , then press until the display shows
DOOR TES T
.
.
2. Press . The automatic delivery door operates.
3. CONTINUE.
TEST THE WHIPPER( S)
1. Press , then press until the display shows
2. Press the number key tha t corre sponds to the whipper you want to tes t. It
will run for one cycle.
3. CONTINUE.
July, 20 03 64 6730018
WHIP T EST
.
Page 71

Test the Machine HDC II Programming Guide
TEST THE GRINDER(S)
1. Press , then press until the display shows
2. Press the number key tha t corre sponds to the grinder you want to test. It
will run for one cycle.
3. CONTINUE.
GRIND TEST
.
TEST THE A I R
1. Press , then press until the display shows
2. Press to run the air compressor.
3. CONTINUE.
AIR TEST
.
TEST THE BRE W ER
1. Press , then press until the display shows
NOTE
Keep away from the brewer mechanism while it is operating.
Coming into contact with moving parts could injure you.
2. Press to test each brewer position:
BREW'R BR EW
BREW'R HO M E
3. CONTINUE.
=The brewer is in the BREW POSIT ION.
=The br ewer is in th e H O M E positi on .
BREW TEST
.
RINSE THE MIXING BOWLS
1. Press , then press until the display shows
2. Press to rinse the mixing bowls. The display shows
the operation is complete.
3. CONTINUE.
6730018 65 July, 2003
BOWL RINSE
RINSING
until
.
Page 72

HDC II Programming Guide Test the Machine
RINSE THE BREWER
1. Press , then press until the display shows
2. Press to rinse the brewer. The display shows
ation is complete.
3. CONTINUE.
BREW RINSE
RINSING
until t he oper-
TEST SWITCHES OR SENSORS
1. Press , then press until the display shows
2. Actuate each switch or sensor to test its function:
M = mug/cup sensor (if equipped) K = freeve nd keysw i tch
P = waste pail switch H = high water tank level switc h
L = low water tank le vel switch 1 = ring 1 cup sensor switch
2 = ring 2 cup sensor switch
As you actuate each input, the display element representing that switch
blinks on. Releas ing the switch causes that element to blink of f again.
3. CONTINUE.
IN.MKPHL12
.
.
VIEW SUREVEND™ LAST RECORDED CALIBRATION VALUE
1. Press SureVend until the display shows
any number from 0 to 255, and represe nts the most recent value read from
the sensor. The lower the number the greater the sensor blockage. A num
ber of 255 m eans that t her e i s a f ata l pro ble m with t he Su reVend™ interface
board. Ensure the SureVend™ interface PCB is properly connected to the
main controller PCB.
2. CONTINUE.
July, 20 03 66 6730018
CAL.L S T XXX
. XXX can be
-
Page 73
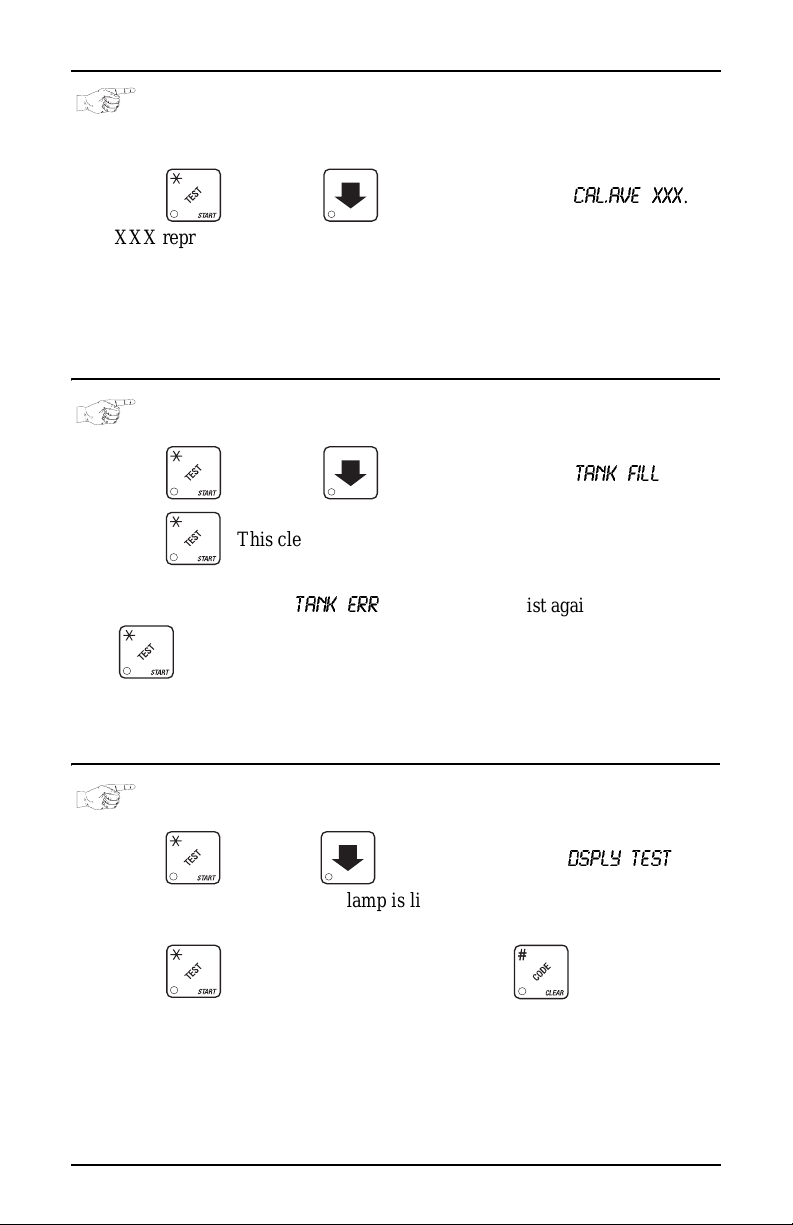
Test the Machine HDC II Programming Guide
VIEW SUREVEND™ AVERAGE CALIBRATION VALUE
1. Press , then press until the display shows
XXX represents the ave rage s ensor calibr ation va lue (s hould be be tween 50
and 255 for proper sensor operation - i.e. 51 through 254). Although this
number could go as low as 20, the SureVend™ system will be inoperative
in this con d ition.
2. CONTINUE.
CAL.AV E XX X
.
CLEAR TANK ERRORS AND FILL THE TANK
1. Press , then press until the display shows
2. Press . This clears any tank error and starts fi lling the tank , if necessary. If it is taking a long time t o fill the tank AND THERE ARE NO
LEAKS, you may see
again after making sure th ere are no other problems, such as a
restriction in the water inlet line or a clogged wate r filter .
3. CONTINUE.
TANK ERR
in the diagnost ic list again. Just press
TANK FILL
.
TEST THE D I SPLAY
1. Press , then press until the displ ay shows
"DRINK BEING SERVED" lamp is lighted (if so equipped), and remains
lighted until you leave this function.
2. Press to light all display segments; press to turn them off.
3. Pressing a NUMBER KEY on th e co ntrol panel causes all segments t o di splay that character.
4. CONTINUE.
6730018 67 July, 2003
DSPLY TEST
. The
Page 74

HDC II Programming Guide Test the Machine
VIEW DIAGNOSTIC MESSAGES
1. Press . The display shows any of the following diagnostic messages, depending upon any fault(s) present:
NO ERRORS
KEYPAD XY
ROM ERROR
RAM ERROR
NOTE: Initializing RAM will erase all your data and
LOCKS SET
KEYSWITCH
MACH.TYPE 0
D+J+WXYZ
TANK ERR
RING 1, 2
MTR 1A1B2X
NO CUPS 1, 2
BREWER JAM
WASTE PAIL
LOW WAT ER
COLD WATER
NO SENSOR
NO FLOAT
None of the following errors are detected:
Key(s) x, y stuck.
Error in the programming EPR OM. Machine will not operate.
RAM is not initialized or is not compatible with the currently
loaded so ftware. I f this mess age a ppears , i nit ializ e your RAM
by performing the following procedure:
drink settings. Be sure you have written this
information down before continuing.
Press AND HOLD until two beeps are heard, and the
display show s
All selection keys are locked out.
The keyswitch input is active and configured as an inhibit.
Machine type error dis plays machine type screen.
NOTE: This is the actual machin e type screen. You may enter
the correct machine type number directly on th is screen with
out further action.
Configuration error; displays the machine configuration
screen. NOTE: this is the actual config screen. You may enter
the correct config numbe r directly on this screen without fur
ther action. (Verify cup size and product times in the product
configuration screen.
Tank failed to fill or refill.
The cup ring is jammed .
Cup tur r et s a re jammed
Out of cups.
The brew er is jammed.
The waste pa il is full.
The water level in the tank is low.
Water in the tank is too cold to vend.
Temperature sensor failed or missing.
Float sensor failed or missing.
FINISHED
.
-
-
July, 20 03 68 6730018
Page 75

Test the Machine HDC II Programming Guide
WHIP 1 2 3 4 5
DOOR JAM
NO MECH
MECH COMM
MECH.SENSOR
MECH ROM
MECH.ERR
MECH.ACCEPT
MECH JAM
CARD.F.COMM
DEBIT CA R D
CHECK DBV
DBV.ACCEPT
DBV COMM
DBV MOTOR
DBV SENSOR
DBV JAM
DBV STACKR
CHK PRI CE
NONE READY
SV.ERR CU P 1
SV.ERR CU P 2
Whipper motor failure (motor 1, 2, 3, 4, 5).
The automatic delivery door is jammed.
Coin mech not detected - machine will not operat e if config-
ured for coin mech.
Incomp lete coin mech communications — check harness.
Coin mech reporting a bad tube sensor — replace mech.
Replace th e co i n me ch an i s m.
There is a problem wi th the coin mech.
Coin mechanism accep tor section is unplugge d from the main
body of the coin mech. Connect the cable and cycle machine
power OFF and then ON.
One or more coin tubes are jammed. Pay a coin from each
tube until the jam is cleared.
Incomplete card reader communications (card reader is not
operational).
Card reade r r eporting error — machine will not operate if
configured for DEBIT ONLY.
Bill validator reporting error — machine will not operate.
Empty s t acker, clear j ams, etc.
The merchandiser is telli ng the bill vali dator not to ac cept an y
bills. Che ck the enabled channels of the bill validator.
Incomplete bill validator communications — check harness.
One of the motors ha s failed. The unit will disable itself until
the error is corrected. Check for bill stuck in the acceptance
path. If no bill is pres ent, replace the validator. Cycle
machine power OFF and then ON.
One of the sen sors in the bill validator has failed. The unit
will disable itself until the error is cor r ected. Check for bill
stuck in the acceptance path. If no bill is present, replace the
validator. Cycle machine power OFF and then ON.
A bill is jammed in t he acceptance path. The unit will disable
itself until the error is corrected. Remove bill stuck in the
acceptance path. Cycle machine power OFF and then ON.
The stacker is open or removed. The unit will disable itself
until the error is corrected. Install the stacker cor r ectly.
Price error detecte d and changed to maximum - check prices.
all selections are reported out of service.
Cup ring 1 is out of service due to a SureVend™ error.
Cup ring 2 is out of service due to a SureVend™ error.
6730018 69 July, 2003
Page 76

HDC II Programming Guide Test the Machine
SV.ERR PC B
SV.ERR SN S R
AJP.TMR1 XX
AJP.TMR2 XX
FLTR PAPER
NO BREW ER
BREWER.ERR
BREWER JAM
RESET BRWR
SureVend™ is ON but not working. The last calibrat ion sample was 255. Check that the SureVend™ PCB is present at
J34.
SureVend™ is ON but not working. The last calibrat ion sample was ≤50. Check for a blocked sensor or disconnected harness.
SureVend™ is active and ring 1 anti-jack pot tim er is ON. XX
is a value between 1 and 99 in minutes.
SureVend™ is active and ring 2 anti-jack pot tim er is ON. XX
is a value between 1 and 99 in minutes, and represents the
amount of time left on the anti-jackpot timer for this cup ring.
Brewer filter paper is empty.
Brewer is missing or malfunctioning.
The brewer is in an incorrec t position.
The brewer has not reache d an ap propriate position within a
certain timeout period. Check for a physical jam or a motor
stall condition.
The brewer is clampe d and not vending, or is not in a brewer
test mode. Close th e door (if open), or run a brew test.
DOWNLOAD DATA TO A PDCD
1. Connect your portab le data collec tion device (PDCD) in accord ance with its
operating instructions.
2. Press . Data is downloa ded into your PDCD.
NOTE
Depending upon the setting selected in "Set Printer or DEX Options",
PAGE 10, data may be cleared after th e download is complete.
3. CONTINUE.
July, 20 03 70 6730018
Page 77

Test the Machine HDC II Programming Guide
SET FR EEVEND OPTIONS
1. Press , then press until one of the following is displayed:
FREE OFF
- Normal vending mode. No items are on freevend. (A closure
on the optional keyswitch input causes the machine to go out of service.)
- OR -
FREE ON
- All items are on freevend. The credit display shows
NO MONEY REQUIRED
(A closure on the optional keyswitch causes the machine to go out of service.)
- OR -
FREE W/KEY
- All items are freevended while there is a closure on the
optional keyswitch input. Normal cash sales are supported when the
optional keys witch input is open.
- OR -
FREE ONCE
- A closure on the o pti onal ke yswitc h in put cau ses onl y the next
item to be freevended . Coin mechanism errors are ignored. This state is
designed for card or token systems where one item is vended per token.
Normal cash sales are also supported.
2. Press until the option you want is displayed.
3. If you selected
FREE W/KEY
, press . The display shows *
This disp lay r epres en ts the sele ct ion s which may get free ven ds. E nabl e the
selections by pres s ing the appropriate letter key.
4. CONTINUE.
ABC
-----
6730018 71 July, 2003
Page 78

HDC II Programming Guide Test the Machine
July, 20 03 72 6730018
Page 79

Hot Drink Center II Programming Guide
Programming Procedure Index
A
Air, Test ..............................................................................................................65
Alt Vends, View .................................................................................................62
Anti-Jackpot Timer, SureVend ..........................................................................43
B
Baud Rate, S elect ...............................................................................................10
Bill Validator, Select ..........................................................................................13
Bowl, Rinse Time ...............................................................................................41
Bowls, Rinse .......................................................................................................65
Brewer
Rinse ............................................................................................................66
Rinse Tim e ..................................................................................................40
Test ..............................................................................................................65
C
Card Reade r, Select ............................................................................................15
Clear
All Resettable Data .....................................................................................56
Paid Sales Data Only ...................................................................................57
Tank Errors and Fill the Tank .....................................................................67
Code
Configuration ..............................................................................................20
Data Recall ....................................................................................................8
Freevend ........................................................................................................7
Supervisor .....................................................................................................7
Coin Box, View Amount ....................................................................................57
Coin Mecha n ism, Select .....................................................................................12
Coins, Payout .....................................................................................................52
Configuration
Code, Set .....................................................................................................20
Setting, View ...............................................................................................51
Cup Sizes
Assign to Selections ....................................................................................24
Set Up ..........................................................................................................23
View ............................................................................................................52
Cup, Test Drop ...................................................................................................64
6730018 Index - 1 July, 2003
Page 80

Hot Drink Center II Programming Guide
Programming Procedure Index
D
Data
Clear All Resettable ....................................................................................56
Clear Paid Sales Only .................................................................................57
Download to a PDCD .................................................................................70
Recall Code ...................................................................................................8
View Four Different Ways ..........................................................................54
View Nonresettable Sal es and Ven d ...........................................................53
View Time ...................................................................................................60
Date, Set .............................................................................................................44
Daylight Savings , Set .........................................................................................44
DEX, Options, Set ....................................................................................... 10, 11
Diagn os ti c M essages, Vi ew ...............................................................................68
Disable Selections ..............................................................................................22
Discount
Mug .............................................................................................................19
Vending, Set ................................................................................................45
View Sales by Time Interval .......................................................................59
Display Language, Select ...................................................................................12
Door, Delivery, Test ...........................................................................................64
E
Errors, Clear .......................................................................................................67
F
Free Vending, Set ...............................................................................................45
Free Vends, View ...............................................................................................59
Freevend
Code, Ent er ....................................................................................................7
Message, Select ...........................................................................................48
Set Options ..................................................................................................71
View Sales by Time Interval .......................................................................58
G
Grinder, Test .......................................................................................................65
H
Hot Drink, Set Up ...............................................................................................25
I
ID Number, View ...............................................................................................62
Inhibit Vending, Set ...........................................................................................45
K
Keys, Mode or Payout ..........................................................................................9
July, 2003 Index - 2 6730018
Page 81

Hot Drink Center II Programming Guide
Programming Procedure Index
L
Language, Select ................................................................................................12
Lock
Mode Key ......................................................................................................9
Payout Key ....................................................................................................9
Low Power Settings, Set ....................................................................................39
Low Temperature Dispensing, Set .....................................................................38
M
Machine Type, Set ..............................................................................................20
Message
Edit Custom .................................................................................................49
Freevend, Select ..........................................................................................48
Out-of-Service, Select .................................................................................48
Standby, Selec t ............................................................................................48
Mode Keys, Lock Or Unlock ...............................................................................9
Monetary Options, Select ...................................................................................15
Month, Day, and Year, Set .................................................................................44
Mug Discount, Set Up ........................................................................................19
O
Out-of-Service Message, Select .........................................................................48
P
Payout Coins ......................................................................................................52
Payout Keys, Lock Or Unlock .............................................................................9
PDCD, Download Data ......................................................................................70
Prices, Set ...........................................................................................................53
Printer
Baud Rate, S elect ........................................................................................10
Options, Set .................................................................................................10
R
Rinse
Brewer .........................................................................................................66
Mixing Bowls ..............................................................................................65
Rinse Tim e
Bowl, Set .....................................................................................................41
Brewer, Set ..................................................................................................40
6730018 Index - 3 July, 2003
Page 82

Hot Drink Center II Programming Guide
Programming Procedure Index
S
Sales
By Drink Size, View ...................................................................................54
By Individual Se lection, View ....................................................................55
By Selection, View .....................................................................................55
Discount, View by Time Interval ................................................................59
Freevend, View by Time Interval ...............................................................58
Machine Total, View ...................................................................................54
Paid, View ...................................................................................................55
Unpaid, View ..............................................................................................61
Selections, Disable .............................................................................................22
Sensors, Test .......................................................................................................66
Software Version, View .....................................................................................43
Stand by M es sage, Sele ct ....................................................................................48
Supervisor
Code, Ent er ....................................................................................................7
Mode, Gain Access .......................................................................................7
SureVend ............................................................................................................63
Anti-Jackpot Ti mer .....................................................................................43
Optional or Mandatory ................................................................................42
turn on or off ...............................................................................................42
View Average Calibration Value ................................................................67
View Last Recorded Calibration Value ......................................................66
Switches, Test .....................................................................................................66
T
Talker Mode, Set ................................................................................................12
Tank
Fill ...............................................................................................................67
Tempe rature, Vi ew or Set ...........................................................................38
Temperature
View or Set Tank ........................................................................................38
View Water Tank ........................................................................................51
Test
Air ...............................................................................................................65
Automatic Delivery Door ............................................................................64
Brewer .........................................................................................................65
Display ........................................................................................................67
Drop a Cup ..................................................................................................64
Grinder ........................................................................................................65
Switches or Sensors ....................................................................................66
Vend Selection s a nd Verify Credit Added ..................................................64
July, 2003 Index - 4 6730018
Page 83

Hot Drink Center II Programming Guide
Programming Procedure Index
T
Test
Whipper .......................................................................................................64
Throws
Dry Product Gram .......................................................................................28
Hot Water ....................................................................................................31
Time Interval Editing .........................................................................................46
Time of Day, Set ................................................................................................44
Time-of-Day
Discount Vending, Set ................................................................................45
Free Vending, Set ........................................................................................45
Inhibit Vending, Set ....................................................................................45
U
Unlock
Mode Key ......................................................................................................9
Payout Key ....................................................................................................9
V
Validator, View Amount ....................................................................................58
Vends
View Number of Mug .................................................................................62
View Number of Test ..................................................................................62
View Total Paid ..........................................................................................56
View Total Unpaid ......................................................................................61
View
Amount in Coin Box ...................................................................................57
Amount in Validator ...................................................................................58
Cup Ring Cycles Related to SureVend .......................................................63
Cup Sizes Assigne d to S elections ...............................................................52
Data Three Different Ways .........................................................................54
Diagn os ti c M essages ...................................................................................68
Discount Sales by Time Interval .................................................................59
Free Vends ..................................................................................................59
Freevend Sales by Time Interval ................................................................58
Home Switch Usage Related to SureVend .................................................63
Hot Water Tan k Temp er a tur e .....................................................................38
Mach in e Configurati o n Se tt ing ...................................................................51
Machine ID Number ...................................................................................62
Nonresettable Sales and Vend Data ............................................................53
Number of Alt Vends ..................................................................................62
Numb e r of Mug Ven ds ...............................................................................62
Number of Test Vends ................................................................................62
6730018 Index - 5 July, 2003
Page 84

Hot Drink Center II Programming Guide
Programming Procedure Index
V
View
Number of Times No Cup Was Detected After a Cup Ring Cycled ..........63
Software Version .........................................................................................43
SureVend Average Calibrat ion Value .........................................................67
SureVend Last Recorded Calibration Value ...............................................66
Time Data ....................................................................................................60
Total Pai d Sa les .................................................................................... 54, 55
Total Paid Vends .........................................................................................56
Total Unpaid Sales ......................................................................................61
Total Unpaid Vends ....................................................................................61
Water Tank Temp e ratur e ............................................................................51
Winners .......................................................................................................59
View Cup Ring Cycles .......................................................................................63
W
Water Tank Temperature, View .........................................................................51
Whipper, Test .....................................................................................................64
Winner Mode, Set Up .........................................................................................18
Winners, View ....................................................................................................59
Y
Year, Set .............................................................................................................44
July, 2003 Index - 6 6730018
Page 85

Terms and Conditions of Sale
LIMITED WARRANTY: Subject to the limitation specified herein, all parts
included on original equipment manufactured by CRANE MERCHANDIS
ING SYSTEMS and sold to purchaser are warranted for two years from
the date of shipment of the equipment in question. This warranty applies
only to the original purchaser of the Merchandiser and is null and void if
the Merchandiser is sold during the period of warranty.
Defective parts will be repaired or replaced free of charge when the defective part is returned, with transportation charges prepaid by purchaser, to
a destination designated by CRANE MERCHANDISING SYSTEMS.
This warranty does not include any cost of service rendered or repairs
made by customer or its agents on Merchandiser, or parts, unless authori
zation to incur such expense has been given in writing by CRANE MERCHANDISING SYSTEMS prior to incurring such expense. This warranty
does not cover labor and service charges performed by CRANE MER
CHANDISING SYSTEMS service technicians.
This warranty does not apply to A) electrical components, wiring, or circuits or mechanical parts or assemblies damaged as a result of operating
the Merchandiser at other than the design voltage and frequency speci
fied on the Electrical Rating Tag, or B) in event of vandalism, fire or negligence, or C) incandescent lamps, neon lamps, fluorescent lamps,
ballasts, starters or other expendable items, or D) when seal is broken on
electronic boards, or E) when other manufactured components are
installed in CRANE MERCHANDISING SYSTEMS Merchandisers.
-
-
-
-
Replacement parts sold by CRANE MERCHANDISING SYSTEMS as
After Market shall be covered for three months from the date shown on
the parts invoice. Purchaser must obtain prior RETURN AUTHORIZA
TION for return of all parts, following guidelines given by CRANE MERCHANDISING SYSTEMS.
New, unused parts purchased as After Market can be returned within 30
days from date of parts invoice, with prior authorization from CRANE
MERCHANDISING SYSTEMS.
THIS WARRANTY IS IN LIEU OF ALL OTHER WARRANTIES EXPRESS
OR IMPLIED, INCLUDING WITHOUT LIMITATION, WARRANTIES OF
MERCHANTABILITY OF FITNESS FOR A PARTICULAR PURPOSE.
CRANE MERCHANDISING SYSTEMS SHALL NOT BE RESPONSIBLE
FOR CONSEQUENTIAL OR PUNITIVE DAMAGES. CRANE MER
CHANDISING SYSTEMS neither assumes nor authorizes any person to
assume for it any obligation or liability in connection with the sale of said
equipment or any part thereof.
-
-
Page 86

 Loading...