

Craftsman 486.246232, 486.246213, 486.246222 User Manual

Owner's Manual
®
STOP
DO NOT RETURN TO STORE
For Missing Parts or Assembly
Questions Call 1-866-576-8388
TRACTOR BRUSH GUARD
Model No's. 486.246213, 486.246222 & 486.246232
CAUTION:
Before using this product, read
this manual and follow all Safety
Rules and Operating Instructions.
Sears, Roebuck and Co., Hoffman Estates, IL 60179 U.S.A.
www.sears.com/craftsman
PRINTED IN U.S.A. FORM NO. 40865 rev. (04/24/08)
• Safety
• Assembly
• Operation
• Maintenance
• Parts
WARRANTY SAFETY
SUSPENSION
BRACKET
1
2
3
4
SUSPENSION BRACKET
SUSPENSION
BRACKET
ONE YEAR LIMITED WARRANTY
When operated and maintained according to the instructions
supplied with it, if this Tractor Brush Guard fails due to a defect
in material or workmanship within one year from the date of
purchase, call 1-800-4-MY-HOME® to arrange for free repair.
If this product is used for commercial or rental purposes, this
warranty applies for only 90 days from the date of purchase.
This warranty gives you specic legal rights, and you may also
have other rights which vary from state to state.
Sears, Roebuck and Co., D817WA, Hoffman Estates, IL
60179
BEFORE YOU BEGIN
TOOLS REQUIRED
(2) 9/16" Wrenches
(1) 1/2" Wrench (for heat shield on page 5)
CARTON CONTENTS
Any power equipment can cause injury if operated
improperly or if the user does not understand how to
operate the equipment. Exercise caution at all times,
when using power equipment.
• Refer to your tractor owners manual for "Rules For
Safe Operation".
• Bumper may get hot when tractor is running! Allow
bumper to cool down before grabbing hold of bumper.
Look for this symbol to point out important safety
precautions. It means — Attention!! Become
alert!! Your safety is involved.
CARTON CONTENTS
REF PART NO. QTY. DESCRIPTION
1 25038 1 Right Mounting Bracket
2 25037 1 Left Mounting Bracket
3 64862 2 Locking Lever
4 64614B 1 Bumper (71-246213)
64614S 1 Bumper (71-246222)
64614C 1 Bumper (71-246232)
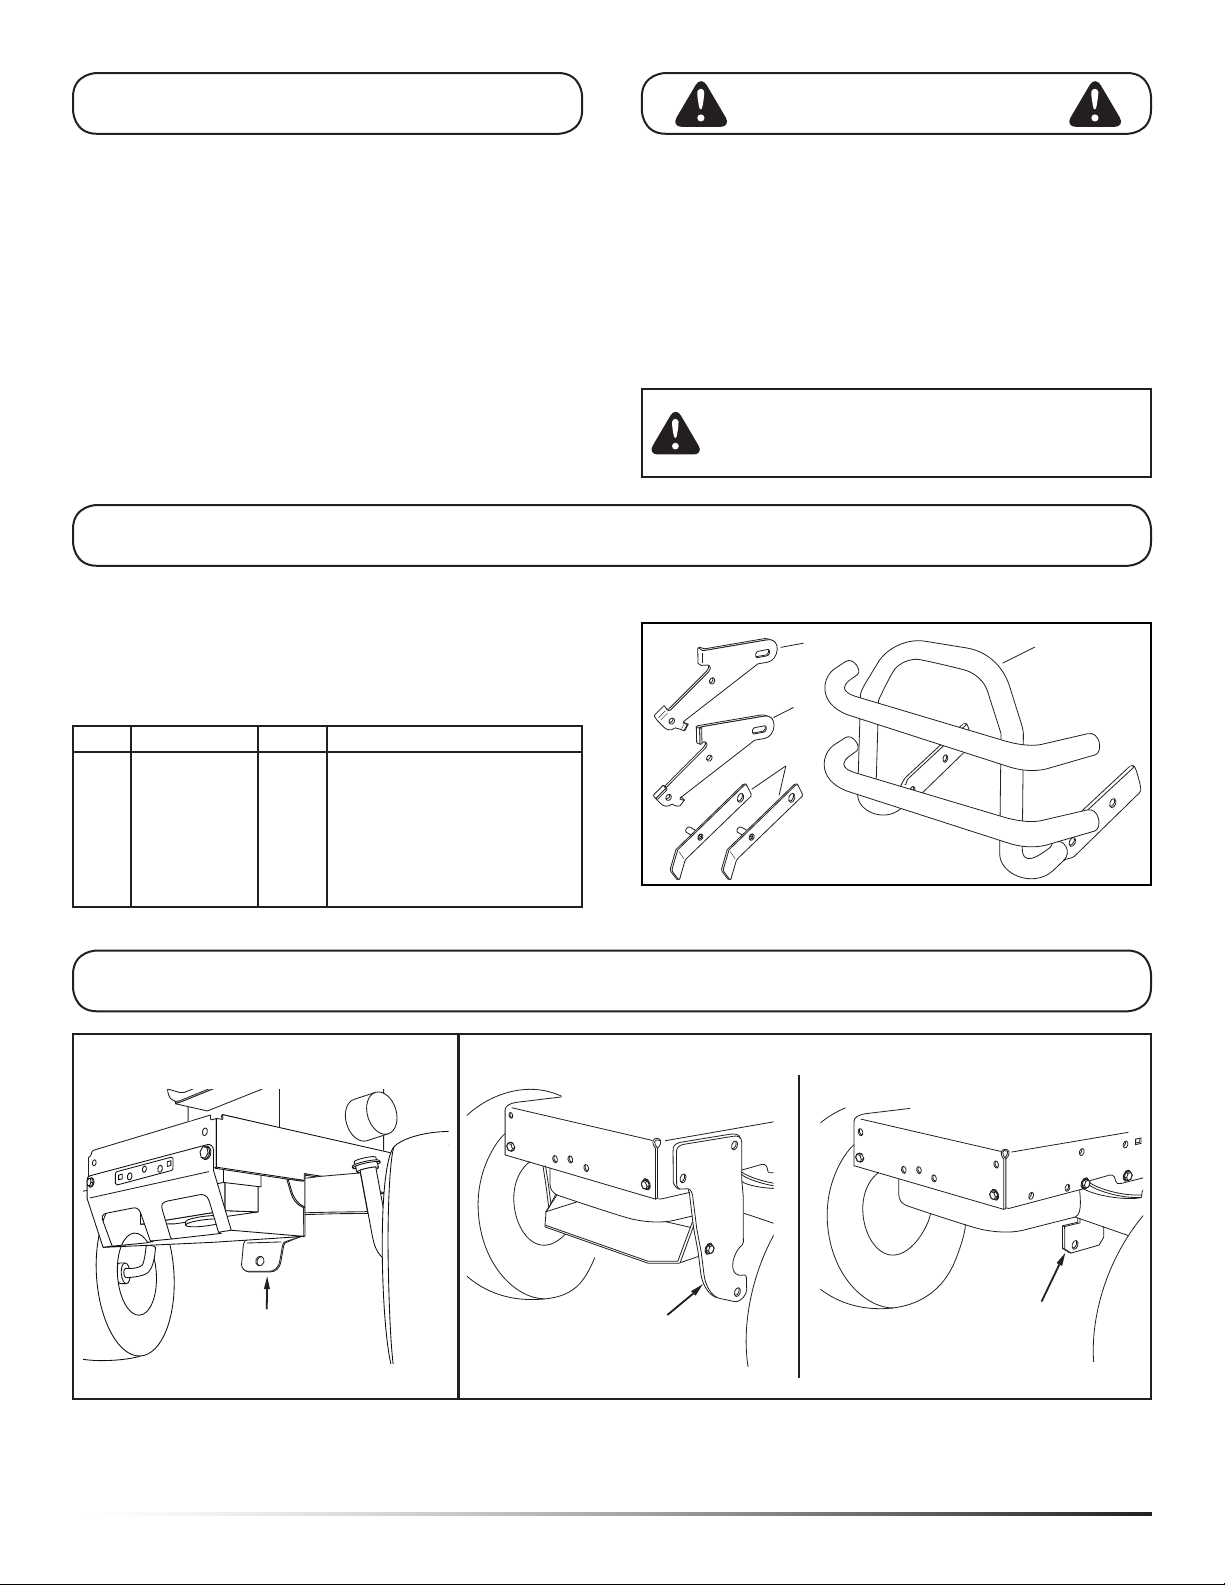
DETERMINE IF YOUR TRACTOR HAS A SINGLE SUSPENSION BRACKET
OR DUAL SUSPENSION BRACKETS
SINGLE SUSPENSION
BRACKET
DUAL SUSPENSION BRACKETS
FIGURE 1A (page 3)
FIGURE 1B (page 5)
Look under the front of your tractor (Figure 1A & 1B). If there is a single mower deck suspension bracket located underneath
the middle of the front axle, continue on to INSTRUCTIONS FOR SINGLE SUSPENSION BRACKET TRACTORS on
page 3. If your tractor does not have a mower deck suspension bracket underneath the middle of the front axle, skip to
INSTRUCTIONS FOR DUAL SUSPENSION BRACKET TRACTORS on page 5.
2
Call 1-866-576-8388 for missing parts or assembly help
DO NOT RETURN TO STORE
INSTRUCTIONS FOR SINGLE SUSPENSION BRACKET TRACTORS
REMOVE
BROWNING SHIELD
REMOVE
FRONT SCREWS
B A
C
D
E
F
NOT SHOWN
FULL SIZE
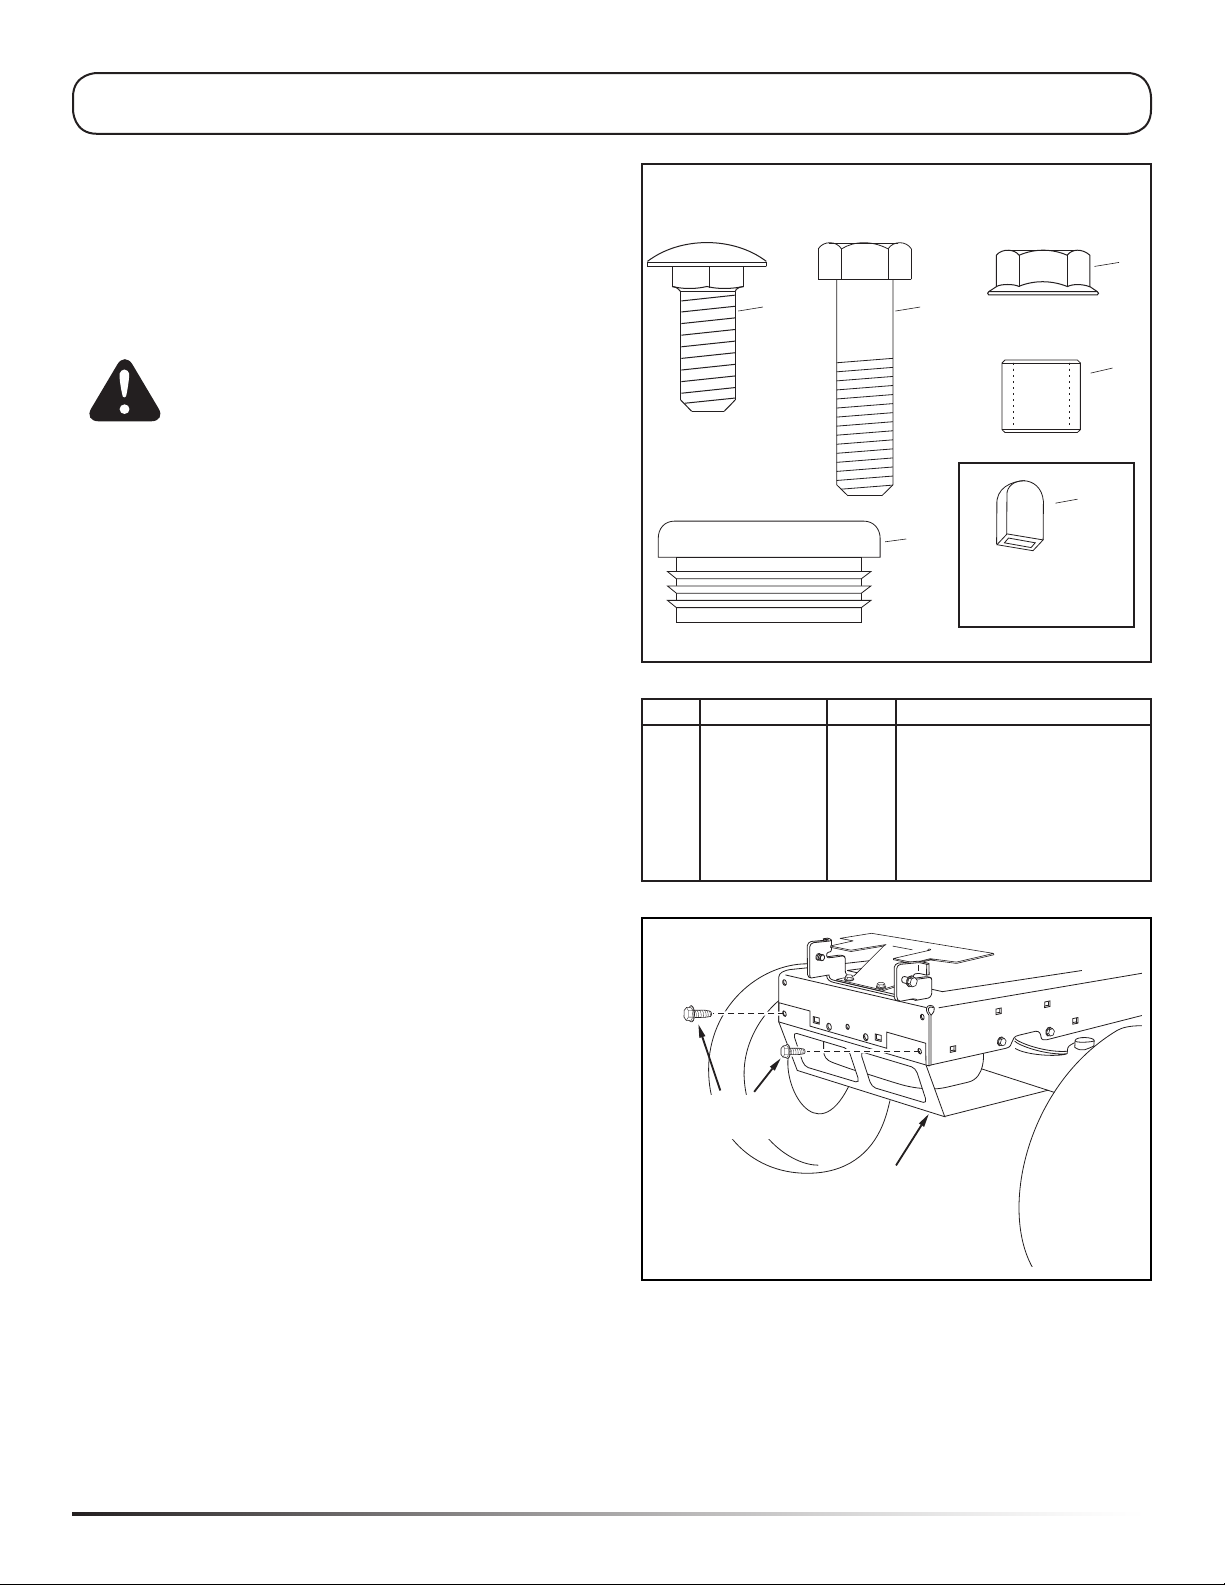
STEP 1: (SEE FIGURE 2)
Open parts bag labelled "A" and verify that all parts are
present.
NOTE: Place cardboard or a mat on work surface to prevent
scratching of parts removed from carton and tractor.
CAUTION! Mufer is hot! Allow engine to
cool down before proceeding with bumper
installation.
NOTE: Right hand (RH) and left hand (LH) are
determined from the operator's position while seated on
the tractor.
SHOWN FULL SIZE
PARTS BAG "A"
FIGURE 2
REF PART NO. QTY. DESCRIPTION
A 43350 2 Carriage Bolt, 3/8-16 x 1"
B 43062 2 Hex Bolt, 3/8-16 x 1-1/2"
C 44072 4 Whizlock Nut, 3/8"
D 44742 4 Plug
E 48866 2 Pivot Spacer
F 1643-60 2 Plastic Grip
STEP 2: (SEE FIGURE 3)
• Remove hood from tractor using instructions in your
tractor owner's manual. Place hood on cardboard or
on a mat to protect paint.
• Remove the browning shield from the front of the
tractor as shown.
IMPORTANT: Be sure to reattach the browning shield
after bumper is installed.
Call 1-866-576-8388 for missing parts or assembly help
DO NOT RETURN TO STORE
FIGURE 3
3
 Loading...